1.介绍
Samba是一个开源文件共享服务,可以使linux与windows之间进行文件共享,可以根据不同人员调整共享设置以及权限管理。
2.安装
一个命令就OK了:yum install -y samba
[root@ansible01 ~]# yum install -y samba
已加载插件:langpacks, product-id, search-disabled-repos, subscription-manager
epel                                                                                                                                                                | 4.3 kB  00:00:00
rhel-7-server-rpms                                                                                                                                                  | 3.5 kB  00:00:00
(1/2): epel/x86_64/updateinfo                                                                                                                                       | 1.0 MB  00:00:02
(2/2): epel/x86_64/primary_db                                                                                                                                       | 8.7 MB  00:00:26
正在解决依赖关系
--> 正在检查事务
---> 软件包 samba.x86_64.0.4.10.16-25.el7_9 将被 安装
--> 正在处理依赖关系 libwbclient = 4.10.16-25.el7_9,它被软件包 samba-4.10.16-25.el7_9.x86_64 需要
--> 正在处理依赖关系 libwbclient = 4.10.16-25.el7_9,它被软件包 samba-4.10.16-25.el7_9.x86_64 需要
......
作为依赖被升级:
  libldb.x86_64 0:1.5.4-2.el7_9               libsmbclient.x86_64 0:4.10.16-25.el7_9           libwbclient.x86_64 0:4.10.16-25.el7_9      samba-client-libs.x86_64 0:4.10.16-25.el7_9
  samba-common.noarch 0:4.10.16-25.el7_9      samba-common-libs.x86_64 0:4.10.16-25.el7_9

完毕!
[root@ansible01 ~]#
3.配置
我们的目的是创建3个用户:test1、test2、test3,三个共享文件夹:share1、share2、share3,权限为:
share1目录三个用户都可读可写
share2目录是三个用户都可读,但是仅test2可写
share3目录是仅test3可读可写
3.1 创建用户和目录
#1.创建3个用户test1,test2,test3,并禁止登录
[root@ansible01 ~]# for i in {test1,test2,test3};do useradd $i -s /sbin/nologin;done
#2.检查是否创建成功
[root@ansible01 ~]# cat /etc/passwd|grep test
test1:x:1001:1001::/home/test1:/sbin/nologin
test2:x:1002:1002::/home/test2:/sbin/nologin
test3:x:1003:1003::/home/test3:/sbin/nologin
#3.设置SMB用户认证密码
[root@ansible01 ~]# smbpasswd -a test1
New SMB password:
Retype new SMB password:
Added user test1.
[root@ansible01 ~]# smbpasswd -a test2
New SMB password:
Retype new SMB password:
Added user test2.
[root@ansible01 ~]# smbpasswd -a test3
New SMB password:
Retype new SMB password:
Added user test3.
#4.创建3个共享目录
[root@ansible01 ~]# mkdir /share{1..3}
#5.创建测试文件
[root@ansible01 ~]# touch /share1/file{11..19}
[root@ansible01 ~]# touch /share2/file{21..29}
[root@ansible01 ~]# touch /share3/file{31..39}
#6.设置共享文件权限
[root@ansible01 ~]# chmod o+w /share{1..3}
3.2 修改配置文件
[root@ansible01 ~]# cat /etc/samba/smb.conf
# See smb.conf.example for a more detailed config file or
# read the smb.conf manpage.
# Run 'testparm' to verify the config is correct after
# you modified it.

[global]
	workgroup = SAMBA
	security = user

	passdb backend = tdbsam

	printing = cups
	printcap name = cups
	load printers = yes
	cups options = raw
[share1]
comment = this is share1
path = /share1
public = no
browseable = yes
writable = yes
[share2]
comment = this is share2
path = /share2
public = no
browseable = yes
writable = no
write list = test2
[share3]
comment = this is share3
path = /share3
public = no
browseable = yes
writable = no
write list = test3
valid users = test3
path:共享目录绝对路径
public:是否允许匿名访问,yes代表允许,no代表不允许
browseable:当前状态下的共享文件是否公开可见,为no时,A用户登录后无法看到file文件夹,为yes时用户登录可以看到文件夹
writable:登录用户能否读写,yes是可读写,no是仅读
write list:可写用户,一般是writable为no时添加
valid users:指定用户访问
3.3 服务启动
[root@ansible01 ~]# systemctl restart smb
[root@ansible01 ~]# systemctl status smb.service
● smb.service - Samba SMB Daemon
   Loaded: loaded (/usr/lib/systemd/system/smb.service; disabled; vendor preset: disabled)
   Active: active (running) since 三 2024-05-29 10:20:05 CST; 5s ago
     Docs: man:smbd(8)
           man:samba(7)
           man:smb.conf(5)
 Main PID: 16809 (smbd)
   Status: "smbd: ready to serve connections..."
    Tasks: 4
   CGroup: /system.slice/smb.service
           ├─16809 /usr/sbin/smbd --foreground --no-process-group
           ├─16811 /usr/sbin/smbd --foreground --no-process-group
           ├─16812 /usr/sbin/smbd --foreground --no-process-group
           └─16813 /usr/sbin/smbd --foreground --no-process-group

5月 29 10:20:05 ansible01 systemd[1]: Starting Samba SMB Daemon...
5月 29 10:20:05 ansible01 smbd[16809]: [2024/05/29 10:20:05.830974,  0] ../../lib/util/become_daemon.c:136(daemon_ready)
5月 29 10:20:05 ansible01 smbd[16809]:   daemon_ready: daemon 'smbd' finished starting up and ready to serve connections
5月 29 10:20:05 ansible01 systemd[1]: Started Samba SMB Daemon.
4.测试
4.1 linux测试
#1.安装samba客户端
[root@k8s-master ~]# yum install samba-client cifs-utils -y
Loaded plugins: fastestmirror, langpacks
Loading mirror speeds from cached hostfile
 * base: mirrors.aliyun.com
 * extras: mirrors.aliyun.com
 * updates: mirrors.aliyun.com
base                                                                                                                                                                | 3.6 kB  00:00:00
docker-ce-stable                                                                                                                                                    | 3.5 kB  00:00:00
epel                                                                                                                                                                | 4.3 kB  00:00:00
extras                                                                                                                                                              | 2.9 kB  00:00:00
kubernetes                                                                                                                                                          | 1.4 kB  00:00:00
updates                                                                                                                                                             | 2.9 kB  00:00:00
Package samba-client-4.10.16-25.el7_9.x86_64 already installed and latest version
Package cifs-utils-6.2-10.el7.x86_64 already installed and latest version
Nothing to do
#2.查看服务器共享目录状态
[root@k8s-master ~]# smbclient -L \\11.0.1.18 -U test1
Enter SAMBA\test1's password:

	Sharename       Type      Comment
	---------       ----      -------
	share1          Disk      this is share1
	share2          Disk      this is share2
	share3          Disk      this is share3
	IPC$            IPC       IPC Service (Samba 4.10.16)
Reconnecting with SMB1 for workgroup listing.

	Server               Comment
	---------            -------

	Workgroup            Master
	---------            -------
[root@k8s-master ~]# smbclient -L \\11.0.1.18 -U test2
Enter SAMBA\test2's password:

	Sharename       Type      Comment
	---------       ----      -------
	share1          Disk      this is share1
	share2          Disk      this is share2
	share3          Disk      this is share3
	IPC$            IPC       IPC Service (Samba 4.10.16)
Reconnecting with SMB1 for workgroup listing.

	Server               Comment
	---------            -------

	Workgroup            Master
	---------            -------
[root@k8s-master ~]# smbclient -L \\11.0.1.18 -U test3
Enter SAMBA\test3's password:

	Sharename       Type      Comment
	---------       ----      -------
	share1          Disk      this is share1
	share2          Disk      this is share2
	share3          Disk      this is share3
	IPC$            IPC       IPC Service (Samba 4.10.16)
Reconnecting with SMB1 for workgroup listing.

	Server               Comment
	---------            -------

	Workgroup            Master
	---------            -------
我们分别挂载后在测试下:
mount -t cifs -o username=test1,password=123456 "\\\11.0.1.18\share1" /mnt
#1.test1对share1目录的权限
[root@k8s-master ~]# mount -t cifs -o username=test1,password=123456 "\\\11.0.1.18\share1" /mnt
[root@k8s-master ~]# cd /mnt/
[root@k8s-master mnt]# ls
file11  file12  file13  file14  file15  file16  file17  file18  file19
[root@k8s-master mnt]# ls -la
total 0
drwxr-xr-x   2 root root   0 May 29 10:06 .
dr-xr-xr-x. 18 root root 256 May 27 13:43 ..
-rwxr-xr-x   1 root root   0 May 29 10:06 file11
-rwxr-xr-x   1 root root   0 May 29 10:06 file12
-rwxr-xr-x   1 root root   0 May 29 10:06 file13
-rwxr-xr-x   1 root root   0 May 29 10:06 file14
-rwxr-xr-x   1 root root   0 May 29 10:06 file15
-rwxr-xr-x   1 root root   0 May 29 10:06 file16
-rwxr-xr-x   1 root root   0 May 29 10:06 file17
-rwxr-xr-x   1 root root   0 May 29 10:06 file18
-rwxr-xr-x   1 root root   0 May 29 10:06 file19
[root@k8s-master mnt]# echo "hello world" >file12
#2.test1对share2目录的权限
[root@k8s-master /]# mount -t cifs -o username=test1,password=123456 "\\\11.0.1.18\share2" /mnt
[root@k8s-master /]# cd /mnt/
[root@k8s-master mnt]# ls
file21  file22  file23  file24  file25  file26  file27  file28  file29
[root@k8s-master mnt]# ls -la
total 0
drwxr-xr-x   2 root root   0 May 29 10:06 .
dr-xr-xr-x. 18 root root 256 May 27 13:43 ..
-rwxr-xr-x   1 root root   0 May 29 10:06 file21
-rwxr-xr-x   1 root root   0 May 29 10:06 file22
-rwxr-xr-x   1 root root   0 May 29 10:06 file23
-rwxr-xr-x   1 root root   0 May 29 10:06 file24
-rwxr-xr-x   1 root root   0 May 29 10:06 file25
-rwxr-xr-x   1 root root   0 May 29 10:06 file26
-rwxr-xr-x   1 root root   0 May 29 10:06 file27
-rwxr-xr-x   1 root root   0 May 29 10:06 file28
-rwxr-xr-x   1 root root   0 May 29 10:06 file29
[root@k8s-master mnt]# vim file21
[root@k8s-master mnt]# echo "hello world" >file21
-bash: file21: Permission denied
#3.test1对share3目录的权限
[root@k8s-master ~]# mount -t cifs -o username=test1,password=123456 "\\\11.0.1.18\share3" /mnt
mount error(13): Permission denied
Refer to the mount.cifs(8) manual page (e.g. man mount.cifs)
我们只使用test1对share1、share2、share3进行了测试。
4.2 windows测试
我们直接在我的电脑中舒服\\11.0.1.18回车输入smb账号密码后即可
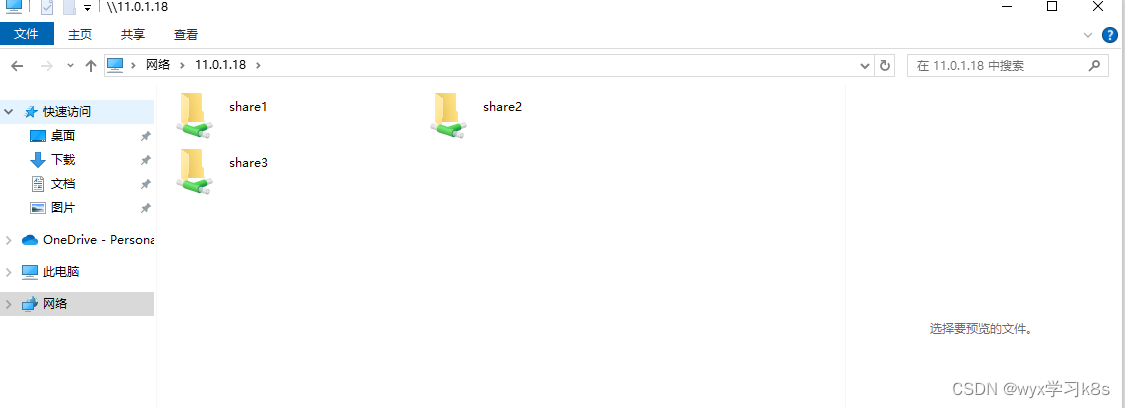
可以分别进去后看能否读写即可
注:
使用Windows客户端测试,每测试完一个用户需要在命令行中运行下面命令,删除缓存。
net use * /del修改smb默认端口:
vim /etc/samba/smb.conf

#在[global]下添加
smb ports = 555