我们在之前的文章 "城市之旅:使用 LLM 和 Elasticsearch 简化地理空间搜索(一)",在今天的练习中,我将使用本地部署来做那里面的 Jupyter notebook。
安装
Elasticsearch 及 Kibana
如果你还没有安装好自己的 Elasticsearch 及 Kibana,请参考如下的链接来进行安装:
- 如何在 Linux,MacOS 及 Windows 上进行安装 Elasticsearch
- Kibana:如何在 Linux,MacOS 及 Windows上安装 Elastic 栈中的 Kibana
在安装的时候,我们选择 Elastic Stack 8.x 来进行安装。特别值得指出的是:ES|QL 只在 Elastic Stack 8.11 及以后得版本中才有。你需要下载 Elastic Stack 8.11 及以后得版本来进行安装。
在首次启动 Elasticsearch 的时候,我们可以看到如下的输出:
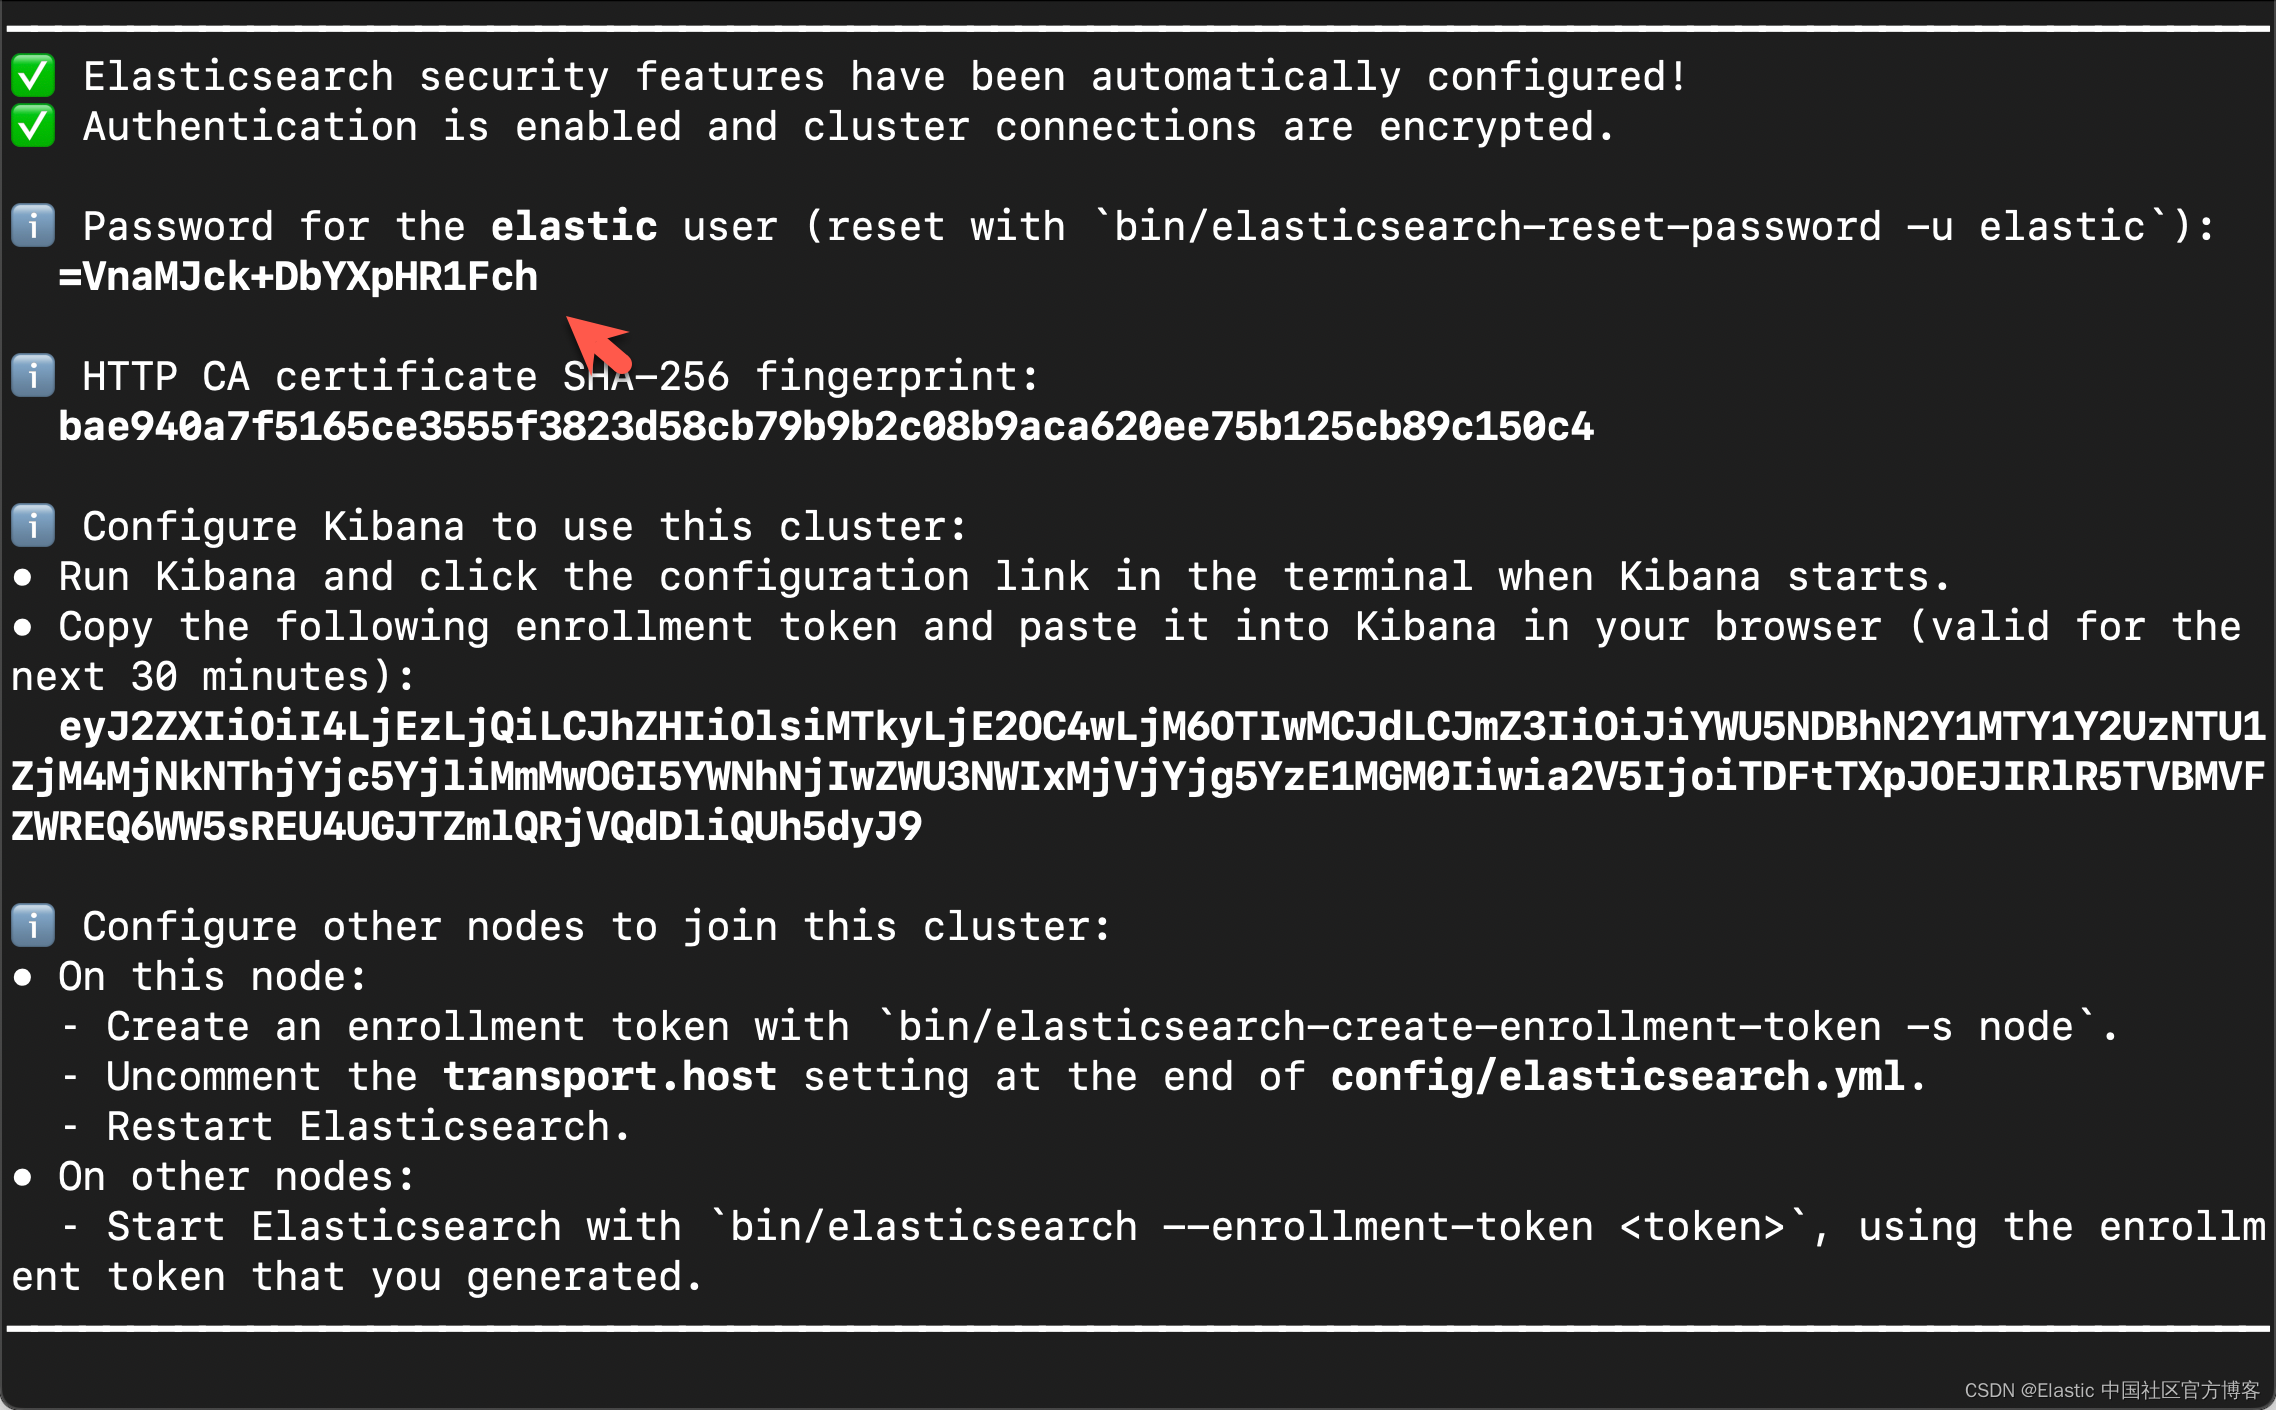
我们需要记下 Elasticsearch 超级用户 elastic 的密码。
我们还可以在安装 Elasticsearch 目录中找到 Elasticsearch 的访问证书:
$ pwd
/Users/liuxg/elastic/elasticsearch-8.13.4/config/certs
$ ls
http.p12      http_ca.crt   transport.p12
在上面,http_ca.crt 是我们需要用来访问 Elasticsearch 的证书。
我们首先克隆已经写好的代码:
git clone https://github.com/liu-xiao-guo/elasticsearch-labs我们然后进入到该项目的根目录下:
$ pwd
/Users/liuxg/python/elasticsearch-labs/supporting-blog-content/geospatial-llm
$ cp ~/elastic/elasticsearch-8.13.4/config/certs/http_ca.crt .
$ ls
09-geospatial-search.ipynb http_ca.crt
在上面,我们把 Elasticsearch 的证书拷贝到当前的目录下。上面的 09-geospatial-search.ipynb 就是我们下面要展示的 notebook。
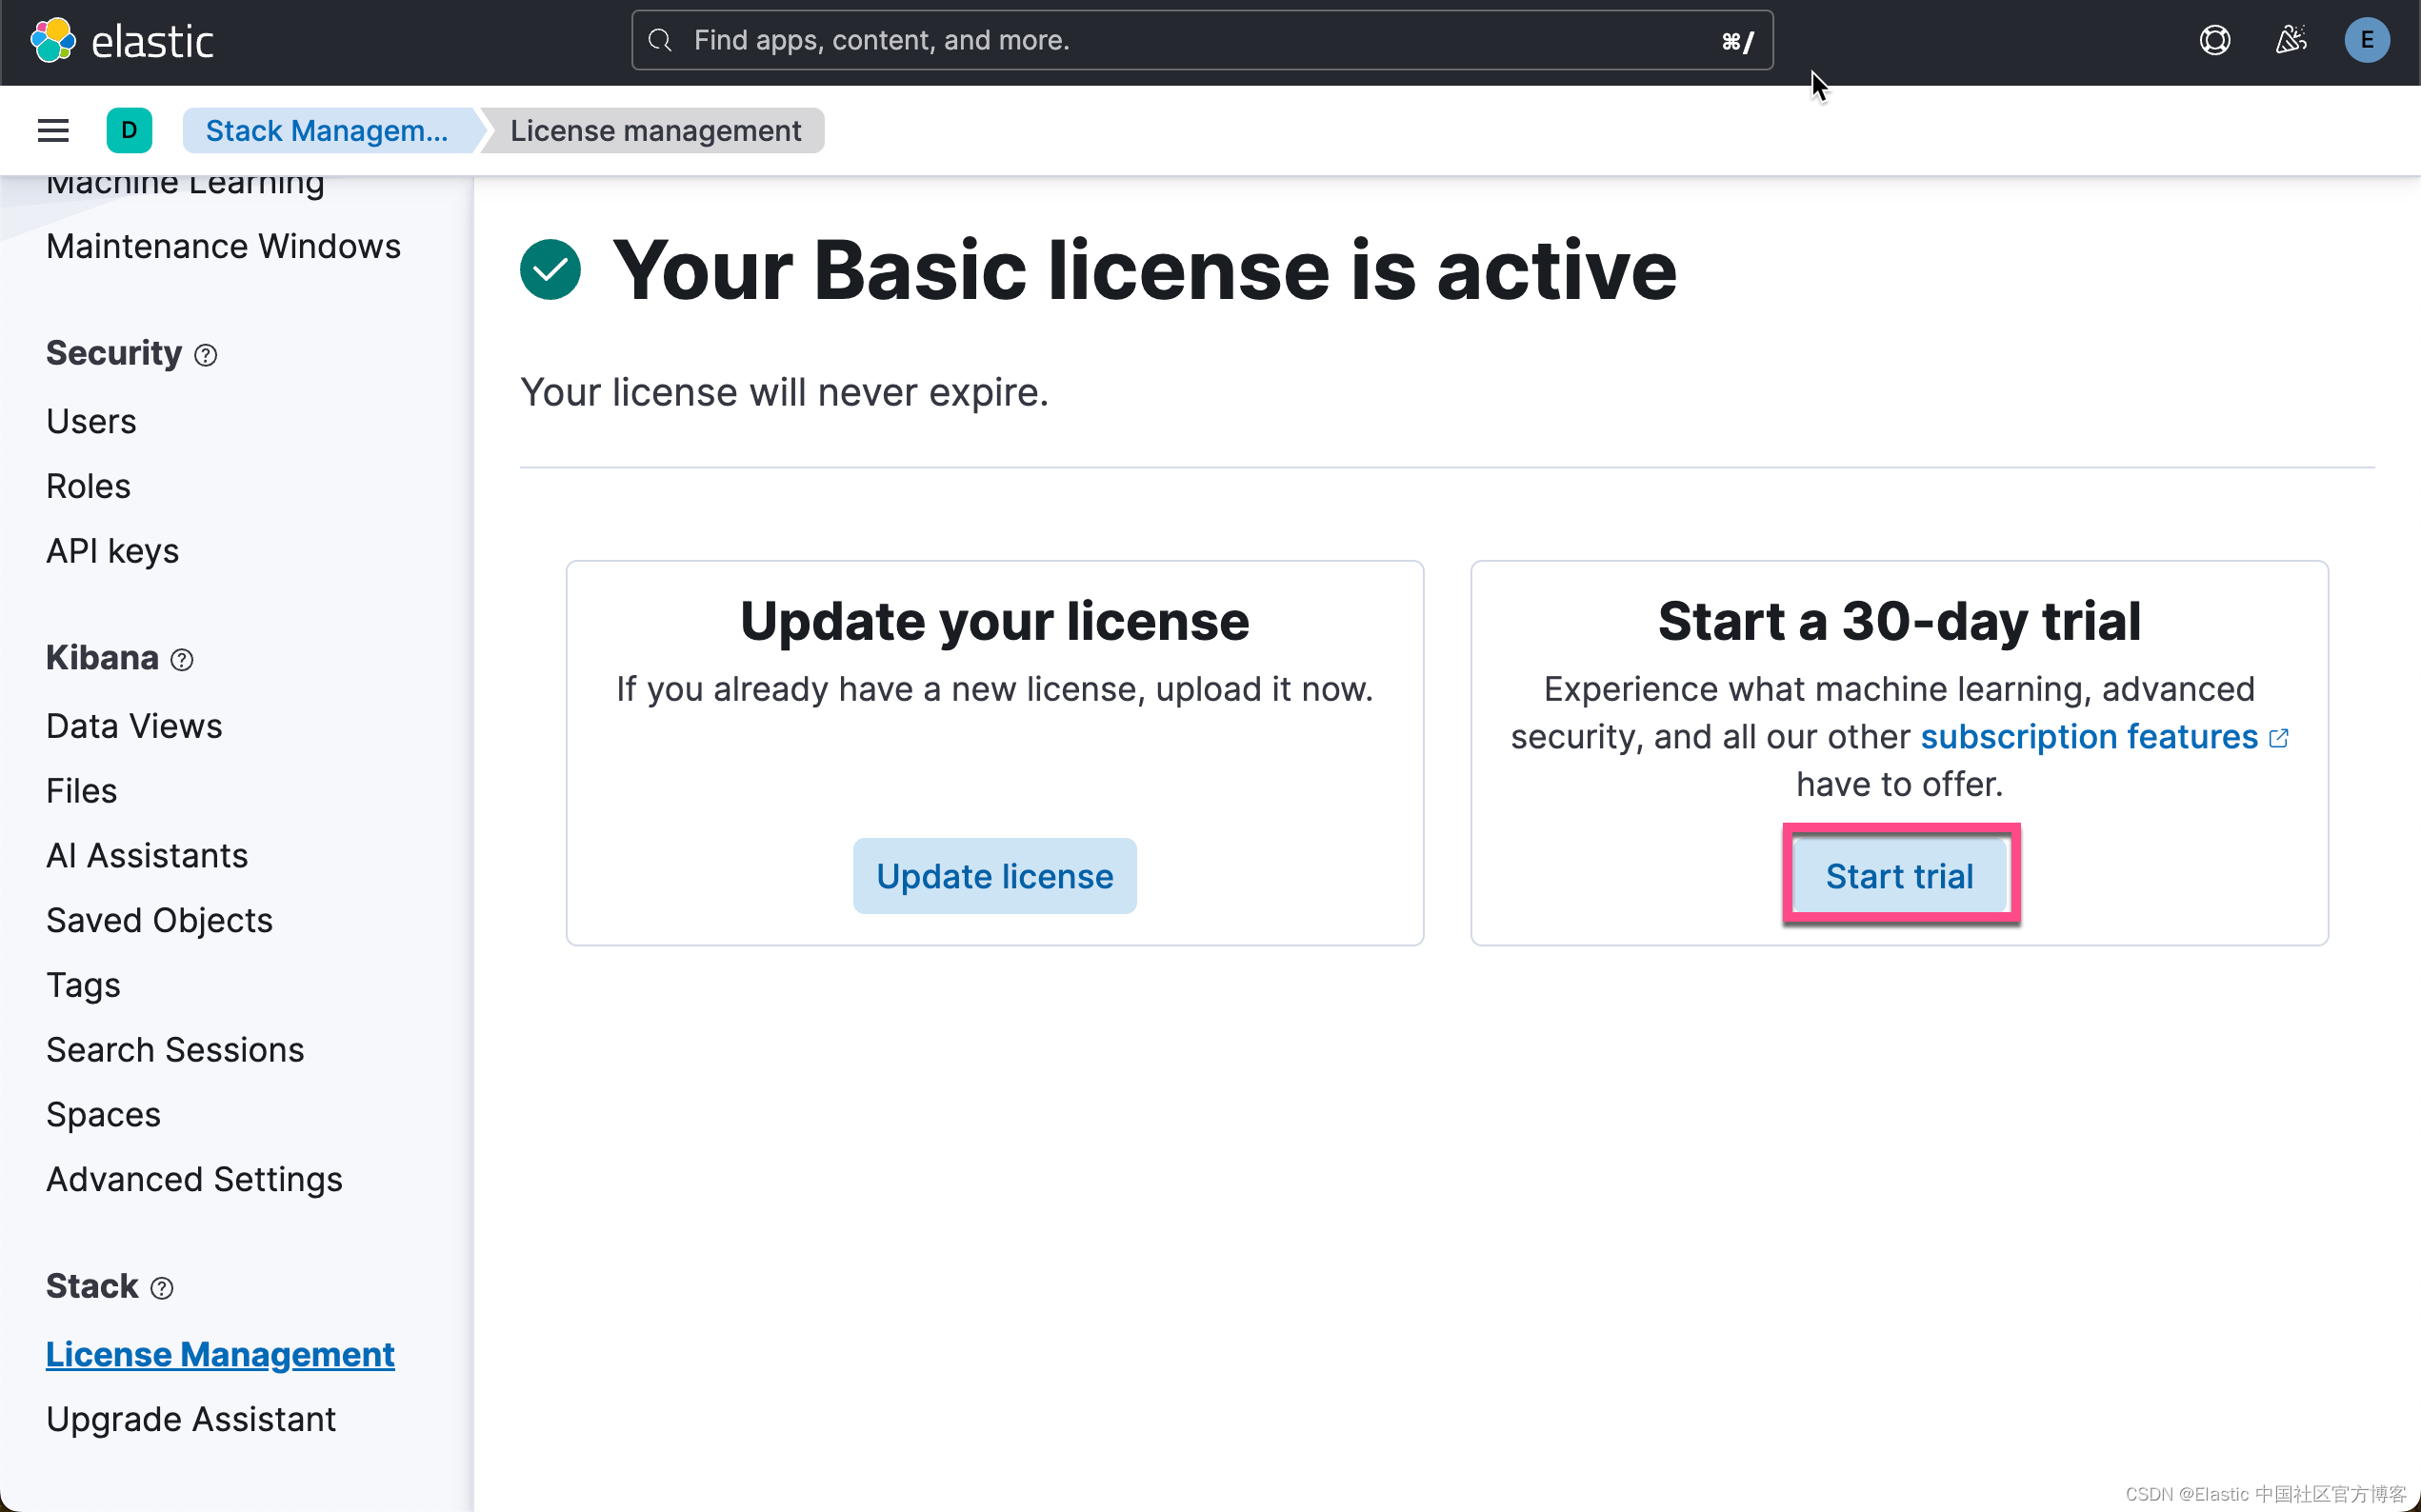
启动白金试用
在下面,我们需要使用 ELSER。这是一个白金试用的功能。我们按照如下的步骤来启动白金试用:

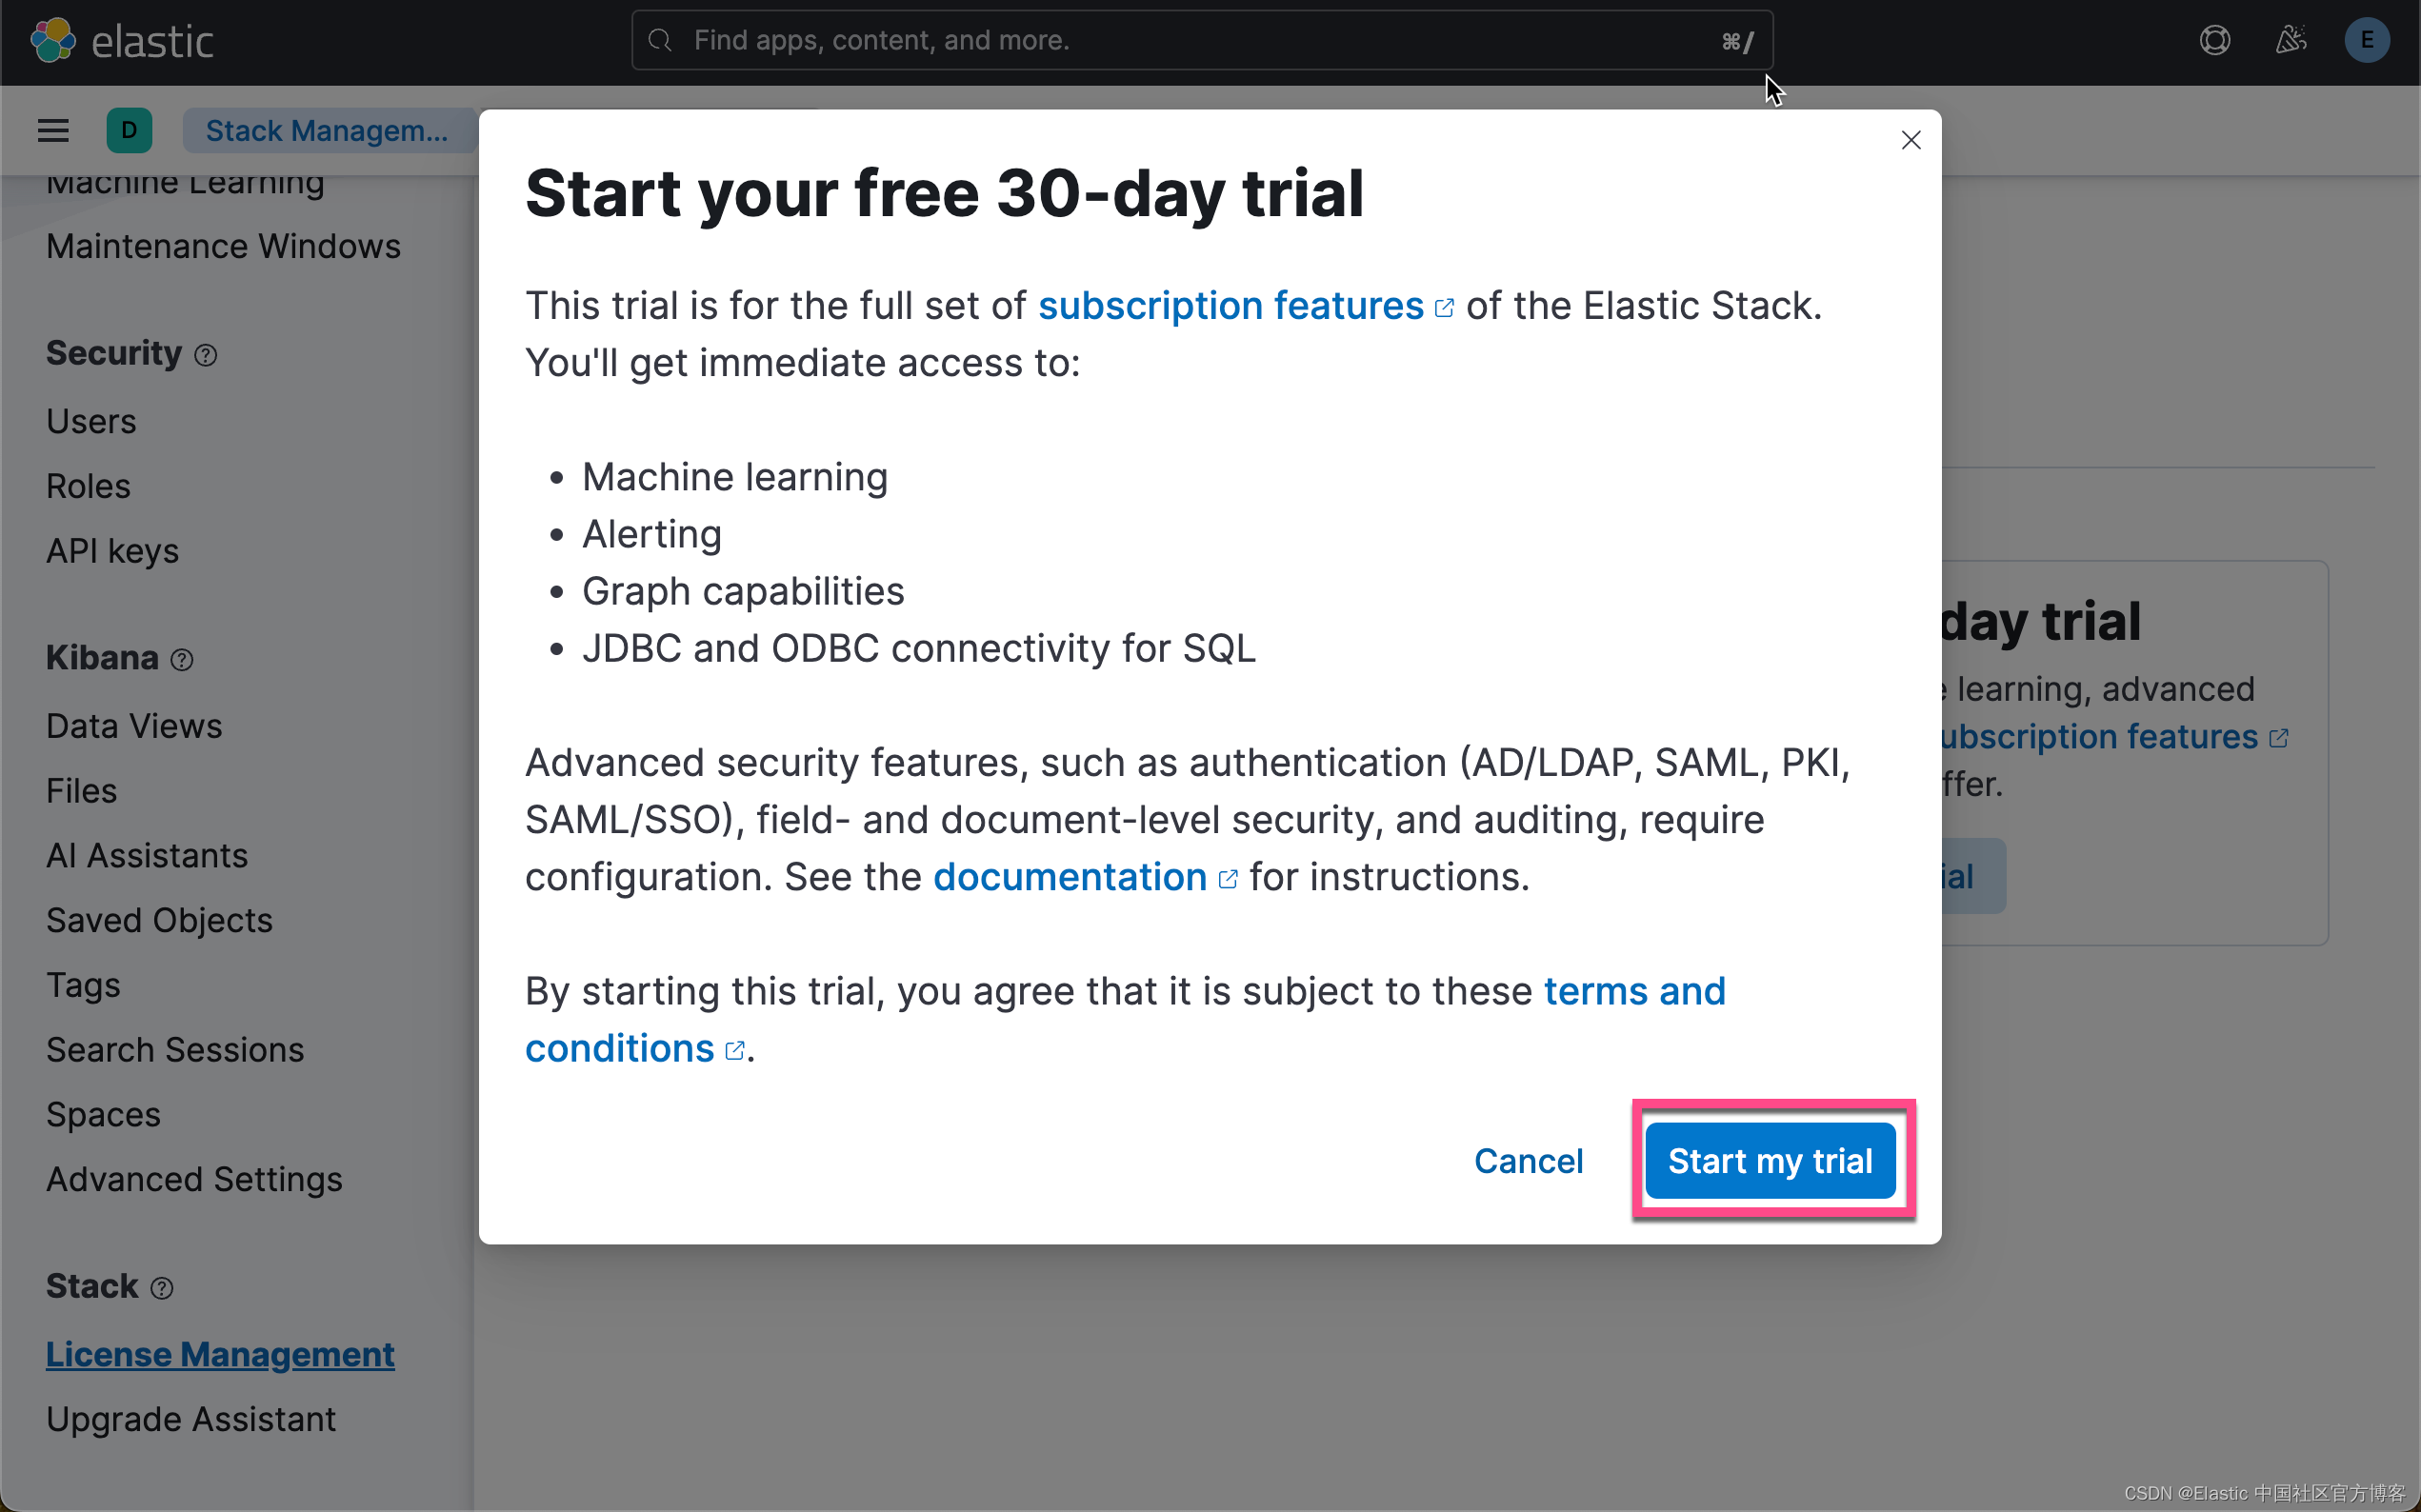
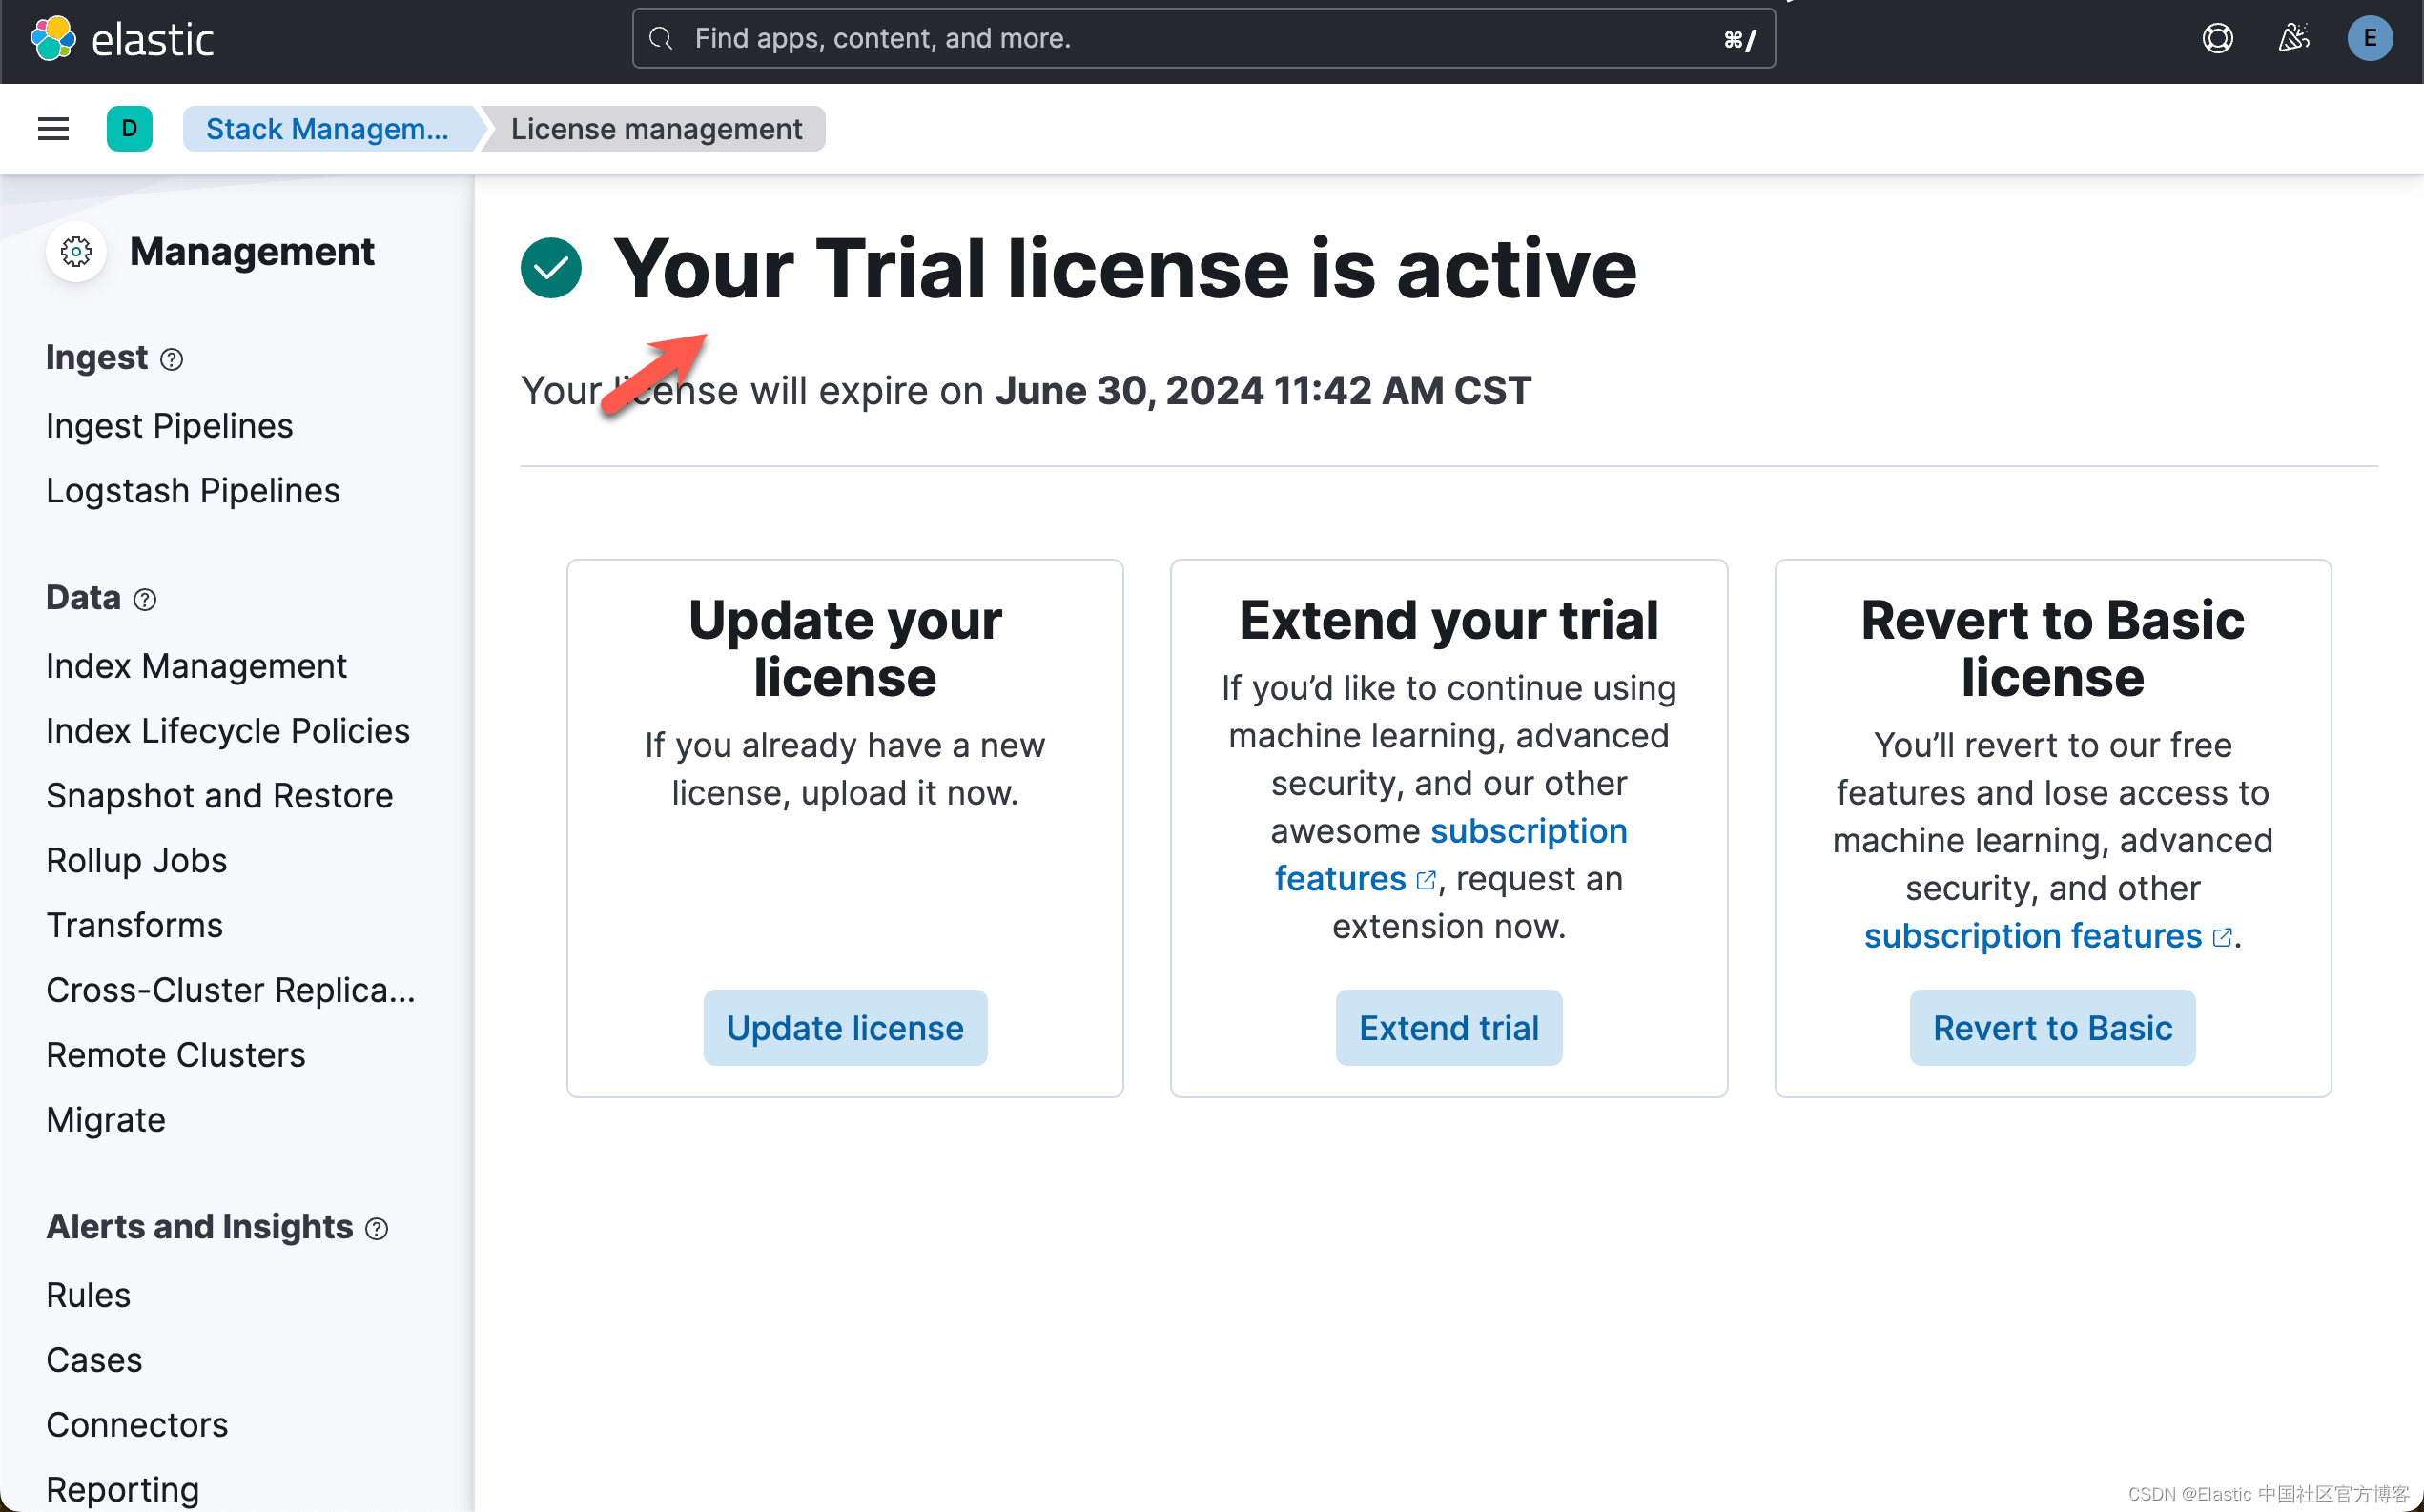
这样我们就完成了白金试用功能。
创建环境变量
为了能够使得下面的应用顺利执行,我们在当前的项目根目录下创建一个叫做 .env 的文件。它的内容如下:
.env
ES_USER="elastic"
ES_PASSWORD="=VnaMJck+DbYXpHR1Fch"
ES_ENDPOINT="localhost"
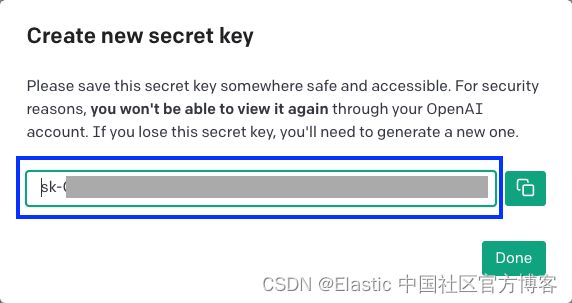
OPENAI_API_KEY="YourOpenAIkey"你需要根据自己的 Elasticsearch 的配置来修改上面的配置。你需要申请自己的 OpenAI key 来完成上面的配置。你可以在地址 https://platform.openai.com/api-keys 进行申请。
创建完上面的文件后,我们可以看到:
$ pwd
/Users/liuxg/python/elasticsearch-labs/supporting-blog-content/geospatial-llm
$ ls -al
total 176
drwxr-xr-x   5 liuxg  staff    160 May 31 11:10 .
drwxr-xr-x  16 liuxg  staff    512 May 31 09:55 ..
-rw-r--r--   1 liuxg  staff    146 May 31 11:10 .env
-rw-r--r--   1 liuxg  staff  78674 May 31 09:48 09-geospatial-search.ipynb
-rw-r-----   1 liuxg  staff   1915 May 31 10:55 http_ca.crt
演示
我们在项目的根目录下,我们使用如下的命令来打开 notebook:
$ pwd
/Users/liuxg/python/elasticsearch-labs/supporting-blog-content/geospatial-llm
$ jupyter notebook 09-geospatial-search.ipynb
安装及连接
首先,我们需要使用 Python 客户端连接到 Elastic 部署。
!pip install -qU elasticsearch requests openai python-dotenv接下来,我们导入所需要的包:
from dotenv import load_dotenv
import os
from elasticsearch import Elasticsearch, helpers, exceptions
from elasticsearch.helpers import BulkIndexError
import time
import json as JSON
现在我们可以实例化 Python Elasticsearch 客户端。然后我们创建一个客户端对象来实例化 Elasticsearch 类的实例
load_dotenv()

ES_USER = os.getenv("ES_USER")
ES_PASSWORD = os.getenv("ES_PASSWORD")
ES_ENDPOINT = os.getenv("ES_ENDPOINT")
OPENAI_API_KEY = os.getenv("OPENAI_API_KEY")

url = f"https://{ES_USER}:{ES_PASSWORD}@{ES_ENDPOINT}:9200"
print(url)

client = Elasticsearch(url, ca_certs = "./http_ca.crt", verify_certs = True)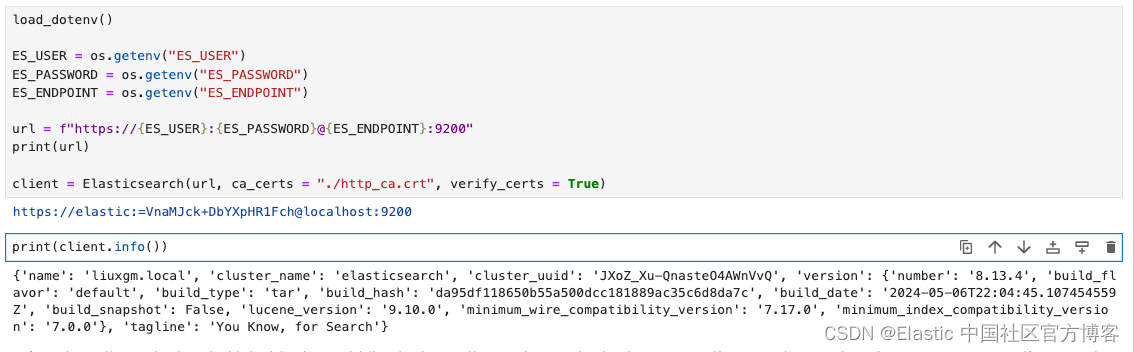
下载并部署 ELSER 模型
在此示例中,我们将下载 ELSER 模型并将其部署到 ML 节点中。确保你有一个 ML 节点才能运行 ELSER 模型。
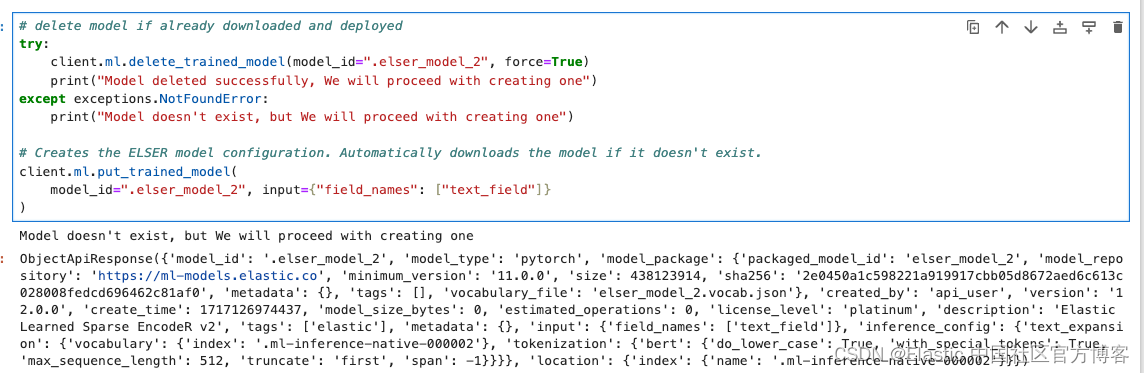
# delete model if already downloaded and deployed
try:
    client.ml.delete_trained_model(model_id=".elser_model_2", force=True)
    print("Model deleted successfully, We will proceed with creating one")
except exceptions.NotFoundError:
    print("Model doesn't exist, but We will proceed with creating one")

# Creates the ELSER model configuration. Automatically downloads the model if it doesn't exist.
client.ml.put_trained_model(
    model_id=".elser_model_2", input={"field_names": ["text_field"]}
)注意:针对 x86 架构,我们可以使用模型 .elser_model_2_linux-x86_64 来代替 .elser_model_2 以获取更好的性能。在下面的代码中,我们也需要相应的更换。
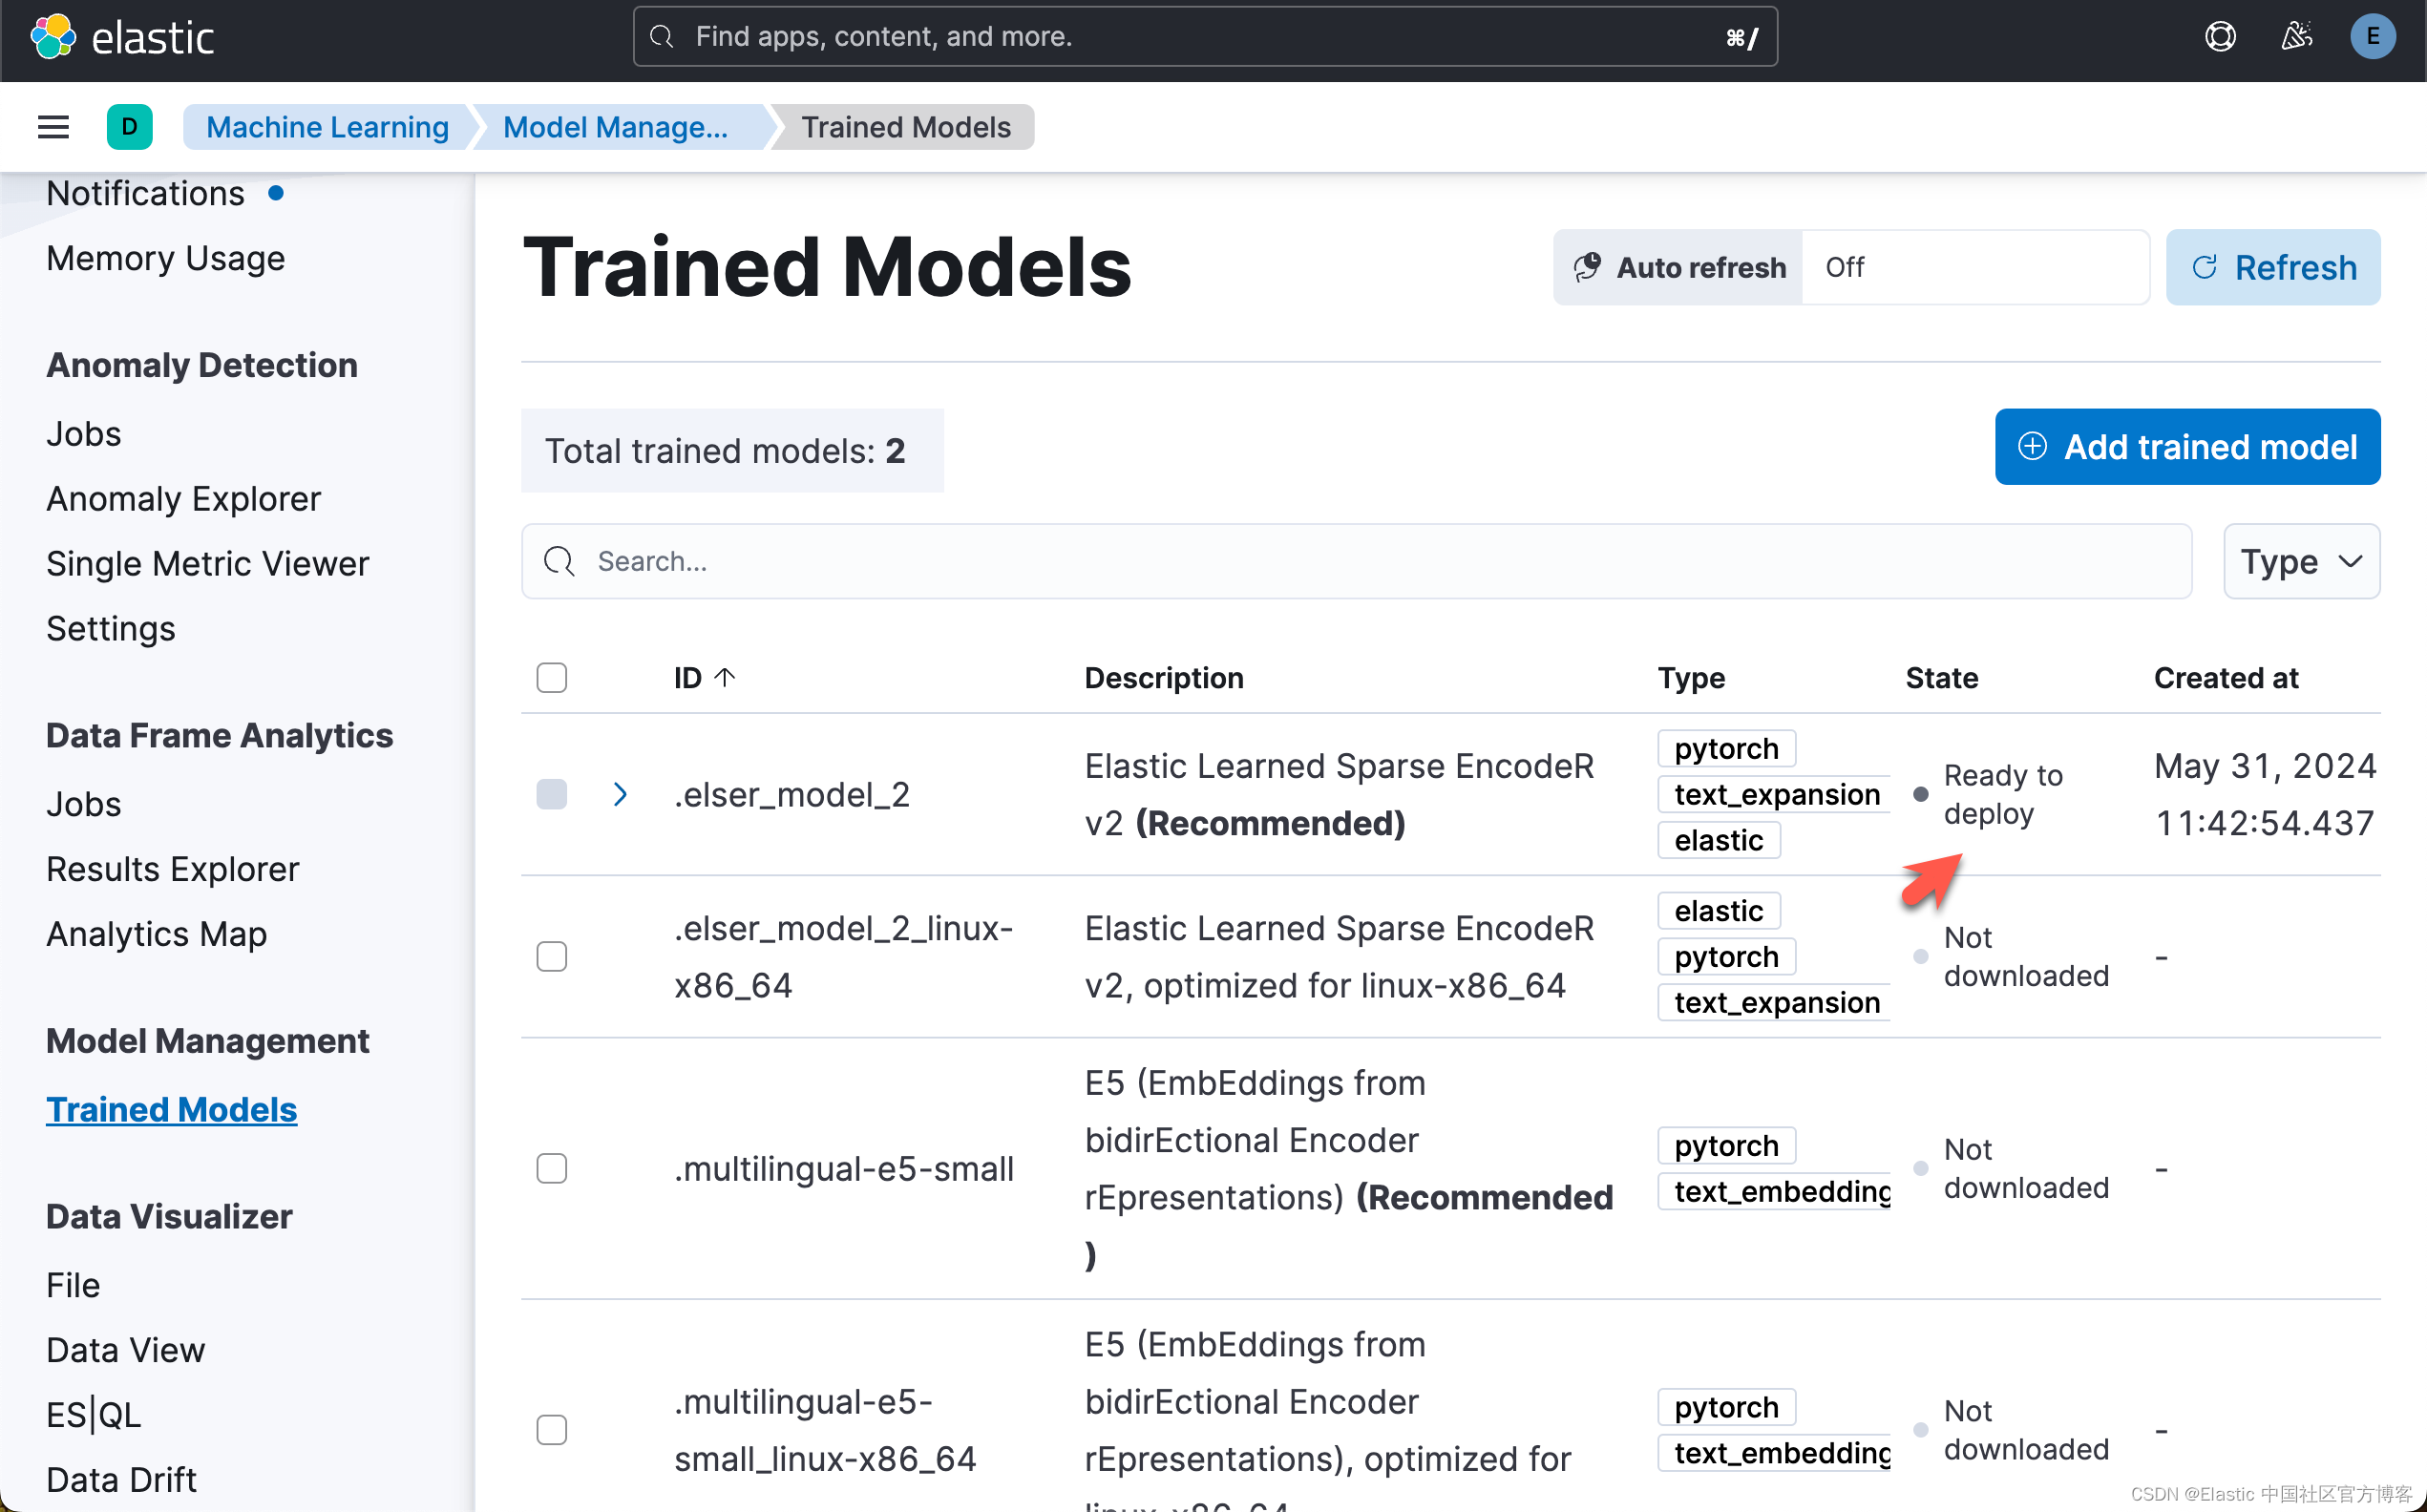
上面的命令下载需要一点时间。我们使用如下的代码来等待模型的下载:
while True:
    status = client.ml.get_trained_models(
        model_id=".elser_model_2", include="definition_status"
    )

    if status["trained_model_configs"][0]["fully_defined"]:
        print("ELSER Model is downloaded and ready to be deployed.")
        break
    else:
        print("ELSER Model is downloaded but not ready to be deployed.")
    time.sleep(5)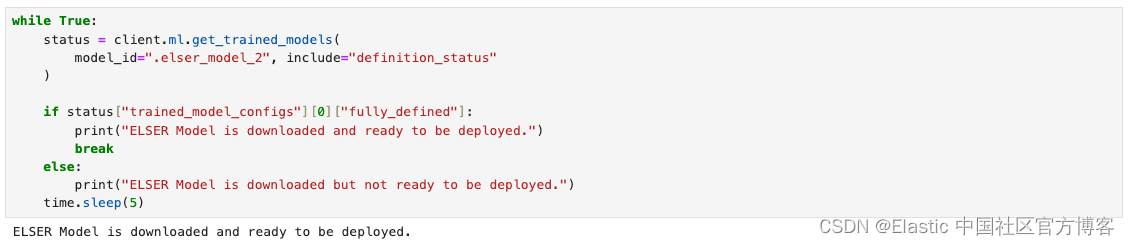
运行完上面的代码后,我们可以在 Kibana 中进行查看:
下载模型后,我们可以将模型部署到 ML 节点中。使用以下命令来部署模型。
# Start trained model deployment if not already deployed
client.ml.start_trained_model_deployment(
    model_id=".elser_model_2", number_of_allocations=1, wait_for="starting"
)

while True:
    status = client.ml.get_trained_models_stats(
        model_id=".elser_model_2",
    )
    if status["trained_model_stats"][0]["deployment_stats"]["state"] == "started":
        print("ELSER Model has been successfully deployed.")
        break
    else:
        print("ELSER Model is currently being deployed.")
    time.sleep(5)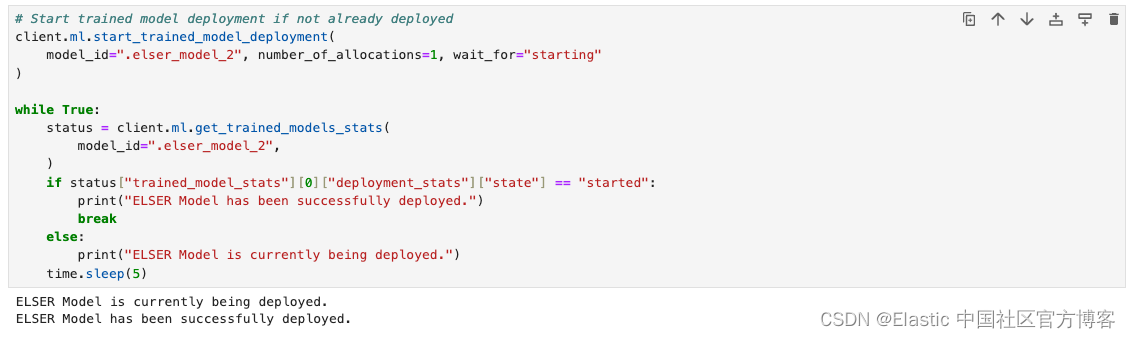
运行完上面的代码后,我们可以在 Kibana 再次进行查看:
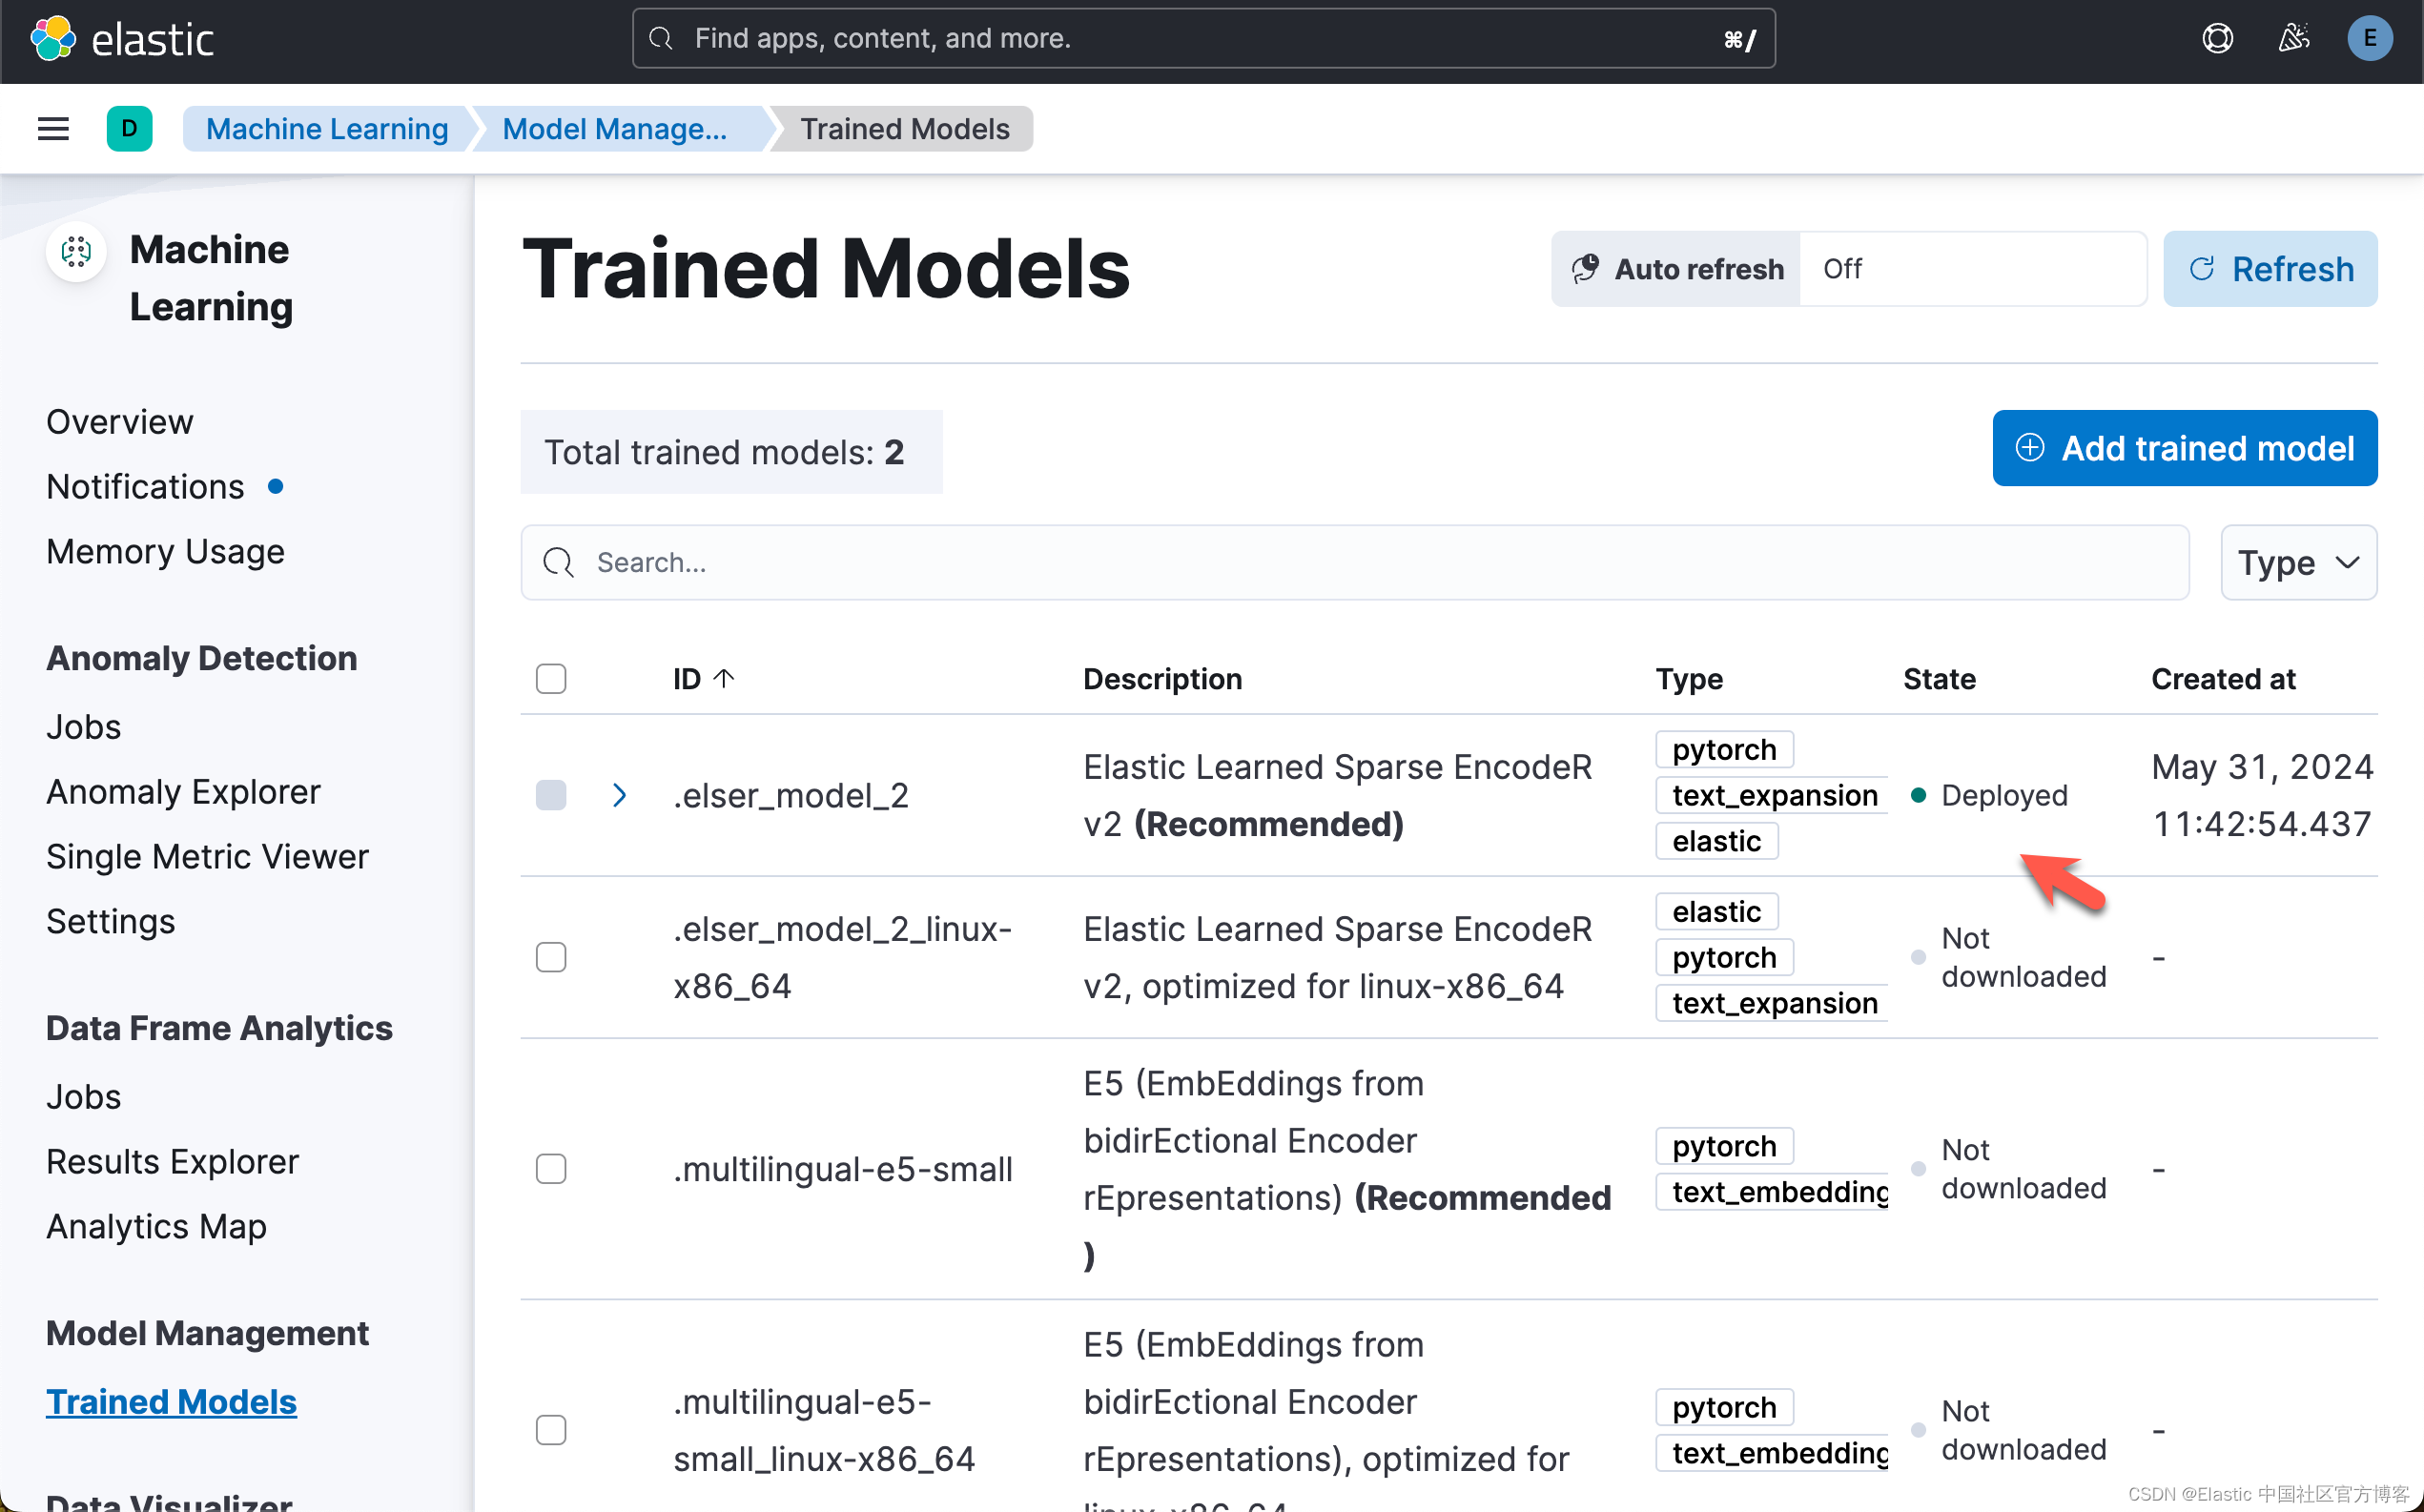
我们也可以从 Kibana 中来部署 ELSER。请详细阅读之前的文章 "Elasticsearch:部署 ELSER - Elastic Learned Sparse EncoderR"。
使用 ELSER 索引文档
为了在我们的 Elasticsearch 部署上使用 ELSER,我们需要创建一个包含运行 ELSER 模型的推理处理器的摄取管道。让我们使用 put_pipeline 方法添加该管道。
client.ingest.put_pipeline(
id="elser-ingest-pipeline",
description="Ingest pipeline for ELSER",
processors=[
{"html_strip": {"field": "name", "ignore_failure": True}},
{"html_strip": {"field": "description", "ignore_failure": True}},
{"html_strip": {"field": "amenities", "ignore_failure": True}},
{"html_strip": {"field": "host_about", "ignore_failure": True}},
{
"inference": {
"model_id": ".elser_model_2",
"input_output": [
{"input_field": "name", "output_field": "name_embedding"}
],
"ignore_failure": True,
}
},
{
"inference": {
"model_id": ".elser_model_2",
"input_output": [
{
"input_field": "description",
"output_field": "description_embedding",
}
],
"ignore_failure": True,
}
},
{
"inference": {
"model_id": ".elser_model_2",
"input_output": [
{"input_field": "amenities", "output_field": "amenities_embedding"}
],
"ignore_failure": True,
}
},
{
"inference": {
"model_id": ".elser_model_2",
"input_output": [
{
"input_field": "host_about",
"output_field": "host_about_embedding",
}
],
"ignore_failure": True,
}
},
],
)
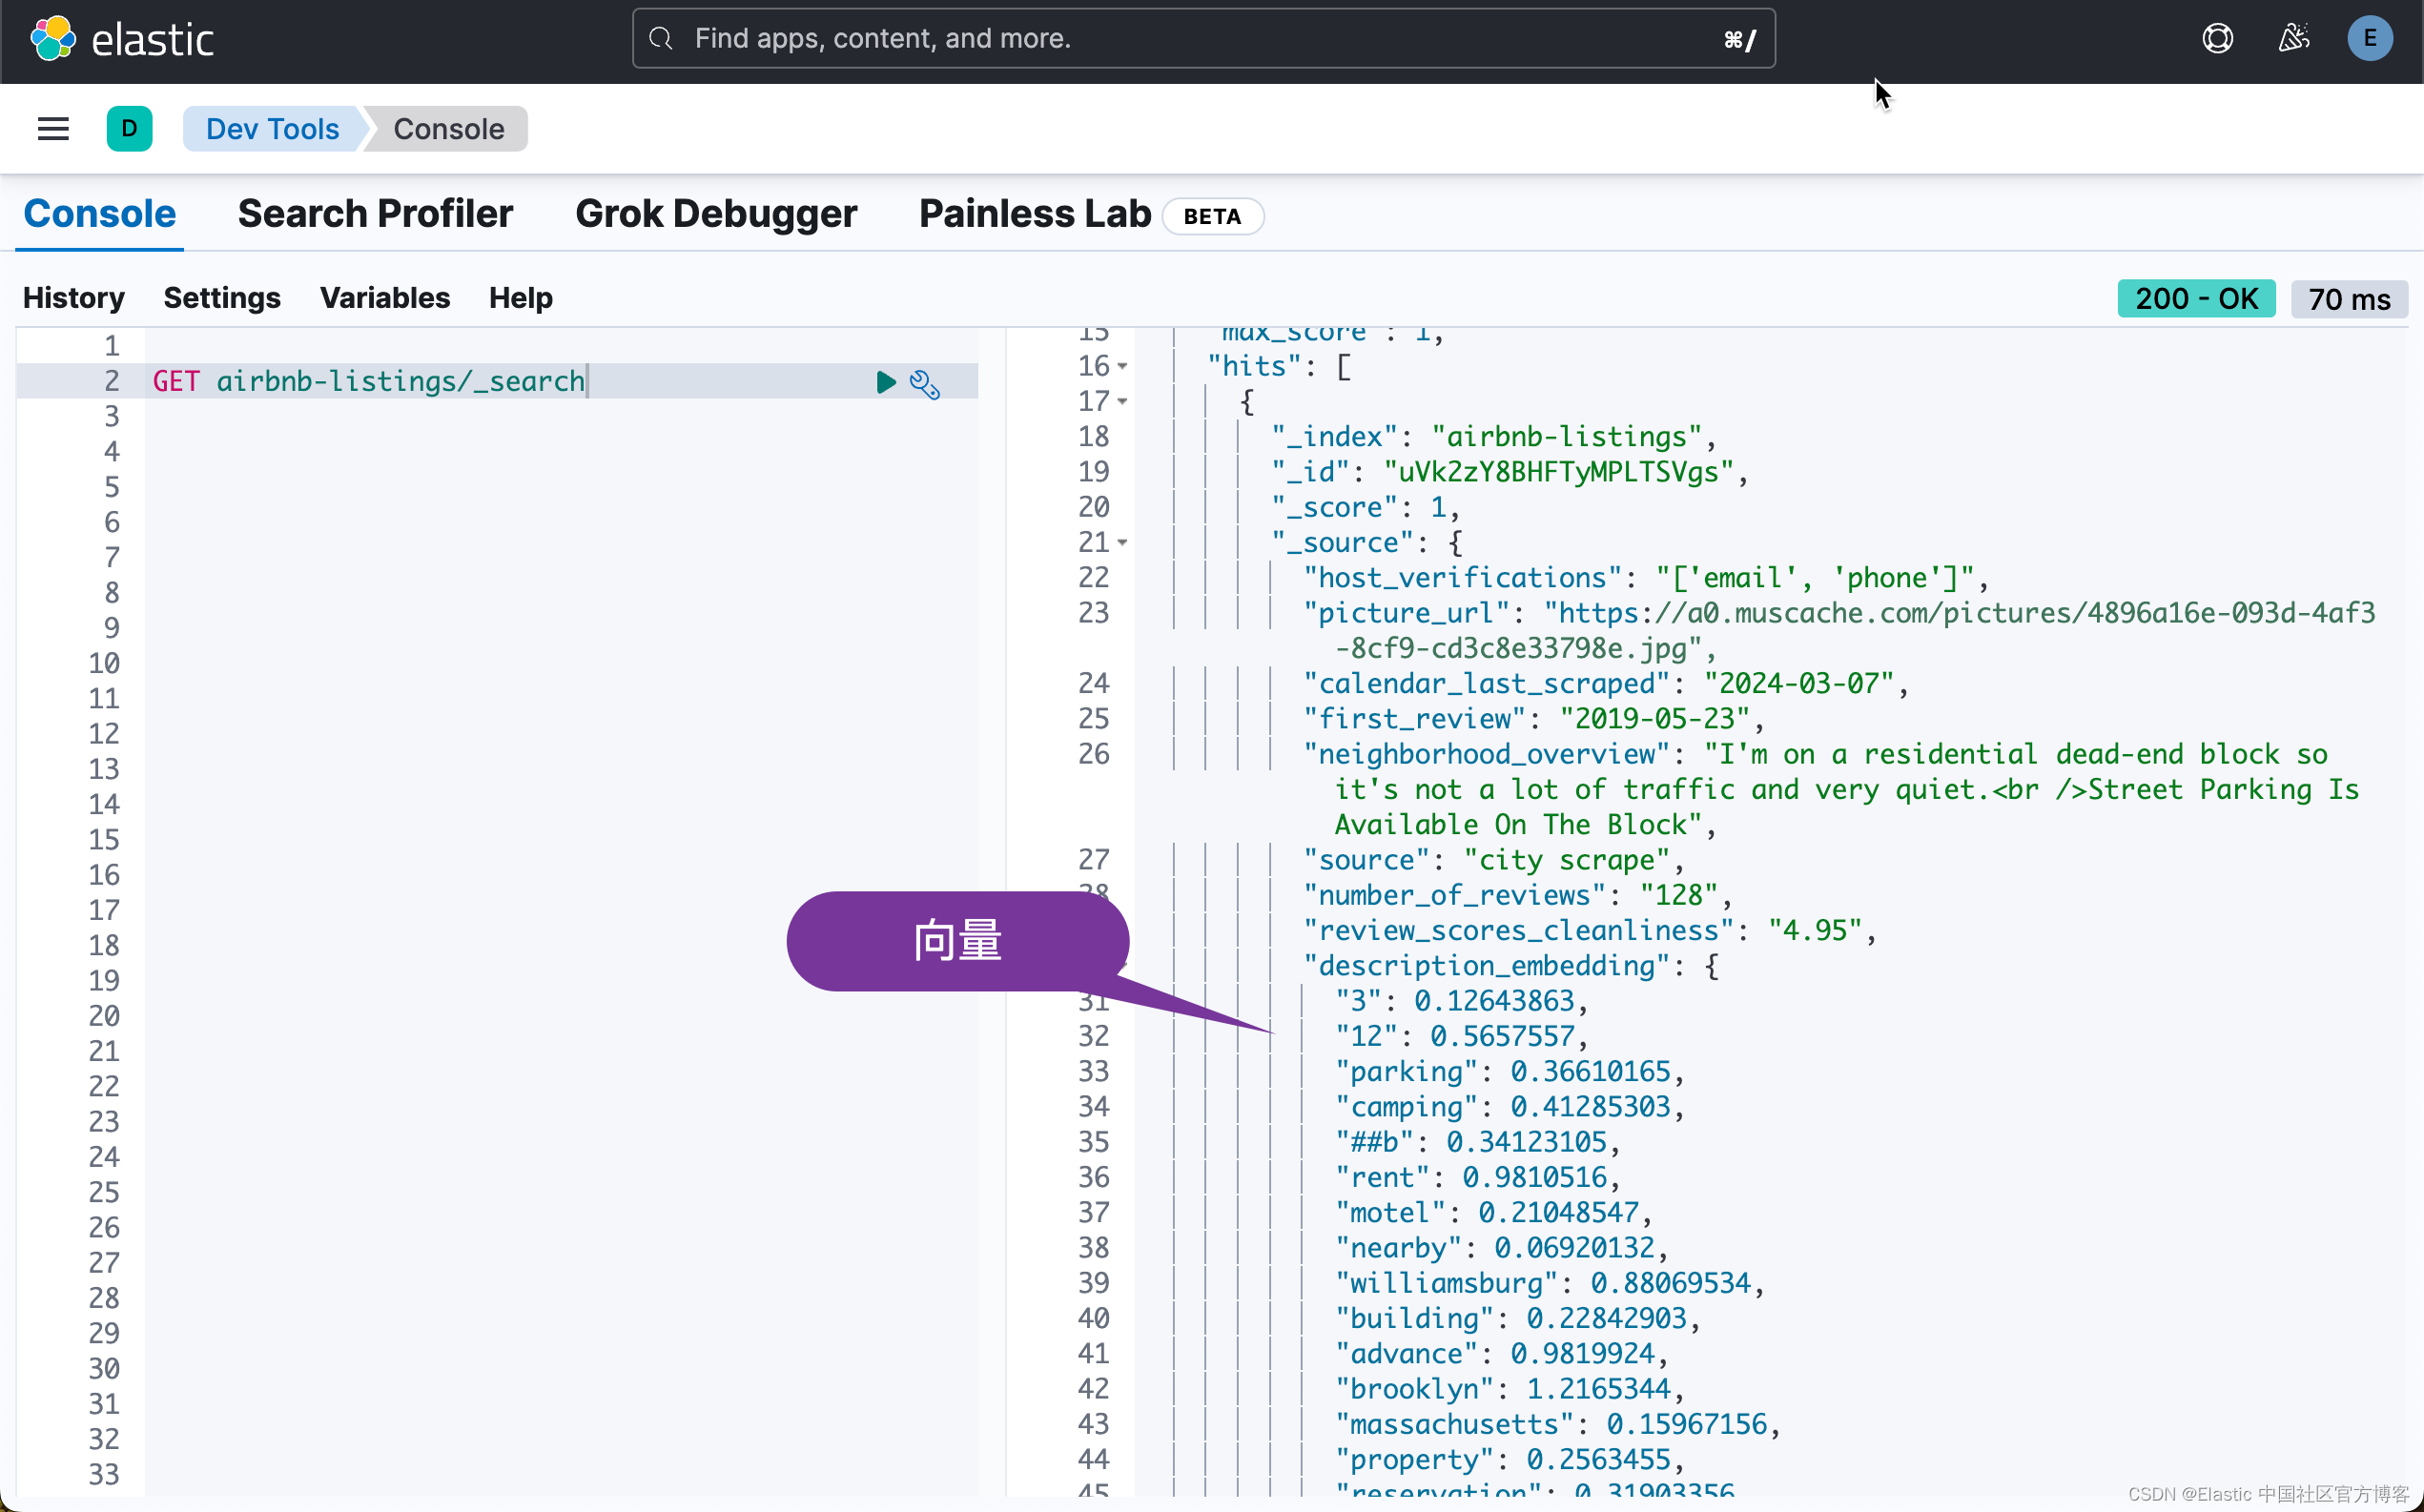
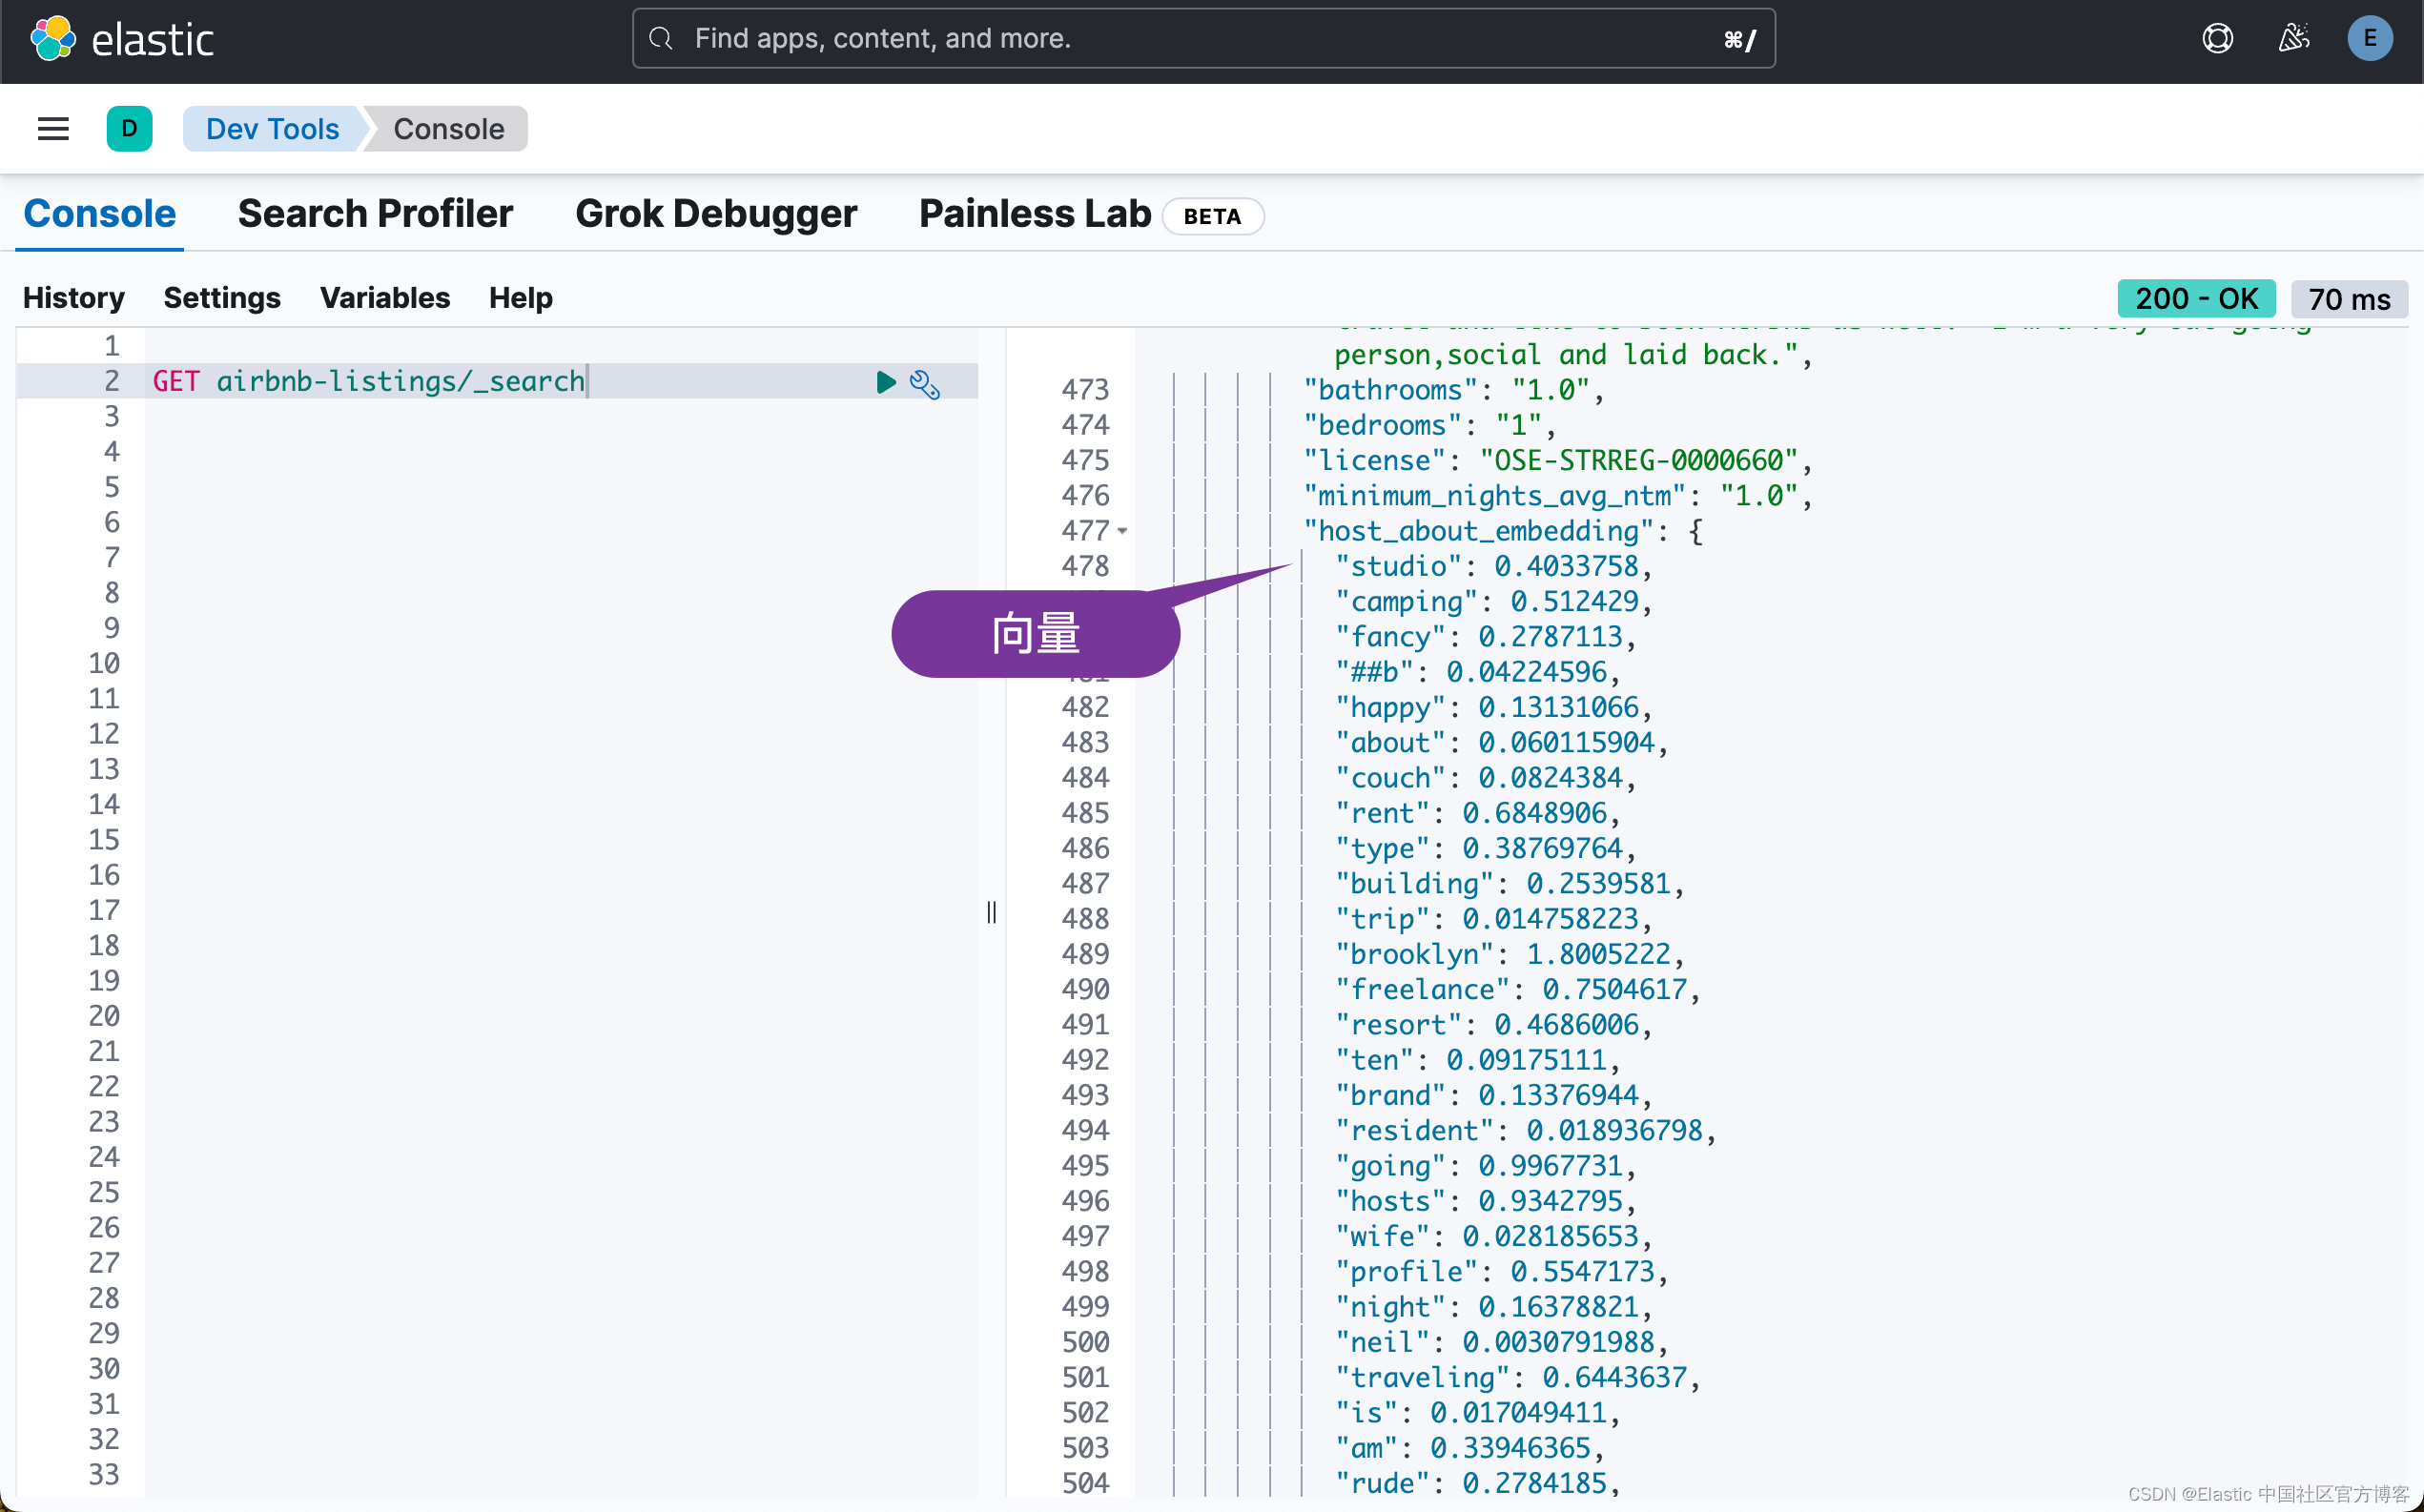
ObjectApiResponse({'acknowledged': True})准备 AirBnB 列表
接下来我们需要准备索引。除非另有说明,我们会将所有内容映射为关键字。我们还将使用 ELSER 将列表的 name 和 decription 映射为 sparse_vectors 。
client.indices.delete(index="airbnb-listings", ignore_unavailable=True)
client.indices.create(
    index="airbnb-listings",
    settings={"index": {"default_pipeline": "elser-ingest-pipeline"}},
    mappings={
        "dynamic_templates": [
            {
                "stringsaskeywords": {
                    "match": "*",
                    "match_mapping_type": "string",
                    "mapping": {"type": "keyword"},
                }
            }
        ],
        "properties": {
            "host_about_embedding": {"type": "sparse_vector"},
            "amenities_embedding": {"type": "sparse_vector"},
            "description_embedding": {"type": "sparse_vector"},
            "name_embedding": {"type": "sparse_vector"},
            "location": {"type": "geo_point"},
        },
    },
)

ObjectApiResponse({'acknowledged': True, 'shards_acknowledged': True, 'index': 'airbnb-listings'})
运行完上面的代码后,我们可以在 Kibana 中找到已经创建的 airbnb-listings 索引:
下载 airbnb 数据
接下来,我们将下载 AirBnB 列表 csv 并将其上传到 Elasticsearch。这可能需要几分钟! AirBnB 列表包含大约 80mb 的 CSV 扩展文件和大约 40,000 个文档。在下面的代码中,我们添加了一个 if 条件以仅处理前 5,000 个文档。
为了能够使得下面的代码能够正常运行,我们使用如下的命令来活动 airbnb 数据:
wget https://data.insideairbnb.com/united-states/ny/new-york-city/2024-03-07/data/listings.csv.gz
$ pwd
/Users/liuxg/tmp/elasticsearch-labs/supporting-blog-content/geospatial-llm
$ wget https://data.insideairbnb.com/united-states/ny/new-york-city/2024-03-07/data/listings.csv.gz
--2024-05-31 12:59:59-- https://data.insideairbnb.com/united-states/ny/new-york-city/2024-03-07/data/listings.csv.gz
Resolving data.insideairbnb.com (data.insideairbnb.com)... 13.226.210.37, 13.226.210.3, 13.226.210.22, ...
Connecting to data.insideairbnb.com (data.insideairbnb.com)|13.226.210.37|:443... connected.
HTTP request sent, awaiting response... 200 OK
Length: 21315678 (20M) [application/x-gzip]
Saving to: 'listings.csv.gz'
listings.csv.gz 100%[=============================>] 20.33M 12.2MB/s in 1.7s
2024-05-31 13:00:01 (12.2 MB/s) - 'listings.csv.gz' saved [21315678/21315678]
$ ls
09-geospatial-search.ipynb listings.csv.gz
$ pwd
/Users/liuxg/tmp/elasticsearch-labs/supporting-blog-content/geospatial-llm
$ ls
09-geospatial-search.ipynb listings.csv.gz
$ gunzip listings.csv.gz
$ ls
09-geospatial-search.ipynb listings.csv
import requests
import gzip
import shutil
import csv
# Download the CSV file
# url = "https://data.insideairbnb.com/united-states/ny/new-york-city/2024-03-07/data/listings.csv.gz"
# response = requests.get(url, stream=True)
# Save the downloaded file
#with open("listings.csv.gz", "wb") as file:
# shutil.copyfileobj(response.raw, file)
# Unpack the CSV file
#with gzip.open("./listings.csv.gz", "rb") as file_in:
# with open("listings.csv", "wb") as file_out:
# shutil.copyfileobj(file_in, file_out)
def remove_empty_fields(data):
empty_fields = []
# Iterate over the dictionary items
for key, value in data.items():
# Check if the value is empty (None, empty string, empty list, etc.)
if not value:
empty_fields.append(key)
# Remove empty fields from the dictionary
for key in empty_fields:
del data[key]
return data
def prepare_documents():
with open("./listings.csv", "r", encoding="utf-8") as file:
reader = csv.DictReader(file, delimiter=",")
# we are going to only add the first 5.000 listings.
limit = 5000
for index, row in enumerate(reader):
if index >= limit:
break
if index % 250 == 0:
print(f"Processing document {index}")
row["location"] = {
"lat": float(row["latitude"]),
"lon": float(row["longitude"]),
}
row = remove_empty_fields(row)
yield {
"_index": "airbnb-listings",
"_source": dict(row),
}
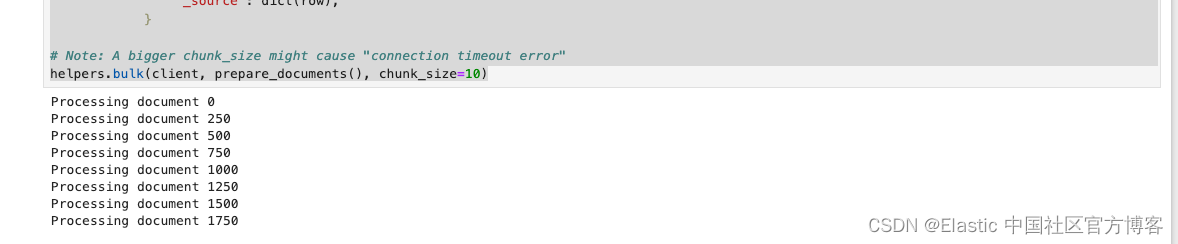
# Note: A bigger chunk_size might cause "connection timeout error"
helpers.bulk(client, prepare_documents(), chunk_size=10)在上面,我们有意识地把 chunk_size 设置为较小的一个数字。如果这个数字较大,那么很有可能会造成 "Connection timeout" 错误信息。这个依赖于我们的 Elasticsearch 的配置及计算机运行的速度。现在每次写入都需要调动 ingest pipeline 来进行向量化。如果这个数字值太大,那么向量化的时间需要的越长,那么极有可能会使得这个 helper.bulk 代码的执行出现 Connection timeout 错误,因为这个执行是需要在规定的时间范围里返回结果的。另外一种解决办法是使用一般操作来完成。
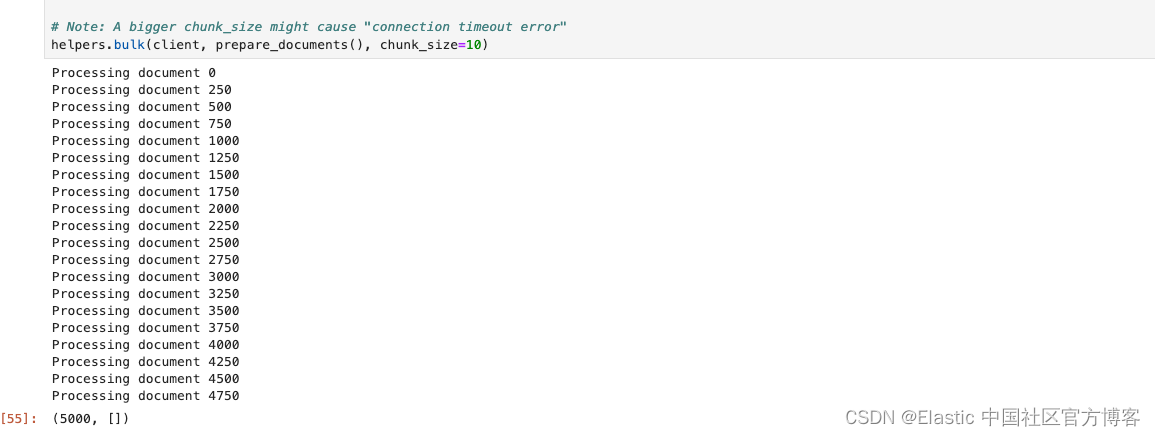
在执行上面的代码后,我们可以看到如下的信息:
整个写入的时间可能会持续一段时间。这个依赖于自己的电脑的配置。
我们可以在 Kibana 中进行查看:

最终,我们把所需要的 5000 个文档写入到 Elasticsearch 中:
准备 MTA 地铁站索引
我们需要准备索引并确保我们将地理位置视为 geo_point 类型。
client.indices.delete(index="mta-stations", ignore_unavailable=True)
client.indices.create(
    index="mta-stations",
    mappings={
        "dynamic_templates": [
            {
                "stringsaskeywords": {
                    "match": "*",
                    "match_mapping_type": "string",
                    "mapping": {"type": "keyword"},
                }
            }
        ],
        "properties": {"location": {"type": "geo_point"}},
    },
)
索引 MTA 数据
我们现在需要为 MTA 的数据建立索引。
import csv

# Download the CSV file
url = "https://data.ny.gov/api/views/39hk-dx4f/rows.csv?accessType=DOWNLOAD"
response = requests.get(url)


# Parse and index the CSV data
def prepare_documents():
    reader = csv.DictReader(response.text.splitlines())
    for row in reader:
        row["location"] = {
            "lat": float(row["GTFS Latitude"]),
            "lon": float(row["GTFS Longitude"]),
        }
        yield {
            "_index": "mta-stations",
            "_source": dict(row),
        }


# Index the documents
helpers.bulk(client, prepare_documents())
准备兴趣点
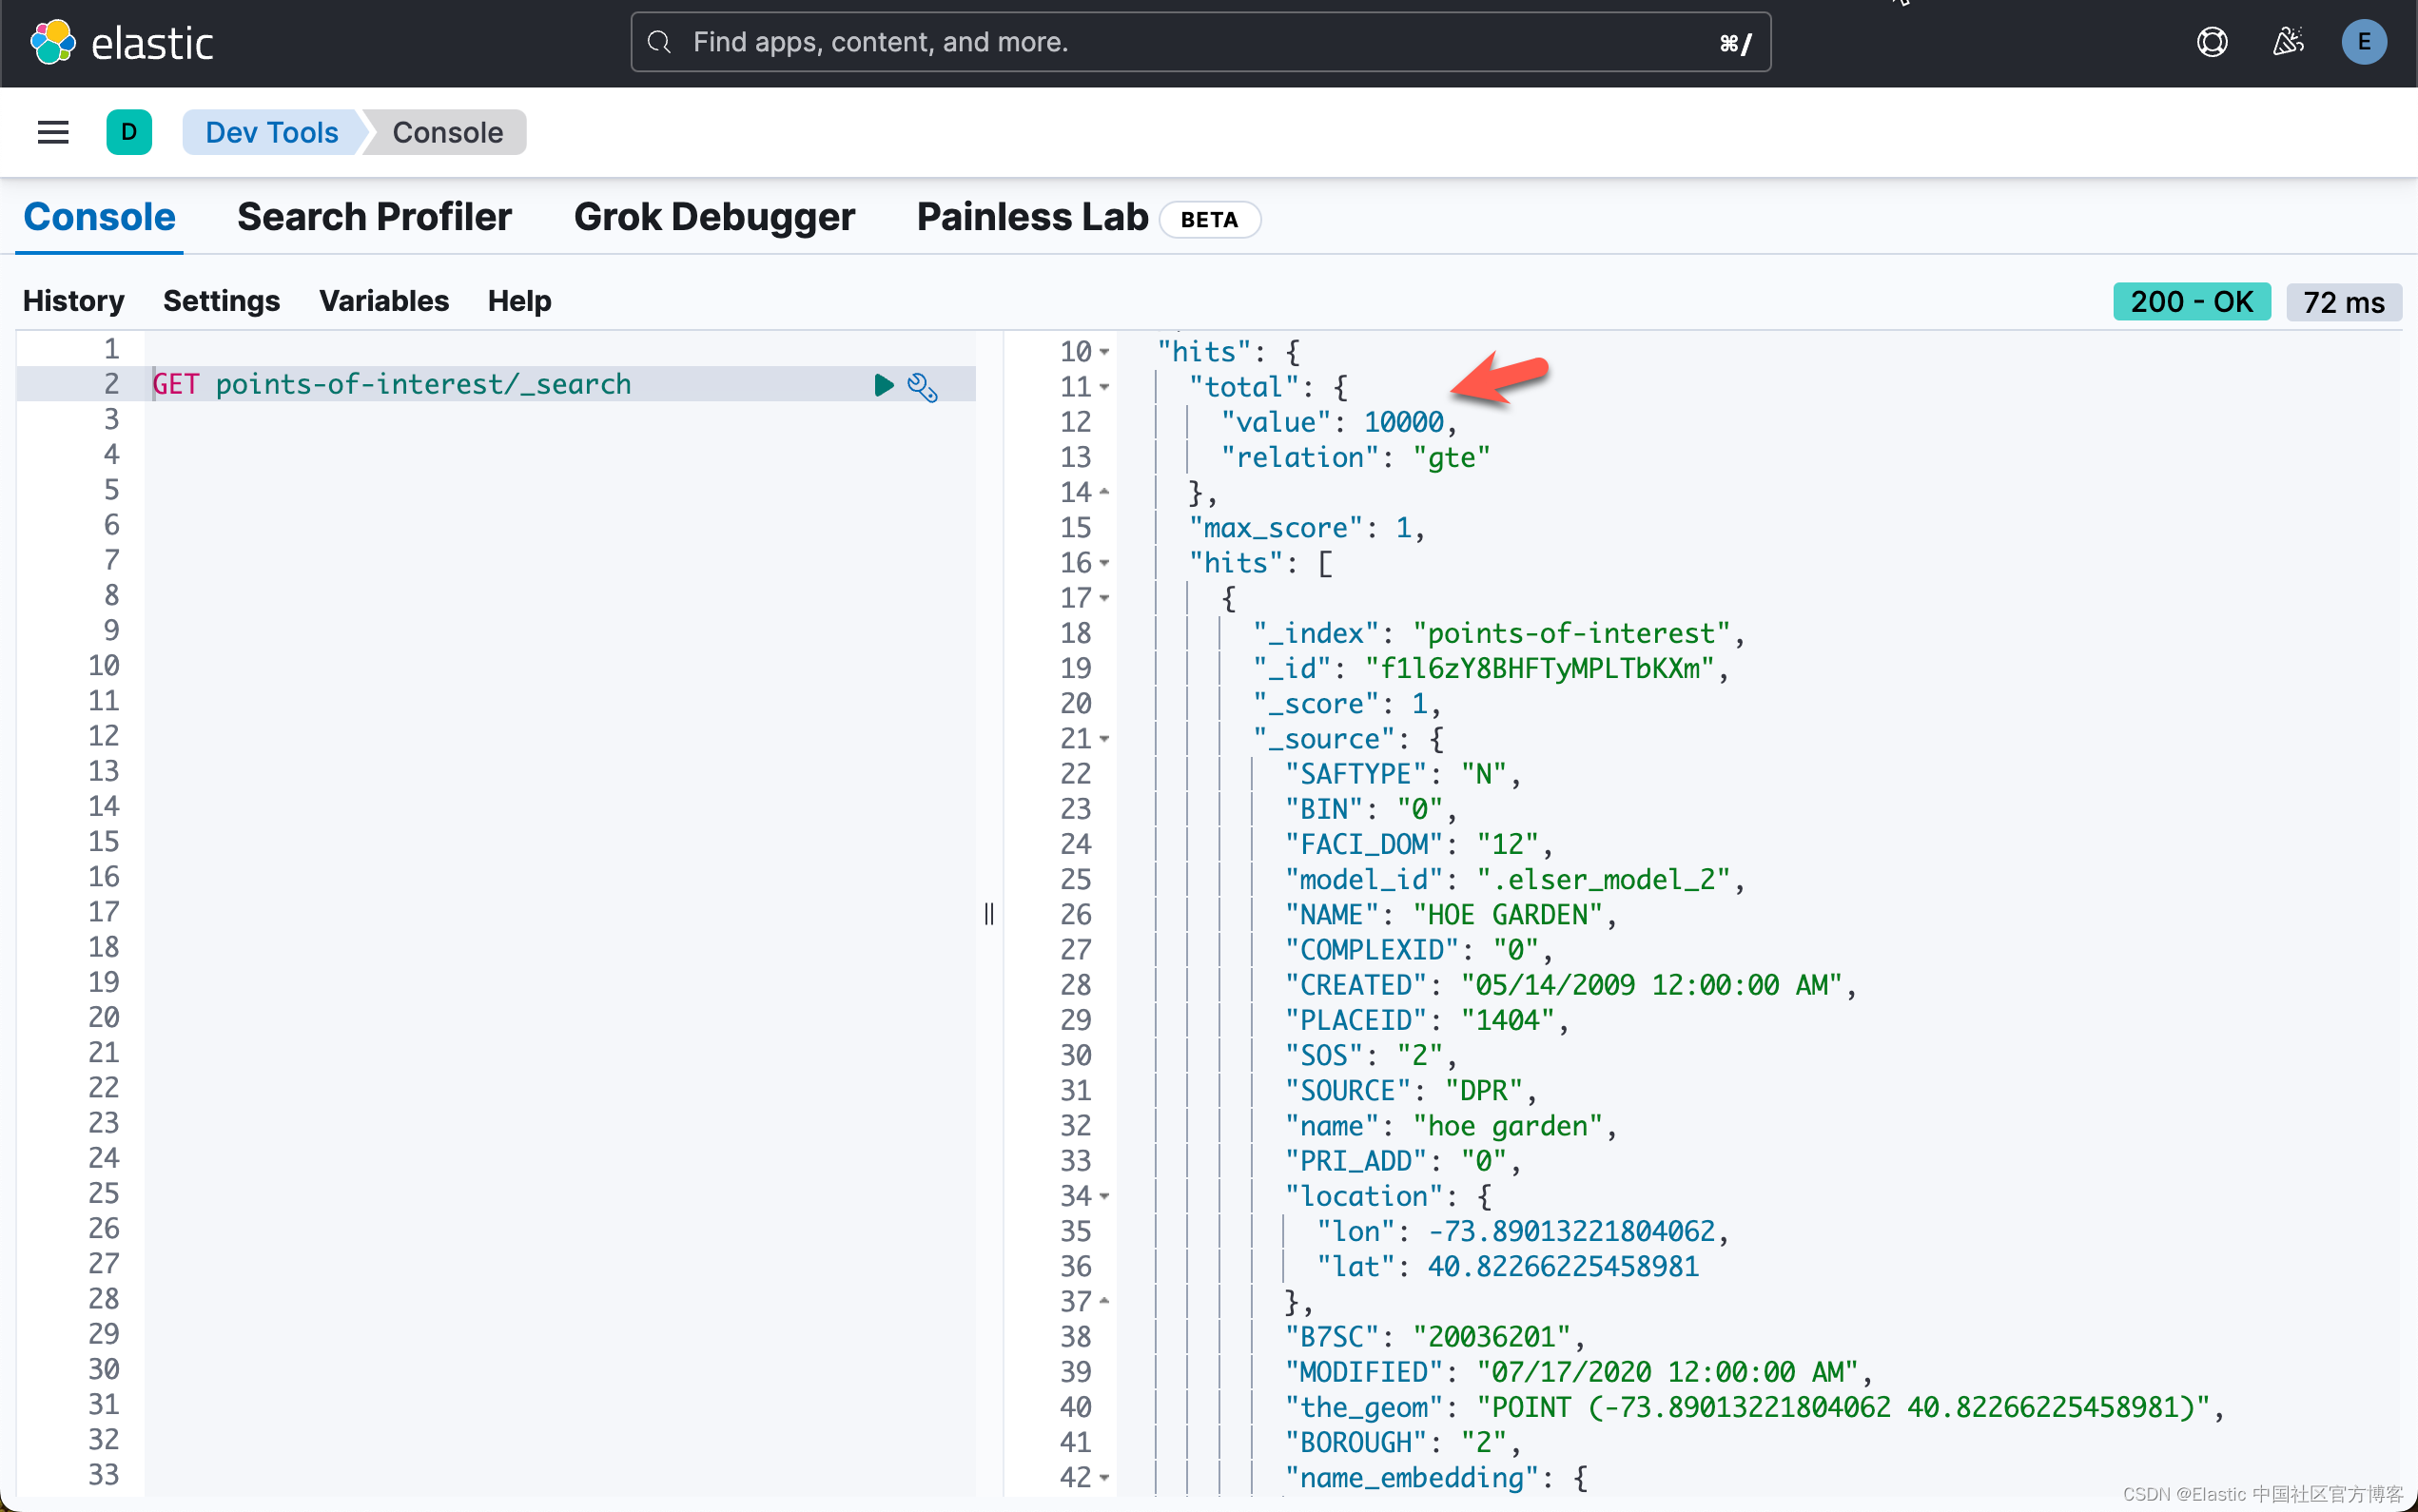
和之前一样。我们想要索引兴趣点并使用 ELSER 来确保任何语义搜索都有效。例如。搜索 "sights with gardens" 应该返回 "Central Park",即使它的名称中不包含 garden。
client.indices.delete(index="points-of-interest", ignore_unavailable=True)
client.indices.create(
    index="points-of-interest",
    settings={"index": {"default_pipeline": "elser-ingest-pipeline"}},
    mappings={
        "dynamic_templates": [
            {
                "stringsaskeywords": {
                    "match": "*",
                    "match_mapping_type": "string",
                    "mapping": {"type": "keyword"},
                }
            }
        ],
        "properties": {
            "NAME": {"type": "text"},
            "location": {"type": "geo_point"},
            "name_embedding": {"type": "sparse_vector"},
        },
    },
)
下载兴趣点
the_geom 看起来像这样: POINT (-74.00701717096757 40.724634757833414) 其格式为众所周知的文本点格式,我们正式支持这一点。我个人总是喜欢将经纬度坐标存储为对象,以确保不会造成混淆。
import csv

# Download the CSV file
url = "https://data.cityofnewyork.us/api/views/t95h-5fsr/rows.csv?accessType=DOWNLOAD"
response = requests.get(url)


# Parse and index the CSV data
def prepare_documents():
    reader = csv.DictReader(response.text.splitlines())
    for row in reader:
        row["location"] = {
            "lat": float(row["the_geom"].split(" ")[2].replace(")", "")),
            "lon": float(row["the_geom"].split(" ")[1].replace("(", "")),
        }
        row["name"] = row["NAME"].lower()
        yield {
            "_index": "points-of-interest",
            "_source": dict(row),
        }


# Index the documents
helpers.bulk(client, prepare_documents(),chunk_size=10)
上面的代码执行需要一段时间。需要耐心等候。
现在我们已经万事俱备了
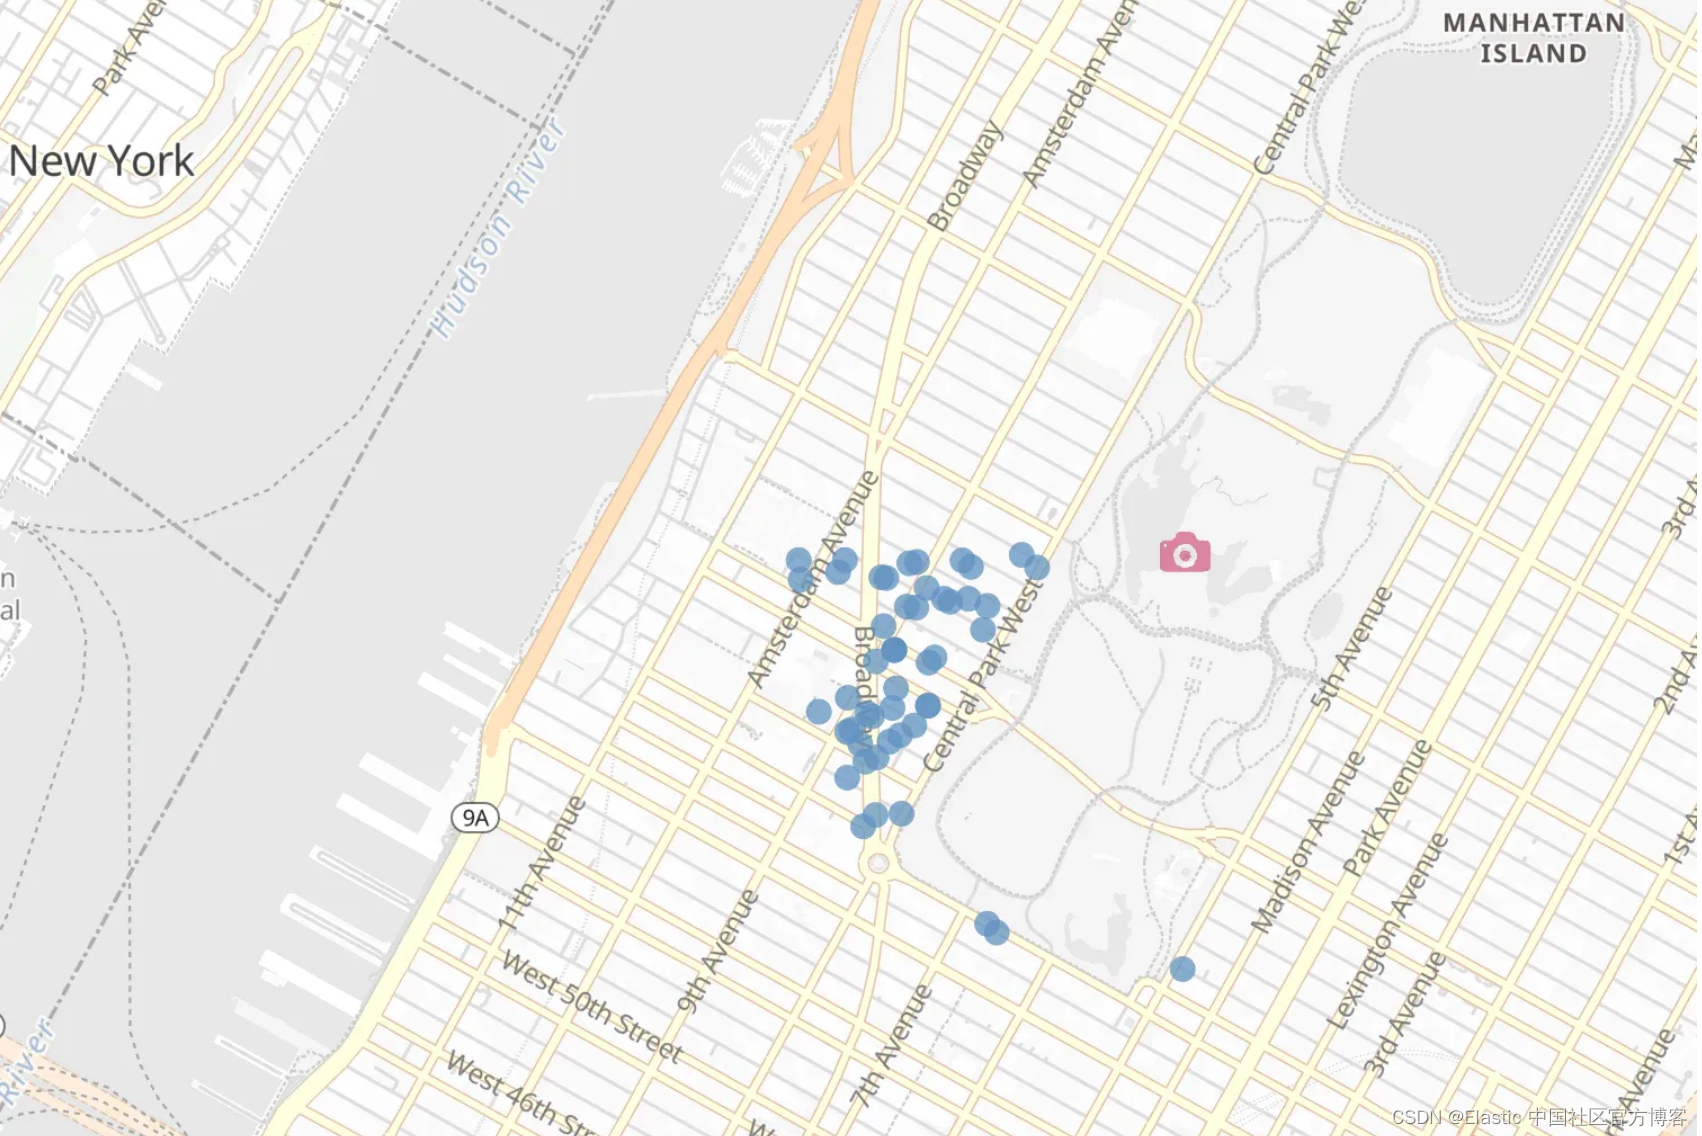
首先让我们看看 ELSER 在 "geo" 查询方面的表现如何。我们就以 Central Park 和 Empire State 旁边的爱彼迎 (AirBnB) 为例。此外,我们现在只查看 description,而不是 name 或作者简介。让我们保持简单。
response = client.search(
    index="airbnb-*",
    size=10,
    query={
        "text_expansion": {
            "description_embedding": {
                "model_id": ".elser_model_2",
                "model_text": "Next to Central Park and Empire State Building",
            }
        }
    },
)

for hit in response["hits"]["hits"]:
    doc_id = hit["_id"]
    score = hit["_score"]
    name = hit["_source"]["name"]
    location = hit["_source"]["location"]
    print(
        f"Score: {score}\nTitle: {name}\nLocation: {location}\nDocument ID: {doc_id}\n"
    )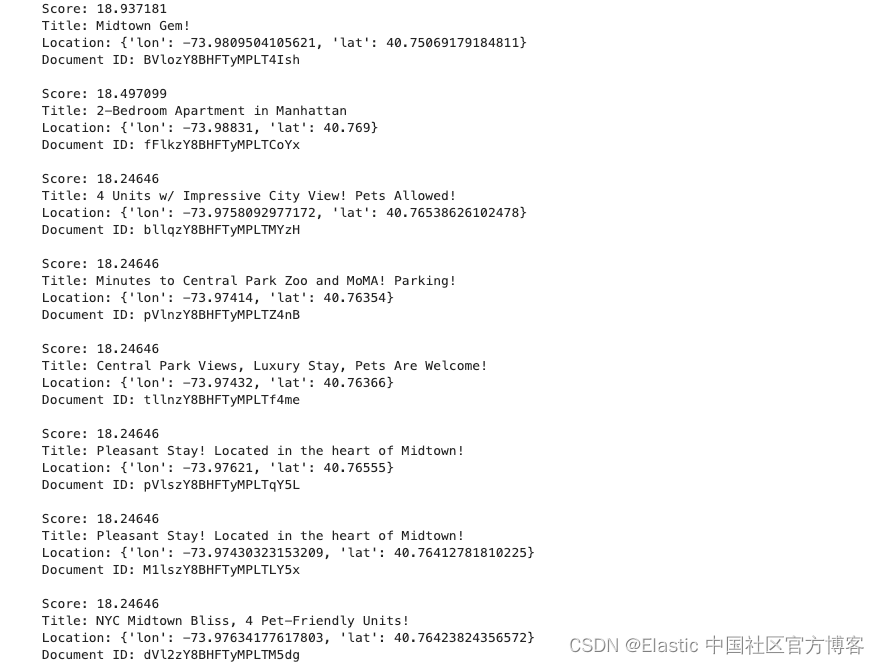
分析响应
我们对所有 AirBnB 进行了索引,因此可能与你仅索引前 5,000 个时获得的结果略有不同。
下一步是在 Elasticsearch 中运行 geo_distance 查询。首先来分析一下中央公园(Central Park)和帝国大厦(Empire State Building)相距多远。由于中央公园相当大并且包含许多景点,因此我们将使用 Bow Bridge 作为标志性景点。
我们将使用一个简单的术语查询来获取中央公园弓桥的地理位置,然后使用 _geo_distance 排序运行 geo_distance 查询来获取准确的距离。目前,geo_distance 查询始终需要距离参数。我们添加了一个术语来搜索帝国大厦,因为我们只对此感兴趣。
response = client.search(
    index="points-of-interest",
    size=1,
    query={"term": {"name": "central park bow bridge"}},
)

for hit in response["hits"]["hits"]:
    # this should now be the central park bow bridge.
    print(f"Name: {hit['_source']['name']}\nLocation: {hit['_source']['location']}\n")
    response = client.search(
        index="points-of-interest",
        size=1,
        query={
            "bool": {
                "must": {"term": {"name": "empire state building"}},
                "filter": {
                    "geo_distance": {
                        "distance": "200km",
                        "location": {
                            "lat": hit["_source"]["location"]["lat"],
                            "lon": hit["_source"]["location"]["lon"],
                        },
                    }
                },
            }
        },
        sort=[
            {
                "_geo_distance": {
                    "location": {
                        "lat": hit["_source"]["location"]["lat"],
                        "lon": hit["_source"]["location"]["lon"],
                    },
                    "unit": "km",
                    "distance_type": "plane",
                    "order": "asc",
                }
            }
        ],
    )
    print(
        f"Distance to Empire State Building: {response['hits']['hits'][0]['sort'][0]} km"
    )

Name: central park bow bridge
Location: {'lon': -73.97178440451849, 'lat': 40.77577539823907}

Distance to Empire State Building: 3.247504472145157 km
与 ELSER 相比
现在我们得分最高的文档:
Score: 20.003891
Title: Gorgeous 1 Bedroom - Upper East Side Manhattan -
Location: {'lon': -73.95856, 'lat': 40.76701}
Document ID: AkgfEI8BHToGwgcUA6-7
让我们使用 geo_distance 运行上面的计算。
response = client.search(
    index="points-of-interest",
    size=10,
    query={
        "bool": {
            "must": {
                "terms": {"name": ["central park bow bridge", "empire state building"]}
            },
            "filter": {
                "geo_distance": {
                    "distance": "200km",
                    "location": {"lat": "40.76701", "lon": "-73.95856"},
                }
            },
        }
    },
    sort=[
        {
            "_geo_distance": {
                "location": {"lat": "40.76701", "lon": "-73.95856"},
                "unit": "km",
                "distance_type": "plane",
                "order": "asc",
            }
        }
    ],
)

for hit in response["hits"]["hits"]:
    print("Distance between AirBnB and", hit["_source"]["name"], hit["sort"][0], "km")

Distance between AirBnB and central park bow bridge 1.4799179352060348 km
Distance between AirBnB and empire state building 3.0577584374128617 km
分析
距离两个景点仅1.4公里和 3 公里。没有那么糟糕。让我们看看当我们创建一个包含帝国大厦和中央公园 Bow Bridge 的地理边界框时我们能发现什么。此外,我们将按照到中央公园 Bow Bridge 的距离对结果进行排序,然后按照到帝国大厦的距离进行排序。
response = client.search(
    index="points-of-interest",
    size=2,
    query={"terms": {"name": ["central park bow bridge", "empire state building"]}},
)

# for easier access we store the locations in two variables
central = {}
empire = {}
for hit in response["hits"]["hits"]:
    hit = hit["_source"]
    if "central park bow bridge" in hit["name"]:
        central = hit["location"]
    elif "empire state building" in hit["name"]:
        empire = hit["location"]

# Now we can run the geo_bounding_box query and sort it by the
# distance first to Central Park Bow Bridge
# and then to the Empire State Building.
response = client.search(
    index="airbnb-*",
    size=50,
    query={
        "geo_bounding_box": {
            "location": {
                "top_left": {"lat": central["lat"], "lon": empire["lon"]},
                "bottom_right": {"lat": empire["lat"], "lon": central["lon"]},
            }
        }
    },
    sort=[
        {
            "_geo_distance": {
                "location": {"lat": central["lat"], "lon": central["lon"]},
                "unit": "km",
                "distance_type": "plane",
                "order": "asc",
            }
        },
        {
            "_geo_distance": {
                "location": {"lat": empire["lat"], "lon": empire["lon"]},
                "unit": "km",
                "distance_type": "plane",
                "order": "asc",
            }
        },
    ],
)

for hit in response["hits"]["hits"]:
    print(f"Distance to Central Park Bow Bridge: {hit['sort'][0]} km")
    print(f"Distance to Empire State Building: {hit['sort'][1]} km")
    print(f"Title: {hit['_source']['name']}\nDocument ID: {hit['_id']}\n")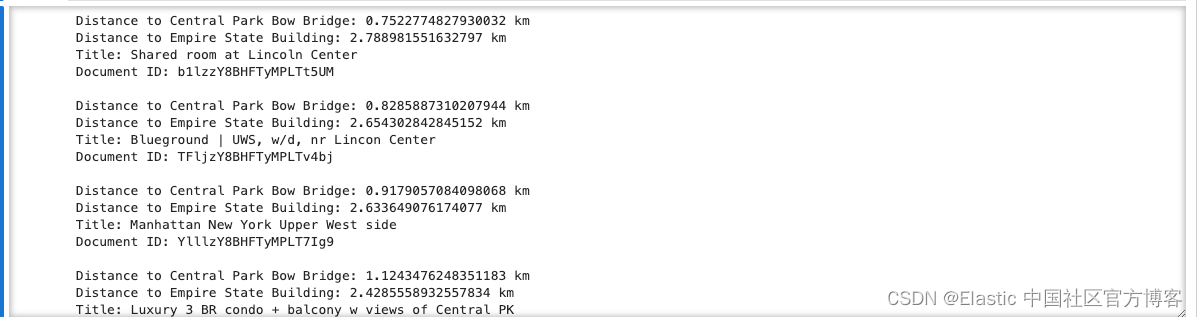
人工智能
现在让我们终于进入 AI 部分。所有这些都是设置和理解地理空间搜索的作用及其工作原理。还有很多东西有待发现。让我们将其连接到我们的 OpenAI 实例。在这里我们使用 OpenAI 资源。
from openai import OpenAI

OPENAI_API_KEY = os.getenv("OPENAI_API_KEY")
client = OpenAI(
    # This is the default and can be omitted
    api_key=os.environ.get("OPENAI_API_KEY"),
)

# Set API key
openai = OpenAI()

# Let's do a test:
question = "What is the capital of France? Answer with just the capital city."

answer = openai.chat.completions.create(
    messages=[
        {
            "role": "user",
            "content": question,
        }
    ],
    model="gpt-3.5-turbo",
)

print(answer.choices[0].message.content)

Paris
上面显示出来正确的答案。它表明我们的 OpenAI 是工作正常的。
既然这可行了,我们确信我们是在正确的地方开始我们的问题。我们正在编写一个提示,强制 ChatGPT 创建 JSON 响应并从问题中提取信息。
question = """
As an expert in named entity recognition machine learning models, I will give you a sentence from which I would like you to extract what needs to be found (location, apartment, airbnb, sight, etc) near which location and the distance between them. The distance needs to be a number expressed in kilometers. I would like the result to be expressed in JSON with the following fields: "what", "near", "distance_in_km". Only return the JSON.
Here is the sentence: "Get me the closest AirBnB between 1 miles distance from the Empire State Building"
"""

answer = openai.chat.completions.create(
    messages=[
        {
            "role": "user",
            "content": question,
        }
    ],
    model="gpt-3.5-turbo",
)
print(answer.choices[0].message.content)
上面代码的输出为:
{
  "what": "AirBnB",
  "near": "Empire State Building",
  "distance_in_km": 1.6
}
我们案例的答案如下
这是所需的输出:
{
    "what": "AirBnB",
    "near": "Empire State Building",
    "distance_in_km": 1610
}-
提取距离 - 完成(1 英里)
-
将距离转换为公里 - 完成 (1.6 公里)
-
提取位置 - 这应该是 "Empire State Building",但从更一般的角度来说,我们应该认识到这是一个位置,因此我们制作一个称为单独的标签
json = answer.choices[0].message.content
This now should contain just the json.
json = JSON.loads(json)
first let's grab the location of the
nearfieldit could be multiple locations, so we will search for all of them.
near = client.search(
index="points-of-interest",
size=100,
query={"bool": {"must": {"terms": {"name": [json["near"].lower()]}}}},
)we store just all of the geo-locations of the near locations.
near_location = []
sort = []for hit in near["hits"]["hits"]:
near_location.append(hit["_source"]["location"])
sort.append(
{
"_geo_distance": {
"location": {
"lat": hit["_source"]["location"]["lat"],
"lon": hit["_source"]["location"]["lon"],
},
"unit": "km",
"distance_type": "plane",
"order": "asc",
}
}
)query = {
"geo_distance": {
"distance": str(json["distance_in_km"]) + "km",
"location": {"lat": near_location[0]["lat"], "lon": near_location[0]["lon"]},
}
}Now let's get all the AirBnBs
whatnear thenearlocation.We always use the first location as our primary reference.
airbnbs = client.search(index="airbnb-*", size=100, query=query, sort=sort)
for hit in airbnbs["hits"]["hits"]:
print(f"Distance to {json['near']}: {hit['sort'][0]} km")
print(f"Title: {hit['_source']['name']}\nDocument ID: {hit['_id']}\n")
上述命令运行的结果为:
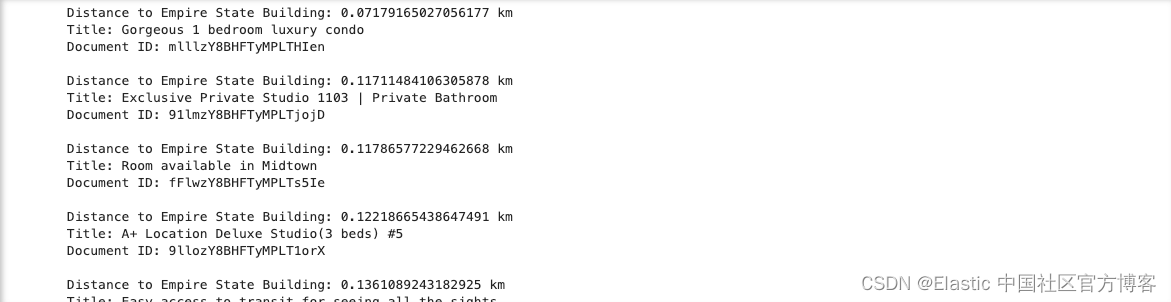
现在,我们将地理空间搜索与 LLMs 结合起来。
所有的源码可以在地址:elasticsearch-labs/supporting-blog-content/geospatial-llm/09-geospatial-search.ipynb at main · liu-xiao-guo/elasticsearch-labs · GitHub 进行下载。