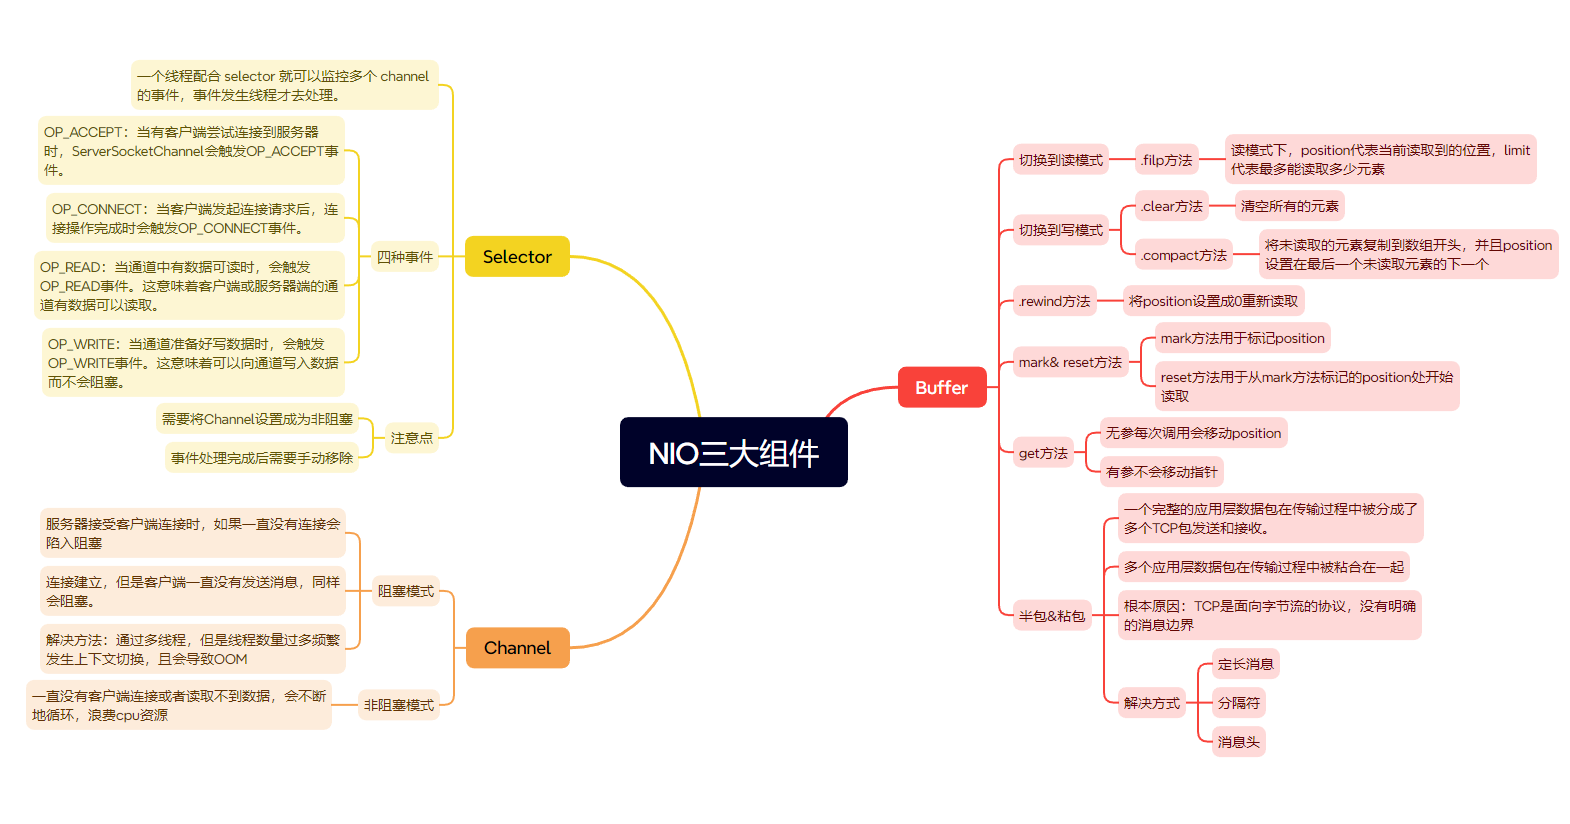
这一篇介绍Buffer&Channel&Selector的常见API使用案例
1、Buffer
1.1、从Buffe中读取/写入
以ByteBuffer为例。Buffer需要和Channel结合使用(在上一篇中提到,通道是数据传输的载体,缓冲区是数据的临时存储区)。
那么如何获取Channel对象?我们可以通过FileInputStream的.getChannel() 方法获取。
new FileInputStream(new File("D:\\Idea_workspace\\2024\\netty\\src\\data.txt")).getChannel()获取ByteBuffer对象需要通过.allocate() 静态方法获取,同时需要指定容量:
ByteBuffer byteBuffer = ByteBuffer.allocate(10);从channel中读取数据,写入ByteBuffer,则用到了channel.read()方法,它的返回值如果为-1则代表读取结束。
int len = channel.read(byteBuffer);如果需要读取ByteBuffer中的内容,需要将Buffer从写模式切换到读模式,用到了Buffer的.flip() 方法,然后利用.get()方法进行读取:
byteBuffer.flip();完整案例:
@Slf4j
public class TestByteBuffer {
    public static void main(String[] args) {
        try (FileChannel channel = new FileInputStream(new File("D:\\Idea_workspace\\2024\\netty\\src\\data.txt")).getChannel()) {
            //准备缓冲区 指定容量为10
            ByteBuffer byteBuffer = ByteBuffer.allocate(10);
            while (true) {
                //从channel中读取数据,写入ByteBuffer
                int len = channel.read(byteBuffer);
                log.debug("获取到的长度:{}",len);
                //len == -1 说明已读取完成
                if (len == -1){
                    break;
                }
                //读取buffer的内容
                //flip():将Buffer从写模式切换到读模式。
                byteBuffer.flip();
                while (byteBuffer.hasRemaining()){
                    log.debug("获取到的字节:{}",(char)byteBuffer.get());
                }
                //clear():清空Buffer,准备写入。
                byteBuffer.clear();
            }
        } catch (IOException e) {


        }
    }
}
在前一篇中提到,缓冲区会维护一个类似于数组的结构,其中包含了position(指针)、limit(限制)和capacity(容量)。三个关键属性,下面我们再通过一个案例结合图片分析:
创建一个容量为10的缓冲区:
ByteBuffer allocate = ByteBuffer.allocate(10);
+--------+-------------------- all ------------------------+----------------+
position: [0], limit: [10]
         +-------------------------------------------------+
         |  0  1  2  3  4  5  6  7  8  9  a  b  c  d  e  f |
+--------+-------------------------------------------------+----------------+
|00000000| 00 00 00 00 00 00 00 00 00 00                   |abc.......      |
+--------+-------------------------------------------------+----------------+
放入三个元素:
allocate.put(new byte[]{97,98,99});
+--------+-------------------- all ------------------------+----------------+
position: [3], limit: [10]
         +-------------------------------------------------+
         |  0  1  2  3  4  5  6  7  8  9  a  b  c  d  e  f |
+--------+-------------------------------------------------+----------------+
|00000000| 61 62 63 00 00 00 00 00 00 00                   |abc.......      |
+--------+-------------------------------------------------+----------------+
切换成读模式,并且获取一个元素:
 allocate.flip();
 allocate.get();
position: [1], limit: [3]
         +-------------------------------------------------+
         |  0  1  2  3  4  5  6  7  8  9  a  b  c  d  e  f |
+--------+-------------------------------------------------+----------------+
|00000000| 61 62 63 00 00 00 00 00 00 00                   |abc.......      |
+--------+-------------------------------------------------+----------------+
如果不切换成读模式呢?那么指针在position: 3 读取到的是00
1.1.1、compact()
利用compact()切换成写模式。将未读的数据复制到Buffer的开头,然后将位置设到最后一个未读元素的后面。(此时数组中读取了索引为0的元素,调用 compact()方法后,就将1,2索引上的元素复制到0,1上,如果下次写入是从2索引开始)
allocate.compact();
position: [2], limit: [10]
         +-------------------------------------------------+
         |  0  1  2  3  4  5  6  7  8  9  a  b  c  d  e  f |
+--------+-------------------------------------------------+----------------+
|00000000| 62 63 63 00 00 00 00 00 00 00                   |bcc.......      |
+--------+-------------------------------------------------+----------------+
再次放入三个元素,覆盖掉2索引上的63:
allocate.put(new byte[]{100,101,102});
+--------+-------------------- all ------------------------+----------------+
position: [5], limit: [10]
         +-------------------------------------------------+
         |  0  1  2  3  4  5  6  7  8  9  a  b  c  d  e  f |
+--------+-------------------------------------------------+----------------+
|00000000| 62 63 64 65 66 00 00 00 00 00                   |bcdef.....      |
+--------+-------------------------------------------------+----------------+
利用clear()切换到写模式,清空数组中的元素:
allocate.clear();
+--------+-------------------- all ------------------------+----------------+
position: [0], limit: [10]
         +-------------------------------------------------+
         |  0  1  2  3  4  5  6  7  8  9  a  b  c  d  e  f |
+--------+-------------------------------------------------+----------------+
|00000000| 62 63 64 65 66 00 00 00 00 00                   |bcdef.....      |
+--------+-------------------------------------------------+----------------+
切换成读模式,除了常规的filp()方法,还有rewind()、mark() & reset()方法:
1.1.2、rewind()
我们再次创建一个容量为10的缓冲区,并且初始化4个元素,使用filp()切换到读模式,再获取两个元素:
ByteBuffer buffer = ByteBuffer.allocate(10);
buffer.put(new byte[]{97,98,99,100});
buffer.flip();
buffer.get();
buffer.get();
此时的position在2位置。
position: 2, limit: 4
         +-------------------------------------------------+
         |  0  1  2  3  4  5  6  7  8  9  a  b  c  d  e  f |
+--------+-------------------------------------------------+----------------+
|00000000| 61 62 63 64 00 00 00 00 00 00                   |abcd......      |
+--------+-------------------------------------------------+----------------+
+--------+-------------------- all ------------------------+----------------+
rewind() 方法的底层会将position重新设置为0:
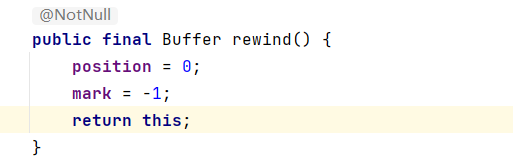
调用rewind() 方法:
buffer.rewind();position重新回到0的位置
+--------+-------------------- all ------------------------+----------------+
position: 0, limit: 4
+-------------------------------------------------+
| 0 1 2 3 4 5 6 7 8 9 a b c d e f |
+--------+-------------------------------------------------+----------------+
|00000000| 61 62 63 64 00 00 00 00 00 00 |abcd...... |
+--------+-------------------------------------------------+----------------+
1.1.3、mark() & reset()
mark() & reset() 通常会结合使用。 mark() 方法的作用是标记当前的position,reset() 方法的作用是重置position为 mark() 方法标记的位置。
接上面的案例,经过了rewind() 方法, position重新回到0的位置。我们进行四次读取,但是在第二次读取结束后使用 mark() 方法:
buffer.get();
buffer.get();
buffer.mark();
buffer.get();
buffer.get();
+--------+-------------------- all ------------------------+----------------+
position: [4], limit: [4]
         +-------------------------------------------------+
         |  0  1  2  3  4  5  6  7  8  9  a  b  c  d  e  f |
+--------+-------------------------------------------------+----------------+
|00000000| 61 62 63 64 00 00 00 00 00 00                   |abcd......      |
+--------+-------------------------------------------------+----------------+
调用reset() 方法:
buffer.reset();
+--------+-------------------- all ------------------------+----------------+
position: [2], limit: [4]
         +-------------------------------------------------+
         |  0  1  2  3  4  5  6  7  8  9  a  b  c  d  e  f |
+--------+-------------------------------------------------+----------------+
|00000000| 61 62 63 64 00 00 00 00 00 00                   |abcd......      |
+--------+-------------------------------------------------+----------------+
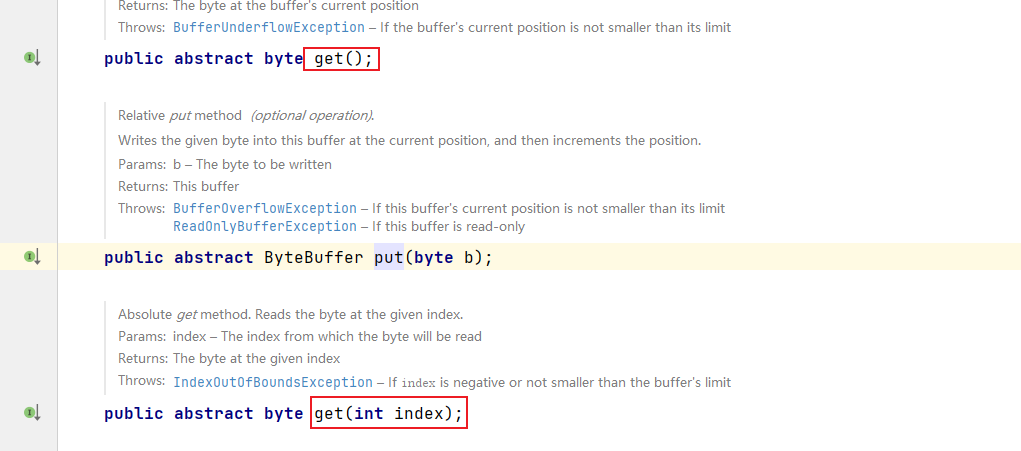
1.1.4、get(index)
get(index)是get()方法的重载。和get()方法的区别在于获取元素不会移动指针。

1.2、半包、粘包
半包现象:
一个完整的应用层数据包在传输过程中被分成了多个TCP包发送和接收。接收方在读取数据时,可能只能读到一个完整包的一部分:
假设发送端要发送一个大小为1024字节的数据包,但由于网络或缓冲区限制,这个数据包被拆分成两个TCP包,第一个包包含前512字节,第二个包包含后512字节。接收方在读取时可能先读到前512字节,接下来再读到后512字节。
其原因在于:
- 在网络传输过程中,数据包可能会被拆分成多个较小的TCP包进行传输。
- 发送端的缓冲区限制了每次可以发送的数据量,因此较大的数据包可能会被拆分。
- 接收方读取数据的速度可能赶不上数据到达的速度,导致每次读取时只能获取部分数据。
粘包现象
多个应用层数据包在传输过程中被粘合在一起,接收方在读取数据时一次性读取到了多个数据包的内容:
假设发送端发送了两个大小分别为512字节的数据包,接收方由于读取速度较慢,可能一次性读取到1024字节的数据,这样两个数据包的内容就粘在了一起。
其原因在于:
- 发送端以较快的速度发送多个数据包,而接收方读取数据的速度较慢,导致多个数据包积累在接收缓冲区中。
- TCP是面向字节流的协议,没有明确的消息边界,多个应用层数据包可能在TCP层被拼接在一起。
为了处理半包和粘包现象,可以采用以下几种常见的方法:
- 定长消息:预先规定每个消息的长度,接收方根据约定的长度读取固定大小的字节数据。
- 分隔符:在每个消息之间插入特殊的分隔符,接收方读取数据时根据分隔符进行拆分。
- 消息头 :在每个消息前添加固定长度的消息头,消息头中包含消息的长度信息,接收方首先读取消息头,然后根据消息头中的长度信息读取相应长度的消息体。
下面是一种通过设置消息头进行解决的案例:
发送方:
public void send(SocketChannel socketChannel, byte[] data) throws IOException {
    //假设我们data的长度为6

    //创建 ByteBuffer 其大小为消息头(4 字节)加上消息体(6 字节)的长度:
    ByteBuffer buffer = ByteBuffer.allocate(4 + data.length);

    //将消息体长度(6)放入缓冲区,作为消息头:
    //写入 4 字节的消息头,内容为 6
    buffer.putInt(data.length);

    // 将消息体放入缓冲区
    buffer.put(data);

    // 切换缓冲区为读模式,准备写入到SocketChannel中
    buffer.flip();

    // 循环写入SocketChannel,确保缓冲区中的数据全部发送出去
    while (buffer.hasRemaining()) {
        socketChannel.write(buffer);
    }
}接收方:
public void receive(SocketChannel socketChannel) throws IOException {
    // 创建一个ByteBuffer用于读取消息头(4字节)
    ByteBuffer headerBuffer = ByteBuffer.allocate(4);

    // 确保消息头全部读入缓冲区
    while (headerBuffer.hasRemaining()) {
        socketChannel.read(headerBuffer);
    }
    // 切换缓冲区为读模式,准备读取消息头中的数据
    headerBuffer.flip();

    // 读取消息头,获取消息体的长度
    // length 的值为 6
    int length = headerBuffer.getInt();

    // 创建一个ByteBuffer用于读取消息体
    // length 的值为 6
    ByteBuffer dataBuffer = ByteBuffer.allocate(length);

    // 确保消息体全部读入缓冲区
    while (dataBuffer.hasRemaining()) {
        socketChannel.read(dataBuffer);
    }
    // 切换缓冲区为读模式,准备读取消息体中的数据
    dataBuffer.flip();

    // 从缓冲区中读取消息体数据
    byte[] data = new byte[length];
    dataBuffer.get(data);

}
2、Channel
我们重点介绍与网络编程有关的SocketChannel和ServerSocketChannel。
SocketChannel和ServerSocketChannel,又分为阻塞和非阻塞两种模式:
2.1、阻塞模式
首先需要创建服务器:
/**
 * nio的阻塞模式 服务端
 */
@Slf4j
public class Server {
    public static void main(String[] args) throws IOException {
        //缓冲区
        ByteBuffer byteBuffer = ByteBuffer.allocate(16);
        //创建服务器
        ServerSocketChannel ssc = ServerSocketChannel.open();
        //绑定端口
        ssc.bind(new InetSocketAddress(8080));

        //连接集合
        ArrayList<SocketChannel> channels = new ArrayList<>();
        while (true){
            //接受客户端的信息
            log.debug("开始链接...");
            SocketChannel socketChannel = ssc.accept();//没有连接时会阻塞
            log.debug("链接完成...{}",socketChannel);
            channels.add(socketChannel);
            for (SocketChannel channel : channels) {
                //把信息读取到缓冲区
                log.debug("开始读取");
                channel.read(byteBuffer);//读取不到数据时会阻塞
                byteBuffer.flip();
                debugRead(byteBuffer);
                byteBuffer.clear();
                log.debug("读取结束");
            }
        }
    }
}
创建前端:
/**
* nio的阻塞模式 前端
*/
public class Client {
public static void main(String[] args) throws IOException {
SocketChannel socketChannel = SocketChannel.open();
socketChannel.connect(new InetSocketAddress("localhost",8080));
// 发送消息到服务器
String message = "Hello, Server!";
ByteBuffer buffer = ByteBuffer.wrap(message.getBytes());
socketChannel.write(buffer);
}
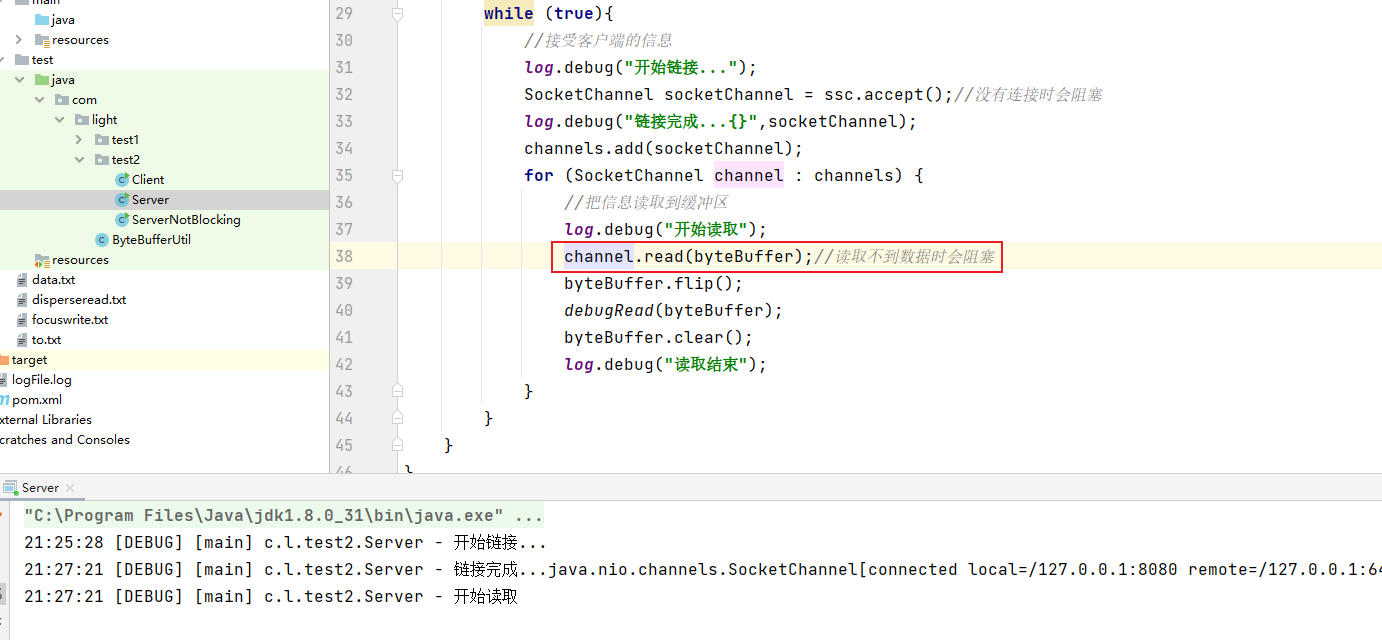
}这里的阻塞主要体现在两个地方,第一在于,服务器接受客户端连接时,如果一直没有连接,会阻塞。第二在于,连接建立上,但是客户端一直没有发送消息,同样会阻塞。
同时启动前端和服务端:

此时前端还没有连接上服务器,服务器一直阻塞在SocketChannel socketChannel = ssc.accept()

前端尚未发出消息:

服务器一直阻塞在channel.read(byteBuffer);
2.2、非阻塞模式
非阻塞模式和阻塞模式的代码大致相同,在服务器对于SocketChannel和ServerSocketChannel设置configureBlocking属性为false。
只启动服务器,很显然此时是没有任何一个客户端连接上的,没有像阻塞模式那样在SocketChannel socketChannel = ssc.accept();这一行一直等待。

前端连接上之后,还没有发送消息:

服务器没有在int read = channel.read(byteBuffer);阻塞。

3、Selector
使用Channel的阻塞模式效率很低,而非阻塞模式,如果一直没有客户端连接或者读取不到数据,就会在循环中空转,也是对cpu的一种浪费,实际开发中也不会采用这样的模式。
为了改进上面的弊端,引入了Selector(选择器),核心思想是一个Selector去管理多个Channel,根据Channel注册的不同事件类型去进行操作
/**
 * NIO selector
 */
@Slf4j
public class ServerSelector {
    public static void main(String[] args) throws IOException {
        //创建selector,管理多个channel
        Selector selector = Selector.open();

        //创建服务器
        ServerSocketChannel ssc = ServerSocketChannel.open();
        //如果要注册到 selector上 必须先设置成非阻塞
        ssc.configureBlocking(false);

        //把ssc注册到selector上,并且设置监听accept事件
        SelectionKey key = ssc.register(selector, 0, null);
        key.interestOps(SelectionKey.OP_ACCEPT);
        log.debug("注册的key:{}", key);


        //绑定端口
        ssc.bind(new InetSocketAddress(8080));

        //连接集合
        ArrayList<SocketChannel> channels = new ArrayList<>();
        while (true) {
            //如果没有事件发生会阻塞
            selector.select();
            Iterator<SelectionKey> it = selector.selectedKeys().iterator();
            while (it.hasNext()){
                SelectionKey selectionKey = it.next();
                log.debug("获取的Key:{}",selectionKey);
                //根据获取到的SelectionKey进行分派不同的事件
                if (selectionKey.isAcceptable()) {
                    ServerSocketChannel channel = ((ServerSocketChannel) selectionKey.channel());
                    SocketChannel sc = channel.accept();
                    log.debug("获取的连接:{}",sc);
                    //将sc同时注册到selector上,监听读事件
                    sc.configureBlocking(false);
                    SelectionKey scKey = sc.register(selector, 0, null);
                    scKey.interestOps(SelectionKey.OP_READ);
                }else if (selectionKey.isReadable()){
                    SocketChannel socketChannel = (SocketChannel) selectionKey.channel();
                    ByteBuffer byteBuffer = ByteBuffer.allocate(16);
                    socketChannel.read(byteBuffer);
                    byteBuffer.flip();
                    debugRead(byteBuffer);
                }
            }
        }
    }
}
只启动服务端,因为没有连接事件,在selector.select()这一行陷入阻塞。

启动客户端:
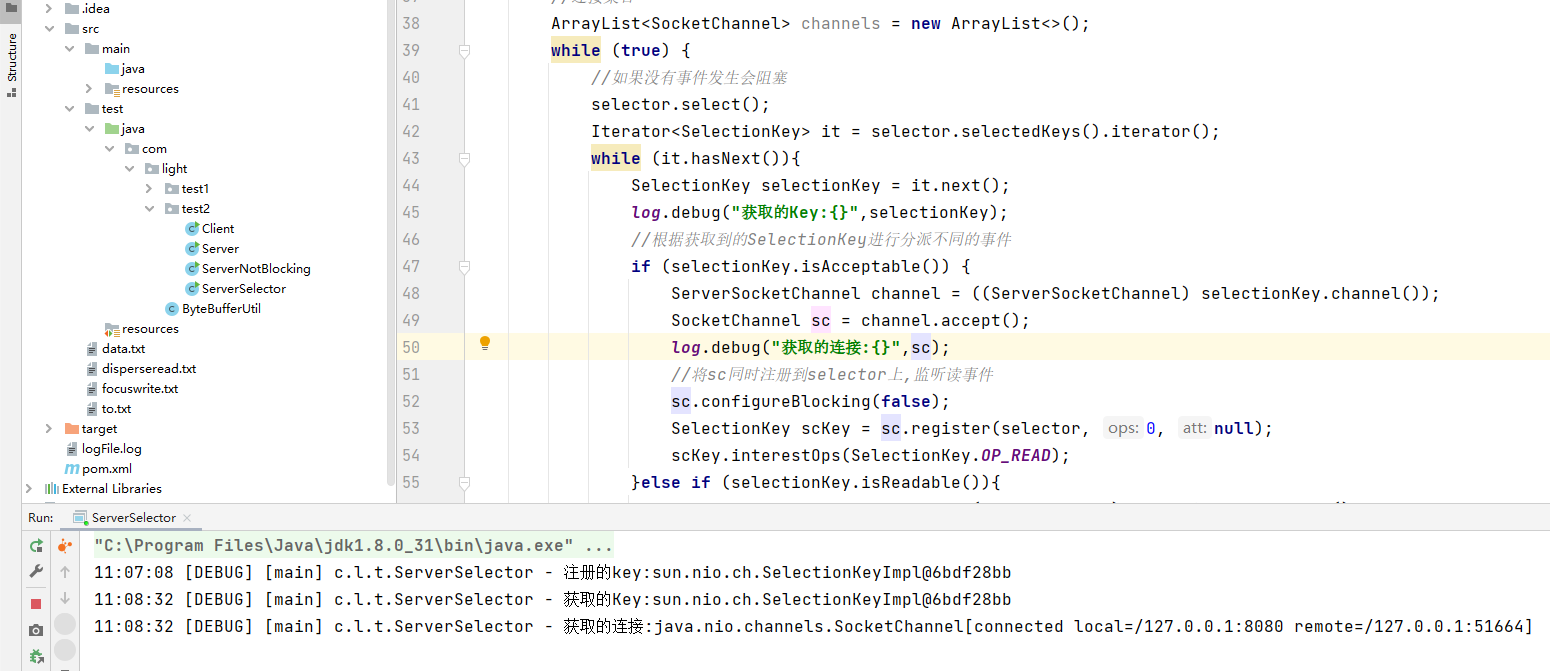
并且尝试向服务端发送数据:

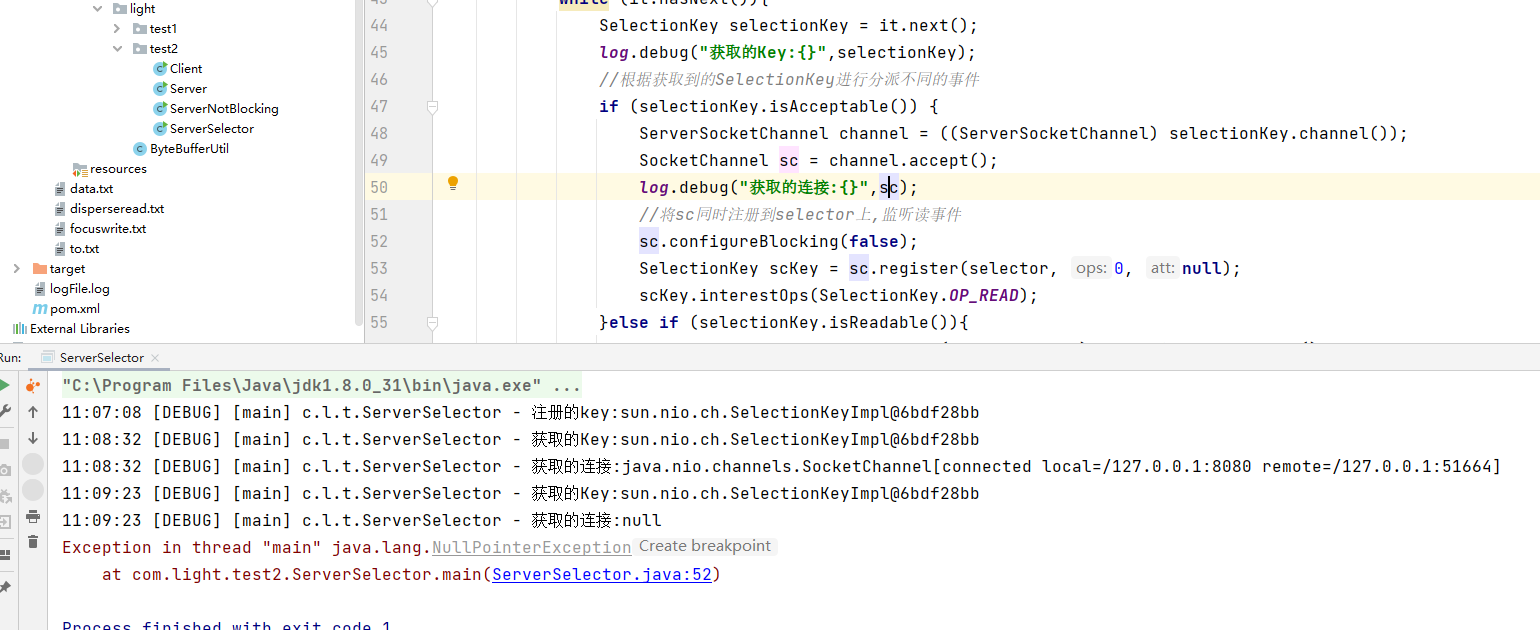
服务端没有接收到消息,反而出现了一个空指针异常,这是什么原因?
Selector是一个抽象类,具体实现是WindowsSelectorImpl
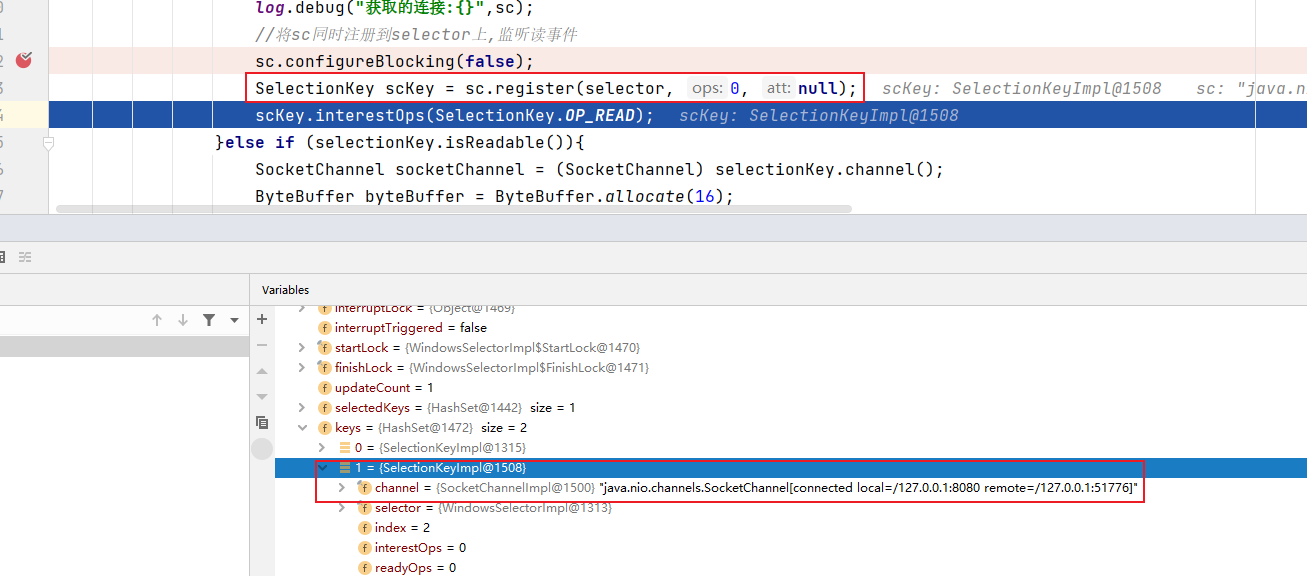
System.out.println(selector.getClass());根据堆栈信息,出现异常在52行,我们在服务端打断点看一下原因:
重点关注selectedKeys和keys两个成员变量:
把ServerSocketChannel注册到selector上时,keys将其记录:

在运行了selector.select()方法后,selectedKeys成员变量中也会记录ServerSocketChannel

在将SocketChannel注册到selector上后,keys将其记录。
此时第一次循环结束,注意,selectedKeys中的ServerSocketChannel没有被删除,下一次循环依旧会匹配到ServerSocketChannel的accept事件:

再次进入selectionKey.isAcceptable()分支。此时没有新的连接,channel.accept()会返回null。(为什么会返回null?因为设置的是非阻塞模式),从而导致空指针。

从上面的过程中可以发现,selectedKeys 集合中的元素不会自动移除,需要我们手动删除。(也是为什么要使用迭代器而不是增强for循环的原因,如果使用增强for一边遍历一边增删集合中的元素,会导致并发修改异常。)
改进上面的代码:
SelectionKey selectionKey = it.next();
log.debug("获取的Key:{}",selectionKey);
it.remove();
小结:
改造服务器的代码,分为以下的步骤:
- 创建selector,管理多个channel。
- 将ServerSocketChannel或SocketChannel注册到selector上(必须设置成非阻塞模式)。并且设置即将监听的事件。
- 调用selector的select方法。
- 得到selector中所有key并遍历,根据不同的key进行任务分派。
- 移除key
3.1、Selector的消息边界问题
Selector也是基于Buffer实现,那么它是如何解决半包,粘包问题的呢?同样有三种方式:
- 在消息传输之前固定好Buffer的容量,例如发送了两条消息,第一条消息占了8个字节,第二条消息只有2个字节,但无论消息有多大,都固定容量为10。
- 在消息中加入特殊的符号,根据符号进行拆分。
- 使用消息头+消息体。消息头固定大小,记录了消息体的大小。
我们这次使用第二种方式:
消息拆分方法,假设我们在消息中使用'\n'字符进行拆分:
/**
* abc123\nabc...\nab ->
* abc123
* abc...
* ab
* @param source
*/
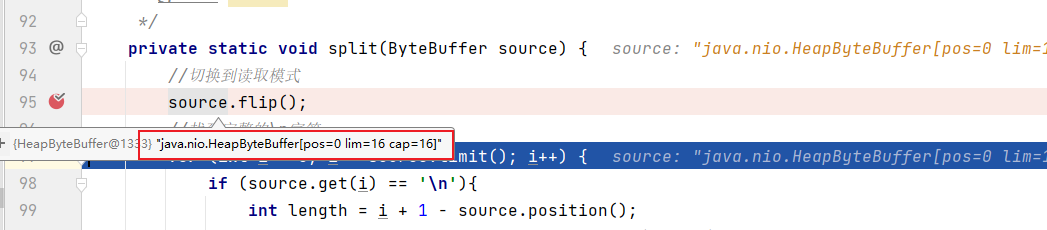
private static void split(ByteBuffer source) {
//切换到读取模式
source.flip();
//找到完整的\n字符
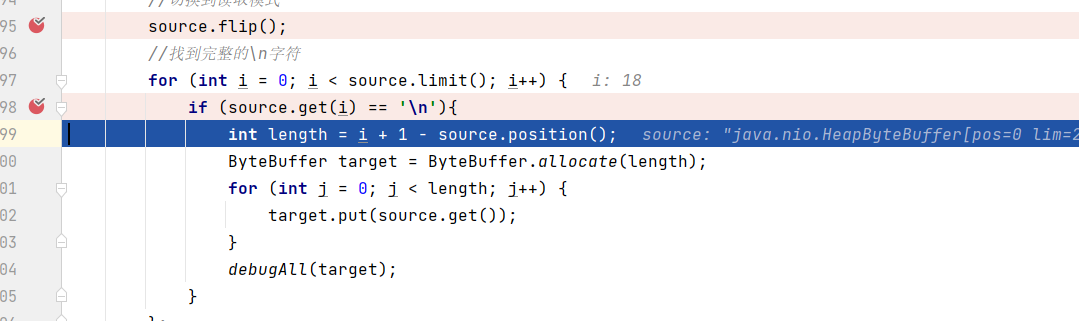
for (int i = 0; i < source.limit(); i++) {
if (source.get(i) == '\n'){
int length = i + 1 - source.position();
ByteBuffer target = ByteBuffer.allocate(length);
for (int j = 0; j < length; j++) {
target.put(source.get());
}
debugAll(target);
}
};
//将剩余部分向前压缩
source.compact();
}在读取消息时,就不能将ByteBuffer作为一个局部变量了。如果触发了多次循环,局部变量每次获取到的都不是同一个ByteBuffer。我们可以在将SocketChannel或ServerSocketChannel注册到selector时,给其绑定一个专属的ByteBuffer(类似于把队列绑定到交换机上):
ByteBuffer byteBuffer = ByteBuffer.allocate(16);
SelectionKey scKey = sc.register(selector, 0,byteBuffer );
需要使用的时候再取出:
//取出附件
ByteBuffer scByteBuffer = (ByteBuffer) selectionKey.attachment();
改造读取消息的代码,加入扩容机制。
split(scByteBuffer);
//加入扩容机制
if (scByteBuffer.position() == scByteBuffer.limit()){
     ByteBuffer newByteBuffer = ByteBuffer.allocate(scByteBuffer.capacity() * 2);
     scByteBuffer.flip();
     newByteBuffer.put(scByteBuffer);
     selectionKey.attach(newByteBuffer);
}
下面我们通过debug的方式加深一下印象:
客户端即将发送的消息如下,第一条消息超过了16个字节:

切换到读取模式前,ByteBuffer已经占满了16个字节:
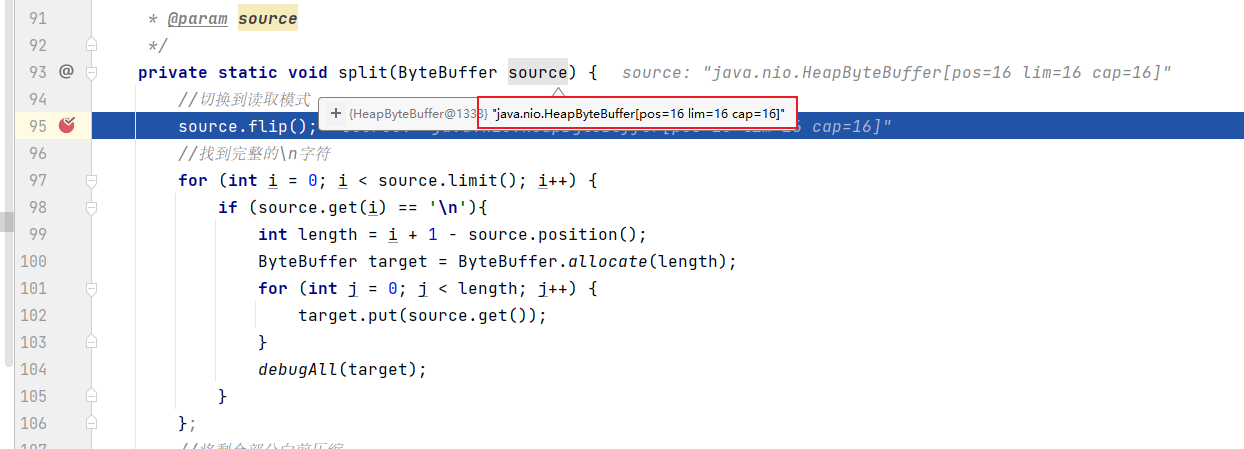
切换到读取模式,从0索引开始读:
第一次循环结束后仍然未找到分隔符的位置,触发扩容:

将扩容后的ByteBuffer(32长度)重新放回附件中,替换掉原先16长度的:

下一次循环进入split方法:

在第18个字节的位置找到了分隔符:

3.2、可写事件
如果服务器端需要向客户端一次写入较多的数据,可以利用Selector的可写事件分批完成。
其核心思想在于,如果第一次向客户端没有完全写入,就给socketChannel向Selector注册一个可写事件, 并且将未读完的ByteBuffer放入附件中。下次循环监听到了可写事件,进入分支再次向客户端写入上一次未完成的内容。直到全部写入完毕,再释放附件,并且删除可写事件
完整案例:
public class ServerWrite {
    public static void main(String[] args) throws IOException {
        ServerSocketChannel serverSocketChannel = ServerSocketChannel.open();
        serverSocketChannel.configureBlocking(false);
        serverSocketChannel.bind(new InetSocketAddress(8080));

        Selector selector = Selector.open();
        //将ServerSocketChannel注册到Selector上,默认连接模式
        serverSocketChannel.register(selector, SelectionKey.OP_ACCEPT,null);

        while (true){
            selector.select();
            Set<SelectionKey> selectionKeys = selector.selectedKeys();
            Iterator<SelectionKey> it = selectionKeys.stream().iterator();
            while (it.hasNext()) {
                SelectionKey selectionKey = it.next();
                it.remove();
                if (selectionKey.isAcceptable()) {
                    SocketChannel socketChannel =  handleAccept(selector,selectionKey);
                    //将SocketChannel注册到Selector上,默认读取模式
                    SelectionKey scKey = socketChannel.register(selector, SelectionKey.OP_READ, null);
                    StringBuilder sb = new StringBuilder();
                    for (int i = 0; i < 50000000; i++) {
                        sb.append("a");
                    }
                    ByteBuffer byteBuffer = StandardCharsets.UTF_8.encode(sb.toString());
                    //未处理完
                    if (byteBuffer.hasRemaining()) {
                        //SocketChannel再次注册写模式
                        scKey.interestOps(scKey.interestOps() + SelectionKey.OP_WRITE);
                        //将未处理完的ByteBuffer放入SocketChannel  scKey的附件中
                        scKey.attach(byteBuffer);
                    }
                //监听到读取模式
                }else if (selectionKey.isWritable()){
                    //从附件中取出ByteBuffer
                    ByteBuffer byteBuffer = (ByteBuffer) selectionKey.attachment();
                    //取出SocketChannel
                    SocketChannel socketChannel = (SocketChannel) selectionKey.channel();
                    //再次写入
                    int write = socketChannel.write(byteBuffer);
                    System.out.println(write);
                    //直到写入完成,删除附件和写模式
                    if (!byteBuffer.hasRemaining()){
                        selectionKey.attach(null);
                        selectionKey.interestOps(selectionKey.interestOps() - SelectionKey.OP_WRITE);
                    }
                }
            }
        }
    }

    private static SocketChannel handleAccept(Selector selector,SelectionKey selectionKey) throws IOException {
        ServerSocketChannel ssc = (ServerSocketChannel) selectionKey.channel();
        ssc.configureBlocking(false);
        return ssc.accept();
    }
}
附录:
NIO Selector四大事件触发的时机:
- OP_ACCEPT:当有客户端尝试连接到服务器时,ServerSocketChannel会触发OP_ACCEPT事件。
- OP_CONNECT:当客户端发起连接请求后,连接操作完成时会触发OP_CONNECT事件。
- OP_READ:当通道中有数据可读时,会触发OP_READ事件。这意味着客户端或服务器端的通道有数据可以读取。
- OP_WRITE:当通道准备好写数据时,会触发OP_WRITE事件。这意味着可以向通道写入数据而不会阻塞。