一、YOLO-V8 转 Onnx
在本专栏的前面几篇文章中,我们使用 ultralytics 公司开源发布的 YOLO-V8 模型,分别 Fine-Tuning 实验了 目标检测、关键点检测、分类 任务,实验后发现效果都非常的不错,但是前面的演示都是基于 ultralytics 框架实现的,如果要发布到移动端或服务端,就需要考虑通用开放格式了,比如 Onnx 格式。
Onnx 格式是一种开放格式,用于表示深度学习模型。它是由微软,亚马逊和Facebook共同开发的,目的是为了促进不同深度学习框架和工具之间的模型互操作性。通过Onnx,开发人员可以更容易地在不同的深度学习框架之间转换模型,例如从PyTorch到TensorFlow,反之亦然。
而 ultralytics 框架针对格式的转换已经做好了封装,只需要通过 model.export 方法,便可以转到多种不同格式的模型,格式如下:
| 格式 | format | 模型 | 元数据 | 论据 |
|---|---|---|---|---|
| PyTorch | - | yolov8n.pt | ✅ | - |
| TorchScript | torchscript | yolov8n.torchscript | ✅ | imgsz, optimize, batch |
| ONNX | onnx | yolov8n.onnx | ✅ | imgsz, half, dynamic, simplify, opset, batch |
| OpenVINO | openvino | yolov8n_openvino_model/ | ✅ | imgsz, half, int8, batch |
| TensorRT | engine | yolov8n.engine | ✅ | imgsz, half, dynamic, simplify, workspace, int8, batch |
| CoreML | coreml | yolov8n.mlpackage | ✅ | imgsz, half, int8, nms, batch |
| TF SavedModel | saved_model | yolov8n_saved_model/ | ✅ | imgsz, keras, int8, batch |
| TF GraphDef | pb | yolov8n.pb | ❌ | imgsz, batch |
| TF 轻型 | tflite | yolov8n.tflite | ✅ | imgsz, half, int8, batch |
| TF 边缘TPU | edgetpu | yolov8n_edgetpu.tflite | ✅ | imgsz |
| TF.js | tfjs | yolov8n_web_model/ | ✅ | imgsz, half, int8, batch |
| PaddlePaddle | paddle | yolov8n_paddle_model/ | ✅ | imgsz, batch |
| NCNN | ncnn | yolov8n_ncnn_model/ | ✅ | imgsz, half, batch |
下面使用前面做过的人脸检测模型,转为 Onnx 格式,并使用 OpenCV 运行推理,该模型的训练过程可以参考下面文章:
下面过程使用的依赖版本如下:
shell
ultralytics==8.1.37
opencv-python==4.7.0.68
onnx==1.16.1
将 YOLO-V8 默认的 Pytorch 模型转为 Onnx 模型 :
python
from ultralytics import YOLO
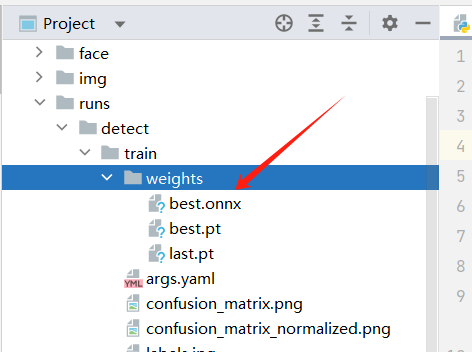
model = YOLO("runs/detect/train/weights/best.pt")
model.export(format="onnx", imgsz=[640,640], opset=12)运行后可以在 runs/detect/train/weights/ 下看到 best.onnx 模型:
二、OpenCV 调用 Onnx 模型
OpenCV 的 dnn 模块提供了 readNetFromONNX ,可以方便的读取 Onnx 模型,整个运行示例过程如下:
python
import cv2
import numpy as np
onnx_model_path = "runs/detect/train/weights/best.onnx"
input_shape = (640, 640)
net = cv2.dnn.readNetFromONNX(onnx_model_path)
model_classify = ["face"]
def recognize(img_path, threshold=0.5):
img = cv2.imread(img_path)
blob = cv2.dnn.blobFromImage(img, 1 / 255.0, input_shape, swapRB=True, crop=False)
net.setInput(blob)
output = net.forward()
output = output.transpose((0, 2, 1))
height, width, _ = img.shape
x_factor, y_factor = width / input_shape[0], height / input_shape[1]
classifys, scores, boxes = [], [], []
for i in range(output[0].shape[0]):
box = output[0][i]
_, _, _, max_idx = cv2.minMaxLoc(box[4:])
class_id = max_idx[1]
score = box[4:][class_id]
if (score > threshold):
scores.append(score)
classifys.append(model_classify[int(class_id)])
x, y, w, h = box[0].item(), box[1].item(), box[2].item(), box[3].item()
x = int((x - 0.5 * w) * x_factor)
y = int((y - 0.5 * h) * y_factor)
w = int(w * x_factor)
h = int(h * y_factor)
box = np.array([x, y, w, h])
boxes.append(box)
indexes = cv2.dnn.NMSBoxes(boxes, scores, 0.25, 0.45)
for i in indexes:
classify, score, box = classifys[i], scores[i], boxes[i]
print(class_id, score, box)
x, y, w, h = box[0], box[1], box[2], box[3]
cv2.rectangle(img, (x, y), (x + w, y + h), (0, 255, 0), 3)
label = f'{classify}: {score:.2f}'
cv2.putText(img, label, (x, y - 10), cv2.FONT_HERSHEY_SIMPLEX, 0.5, (0, 255, 0), 2)
cv2.imshow("img", img)
cv2.waitKey(0)
if __name__ == '__main__':
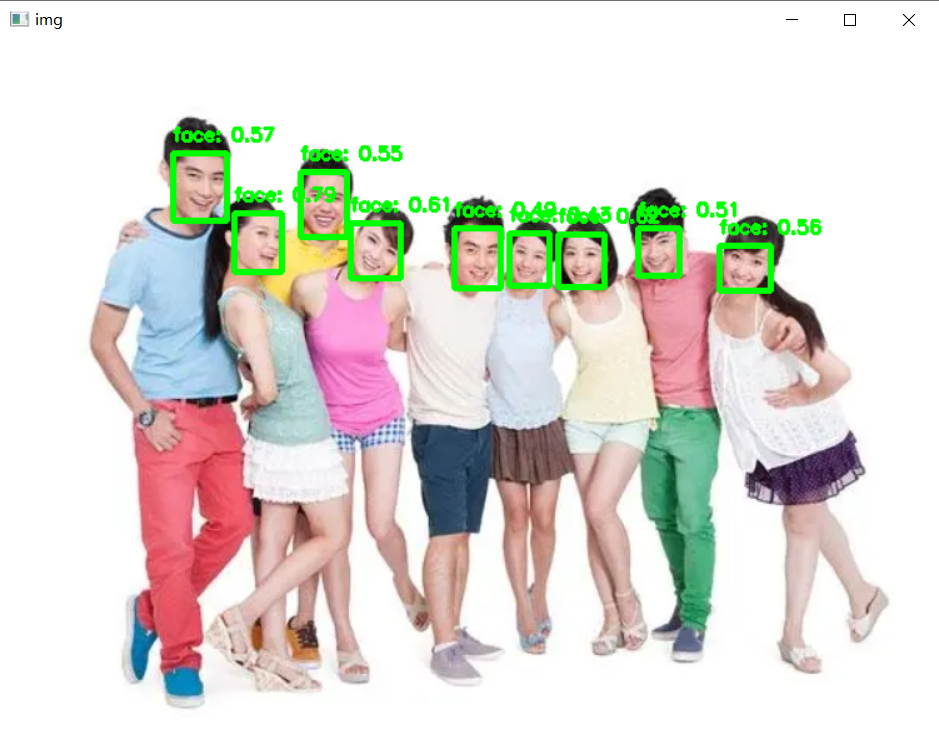
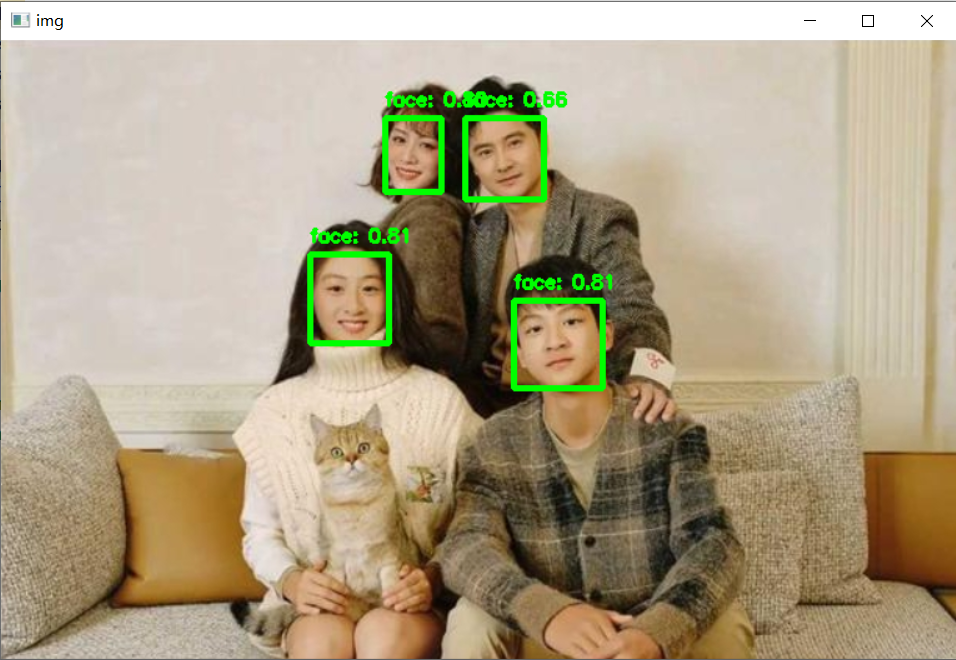
recognize('data/images/10.jpg',0.3)运行效果示例: