概念
上一文中,我们实现了首页的数据展示,本文讲解商品分类的商品展示,实现分页显示功能。
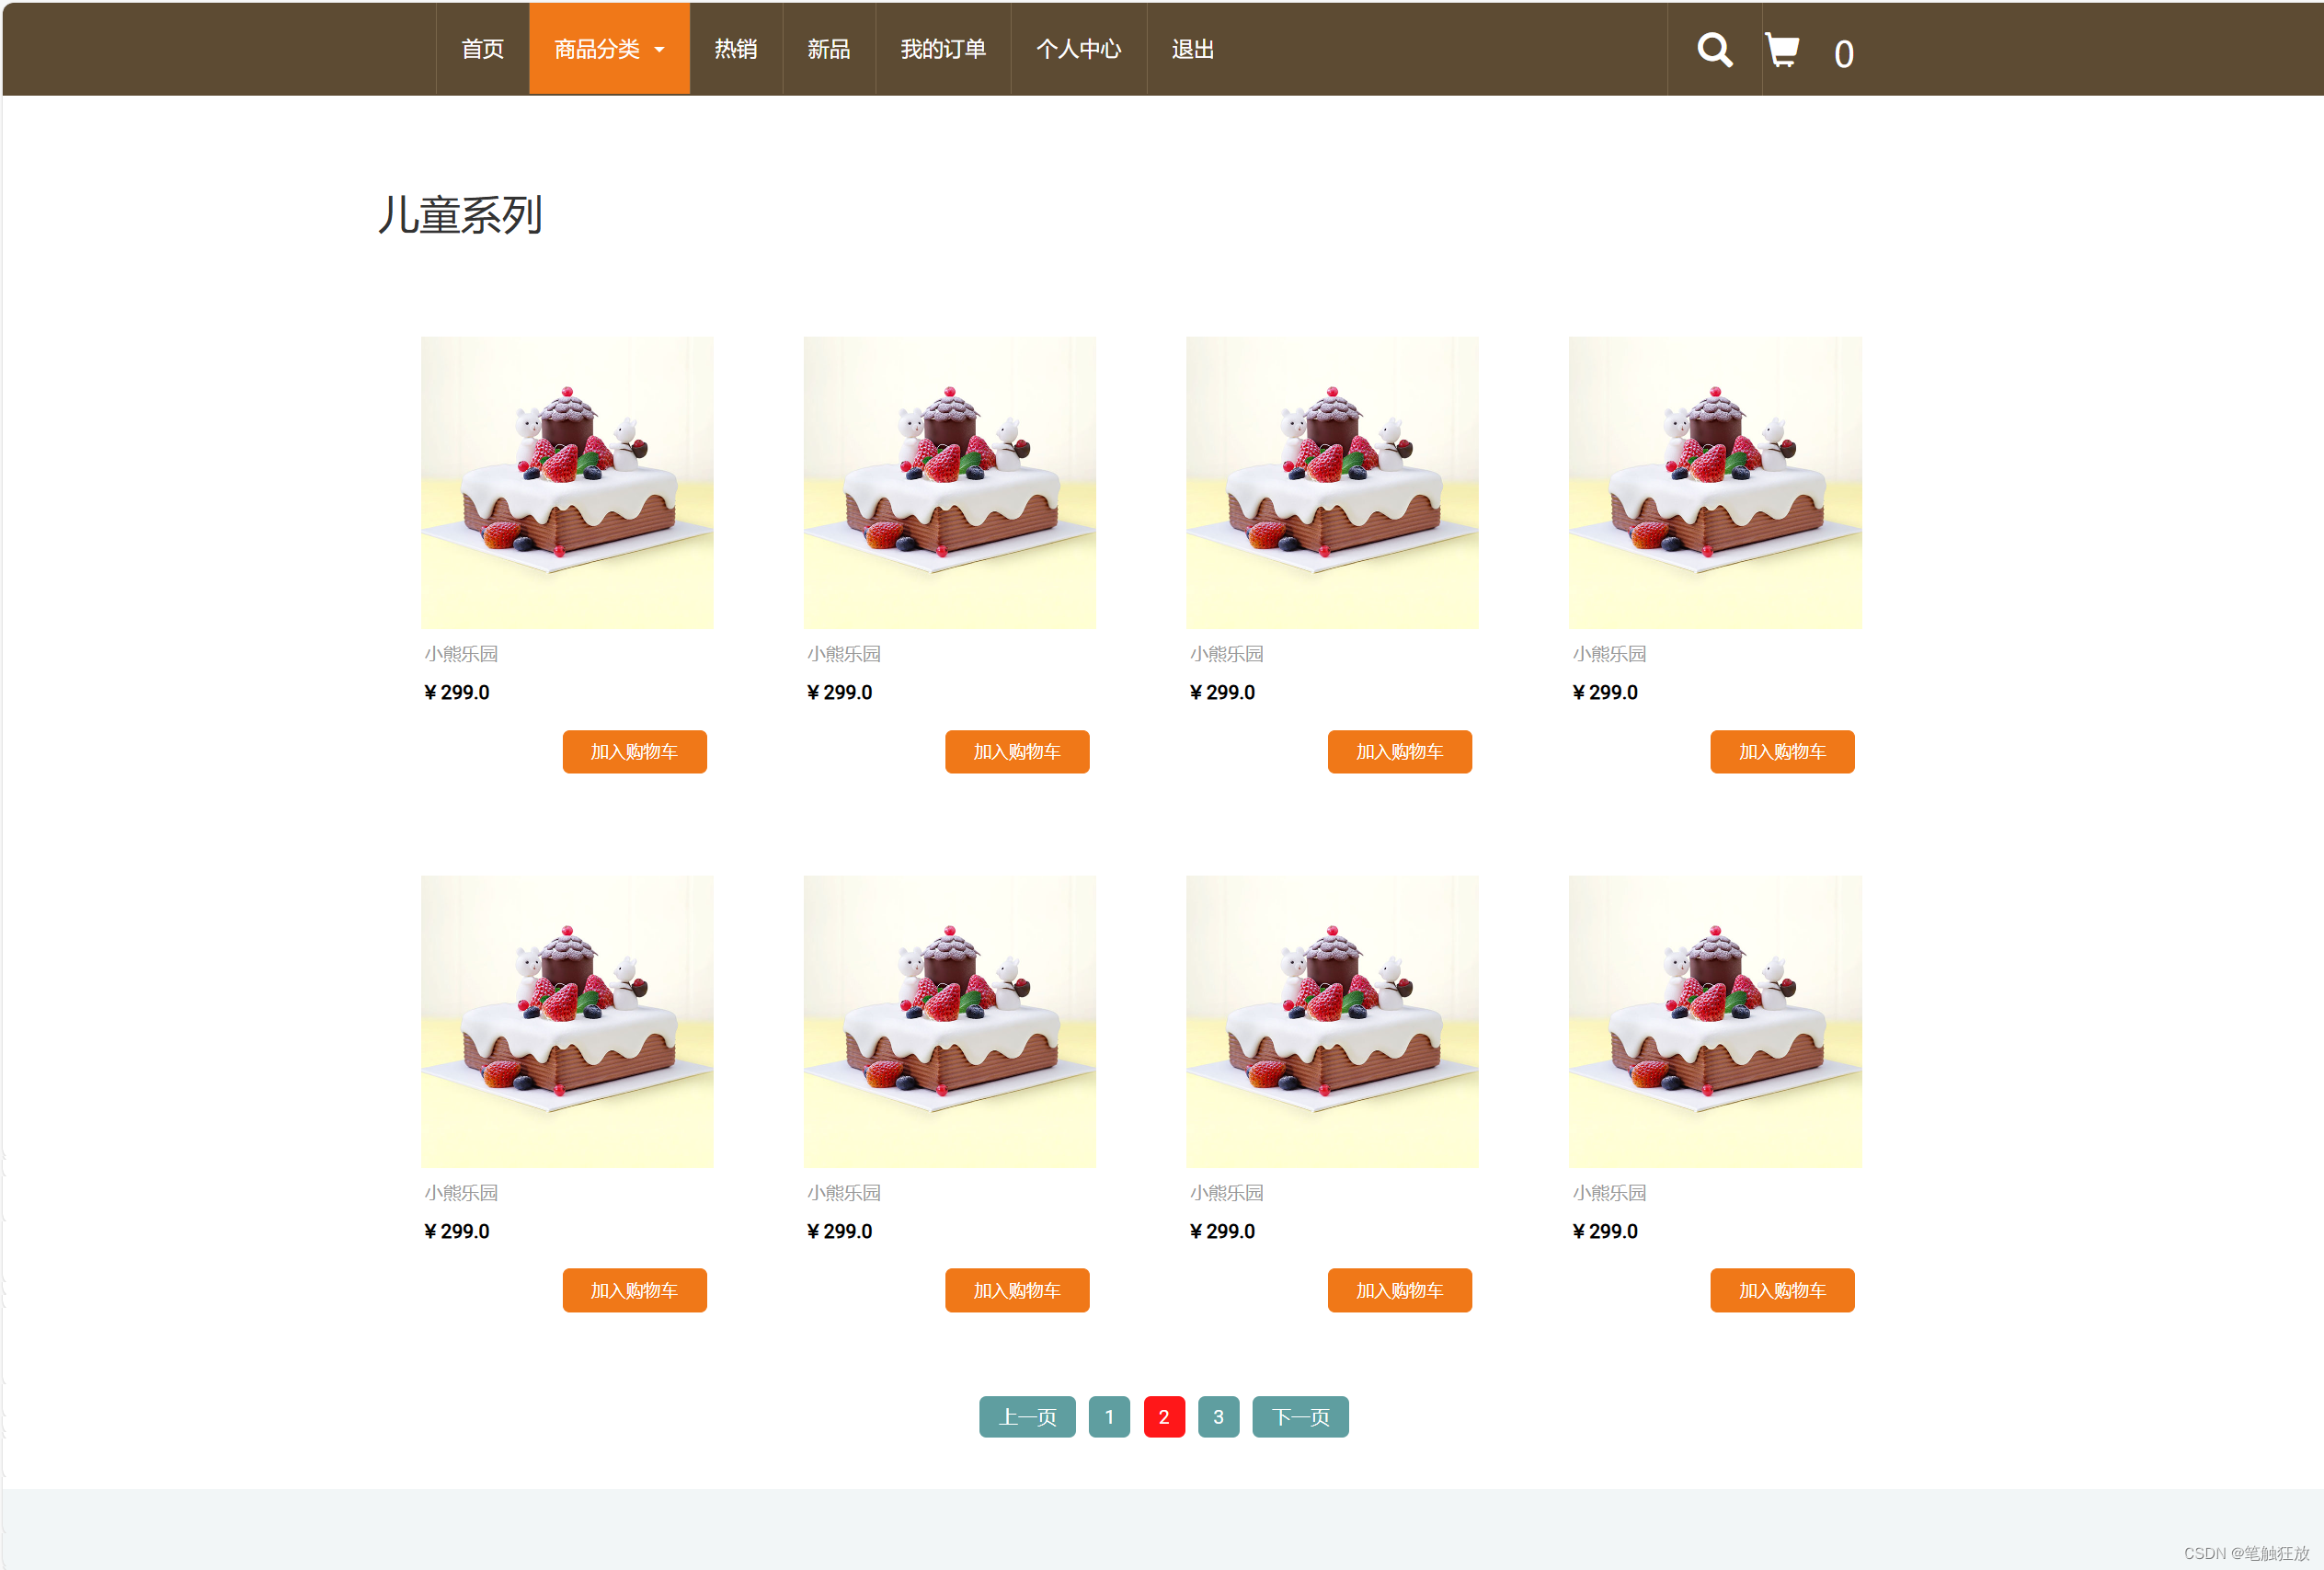
点击商品分类中的各种分类,向服务器发送请求,获取数据库中对应该分类的所有商品并以分页的形式返回显示。
商品分类步骤实现
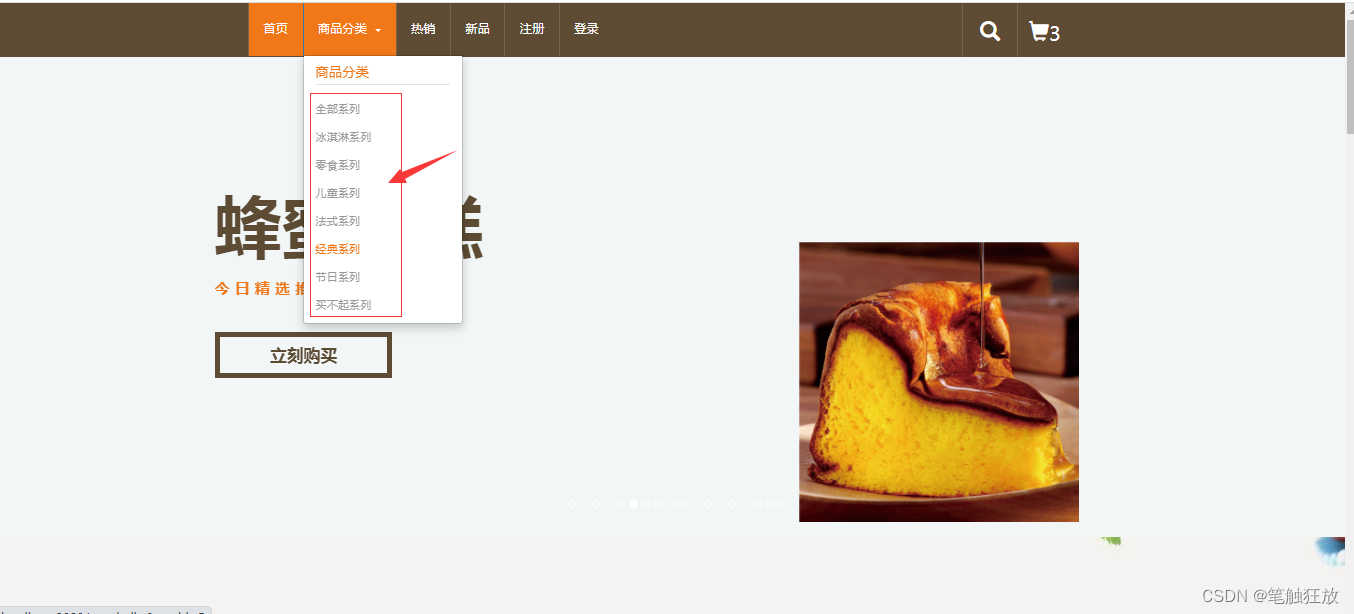
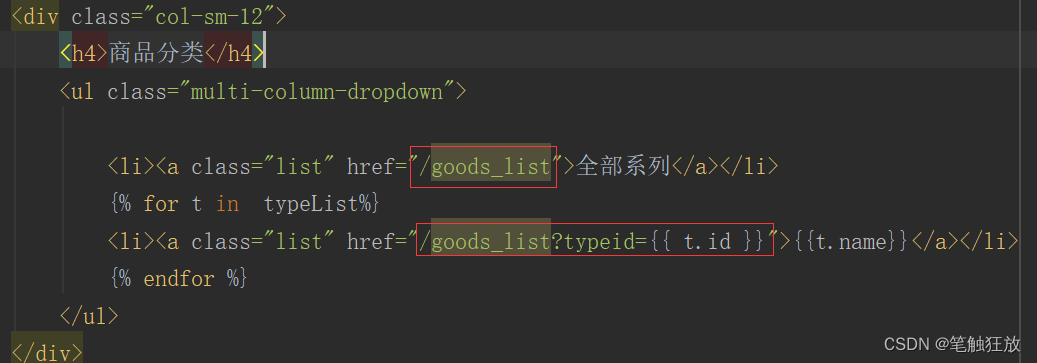
当点击商品分类中的某一项分类时,head.html头部页面中触发超链接点击事件,向服务器发送商品分类id
在urls.py文件中定义获取该请求的地址
python
path('goods_list/',views.goods_list),在views.py文件中定义goods_list函数,获取用户指定的分类id的商品信息,并进行分页处理
python
# 处理商品列表的请求
def goods_list(request):
    # 读取分类id
    try:
        typeId = request.GET["typeid"]
    except:
        typeId = 0
    # 读取分页页码
    try:
        ym=request.GET["ym"]
    except:
        ym=1

    # 根据分类id获取分类信息
    t=Type.objects.get(id=typeId)
    # 根据分类id查询该分类的所有商品信息
    if int(typeId)>0:
        goods = Goods.objects.filter(type_id=typeId)
    else:
        # 分类id为0,说明查询所有商品
        goods=Goods.objects.all()
    # 将该分类的商品信息进行分页处理,每页显示8条记录
    pag=paginator.Paginator(goods,8)
    # 根据当前页码获取当前分页信息
    pageInfo=pag.get_page(ym)
    # 获取当前页的商品列表信息
    goodsList=pageInfo.object_list
    # 获取总页码数
    yms=pag.page_range

    return render(request,"goods_list.html",{"typeList":types,"t":t,"goodsList":goodsList,"page":pageInfo,"yms":yms})
最后将查询的该分类的商品数据发送给goods_list.html商品列表页面显示
html
<!DOCTYPE html>
<html>
<head>
<title>商品列表</title>
{% load static %}
<meta name="viewport" content="width=device-width, initial-scale=1">
<meta http-equiv="Content-Type" content="text/html; charset=utf-8">
<link type="text/css" rel="stylesheet" href="{% static 'css/bootstrap.css' %}">
<link type="text/css" rel="stylesheet" href="{% static 'css/style.css' %}">
<script type="text/javascript" src="{% static 'js/jquery.min.js' %}"></script>
<script type="text/javascript" src="{% static 'js/bootstrap.min.js' %}"></script>
<script type="text/javascript" src="{% static 'layer/layer.js' %}"></script>
<script type="text/javascript" src="{% static 'js/cart.js' %}"></script>
<style>
#nav{
width: 100%;
height: 40px;
margin-top: 20px;
clear: left;
}
#nav a{
text-decoration: none;
margin: 3px;
background-color: cadetblue;
}
#nav a:hover{
background-color: #FF1719;
}
#nav a.c_page{
background-color: #FF1719;
}
#nav a.up_page,#nav a.do_page{
width: 70px;
height: 30px;
padding: 5px 10px;
border-radius: 5px;
color: white;
display: inline-block;
}
#nav a.p_page{
width: 30px;
height: 30px;
padding: 5px;
border-radius: 5px;
color: white;
display: inline-block;
}
</style>
<script>
//定义方法,用于处理分页导航栏的样式
function a_style() {
//通过class选择器获得分页导航栏对象
var aElements=document.getElementsByClassName("p_page");
for (var i = 0; i < aElements.length; i++) {
var text=aElements.item(i).innerHTML;
if (text<10){
aElements.item(i).innerHTML=" "+text+" ";
}
}
}
</script>
</head>
<body>
{% include "header.html" with flag=2 typeList=typeList %}
<div class="products">
<div class="container">
<h2>
{% if t %}
{{t.name}}
{% else %}
全部系列
{% endif %}
</h2>
<div class="col-md-12 product-model-sec">
{% for g in goodsList %}
<div class="product-grid">
<a href="/goods_detail?id={{ g.id }}">
<div class="more-product"><span> </span></div>
<div class="product-img b-link-stripe b-animate-go thickbox">
<img src="{% static g.cover %}" class="img-responsive" alt="{{ g.name }}" width="240" height="240">
<div class="b-wrapper">
<h4 class="b-animate b-from-left b-delay03">
<button href="/goods_detail?id={{ g.id }}">查看详情</button>
</h4>
</div>
</div>
</a>
<div class="product-info simpleCart_shelfItem">
<div class="product-info-cust prt_name">
<h4>{{ g.name }}</h4>
<span class="item_price">¥ {{ g.price }}</span>
<input type="button" class="item_add items" value="加入购物车" onclick="buy({{ g.id }})">
<div class="clearfix"> </div>
</div>
</div>
</div>
{% endfor %}
</div>
<!-- 显示页码导航栏 -->
<div id="nav" align="center">
<!-- 上一页 -->
<!-- 判断当前页是否有上一页,如果有上一页则显示上一页的按钮,否则就不显示上一页 -->
{% if page.has_previous %}
<a href="/goods_list/?ym={{ page.previous_page_number }}&typeid={{ t.id }}" class="up_page">上一页</a>
{% endif %}
<!-- 页码 -->
{% for ym in yms %}
{% if page.number == ym %}
<a href="/goods_list/?ym={{ ym }}&typeid={{ t.id }}" class="p_page c_page">{{ ym }}</a>
{% else %}
<a href="/goods_list/?ym={{ ym }}&typeid={{ t.id }}" class="p_page">{{ ym }}</a>
{% endif %}
{% endfor %}
<!-- 下一页 -->
{% if page.has_next %}
<a href="/goods_list/?ym={{ page.next_page_number }}&typeid={{ t.id }}" class="do_page">下一页</a>
{% endif %}
</div>
</div>
</div>
</div>
{% include "footer.html" %}
</body>
</html>