当技术总监直接丢给我一个服务器账号密码时,我该怎么完成映射本机;配置网关;配置代理和发布项目呢?
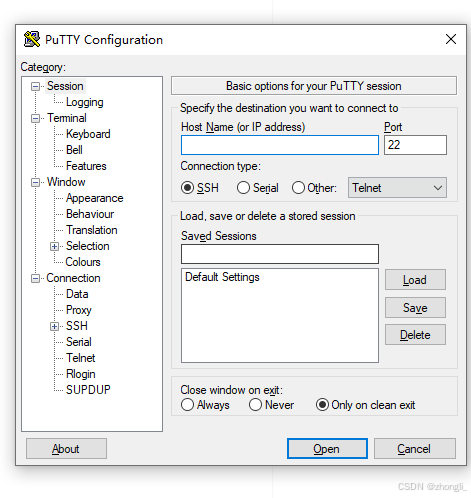
我使用的是putty远程登录到服务器
输入ip后,点open
输入账号密码
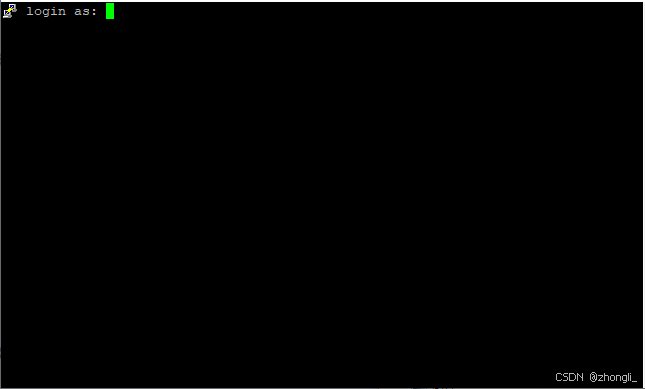
登录的账号如果不是root;使用sudo su切换到root账号;再用命令cd /到根目录

服务器共享本机
首先将服务器共享到本机,更方便管理;全局安装Samba;
Samba的作用有以下两点:
- Samba 是一个提供 SMB/CIFS 协议实现的开源软件包,允许 Linux 系统与 Windows 系统进行文件和打印共享。
- 可用于设置网络共享目录,允许不同操作系统的用户访问和共享文件。
安装步骤**(如果没在root用户下运行加上sudo)**:
1、安装Samba
apt update(sudo apt update)
apt install -y samba ( sudo apt install -y samba)
2、验证安装
检查 Samba 服务是否已成功安装和正在运行:
systemctl status smbd
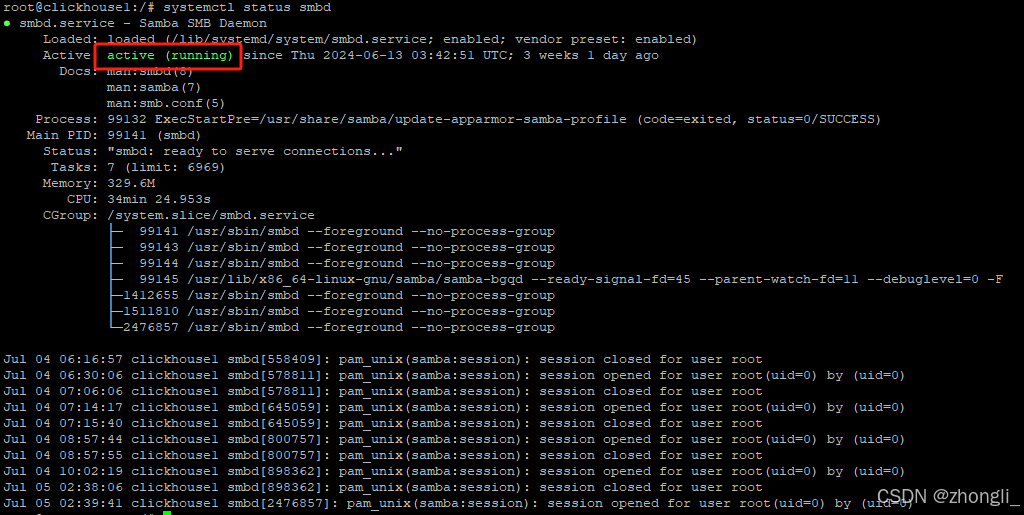
出现以上active字样就是正常运行中;接下来就是配置Samba
配置Samba
1、编辑Samba配置文件:
nano /etc/samba/smb.conf (sudo nano /etc/samba/smb.conf)
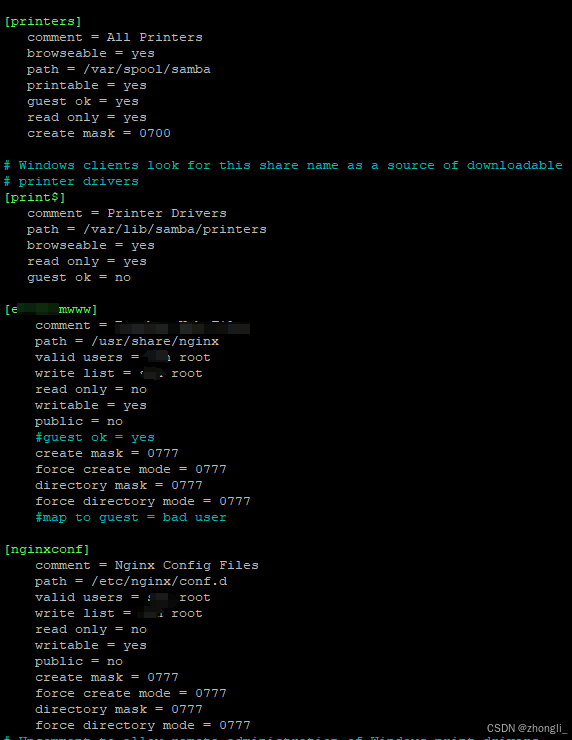
2、添加共享目录配置:
printers
comment = All Printers
browseable = yes
path = /var/spool/samba
printable = yes
guest ok = yes
read only = yes
create mask = 0700
Windows clients look for this share name as a source of downloadable
printer drivers
print$
comment = Printer Drivers
path = /var/lib/samba/printers
browseable = yes
read only = yes
guest ok = no
共享文件1发布使用自己命名
comment = 说明内容自己写
path = /usr/share/nginx // 共享路径
valid users = 本机用户名自己写 root // 权限给到哪些用户
write list = 本机用户名自己写 root
read only = no // 读权限
writable = yes // 写权限
public = no // 是否允许匿名访问
#guest ok = yes //是否允许未验证的用户访问 `#`表示设置未启用
create mask = 0777 // 指定新文件创建时默认权限掩码
force create mode = 0777 //强制新文件创建时具有的权限
directory mask = 0777 // 指定新目录创建时的默认权限掩码
force directory mode = 0777 // 强制新目录创建时具有的权限
共享文件2代理使用自己命名
comment = 说明内容自己写
path = /etc/nginx/conf.d
valid users = 本机用户名自己写 root
write list = 本机用户名自己写 root
read only = no
writable = yes
public = no
create mask = 0777
force create mode = 0777
directory mask = 0777
force directory mode = 0777
例子:
配置完后ctrl + o保存;ctrl + x退出;然后启动Samba服务
3、重启Samba服务
systemctl restart smbd(sudo systemctl restart smbd)
systemctl restart nmbd(sudo systemctl restart nmbd)
4、添加用户到Samba
smbpasswd -a your_username (sudo smbpasswd -a your_username)

设置密码
5、启用Samba用户
smbpasswd -e your_username (sudo smbpasswd -e your_username)
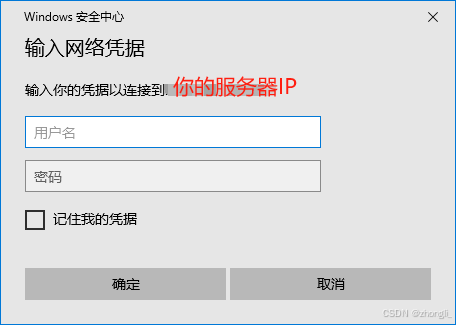
自己设置的密码要记住咯。这时可以测试连接,在 Windows 中,确保使用正确的网络凭据尝试连接到 Samba 共享。格式通常是 \\<服务器IP>\share。确保输入的用户名和密码正确无误,并与服务器上的 Samba 用户一致。
例子:
win + R 输入\\<服务器IP>;enter回车输入账号密码;勾选记住我的凭据点确定
进来是这样

如果遇到了权限不够的情况可以使用这条命令:chown -R 用户名 ./(想给权限的路径,这里我是都给就可以使用./)

部署服务器
配置环境
-
更新系统包列表:
sudo apt update
安装 Node.js
Yarn 依赖于 Node.js,所以需要先安装 Node.js。推荐使用 NodeSource 提供的安装脚本
curl -fsSL https://deb.nodesource.com/setup_16.x | sudo -E bash - //查看自己项目需要node是什么版本,我的是需要16版本的,用的setup_16.x
apt install -y nodejs (sudo apt install -y nodejs)
如果你需要在同一服务器上管理多个 Node.js 版本,看作者另一篇博客。
Ubuntu下安装Node.js;npm_ubuntu 安装nodejs npm-CSDN博客
安装 Yarn
使用官方 Yarn 仓库进行安装。
curl -sL https://dl.yarnpkg.com/debian/pubkey.gpg | sudo apt-key add -
echo "deb https://dl.yarnpkg.com/debian/ stable main" | sudo tee /etc/apt/sources.list.d/yarn.list
apt update (sudo apt update)
apt install yarn (sudo apt install yarn)
如果遇到apt-key已弃用而安装不成功的使用以下方法进行安装
curl -sS https://dl.yarnpkg.com/debian/pubkey.gpg | gpg --dearmor | sudo tee /usr/share/keyrings/yarn-archive-keyring.gpg > /dev/null
echo "deb signed-by=/usr/share/keyrings/yarn-archive-keyring.gpg https://dl.yarnpkg.com/debian/ stable main" | sudo tee /etc/apt/sources.list.d/yarn.list
apt update (sudo apt update)
apt install yarn (sudo apt install yarn)
验证安装
yarn --version
安装 PM2
-
全局安装 PM2:
sudo npm install -g pm2 -
验证安装:安装完成后,可以使用以下命令验证 PM2 是否安装成功并查看版本:
pm2 -v
安装 Nginx
根据个人项目选择使用
1、全局安装nginx
sudo apt install nginx
2、启动nginx服务
sudo systemctl start nginx
3、确保nginx在开机时自动启动
sudo systemctl enable nginx
4、验证nginx状态
sudo systemctl status nginx
配置pm2启动文件
如果是服务端请求接口需要配置,如果是客户端请求接口无需配置
例子production.json:
{
"apps": [
{
"name": "自定义项目名",
"port": 端口,
"cwd": "发布项目的文件路径",
"script": ".项目运行的js",
"log_date_format": "YYYY-MM-DD HH:mm Z",
"out_file": "./logs/app-blog-out.log",
"error_file": "./logs/app-blog-err.log",
"instances": "1",
"min_uptime": "30s",
"max_restarts": 30,
"max_memory_restart": "600M",
"watch": false,
"ignore_watch": [
"logs",
"node_modules"
],
"merge_logs": true,
"exec_interpreter": "node",
"exec_mode": "fork",
"autorestart": true,
"restart_delay": "10",
"vizion": false,
"env": {
"NODE_ENV": "production"
}
}
]
}
每次修改完production.json文件后都要重新启动才生效
cd到当前有production.json的文件夹下
pm2 restart production.json
配置反向代理
根据项目是否需要再使用
关于更多知识点及原理我找了两篇,
一篇19年Nginx配置SSL实现https请求_listen 443 ssl;-CSDN博客;
一篇24年Nginx 配置 SSL(HTTPS)详解_nginx ssl-CSDN博客;
区别就是19年的用的系统是Ubuntu;24年的用的系统是linux
#配置端口代码 www是我的文件名
#微前端使用
upstream 项目名 {
server 0.0.0.1:8000;
}
server {
listen 443 ssl http2;
#域名
server_name server.com;
#证书
ssl_certificate /usr/share/nginx/www/cert/fullchain.pem;
#秘钥
ssl_certificate_key /usr/share/nginx/www/cert/privkey.key;
ssl_session_timeout 1d;
ssl_session_cache shared:SharedNixCraftSSL:10m;
ssl_session_tickets off;
proxy_connect_timeout 15s;
proxy_read_timeout 15s;
proxy_send_timeout 15s;
#add_header X-Frame-Options "SAMEORIGIN";
add_header X-XSS-Protection "1; mode=block";
add_header X-Content-Type-Options "nosniff";
add_header Strict-Transport-Security "max-age=63072000; includeSubdomains; preload" always;
add_header X-Cache-Status $upstream_cache_status;
ssl_stapling on;
ssl_stapling_verify on;
#log
ssl_trusted_certificate /usr/share/nginx/www/cert/fullchain.pem;
error_log /usr/share/nginx/www/logs/access.log error;
#头部协议
proxy_pass_header Authorization;
proxy_set_header Host $http_host;
proxy_set_header X-Real-IP $remote_addr;
proxy_set_header X-Forwarded-For $http_x_forwarded_for;
proxy_http_version 1.1;
proxy_set_header Upgrade $http_upgrade;
proxy_set_header Connection "upgrade";
#ssl动态路由(微前端使用更佳)
location ~^/demo/(.*){
proxy_poss http://项目名$request_uri;
}
#ssl动态路由(常规项目使用)
location ~^/demo/(.*){
proxy_poss http://0.0.0.1:8000$request_uri;
}
#ssl常规路由
location = / {
proxy_pass http://0.0.0.1:8000/;
}
#client常规以个人中心为例
location ~ ^/(user|customer)(.*) {
root www/文件名/client;
}
}
保存配置,
启动nginx:systemctl restart nginx
只要更改过文件,都要重启
重启nginx:systemctl reload nginx
现在粗略看看等有空再细致更新啦。