1 集群规划
| Hostname | IP | 角色 |
|---|---|---|
| centos702 | 192.168.131.102 | master |
| centos704 | 192.168.131.104 | node |
| centos705 | 192.168.131.105 | node |
2 安装步骤
初始操作和安装基础软件每个节点都要执行。
2.1 初始操作
2.1.1 关闭防火墙
systemctl stop firewalld
systemctl disable firewalld
2.1.2 关闭 SELinux
# 永久关闭
sed -i 's/enforcing/disabled/' /etc/selinux/config
# 临时
setenforce 0
2.1.3 关闭 swap
# 临时
swapoff -a
# 永久
sed -ri 's/.*swap.*/#&/' /etc/fstab
关闭swap后需要重启
2.1.4 设置主机名
hostnamectl set-hostname <hostname>2.1.5 添加 hosts
cat >> /etc/hosts << EOF
192.168.131.102 centos702
192.168.131.104 centos704
192.168.131.105 centos705
EOF
2.1.6 将桥接的 IPv4 流量传递到 iptables 的链
1
cat > /etc/sysctl.d/k8s.conf << EOF
net.bridge.bridge-nf-call-ip6tables = 1
net.bridge.bridge-nf-call-iptables = 1
EOF

# 使配置生效
sysctl --system
2.1.7 时间同步
yum install ntpdate -y
ntpdate time.windows.com
2.2 安装基础软件
2.2.1 Docker
https://blog.csdn.net/weixin_43724577/article/details/139773553
修改Docker配置文件
vim /etc/docker/daemon.json增加一个新的配置,关闭cgroup
{
 "exec-opts":["native.cgroupdriver=systemd"]
}
重启Docker kubelet
systemctl daemon-reload
systemctl restart docker
2.2.2 添加阿里云 K8s yum 源
cat > /etc/yum.repos.d/kubernetes.repo << EOF
[kubernetes]
baseurl=https://mirrors.aliyun.com/kubernetes/yum/repos/kubernetes-el7-x86_64
enabled=1
gpgcheck=0
repo_gpgcheck=0

gpgkey=https://mirrors.aliyun.com/kubernetes/yum/doc/yum-key.gpg https://mirrors.aliyun.com/kubernetes/yum/doc/rpm-package-key.gpg
EOF
2.2.3 安装 kubelet kubeadm kubectl
yum install -y kubelet-1.23.6 kubeadm-1.23.6 kubectl-1.23.6
systemctl enable kubelet
查看kubelet状态
systemctl status kubelet报错
● kubelet.service - kubelet: The Kubernetes Node Agent
   Loaded: loaded (/usr/lib/systemd/system/kubelet.service; enabled; vendor preset: disabled)
  Drop-In: /usr/lib/systemd/system/kubelet.service.d
           └─10-kubeadm.conf
   Active: activating (auto-restart) (Result: exit-code) since Thu 2024-08-08 14:53:04 CST; 1s ago
     Docs: https://kubernetes.io/docs/
  Process: 2245 ExecStart=/usr/bin/kubelet $KUBELET_KUBECONFIG_ARGS $KUBELET_CONFIG_ARGS $KUBELET_KUBEADM_ARGS $KUBELET_EXTRA_ARGS (code=exited, status=1/FAILURE)
 Main PID: 2245 (code=exited, status=1/FAILURE)

Aug 08 14:53:04 centos702 systemd[1]: Unit kubelet.service entered failed state.
Aug 08 14:53:04 centos702 systemd[1]: kubelet.service failed.
查看日志
journalctl -xefu kubelet

Aug 08 14:55:27 centos702 kubelet[2347]: E0808 14:55:27.692085    2347 server.go:205] "Failed to load kubelet config file" err="failed to load Kubelet config file /var/lib/kubelet/config.yaml, error failed to read kubelet config file \"/var/lib/kubelet/config.yaml\", error: open /var/lib/kubelet/config.yaml: no such file or directory" path="/var/lib/kubelet/config.yaml"
这个是因为没初始化,所以没有这个文件/var/lib/kubelet/config.yaml 执行后面的初始化就好了。
在执行初始化之后,再次查看kubelet日志
Aug 08 15:44:36 centos702 kubelet[5549]: E0808 15:44:36.264239 5549 server.go:302] "Failed to run kubelet" err="failed to run Kubelet: misconfiguration: kubelet cgroup driver: \"systemd\" is different from docker cgroup driver: \"cgroupfs\""查看Docker的Cgroup Driver
docker info | grep "Cgroup Driver"修改Docker配置文件
vim /etc/docker/daemon.json增加一个新的配置
{
 "exec-opts":["native.cgroupdriver=systemd"]
}
重启Docker kubelet
systemctl daemon-reload
systemctl restart docker
systemctl restart kubelet
重置kubeadm
kubeadm reset2.3 部署 Master
在Master节点执行
kubeadm init \
--apiserver-advertise-address=192.168.131.102 \
--image-repository registry.aliyuncs.com/google_containers \
--kubernetes-version v1.23.6 \
--service-cidr=10.96.0.0/12 \
--pod-network-cidr=10.233.0.0/16
如下信息提示初始化成功,仔细看,里面说了如何配置config,如何加入node。
Your Kubernetes control-plane has initialized successfully!

To start using your cluster, you need to run the following as a regular user:

  mkdir -p $HOME/.kube
  sudo cp -i /etc/kubernetes/admin.conf $HOME/.kube/config
  sudo chown $(id -u):$(id -g) $HOME/.kube/config

Alternatively, if you are the root user, you can run:

  export KUBECONFIG=/etc/kubernetes/admin.conf

You should now deploy a pod network to the cluster.
Run "kubectl apply -f [podnetwork].yaml" with one of the options listed at:
  https://kubernetes.io/docs/concepts/cluster-administration/addons/

Then you can join any number of worker nodes by running the following on each as root:

kubeadm join 192.168.131.102:6443 --token 1xuyt0.tdrx369a2vtjwq4o \
        --discovery-token-ca-cert-hash sha256:0fe1a9ed96e0c28c7b8e4fa84ca9883d6e5d5c5f5a519df1e988831a4361ac7a
之后复制配置文件
mkdir -p $HOME/.kube
sudo cp -i /etc/kubernetes/admin.conf $HOME/.kube/config
sudo chown $(id -u):$(id -g) $HOME/.kube/config
kubectl get nodes
2.4 加入 Node
在node节点执行之前初始化master成功后的提示信息
kubeadm join 192.168.131.102:6443 --token 1xuyt0.tdrx369a2vtjwq4o \
        --discovery-token-ca-cert-hash sha256:0fe1a9ed96e0c28c7b8e4fa84ca9883d6e5d5c5f5a519df1e988831a4361ac7a

# 如果token不小心清空了,可通过如下命令获取
kubeadm token create --print-join-command
去master查看nodes
kubectl get nodes

kubectl get componentstatus

kubectl get pods -n kube-system
2.5 部署 CNI 网络插件
在master节点上执行
# 下载 calico 配置文件,可能会超时
mkdir /opt/k8s
cd /opt/k8s

curl https://calico-v3-25.netlify.app/archive/v3.25/manifests/calico.yaml -O

# 修改 calico.yaml 文件中的 CALICO_IPV4POOL_CIDR 配置,修改为与master初始化cidr相同 2.3中的 --pod-network-cidr=10.233.0.0/16

# 找到 calico.yaml 所有的镜像
grep image calico.yaml
sed -i 's#docker.io/##g' calico.yaml

# 构建
kubectl apply -f calico.yaml

kubectl get po -n kube-system

kubectl describe po calico-kube-controllers-cd8566cf-hjjzm -n kube-system

kubectl get nodes
2.6 测试 kubernetes 集群
# 创建部署
kubectl create deployment nginx --image=nginx
# 暴露端口
kubectl expose deployment nginx --port=80 --type=NodePort
# 查看 pod 以及服务信息
kubectl get pod,svc
[root@centos702 ~]# kubectl get pod,svc
NAME READY STATUS RESTARTS AGE
pod/nginx-85b98978db-rq5gm 0/1 Completed 0 45h
NAME TYPE CLUSTER-IP EXTERNAL-IP PORT(S) AGE
service/kubernetes ClusterIP 10.96.0.1 <none> 443/TCP 5d22h
service/nginx NodePort 10.107.196.178 <none> 80:30435/TCP 45h
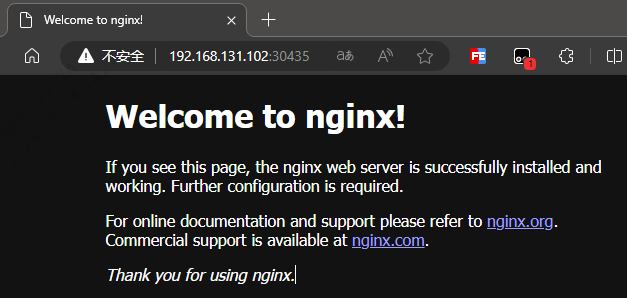
# 测试
curl 192.168.131.102 30435浏览器打开http://192.168.131.102:30435/ 和 http://192.168.131.104:30435/
2.7 在任意节点使用 kubectl
在 master 拷贝 conf 文件
scp /etc/kubernetes/admin.conf root@192.168.131.104:/etc/kubernetes/在 node 配置环境变量
echo "export KUBECONFIG=/etc/kubernetes/admin.conf" >> ~/.bash_profile
source ~/.bash_profile
3 kubectl 命令
官方文档:
https://kubernetes.io/docs/reference/generated/kubectl/kubectl-commands
--help
3.1 资源操作
创建对象
kubectl create -f manifest.yaml
kubectl create -f ./dir
kubectl create -f https://git.io/vPieo
kubectl run nginx --image=nginx
scale 资源
kubectl scale --replicas=3 rs/foo
kubectl scale --replicas=3 -f foo.yaml
kubectl scale --curent-replicas=2 --replicas=3 deployment/
kubectl scale --replicas=5 rc/foo rc/bar rc/baz

[root@centos702 .kube]# kubectl get pod
NAME                     READY   STATUS    RESTARTS   AGE
nginx-85b98978db-lgdgn   1/1     Running   0          84m
[root@centos702 .kube]# kubectl get deploy
NAME    READY   UP-TO-DATE   AVAILABLE   AGE
nginx   1/1     1            1           46h
[root@centos702 .kube]# kubectl scale deploy --replicas=2 nginx
deployment.apps/nginx scaled
[root@centos702 .kube]# kubectl get deploy
NAME    READY   UP-TO-DATE   AVAILABLE   AGE
nginx   2/2     2            2           46h
[root@centos702 .kube]# kubectl get po -o wide
NAME                     READY   STATUS    RESTARTS   AGE   IP              NODE        NOMINATED NODE   READINESS GATES
nginx-85b98978db-25b8q   1/1     Running   0          59s   10.233.215.16   centos704   <none>           <none>
nginx-85b98978db-lgdgn   1/1     Running   0          87m   10.233.215.15   centos704   <none>           <none>
命名空间
kubectl get nsdeployment
kubectl get deploy3.2 资源类型的别名
pods po
deployments deploy
services svc
namespace ns
nodes no
3.3 格式化输出
# 获取deployment的信息,输出为yaml文件
kubectl get deploy nginx -o yaml
4 API
官方文档:
https://kubernetes.io/zh-cn/docs/reference/using-api/
4.1 类型
Alpha Beta Stable
4.2 废弃 API 说明
https://kubernetes.io/docs/reference/using-api/deprecation-guide/