EchoMimic学习地址:https://github.com/BadToBest/EchoMimic
CentOS 7.9 安装部署 EchoMimic
- 1、创建虚拟机
- 2、基础环境准备
-
- [2.1 安装驱动](#2.1 安装驱动)
- [2.2 下载 Anaconda3-2024.06-1-Linux-x86_64.sh](#2.2 下载 Anaconda3-2024.06-1-Linux-x86_64.sh)
- [2.3 下载完成后执行](#2.3 下载完成后执行)
- [2.4 退出客户端重新连一下](#2.4 退出客户端重新连一下)
- [2.5 查看python版本及cuda版本](#2.5 查看python版本及cuda版本)
- [3 EchoMimic的安装与使用](#3 EchoMimic的安装与使用)
-
- [3.1 下载代码](#3.1 下载代码)
- [3.2 Python 环境设置](#3.2 Python 环境设置)
- [3.3 使用以下方式安装软件包pip](#3.3 使用以下方式安装软件包pip)
- [3.4 下载 ffmpeg-static](#3.4 下载 ffmpeg-static)
-
- [3.4.1 解压tar.xz安装包](#3.4.1 解压tar.xz安装包)
- [3.4.2 配置环境变量](#3.4.2 配置环境变量)
- [3.5 下载预训练权重](#3.5 下载预训练权重)
-
- [3.5.1 音频驱动算法推理](#3.5.1 音频驱动算法推理)
- [3.5.2 音频驱动算法推理加速](#3.5.2 音频驱动算法推理加速)
- [3.5.3 使用姿势驱动算法推理](#3.5.3 使用姿势驱动算法推理)
- [3.5.4 使用姿势驱动算法推理 ACC](#3.5.4 使用姿势驱动算法推理 ACC)
- [3.6 音频驱动算法推理](#3.6 音频驱动算法推理)
-
- [3.6.1 音频驱动算法推理您自己的案例](#3.6.1 音频驱动算法推理您自己的案例)
- [3.6.2 参考图像和驱动视频之间的运动对齐](#3.6.2 参考图像和驱动视频之间的运动对齐)
- [3.6.3 音频和姿势驱动的算法推理](#3.6.3 音频和姿势驱动的算法推理)
- [3.6.4 姿势驱动算法推理](#3.6.4 姿势驱动算法推理)
- [3.7 运行 Gradio UI](#3.7 运行 Gradio UI)
- [3.8 访问Web](#3.8 访问Web)
1、创建虚拟机
这里我创建的是一台CentOS 7.9 的纯净虚拟机,配置如下:
CPU:12核
内存:24GB
系统盘:100G(本地硬盘)
数据盘:100G(本地硬盘)
透传设备:2块 (算力GPU-GeForce RTX 4090 D)
2、基础环境准备
2.1 安装驱动
把 install.sh 驱动脚本传上去执行(创建一个data目录,以后所有东西都放这里吧):
sh install.sh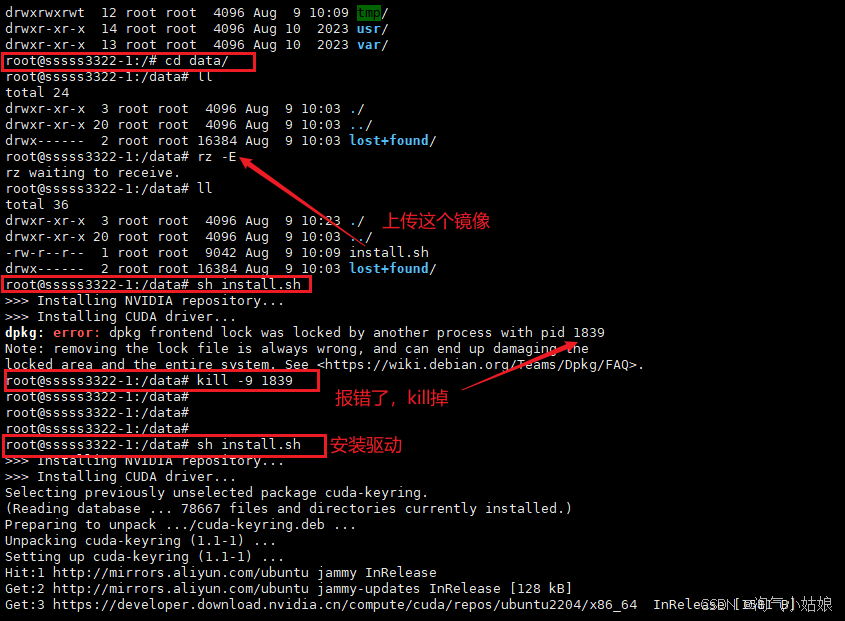
install.sh脚本如下:
#!/bin/sh
# This script installs Ollama on Linux.
# It detects the current operating system architecture and installs the appropriate version of Ollama.

set -eu

status() { echo ">>> $*" >&2; }
error() { echo "ERROR $*"; exit 1; }
warning() { echo "WARNING: $*"; }

TEMP_DIR=$(mktemp -d)
cleanup() { rm -rf $TEMP_DIR; }
trap cleanup EXIT

available() { command -v $1 >/dev/null; }
require() {
    local MISSING=''
    for TOOL in $*; do
        if ! available $TOOL; then
            MISSING="$MISSING $TOOL"
        fi
    done

    echo $MISSING
}

[ "$(uname -s)" = "Linux" ] || error 'This script is intended to run on Linux only.'

ARCH=$(uname -m)
case "$ARCH" in
    x86_64) ARCH="amd64" ;;
    aarch64|arm64) ARCH="arm64" ;;
    *) error "Unsupported architecture: $ARCH" ;;
esac

IS_WSL2=false

KERN=$(uname -r)
case "$KERN" in
    *icrosoft*WSL2 | *icrosoft*wsl2) IS_WSL2=true;;
    *icrosoft) error "Microsoft WSL1 is not currently supported. Please upgrade to WSL2 with 'wsl --set-version <distro> 2'" ;;
    *) ;;
esac

VER_PARAM="${OLLAMA_VERSION:+?version=$OLLAMA_VERSION}"

SUDO=
if [ "$(id -u)" -ne 0 ]; then
    # Running as root, no need for sudo
    if ! available sudo; then
        error "This script requires superuser permissions. Please re-run as root."
    fi

    SUDO="sudo"
fi

NEEDS=$(require curl awk grep sed tee xargs)
if [ -n "$NEEDS" ]; then
    status "ERROR: The following tools are required but missing:"
    for NEED in $NEEDS; do
        echo "  - $NEED"
    done
    exit 1
fi

# Everything from this point onwards is optional.

# WSL2 only supports GPUs via nvidia passthrough
# so check for nvidia-smi to determine if GPU is available
if [ "$IS_WSL2" = true ]; then
    if available nvidia-smi && [ -n "$(nvidia-smi | grep -o "CUDA Version: [0-9]*\.[0-9]*")" ]; then
        status "Nvidia GPU detected."
    fi
    install_success
    exit 0
fi

# Install GPU dependencies on Linux
if ! available lspci && ! available lshw; then
    warning "Unable to detect NVIDIA/AMD GPU. Install lspci or lshw to automatically detect and install GPU dependencies."
    exit 0
fi

check_gpu() {
    # Look for devices based on vendor ID for NVIDIA and AMD
    case $1 in
        lspci)
            case $2 in
                nvidia) available lspci && lspci -d '10de:' | grep -q 'NVIDIA' || return 1 ;;
                amdgpu) available lspci && lspci -d '1002:' | grep -q 'AMD' || return 1 ;;
            esac ;;
        lshw)
            case $2 in
                nvidia) available lshw && $SUDO lshw -c display -numeric -disable network | grep -q 'vendor: .* \[10DE\]' || return 1 ;;
                amdgpu) available lshw && $SUDO lshw -c display -numeric -disable network | grep -q 'vendor: .* \[1002\]' || return 1 ;;
            esac ;;
        nvidia-smi) available nvidia-smi || return 1 ;;
    esac
}

if check_gpu nvidia-smi; then
    status "NVIDIA GPU installed."
    exit 0
fi

if ! check_gpu lspci nvidia && ! check_gpu lshw nvidia && ! check_gpu lspci amdgpu && ! check_gpu lshw amdgpu; then
    install_success
    warning "No NVIDIA/AMD GPU detected. Ollama will run in CPU-only mode."
    exit 0
fi

if check_gpu lspci amdgpu || check_gpu lshw amdgpu; then
    # Look for pre-existing ROCm v6 before downloading the dependencies
    for search in "${HIP_PATH:-''}" "${ROCM_PATH:-''}" "/opt/rocm" "/usr/lib64"; do
        if [ -n "${search}" ] && [ -e "${search}/libhipblas.so.2" -o -e "${search}/lib/libhipblas.so.2" ]; then
            status "Compatible AMD GPU ROCm library detected at ${search}"
            install_success
            exit 0
        fi
    done

    status "Downloading AMD GPU dependencies..."
    $SUDO rm -rf /usr/share/ollama/lib
    $SUDO chmod o+x /usr/share/ollama
    $SUDO install -o ollama -g ollama -m 755 -d /usr/share/ollama/lib/rocm
    curl --fail --show-error --location --progress-bar "https://ollama.com/download/ollama-linux-amd64-rocm.tgz${VER_PARAM}" \
        | $SUDO tar zx --owner ollama --group ollama -C /usr/share/ollama/lib/rocm .
    install_success
    status "AMD GPU ready."
    exit 0
fi

# ref: https://docs.nvidia.com/cuda/cuda-installation-guide-linux/index.html#rhel-7-centos-7
# ref: https://docs.nvidia.com/cuda/cuda-installation-guide-linux/index.html#rhel-8-rocky-8
# ref: https://docs.nvidia.com/cuda/cuda-installation-guide-linux/index.html#rhel-9-rocky-9
# ref: https://docs.nvidia.com/cuda/cuda-installation-guide-linux/index.html#fedora
install_cuda_driver_yum() {
    status 'Installing NVIDIA repository...'
    case $PACKAGE_MANAGER in
        yum)
            $SUDO $PACKAGE_MANAGER -y install yum-utils
            $SUDO $PACKAGE_MANAGER-config-manager --add-repo https://developer.download.nvidia.com/compute/cuda/repos/$1$2/$(uname -m)/cuda-$1$2.repo
            ;;
        dnf)
            $SUDO $PACKAGE_MANAGER config-manager --add-repo https://developer.download.nvidia.com/compute/cuda/repos/$1$2/$(uname -m)/cuda-$1$2.repo
            ;;
    esac

    case $1 in
        rhel)
            status 'Installing EPEL repository...'
            # EPEL is required for third-party dependencies such as dkms and libvdpau
            $SUDO $PACKAGE_MANAGER -y install https://dl.fedoraproject.org/pub/epel/epel-release-latest-$2.noarch.rpm || true
            ;;
    esac

    status 'Installing CUDA driver...'

    if [ "$1" = 'centos' ] || [ "$1$2" = 'rhel7' ]; then
        $SUDO $PACKAGE_MANAGER -y install nvidia-driver-latest-dkms
    fi

    $SUDO $PACKAGE_MANAGER -y install cuda-drivers
}

# ref: https://docs.nvidia.com/cuda/cuda-installation-guide-linux/index.html#ubuntu
# ref: https://docs.nvidia.com/cuda/cuda-installation-guide-linux/index.html#debian
install_cuda_driver_apt() {
    status 'Installing NVIDIA repository...'
    curl -fsSL -o $TEMP_DIR/cuda-keyring.deb https://developer.download.nvidia.com/compute/cuda/repos/$1$2/$(uname -m)/cuda-keyring_1.1-1_all.deb

    case $1 in
        debian)
            status 'Enabling contrib sources...'
            $SUDO sed 's/main/contrib/' < /etc/apt/sources.list | $SUDO tee /etc/apt/sources.list.d/contrib.list > /dev/null
            if [ -f "/etc/apt/sources.list.d/debian.sources" ]; then
                $SUDO sed 's/main/contrib/' < /etc/apt/sources.list.d/debian.sources | $SUDO tee /etc/apt/sources.list.d/contrib.sources > /dev/null
            fi
            ;;
    esac

    status 'Installing CUDA driver...'
    $SUDO dpkg -i $TEMP_DIR/cuda-keyring.deb
    $SUDO apt-get update

    [ -n "$SUDO" ] && SUDO_E="$SUDO -E" || SUDO_E=
    DEBIAN_FRONTEND=noninteractive $SUDO_E apt-get -y install cuda-drivers -q
}

if [ ! -f "/etc/os-release" ]; then
    error "Unknown distribution. Skipping CUDA installation."
fi

. /etc/os-release

OS_NAME=$ID
OS_VERSION=$VERSION_ID

PACKAGE_MANAGER=
for PACKAGE_MANAGER in dnf yum apt-get; do
    if available $PACKAGE_MANAGER; then
        break
    fi
done

if [ -z "$PACKAGE_MANAGER" ]; then
    error "Unknown package manager. Skipping CUDA installation."
fi

if ! check_gpu nvidia-smi || [ -z "$(nvidia-smi | grep -o "CUDA Version: [0-9]*\.[0-9]*")" ]; then
    case $OS_NAME in
        centos|rhel) install_cuda_driver_yum 'rhel' $(echo $OS_VERSION | cut -d '.' -f 1) ;;
        rocky) install_cuda_driver_yum 'rhel' $(echo $OS_VERSION | cut -c1) ;;
        fedora) [ $OS_VERSION -lt '37' ] && install_cuda_driver_yum $OS_NAME $OS_VERSION || install_cuda_driver_yum $OS_NAME '37';;
        amzn) install_cuda_driver_yum 'fedora' '37' ;;
        debian) install_cuda_driver_apt $OS_NAME $OS_VERSION ;;
        ubuntu) install_cuda_driver_apt $OS_NAME $(echo $OS_VERSION | sed 's/\.//') ;;
        *) exit ;;
    esac
fi

if ! lsmod | grep -q nvidia || ! lsmod | grep -q nvidia_uvm; then
    KERNEL_RELEASE="$(uname -r)"
    case $OS_NAME in
        rocky) $SUDO $PACKAGE_MANAGER -y install kernel-devel kernel-headers ;;
        centos|rhel|amzn) $SUDO $PACKAGE_MANAGER -y install kernel-devel-$KERNEL_RELEASE kernel-headers-$KERNEL_RELEASE ;;
        fedora) $SUDO $PACKAGE_MANAGER -y install kernel-devel-$KERNEL_RELEASE ;;
        debian|ubuntu) $SUDO apt-get -y install linux-headers-$KERNEL_RELEASE ;;
        *) exit ;;
    esac

    NVIDIA_CUDA_VERSION=$($SUDO dkms status | awk -F: '/added/ { print $1 }')
    if [ -n "$NVIDIA_CUDA_VERSION" ]; then
        $SUDO dkms install $NVIDIA_CUDA_VERSION
    fi

    if lsmod | grep -q nouveau; then
        status 'Reboot to complete NVIDIA CUDA driver install.'
        exit 0
    fi

    $SUDO modprobe nvidia
    $SUDO modprobe nvidia_uvm
fi

# make sure the NVIDIA modules are loaded on boot with nvidia-persistenced
if command -v nvidia-persistenced > /dev/null 2>&1; then
    $SUDO touch /etc/modules-load.d/nvidia.conf
    MODULES="nvidia nvidia-uvm"
    for MODULE in $MODULES; do
        if ! grep -qxF "$MODULE" /etc/modules-load.d/nvidia.conf; then
            echo "$MODULE" | sudo tee -a /etc/modules-load.d/nvidia.conf > /dev/null
        fi
    done
fi

status "NVIDIA GPU ready."
yum -y install cuda-toolkit-12-4
install_success
驱动安装完成:

2.2 下载 Anaconda3-2024.06-1-Linux-x86_64.sh
wget https://repo.anaconda.com/archive/Anaconda3-2024.06-1-Linux-x86_64.sh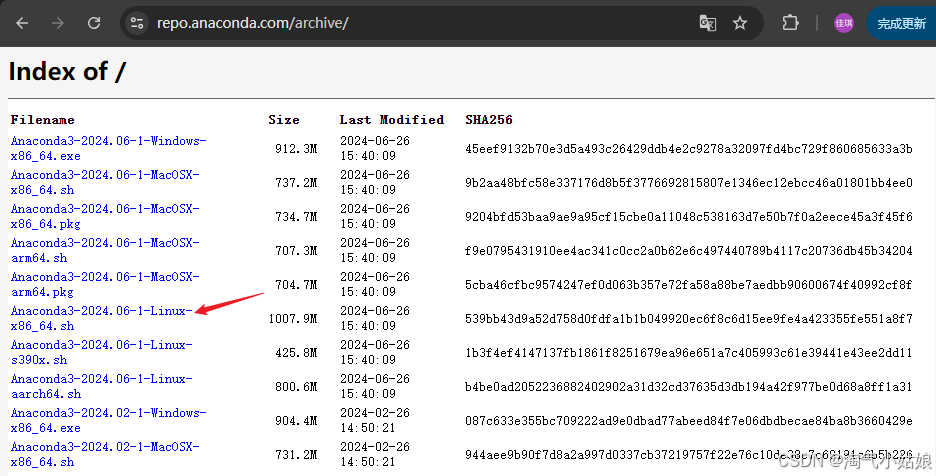
2.3 下载完成后执行
sh Anaconda3-2024.06-1-Linux-x86_64.sh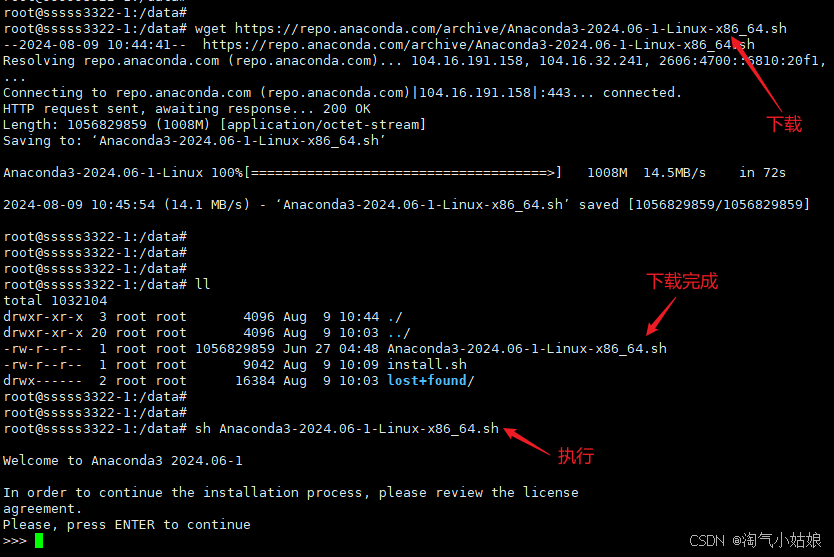
安装地址:/usr/local/annocada3,剩下一直回车就行:

安装完成显示:

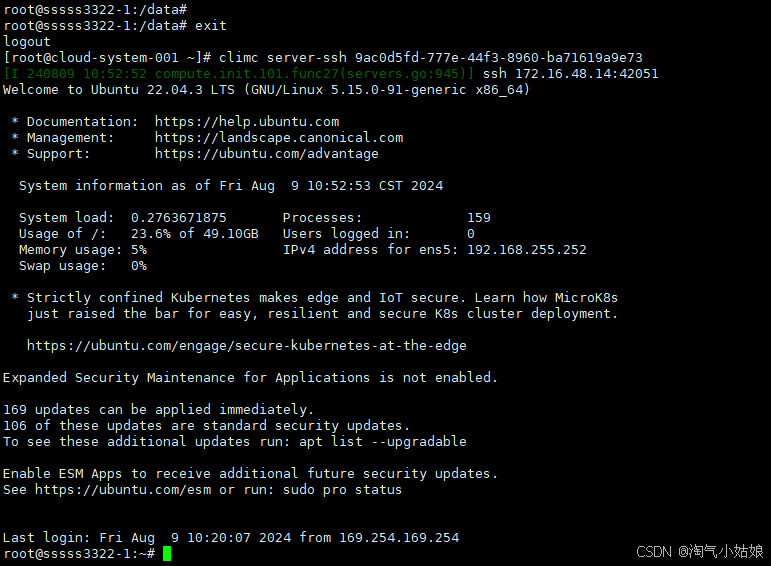
2.4 退出客户端重新连一下
2.5 查看python版本及cuda版本
 # 查看python版本
 python3 --version

 # 查看cuda版本
 nvidia-smi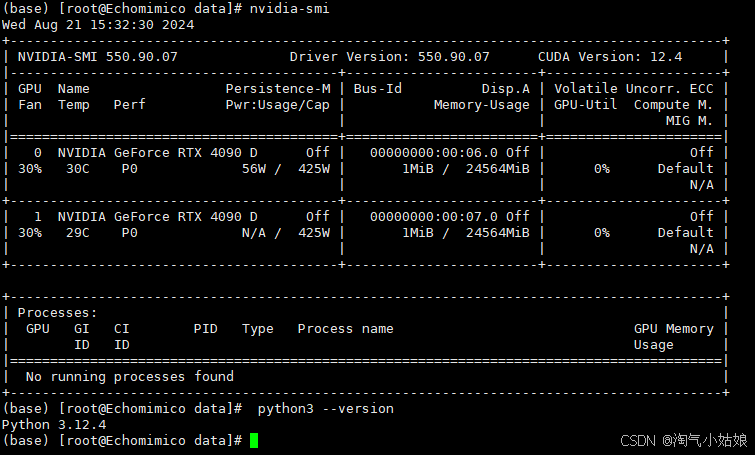
3 EchoMimic的安装与使用
3.1 下载代码
git clone https://github.com/BadToBest/EchoMimic
cd EchoMimic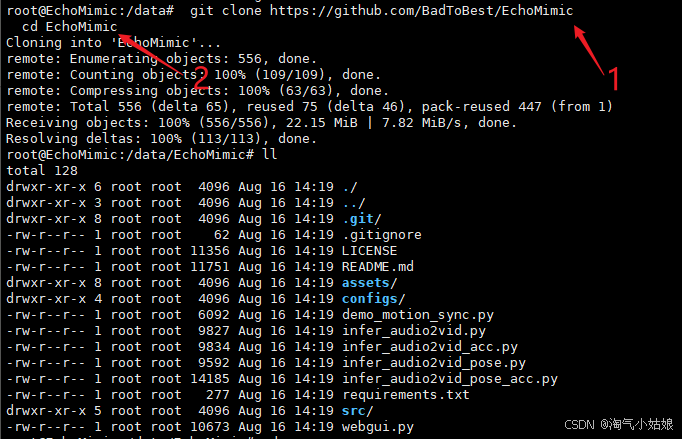
3.2 Python 环境设置
官网Python 环境要求
- 测试系统环境:Centos 7.2/Ubuntu 22.04,Cuda >= 11.7
- 测试的 GPU:A100(80G)/ RTX4090D(24G)/ V100(16G)
- 测试的 Python 版本:3.8 / 3.10 / 3.11
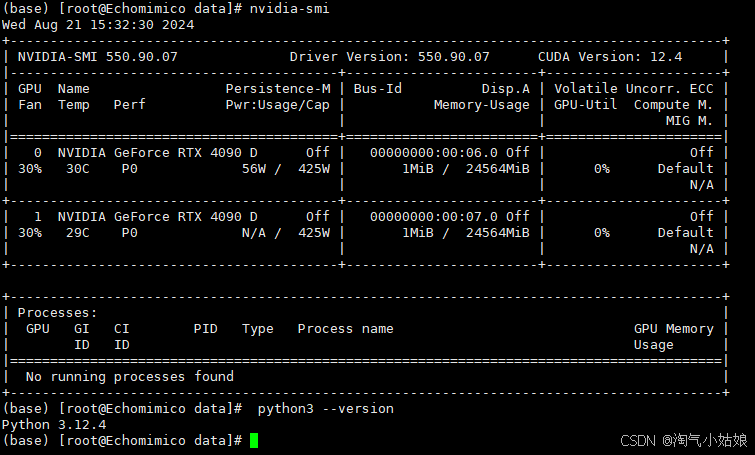
我用Centos时的Python 环境要求
- 测试系统环境:Ubuntu 22.04,Cuda = 12.4
- 测试的 GPU:2卡 RTX4090D 系统盘100G /数据盘100G
- 测试的 Python 版本:3.12.4
3.3 使用以下方式安装软件包pip
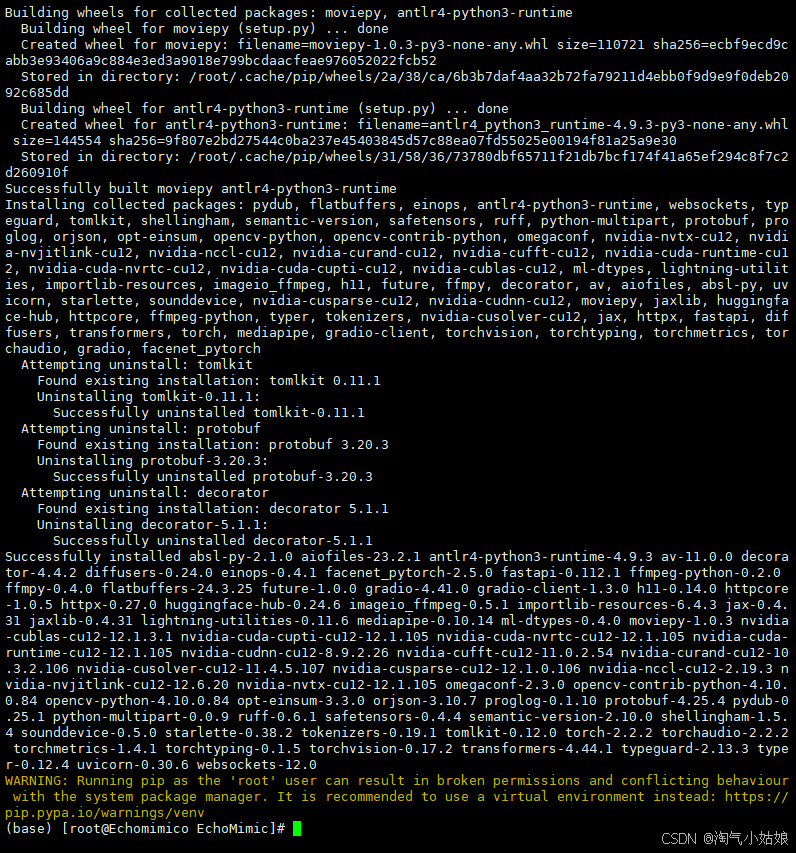
pip install -r requirements.txt注意: 这里如果用上面的命令执行,很慢很慢,而且执行一半有可能报错!!
Python包时超时失败ReadTimeoutError:
HTTPSConnectionPool(host='files.pythonhosted.org', port=443)
如果报了这个错,那就把执行命令加个参数:
pip install -r requirements.txt -i https://pypi.tuna.tsinghua.edu.cn/simple/
加了参数后,我运行成功了!!!
3.4 下载 ffmpeg-static
下载并解压ffmpeg-static,下载完成后,上传至Linux目录:/data/EchoMimic/

3.4.1 解压tar.xz安装包
在CentOS上安装ffmpeg,下载的文件是ffmpeg-4.4-amd64-static.tar.xz,这是两层压缩,外面是xz压缩,里层是tar压缩,所以分两步实现解压。
xz -d ffmpeg-4.4-amd64-static.tar.xz
tar -xvf ffmpeg-4.4-amd64-static.tar.xz
也可以直接解压,这里我是直接解压的!!!
tar -xvJf ffmpeg-4.4-amd64-static.tar.xz3.4.2 配置环境变量
# export FFMPEG_PATH=/path/to/ffmpeg-4.4-amd64-static
# 我的目录是/data/EchoMimic/ffmpeg-4.4-amd64-static,所以我的命令如下
export FFMPEG_PATH=/data/EchoMimic/ffmpeg-4.4-amd64-static
3.5 下载预训练权重
git clone https://huggingface.co/BadToBest/EchoMimic pretrained_weights如果下载不下来,那就手动下载到本地,再一点一点传到虚拟机吧!
pretrained_weights的组织
./pretrained_weights/
├── denoising_unet.pth
├── reference_unet.pth
├── motion_module.pth
├── face_locator.pth
├── sd-vae-ft-mse
│   └── ...
├── sd-image-variations-diffusers
│   └── ...
└── audio_processor
    └── whisper_tiny.pt
其中denoising_unet.pth / reference_unet.pth / motion_module.pth / face_locator.pth是EchoMimic的主要检查点。得益于他们的出色工作,该中心的其他模型也可以从其原始中心下载:
3.5.1 音频驱动算法推理
├── ComfyUI/models/
|     ├──echo_mimic
|         ├── unet
|             ├── diffusion_pytorch_model.bin
|             ├── config.json
|         ├── audio_processor
|             ├── whisper_tiny.pt
|         ├── vae
|             ├── diffusion_pytorch_model.safetensors
|             ├── config.json
|         ├── denoising_unet.pth
|         ├── face_locator.pth
|         ├── motion_module.pth
|         ├── reference_unet.pth
3.5.2 音频驱动算法推理加速
├── ComfyUI/models/
|     ├──echo_mimic
|         ├── unet
|             ├── diffusion_pytorch_model.bin
|             ├── config.json
|         ├── audio_processor
|             ├── whisper_tiny.pt
|         ├── vae
|             ├── diffusion_pytorch_model.safetensors
|             ├── config.json
|         ├── denoising_unet_acc.pth
|         ├── face_locator.pth
|         ├── motion_module_acc.pth
|         ├── reference_unet.pth
3.5.3 使用姿势驱动算法推理
├── ComfyUI/models/
|     ├──echo_mimic
|         ├── unet
|             ├── diffusion_pytorch_model.bin
|             ├── config.json
|         ├── audio_processor
|             ├── whisper_tiny.pt
|         ├── vae
|             ├── diffusion_pytorch_model.safetensors
|             ├── config.json
|         ├── denoising_unet_pose.pth
|         ├── face_locator_pose.pth
|         ├── motion_module_pose.pth
|         ├── reference_unet_pose.pth
3.5.4 使用姿势驱动算法推理 ACC
├── ComfyUI/models/
|     ├──echo_mimic
|         ├── unet
|             ├── diffusion_pytorch_model.bin
|             ├── config.json
|         ├── audio_processor
|             ├── whisper_tiny.pt
|         ├── vae
|             ├── diffusion_pytorch_model.safetensors
|             ├── config.json
|         ├── denoising_unet_pose_acc.pth
|         ├── face_locator_pose.pth
|         ├── motion_module_pose_acc.pth
|         ├── reference_unet_pose.pth
3.6 音频驱动算法推理
运行python推理脚本,一共是有下面两个:
  python -u infer_audio2vid.py
  python -u infer_audio2vid_pose.py
3.6.1 音频驱动算法推理您自己的案例
编辑推理配置文件./configs/prompts/animation.yaml,并添加您自己的案例:
test_cases:
  "path/to/your/image":
    - "path/to/your/audio"
运行python推理脚本:
python -u infer_audio2vid.py3.6.2 参考图像和驱动视频之间的运动对齐
(首先从 huggingface 下载带有"_pose.pth"后缀的检查点)
在 demo_motion_sync.py 中编辑 driver_video 和 ref_image 到你的路径,然后运行
python -u demo_motion_sync.py3.6.3 音频和姿势驱动的算法推理
编辑 ./configs/prompts/animation_pose.yaml,然后运行
python -u infer_audio2vid_pose.py3.6.4 姿势驱动算法推理
在 infer_audio2vid_pose.py 的第 135 行设置 draw_mouse=True。编辑 ./configs/prompts/animation_pose.yaml,然后运行
python -u infer_audio2vid_pose.py注意:
针对上面四种,我都没有相应的修改,我就是下载好权重之后,直接运行了python -u infer_audio2vid.py,然后直接执行3.7的命令。
3.7 运行 Gradio UI
python -u webgui.py --server_port=30003.8 访问Web
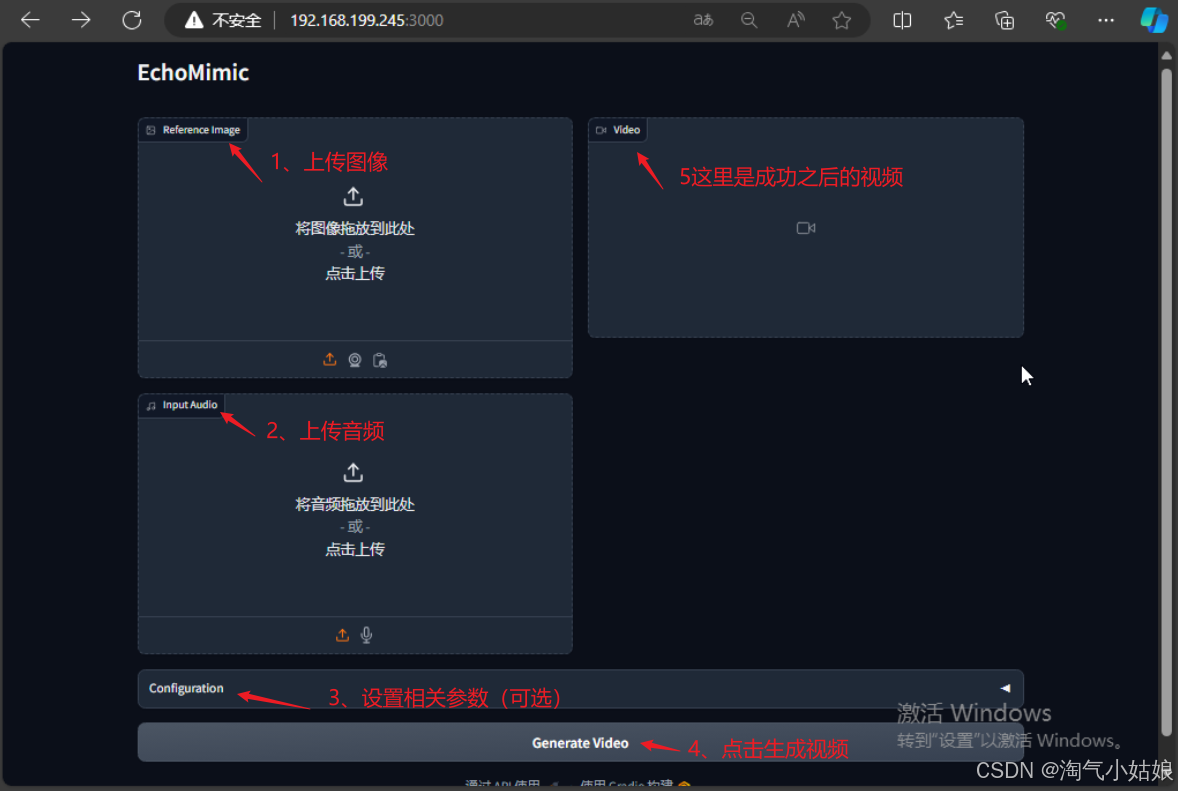
注意:
在页面上上传图像和音频后,点击生成后报错了,如下截图:
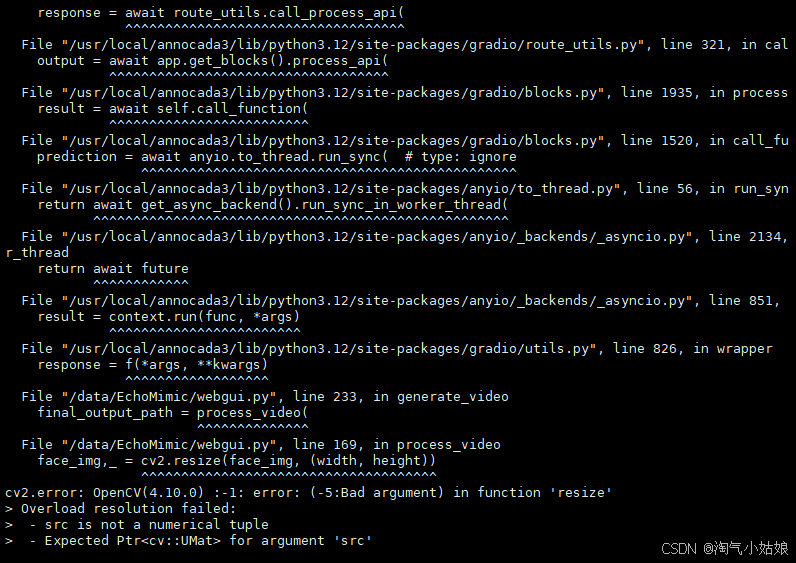
解决办法:
将webgui.py文件的第167行左右的process_video函数下的
face_img = crop_and_pad(face_img, crop_rect)
face_mask = crop_and_pad(face_mask, crop_rect)
改为
face_img,crop_rect = crop_and_pad(face_img, crop_rect)
face_mask,crop_rect = crop_and_pad(face_mask, crop_rect)
改好后,在执行3.7的命令,图像和音频融合成功!!!