介绍
Stable Diffusion是文本到图像的潜在扩散模型,它可以根据文本提示词生成对应的图像。Stable Diffusion模型是扩散模型的变种,可以通过逐步对随机高斯噪声进行去噪以获得感兴趣的样本。与传统生成模型相比,Stable Diffusion可以在不需要复杂训练过程或大量数据集的情况下生成真实感强、细节丰富的图像。目前该项目已经应用于多种场景,包括计算机视觉、数字艺术、视频游戏等领域。
资源编排服务(Resource Orchestration Service, ROS)是阿里云提供基于基础设施即代码(Infrastructure as Code, IaC) 理念的自动化部署服务,我们可以通过定义一个 Terraform 模板,轻松部署云上的 Stable Diffusion 模型。
部署步骤
- 登录ROS控制台 Stable Diffusion部署页面
- 配置模板参数:选择 ECS 实例的实例类型、可用区参数
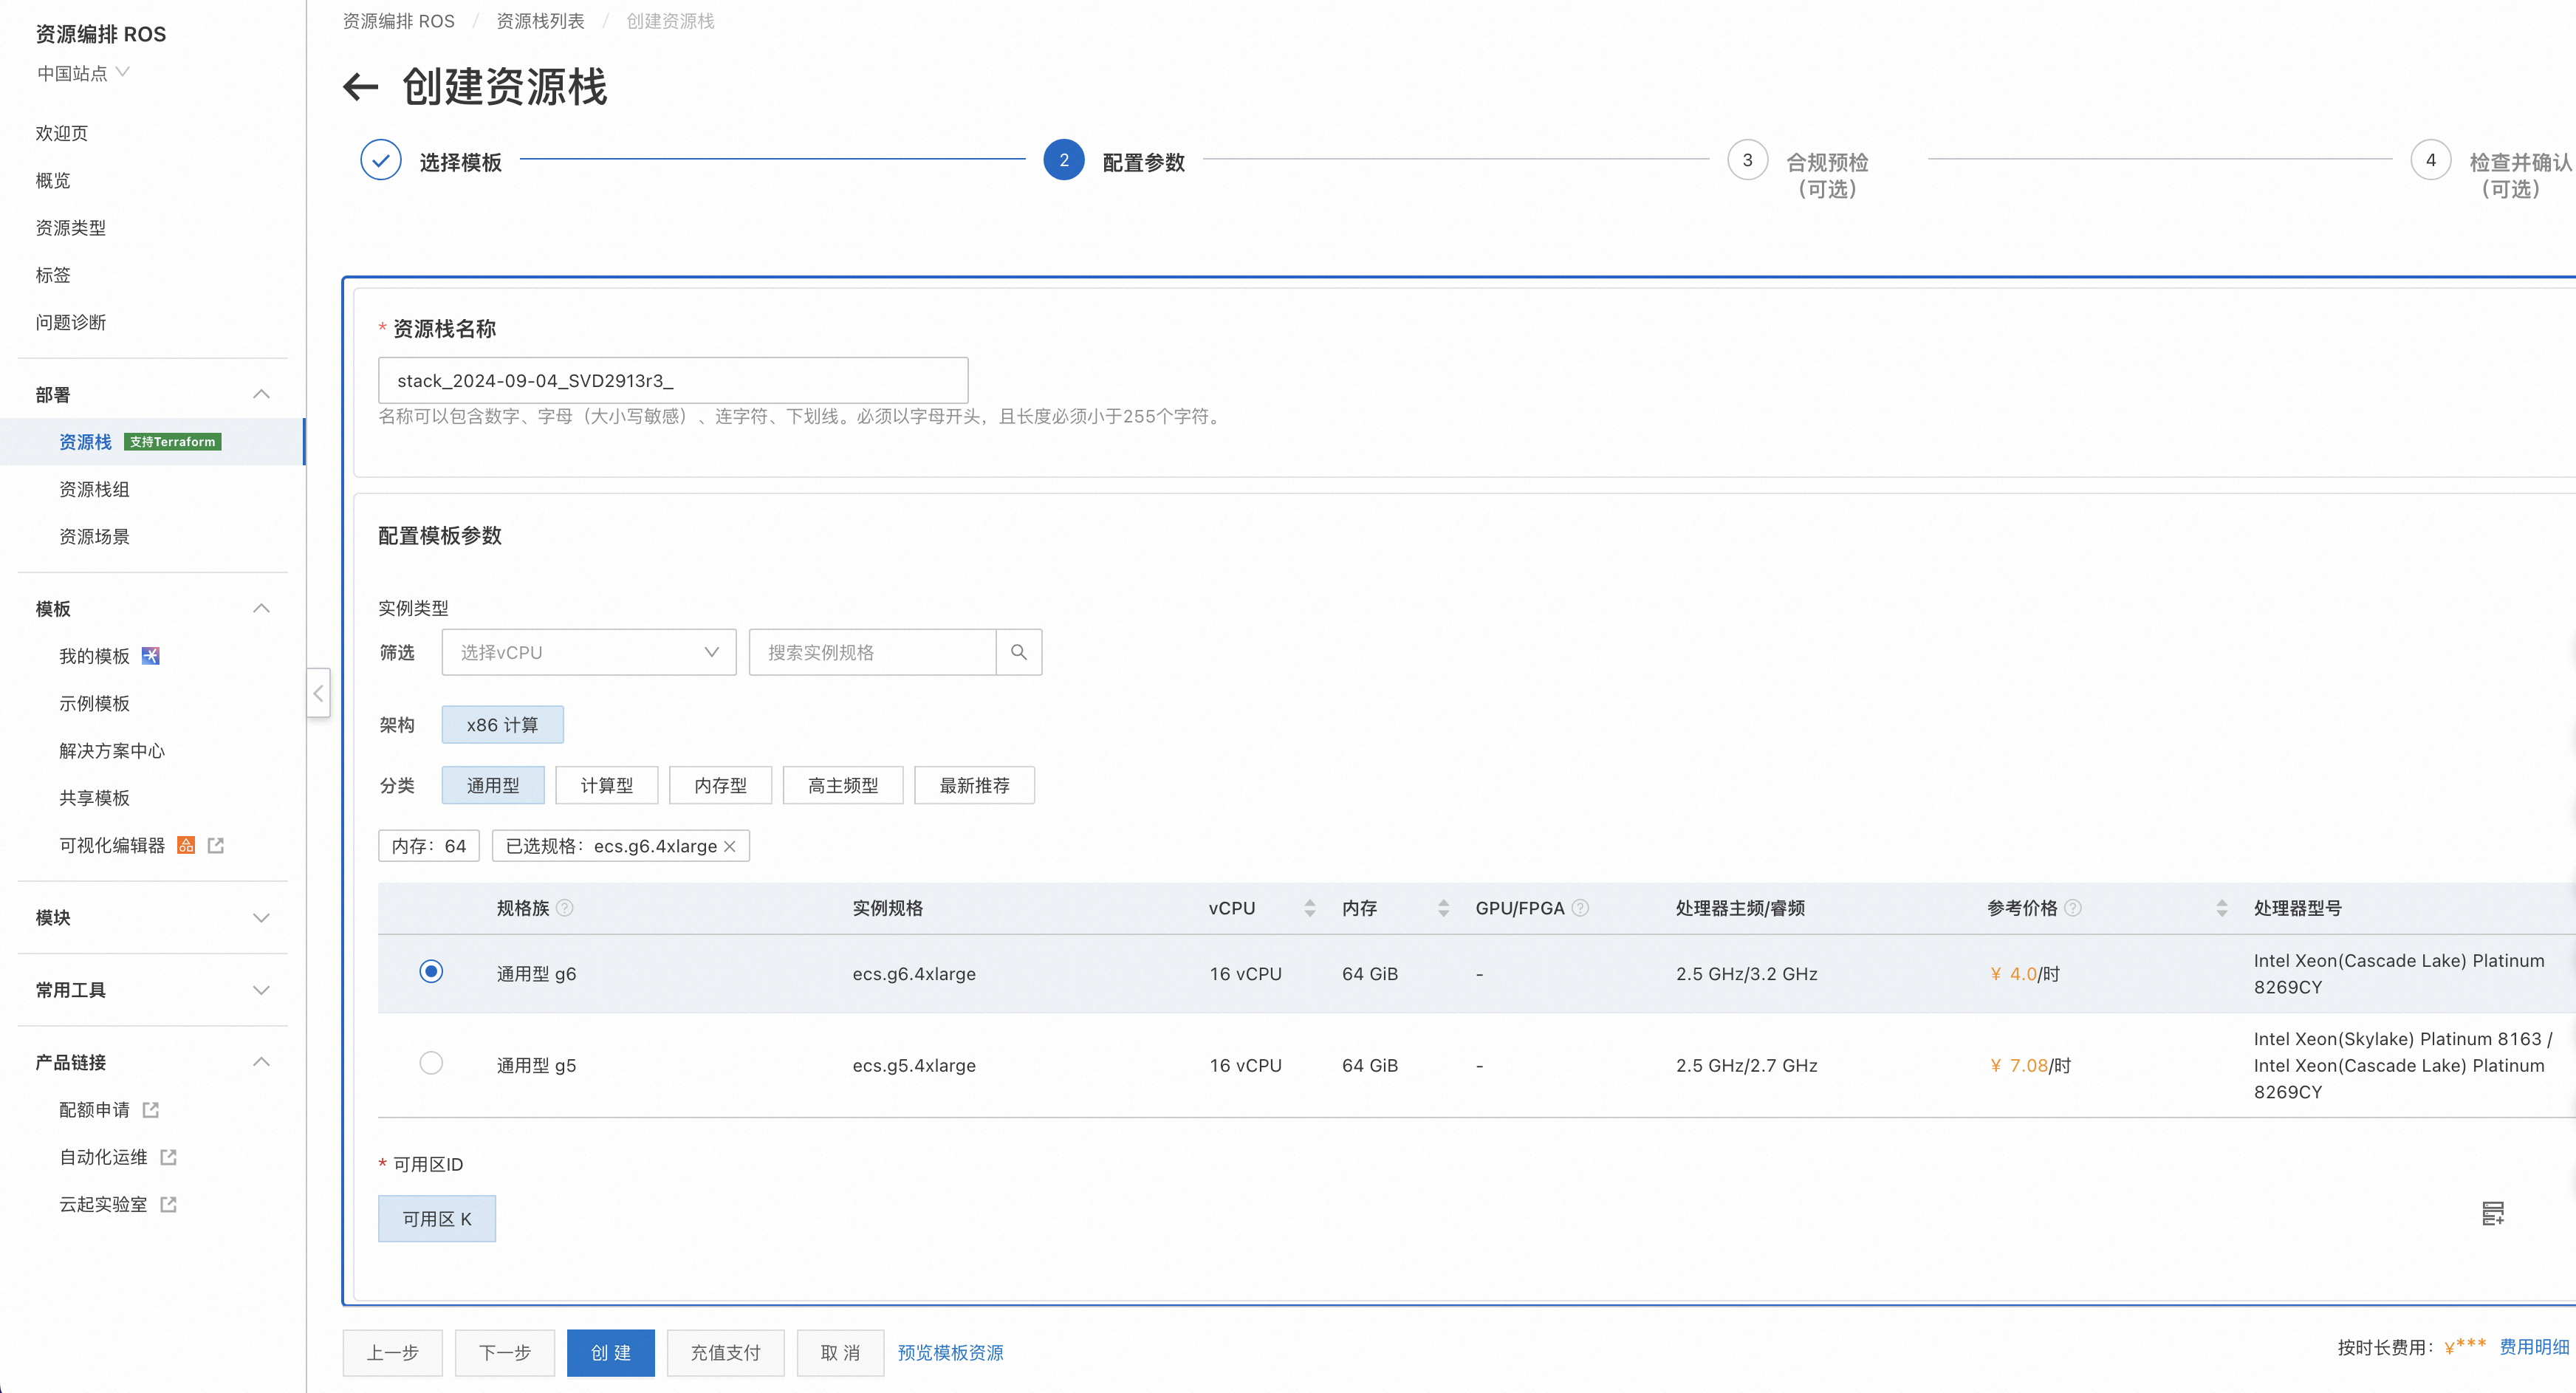
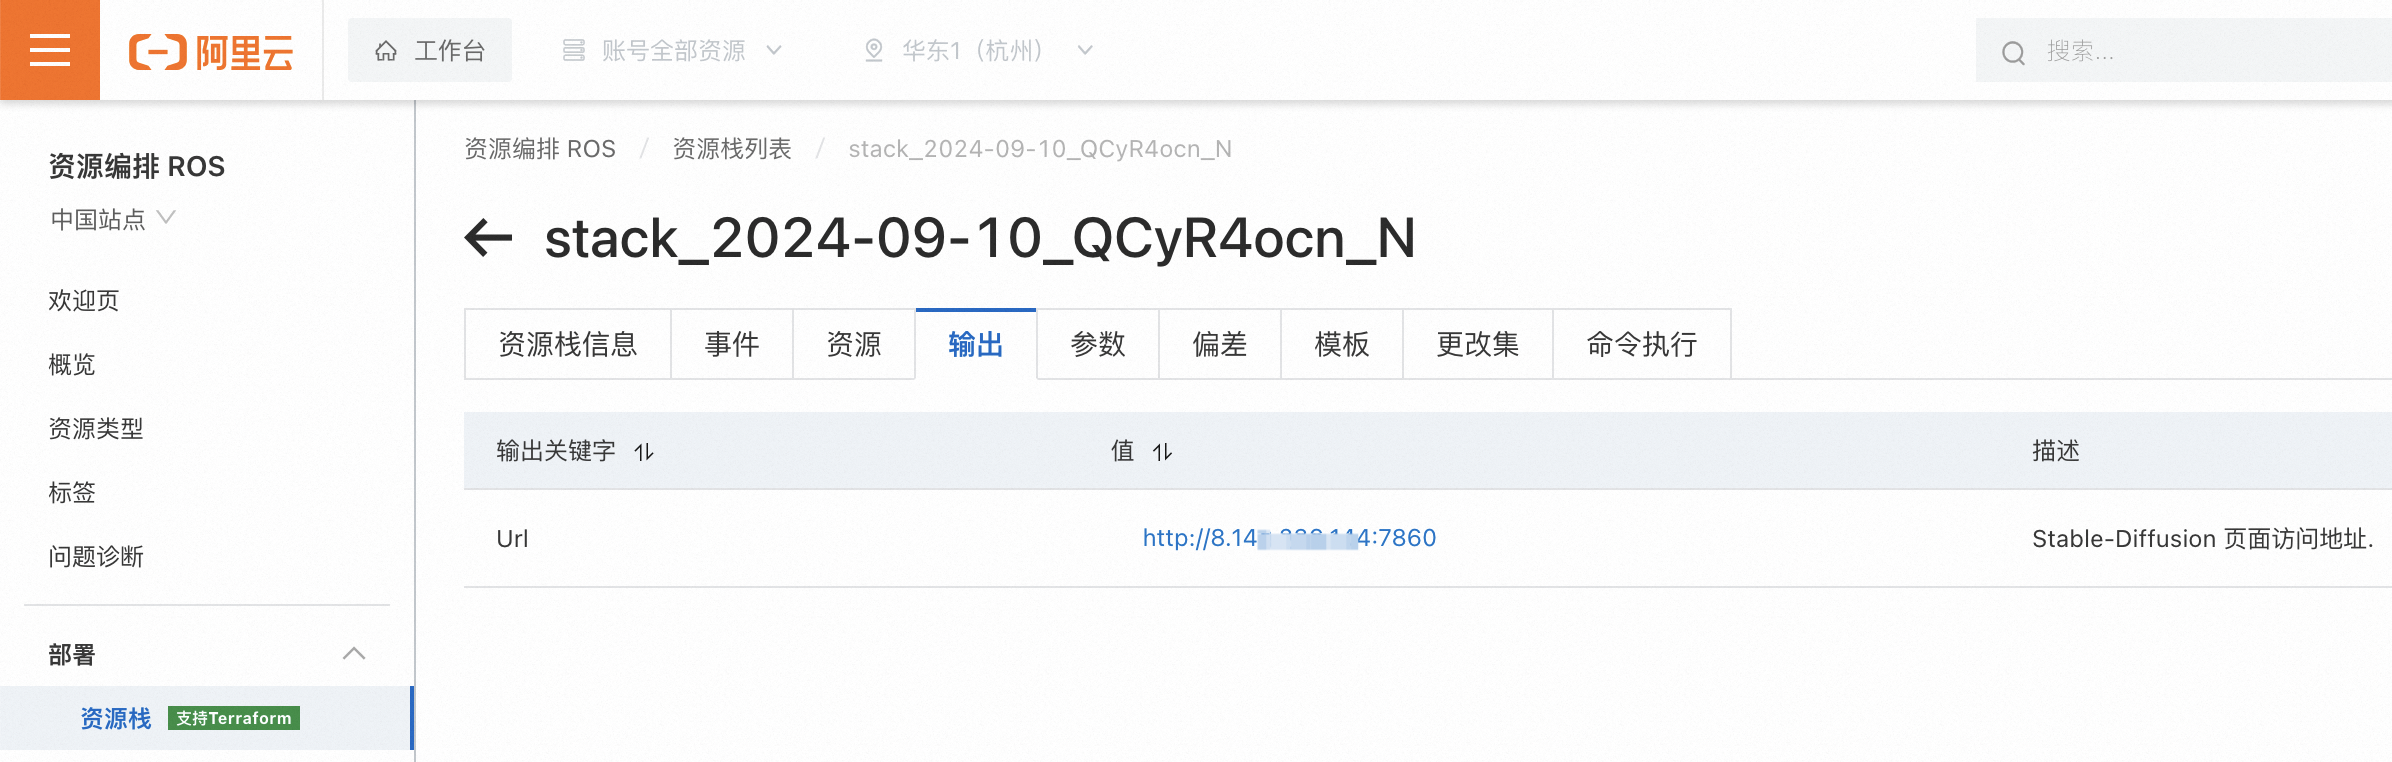
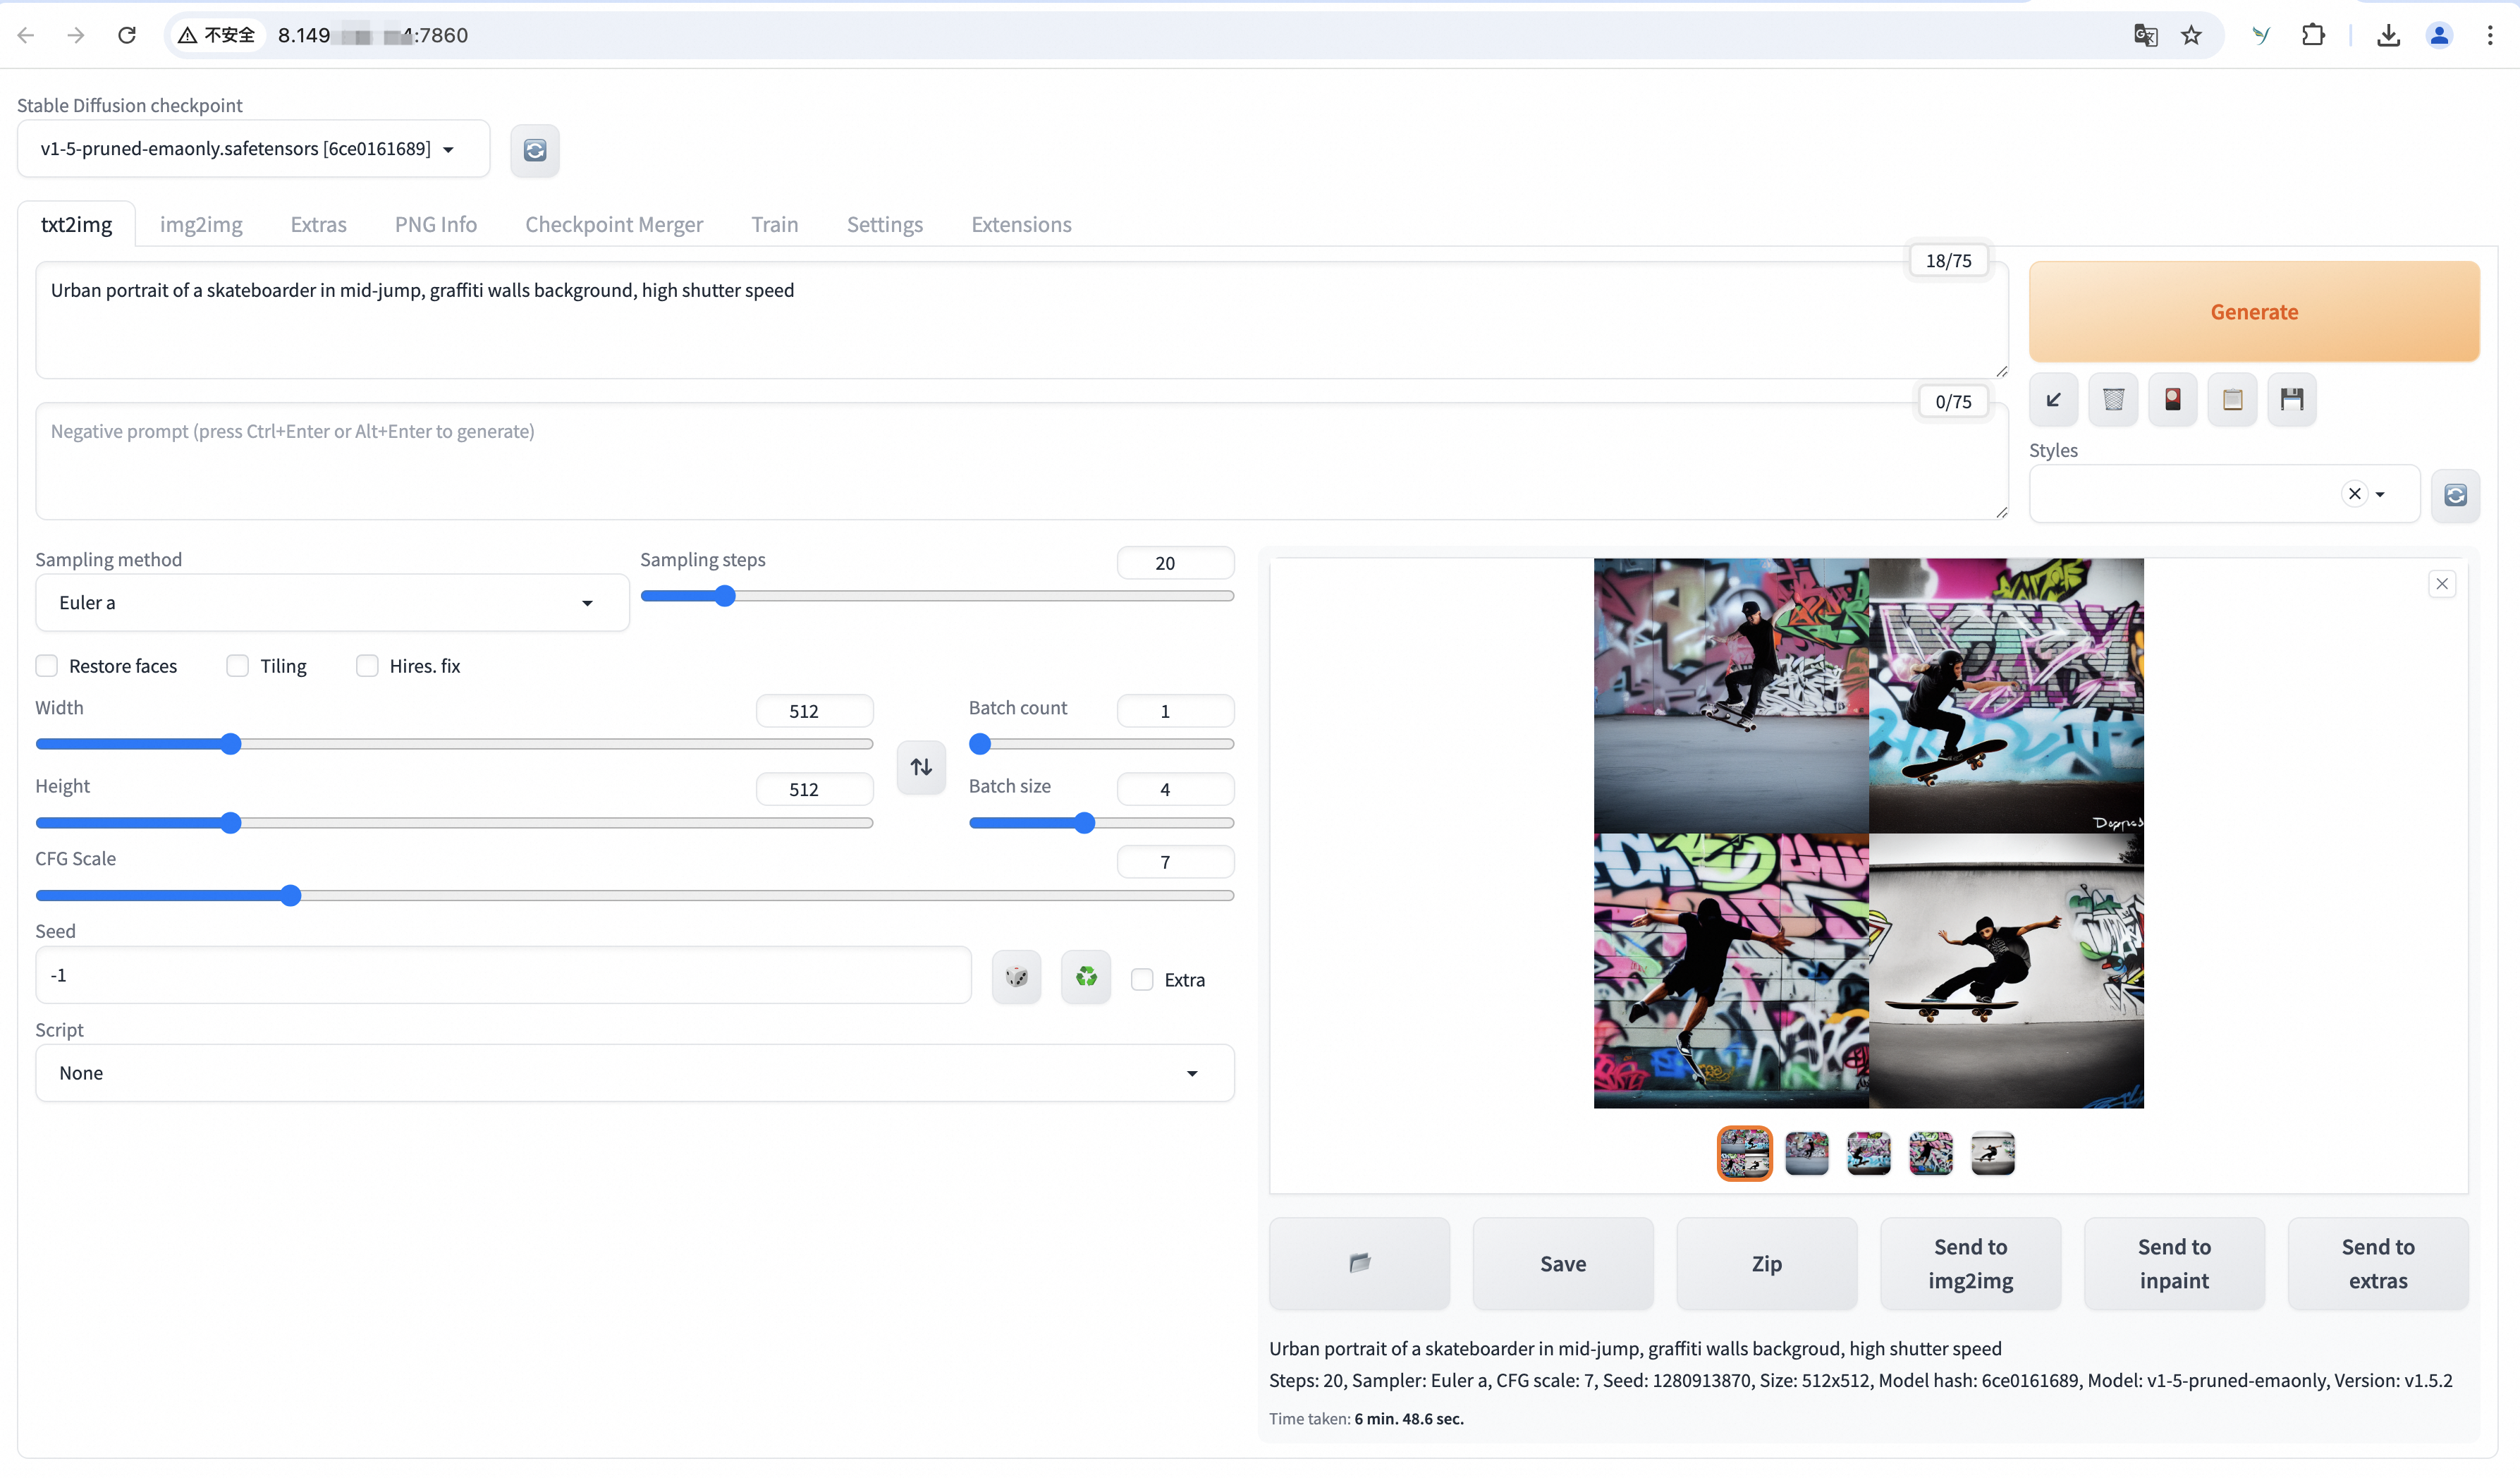
- 点击【创建】进行资源部署。部署完成后,点击资源栈的输出,即可看到 Stable Diffusion 服务的地址。点击链接即可体验 Stable Diffusion 的功能。
部署原理
我们可以看到通过 ROS 可以非常快捷地部署阿里云上的各种云资源(比如 vpc、vswitch、ecs 实例等)和应用程序(比如 Stable Diffusion)。如果想了解是如何做到的,那么可以阅读此章节。
- 编写 Terraform 模板。在如下模板中定义了:
- resource:定义了 vpc、vswitch、ecs、安全组、安全组规则以及安装 Stable Diffusion 的命令执行。
- variable:定义了常用的参数,比如可用区、ECS实例类型类型。
- output:定义了自定义输出,比如 Stable Diffusion 服务的地址
hcl
variable "zone_id" {
  type        = string
  description = <<EOT
  {
    "AssociationProperty": "ZoneId",
    "Label": {
      "zh-cn": "可用区ID",
      "en": "Zone ID"
    }
  }
  EOT
}

variable "instance_type" {
  type        = string
  description = <<EOT
  {
    "Label": {
        "zh-cn": "实例类型",
        "en": "Instance Type"
    },
    "AssociationProperty": "ALIYUN::ECS::Instance::InstanceType",
    "AssociationPropertyMetadata": {
      "Constraints": {
        "Memory": [
          64
        ]
      }
    }
  }
  EOT
  default     = "ecs.g8a.4xlarge"
}

resource "alicloud_vpc" "vpc" {
  vpc_name   = "stable-diffusion-vpc"
  cidr_block = "192.168.0.0/16"
}

resource "alicloud_vswitch" "vswitch" {
  vpc_id     = alicloud_vpc.vpc.id
  zone_id    = var.zone_id
  cidr_block = "192.168.0.0/24"
}


resource "alicloud_security_group" "group" {
  vpc_id = alicloud_vpc.vpc.id
}

resource "alicloud_security_group_rule" "rule" {
  type              = "ingress"
  ip_protocol       = "tcp"
  nic_type          = "intranet"
  policy            = "accept"
  port_range        = "7860/7860"
  priority          = 1
  security_group_id = alicloud_security_group.group.id
  cidr_ip           = "0.0.0.0/0"
}

resource "alicloud_instance" "ecs" {
  availability_zone          = var.zone_id
  security_groups            = alicloud_security_group.group.*.id
  instance_type              = var.instance_type
  system_disk_category       = "cloud_essd"
  image_id                   = "aliyun_3_x64_20G_alibase_20240528.vhd"
  instance_name              = "stable-diffusion"
  vswitch_id                 = alicloud_vswitch.vswitch.id
  internet_max_bandwidth_out = 100
  system_disk_size = 100
}

locals {
  command         = <<EOF
#!/bin/bash
sudo dnf config-manager --add-repo=https://mirrors.aliyun.com/docker-ce/linux/centos/docker-ce.repo
sudo dnf -y install dnf-plugin-releasever-adapter --repo alinux3-plus
sudo dnf -y install docker-ce --nobest
sudo systemctl start docker
sudo systemctl enable docker

sudo docker pull registry.openanolis.cn/openanolis/pytorch-amd:1.13.1-23-zendnn4.1
sudo docker run -d --name pytorch-amd --net host -v $HOME:/root registry.openanolis.cn/openanolis/pytorch-amd:1.13.1-23-zendnn4.1 sh -c "tail -f /dev/null" &
sleep 3
sudo docker exec -w /root pytorch-amd sh -c '
yum install -y git git-lfs wget tmux mesa-libGL gperftools-libs  &&
git lfs install  &&
git clone -b v1.5.2 https://github.com/AUTOMATIC1111/stable-diffusion-webui.git   &&
mkdir stable-diffusion-webui/repositories && cd $_   &&
git clone https://github.com/Stability-AI/stablediffusion.git stable-diffusion-stability-ai   &&
git clone https://github.com/Stability-AI/generative-models.git generative-models   &&
git clone https://github.com/crowsonkb/k-diffusion.git k-diffusion   &&
git clone https://github.com/sczhou/CodeFormer.git CodeFormer   &&
git clone https://github.com/salesforce/BLIP.git BLIP   &&
git -C stable-diffusion-stability-ai checkout cf1d67a6fd5ea1aa600c4df58e5b47da45f6bdbf   &&
git -C generative-models checkout 5c10deee76adad0032b412294130090932317a87   &&
git -C k-diffusion checkout c9fe758757e022f05ca5a53fa8fac28889e4f1cf   &&
git -C CodeFormer checkout c5b4593074ba6214284d6acd5f1719b6c5d739af   &&
git -C BLIP checkout 48211a1594f1321b00f14c9f7a5b4813144b2fb9   &&
cd ~ && mkdir -p stable-diffusion-webui/models/Stable-diffusion   &&
wget "https://www.modelscope.cn/api/v1/models/AI-ModelScope/stable-diffusion-v1-5/repo?Revision=master&FilePath=v1-5-pruned-emaonly.safetensors" -O stable-diffusion-webui/models/Stable-diffusion/v1-5-pruned-emaonly.safetensors   &&
mkdir -p ~/stable-diffusion-webui/models/clip   &&
git clone --depth=1 https://gitee.com/modelee/clip-vit-large-patch14.git ~/stable-diffusion-webui/models/clip/clip-vit-large-patch14   &&
sed -i "s?openai/clip-vit-large-patch14?/root/stable-diffusion-webui/models/clip/clip-vit-large-patch14?g" ~/stable-diffusion-webui/repositories/stable-diffusion-stability-ai/ldm/modules/encoders/modules.py   &&
mkdir -p ~/.config/pip   &&
cat > ~/.config/pip/pip.conf <<EOX
[global]
index-url=http://mirrors.cloud.aliyuncs.com/pypi/simple/

[install]
trusted-host=mirrors.cloud.aliyuncs.com
EOX
pip install cython gfpgan open-clip-torch==2.8.0 httpx==0.24.1  &&
pip install git+https://github.com/openai/CLIP.git@d50d76daa670286dd6cacf3bcd80b5e4823fc8e1   &&
cat > /etc/profile.d/env.sh <<EOX
export OMP_NUM_THREADS=\$(nproc --all)
export GOMP_CPU_AFFINITY=0-\$(( \$(nproc --all) - 1 ))
EOX
source /etc/profile   &&
cd ~/stable-diffusion-webui   &&
venv_dir="-" ./webui.sh -f --skip-torch-cuda-test --exit   &&
export LD_PRELOAD=/usr/lib64/libtcmalloc.so.4   &&
export venv_dir="-"   &&
nohup python3 launch.py -f --skip-torch-cuda-test --skip-version-check --no-half --precision full --use-cpu all --listen > output.log 2>&1 &
'
EOF
  base_64_command = base64encode(local.command)
}

resource "alicloud_ecs_command" "command" {
  name            = "stable-diffusion-command"
  command_content = local.base_64_command
  type            = "RunShellScript"
  timeout         = 7200
  working_dir = "/root"
}

resource "alicloud_ecs_invocation" "default" {
  command_id  = alicloud_ecs_command.command.id
  instance_id = [alicloud_instance.ecs.id]
  timeouts {
    create = "7200s"
  }
}

output "Url" {
  description = <<EOT
  {
    "Label": "Web 访问地址",
    "Description": "Stable-Diffusion 页面访问地址."
  }
  EOT
  value = format("http://%s:7860", alicloud_instance.ecs.public_ip)
}- 在 ROS 控制台中使用此模板创建资源栈。ROS 会自动解析出模板中资源的依赖关系,按照资源依赖顺序创建云资源。如果资源间没有依赖,则会并发创建,从而提升部署效率。ROS 会把这次创建的所有资源存放到一个"资源栈"中,后续可以方便地管理这组资源集合。比如:
- 将新模板应用到这个"资源栈"中,从而更新里面的资源。
- 删除这个"资源栈",从而把所有的资源删掉。
总结
基于 IaC 的理念,通过定义一个模板,使用 ROS 进行自动化部署,可以非常高效快捷地部署任意云资源和应用(比如 Stable Diffusion 模型)。相比于手动部署或者通过 API、SDK 的部署方式,有着高效、稳定等诸多优势,也是服务上云的最佳实践。