MyBatis 数据处理:主键获取、批量删除与动态表名
1.主键获取
XML配置中使用了useGeneratedKeys="true"和keyProperty="id"来自动获取并设置插入后的自增主键。这是一个标准的做法。
1)mapper接口
/**
 * 添加数据时获取自增id
 */
int addUserGetId(User user);
2)mapper.xml
<!--添加数据时获取自增主键-->
<insert id="addUserGetId" parameterType="org.xiji.enty.User" useGeneratedKeys="true" keyProperty="id">
    insert into user (username,password,userInfo) values(#{username},#{password},#{userInfo})
</insert>
3)测试代码
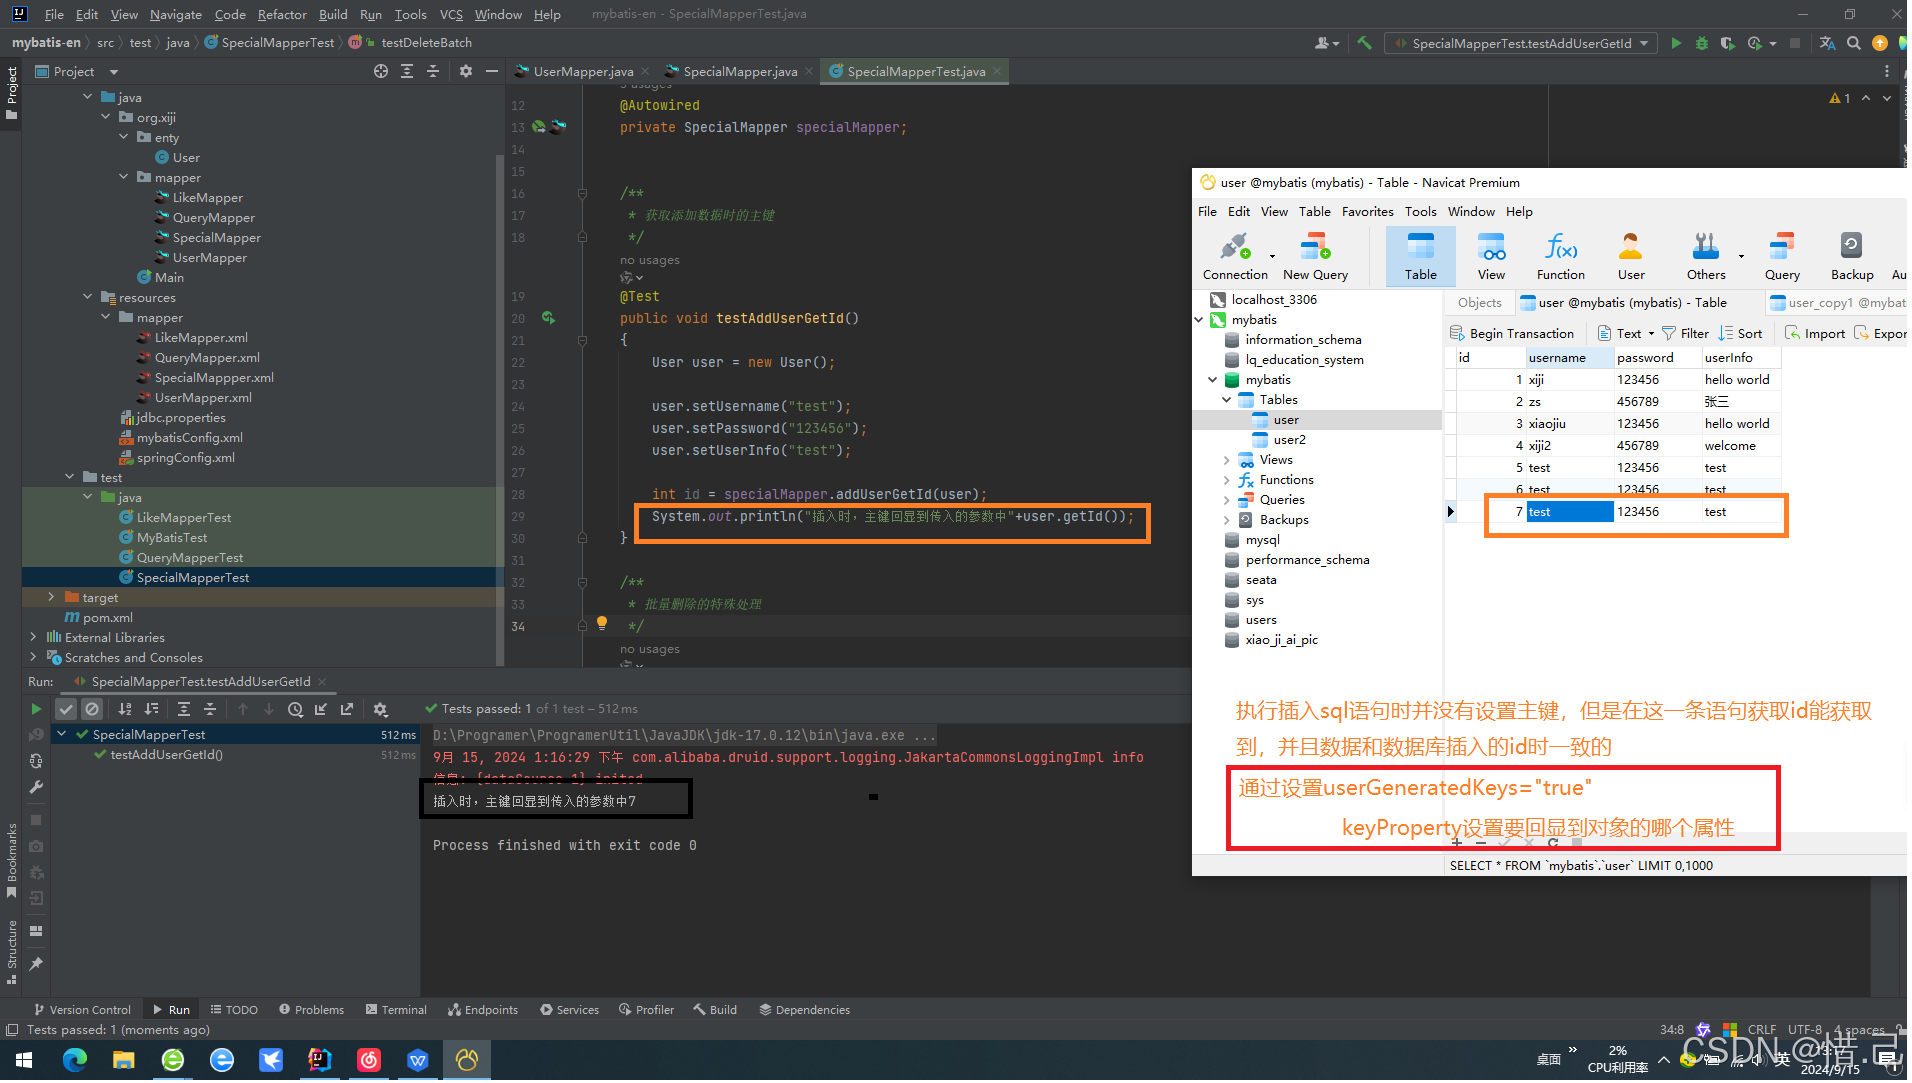
在测试代码中,user.getId()应该能够返回插入后数据库自动生成的主键值。注意,这需要数据库支持自增主键,并且在JDBC连接中正确配置了自动生成主键的功能。
/**
 * 获取添加数据时的主键
 */
@Test
public void testAddUserGetId()
{
    User user = new User();

    user.setUsername("test");
    user.setPassword("123456");
    user.setUserInfo("test");

    int id = specialMapper.addUserGetId(user);
    System.out.println("插入时,主键回显到传入的参数中"+user.getId());
}
4)测试结果
2.批量删除
使用${ids}直接拼接SQL语句的方式存在SQL注入的风险,不建议使用。而使用<foreach>标签则是更安全的方式。
1)mapper接口
1-使用手动拼接字符串数组的方法
/**
 * 批量删除
 */
int deleteBatch(String ids);
2-使用mybatis中的foreach标签
/**
 * 通过传入的数组
 */
int deleteUserByArray(@Param("array") int[] array);
2)mapper.xml
1-使用手动拼接字符串数组的方法
<!--这种是手动拼接 批量删除获取参数-->
<delete id="deleteBatch" >
    delete from user where id in (${ids})
</delete>
2-使用mybatis中的foreach标签
<!--通过传入的数组-->
<!--批量删除获取参数-->
<delete id="deleteUserByArray" >
    delete from user where id  in
                     <foreach collection="array" item="id" open="(" separator="," close=")">
                         #{id}
                     </foreach>
</delete>
3)测试代码
对于使用<foreach>标签的方法,测试代码看起来是正确的。注意,@Param("array") int\[\] array这样的参数传递方式是正确的,MyBatis会识别数组并正确地将其传递给SQL语句。
1-使用手动拼接字符串数组的方法
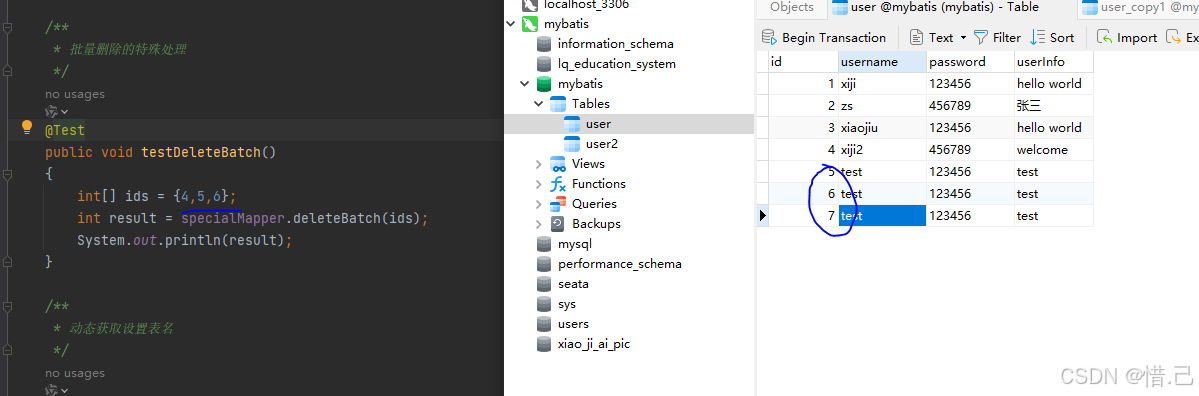
/**
 * 批量删除的特殊处理
 */
@Test
public void testDeleteBatch()
{
//    手动把输入传入的集合转化为字符串,传入

    int result = specialMapper.deleteBatch("4,5,6");
    System.out.println(result);
}
2-使用mybatis中的foreach标签
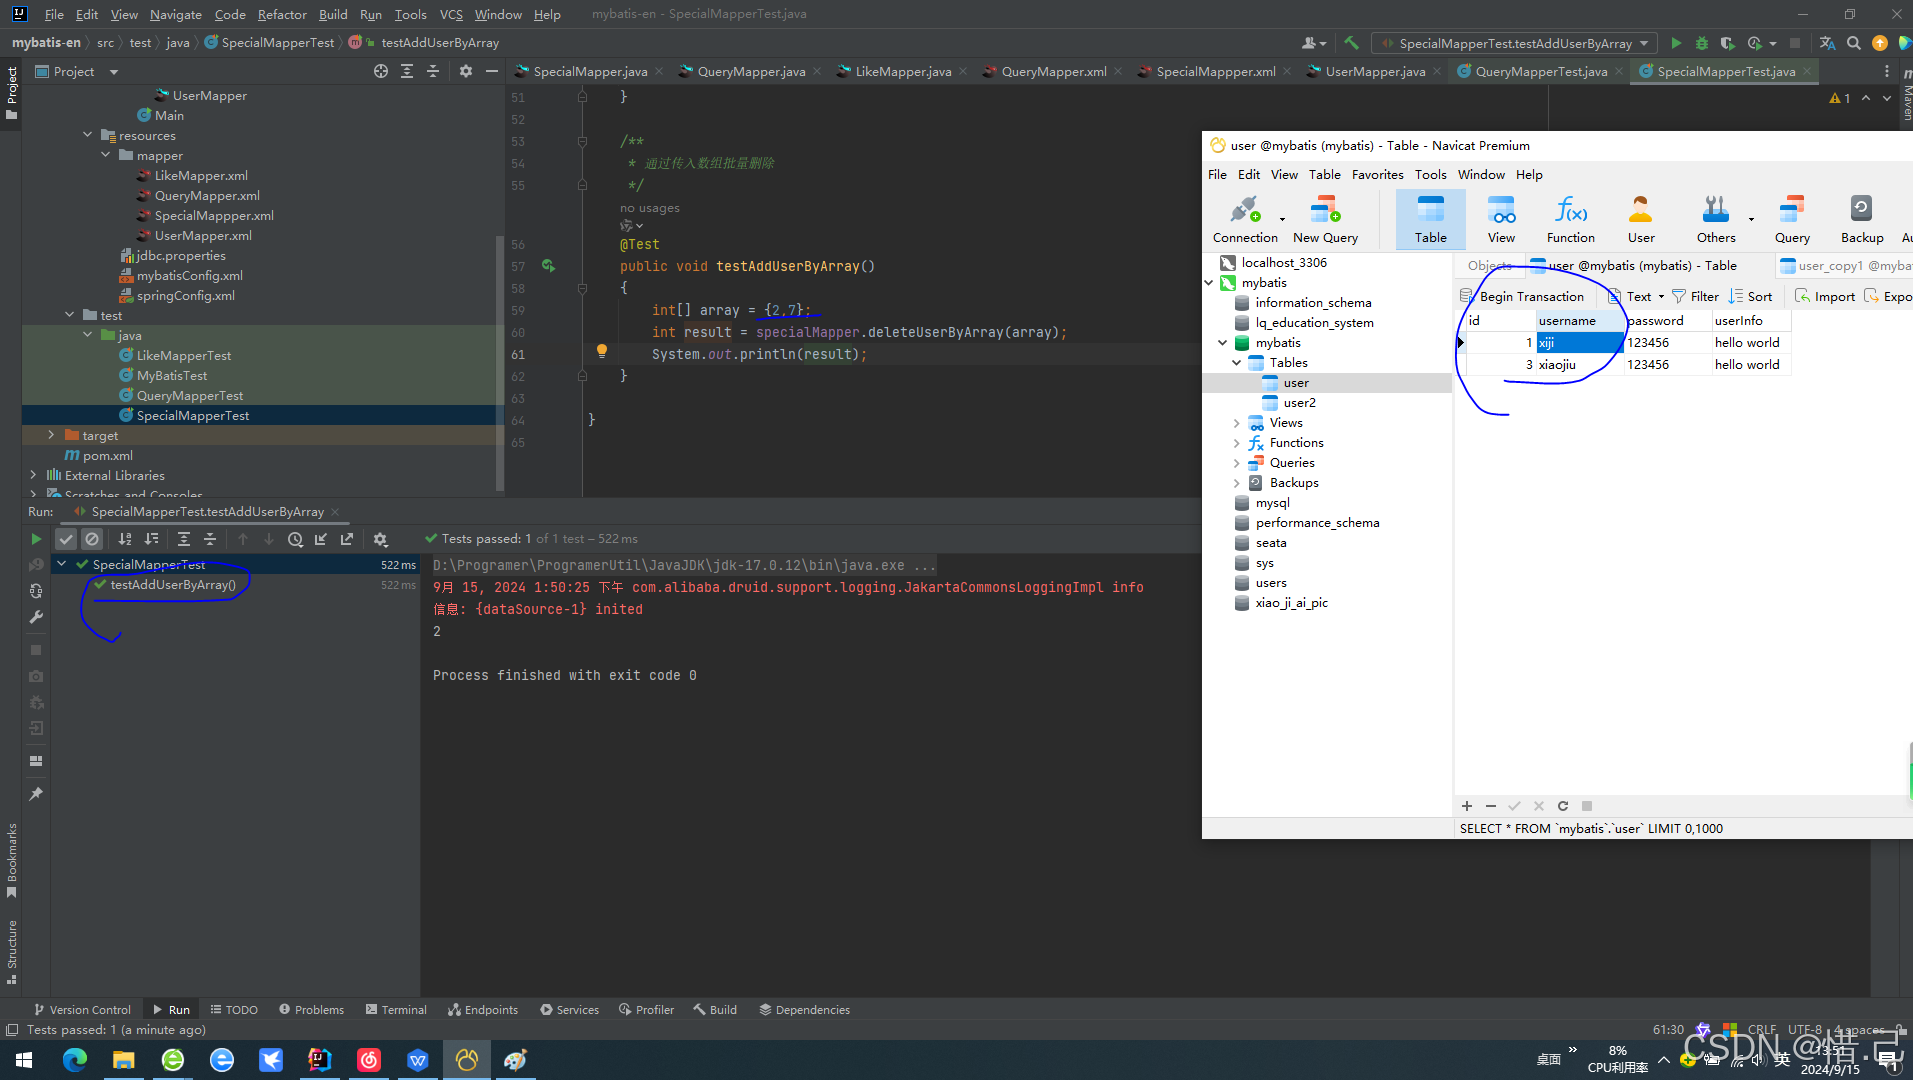
/**
 * 通过传入数组批量删除
 */
@Test
public void testAddUserByArray()
{
    int[] array = {2,7};
    int result = specialMapper.deleteUserByArray(array);
    System.out.println(result);
}
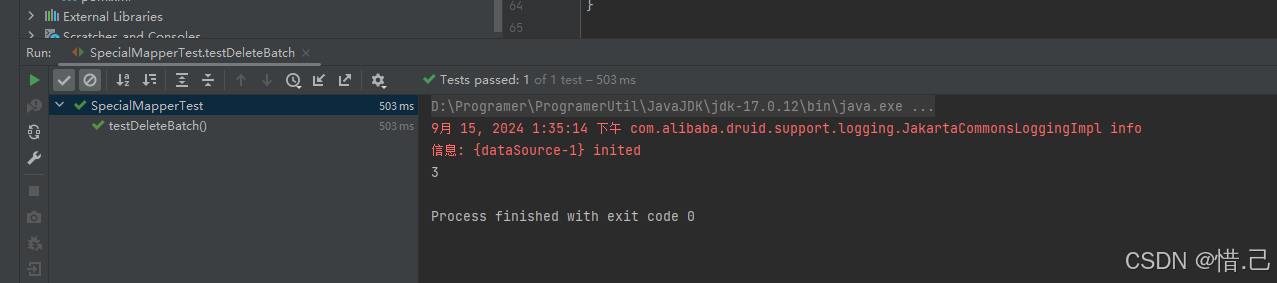
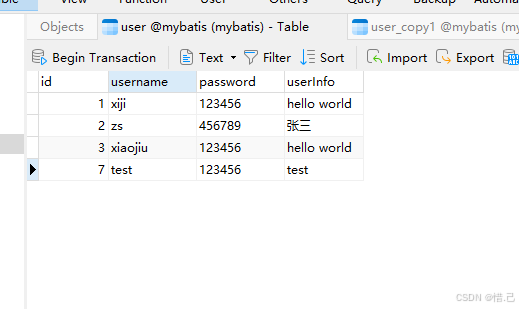
4)测试结果
1-使用手动拼接字符串数组的方法
2-使用mybatis中的foreach标签
这里删除第二条和第一条数据

3.动态设置表名
动态设置表名时,使用${tableName}可以直接将变量值嵌入到SQL语句中,但这同样存在SQL注入的风险。如果tableName是从外部输入获得的话,请务必进行严格的验证和过滤。
1)mapper接口
/**
 * 动态设置表名
 */
@MapKey("id")
List<Map<String,Object>> getUserByTableName(String tableName);
2)mapper.xml
/**
 * 动态设置表名
 */
@MapKey("id")
List<Map<String,Object>> getUserByTableName(String tableName);
3)测试代码
在测试代码中,动态设置表名的功能得到了验证,但是要注意在实际应用中确保表名的安全性。
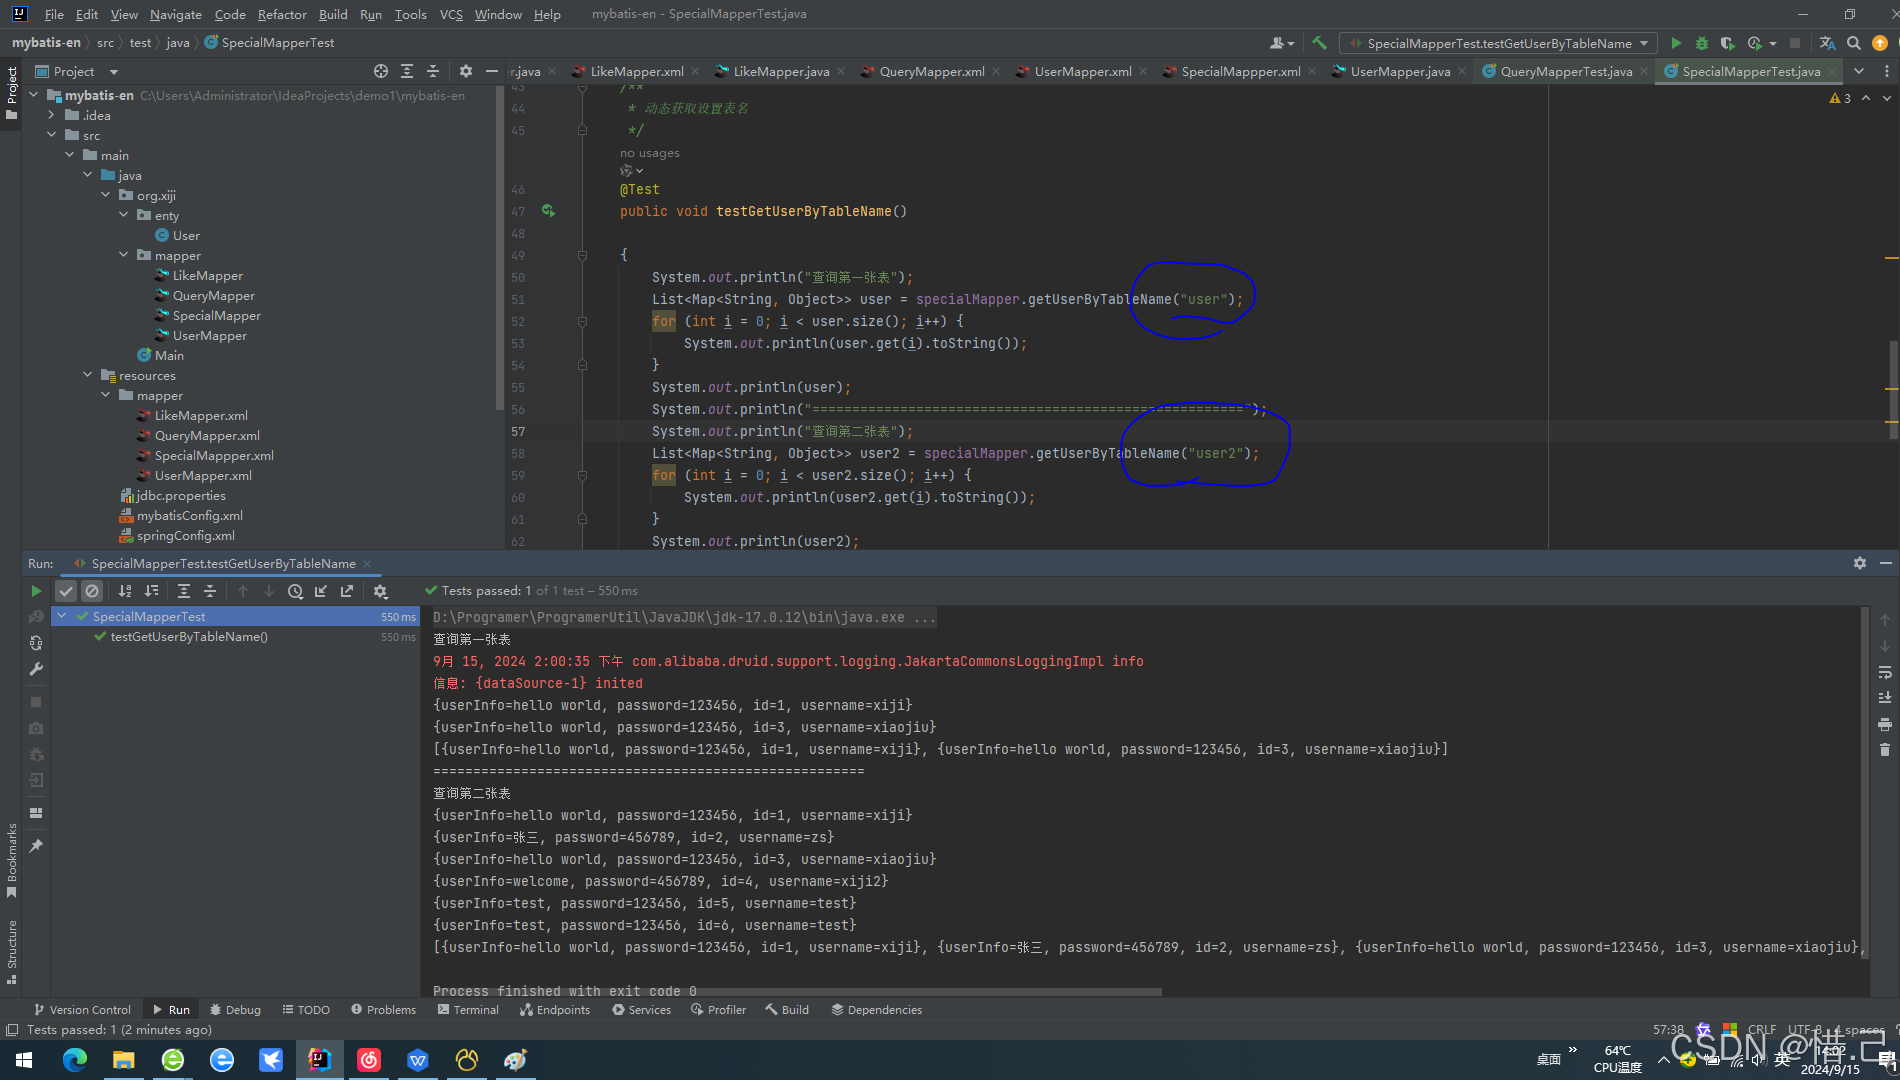
/**
 * 动态获取设置表名
 */
@Test
public void testGetUserByTableName()

{
    System.out.println("查询第一张表");
    List<Map<String, Object>> user = specialMapper.getUserByTableName("user");
    for (int i = 0; i < user.size(); i++) {
        System.out.println(user.get(i).toString());
    }
    System.out.println(user);
    System.out.println("======================================================");
    System.out.println("查询第二张表");
    List<Map<String, Object>> user2 = specialMapper.getUserByTableName("user2");
    for (int i = 0; i < user2.size(); i++) {
        System.out.println(user2.get(i).toString());
    }
    System.out.println(user2);

}
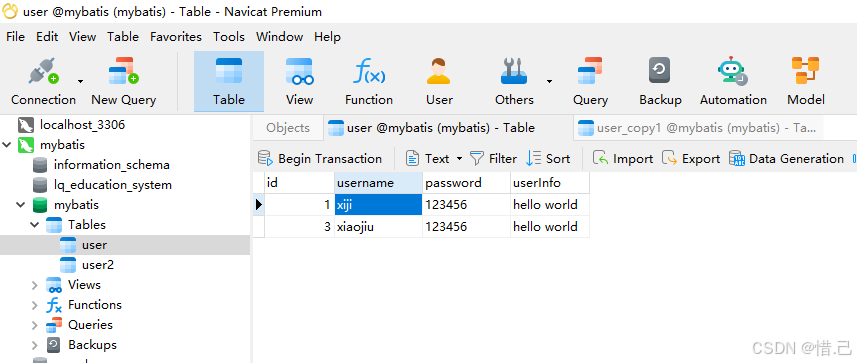
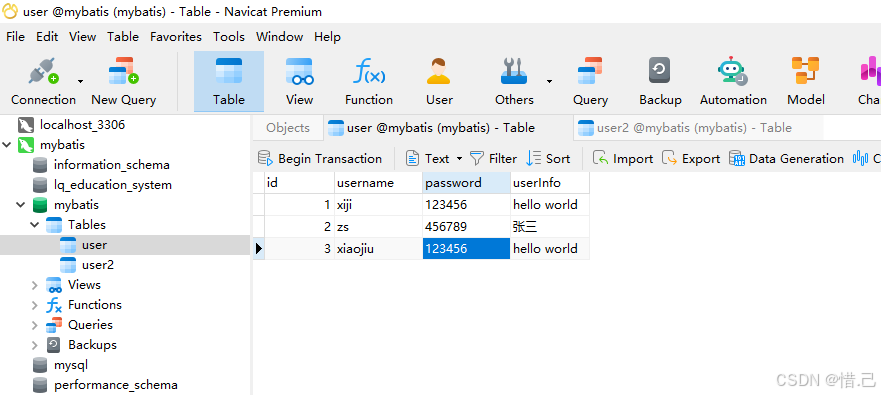
4)测试结果
user表的数据
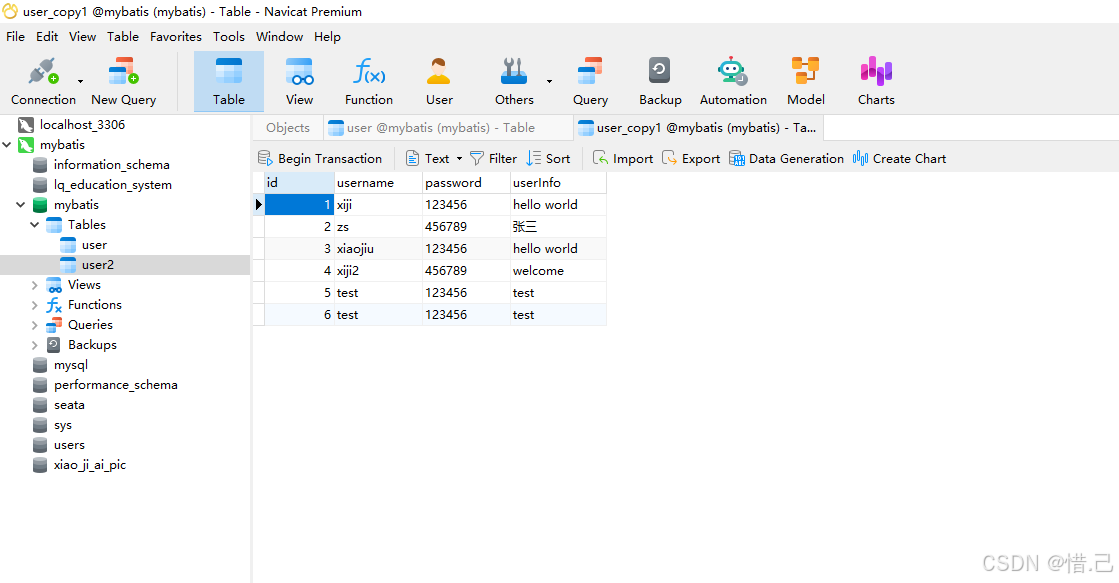
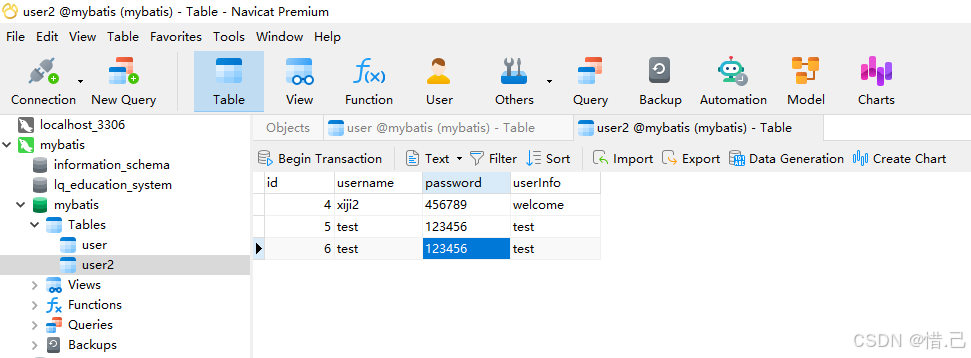
user2表内容
5)扩展(水平分表的查询实现)
对于水平分表的情况,需要根据ID来决定查询哪个表。在这个例子中,queryUserByTableName方法接收两个参数:id和tableName。然后根据id的值来决定查询哪个表。这种方式在处理分表的情况下是有效的,但同样要注意表名的安全性。
例:现在我们有一张表数据量太多了,想要垂直分表
下面是思路
user表有6条数据
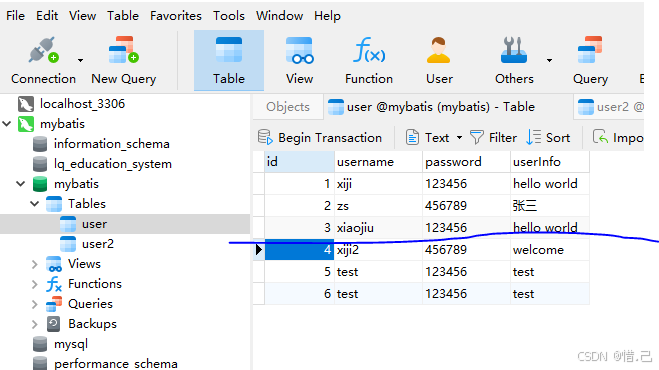
我们想要从3号id开始垂直分,分到user2表中
1-mapper接口
/**
 * 水平分表
 */
List<User> queryUserByTableName(@Param("id") int id,@Param("tableName") String tableName);
2-mapper.xml
<!--水平分表查询-->
<select id="queryUserByTableName"  resultType="org.xiji.enty.User" >
    select * from ${tableName} where id=#{id}

</select>
3-test代码
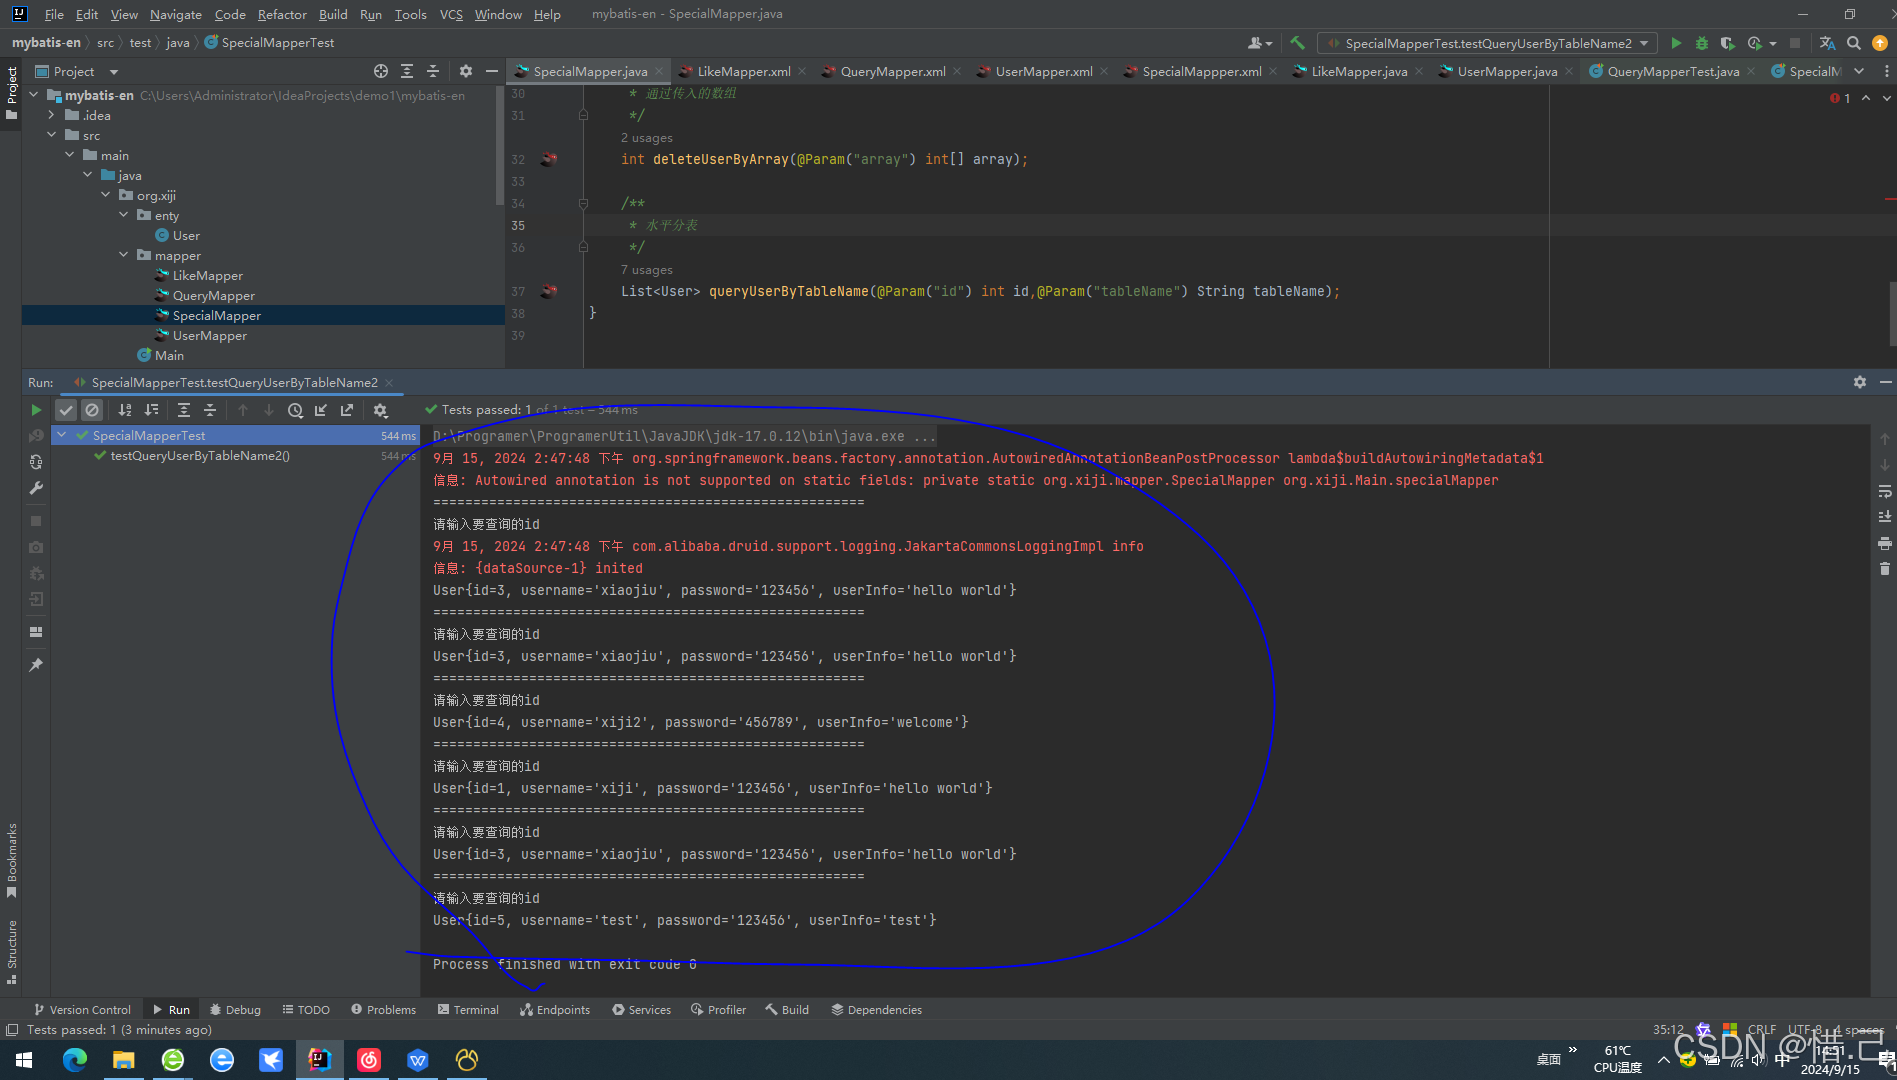
@Test
public void testQueryUserByTableName2()
{
    //用于接受数据
    List<User> userList =null;
    int id = 2;


    /**
     * 随机查询
     */

    for (int i = 0; i < 6; i++) {
        id = (int) (Math.random()*6);
        /*如果id等于零那就赋值唯1*/
        if (id == 0) {
            id = 1;
        }
        System.out.println("======================================================");
        System.out.println("请输入要查询的id");
        //传入查询id
        if (id < 4 && id > 0) {
            userList = specialMapper.queryUserByTableName(id, "user");
        }
        if (id > 3 && id < 7) {
            userList=specialMapper.queryUserByTableName(id,"user2");
        }


        for (int j = 0; j < userList.size(); j++) {
            User user = userList.get(j);
            System.out.println(user.toString());

        }
    }


}
4-测试结果
附录:
1 SpecialMapper文件
java
package org.xiji.mapper;

import org.apache.ibatis.annotations.MapKey;
import org.apache.ibatis.annotations.Mapper;
import org.apache.ibatis.annotations.Param;
import org.xiji.enty.User;

import java.util.List;
import java.util.Map;

@Mapper
public interface SpecialMapper {
    /**
     * 批量删除
     */
    int deleteBatch(@Param("ids") String ids);

    /**
     * 动态设置表名
     */
    @MapKey("id")
    List<Map<String,Object>> getUserByTableName(@Param("tableName") String tableName);

    /**
     * 添加数据时获取自增id
     */
    int addUserGetId(User user);

    /**
     * 通过传入的数组
     */
    int deleteUserByArray(@Param("array") int[] array);

    /**
     * 水平分表
     */
    List<User> queryUserByTableName(@Param("id") int id,@Param("tableName") String tableName);
}
2 SpecialMapper.xml文件
XML
<?xml version="1.0" encoding="UTF-8" ?>
<!DOCTYPE mapper
        PUBLIC "-//mybatis.org//DTD Mapper 3.0//EN"
        "http://mybatis.org/dtd/mybatis-3-mapper.dtd">
<mapper namespace="org.xiji.mapper.SpecialMapper">

    <!--添加数据时获取自增主键-->
    <insert id="addUserGetId" parameterType="org.xiji.enty.User" useGeneratedKeys="true" keyProperty="id">
        insert into user (username,password,userInfo) values(#{username},#{password},#{userInfo})
    </insert>
    <insert id="addUserByArray"></insert>

    <!--通过传入的数组-->
    <!--批量删除获取参数-->
    <delete id="deleteUserByArray" >
        delete from user where id  in
                         <foreach collection="array" item="id" open="(" separator="," close=")">
                             #{id}
                         </foreach>
    </delete>


    <!--动态设置表名-->
    <select id="getUserByTableName" resultType="java.util.Map">
        select * from ${tableName}
    </select>
    <!--水平分表查询-->
    <select id="queryUserByTableName"  resultType="org.xiji.enty.User" >
        select * from ${tableName} where id=#{id}

    </select>


</mapper>
3.SpecialMaperTest文件
java
import org.junit.jupiter.api.Test;
import org.springframework.beans.factory.annotation.Autowired;
import org.springframework.test.context.junit.jupiter.SpringJUnitConfig;
import org.xiji.enty.User;
import org.xiji.mapper.SpecialMapper;

import java.util.List;
import java.util.Map;
import java.util.Scanner;

@SpringJUnitConfig(locations = {"classpath:springConfig.xml"})
public class SpecialMapperTest {
    @Autowired
    private SpecialMapper specialMapper;


    /**
     * 获取添加数据时的主键
     */
    @Test
    public void testAddUserGetId()
    {
        User user = new User();

        user.setUsername("test");
        user.setPassword("123456");
        user.setUserInfo("test");

        int id = specialMapper.addUserGetId(user);
        System.out.println("插入时,主键回显到传入的参数中"+user.getId());
    }

    /**
     * 批量删除的特殊处理
     */
    @Test
    public void testDeleteBatch()
    {

        int result = specialMapper.deleteBatch("4,5,6");
        System.out.println(result);
    }

    /**
     * 动态获取设置表名
     */
    @Test
    public void testGetUserByTableName()

    {
        System.out.println("查询第一张表");
        List<Map<String, Object>> user = specialMapper.getUserByTableName("user");
        for (int i = 0; i < user.size(); i++) {
            System.out.println(user.get(i).toString());
        }
        System.out.println(user);
        System.out.println("======================================================");
        System.out.println("查询第二张表");
        List<Map<String, Object>> user2 = specialMapper.getUserByTableName("user2");
        for (int i = 0; i < user2.size(); i++) {
            System.out.println(user2.get(i).toString());
        }
        System.out.println(user2);

    }

    /**
     * 通过传入数组批量删除
     */
    @Test
    public void testAddUserByArray()
    {
        int[] array = {2,7};
        int result = specialMapper.deleteUserByArray(array);
        System.out.println(result);
    }

    /**
     * 水平分表查询
     */
    @Test
    public void testQueryUserByTableName()
    {


        /**
         * 模拟查询
         */


        //传入查询id
        int id = 2;
        List<User> user = specialMapper.queryUserByTableName(id, "user");
        User user1 = user.get(0);
        String username = user1.getUsername();
        System.out.println(username);
        System.out.println("======================================================");
            id = 5;

        List<User> user2 = specialMapper.queryUserByTableName(id, "user2");
        User user3 = user2.get(0);
        String username2 = user3.getUsername();
        System.out.println(username2);


    }

    @Test
    public void testQueryUserByTableName2()
    {
        //用于接受数据
        List<User> userList =null;
        int id = 2;


        /**
         * 随机查询
         */

        for (int i = 0; i < 6; i++) {
            id = (int) (Math.random()*6);
            /*如果id等于零那就赋值唯1*/
            if (id == 0) {
                id = 1;
            }
            System.out.println("======================================================");
            System.out.println("请输入要查询的id");
            //传入查询id
            if (id < 4 && id > 0) {
                userList = specialMapper.queryUserByTableName(id, "user");
            }
            if (id > 3 && id < 7) {
                userList=specialMapper.queryUserByTableName(id,"user2");
            }


            for (int j = 0; j < userList.size(); j++) {
                User user = userList.get(j);
                System.out.println(user.toString());

            }
        }


    }


}
4.user表
sql
SET NAMES utf8mb4;
SET FOREIGN_KEY_CHECKS = 0;

-- ----------------------------
-- Table structure for user
-- ----------------------------
DROP TABLE IF EXISTS `user`;
CREATE TABLE `user`  (
  `id` int NOT NULL AUTO_INCREMENT COMMENT '用户id',
  `username` varchar(255) CHARACTER SET utf8mb4 COLLATE utf8mb4_0900_ai_ci NULL DEFAULT NULL COMMENT '用户名字',
  `password` varchar(255) CHARACTER SET utf8mb4 COLLATE utf8mb4_0900_ai_ci NULL DEFAULT NULL COMMENT '用户密码',
  `userInfo` varchar(255) CHARACTER SET utf8mb4 COLLATE utf8mb4_0900_ai_ci NULL DEFAULT NULL COMMENT '用户信息',
  PRIMARY KEY (`id`) USING BTREE
) ENGINE = InnoDB CHARACTER SET = utf8mb4 COLLATE = utf8mb4_0900_ai_ci ROW_FORMAT = Dynamic;

SET FOREIGN_KEY_CHECKS = 1;