GUI Agent 之computer use?phone use?------多模态大语言模型的进阶之路
本文会总结概括这一应用的利弊,然后给出分析和工具代码部分解析,以及优化方案
1.最新技术事件浅析
事件1. 2024年10月 Anthropics放出了最新的claude3.5 sonnect,编码、复杂推理能力大幅提升,确实很强,其中最吸引人眼球的是展示了computer use的demo演示,虽然很初级,但是未来可期的意思。
事件2. 前后时间内,智谱也发布了autoglm系列, 展示了web use和phone use的演示。
"冷饭热炒" ------AI Agent(LLM)&&RPA
实际上,从2023年就一直涌现相关开源项目,通过软硬件交互的RPA、自动化执行指令相关技术一直都有,唯一区别:多模态大语言模型能力的进化,帮助了人们可以通过截屏视觉和自然语言交互,来更准确执行软硬件的功能函数指令。
导致一切变化,归因"大模型的能力迭代"因此不论是哪家的相关技术,本质仍是多模态大语言模型起到决定性作用,这一应用点取决于视觉理解屏幕信息 和 LLM决策能力(Agent------主要是通过工具调用来决定执行那个操作函数,如鼠标左键点击、右键点击),这是一种多模态大模型 通过感知屏幕和用户提问,走出思考,一步步调用预定义好的指令函数来完成回答的一个过程。
快速总结
其实几个核心难点分别在于:大模型思考能力(特别是function call工具调用能力)、截屏视觉分析能力(视觉模型要进行精准的语义分析和像素坐标)、需要适配操作场景中的各种软件APP的交互。
从算法层面来说,其实关键问题仍旧是得有一个强大的LLM能够精准理解和执行,这对模型能力要求很高,目前来看几B参数的模型很难做到,但是如果聚焦场景微调也不是不可行。
因此claude3.5这个demo实际上仍旧是对自己模型能力的一个宣传,在评测报告中其复杂COT能力提高,正是对于GUI-AGENT应用一个关键助力,同理,智谱也如此。
我自费一个api key,用官方docker体验了下,自媒体上面也有很多总体在它沙盒里面感觉还可以,(这里我推荐一个GIT项目------agent.exe,用JS做的DEMO)
试用场景和使用限制:假设在模型能力达标前提下,电脑低风险任务、简单明确的规则场景,具体怎么理解:比如说订票会给你订错、安装软件因为网络、条款等等使用问题,无法识别和进行后续操作,总之BAD CASE超多,但是claude3.5 确实强,后面需要进行每个软件适配。
三、思考和方案设计
不考虑适配问题,我们的核心是AI AGENT(这里的AGENT更简单,加一些提示词规则和工具函数调用配置),那么最终问题还是模型本身------工具调用能力和COT能力。
那么最终落到自研角度,最关键的问题------首先,如何拥有或者训练一个这种类似能力的模型去平替?有感兴趣的朋友可以用一些开源的VL去试试,我简单放了个截图给自己微调的VL-7B模型进行一个试探,就想看看小模型能不能微调来适应这个场景

我们看到一般的视觉语言模型是有基础的视觉定位能力、逻辑思考能力,但是还远未到标准,所以要是想不通过三方实现,训练微调这些函数调用、多模态视觉这个门槛是一定要迈的。
这里我测试了两种DEMO,一种是按照官方DEMO DOCKER沙盒里面的系统进行操作,理论上是最好的。另一种是脱离Docker容器化,那么就是直接在用户系统上进行交互,并且要将代码部分函数操作变成windows的函数,实际上还是很不稳定,比如说输入网址操作时候,你的界面上有多个文本框,就会识别错误,更严重的是帮你执行了比较有风险的操作,所以大家用时候还是要监控下,还有很多AGENT的常规缺陷(在过程中遇到和预期不符的结果进入更多的推理,最终结果仍然无效化),下面展示下官方的例子,理论上也是最好的
1.我输入一个问题,看是否能帮我正确执行?

2.Claude 会逐步分析思考,因为是基于视觉,所以每次第一步都会截图去分析图标语义和像素坐标信息,调用screenshot函数

3.根据截屏图像理解,找到firefox,根据坐标移动mouse_move函数调用

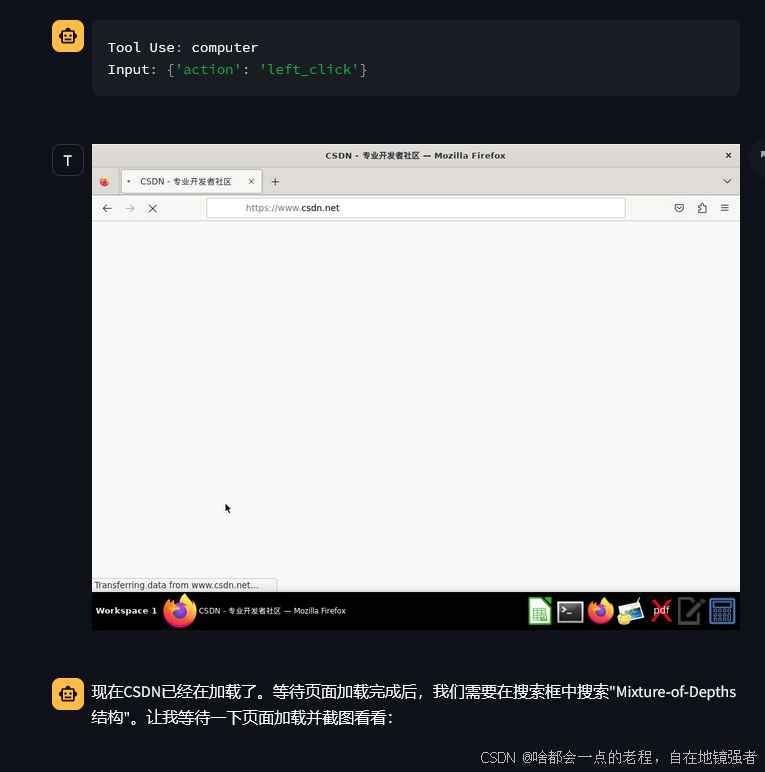
4.进行点击
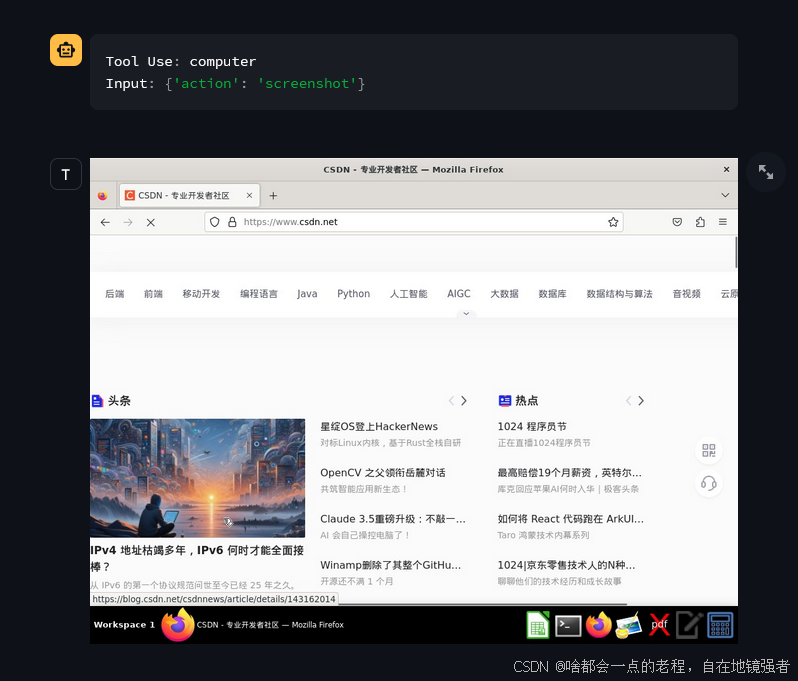
5.点击火狐后,模型做出了思考,需要继续点进行点击地址栏,再输入网址,继续第一步截屏,需要分析画面 哪个是地址栏

6.因为我搜索过有历史记录,所以模型发现可以偷懒,直接触发,所以他分析了CSDN的坐标位置,调用Mouse_move移动鼠标

7.继续左键点击函数调用,就成功进去了

8.然后就继续思考要执行我的问题关键信息"Mixtrure-of-Depths"的问题,还是每次执行前必须要进行截图

9.根据图像信息理解,定位到搜索框进行输入词语查找,所以继续mouse_move到搜索框坐标那里

10.同理,鼠标点击

11.打印相关信息

12.执行等待返回结果

13.这里貌似漏了个截屏分析,不重要,继续执行鼠标移动到BOX位置

14.左键点击

15.这里应该是截屏分析最终结果

最终就是根据屏幕信息进行总结,但是由于是视觉方案,所以仅针对截图部分进行了理解,模型本身还是赞的!

PS:双屏容易发生错误,因为其程序只针对一个屏幕进行截屏识别;
国内你要用速率受限制的那么开发是不太可能了。
非官方docker的个性化用户界面测试
直接给结论:效果很差,这里说一个主要原因就是:
1.每个人的UI界面不一样,主题颜色、界面复杂度等等,这会导致claude模型出现视觉定位或者目标识别的错误
界面复杂度这个很重要,如果你有大量页面打开,大概率会降低截屏识别的准确性。
2.还有一种是模型的思考和视觉界面操作没有对齐:
比如这种很容易发生理解和执行错误,模型操作到下方Chrome了 ,但是这个时候我已经存在分页了,点击并不会新建,所以这种情况执行会无效化。
3.bad case太多了 在自己电脑上体验下就知道了

三 应用可行性思考
1.通过上述,我们可以得到一个经验性结论:强如claude3.5也会有着很多问题,一方面是模型视觉能力和在个性化用户界面存在理解的准确性GAP,即使Claude思考的基本都是对的,但是视觉能力的差异导致整个操作链路崩溃。
2.操作浏览器和软件都需要经过定制化的适配,因为有很多权限或者证书、网络问题
3.那么这个应用没有价值进行落地嘛?
答:不是,恰恰就是没那么成熟,所以目前业界一线巨头都要去冲这个应用,利用云端大模型这种能力进行任何能联网的操作系统GUI设备的适配,电脑、手机等等,智谱已经释放了手机DEMO,这块应用会蔓延,对于个人来说,我比较关心如何能够保持特定场景准确性?如何使用开源VL模型平替(微调)?
目前针对上述问题1 截屏识别优化,简单分享下我的思路:
1.端到端微调操作系统界面的图标,进行训练,适合大模型算法相关人员,需要继续后训练
2.进行检测器+Caption, 不需要训练大模型,进行小模型堆叠,增强截屏识别的准确性,这点微软已经这么做了,omniparser,简单来说通过YOLO检测器训练了Windows的相关图标,能够准确定位识别;同时需要caption模型这样有助于大模型对图标的理解正确,作为一个视觉增强插件,目前结合我实际体会确实这样能Work,对于GPT4、cladue这种模型,他们的文本推理能力并不差。

这种方案输出:图标类型和坐标,并且进行了丰富语义描述,这样能帮助大模型进行正确的理解,但是如果你这两小模型不行,那么一样会拉垮,所以这种方案输出给的目标是VLM模型还是LLM?我个人觉得仍然要给VLM视觉语言模型,
从实现难度上来看,直接端到端训练是相对比较难的,而第二种方案是风险较小的,但是会增强推理开销。
我们继续思考,那么这套Detect&caption的组合直接给LLM,而不是VLM呢?微软没提这个默认是给各种开源和闭源视觉模型,从综合来看还是扔给VLM,还是缺少完整的图像信息,但是硬给这些文本结构化信息呢?LLM也并不是不行。
工具代码部分
其实就是Fuctionc call 冷饭,我们主要看下sys prompt和工具怎么写的
1.提示词
python
# System prompt adapted for Windows environment
SYSTEM_PROMPT = f"""<SYSTEM_CAPABILITY>
* You are utilizing a Windows {platform.machine()} system with internet access.
* You have access to mouse and keyboard control through PyAutoGUI.
* You can perform clicks, type text, and take screenshots.
* The system maintains exact monitor resolution for perfect accuracy.
* Screenshots are taken at full monitor resolution and compressed only if needed.
* The system properly accounts for Windows DPI scaling and taskbar position.
* When using your computer function calls, they take a while to run and send back to you. Where possible/feasible, try to chain multiple of these calls all into one function calls request.
* The current date is {datetime.today().strftime('%A, %B %d, %Y')}.
</SYSTEM_CAPABILITY>

<IMPORTANT>
* The system maintains exact screen dimensions - no resolution scaling is performed.
* Screenshots are taken at full monitor resolution to maintain perfect accuracy.
* Only compression is applied if needed to stay under size limits.
* The system handles Windows-specific elements like taskbar and DPI scaling.
* When viewing a page it can be helpful to zoom out so that you can see everything on the page.
</IMPORTANT>

<COORDINATE_HANDLING>
* Coordinates are maintained at exact screen resolution.
* DPI scaling is properly handled for accurate positioning.
* Taskbar position is accounted for in coordinate calculations.
* The system maintains perfect 1:1 pixel mapping with the screen.
* Coordinate translations preserve exact screen positions.
</COORDINATE_HANDLING>"""
Windows系统信息:You are utilizing a Windows {platform.machine()} system with internet access. 这里使用了platform.machine()来获取Windows系统的机器类型。
鼠标和键盘控制:You have access to mouse and keyboard control through PyAutoGUI. PyAutoGUI是一个跨平台的自动化工具,但在Windows环境下使用时,可以进行鼠标点击、键盘输入等操作。
屏幕分辨率和DPI缩放:The system maintains exact monitor resolution for perfect accuracy. 和 The system properly accounts for Windows DPI scaling and taskbar position. 这些提示说明了系统如何处理Windows特有的DPI缩放和任务栏位置。
截图和压缩:Screenshots are taken at full monitor resolution and compressed only if needed. 说明了截图的处理方式,特别是在Windows环境下如何处理全屏截图和压缩。
2.工具类API定义,这里主要看computer tool就够了
ComputerTool:这个工具可能包含了一些特定于Windows的操作,例如使用PyAutoGUI进行鼠标点击、键盘输入、截图等操作。
这里贴下源码:
简单来说就算计算机工具的各种操作函数和动作描述等。
python
import subprocess
import platform
import pyautogui
import asyncio
import base64
import os
from enum import StrEnum
from pathlib import Path
from typing import Literal, TypedDict
from uuid import uuid4

from anthropic.types.beta import BetaToolComputerUse20241022Param

from .base import BaseAnthropicTool, ToolError, ToolResult
from .run import run

OUTPUT_DIR = "/tmp/outputs"

TYPING_DELAY_MS = 12
TYPING_GROUP_SIZE = 50

Action = Literal[
    "key",
    "type",
    "mouse_move",
    "left_click",
    "left_click_drag",
    "right_click",
    "middle_click",
    "double_click",
    "screenshot",
    "cursor_position",
]


class Resolution(TypedDict):
    width: int
    height: int


MAX_SCALING_TARGETS: dict[str, Resolution] = {
    "XGA": Resolution(width=1024, height=768),  # 4:3
    "WXGA": Resolution(width=1280, height=800),  # 16:10
    "FWXGA": Resolution(width=1366, height=768),  # ~16:9
}


class ScalingSource(StrEnum):
    COMPUTER = "computer"
    API = "api"


class ComputerToolOptions(TypedDict):
    display_height_px: int
    display_width_px: int
    display_number: int | None


def chunks(s: str, chunk_size: int) -> list[str]:
    return [s[i : i + chunk_size] for i in range(0, len(s), chunk_size)]


class ComputerTool(BaseAnthropicTool):
    """
    A tool that allows the agent to interact with the screen, keyboard, and mouse of the current computer.
    Adapted for Windows using 'pyautogui'.
    """

    name: Literal["computer"] = "computer"
    api_type: Literal["computer_20241022"] = "computer_20241022"
    width: int
    height: int
    display_num: int | None

    _screenshot_delay = 2.0
    _scaling_enabled = True

    @property
    def options(self) -> ComputerToolOptions:
        width, height = self.scale_coordinates(
            ScalingSource.COMPUTER, self.width, self.height
        )
        return {
            "display_width_px": width,
            "display_height_px": height,
            "display_number": self.display_num,
        }

    def to_params(self) -> BetaToolComputerUse20241022Param:
        return {"name": self.name, "type": self.api_type, **self.options}

    def __init__(self):
        super().__init__()

        # Get screen width and height using Windows command
        self.width, self.height = self.get_screen_size()
        self.display_num = None

        # Path to cliclick
        self.cliclick = "cliclick"
        self.key_conversion = {"Page_Down": "pagedown", "Page_Up": "pageup", "Super_L": "win"}

    async def __call__(
        self,
        *,
        action: Action,
        text: str | None = None,
        coordinate: tuple[int, int] | None = None,
        **kwargs,
    ):
        if action in ("mouse_move", "left_click_drag"):
            if coordinate is None:
                raise ToolError(f"coordinate is required for {action}")
            if text is not None:
                raise ToolError(f"text is not accepted for {action}")
            if not isinstance(coordinate, (list, tuple)) or len(coordinate) != 2:
                raise ToolError(f"{coordinate} must be a tuple of length 2")
            if not all(isinstance(i, int) and i >= 0 for i in coordinate):
                raise ToolError(f"{coordinate} must be a tuple of non-negative ints")

            x, y = self.scale_coordinates(
                ScalingSource.API, coordinate[0], coordinate[1]
            )

            if action == "mouse_move":
                pyautogui.moveTo(x, y)
                return ToolResult(output=f"Moved mouse to ({x}, {y})")
            elif action == "left_click_drag":
                current_x, current_y = pyautogui.position()
                pyautogui.dragTo(x, y, duration=0.5)  # Adjust duration as needed
                return ToolResult(output=f"Dragged mouse from ({current_x}, {current_y}) to ({x}, {y})")

        if action in ("key", "type"):
            if text is None:
                raise ToolError(f"text is required for {action}")
            if coordinate is not None:
                raise ToolError(f"coordinate is not accepted for {action}")
            if not isinstance(text, str):
                raise ToolError(output=f"{text} must be a string")

            if action == "key":
                # Handle key combinations
                keys = text.split('+')
                for key in keys:
                    key = self.key_conversion.get(key.strip(), key.strip())
                    pyautogui.keyDown(key)  # Press down each key
                for key in reversed(keys):
                    key = self.key_conversion.get(key.strip(), key.strip())
                    pyautogui.keyUp(key)    # Release each key in reverse order
                return ToolResult(output=f"Pressed keys: {text}")

            elif action == "type":
                pyautogui.typewrite(text, interval=TYPING_DELAY_MS / 1000)  # Convert ms to seconds
                screenshot_base64 = (await self.screenshot()).base64_image
                return ToolResult(output=text, base64_image=screenshot_base64)

        if action in (
            "left_click",
            "right_click",
            "double_click",
            "middle_click",
            "screenshot",
            "cursor_position",
        ):
            if text is not None:
                raise ToolError(f"text is not accepted for {action}")
            if coordinate is not None:
                raise ToolError(f"coordinate is not accepted for {action}")

            if action == "screenshot":
                return await self.screenshot()
            elif action == "cursor_position":
                x, y = pyautogui.position()
                x, y = self.scale_coordinates(ScalingSource.COMPUTER, x, y)
                return ToolResult(output=f"X={x},Y={y}")
            else:
                if action == "left_click":
                    pyautogui.click()
                elif action == "right_click":
                    pyautogui.rightClick()
                elif action == "middle_click":
                    pyautogui.middleClick()
                elif action == "double_click":
                    pyautogui.doubleClick()
                return ToolResult(output=f"Performed {action}")
        raise ToolError(f"Invalid action: {action}")

    async def screenshot(self):
        """Take a screenshot of the current screen and return a ToolResult with the base64 encoded image."""
        output_dir = Path(OUTPUT_DIR)
        output_dir.mkdir(parents=True, exist_ok=True)
        path = output_dir / f"screenshot_{uuid4().hex}.png"

        # Take screenshot using pyautogui
        screenshot = pyautogui.screenshot()
        screenshot.save(str(path))

        if path.exists():
            # Return a ToolResult instance instead of a dictionary
            return ToolResult(base64_image=base64.b64encode(path.read_bytes()).decode())

        raise ToolError(f"Failed to take screenshot: {path} does not exist.")

    async def shell(self, command: str, take_screenshot=True) -> ToolResult:
        """Run a shell command and return the output, error, and optionally a screenshot."""
        _, stdout, stderr = await run(command)
        base64_image = None

        if take_screenshot:
            # delay to let things settle before taking a screenshot
            await asyncio.sleep(self._screenshot_delay)
            base64_image = (await self.screenshot()).base64_image

        return ToolResult(output=stdout, error=stderr, base64_image=base64_image)

    def scale_coordinates(self, source: ScalingSource, x: int, y: int):
        """Scale coordinates to a target maximum resolution."""
        if not self._scaling_enabled:
            return x, y
        ratio = self.width / self.height
        target_dimension = None
        for dimension in MAX_SCALING_TARGETS.values():
            # allow some error in the aspect ratio - not ratios are exactly 16:9
            if abs(dimension["width"] / dimension["height"] - ratio) < 0.02:
                if dimension["width"] < self.width:
                    target_dimension = dimension
                break
        if target_dimension is None:
            return x, y
        # should be less than 1
        x_scaling_factor = target_dimension["width"] / self.width
        y_scaling_factor = target_dimension["height"] / self.height
        if source == ScalingSource.API:
            if x > self.width or y > self.height:
                raise ToolError(f"Coordinates {x}, {y} are out of bounds")
            # scale up
            return round(x / x_scaling_factor), round(y / y_scaling_factor)
        # scale down
        return round(x * x_scaling_factor), round(y * y_scaling_factor)

    def get_screen_size(self):
        if platform.system() == "Windows":
            # Command to get screen resolution on Windows
            cmd = "wmic path Win32_VideoController get CurrentHorizontalResolution,CurrentVerticalResolution /format:value"
        elif platform.system() == "Darwin":  # macOS
            cmd = "system_profiler SPDisplaysDataType | grep Resolution"
        else:  # Linux or other OS
            cmd = "xrandr | grep '*' | awk '{print $1}'"

        try:
            output = subprocess.check_output(cmd, shell=True).decode()

            if platform.system() == "Windows":
                lines = output.strip().split('\n')
                width = height = None

                for line in lines:
                    if line.strip():  # Check for non-empty line
                        key, value = line.split('=')
                        value = value.strip()  # Strip whitespace from value
                        # Assign only if value is non-empty and can be converted to int
                        if value and key == 'CurrentHorizontalResolution':
                            width = int(value) if value.isdigit() else None
                        elif value and key == 'CurrentVerticalResolution':
                            height = int(value) if value.isdigit() else None

                # After the loop, check if we have valid width and height
                if width is not None and height is not None:
                    print(f"Resolution: {width}x{height}")
                else:
                    print("Could not retrieve valid resolution values.")
            elif platform.system() == "Darwin":
                resolution = output.split()[0]
                width, height = map(int, resolution.split('x'))
            else:
                resolution = output.strip().split()[0]
                width, height = map(int, resolution.split('x'))

            return width, height

        except subprocess.CalledProcessError as e:
            print(f"Error occurred: {e}")
            return None, None  # Return None or some default values


    def get_mouse_position(self):
        # TODO: enhance this func
        from AppKit import NSEvent
        from Quartz import CGEventSourceCreate, kCGEventSourceStateCombinedSessionState

        loc = NSEvent.mouseLocation()
        # Adjust for different coordinate system
        return int(loc.x), int(self.height - loc.y)

    def map_keys(self, text: str):
        """Map text to cliclick key codes if necessary."""
        # For simplicity, return text as is
        # Implement mapping if special keys are needed
        return text
总结
当前对于自己应用难点就是你需要一个类似claude能力极强的模型,并且其functioncall能力也要很强,然后才可以进行自主开发,模型是第一关,后面可以用视觉方案增强也好,再微调也好都可以,更进一步当你的操作系统有N个tools怎么办呢?这里实际上也有两种业内方案,点赞超100 我补更。