UE5相机系统初探(一)
和Unity类似,UE的相机也是由名为Camera的component控制的。那么,在UE中要如何实现一个跟随玩家的第三人称相机呢?假设我们已经有了一个表示玩家的类ACF_Character,首先第一步就是要先在ACF_Character类中定义camera component:
c++
UPROPERTY(EditAnywhere, BlueprintReadWrite, Category = "Camera")
UCameraComponent* Camera;
我们希望camera component可以在蓝图中编辑,也可以在属性窗口中修改一些参数,因而这里设置UPROPERTY为EditAnywhere和BlueprintReadWrite。
下一步要在构造函数中创建该component,并将其挂接到root component下:
c++
ACF_Character::ACF_Character()
{
 	// Set this character to call Tick() every frame.  You can turn this off to improve performance if you don't need it.
	PrimaryActorTick.bCanEverTick = true;

	Camera = CreateDefaultSubobject<UCameraComponent>("Camera");
	Camera->SetupAttachment(RootComponent);

}
此时编译并创建相应的蓝图类,就可以预览camera component了:
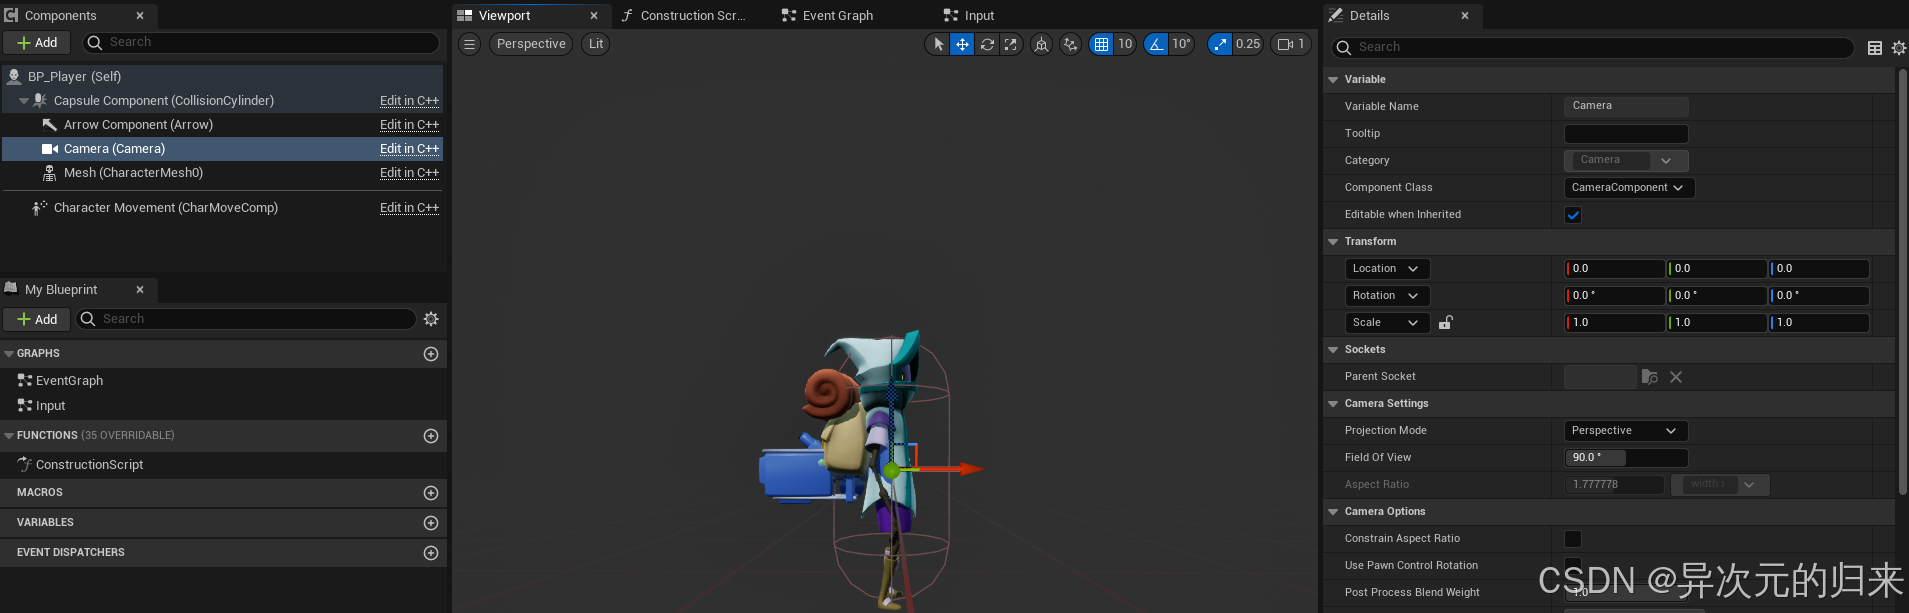
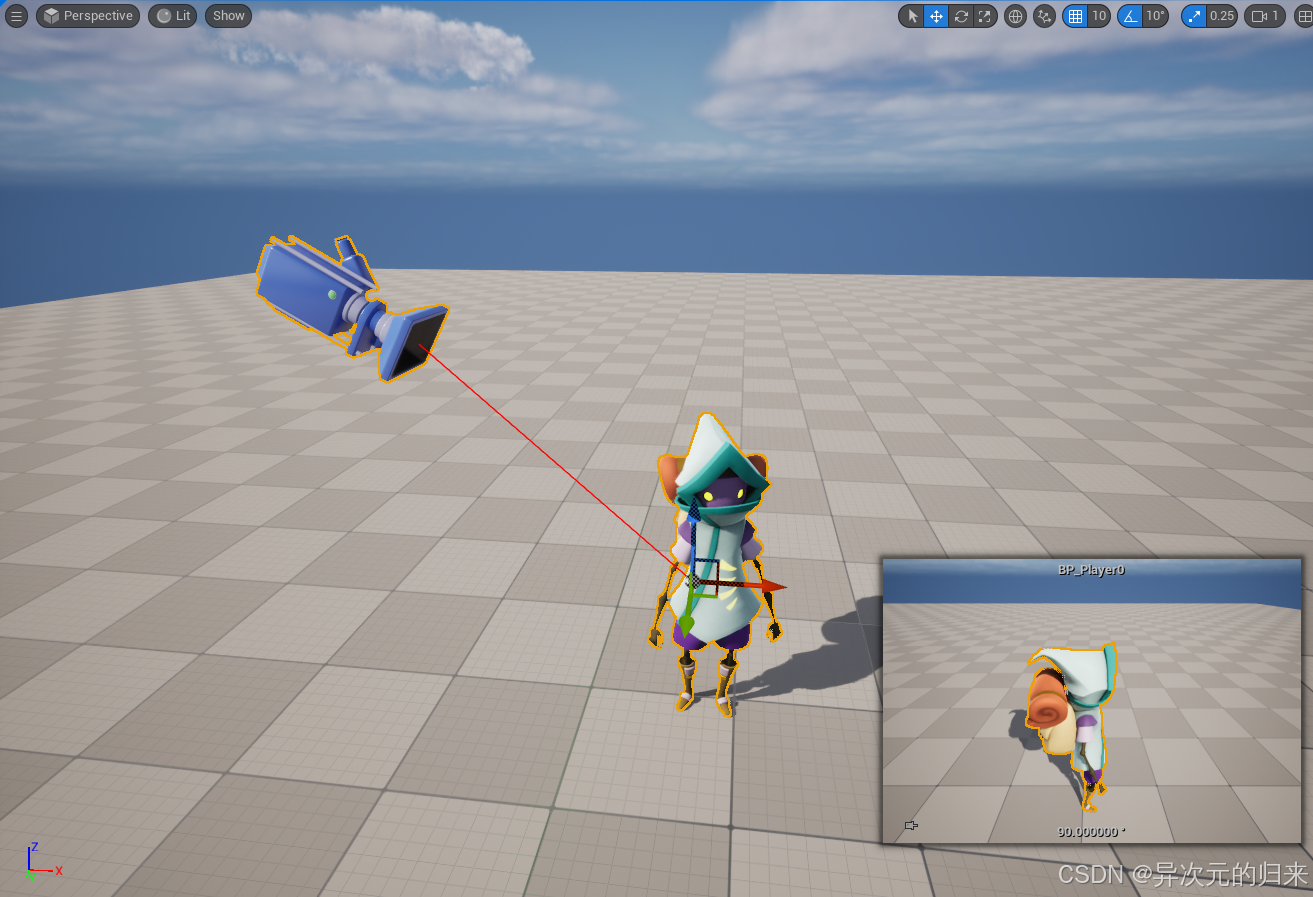
这里相机的位置默认为0,0,0,这样会视角穿透玩家,需要调整一下,比如调整为离玩家一定距离俯视玩家:
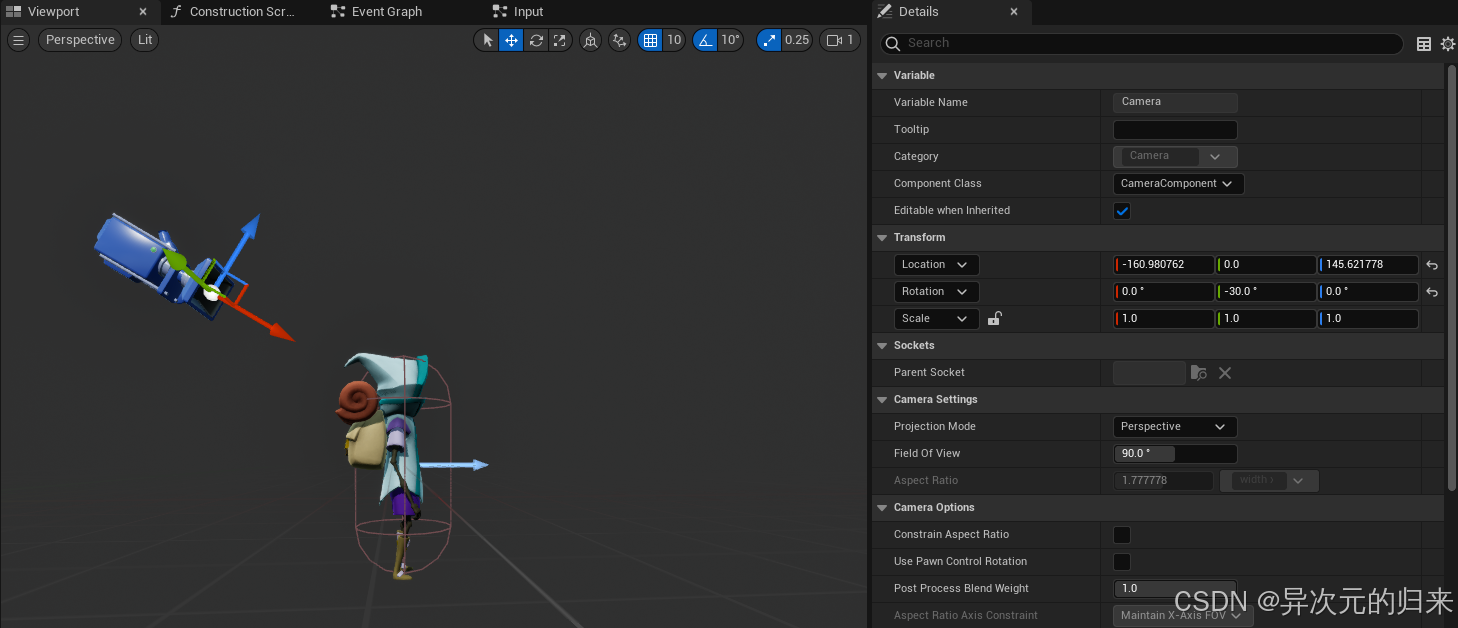
然后,我们到场景里运行下看看实际效果:
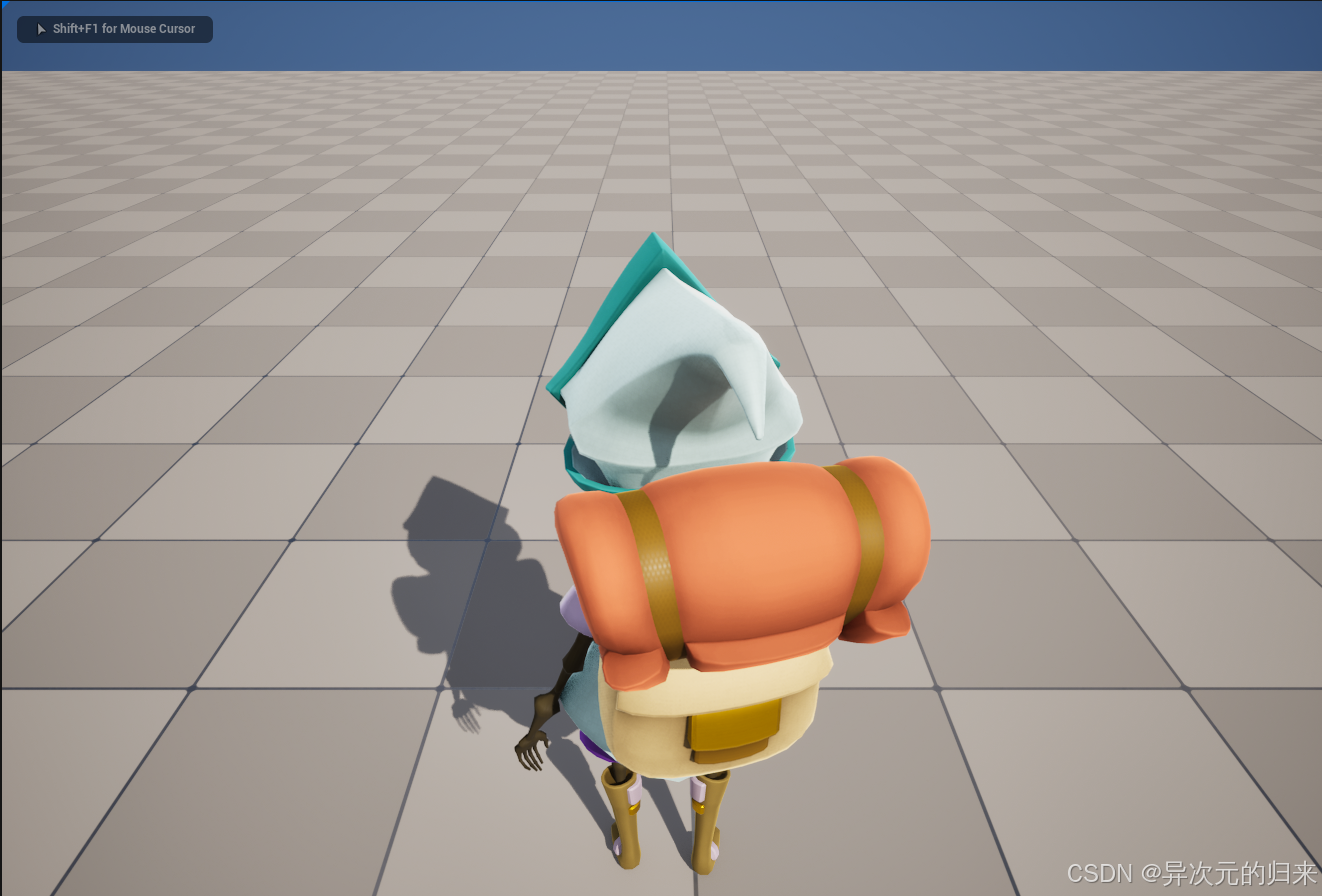
作为一个基本的相机系统,我们希望相机可以一直跟随玩家移动,并且视角永远朝向玩家的前方。这里先加入玩家前后移动与左右移动的代码,并在Project Settings里进行绑定:
c++
void ACF_Character::MoveForward(float Value)
{
	if ((Controller != nullptr) && (Value != 0.0f))
	{
		const FRotator Rotation = Controller->GetControlRotation();
		const FRotator Yaw(0, Rotation.Yaw, 0);

		const FVector Direction = FRotationMatrix(Yaw).GetUnitAxis(EAxis::X);
		AddMovementInput(Direction, Value);
	}
}

void ACF_Character::MoveRight(float Value)
{
	if ((Controller != nullptr) && (Value != 0.0f))
	{
		const FRotator Rotation = Controller->GetControlRotation();
		const FRotator Yaw(0, Rotation.Yaw, 0);

		const FVector Direction = FRotationMatrix(Yaw).GetUnitAxis(EAxis::Y);
		AddMovementInput(Direction, Value);
	}
}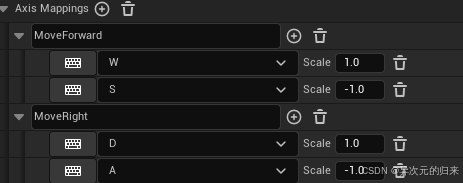
玩家正面朝向x轴方向,肩膀和y轴平行,所以forward使用的EAxis::X,而right使用的是EAxis::Y。
如果此时运行游戏,按方向键,会出现反直觉的奇怪现象,玩家除了location会变化,rotation也会变化,而我们明明只是调用了AddMovementInput,并没有设置玩家的rotation。
这是因为Character Movement这个component默认会勾选Orient Rotation To Movement:
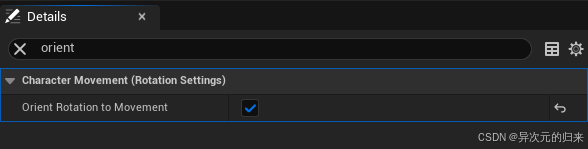
它的初衷是希望玩家移动时,朝向会跟着插值到移动的方向,不然表现会很奇怪,会出现玩家倒着走的情况。
那么实际上,这个选项还是应当勾上的。问题在于我们的camera component是挂在玩家上的,因此玩家旋转时相机也跟着旋转了,导致所有的按键方向最后看上去都变成了前进的方向。
在Camera Option中,还有一个Use Pawn Control Rotation的选项,表示是否把controller当前的rotation设置给camera。具体逻辑可以参见源码:
c++
// CameraComponent.cpp
if (bUsePawnControlRotation)
{
const APawn* OwningPawn = Cast<APawn>(GetOwner());
const AController* OwningController = OwningPawn ? OwningPawn->GetController() : nullptr;
if (OwningController && OwningController->IsLocalPlayerController())
{
const FRotator PawnViewRotation = OwningPawn->GetViewRotation();
if (!PawnViewRotation.Equals(GetComponentRotation()))
{
SetWorldRotation(PawnViewRotation);
}
}
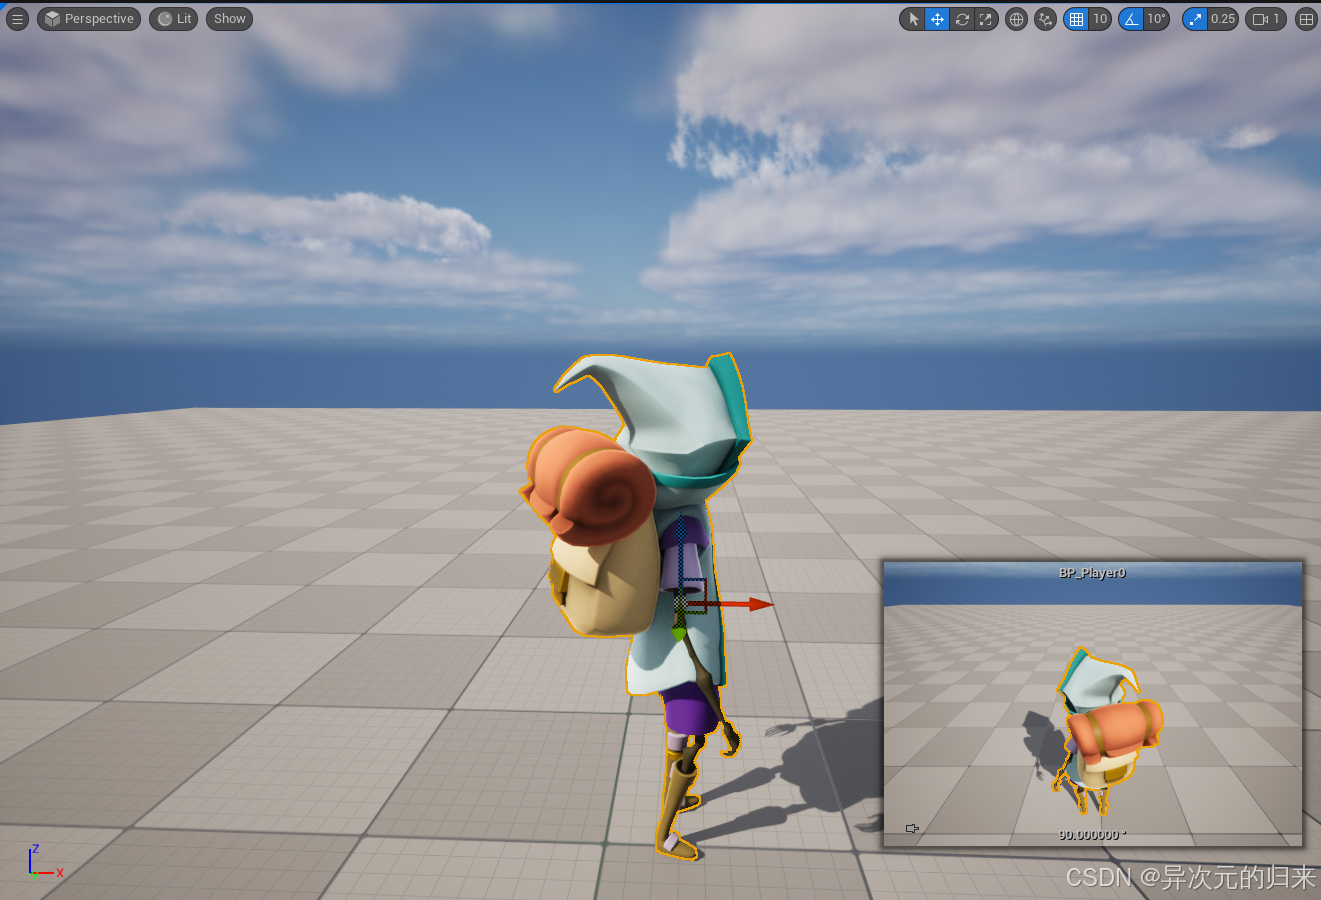
}但如果勾选上了,表现依旧会非常奇怪,这是因为我们现在的输入逻辑压根就不会修改controller的rotation,所以rotation恒定为0,但又因为camera component挂接在root component下,它的location会随着变化。我们可以控制台输入showdebug camera显示当前相机的信息:
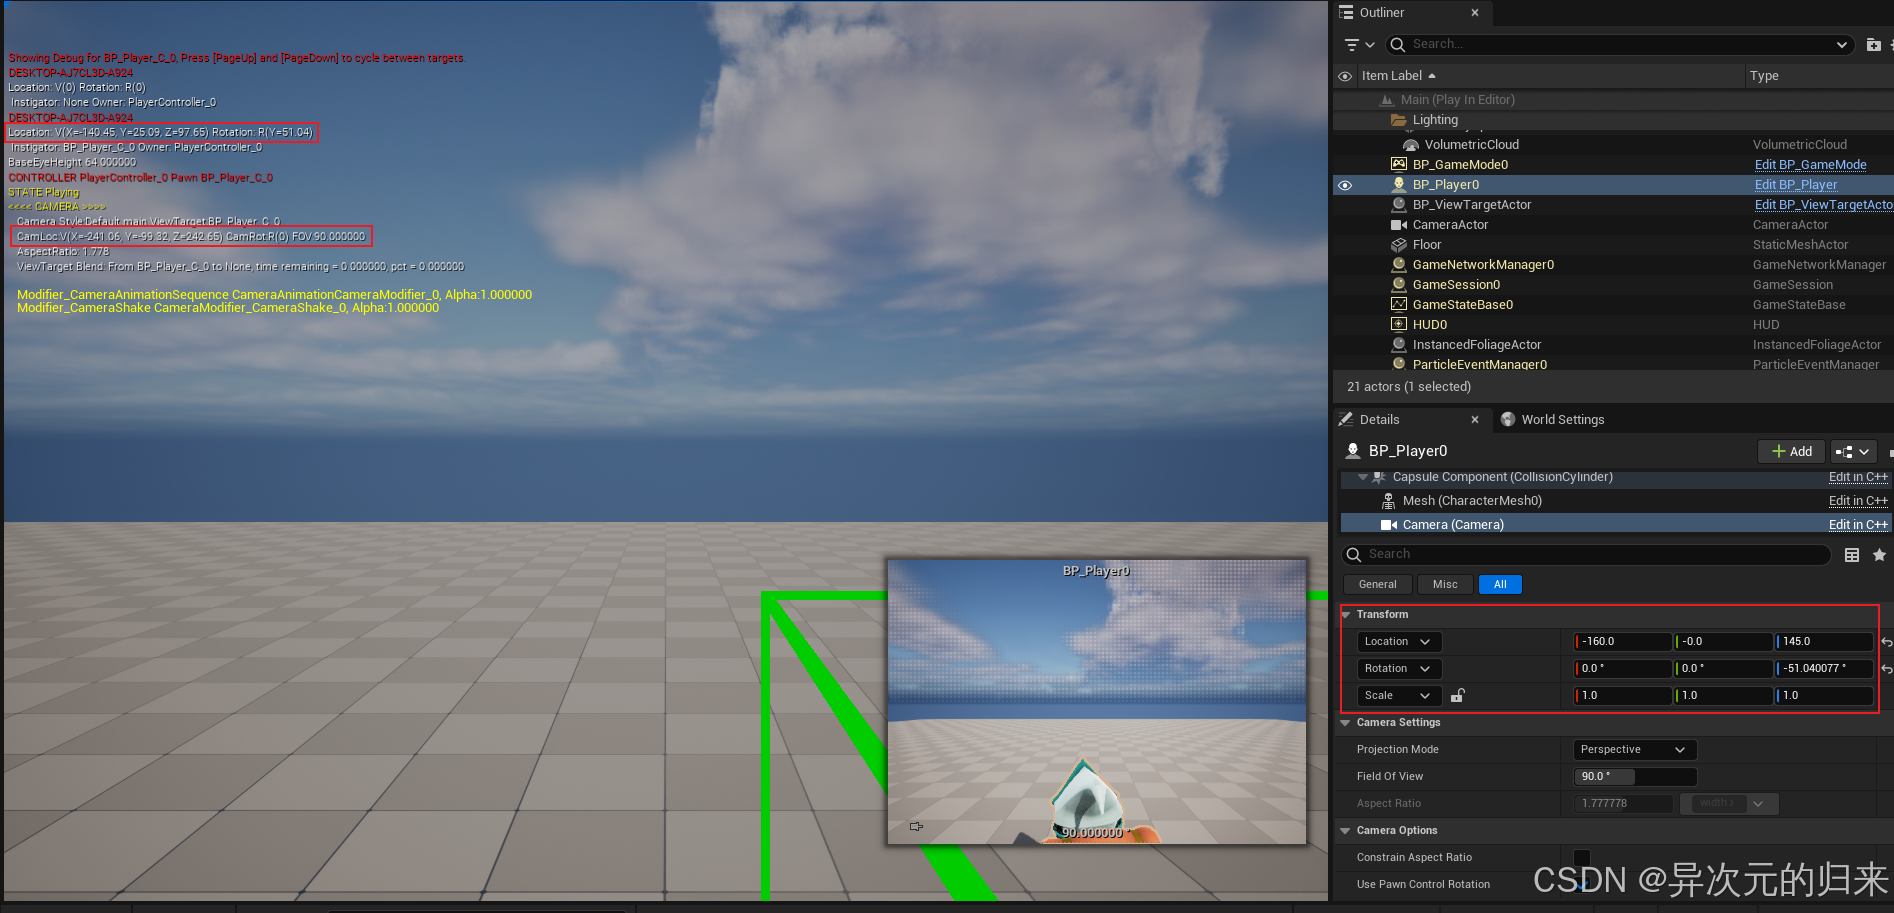
首先注意到camera在世界坐标系下的rotation为0,而玩家当前的rotation为(Y=51.04),右边视图显示的是camera component的transform,它表示camera相对于root component也就是玩家的旋转,因此是-51.04。自由视角下看起来更直观:

那么,为了方便解决这类问题,我们可以使用UE提供的Spring Arm Component。这是个非常强大的组件,它还可以处理相机被其他物体所遮挡的情况。首先在头文件中引入变量声明:
c++
UPROPERTY(EditAnywhere, BlueprintReadWrite, Category = "Camera")
USpringArmComponent* SpringArm;
接着在构造函数中创建component,注意此时camera component需要挂在spring arm上,spring arm会控制它的child component的transform:
c++
ACF_Character::ACF_Character()
{
 	// Set this character to call Tick() every frame.  You can turn this off to improve performance if you don't need it.
	PrimaryActorTick.bCanEverTick = true;

	SpringArm = CreateDefaultSubobject<USpringArmComponent>("SpringArm");
	SpringArm->SetupAttachment(RootComponent);

	Camera = CreateDefaultSubobject<UCameraComponent>("Camera");
	Camera->SetupAttachment(SpringArm);

}
在蓝图中预览:
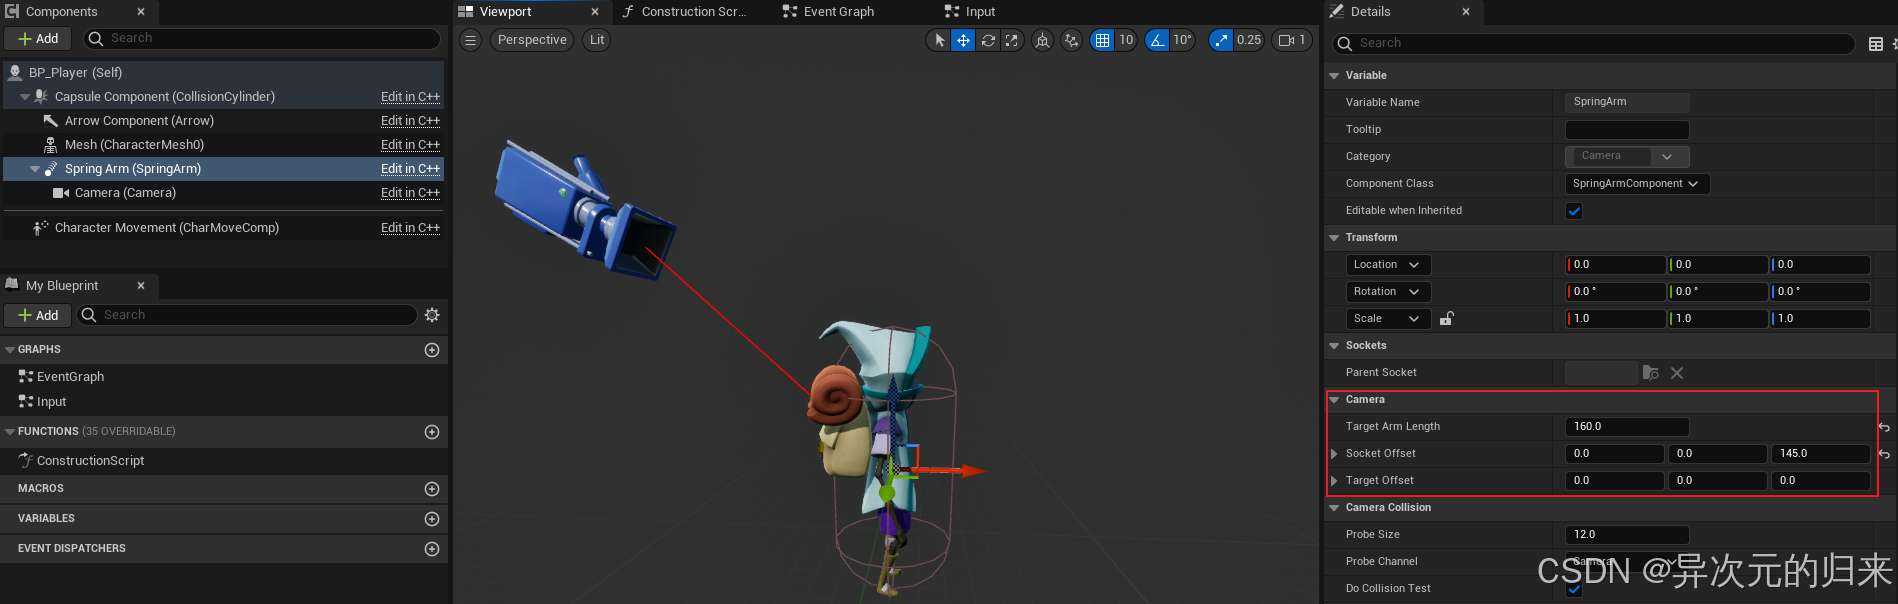
这里主要注意Camera Category下的几个字段。首先是Target Arm Length,它表示弹簧臂的长度,可以用作camera component在玩家forward方向下的距离。如果要调整其他方向的距离,可以使用Socket Offset字段或是Target Offset字段。当然,这两个字段也可以用来调整forward方向,那么它们到底有什么区别呢?如果只是设置offset,看上去效果都一样:
看各种解释也是比较云里雾里,不如直接看代码。用到这两个offset的代码主要集中在USpringArmComponent::UpdateDesiredArmLocation这个函数,相关代码如下:
c++
void USpringArmComponent::UpdateDesiredArmLocation(bool bDoTrace, bool bDoLocationLag, bool bDoRotationLag, float DeltaTime)
{
FRotator DesiredRot = GetTargetRotation();
PreviousDesiredRot = DesiredRot;
// Get the spring arm 'origin', the target we want to look at
FVector ArmOrigin = GetComponentLocation() + TargetOffset;
// We lag the target, not the actual camera position, so rotating the camera around does not have lag
FVector DesiredLoc = ArmOrigin;
PreviousArmOrigin = ArmOrigin;
PreviousDesiredLoc = DesiredLoc;
// Now offset camera position back along our rotation
DesiredLoc -= DesiredRot.Vector() * TargetArmLength;
// Add socket offset in local space
DesiredLoc += FRotationMatrix(DesiredRot).TransformVector(SocketOffset);
{
ResultLoc = DesiredLoc;
bIsCameraFixed = false;
UnfixedCameraPosition = ResultLoc;
}
// Form a transform for new world transform for camera
FTransform WorldCamTM(DesiredRot, ResultLoc);
// Convert to relative to component
FTransform RelCamTM = WorldCamTM.GetRelativeTransform(GetComponentTransform());
// Update socket location/rotation
RelativeSocketLocation = RelCamTM.GetLocation();
RelativeSocketRotation = RelCamTM.GetRotation();
UpdateChildTransforms();
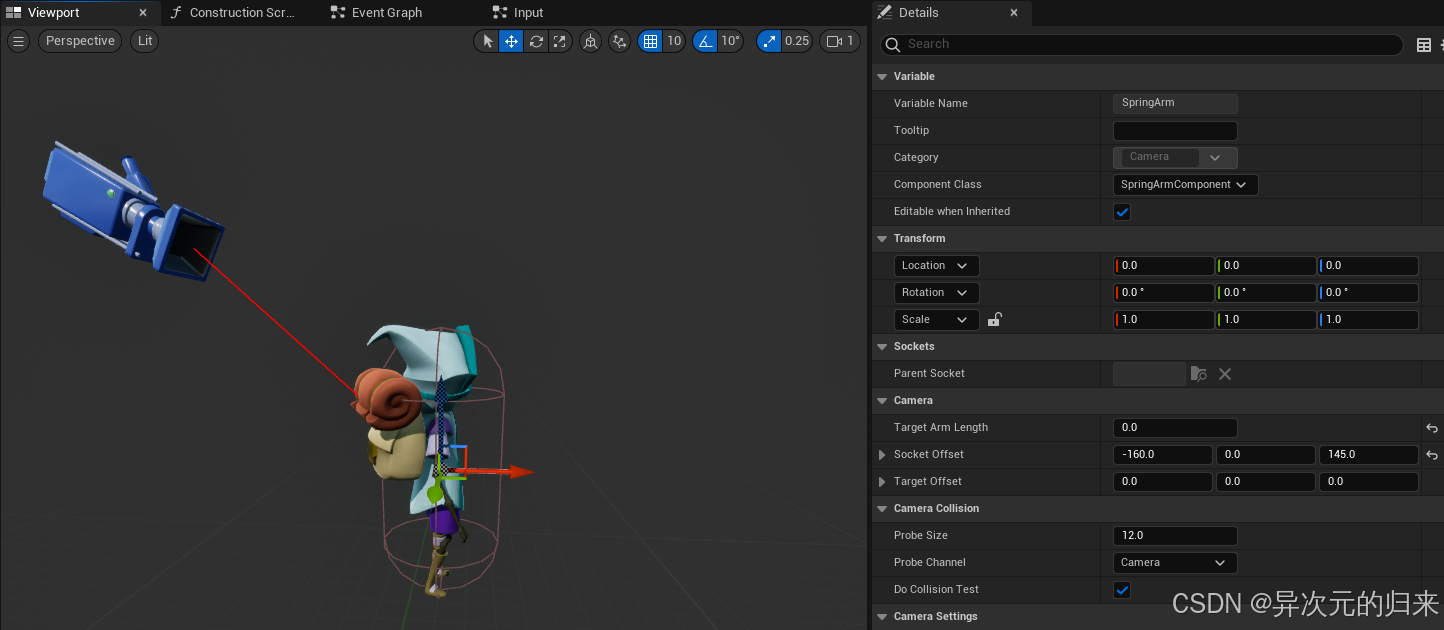
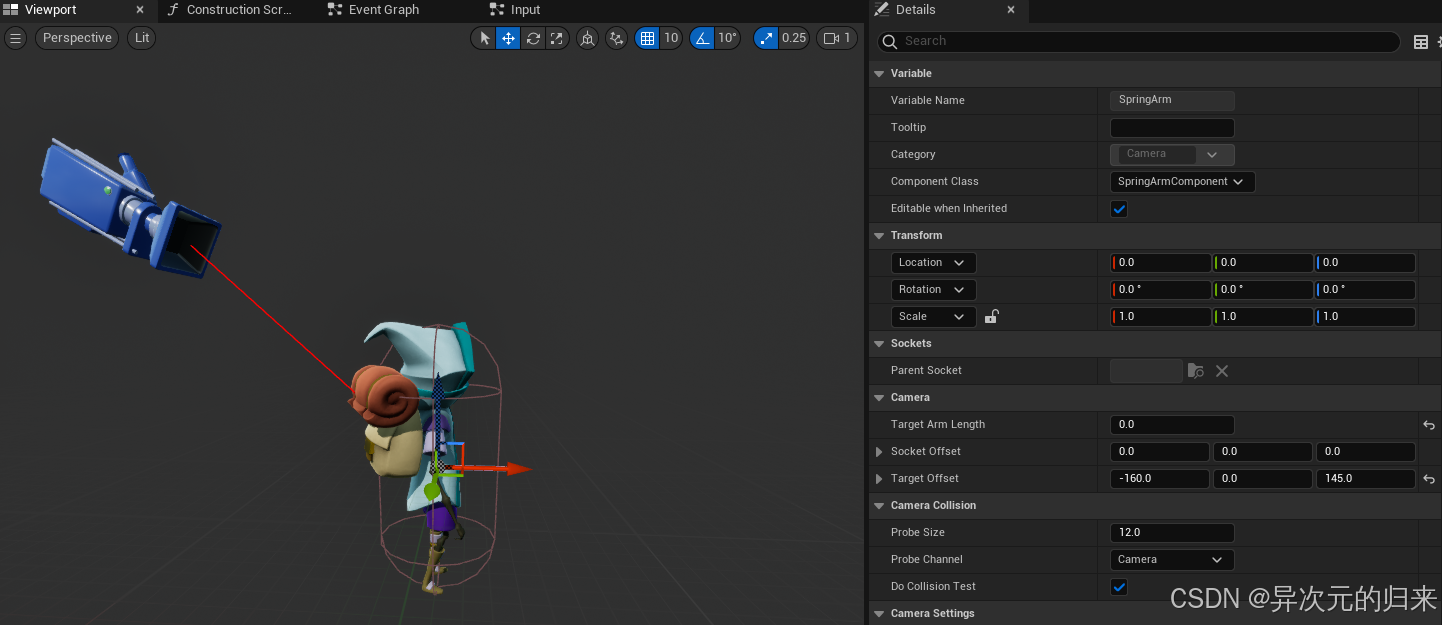
}从代码中可以看出,TargetOffset用处就是对目标的原点进行了偏移,DesiredRot.Vector()表示旋转后的forward方向(x轴),所以TargetArmLength用于计算forward方向下摄像机的位置。最后SocketOffset相当于以此时目标位置为原点旋转范围的半径。这么说有点抽象,我们来看下分别设置TargetOffset和SocketOffset时旋转spring arm component的效果,就一目了然了。
我们再次回到DesiredRot.Vector(),前面说它表示旋转后的forward方向向量,这次来看下它的内部实现:
c++
template<typename T>
UE::Math::TVector<T> UE::Math::TRotator<T>::Vector() const
{
	// Remove winding and clamp to [-360, 360]
	const T PitchNoWinding = FMath::Fmod(Pitch, (T)360.0);
	const T YawNoWinding = FMath::Fmod(Yaw, (T)360.0);

	T CP, SP, CY, SY;
	FMath::SinCos( &SP, &CP, FMath::DegreesToRadians(PitchNoWinding) );
	FMath::SinCos( &SY, &CY, FMath::DegreesToRadians(YawNoWinding) );
	UE::Math::TVector<T> V = UE::Math::TVector<T>( CP*CY, CP*SY, SP );

	return V;
}
这个是怎么得到的呢?首先我们知道TRotator也就包含三个旋转分量:
c++
template<typename T>
struct TRotator
{
public:
	/** Rotation around the right axis (around Y axis), Looking up and down (0=Straight Ahead, +Up, -Down) */
	T Pitch;

	/** Rotation around the up axis (around Z axis), Turning around (0=Forward, +Right, -Left)*/
	T Yaw;

	/** Rotation around the forward axis (around X axis), Tilting your head, (0=Straight, +Clockwise, -CCW) */
	T Roll;
};我们认为每次旋转都是围绕固定轴(世界坐标系)旋转,也就是外旋,那么按照外旋方式,是以X-Y-Z(roll-pitch-yaw )的旋转顺序旋转,最终得到的是一个左乘 的旋转矩阵。不过这里的输入向量很简单,就是(1,0,0)。分别按顺序乘以3个旋转矩阵:
R o l l = 1 0 0 0 c o s ( r o l l ) − s i n ( r o l l ) 0 s i n ( r o l l ) c o s ( r o l l ) Roll = \begin{bmatrix} 1 & 0 & 0 \\ 0 & cos(roll) & -sin(roll) \\ 0 & sin(roll) & cos(roll) \end{bmatrix} Roll= 1000cos(roll)sin(roll)0−sin(roll)cos(roll)
R o l l ⋅ 1 , 0 , 0 T = 1 , 0 , 0 T Roll \cdot 1, 0, 0^T = 1, 0, 0^T Roll⋅1,0,0T=1,0,0T
P i t c h = c o s ( p i t c h ) 0 − s i n ( p i t c h ) 0 1 0 s i n ( p i t c h ) 0 c o s ( p i t c h ) Pitch = \begin{bmatrix} cos(pitch) & 0 & -sin(pitch) \\ 0 & 1 & 0 \\ sin(pitch) & 0 & cos(pitch) \end{bmatrix} Pitch= cos(pitch)0sin(pitch)010−sin(pitch)0cos(pitch)
P i t c h ⋅ 1 , 0 , 0 T = c o s ( p i t c h ) , 0 , s i n ( p i t c h ) T Pitch \cdot 1, 0, 0^T = cos(pitch), 0, sin(pitch)^T Pitch⋅1,0,0T=cos(pitch),0,sin(pitch)T
Y a w = c o s ( y a w ) − s i n ( y a w ) 0 s i n ( y a w ) c o s ( y a w ) 0 0 0 1 Yaw = \begin{bmatrix} cos(yaw) & -sin(yaw) & 0 \\ sin(yaw) & cos(yaw) & 0 \\ 0 & 0 & 1 \end{bmatrix} Yaw= cos(yaw)sin(yaw)0−sin(yaw)cos(yaw)0001
Y a w ⋅ c o s ( p i t c h ) , 0 , s i n ( p i t c h ) T = c o s ( y a w ) c o s ( p i t c h ) , s i n ( y a w ) c o s ( p i t c h ) , s i n ( p i t c h ) T Yaw \cdot cos(pitch), 0, sin(pitch)^T = cos(yaw)cos(pitch), sin(yaw)cos(pitch), sin(pitch)^T Yaw⋅cos(pitch),0,sin(pitch)T=cos(yaw)cos(pitch),sin(yaw)cos(pitch),sin(pitch)T
这就和代码里完全一致了。如果用几何方式来推导,答案也是一样的。
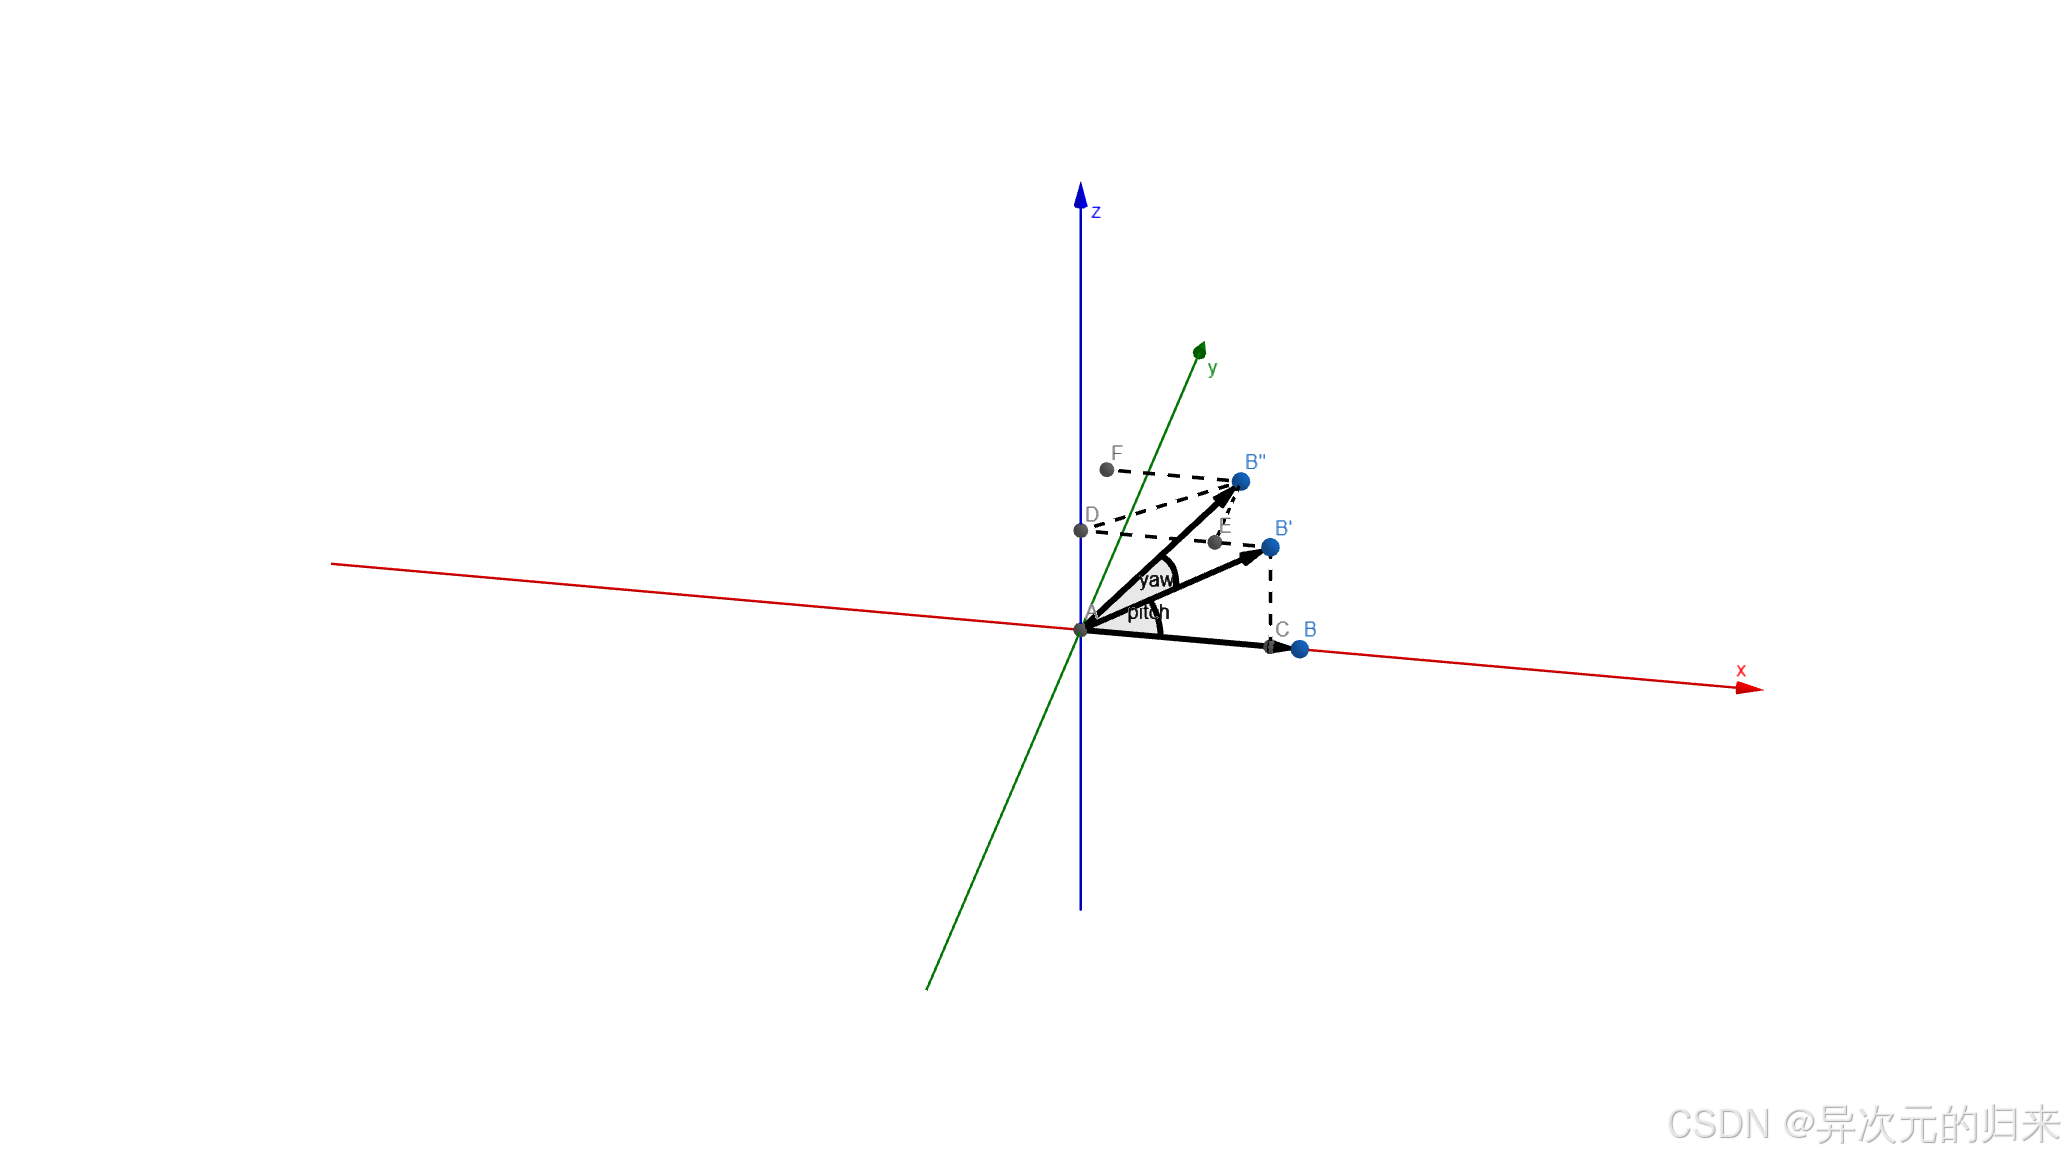
如图,易知B'的坐标为 ( c o s ( p i t c h ) , 0 , s i n ( p i t c h ) ) (cos(pitch), 0, sin(pitch)) (cos(pitch),0,sin(pitch)),然后在绕z轴旋转时,平行于z轴的分量是不参与旋转的,只需计算垂直的分量,那么容易知道DB'的长度为 c o s ( p i t c h ) cos(pitch) cos(pitch),B"E的长度为 s i n ( y a w ) c o s ( p i t c h ) sin(yaw)cos(pitch) sin(yaw)cos(pitch),B''F的长度为 c o s ( y a w ) c o s ( p i t c h ) cos(yaw)cos(pitch) cos(yaw)cos(pitch)。所以最后B''的坐标为 ( c o s ( y a w ) c o s ( p i t c h ) , s i n ( y a w ) c o s ( p i t c h ) , s i n ( p i t c h ) ) (cos(yaw)cos(pitch), sin(yaw)cos(pitch), sin(pitch)) (cos(yaw)cos(pitch),sin(yaw)cos(pitch),sin(pitch))。
不过此时运行起来发现,相机依旧是跟随着玩家旋转,似乎并没有什么卵用。但是,如果我们勾选上Spring Arm Component里的Use Pawn Control Rotation,一切就变得大不同:
这是为什么呢?为什么在Camera Component中勾选这个选项是没用的,而Spring Arm Component就可以了呢?这点还是要去源码里找答案:
c++
FRotator USpringArmComponent::GetTargetRotation() const
{
	FRotator DesiredRot = GetDesiredRotation();

	if (bUsePawnControlRotation)
	{
		if (APawn* OwningPawn = Cast<APawn>(GetOwner()))
		{
			const FRotator PawnViewRotation = OwningPawn->GetViewRotation();
			if (DesiredRot != PawnViewRotation)
			{
				DesiredRot = PawnViewRotation;
			}
		}
	}
}可以看到,这里rotation的计算和前面是一样的,但别忘了我们前面讨论的UpdateDesiredArmLocation函数,相机的位置会更新为距离Spring Arm的forward方向TargetArmLength,再加上固定的SocketOffset,同时相机rotation和Spring Arm保持一致,就像这样:
到目前为止,我们终于让WASD键只控制玩家移动,不再控制相机,相机也能默默地跟随玩家了。那么下一步很自然地,就是如何手动控制相机呢?首先还是先做下绑定:
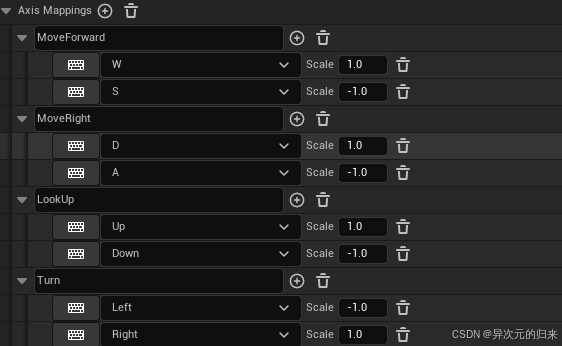
然后,基于我们现在的设置,其实只要对controller施加旋转,理论上就能达到想要的效果了:
c++
void ACF_Character::TurnAtRate(float Rate)
{
	AddControllerYawInput(Rate * TurnRate * GetWorld()->GetDeltaSeconds());
}

void ACF_Character::LookUpAtRate(float Rate)
{
	AddControllerPitchInput(Rate * LookUpRate * GetWorld()->GetDeltaSeconds());
}
到目前为止,我们有了一个初步可用的第三人称相机了。在下一章节中,我们再对当前的相机做一些优化,让它的功能更加丰富。
Reference
1 Camera Framework Essentials for Games
2 Working with Camera Components
5 How can I use "Add Movement Input" without rotation?
7 How to convert Euler angles to directional vector?
8 欧拉角顺序与转换