前言
在一切开始之前,请确保你的cmd命令行和powershell命令行可以正常打开。如果不能,建议重装系统。我不确定这是否会影响你最终的结果,毕竟windows的坑太多了。
安装顺序:visual studio -> cuda -> cudnn -> python -> tensorflow
版本兼容关系:Tensorflow与Python、CUDA、cuDNN的版本对应表_tensorflow版本对应-CSDN博客
由于tensorflow的新版本已经不支持windows的gpu训练,因此你最好的选择是:

同时,从官方的文档 CUDA Installation Guide for Windows 中,你也可以看到 MSVC 2019 其实就是 Visual Studio 2019 16.x。 其实 Visual Studio 2019 对应的版本就是16.x,不用担心不一致的问题。但是我们需要 下载 VisualStudio 2022,因为微软已经不提供2019的下载链接。
友情提示:本教程中,没有步骤可以跳过。如果你跳过了某一步,你一定会回来重新补上。
如有不当之处,欢迎指教,不胜感激。
下载 VisualStudio 2022
https://my.visualstudio.com/Downloads?PId=8228 ,打开链接可能会提示你需要登陆Microsoft账户,登陆后, 再次点击这个链接,可能会提示你要订阅 Dev Essensial, 点击确认,再次点击。总之,可能要重复好多次你才能真正进入到下载页面。
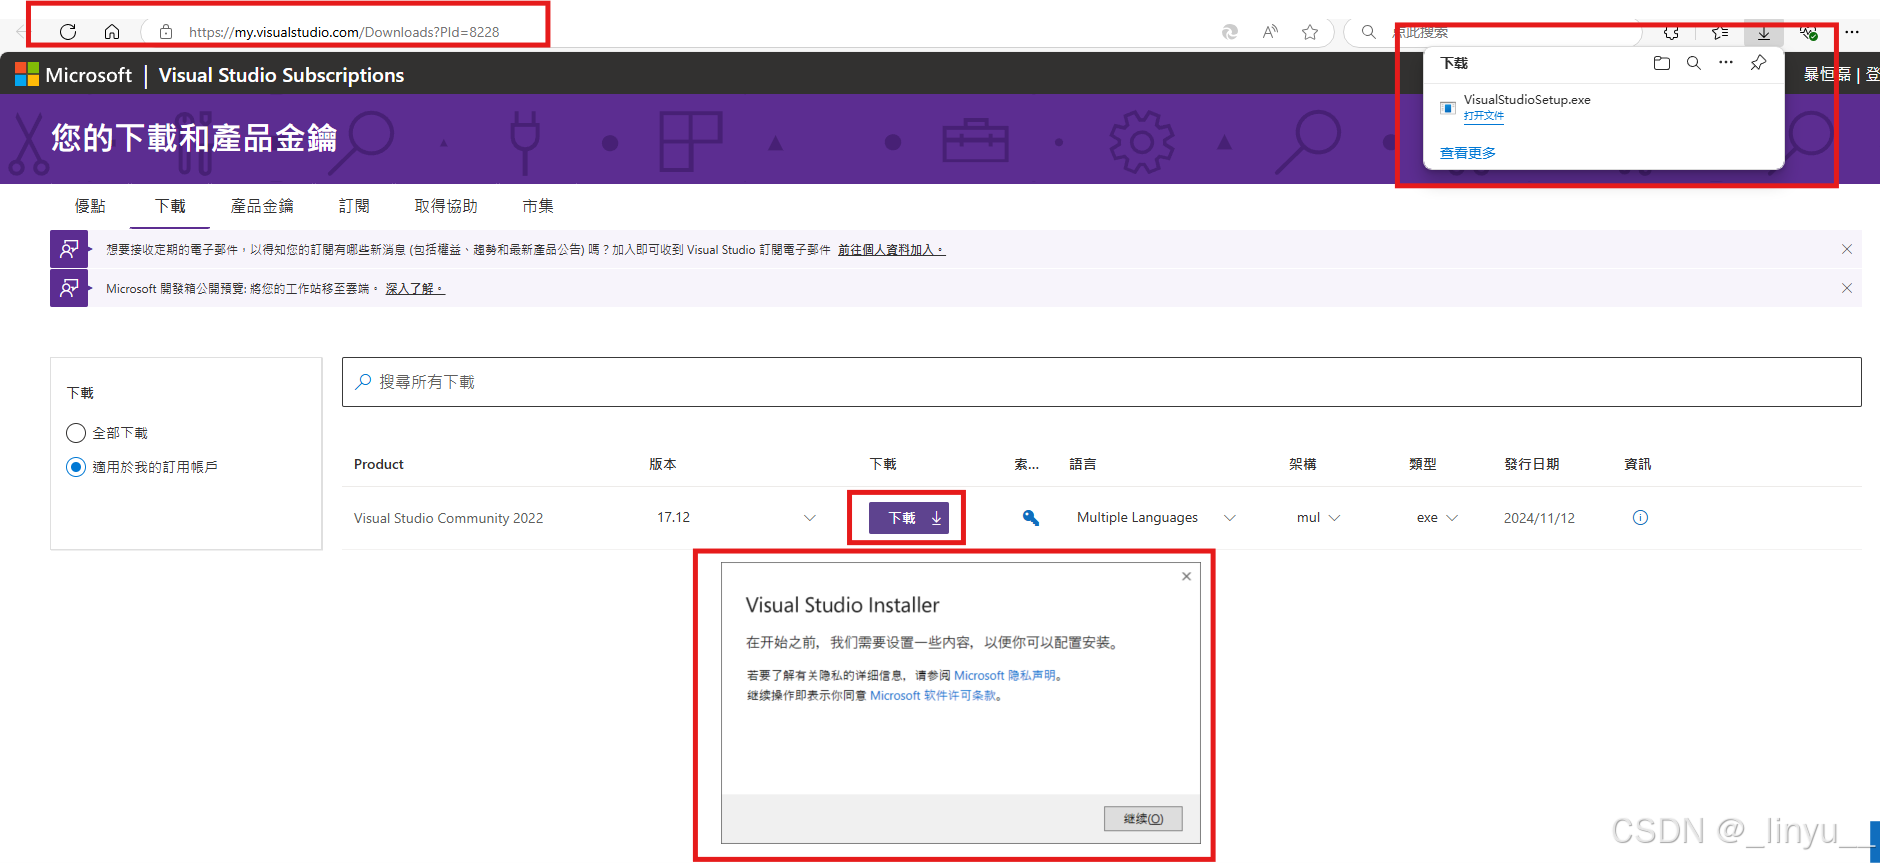
打开安装器,等待初始化完成后,只选择C++桌面开发,然后安装即可。
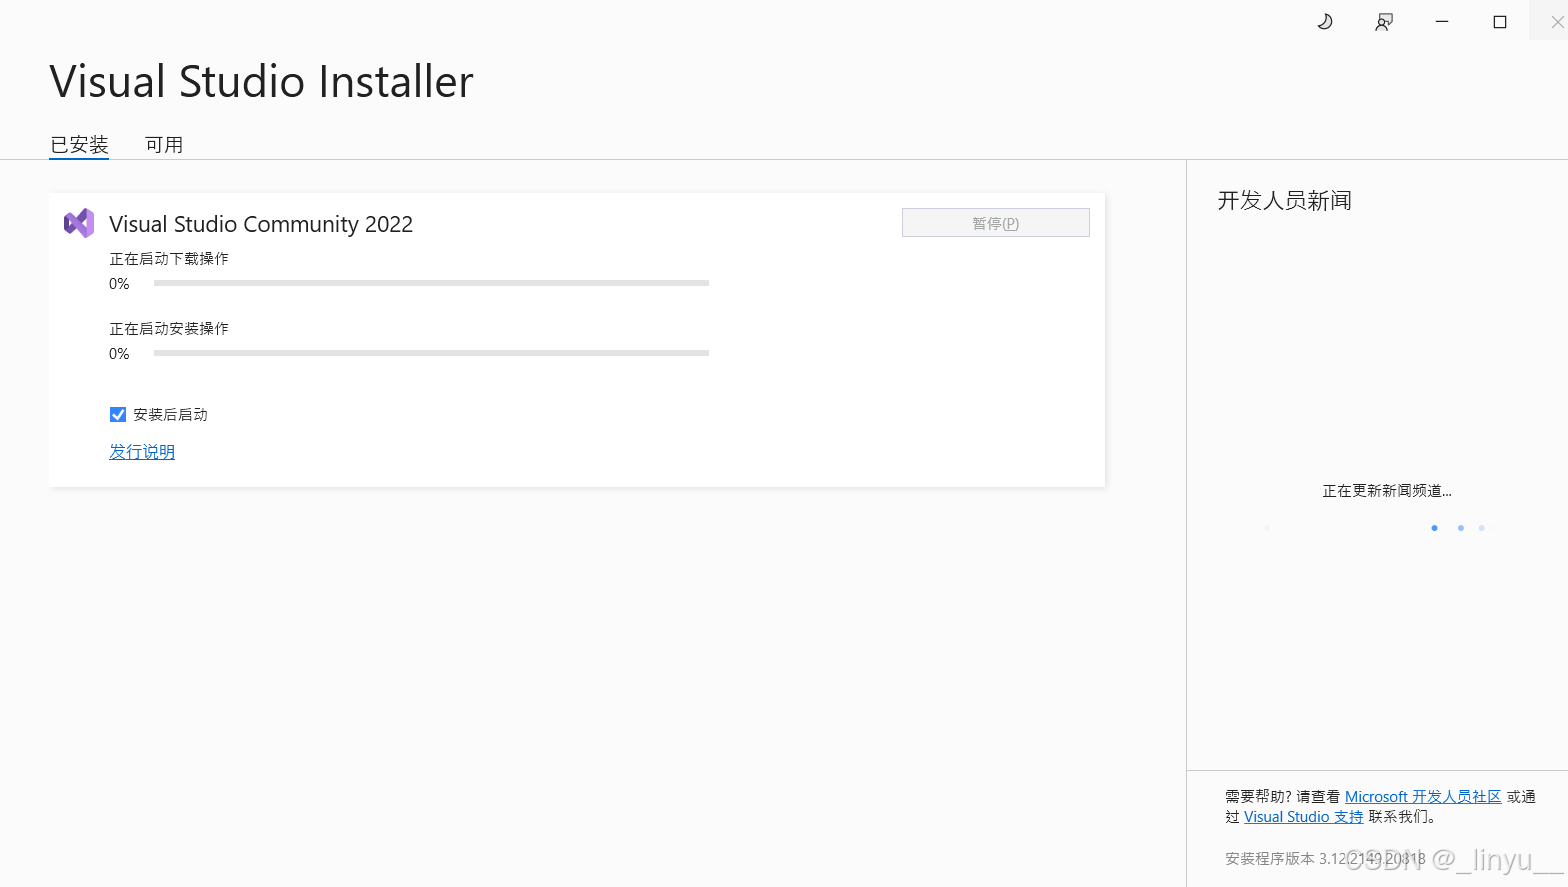
安装完成后,启动visual studio2022,登录微软账户,然后新建一个空项目(这是为了验证你的visual studio2022是否正常)。然后关闭应用即可。
安装cuda
tensorflow 2.10 对应的是cuda11,因此我们下载cuda 11.8.0 这个版本即可。
CUDA Toolkit Archive | NVIDIA Developer
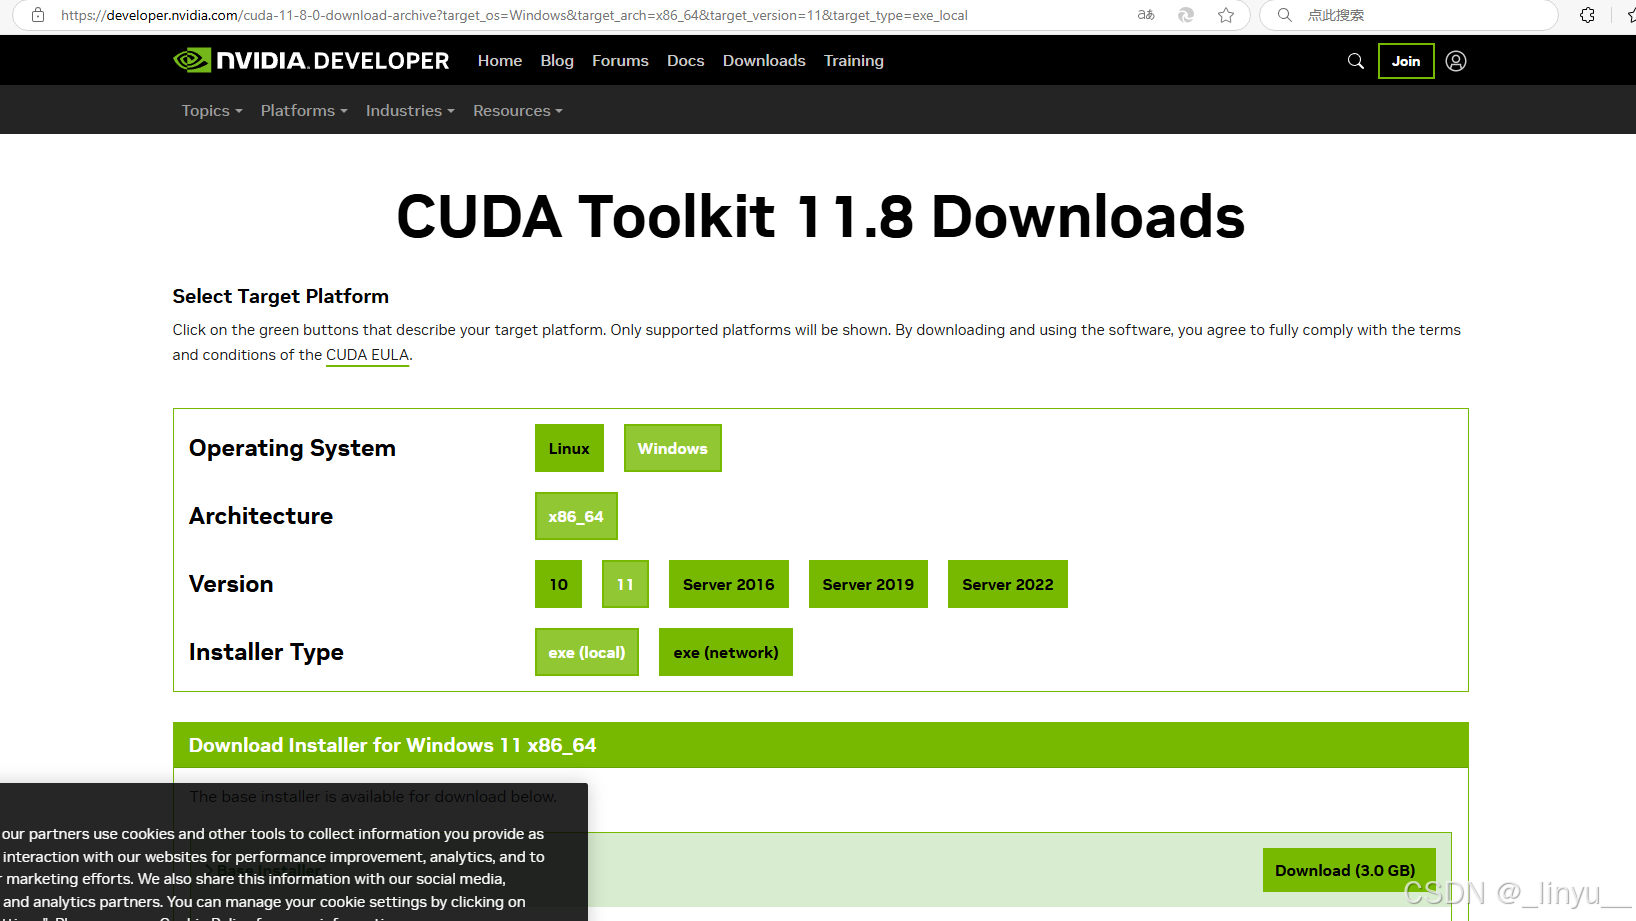
下载后,执行安装包(挺慢的,需要等好几分钟才会出现窗口)。安装时要注意:选择自定义安装,勾选所有安装项。
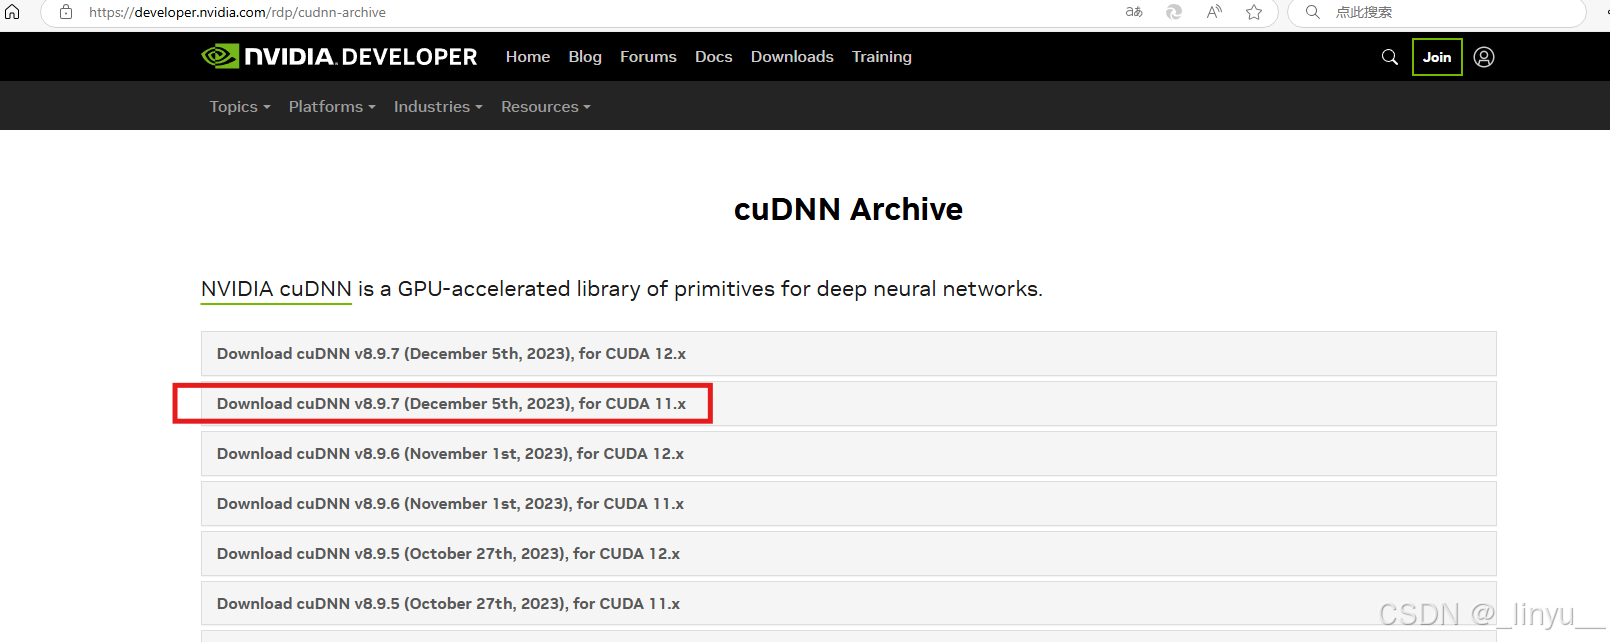
安装cudnn
虽然cudnn9也支持cuda11,但是tensorflow2.10并没有适配cudnn9,因此我们还是需要下载cudnn8。
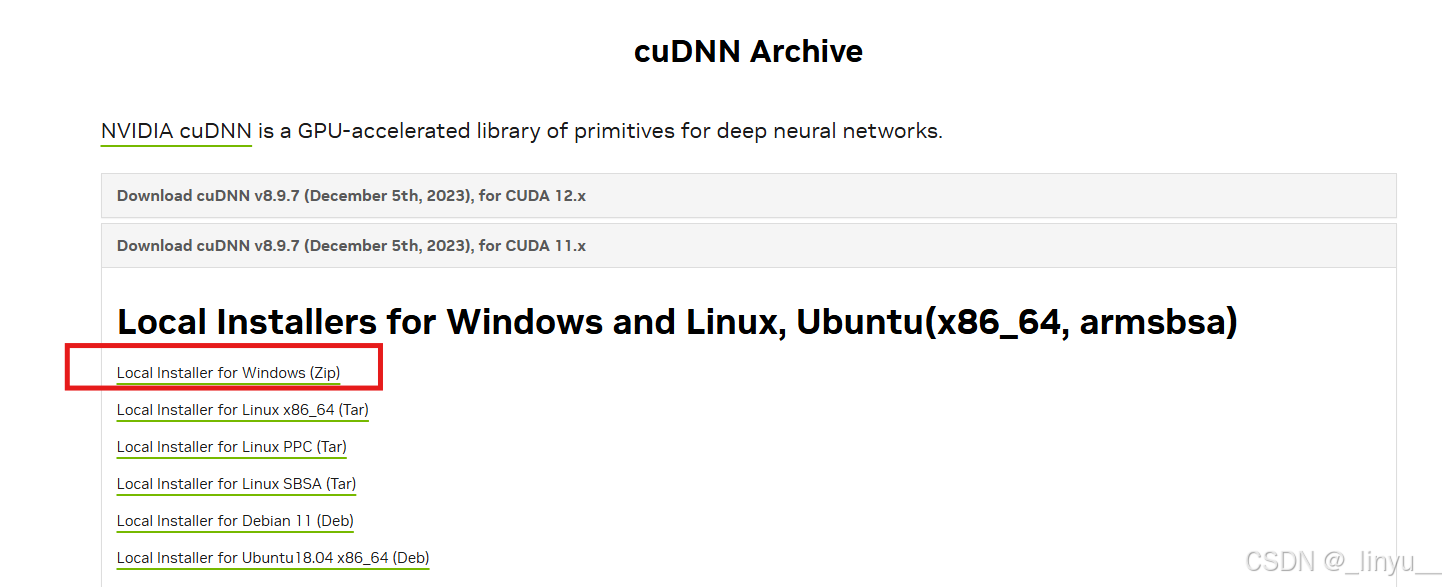
cuDNN Archive | NVIDIA Developer
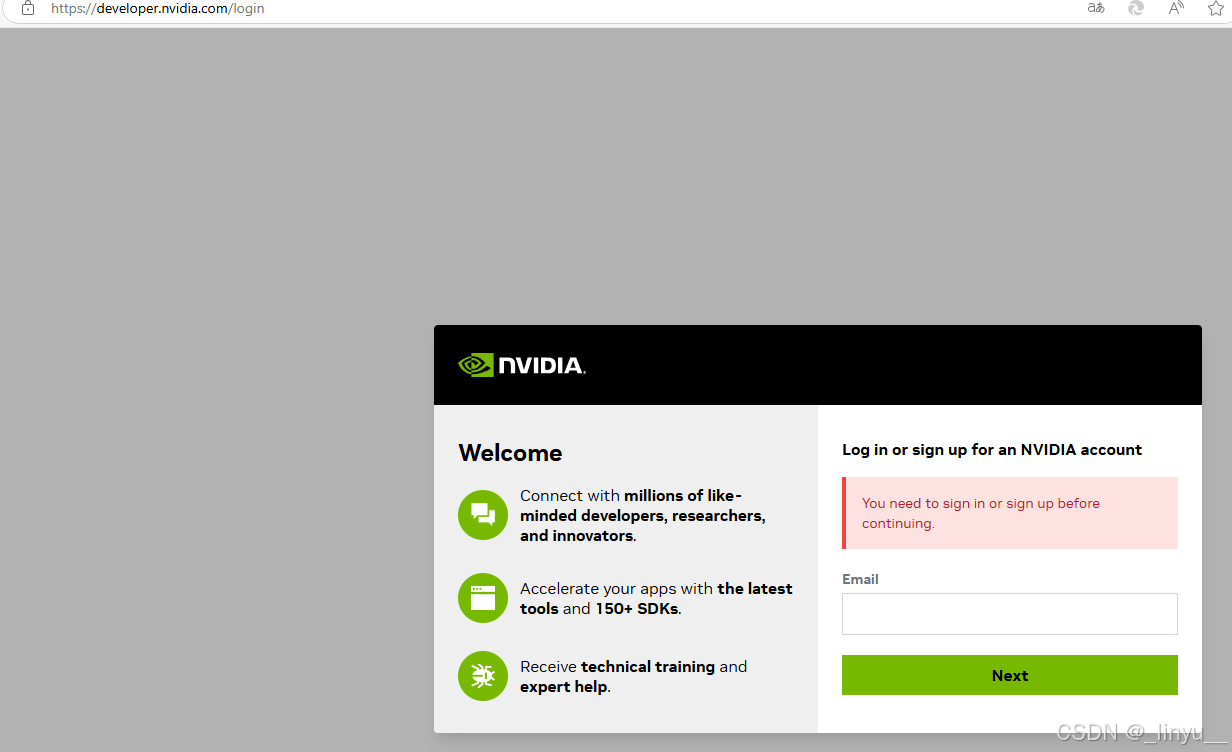
选择cudnn8的最新版本中,适用于cuda11.x的版本。选择适用于windows的zip安装包。登录才能下载,天下的乌鸦一般黑。
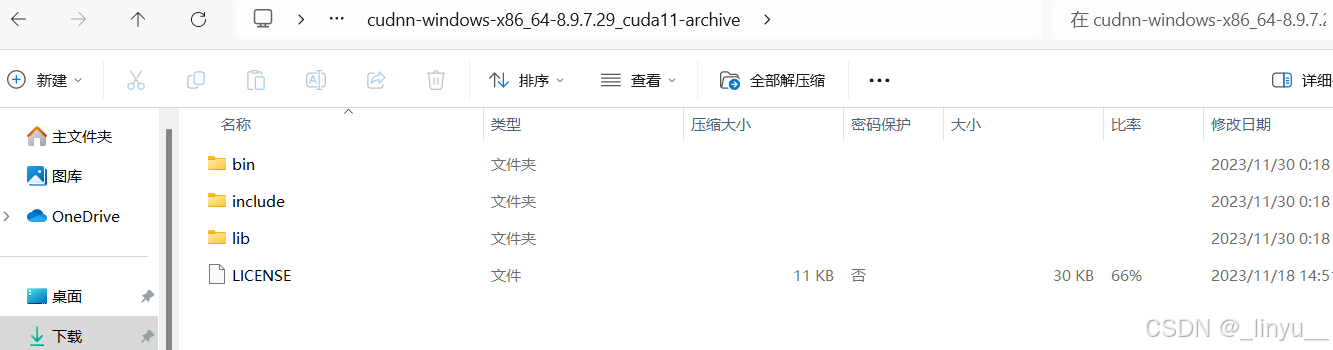
解压zip包,将 bin、include、lib\x64 下的文件,分别复制到 %CUDA_PATH% 下的 bin、include、lib\x64 下。%CUDA_PATH%是一个环境变量,在你安装完cuda之后就已经被自动设置了,你在资源管理器路径栏输入%CUDA_PATH%,然后回车即可跳转到该目录下。
安装python
tensorflow2.10支持的python版本是 3.10,建议选择 3.10.11,因为这是python3.10最后一个有安装包的版本。
Python Release Python 3.10.11 | Python.org
安装tensorflow
依次执行命令:
bash
pip install numpy==1.24.0 -i https://pypi.tuna.tsinghua.edu.cn/simple
pip install tensorflow==2.10.0 -i https://pypi.tuna.tsinghua.edu.cn/simple
验证tensorflow
这里给一段程序,正常运行效果如下,并且开头不应该有任何warning或者提示:
python
import tensorflow as tf

mnist = tf.keras.datasets.mnist

(x_train, y_train), (x_test, y_test) = mnist.load_data()
x_train, x_test = x_train / 255.0, x_test / 255.0

model = tf.keras.models.Sequential([
  tf.keras.layers.Flatten(input_shape=(28, 28)),
  tf.keras.layers.Dense(128, activation='relu'),
  tf.keras.layers.Dropout(0.2),
  tf.keras.layers.Dense(10)
])

predictions = model(x_train[:1]).numpy()
predictions

tf.nn.softmax(predictions).numpy()

loss_fn = tf.keras.losses.SparseCategoricalCrossentropy(from_logits=True)

loss_fn(y_train[:1], predictions).numpy()

model.compile(optimizer='adam',
              loss=loss_fn,
              metrics=['accuracy'])

model.fit(x_train, y_train, epochs=5)

model.evaluate(x_test,  y_test, verbose=2)

probability_model = tf.keras.Sequential([
  model,
  tf.keras.layers.Softmax()
])

probability_model(x_test[:5])
常见问题
tensorflow运行报错
原因是numpy版本太高了,必须使用 numpy 1.x,不能是2.x。
python
A module that was compiled using NumPy 1.x cannot be run in
NumPy 2.1.3 as it may crash. To support both 1.x and 2.x
versions of NumPy, modules must be compiled with NumPy 2.0.
Some module may need to rebuild instead e.g. with 'pybind11>=2.12'.

If you are a user of the module, the easiest solution will be to
downgrade to 'numpy<2' or try to upgrade the affected module.
We expect that some modules will need time to support NumPy 2.

Traceback (most recent call last):  File "C:\Users\baohe\Documents\projs\genshin-roller\main.py", line 1, in <module>
    import tensorflow as tf
  File "C:\Users\baohe\Documents\projs\genshin-roller\venv\lib\site-packages\tensorflow\__init__.py", line 37, in <module>
    from tensorflow.python.tools import module_util as _module_util
  File "C:\Users\baohe\Documents\projs\genshin-roller\venv\lib\site-packages\tensorflow\python\__init__.py", line 37, in <module>
    from tensorflow.python.eager import context
  File "C:\Users\baohe\Documents\projs\genshin-roller\venv\lib\site-packages\tensorflow\python\eager\context.py", line 35, in <module>
    from tensorflow.python.client import pywrap_tf_session
  File "C:\Users\baohe\Documents\projs\genshin-roller\venv\lib\site-packages\tensorflow\python\client\pywrap_tf_session.py", line 19, in <module>
    from tensorflow.python.client._pywrap_tf_session import *
AttributeError: _ARRAY_API not found
解决办法:
bash
pip uninstall numpy
pip install numpy==1.24.0 -i https://pypi.tuna.tsinghua.edu.cn/simple
tensorflow虽然能正常运行,但是GPU没有被使用
warning信息如下:
python
2024-11-17 00:58:51.406580: W tensorflow/stream_executor/platform/default/dso_loader.cc:64] Could not load dynamic library 'cudart64_110.dll'; dlerror: cudart64_110.dll not found
2024-11-17 00:58:51.406746: I tensorflow/stream_executor/cuda/cudart_stub.cc:29] Ignore above cudart dlerror if you do not have a GPU set up on your machine.
cudart64_110.dll 是 cuda11.x 版本的dll文件,没有就说明你安装的cuda版本不正确。请按照上面"安装cuda"环节重新安装正确的版本。
还有一种情况:
python
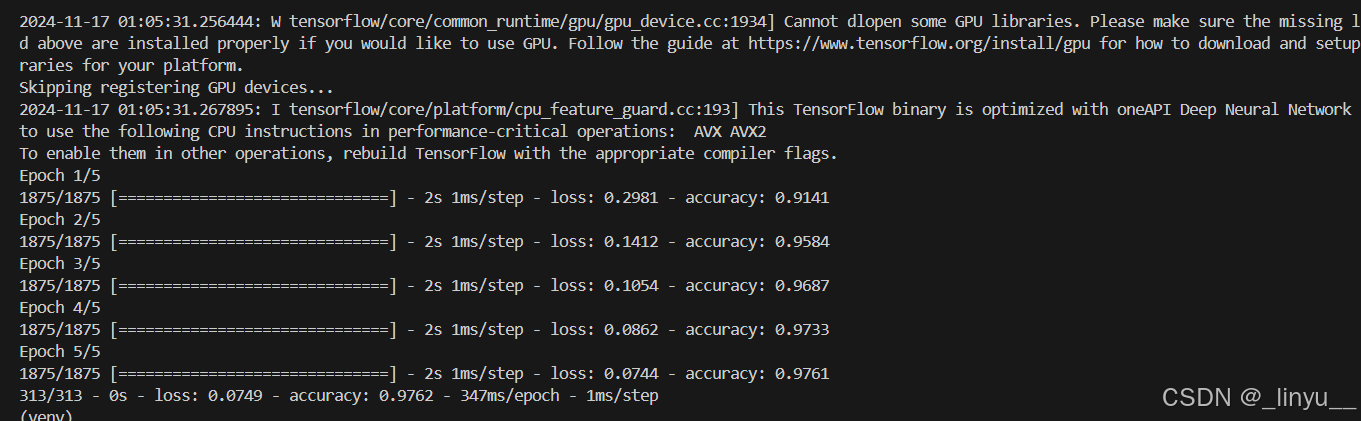
2024-11-17 08:00:45.590570: W tensorflow/stream_executor/platform/default/dso_loader.cc:64] Could not load dynamic library 'cudnn64_8.dll'; dlerror: cudnn64_8.dll not found
2024-11-17 08:00:45.594909: W tensorflow/core/common_runtime/gpu/gpu_device.cc:1934] Cannot dlopen some GPU libraries. Please make sure the missing libraries mentioned above are installed properly if you would like to use GPU. Follow the guide at https://www.tensorflow.org/install/gpu for how to download and setup the required libraries for your platform.
Skipping registering GPU devices...
cudnn64_8.dll 是cudnn8的dll文件,没有就说明你没有正确安装cudnn。请按照上面"安装cudnn"环节重新安装正确的版本。