文章目录
- [1、docker hub](#1、docker hub)
-
- 1_注册
- 2_登录
- 3_创建容器镜像仓库
- [4_在本地登录Docker Hub](#4_在本地登录Docker Hub)
- 5_上传容器镜像
- 6_下载容器镜像
- 2、harbor
-
- [1_获取 docker compose二进制文件](#1_获取 docker compose二进制文件)
- 2_获取harbor安装文件
- 3_获取TLS文件
- 4_修改配置文件
- 5_执行预备脚本
- 6_执行安装脚本
- 7_验证运行情况
- 8_访问harborUI界面
- 9_harbor重启时存在的问题
- 3、docker镜像上传至Harbor及镜像下载
-
- [1_修改docker daemon使用harbor](#1_修改docker daemon使用harbor)
- [2_docker tag](#2_docker tag)
- [3_docker push](#3_docker push)
- [4_docker pull](#4_docker pull)
- [5_向 Harbor 和 Docker 提供证书](#5_向 Harbor 和 Docker 提供证书)
- 4、阿里云容器镜像仓库
- 5、总结
容器镜像仓库 (Container Image Registry)是用来存储、管理、分发和共享容器镜像的系统。
容器镜像本质上是一个包含所有必要代码、库、配置文件以及环境依赖的可执行包,而镜像仓库则提供了一个集中管理这些镜像的平台,使得容器可以跨环境、跨平台共享和分发。
容器镜像仓库的出现解决了本地存储镜像占用空间大且管理困难等多个问题,尤其是在大规模应用和分布式系统的环境中,带来了很大的便利。
1、docker hub
Docker Hub 是 Docker 官方推出的容器镜像仓库,旨在为开发者提供一个集中的公共存储库来存放和共享Docker 镜像。
Docker Hub 的推出使得开发人员能够快速地上传、下载和分享容器镜像,大大简化了容器的分发和管理过程。
Docker Hub 提供了数千个官方和社区镜像,包括操作系统镜像、数据库镜像、编程语言环境镜像等。
用户可以通过 Docker Hub 提供的 API 进行自动化操作,同时也可以直接使用命令行工具 docker pull 来从Docker Hub 拉取镜像,或者通过 docker push 上传镜像。
官方网址:https://hub.docker.com/ 。
1_注册
准备邮箱及用户ID,访问网址:https://www.docker.com/
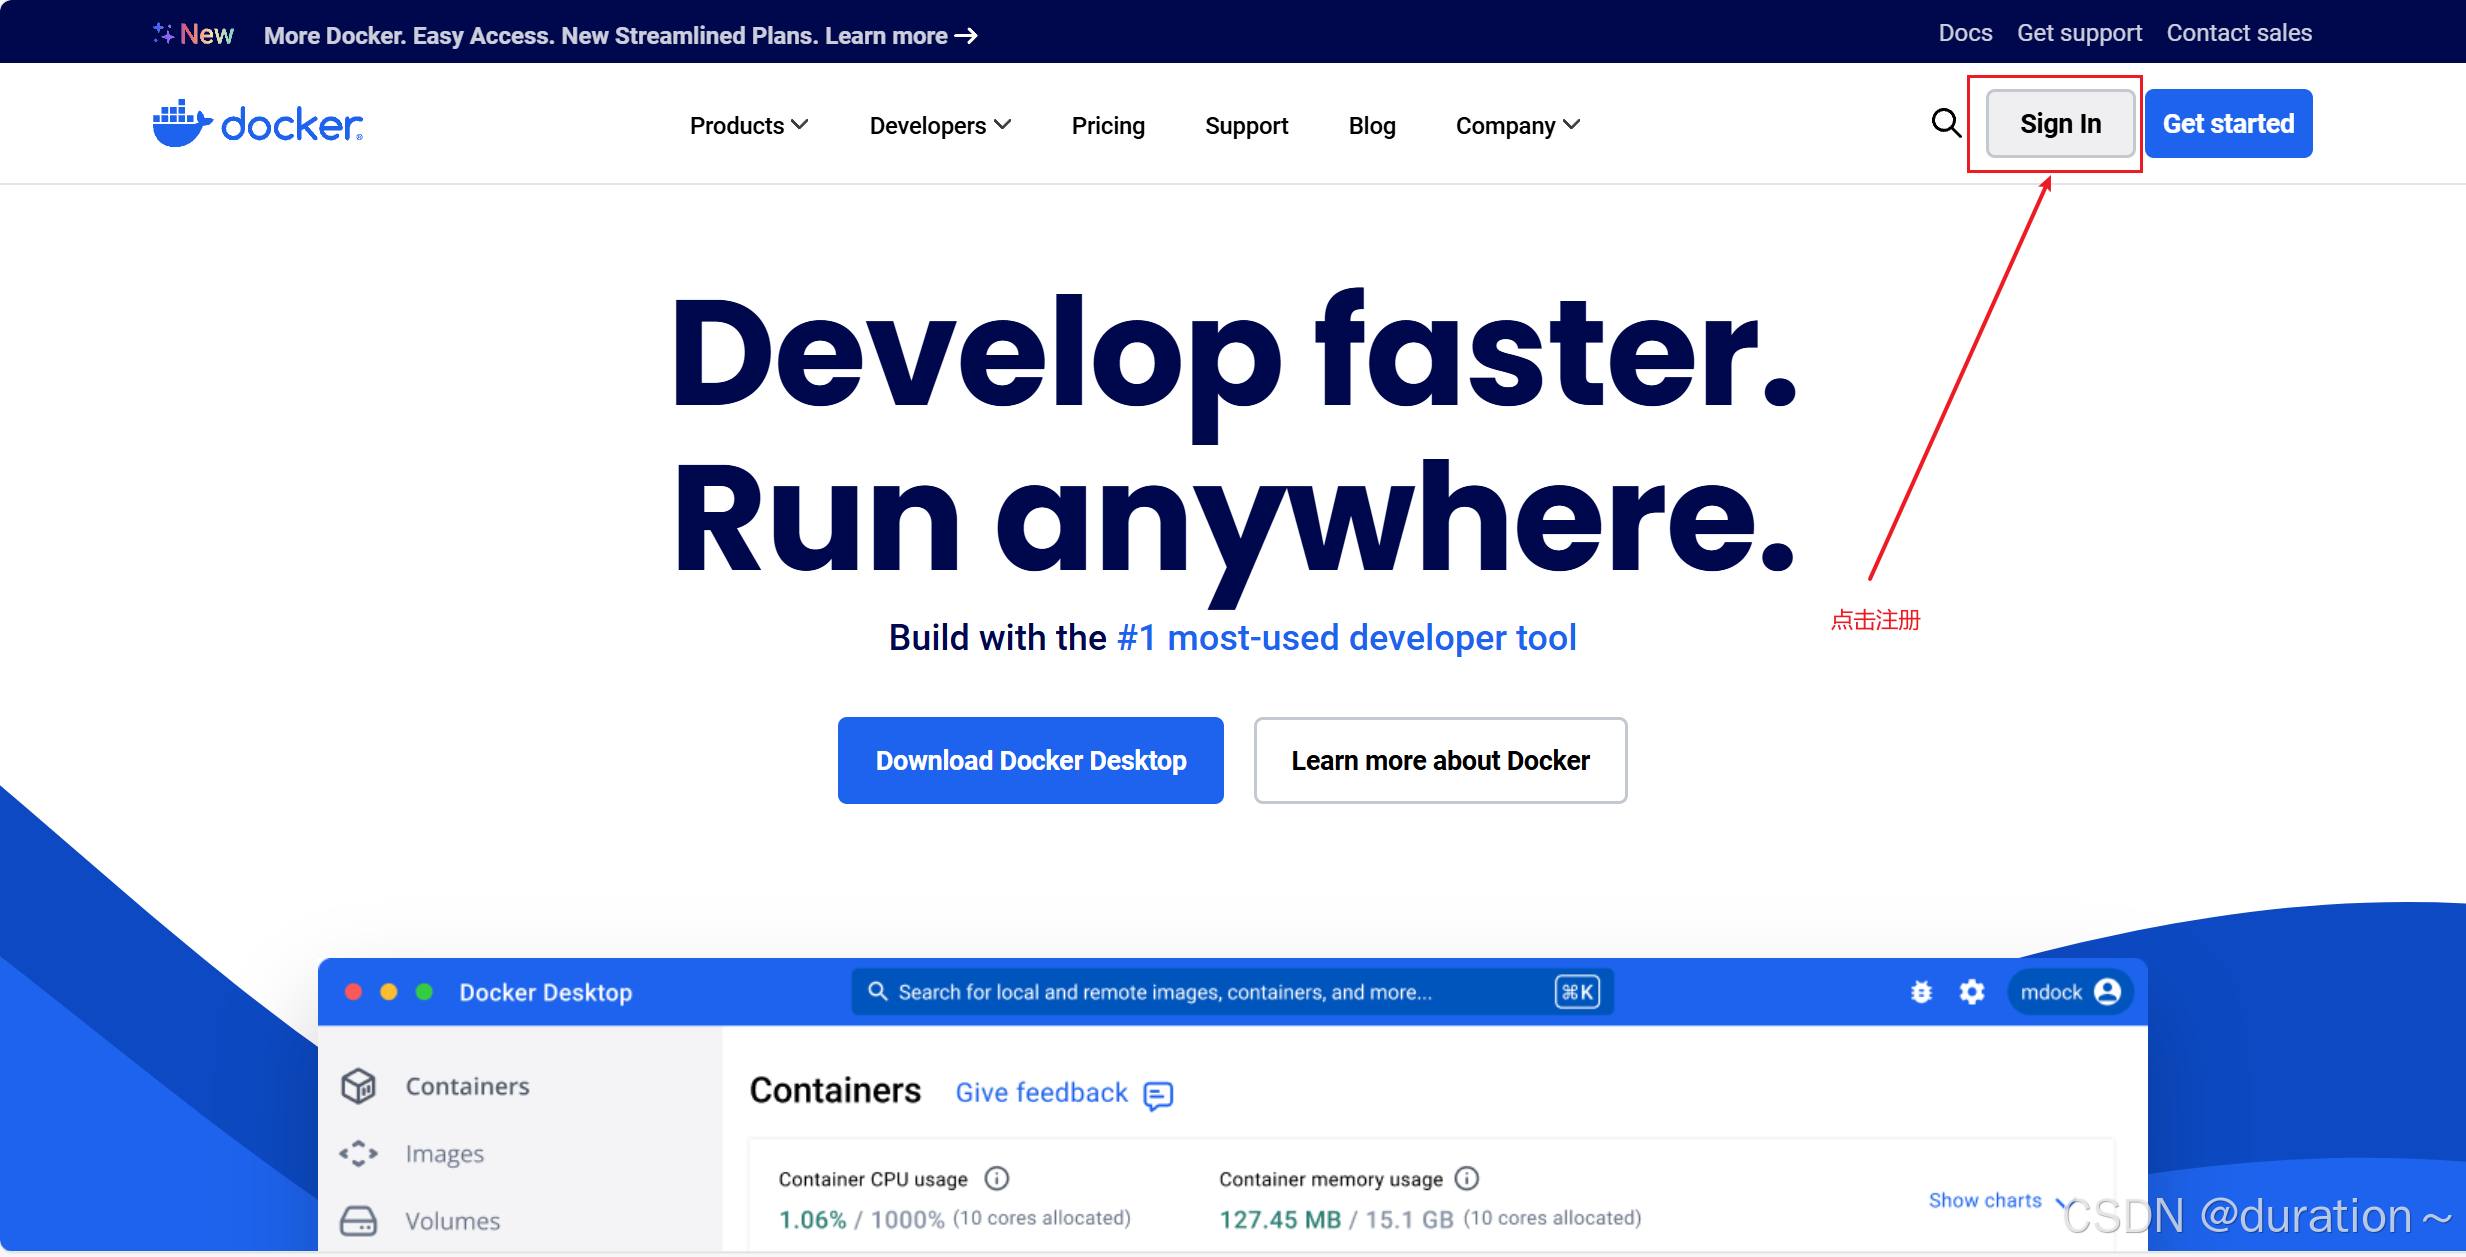
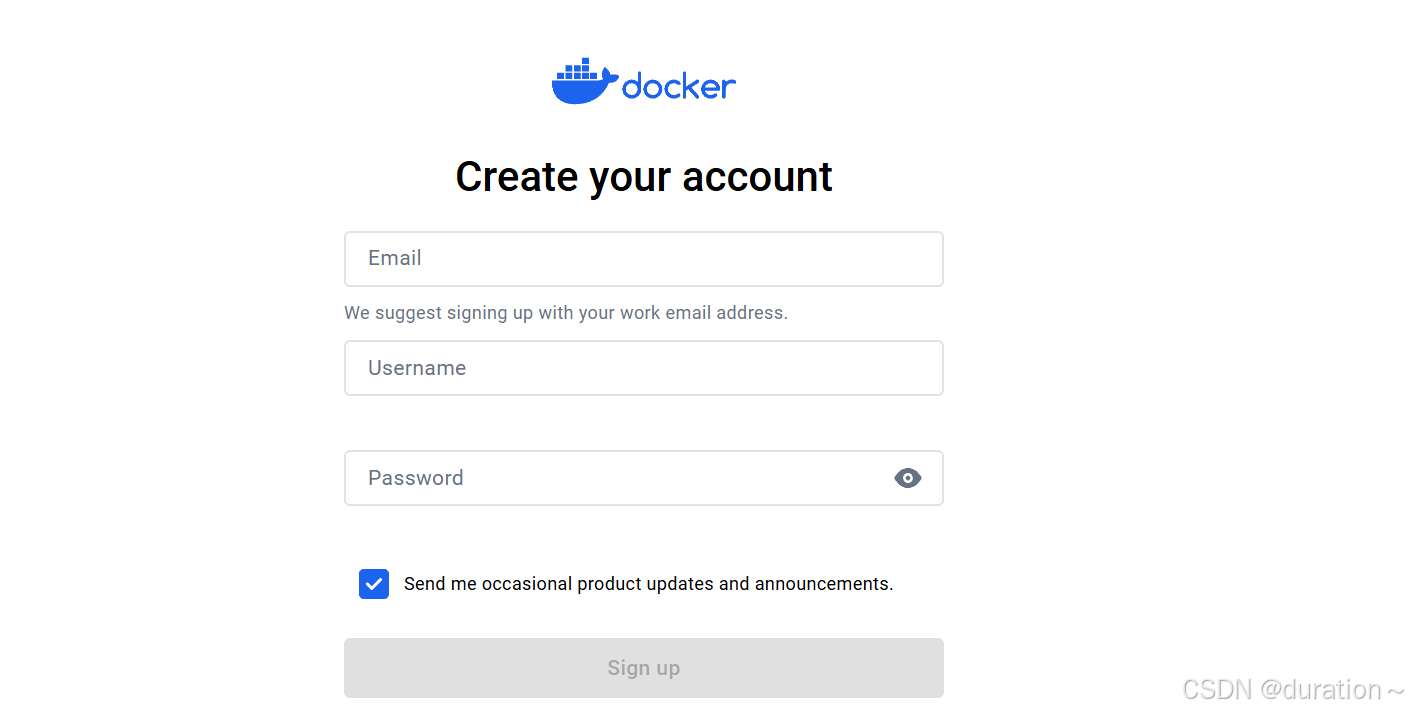
2_登录
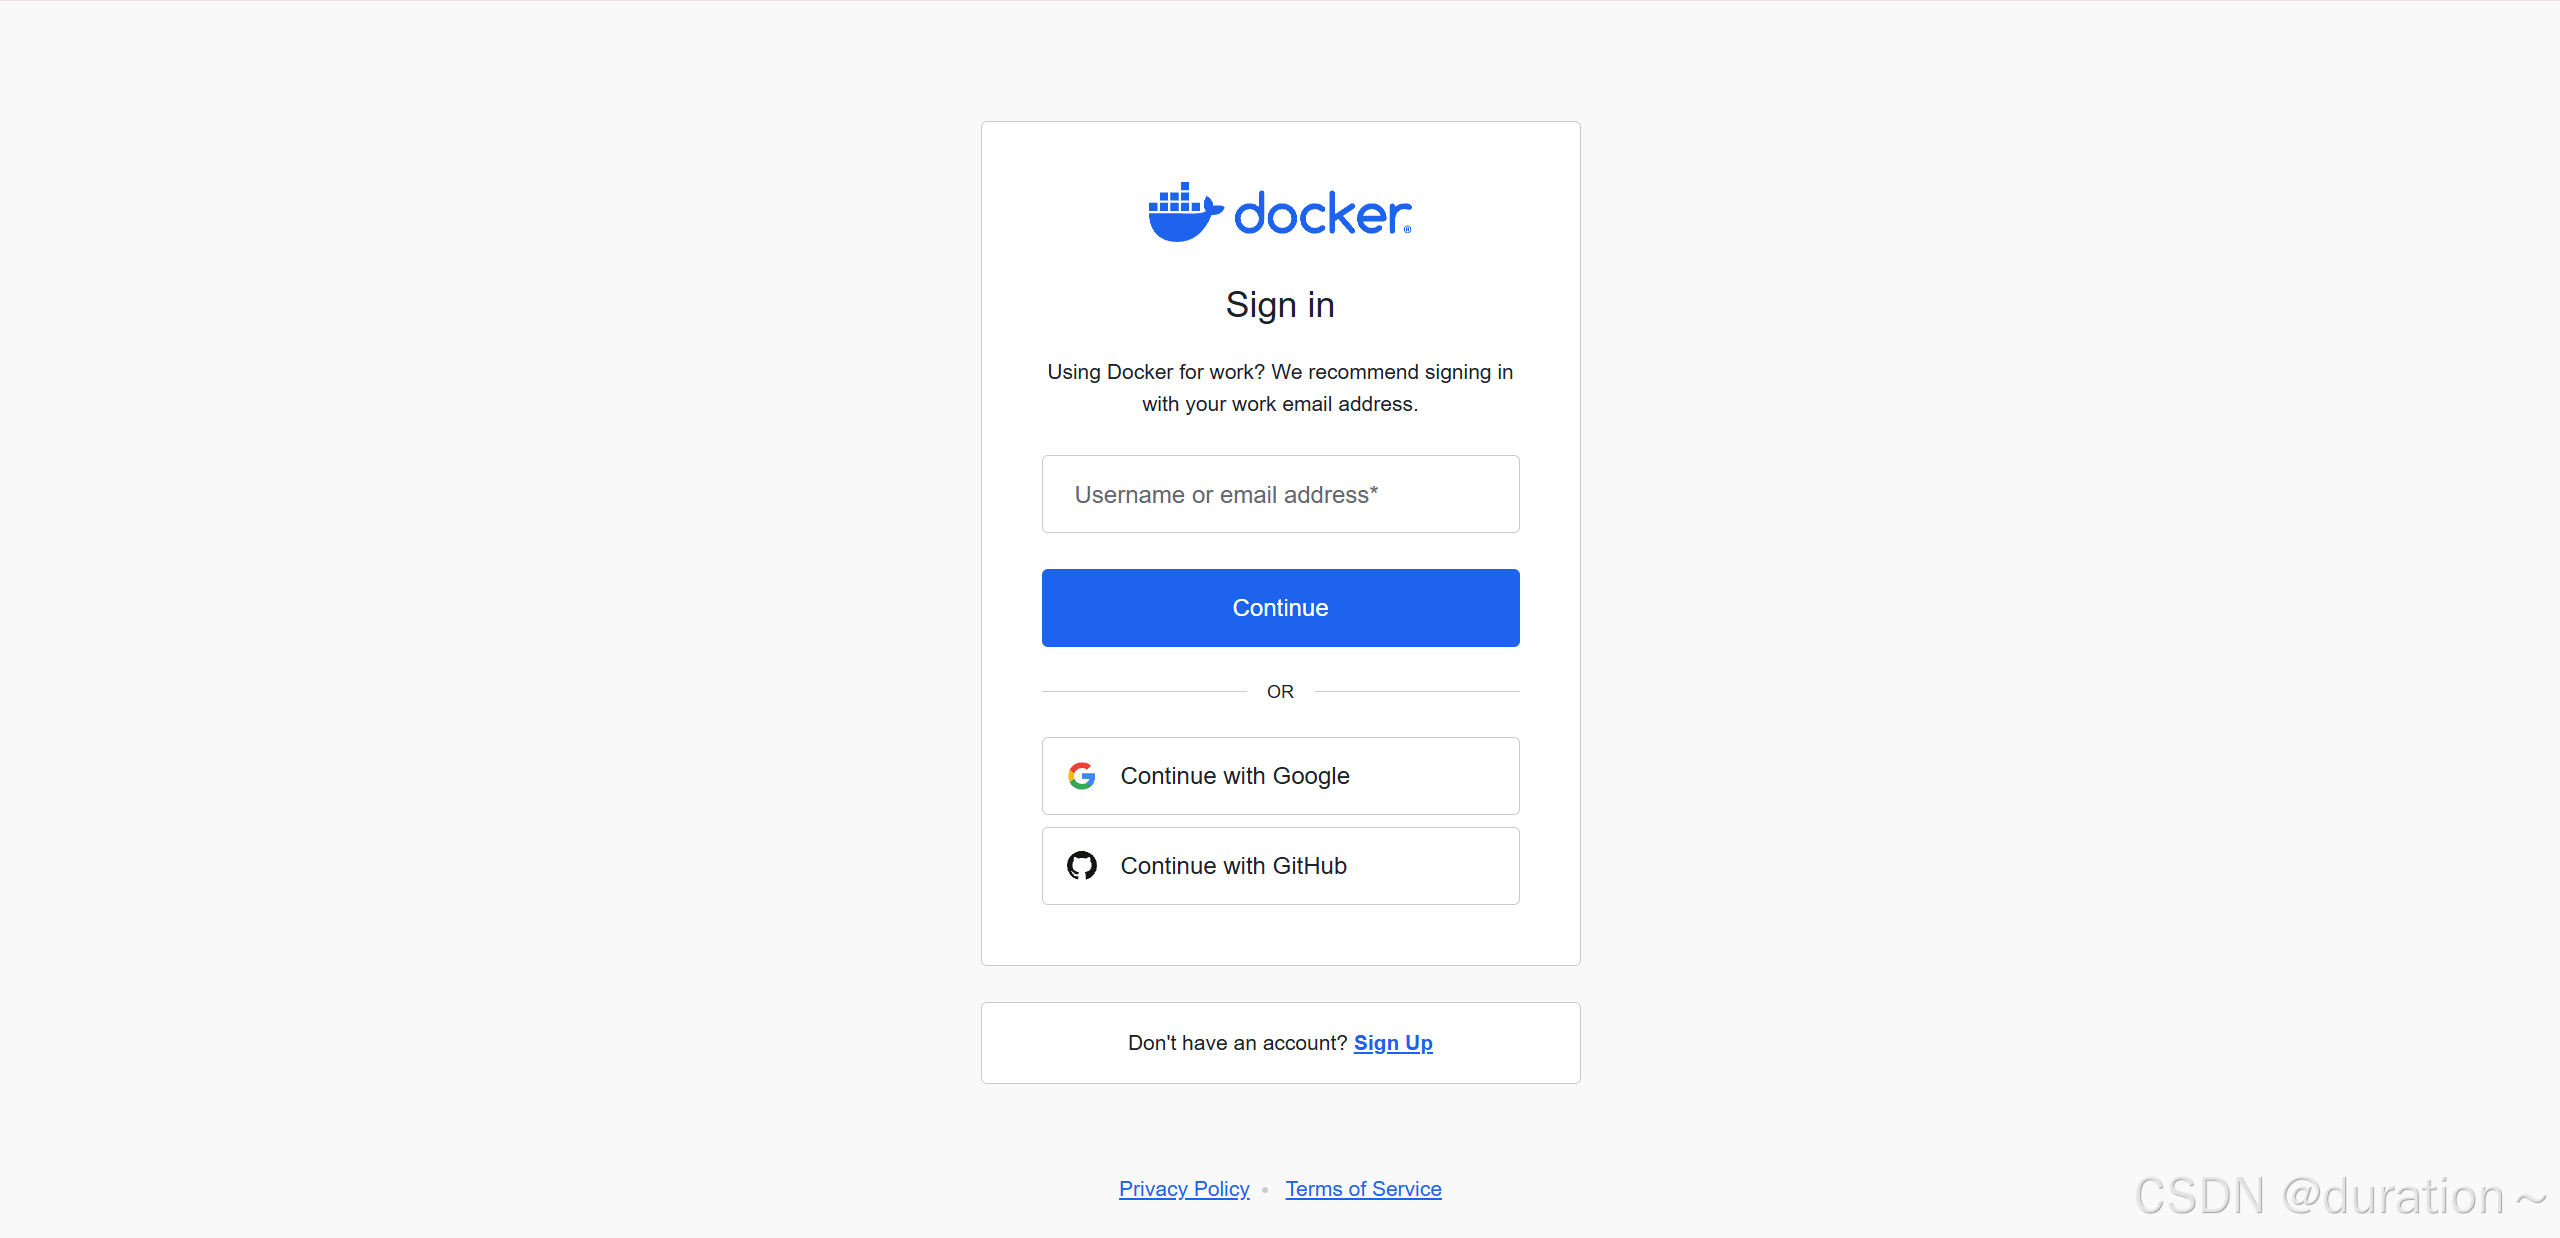
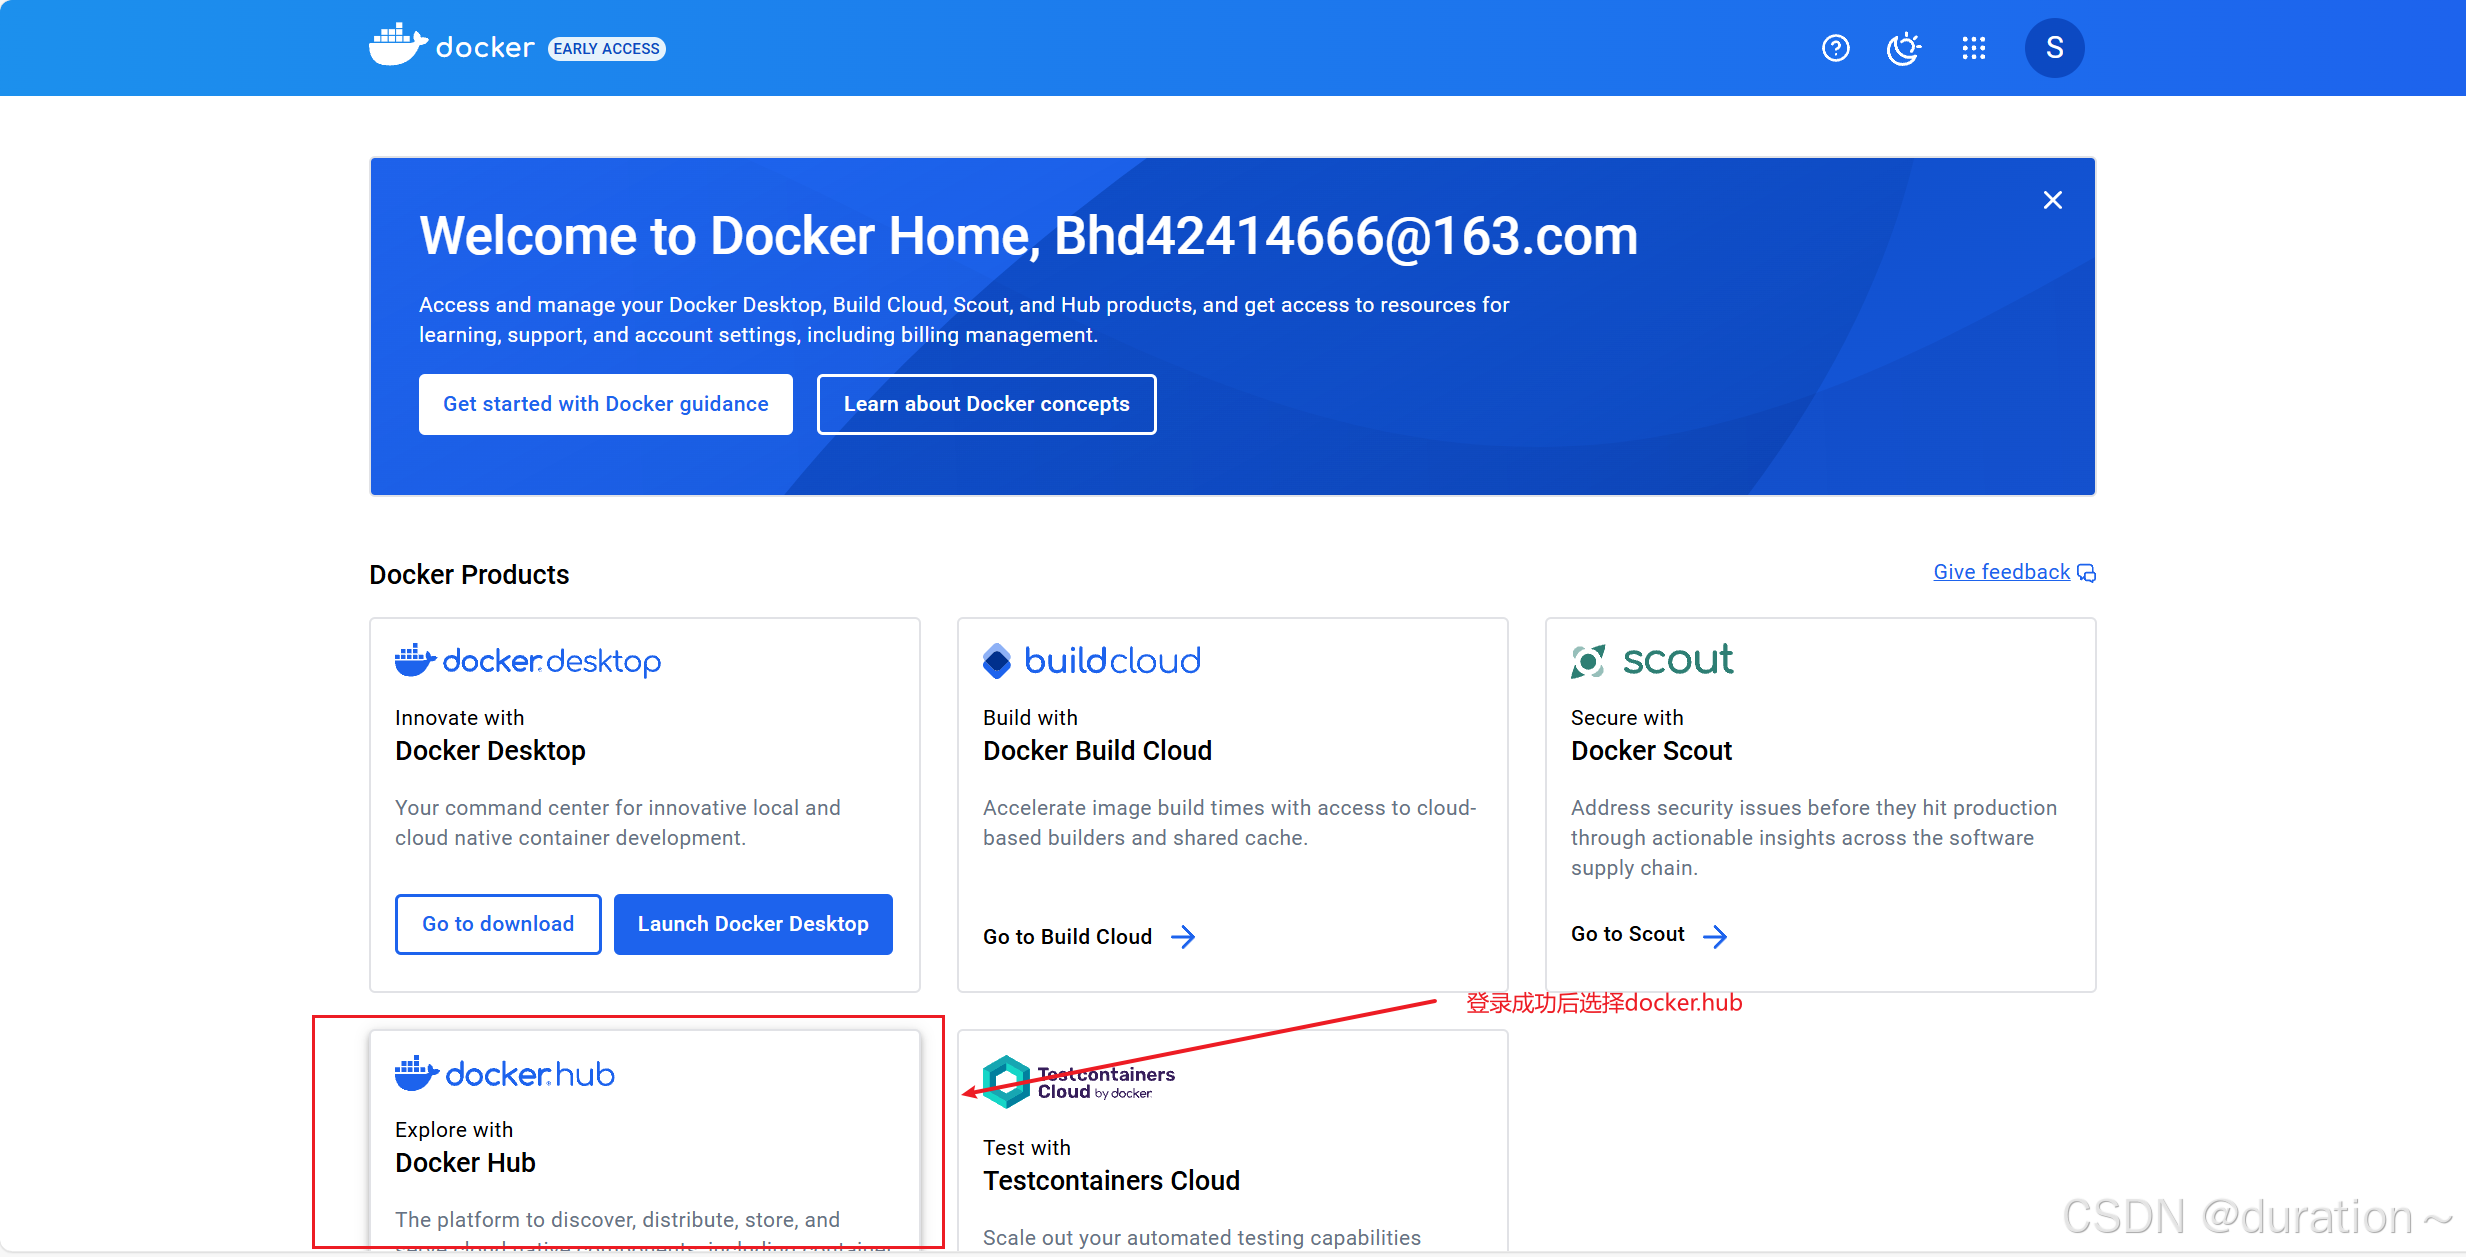
3_创建容器镜像仓库
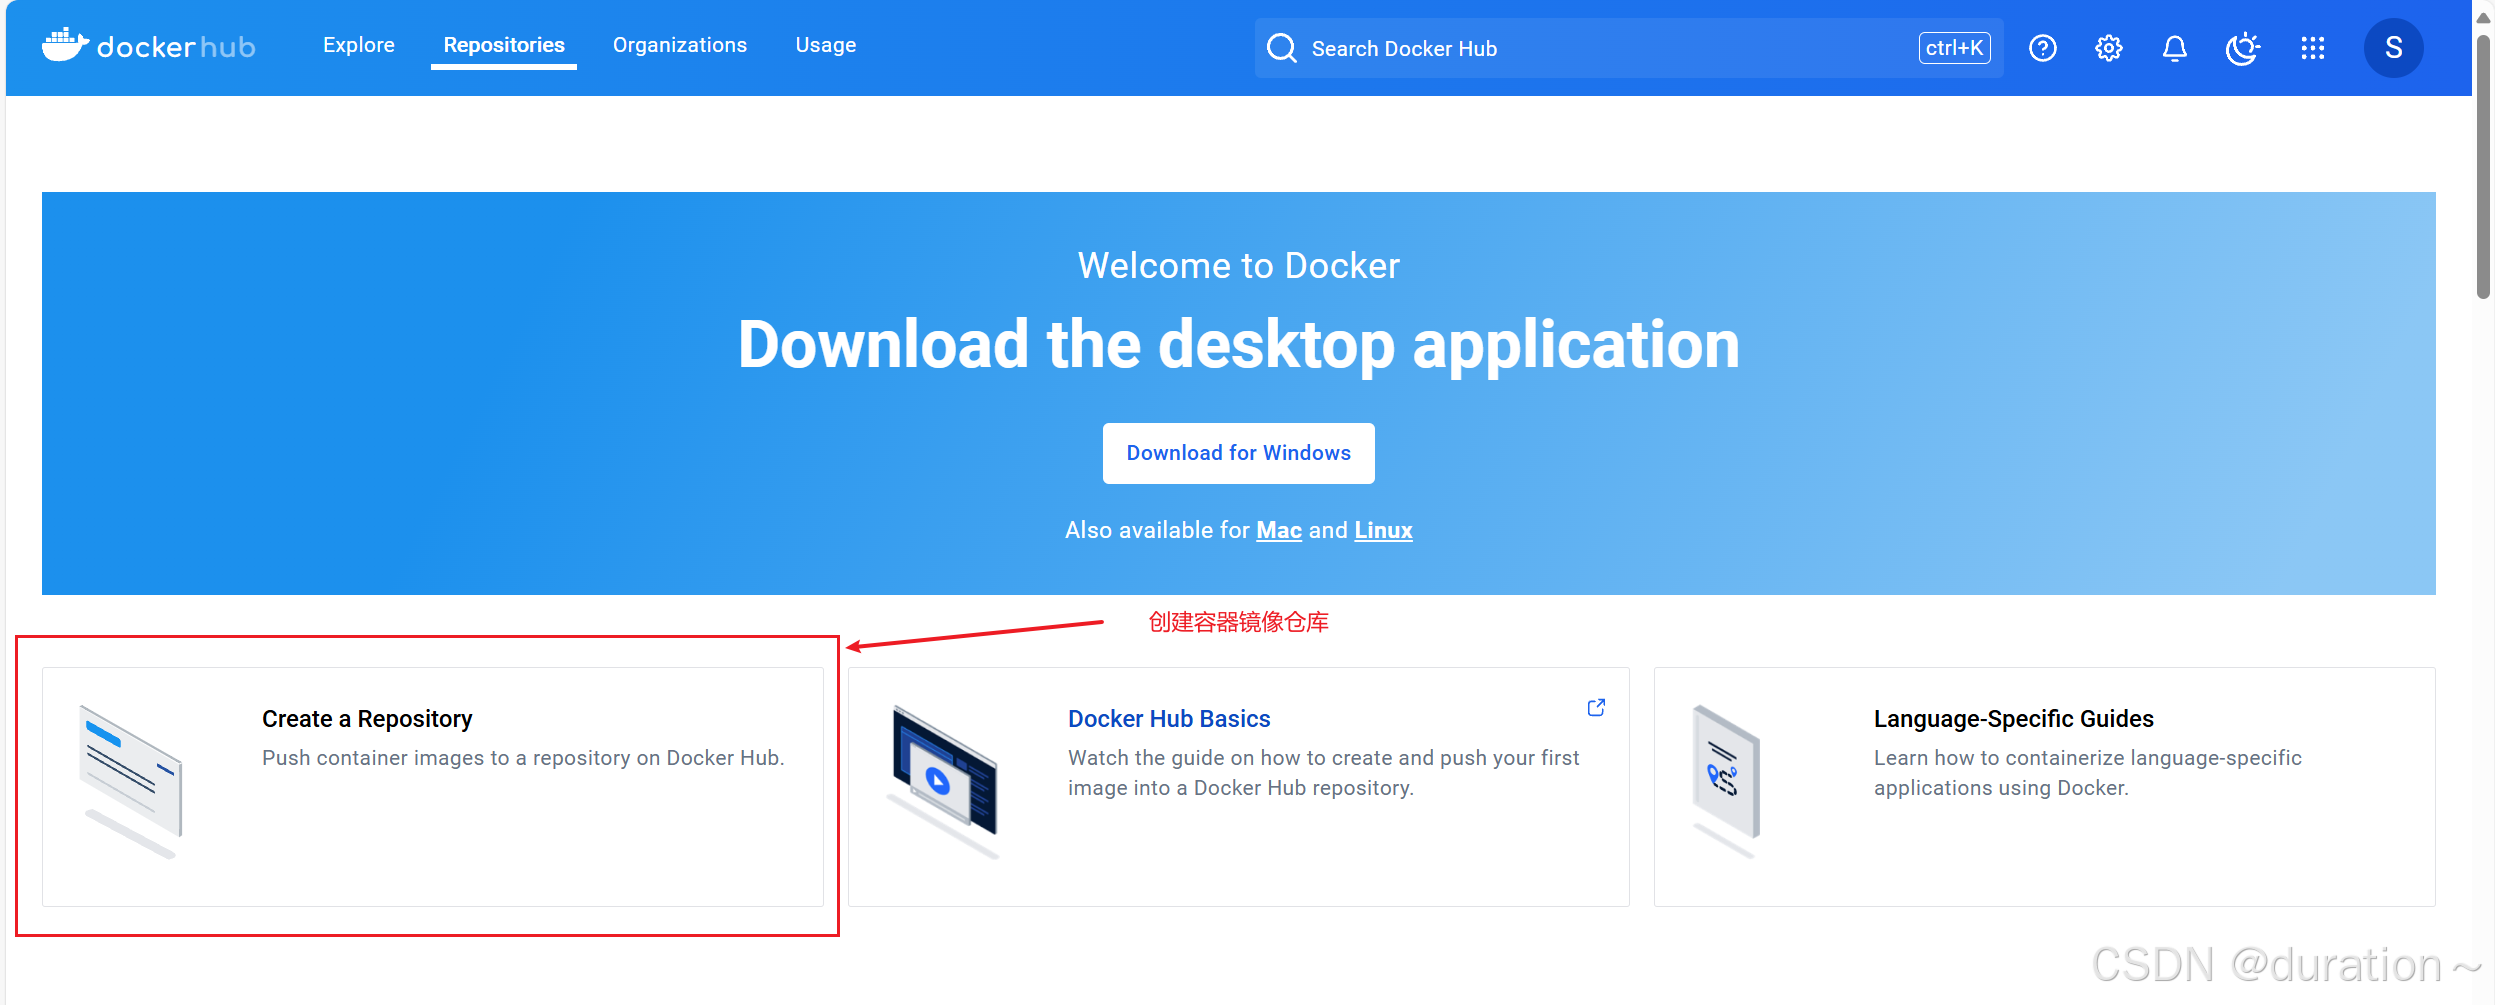
创建时注意命名规范
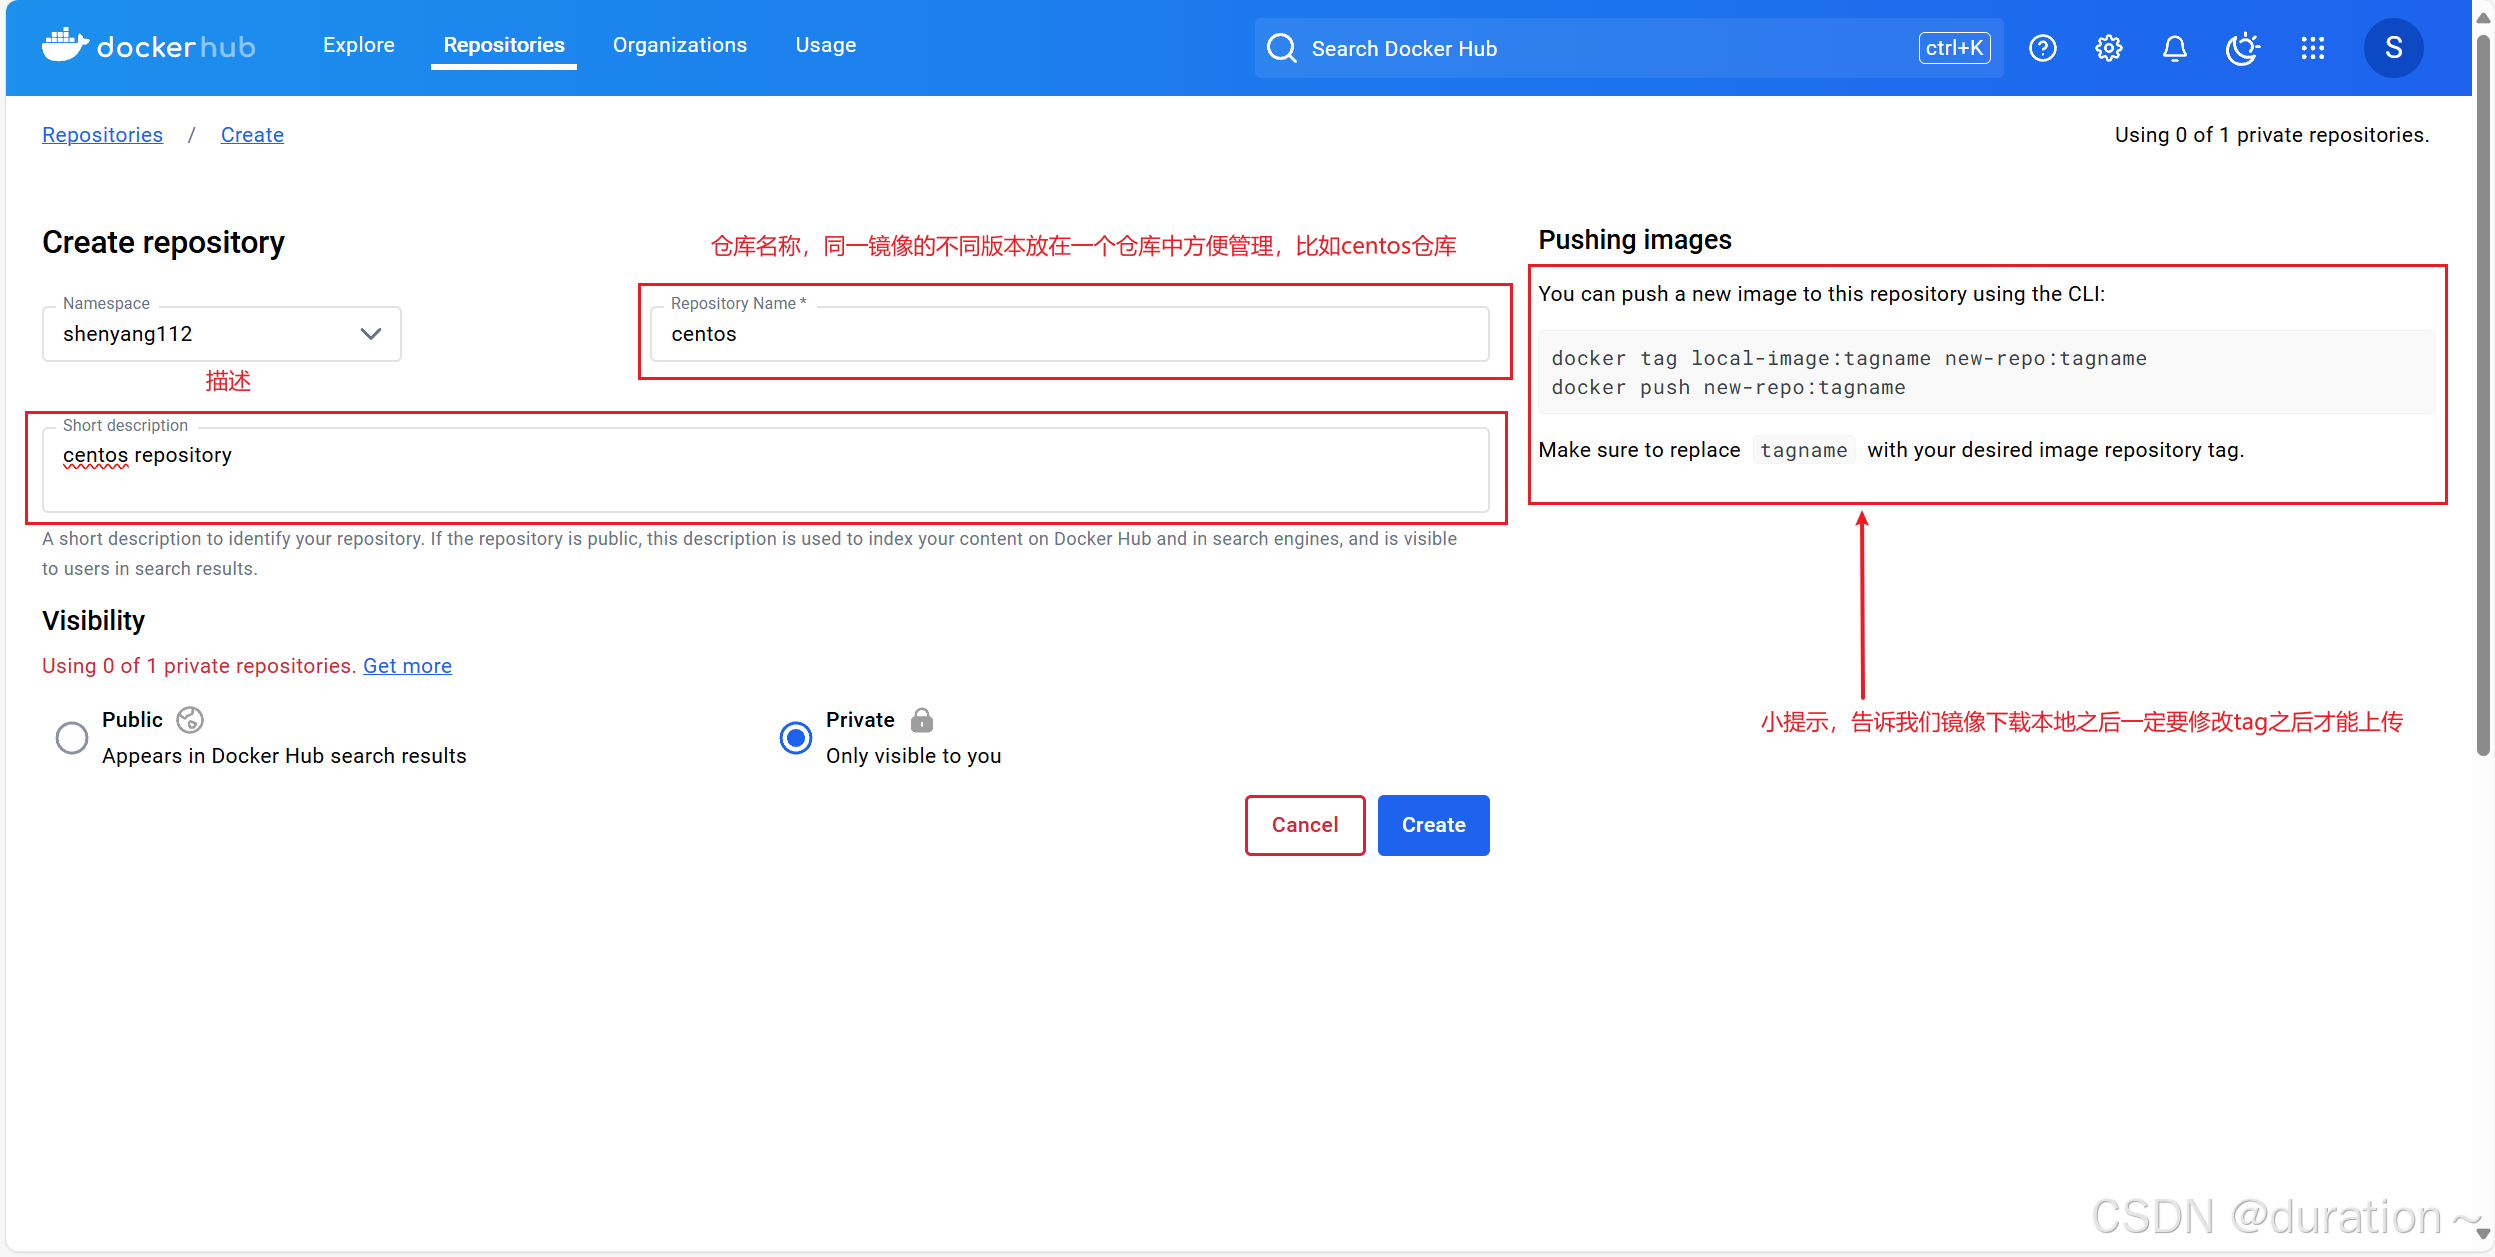
我们这里是个人版,所以只能创建一个仓库,如果想要创建多个需要花钱$。
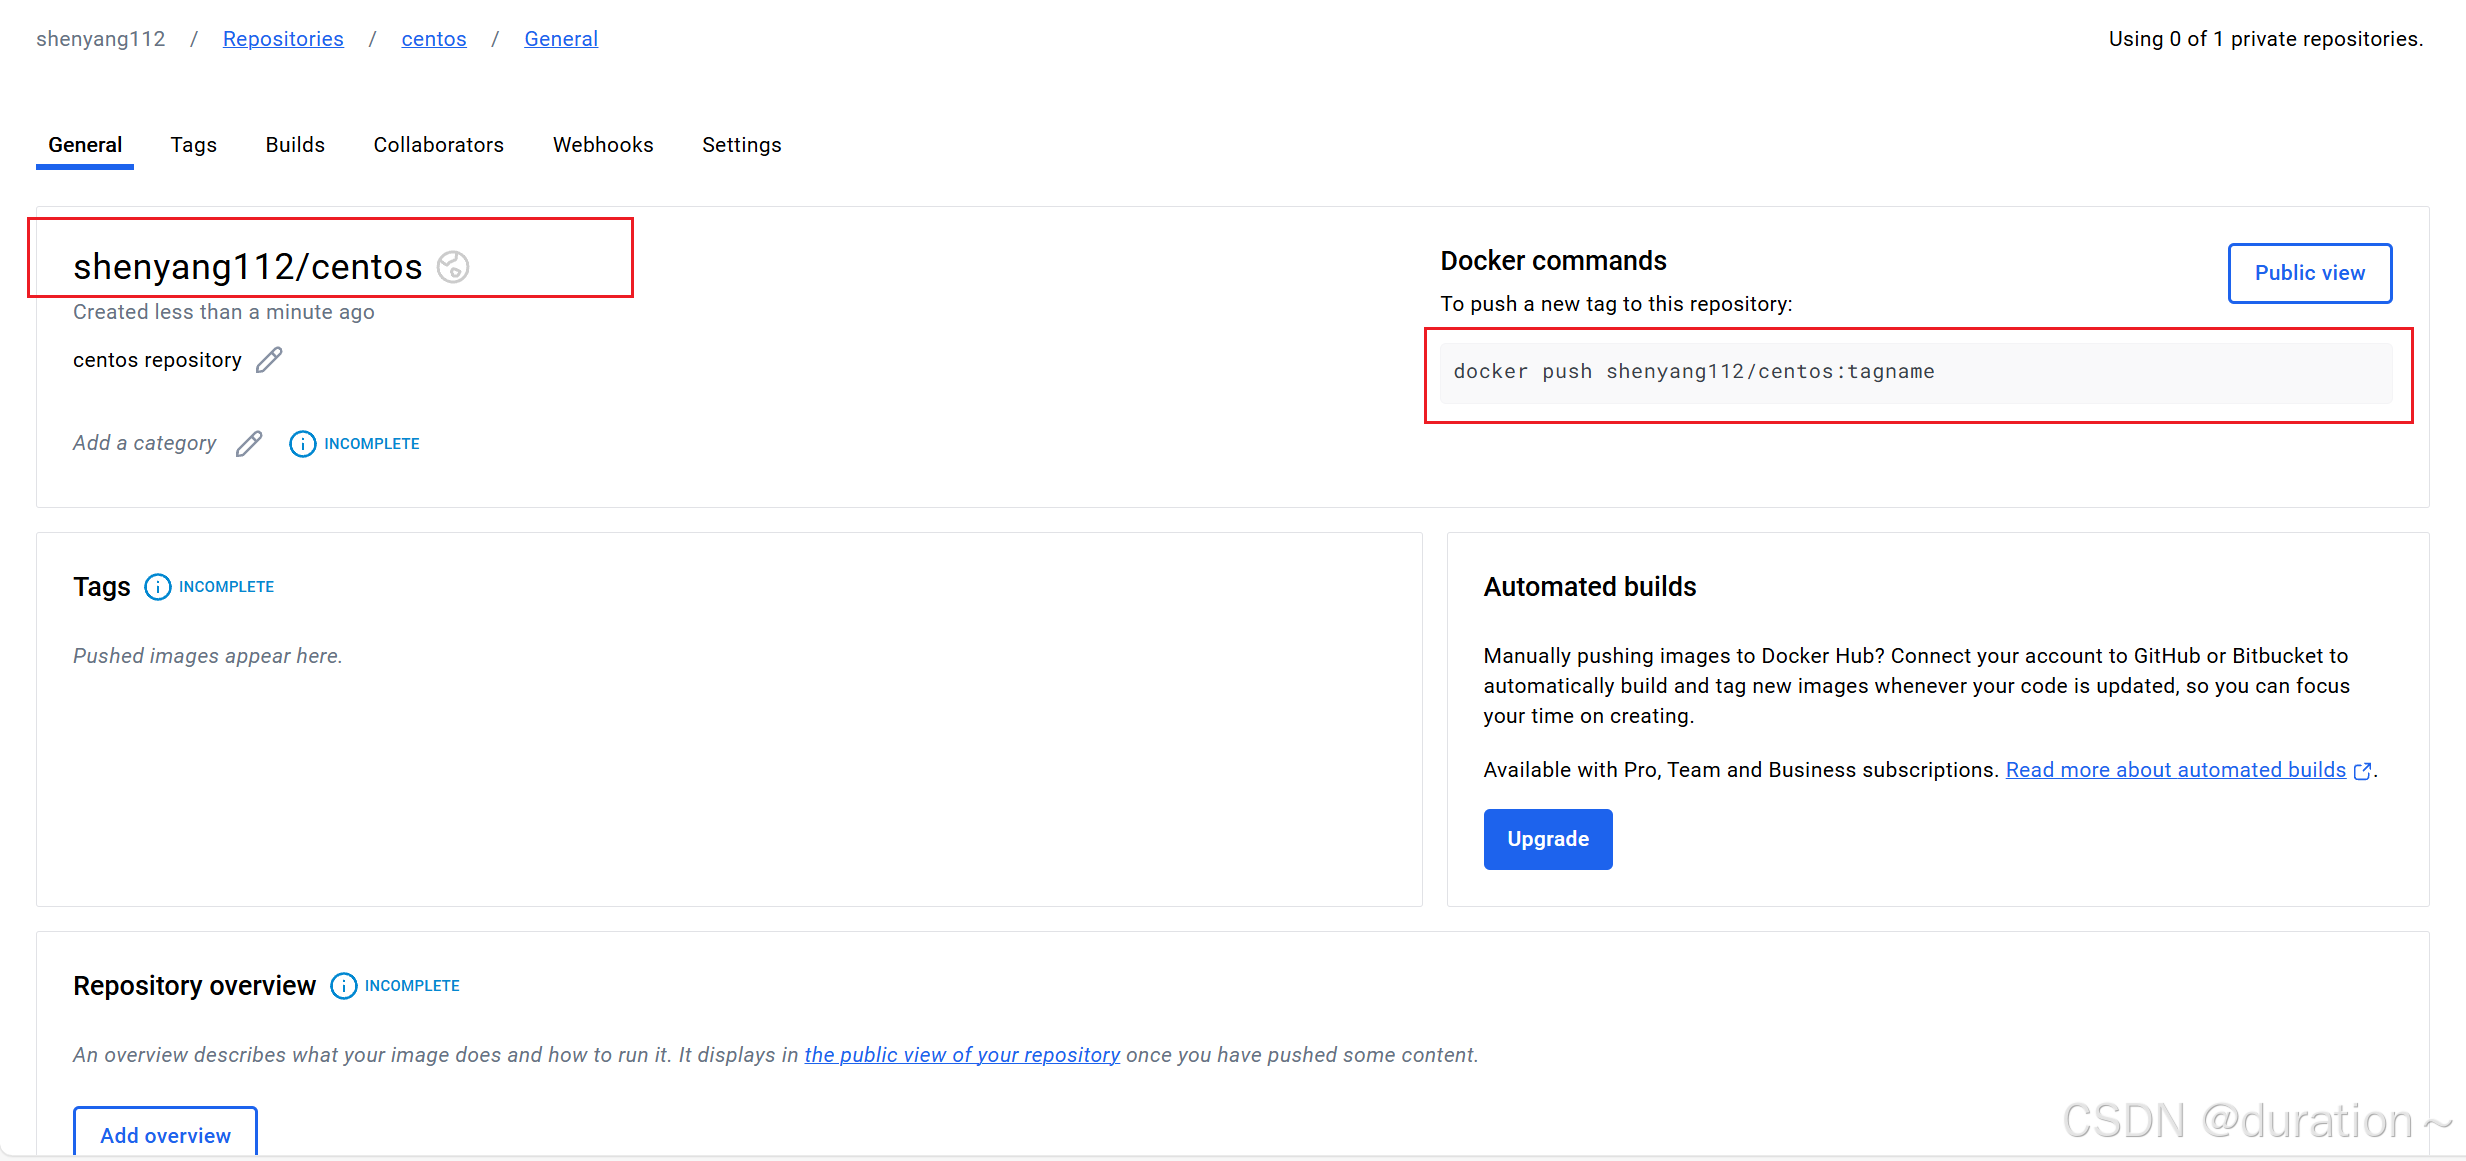
这里提示了我们推送镜像的命令,格式就是:docker push namespace/repository_name:tagname。
4_在本地登录Docker Hub
默认可以不添加docker hub容器镜像仓库地址
shell
docker login执行后可以看到如下输出:
powershell
USING WEB-BASED LOGIN
To sign in with credentials on the command line, use 'docker login -u <username>'

Your one-time device confirmation code is: VBZB-SCWC
Press ENTER to open your browser or submit your device code here: https://login.docker.com/activate

Waiting for authentication in the browser...
WARNING! Your password will be stored unencrypted in /root/.docker/config.json.
Configure a credential helper to remove this warning. See
https://docs.docker.com/engine/reference/commandline/login/#credential-stores访问控制台提示地址(https://login.docker.com/activate)并填写验证码
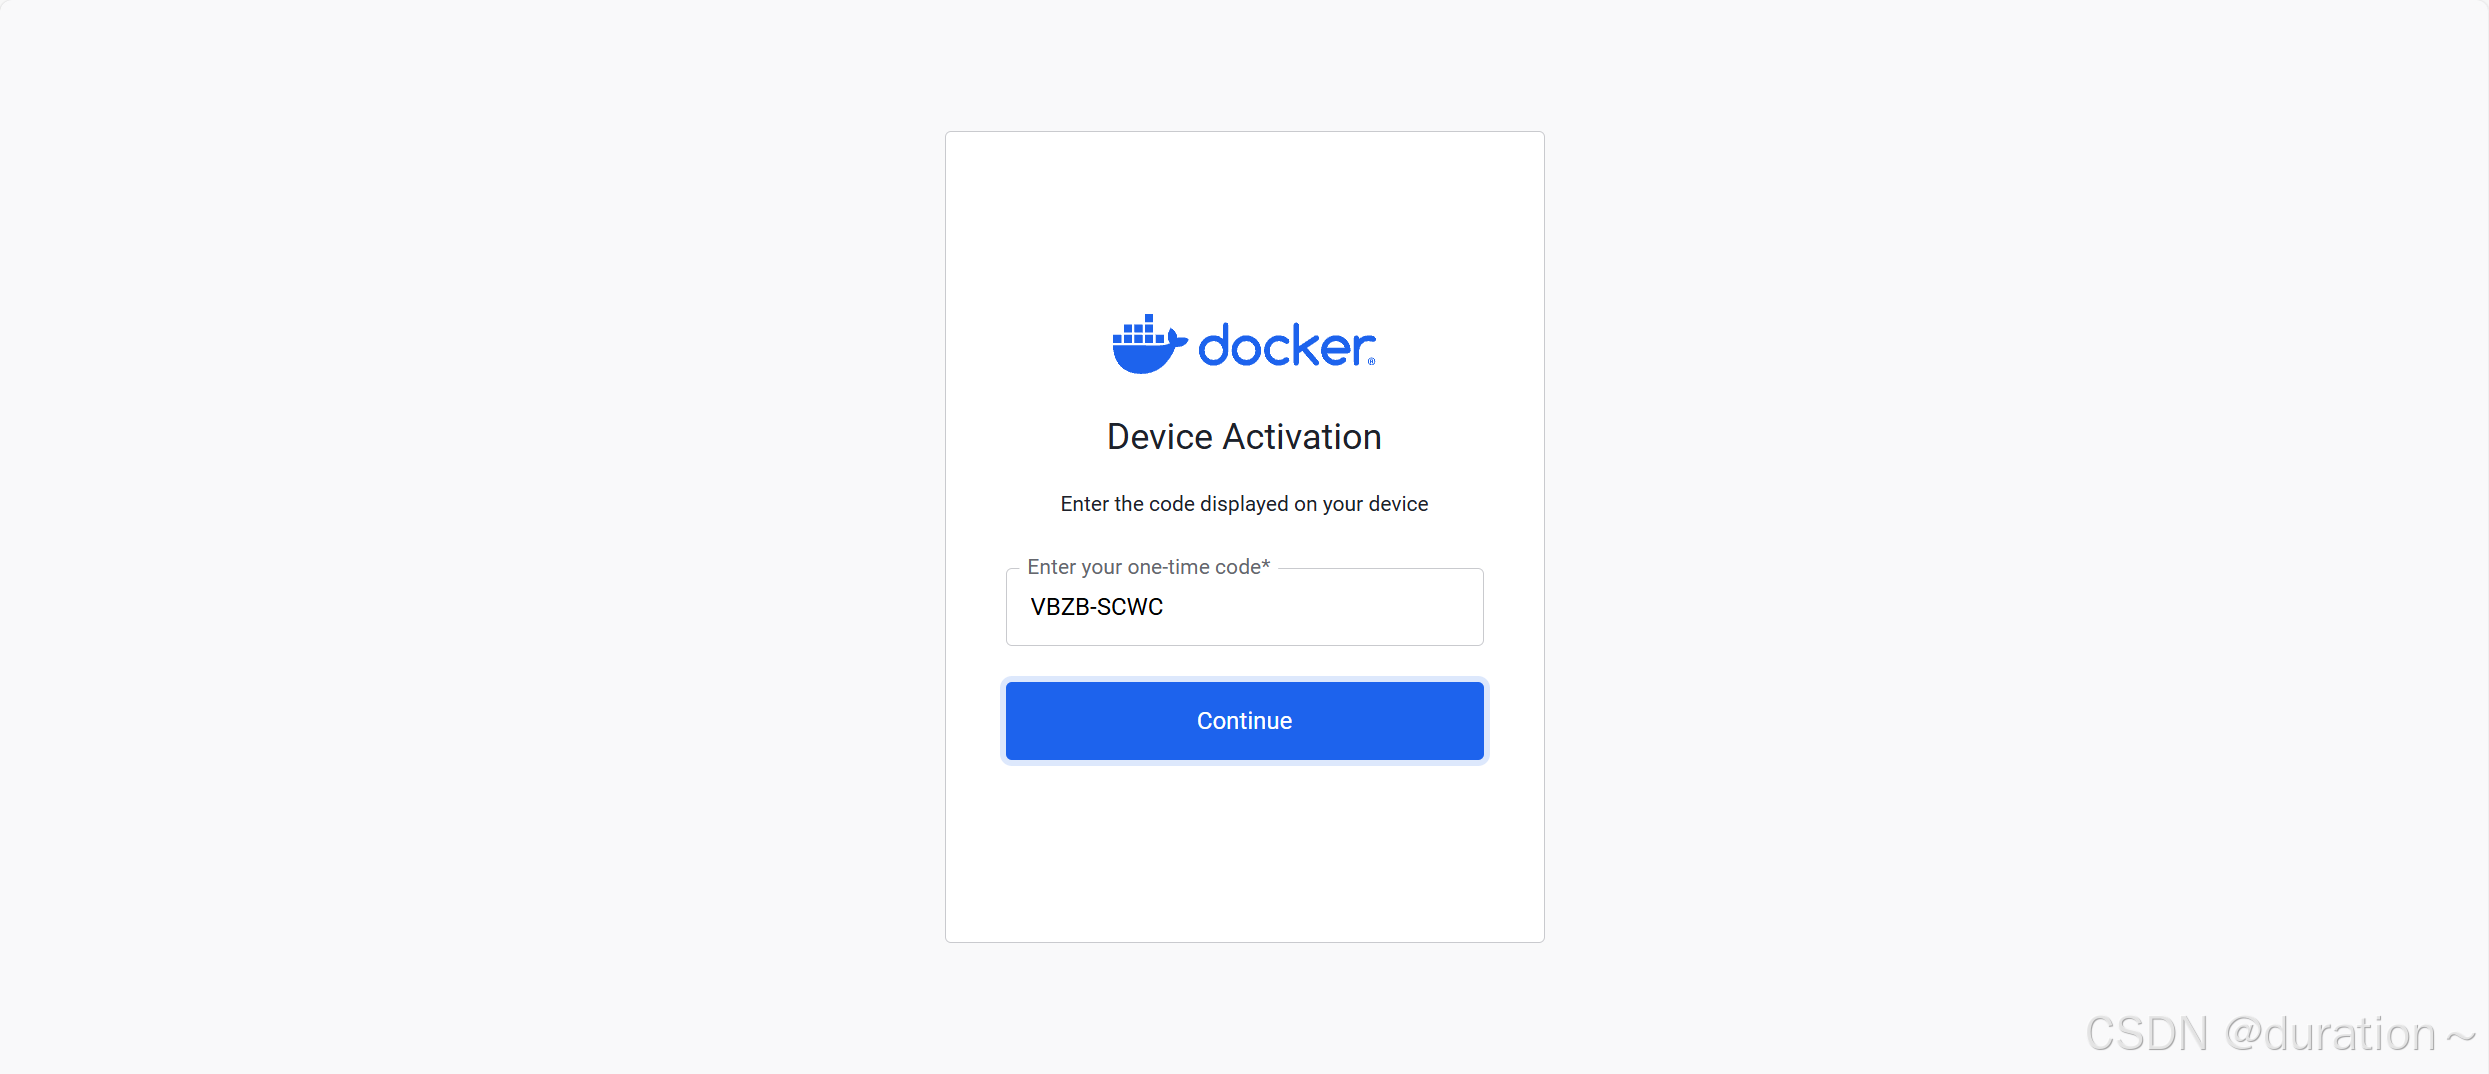
完成后控制台将会输出登陆成功的消息
powershell
Login Succeeded 成功登出
shell
docker logout5_上传容器镜像
在登录 Docker Hub 主机上传容器镜像,向全球用户共享容器镜像。
查看原始容器镜像
powershell
[root@localhost ~]# docker images
REPOSITORY   TAG       IMAGE ID       CREATED       SIZE
centos       latest    5d0da3dc9764   3 years ago   231MB
重新为容器镜像打标记
shell
docker tag centos:latest shenyang112/centos:v1重新打标记后容器镜像
powershell
[root@localhost ~]# docker images
REPOSITORY           TAG       IMAGE ID       CREATED       SIZE
shenyang112/centos   v1        5d0da3dc9764   3 years ago   231MB
centos latest 5d0da3dc9764 3 years ago 231MB上传容器镜像至docker hub
powershell
[root@localhost ~]# docker push shenyang112/centos:v1
The push refers to repository [docker.io/shenyang112/centos]
74ddd0ec08fa: Pushed
v1: digest: sha256:a1801b843b1bfaf77c501e7a6d3f709401a1e0c83863037fa3aab063a7fdb9dc size: 529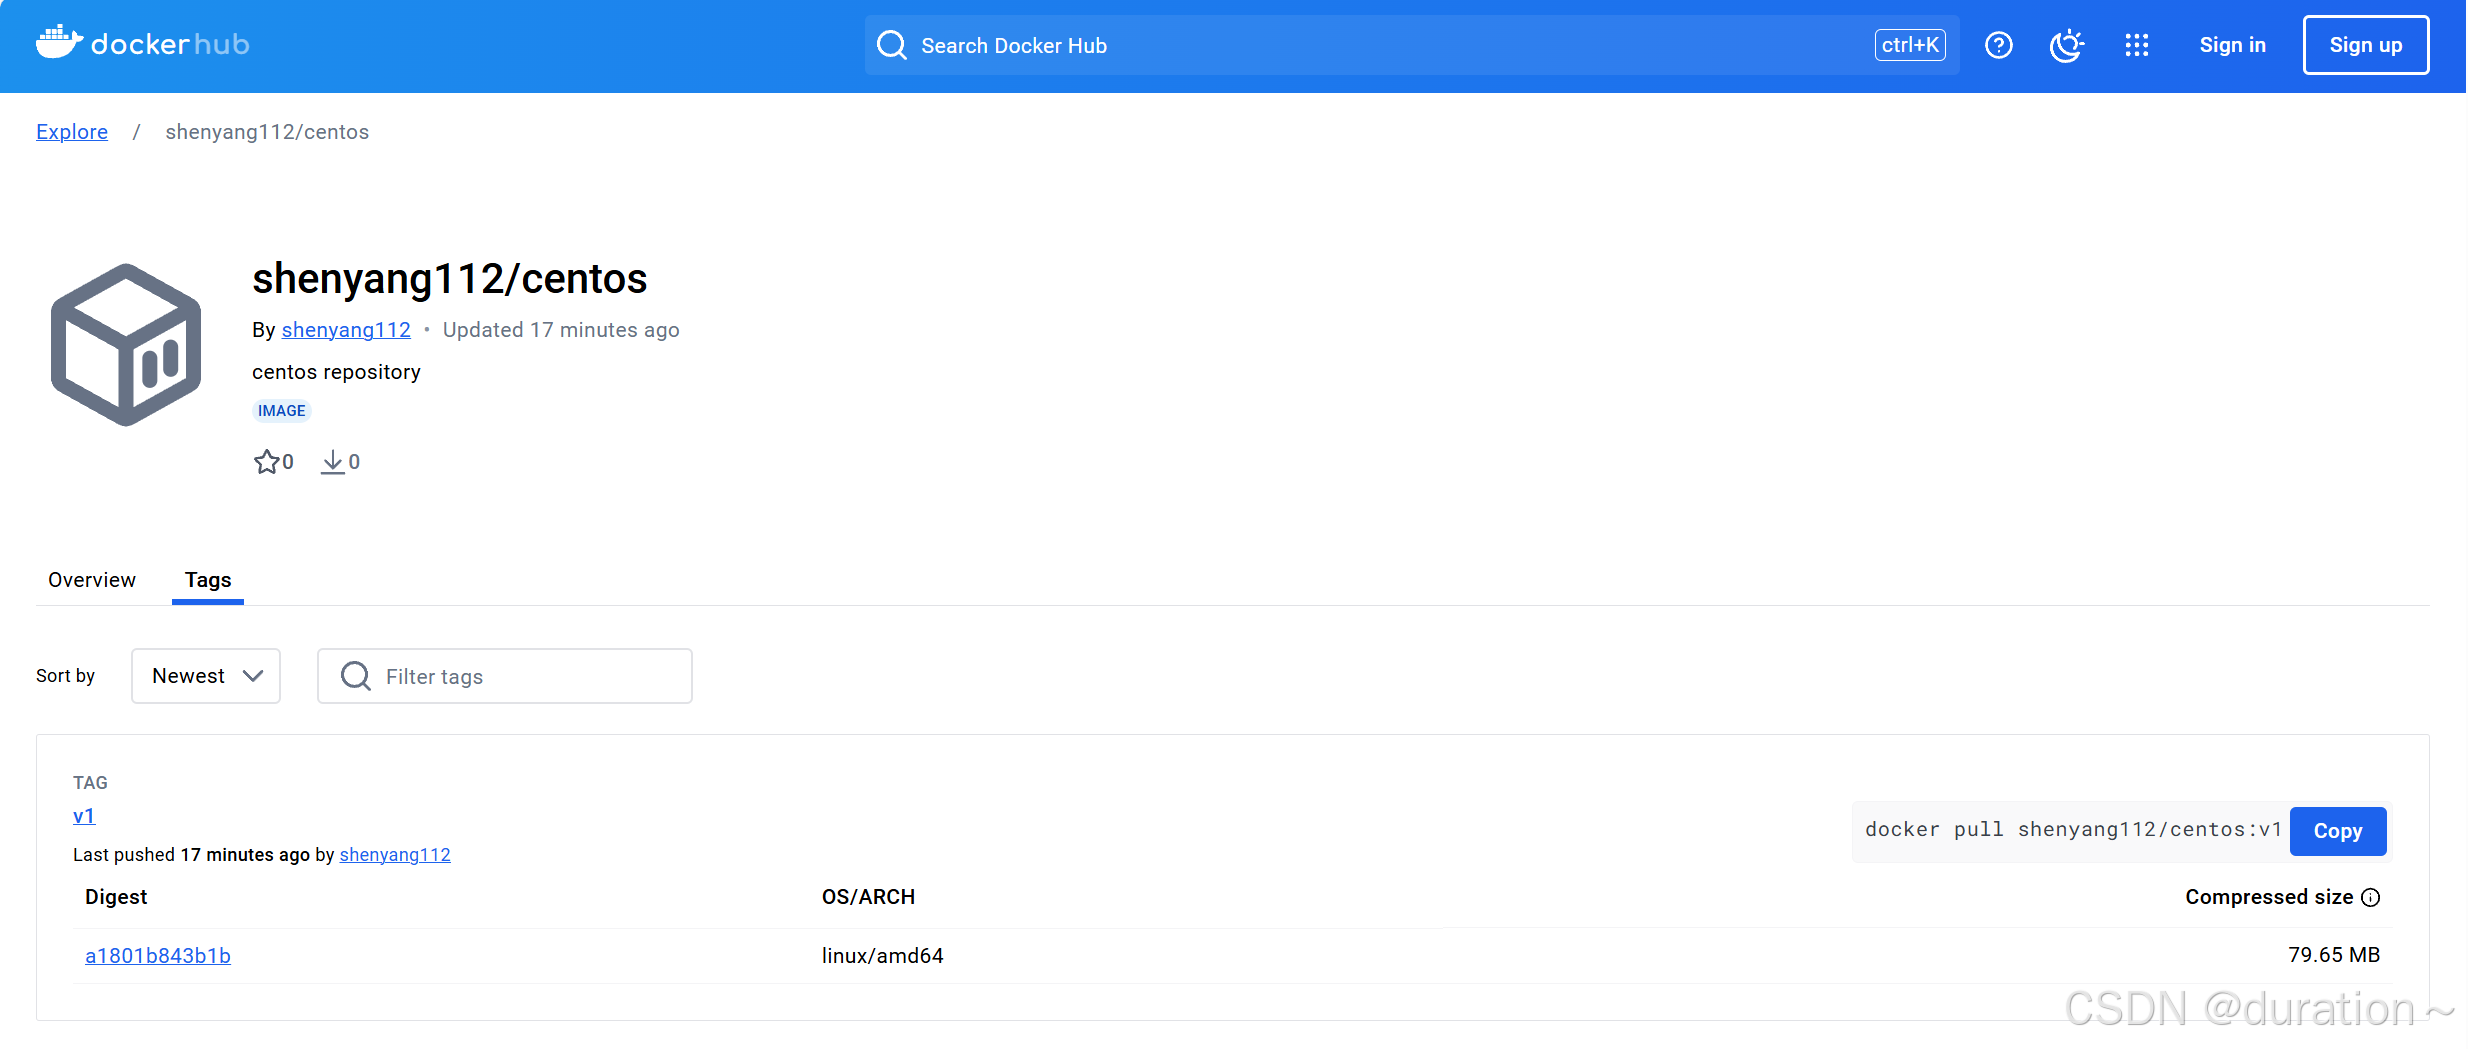
可以看到v1镜像已经成功上传至 docker hub 仓库中。
6_下载容器镜像
在其它主机上下载(我创建的时候仓库其实设置的是public所以都可以下载到)
shell
docker pull shenyang112/centos:v1控制台打印如下信息:
bash
v1: Pulling from shenyang112/centos
a1d0c7532777: Pull complete
Digest: sha256:a1801b843b1bfaf77c501e7a6d3f709401a1e0c83863037fa3aab063a7fdb9dc
Status: Downloaded newer image for shenyang112/centos:v1
docker.io/shenyang112/centos:v1
查看下载后容器镜像,下载成功
powershell
[root@centos ~]# docker images
REPOSITORY              TAG              IMAGE ID       CREATED         SIZE
shenyang112/centos      v1               5d0da3dc9764   3 years ago     231MB
2、harbor
Harbor 是一个开源的企业级 Docker 镜像仓库管理平台,它旨在提供高效、安全、易于使用的镜像管理功能,主要用于存储、管理和分发 Docker 镜像。
Harbor 提供了很多增强功能,使其适用于企业环境中的大规模容器化应用,我们主要了解如何使用 Harbor 搭建私有镜像仓库。
如果想要真正将 Harbor 应用到企业开发中的话,最低配置不要低于:cpu 2 mem 4g disk 160G 的标准。
1_获取 docker compose二进制文件
下载 docker-compose 二进制文件
shell
wget https://github.com/docker/compose/releases/download/1.25.0/docker-compose-Linux-x86_64注意 docker 20.10 以上版本自动集成 v2 的
docker compose( 没有连词符-)
查看已下载二进制文件
powershell
[root@localhost ~]# ls
docker-compose-Linux-x86_64
查看当前环境变量,这几个目录选择哪个都可以
powershell
[root@localhost ~]# echo $PATH
/root/.local/bin:/root/bin:/usr/local/sbin:/usr/local/bin:/usr/sbin:/usr/bin移动二进制文件到/usr/bin目录,并更名为docker-compose
shell
mv docker-compose-Linux-x86_64 /usr/bin/docker-compose为二进制文件添加可执行权限
shell
chmod +x /usr/bin/docker-compose安装完成后,查看docker-compse版本,v2 版本使用docker compose version(无连词符)
powershell
[root@localhost ~]# docker-compose version
docker-compose version 1.25.0, build 0a186604
docker-py version: 4.1.0
CPython version: 3.7.4
OpenSSL version: OpenSSL 1.1.0l  10 Sep 2019
觉得版本比较老可以选择较新的稳定版,本机已经有
docker compose的小伙伴可以选择跳过该步骤。
2_获取harbor安装文件
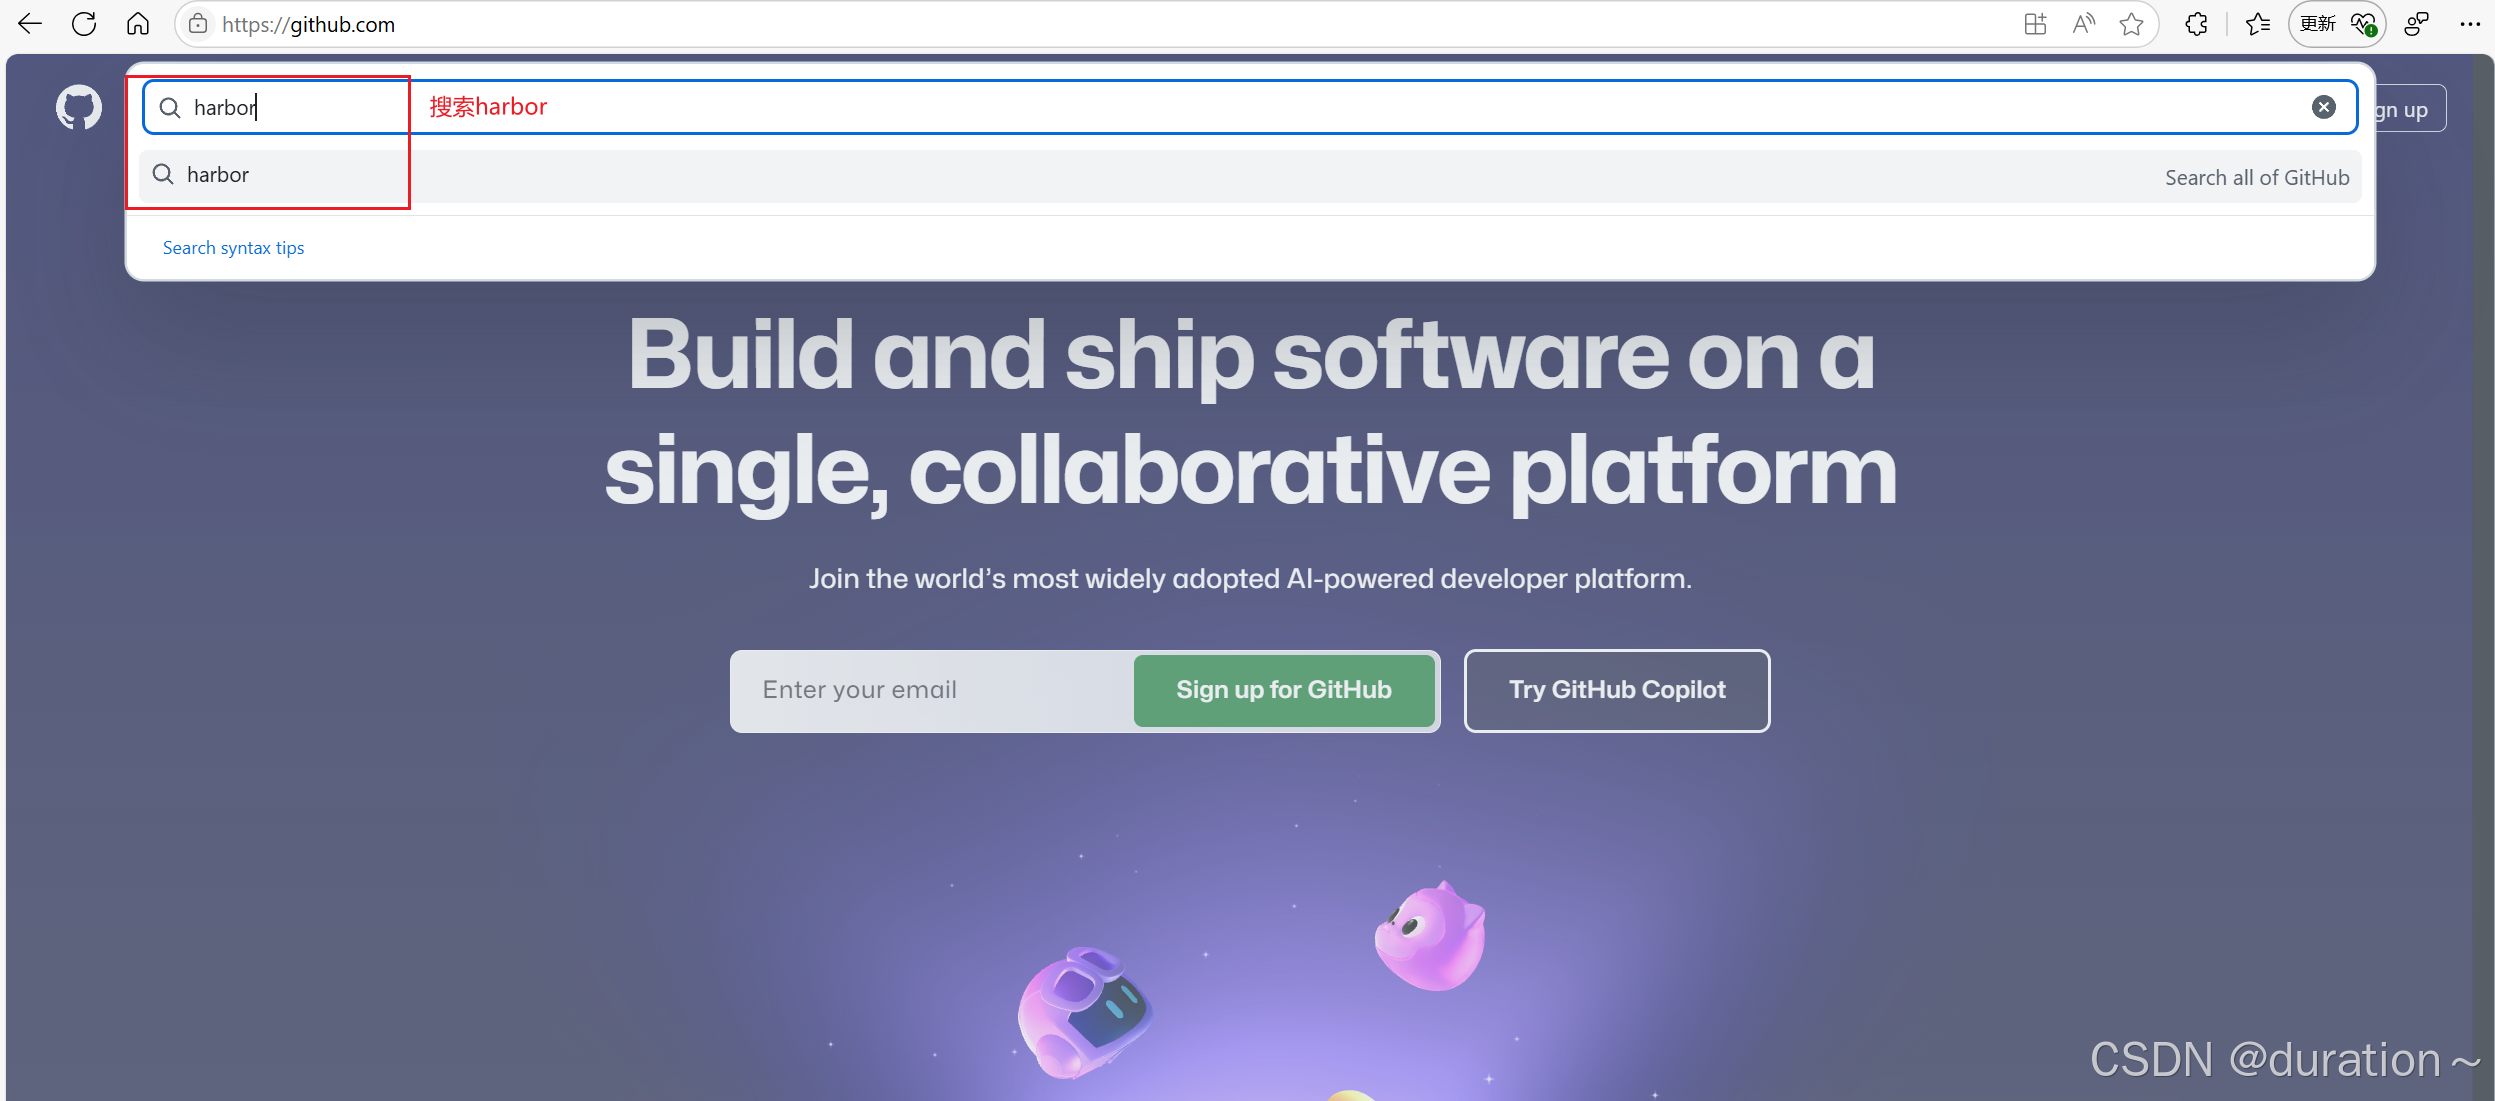
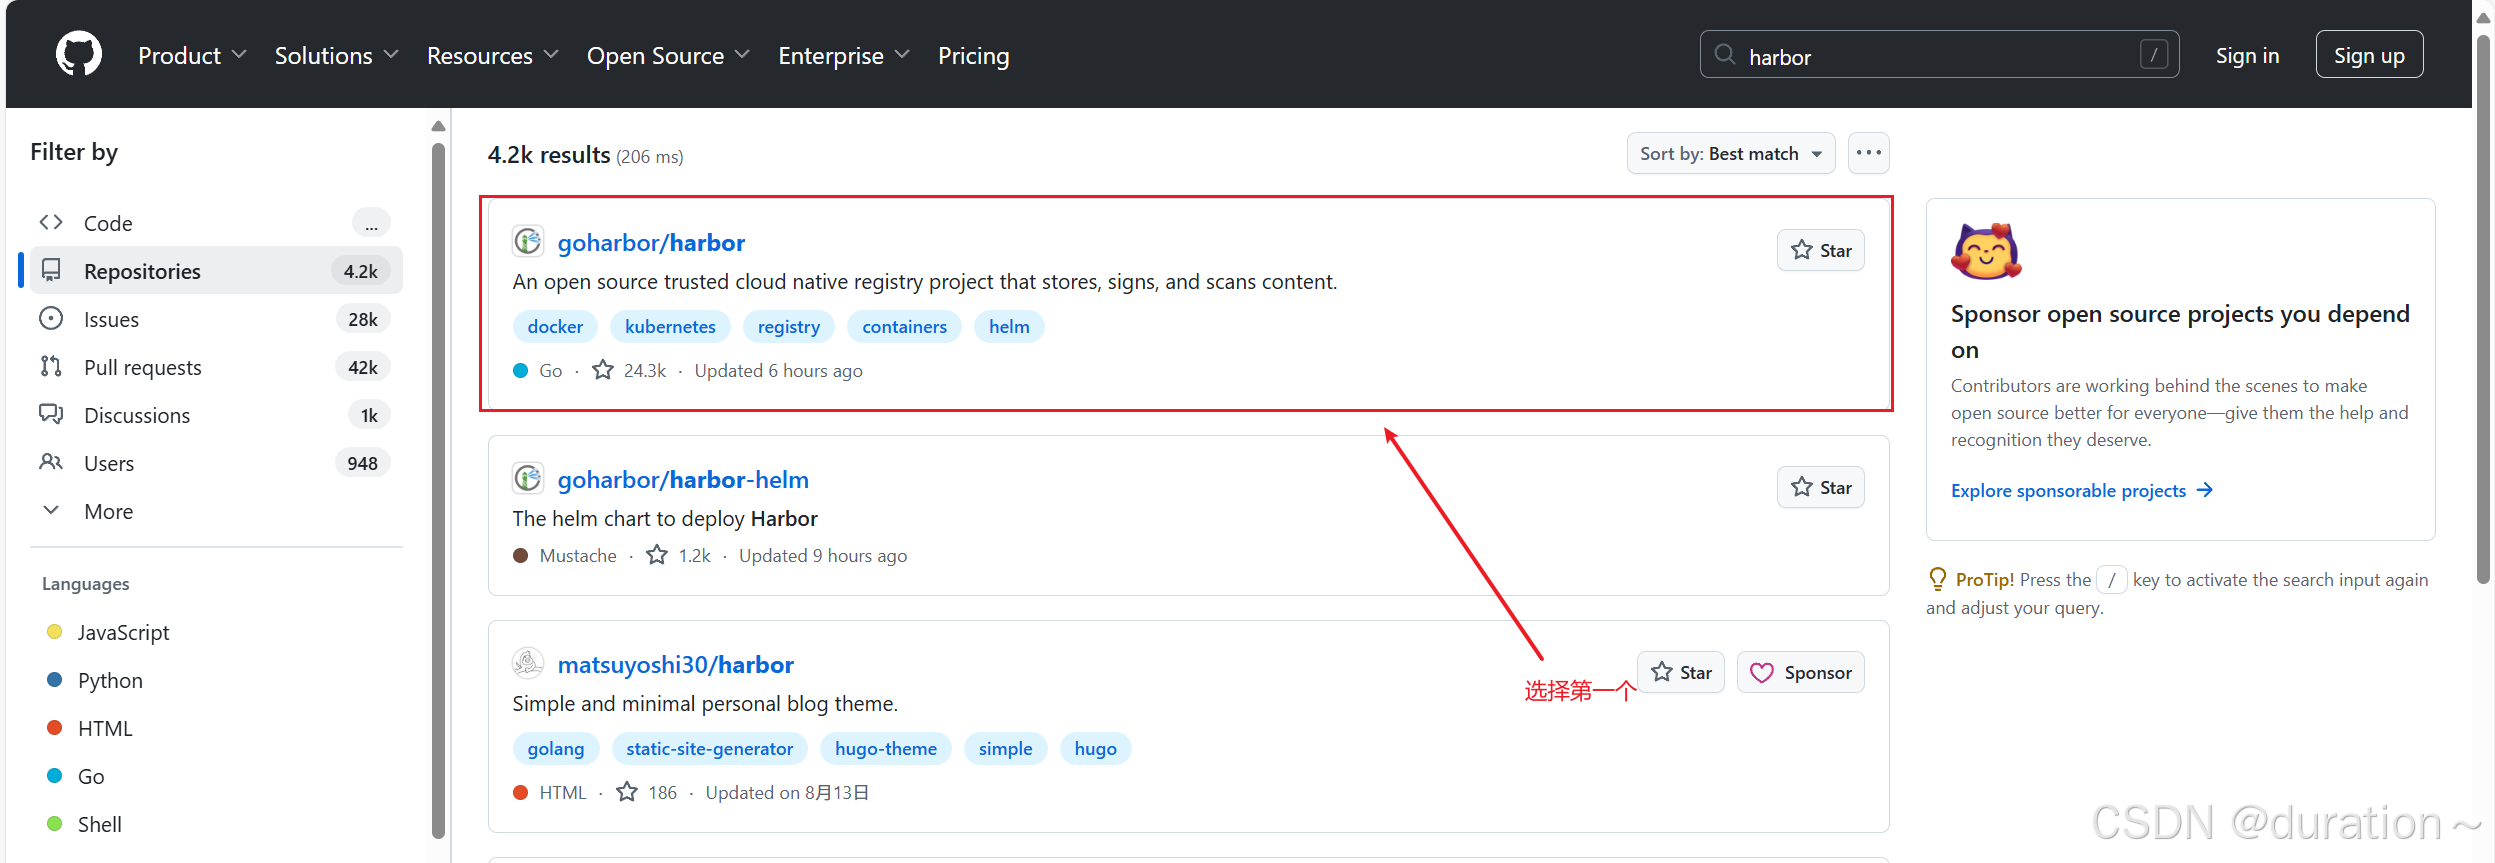
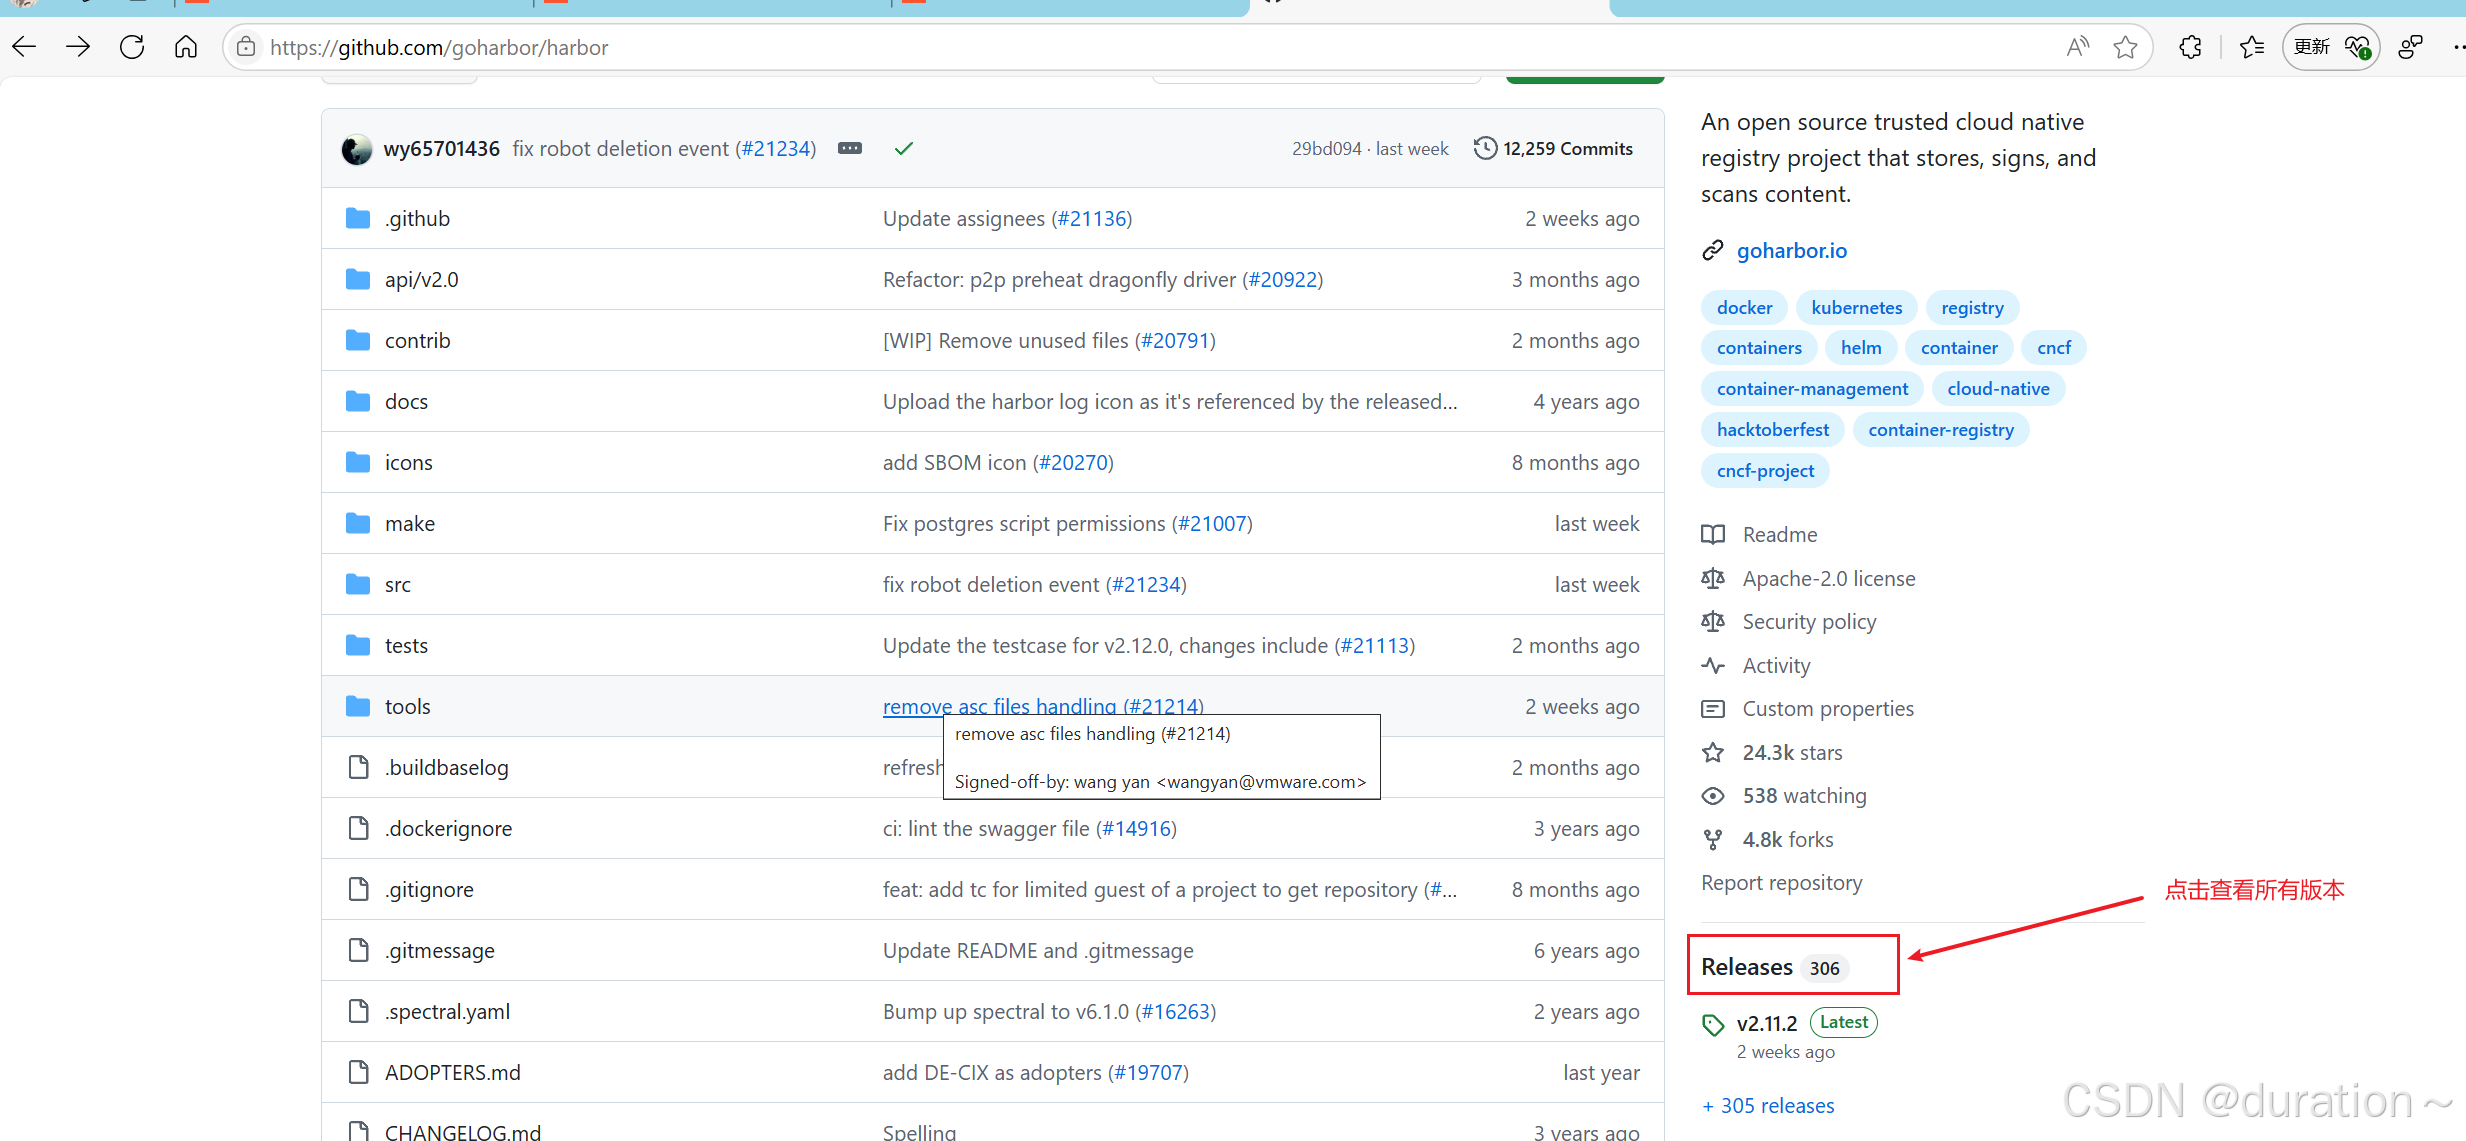
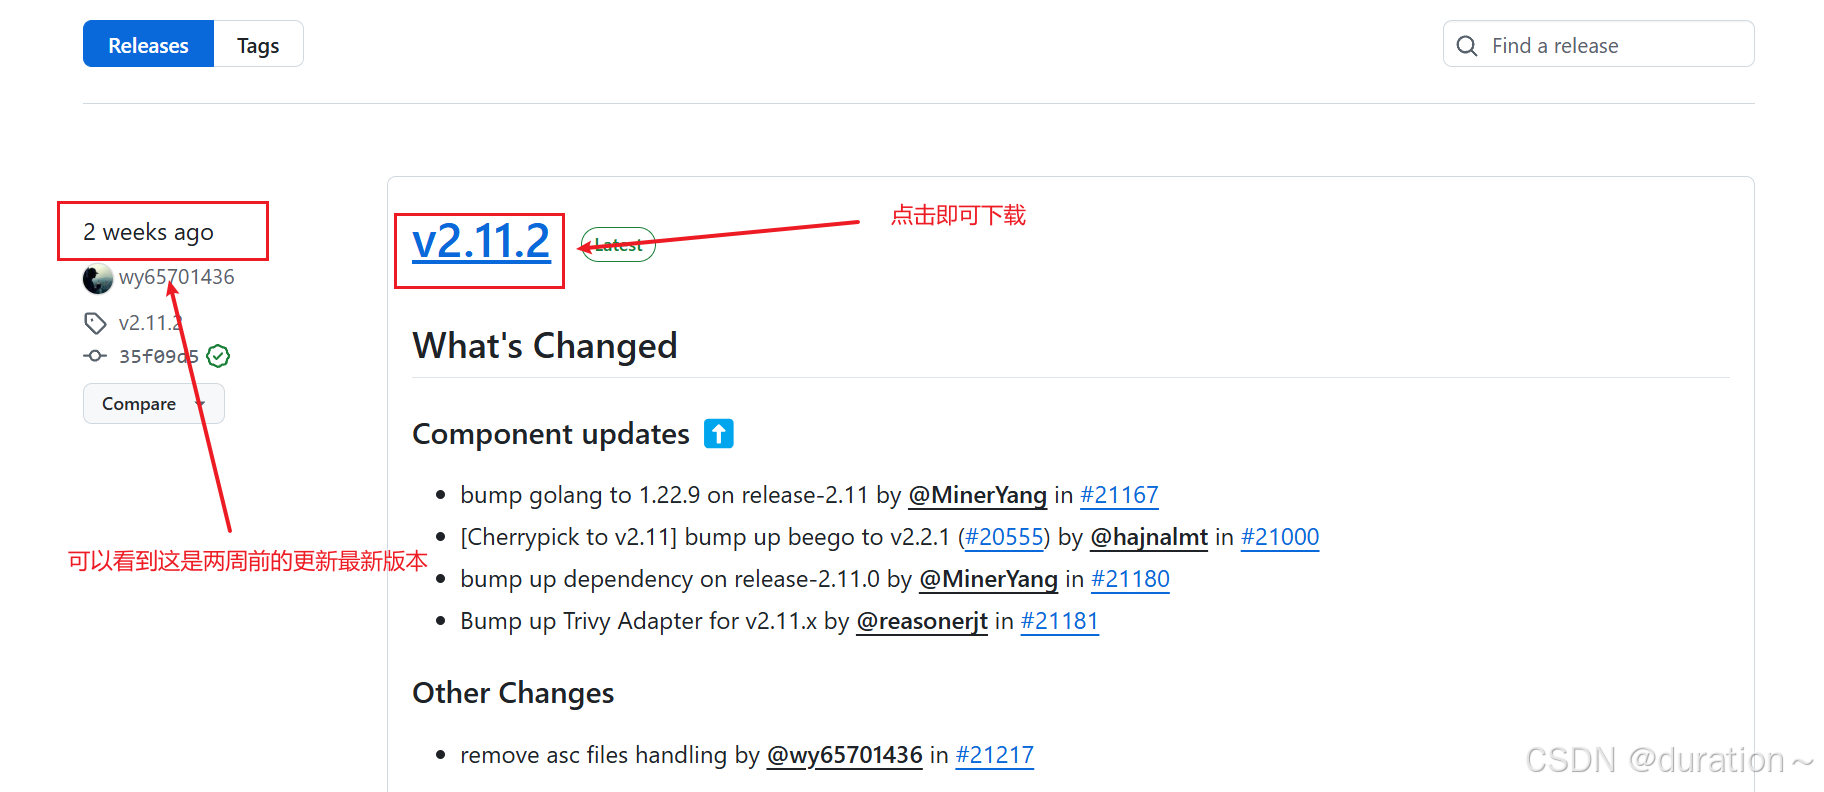
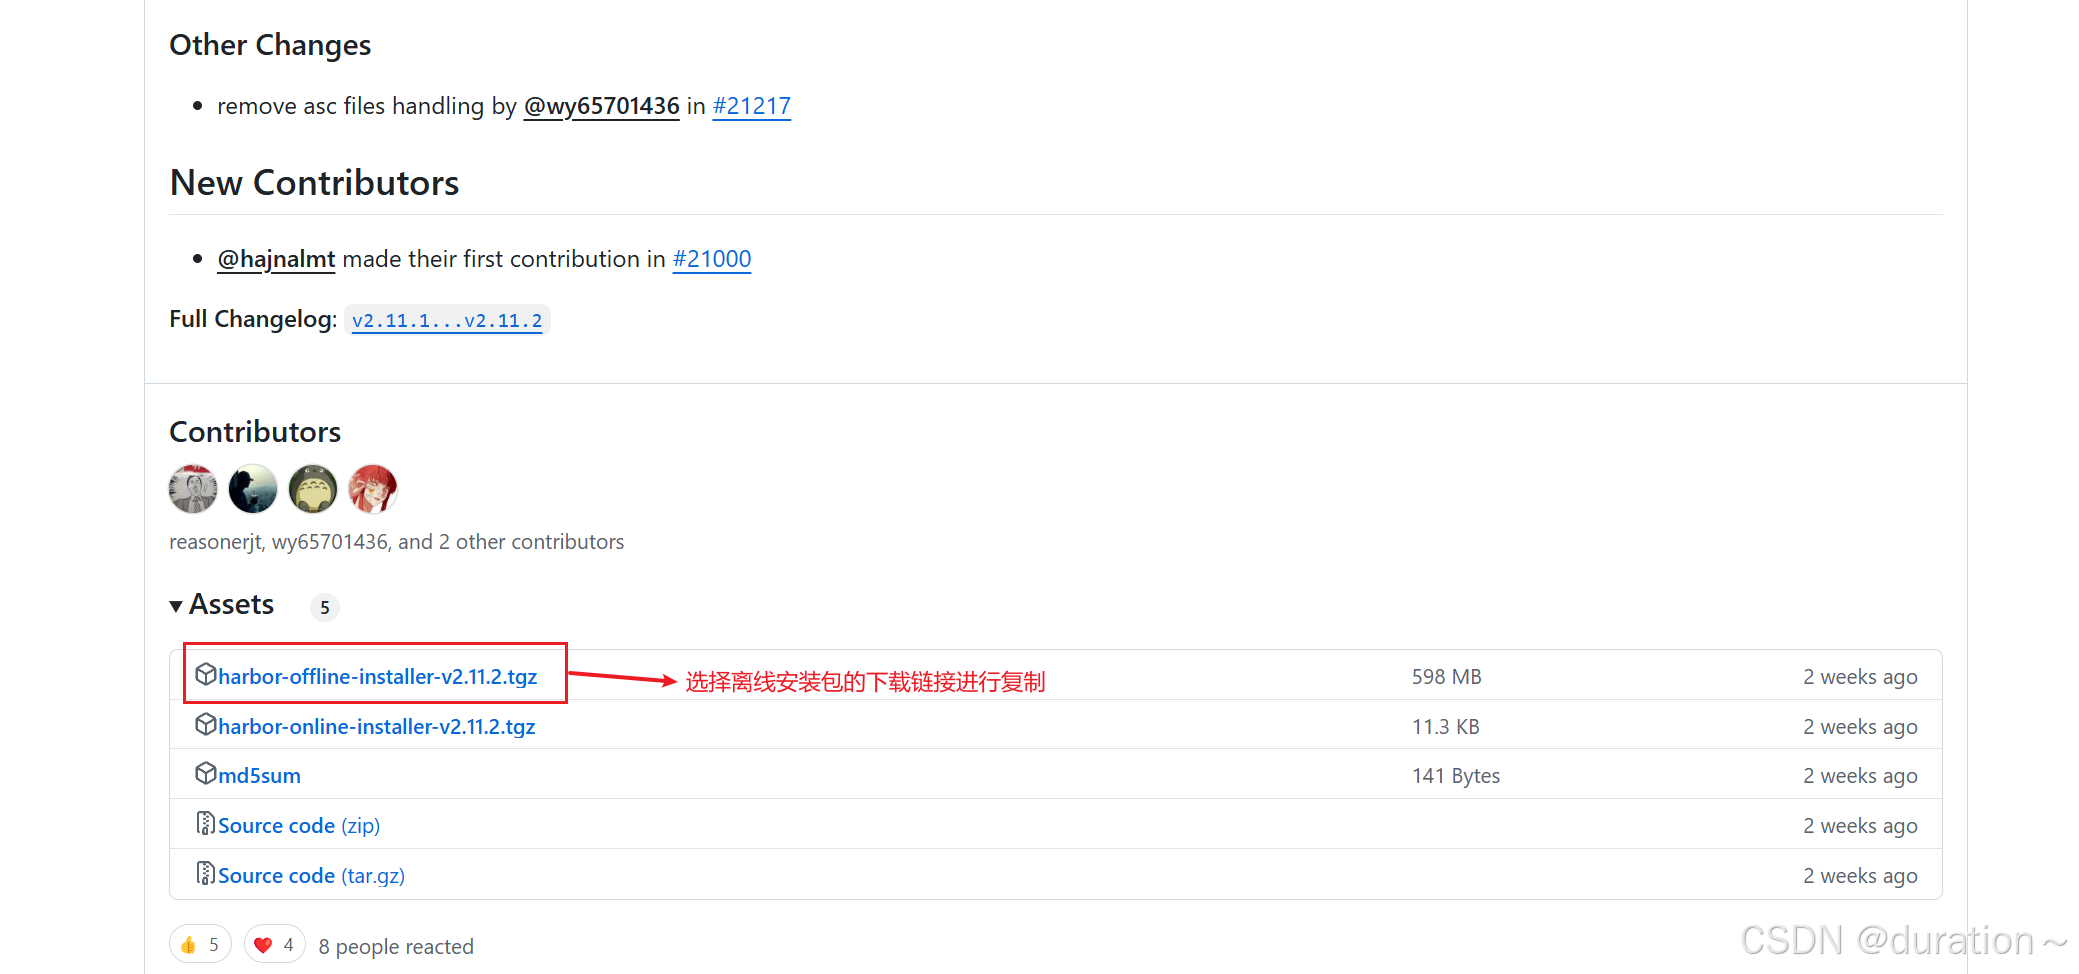
以/home目录作为基础环境
shell
cd /home下载 harbor 离线安装包( 大约590MB,注意网络环境 )
shell
wget https://github.com/goharbor/harbor/releases/download/v2.11.2/harbor-offline-installer-v2.11.2.tgz查看已下载的离线安装包
powershell
[root@localhost home]# ls
harbor-offline-installer-v2.11.2.tgz
3_获取TLS文件
创建自签证书参考官网:https://goharbor.io/docs/2.11.0/install-config/configure-https/。
编辑如下系统文件
shell
vim /etc/hosts添加域名解析(添加本机IP):
go
192.168.150.145 hub.harbor.com # 这里的值与下面的证书的名称都需要保持一致创建存放各种证书的文件夹
shell
mkdir ssl
cd ssl
生成 CA 证书私有密钥
shell
openssl genrsa -out ca.key 4096生成 CA 证书
shell
openssl req -x509 -new -nodes -sha512 -days 3650 \
 -subj "/C=CN/ST=Beijing/L=Beijing/O=example/OU=Personal/CN=MyPersonal Root CA" \
 -key ca.key \
 -out ca.crt
生成 Harbor 服务器私钥
shell
openssl genrsa -out hub.harbor.com.key 4096生成 Harbor 服务器证书签名请求(CSR)
shell
openssl req -sha512 -new \
    -subj "/C=CN/ST=Beijing/L=Beijing/O=example/OU=Personal/CN=hub.harbor.com" \
    -key hub.harbor.com.key \
    -out hub.harbor.com.csr
生成域名配置 v3 扩展文件
shell
cat > v3.ext <<-EOF
authorityKeyIdentifier=keyid,issuer
basicConstraints=CA:FALSE
keyUsage = digitalSignature, nonRepudiation, keyEncipherment, dataEncipherment
extendedKeyUsage = serverAuth
subjectAltName = @alt_names

[alt_names]
DNS.1=hub.harbor.com
EOF使用v3.ext文件为 Harbor 主机生成证书。
shell
openssl x509 -req -sha512 -days 3650 \
    -extfile v3.ext \
    -CA ca.crt -CAkey ca.key -CAcreateserial \
    -in hub.harbor.com.csr \
-out hub.harbor.com.crtcrt转换为cert,以供 Docker 使用。
shell
openssl x509 -inform PEM -in hub.harbor.com.crt -out hub.harbor.com.cert完成后可以看到共计 8 个文件
powershell
[root@localhost ssl]# ls
ca.crt  ca.key  ca.srl  hub.harbor.com.cert  hub.harbor.com.crt  hub.harbor.com.csr  hub.harbor.com.key  v3.ext
想要真实证书可以根据域名去阿里云进行申请,本地测试环境就不这么做了。
4_修改配置文件
回到/home下
shell
cd /home解压harbor离线安装包
shell
tar xf harbor-offline-installer-v2.11.2.tgz查看解压出来的目录
powershell
[root@localhost home]# ls
harbor查看harbor目录
powershell
[root@hub home]# ls harbor
common.sh  harbor.v2.11.2.tar.gz  harbor.yml.tmpl  install.sh  LICENSE  prepare
创建配置文件
shell
cd harbor/
mv harbor.yml.tmpl harbor.yml
修改配置文件内容
yaml
[root@localhost harbor]# vim harbor.yml

# Configuration file of Harbor

# The IP address or hostname to access admin UI and registry service.
# DO NOT use localhost or 127.0.0.1, because Harbor needs to be accessed by external clients.
hostname: hub.harbor.com	修改为域名,而且一定是证书签发的域名

# http related config
http:
  # port for http, default is 80. If https enabled, this port will redirect to https port
  port: 80

# https related config
https:
  # https port for harbor, default is 443
  port: 443
  # The path of cert and key files for nginx
  certificate: /home/ssl/hub.harbor.com.crt	 证书(绝对路径)
  private_key: /home/ssl/hub.harbor.com.key	 密钥 绝对路径
  # enable strong ssl ciphers (default: false)
  # strong_ssl_ciphers: false

.....

# Remember Change the admin password from UI after launching Harbor.
harbor_admin_password: 123456  访问密码
.....
注意:配置文件中不要出现带有自定义的注释。
5_执行预备脚本
shell
./prepare输出
powershell
prepare base dir is set to /home/harbor
Generated configuration file: /config/portal/nginx.conf
Generated configuration file: /config/log/logrotate.conf
Generated configuration file: /config/log/rsyslog_docker.conf
Generated configuration file: /config/nginx/nginx.conf
Generated configuration file: /config/core/env
Generated configuration file: /config/core/app.conf
Generated configuration file: /config/registry/config.yml
Generated configuration file: /config/registryctl/env
Generated configuration file: /config/registryctl/config.yml
Generated configuration file: /config/db/env
Generated configuration file: /config/jobservice/env
Generated configuration file: /config/jobservice/config.yml
Generated and saved secret to file: /data/secret/keys/secretkey
Successfully called func: create_root_cert
Generated configuration file: /compose_location/docker-compose.yml
Clean up the input dir
6_执行安装脚本
shell
./install.sh输出
powershell
[Step 0]: checking if docker is installed ...

Note: docker version: 27.3.1

[Step 1]: checking docker-compose is installed ...

Note: Docker Compose version v2.29.7

[Step 2]: loading Harbor images ...

[Step 3]: preparing environment ...

[Step 4]: preparing harbor configs ...
prepare base dir is set to /home/harbor

[Step 5]: starting Harbor ...
WARN[0000] /home/harbor/docker-compose.yml: the attribute `version` is obsolete, it will be ignored, please remove it to avoid potential confusion
[+] Running 10/10
 ✔ Network harbor_harbor        Created                                                                                                                                                                     0.5s
 ✔ Container harbor-log         Started                                                                                                                                                                     0.7s
 ✔ Container registry           Started                                                                                                                                                                     3.1s
 ✔ Container harbor-db          Started                                                                                                                                                                     3.2s
 ✔ Container redis              Started                                                                                                                                                                     3.0s
 ✔ Container harbor-portal      Started                                                                                                                                                                     3.1s
 ✔ Container registryctl        Started                                                                                                                                                                     3.7s
 ✔ Container harbor-core        Started                                                                                                                                                                     4.0s
 ✔ Container harbor-jobservice  Started                                                                                                                                                                     4.7s
 ✔ Container nginx              Started                                                                                                                                                                     4.7s
✔ ----Harbor has been installed and started successfully.----
这里运行了9个服务,如果有一个出现了问题,就会导致整体不可用,需要检查启动数量是否足够。
7_验证运行情况
powershell
[root@localhost harbor]# docker ps
CONTAINER ID   IMAGE                                 COMMAND                   CREATED         STATUS                   PORTS                                                                                NAMES
674230487f7b   goharbor/nginx-photon:v2.11.2         "nginx -g 'daemon of..."   5 minutes ago   Up 5 minutes (healthy)   0.0.0.0:80->8080/tcp, [::]:80->8080/tcp, 0.0.0.0:443->8443/tcp, [::]:443->8443/tcp   nginx
eb1ca760d0d7   goharbor/harbor-jobservice:v2.11.2    "/harbor/entrypoint...."   5 minutes ago   Up 5 minutes (healthy)                                                                                        harbor-jobservice
e14e3c327b39   goharbor/harbor-core:v2.11.2          "/harbor/entrypoint...."   5 minutes ago   Up 5 minutes (healthy)                                                                                        harbor-core
eba3e5fb662c   goharbor/redis-photon:v2.11.2         "redis-server /etc/r..."   5 minutes ago   Up 5 minutes (healthy)                                                                                        redis
3403899c9bb8   goharbor/registry-photon:v2.11.2      "/home/harbor/entryp..."   5 minutes ago   Up 5 minutes (healthy)                                                                                        registry
f144bcd948ce   goharbor/harbor-db:v2.11.2            "/docker-entrypoint...."   5 minutes ago   Up 5 minutes (healthy)                                                                                        harbor-db
5df0ee35e953   goharbor/harbor-portal:v2.11.2        "nginx -g 'daemon of..."   5 minutes ago   Up 5 minutes (healthy)                                                                                        harbor-portal
6e5c3c09473e   goharbor/harbor-registryctl:v2.11.2   "/home/harbor/start...."   5 minutes ago   Up 5 minutes (healthy)                                                                                        registryctl
23a05a72e27f   goharbor/harbor-log:v2.11.2           "/bin/sh -c /usr/loc..."   5 minutes ago   Up 5 minutes (healthy)   127.0.0.1:1514->10514/tcp                                                            harbor-log
8_访问harborUI界面
在物理机通过浏览器访问
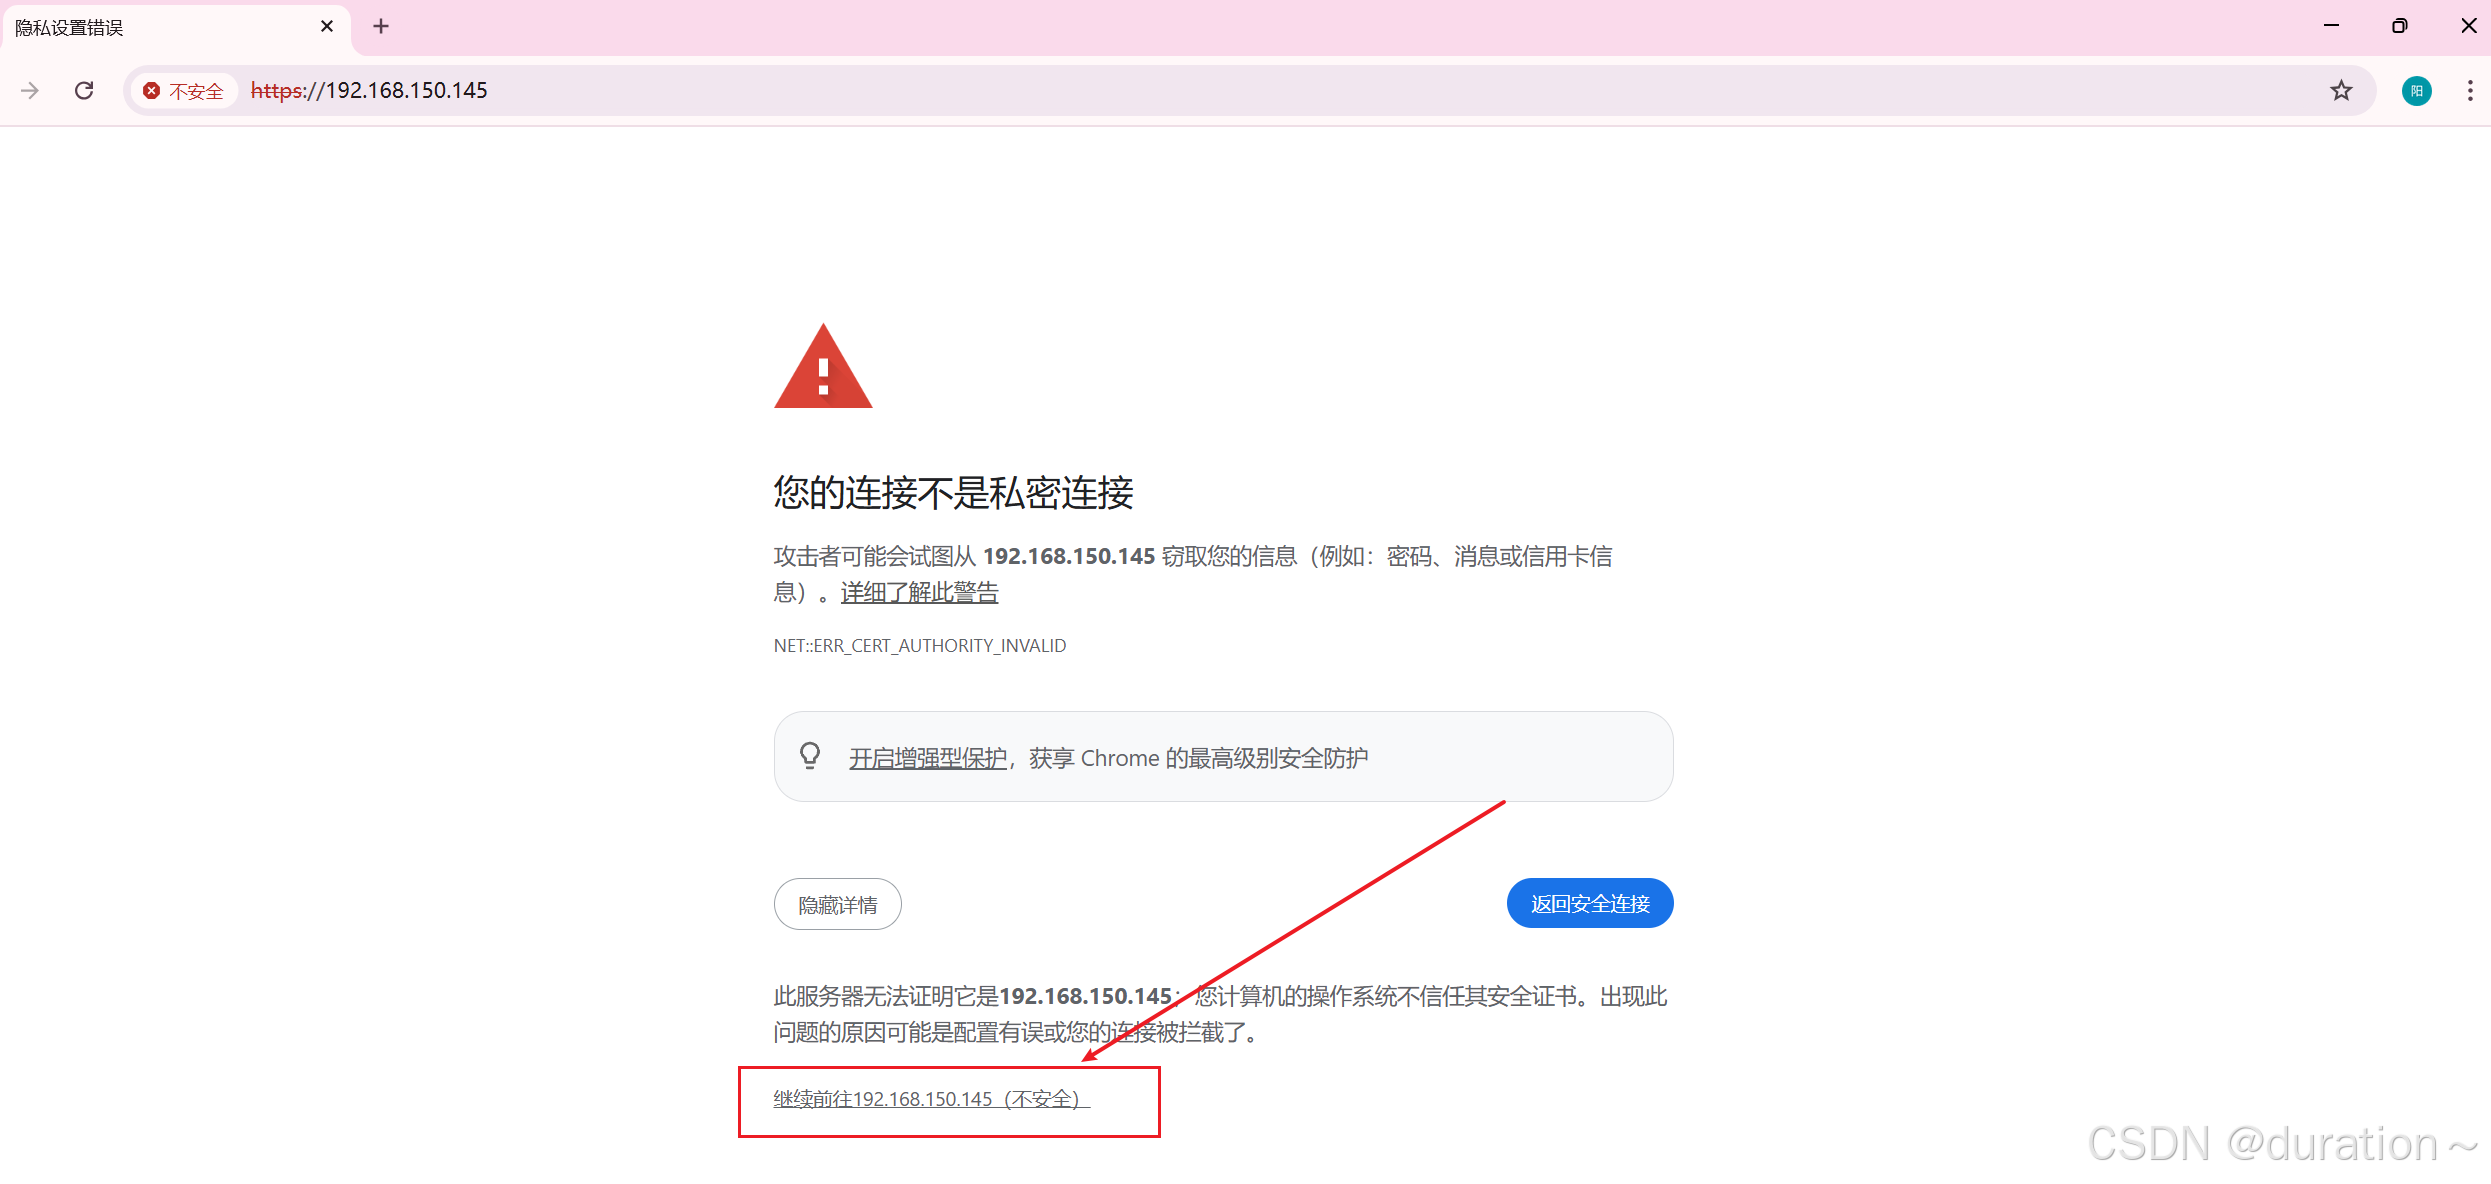
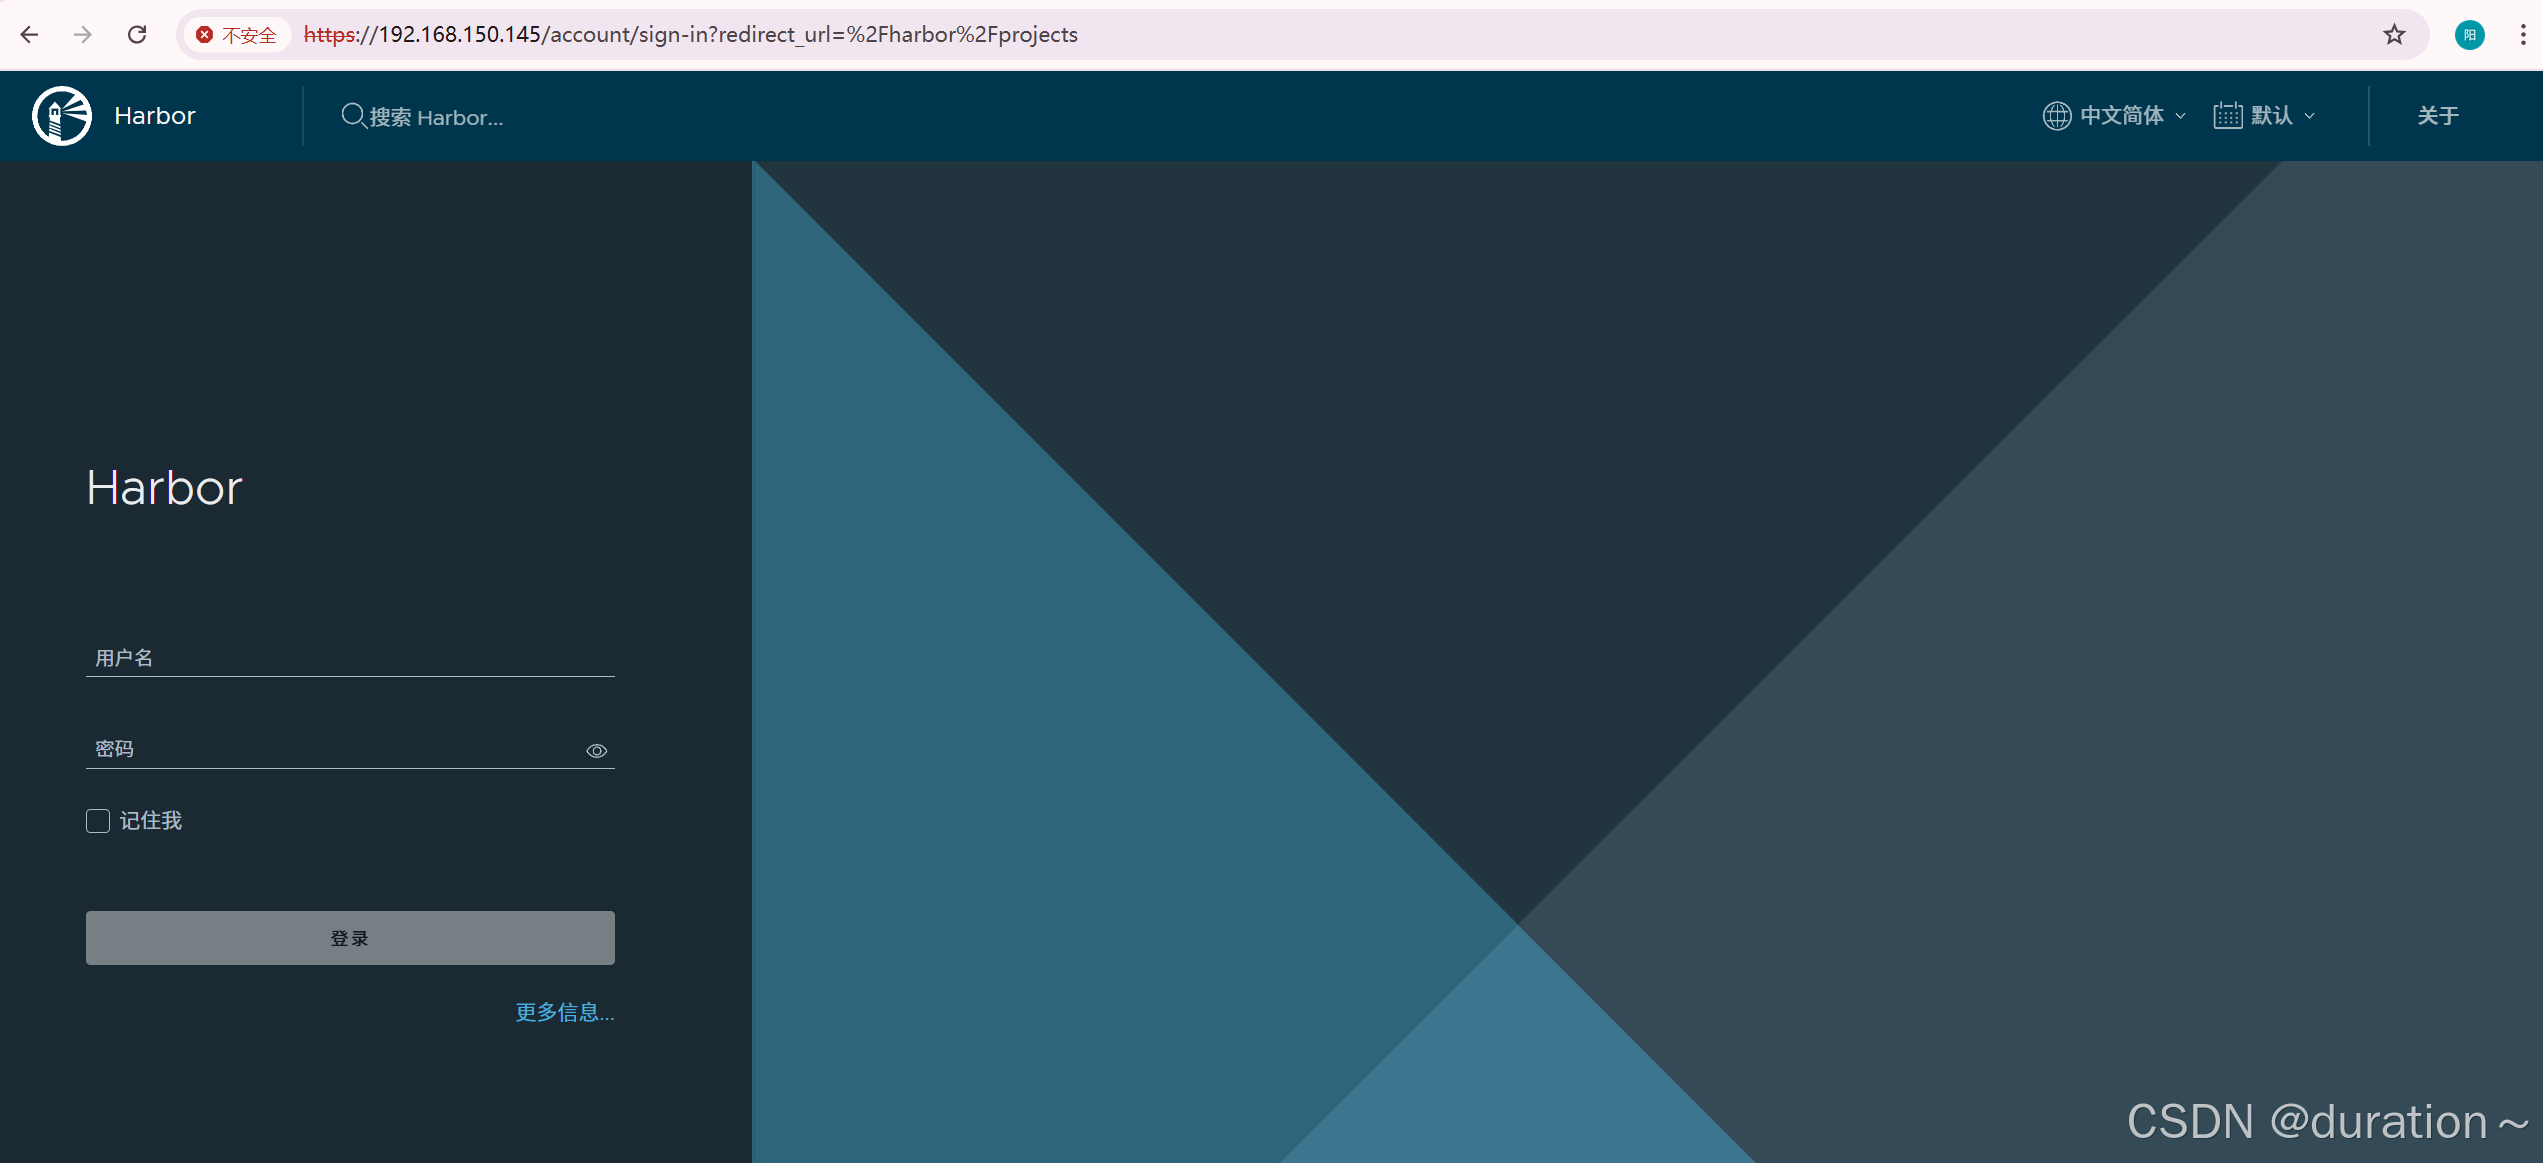
在DockerHost主机通过域名访问
将证书添加到系统的 CA 证书存储库 来信任证书(CentOS):
shell
sudo cp /home/ssl/ca.crt /etc/pki/ca-trust/source/anchors/
sudo update-ca-trust我们这里是使用OS级别信任证书来访问hub.harbor.com
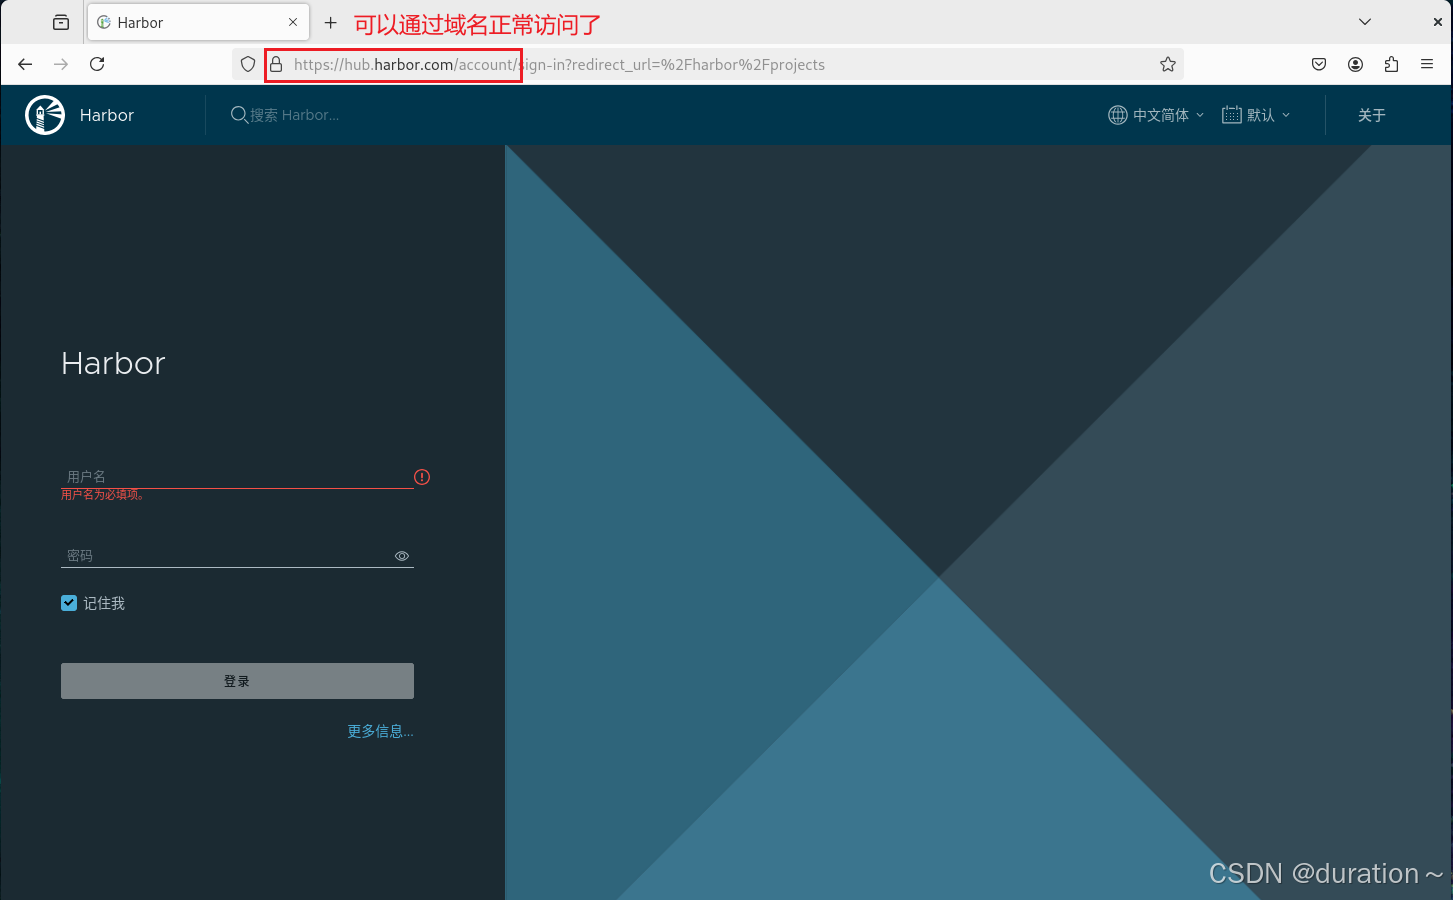
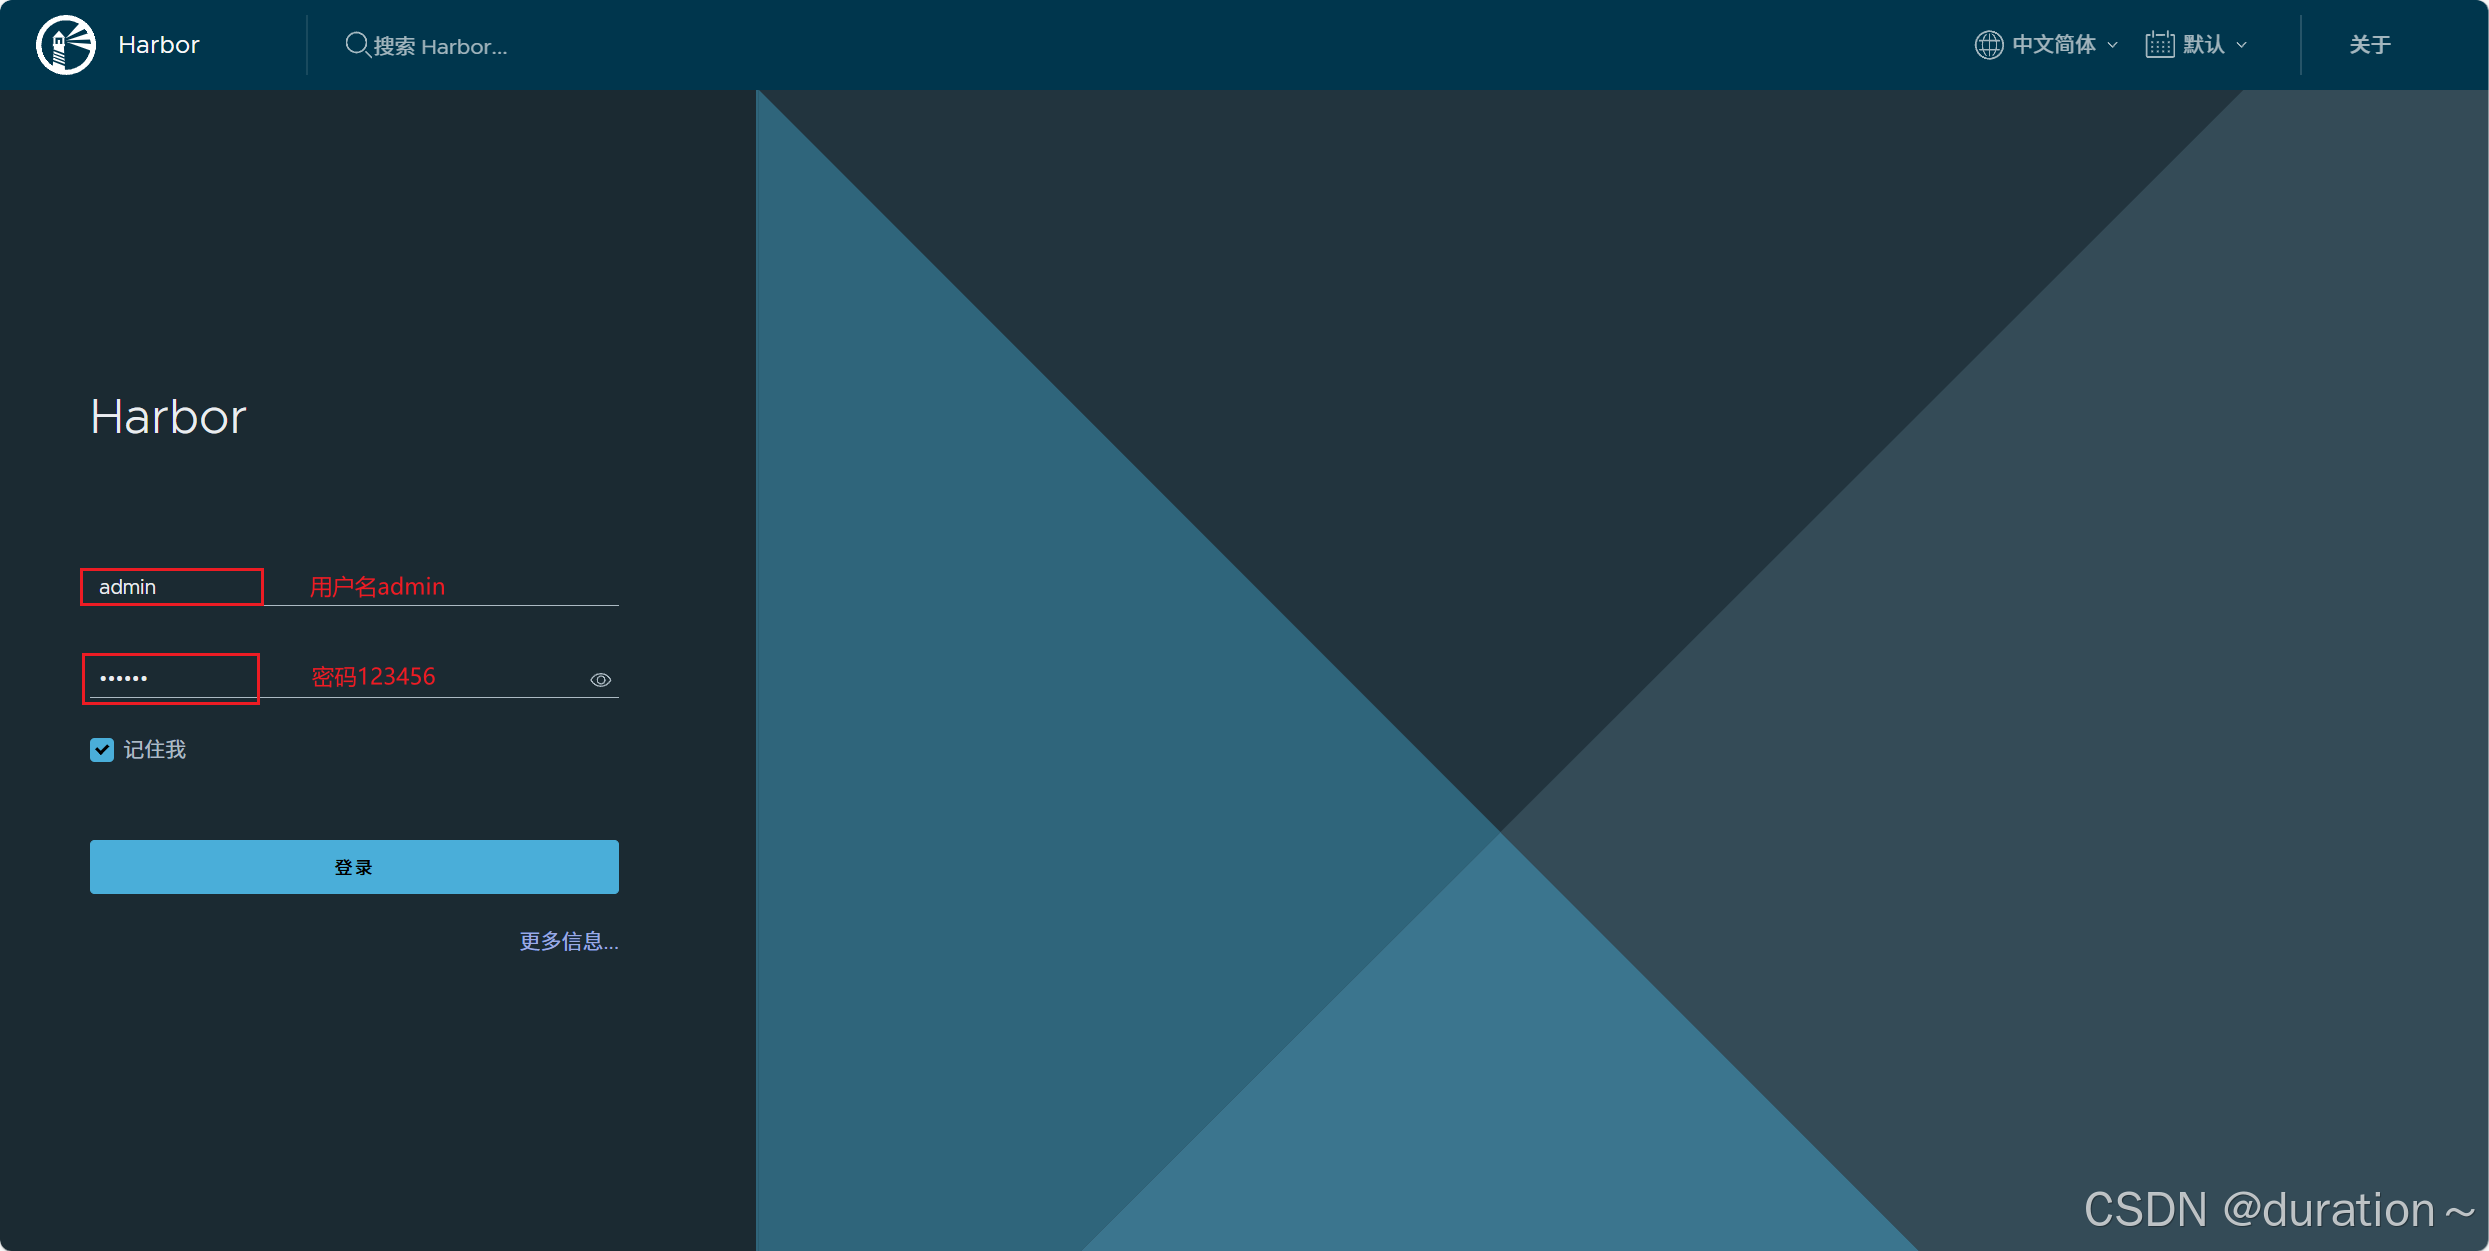
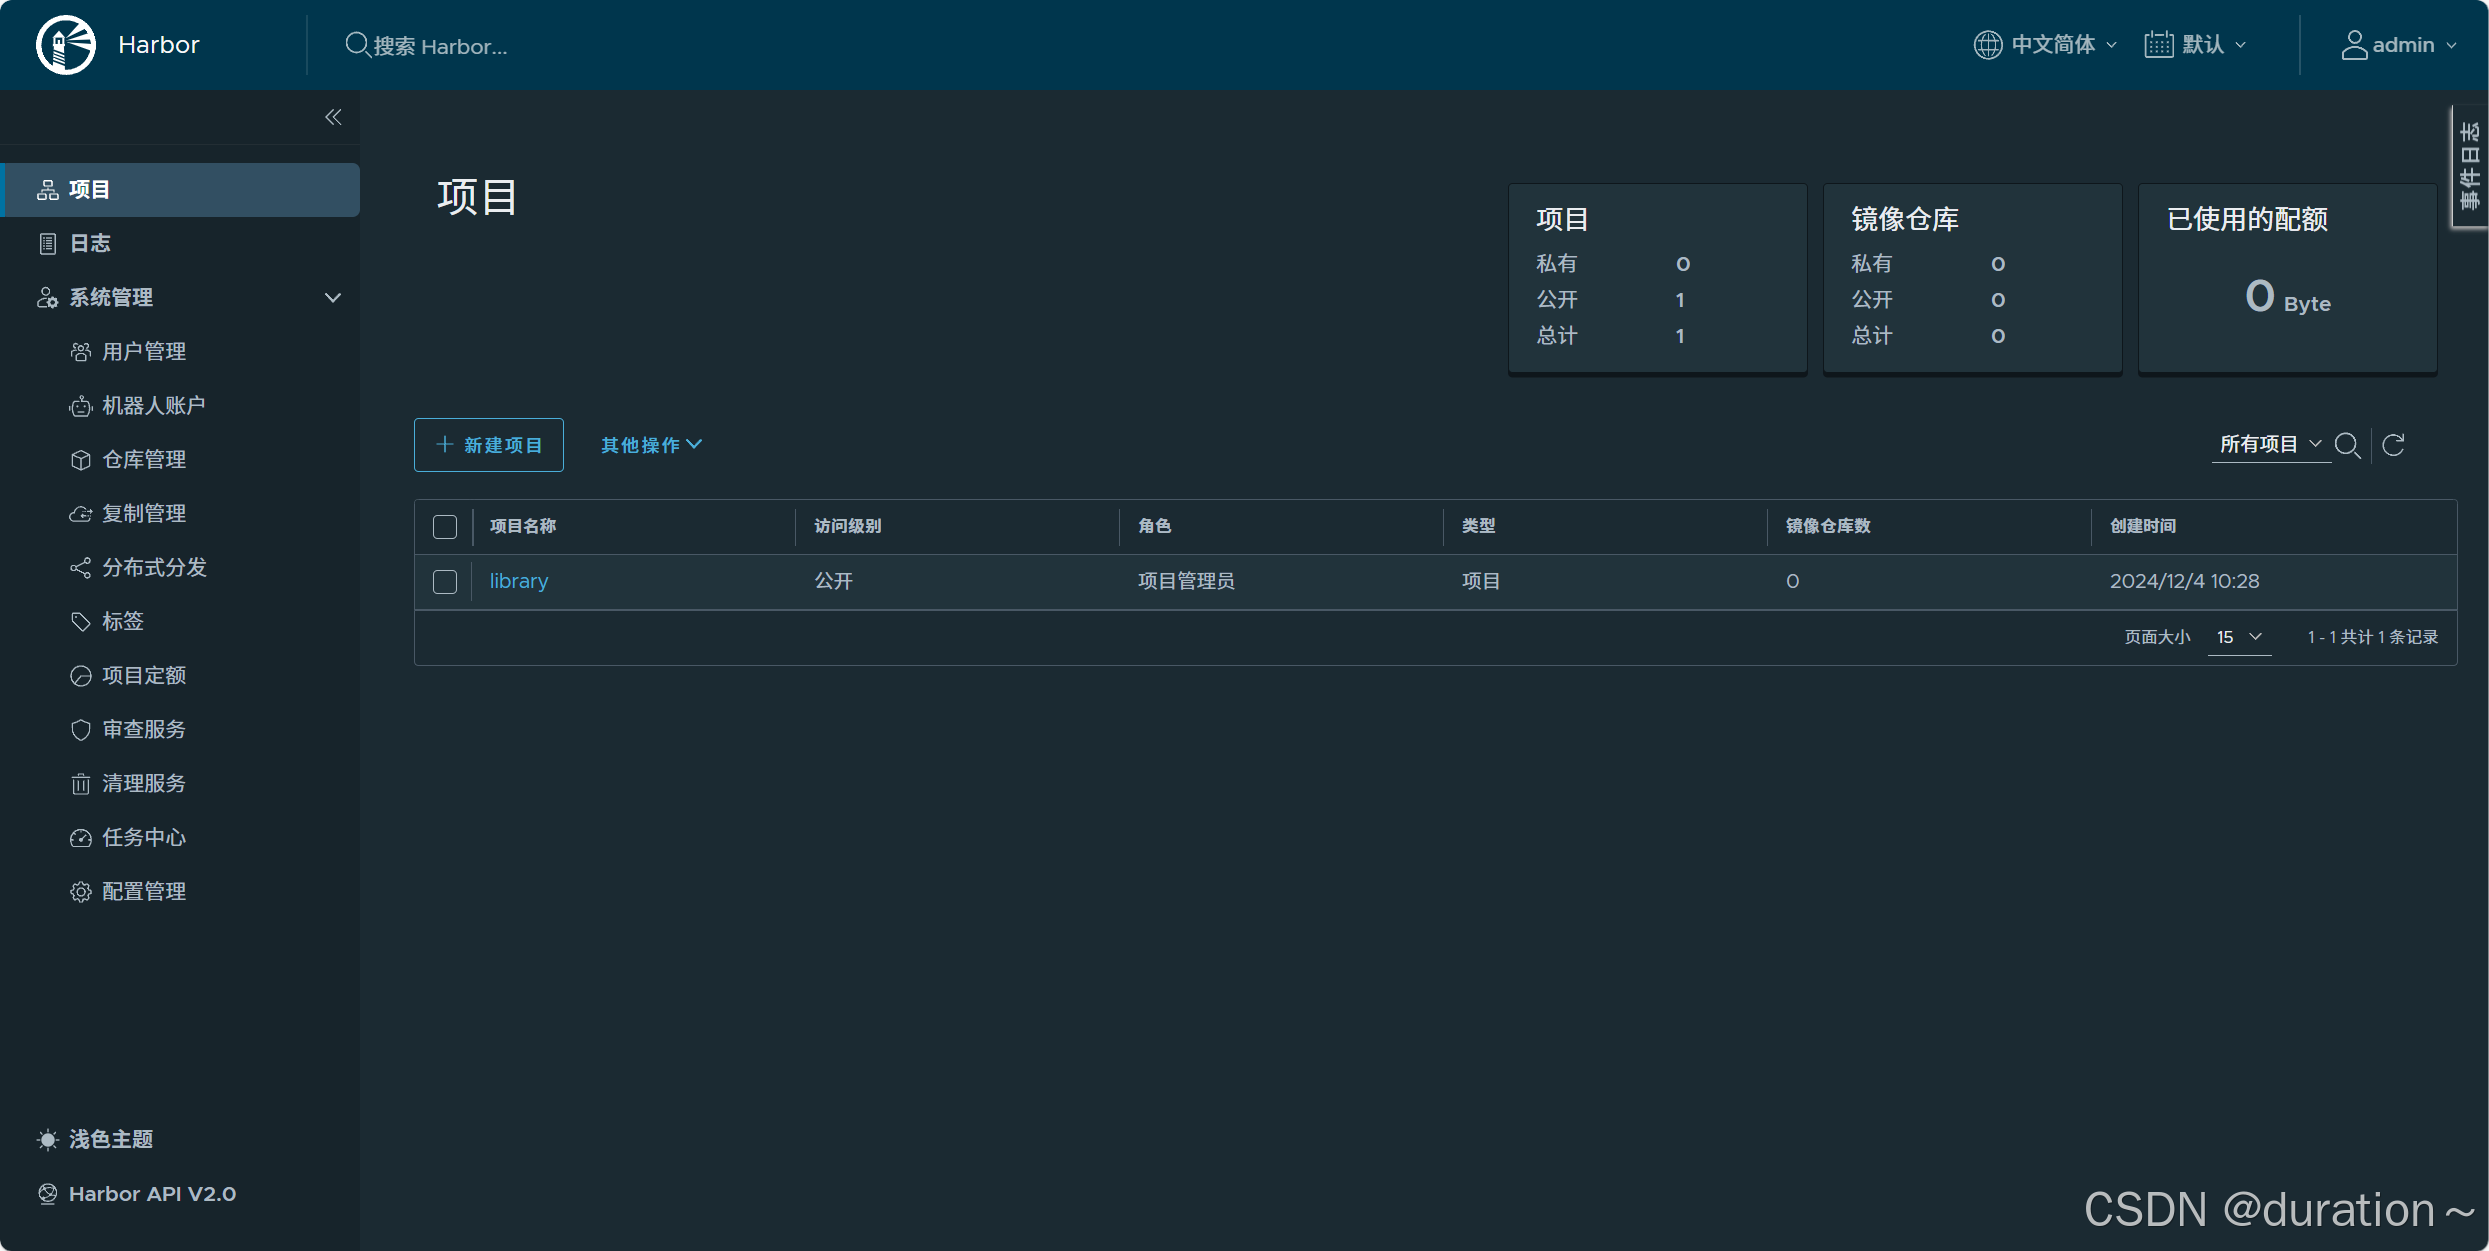
这里是通过Linux本机的浏览器进行访问的,如果需要使用windows测试请编辑本机的hosts文件,并将ca.crt证书导入到本地受信根证书下(将证书下载本地后,双击安装即可)。
9_harbor重启时存在的问题
如果你的机器或docker重启了,你会发现原来如果有9个服务最终只启动了5个,即使将剩余的服务启动后依然无法正常访问。
如果出现这一问题,使用如下命令重启 Harbor 服务进行解决:
shell
cd /home/harbor # 这就是服务单独存放一个固定目录的好处
docker compose down # 关闭 harbor 容器
docker compose up -d # 启动
docker ps # 查看启动的harbor服务是不是9个
注意: v1 版本的 docker compose 不要忘记添加连词符-。
3、docker镜像上传至Harbor及镜像下载
在一台新的机器上尝试以下操作,原来配置 Harbor 的主机仅当做管理容器镜像的私有仓库。
1_修改docker daemon使用harbor
首先添加域名映射
shell
vim /etc/hosts
192.168.150.145 hub.harbor.com编辑etc/docker/daemon.json文件,如果不存在,需要手动添加
shell
vim /etc/docker/daemon.json添加如下内容,这段配置的意思是这是个非安全的仓库(跳过了HTTPS验证)
json
{
  "insecure-registries": ["hub.harbor.com"]
}重启加载daemon配置
shell
systemctl daemon-reload重启 docker
shell
systemctl restart docker如果可以再将机器的时钟也顺便同步了,以防证书由于时间问题不生效。
2_docker tag
查看已有容器镜像文件
powershell
[root@centos ~]# docker images
REPOSITORY              TAG              IMAGE ID       CREATED         SIZE
redis latest 31f08b90668e 20 months ago 117MB为已存在镜像重新添加tag
powershell
docker tag redis:latest hub.harbor.com/library/redis:v1再次查看本地容器镜像
powershell
[root@centos ~]# docker images
REPOSITORY                     TAG              IMAGE ID       CREATED         SIZE
redis                          latest           31f08b90668e   20 months ago   117MB
hub.harbor.com/library/redis   v1               31f08b90668e   20 months ago   117MB
3_docker push
登录到私有仓库
powershell
[root@centos ~]# docker login hub.harbor.com
Username: admin  用户名 admin
Password: 		 密码   12345
WARNING! Your password will be stored unencrypted in /root/.docker/config.json.
Configure a credential helper to remove this warning. See
https://docs.docker.com/engine/reference/commandline/login/#credentials-store

Login Succeeded 登陆成功推送本地容器镜像到harbor仓库
shell
docker push hub.harbor.com/library/redis:v1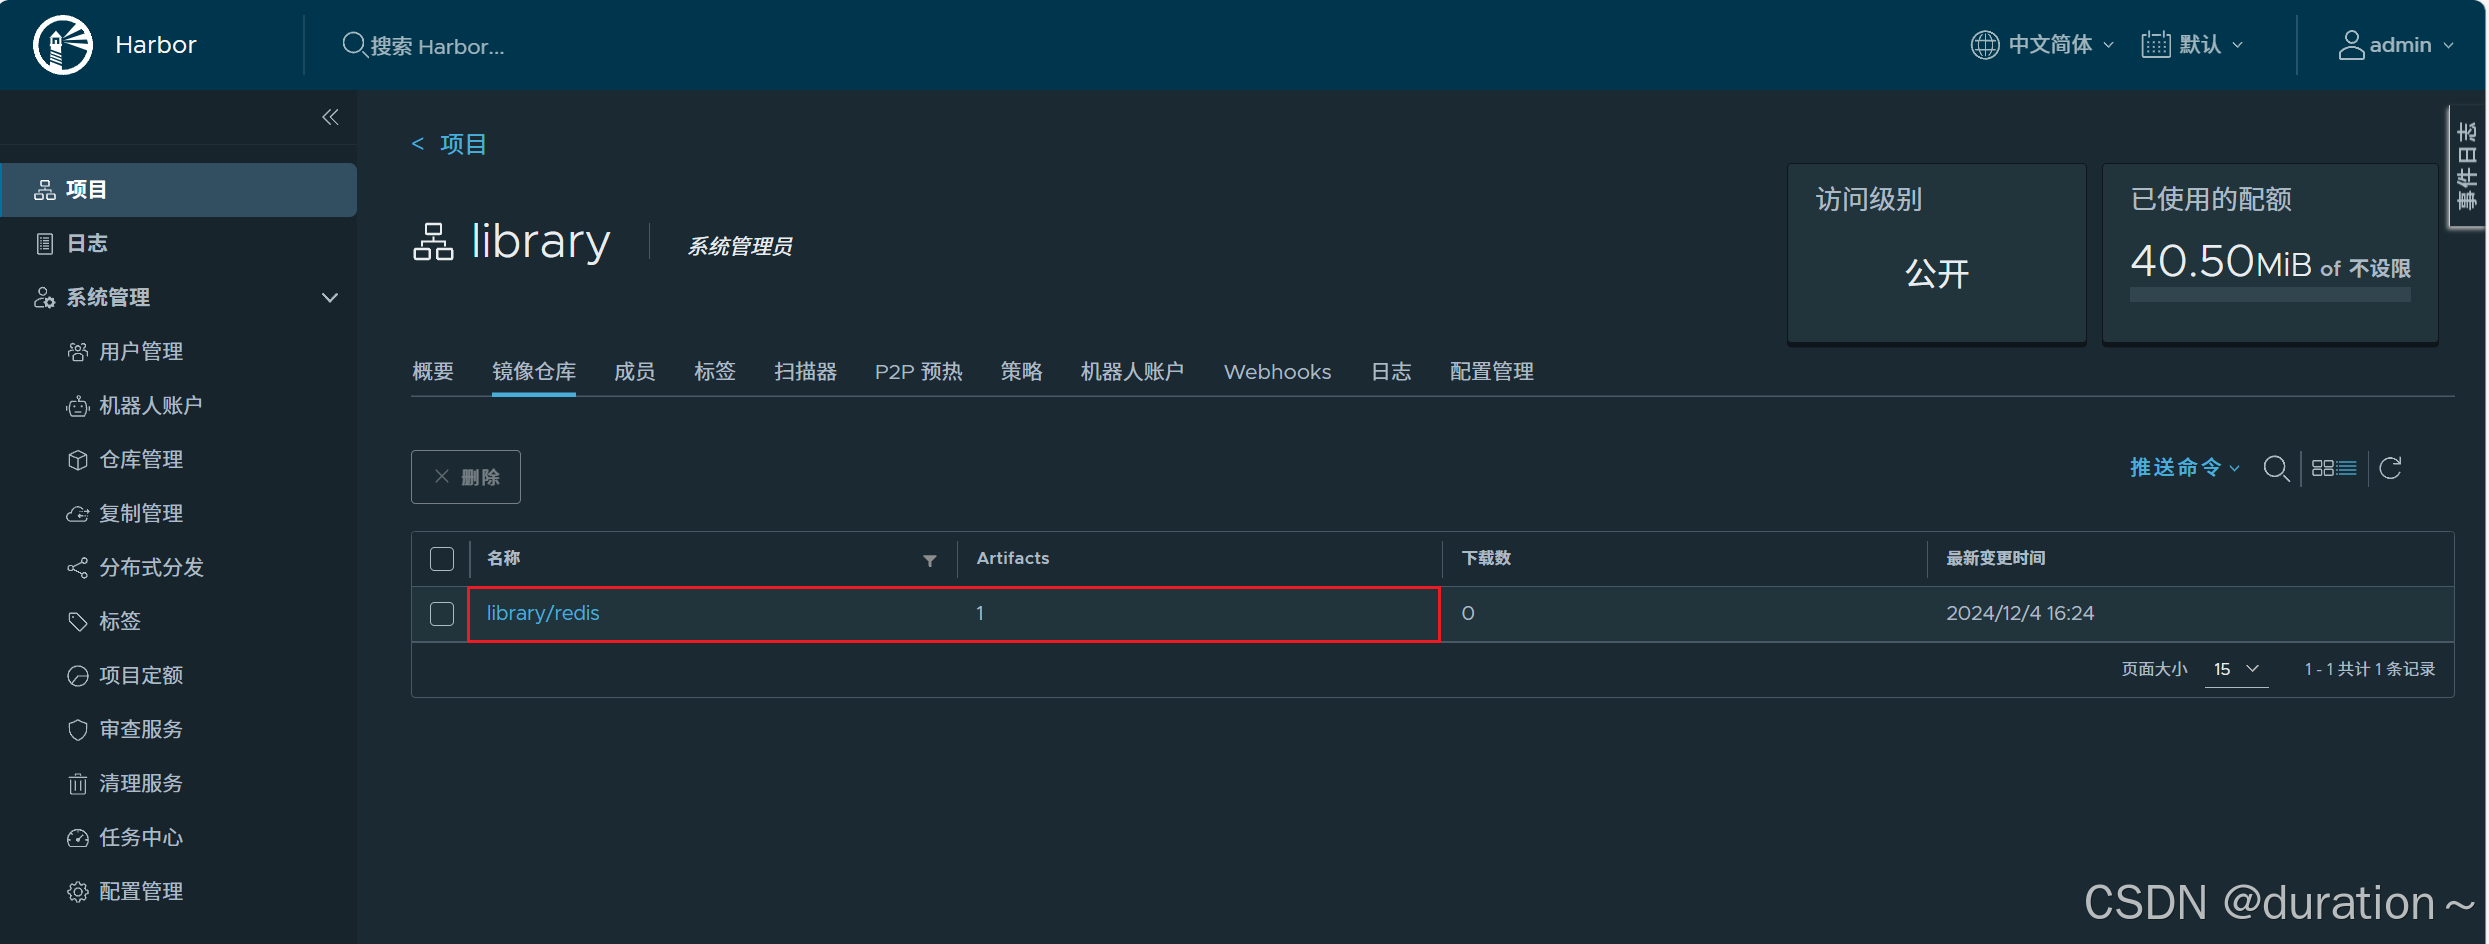
4_docker pull
在其它主机上下载使用harbor容器镜像仓库中的容器镜像
在本地域名解析文件中vim /etc/hosts添加如下内容
go
192.168.150.145 hub.harbor.com在/etc/docker/daemon.json文件中添加本地主机访问的容器镜像仓库
json
{
  "insecure-registries": ["hub.harbor.com"]
}
更新配置
shell
systemctl daemon-reload
systemctl restart docker
下载容器镜像
powershell
[root@centos ~]# docker pull hub.harbor.com/library/redis:v1
v1: Pulling from library/redis
Digest: sha256:94a25c195c764f7962087eda247471989797001c222f079d5d4dbb1c34cc4854
Status: Downloaded newer image for hub.harbor.com/library/redis:v1
hub.harbor.com/library/redis:v1
查看已下载的容器镜像
powershell
[root@centos ~]# docker images
REPOSITORY                     TAG                 IMAGE ID       CREATED         SIZE
hub.harbor.com/library/redis   v1                  31f08b90668e   20 months ago   117MB
5_向 Harbor 和 Docker 提供证书
之前配置的docker都是使用 insecure-registries 跳过证书验证来访问 Harbor 的,也就是说避免了配置docker的信任证书。
那么docker配置HTTPS验证该怎样操作呢? 所需证书在获取TLS文件这一小节都已经提前准备好了。
将服务器证书、密钥和 CA 文件复制到 Harbor 主机上的 Docker 证书文件夹和certficates文件夹中。
shell
cd /home/ssl # cd 到我们存放证书的目录下
# 向 docker 提供证书, 目录不存在一定要先创建
mkdir -p /etc/docker/certs.d/hub.harbor.com/ # 文件夹的名字一定要对
cp hub.harbor.com.cert /etc/docker/certs.d/hub.harbor.com/
cp hub.harbor.com.key /etc/docker/certs.d/hub.harbor.com/
cp ca.crt /etc/docker/certs.d/hub.harbor.com/
# 向 Harbor 提供证书, 目录不存在一定要先创建
mkdir -p /data/cert/ # 文件夹的名字一定要对
cp hub.harbor.com.crt /data/cert/
cp hub.harbor.com.key /data/cert/
# 无论是向docker还是Harbor提供完证书都需要重启
systemctl restart docker # 重启后如果harbor不能提供正常服务,详见2_9小节
官网提供的示例证书的配置:
shell
/etc/docker/certs.d/
    └── yourdomain.com:port # 如果将默认端口 443 映射到其他端口,创建此文件夹添加端口
       ├── yourdomain.com.cert  <-- Server certificate signed by CA
       ├── yourdomain.com.key   <-- Server key signed by CA
       └── ca.crt               <-- Certificate authority that signed the registry certificat
因为我们的 Harbor 主机本身就没有配置/etc/docker/daemon.json insecure-registry,所以我们在此服务器上直接尝试推送或拉取镜像即可,如果进行了相关配置,可以删掉再进行测试。
如果其他主机的 docker 容器想要访问 Harbor,将相关证书下载并拷贝到对应的目录下就可以使用了,只用向 docker 提供证书。
千万别忘记创建对应的目录、重启docker容器以及配置域名解析,另外多台机器之间的时钟一定要同步。
4、阿里云容器镜像仓库
在阿里云中搜索容器镜像服务,进行个人身份认证。根据需要选择个人版或企业版开通服务。个人版可免费使用,但功能可能受限。(我以个人版为例进行讲解)

1_创建命名空间
在容器镜像服务控制台中,选择"命名空间"进行创建,命名空间用于组织和管理多个镜像仓库。

输入命名空间名称时注意遵循命名规范,如使用公司名称或项目名称作为命名空间。
2_创建镜像仓库
在命名空间下,选择"创建镜像仓库"(也可以不创建,上传时自动创建)

输入仓库名称,选择仓库类型(如公开或私有),并设置其他相关属性(如仓库描述、是否启用自动构建等)。
3_本地登录
在本地 Docker环境中,使用docker login命令登录阿里云 Docker Registry 。
shell
docker login --username=aliyunaccount registry.cn-your-region.aliyuncs.com其中,--username后跟你的阿里云账号全名(或邮箱),registry.cn-your-region.aliyuncs.com替换为你的阿里云区域对应的镜像仓库地址。
也可以选择在阿里云控制台的访问凭证中直接复制

执行后输入创建时设置的登录密码即可成功。

4_使用容器镜像仓库
和我们之前使用的方式一样,都是 打tag、推送、拉取。
1 标记本地镜像:
shell
docker tag [ImageId] registry.cn-your-region.aliyuncs.com/namespace/repository-name:[ImageVersion]2 推送镜像:
shell
docker push registry.cn-your-region.aliyuncs.com/namespace/repository-name:[ImageVersion]测试推送redis:v1成功:

3 从阿里云私有镜像仓库拉取镜像
shell
docker pull registry.cn-your-region.aliyuncs.com/namespace/repository-name:[ImageVersion]| 标志 | 说明 |
|---|---|
| ImageId | 镜像ID,使用 镜像名称:tag 也可以 |
| namespace | 创建的命名空间名字 |
| repository-name | 仓库名称,阿里云中没有创建,会自动创建 |
| ImageVersion | 镜像版本号,也就是我们自己打的tag |
如果想要看到使用的详细操作指导,点击仓库就可以了

5、总结
在量小时云服务免费、方便,比较适合我们个人使用;作为企业来说还是搭建 harbor 这种企业私有镜像仓库统一管理、分发再合适不过了;而 docker hub 访问慢,在没有使用科学上网的方式下还是挺愁的。