一、插入公式
点击公式的时候 latexEditorVisible 会变成 true
src/views/Editor/CanvasTool/index.vue
typescript
<Modal
  v-model:visible="latexEditorVisible"
  :width="880"
>
  <LaTeXEditor
    @close="latexEditorVisible = false"
    @update="data => { createLatexElement(data); latexEditorVisible = false }"
  />
</Modal>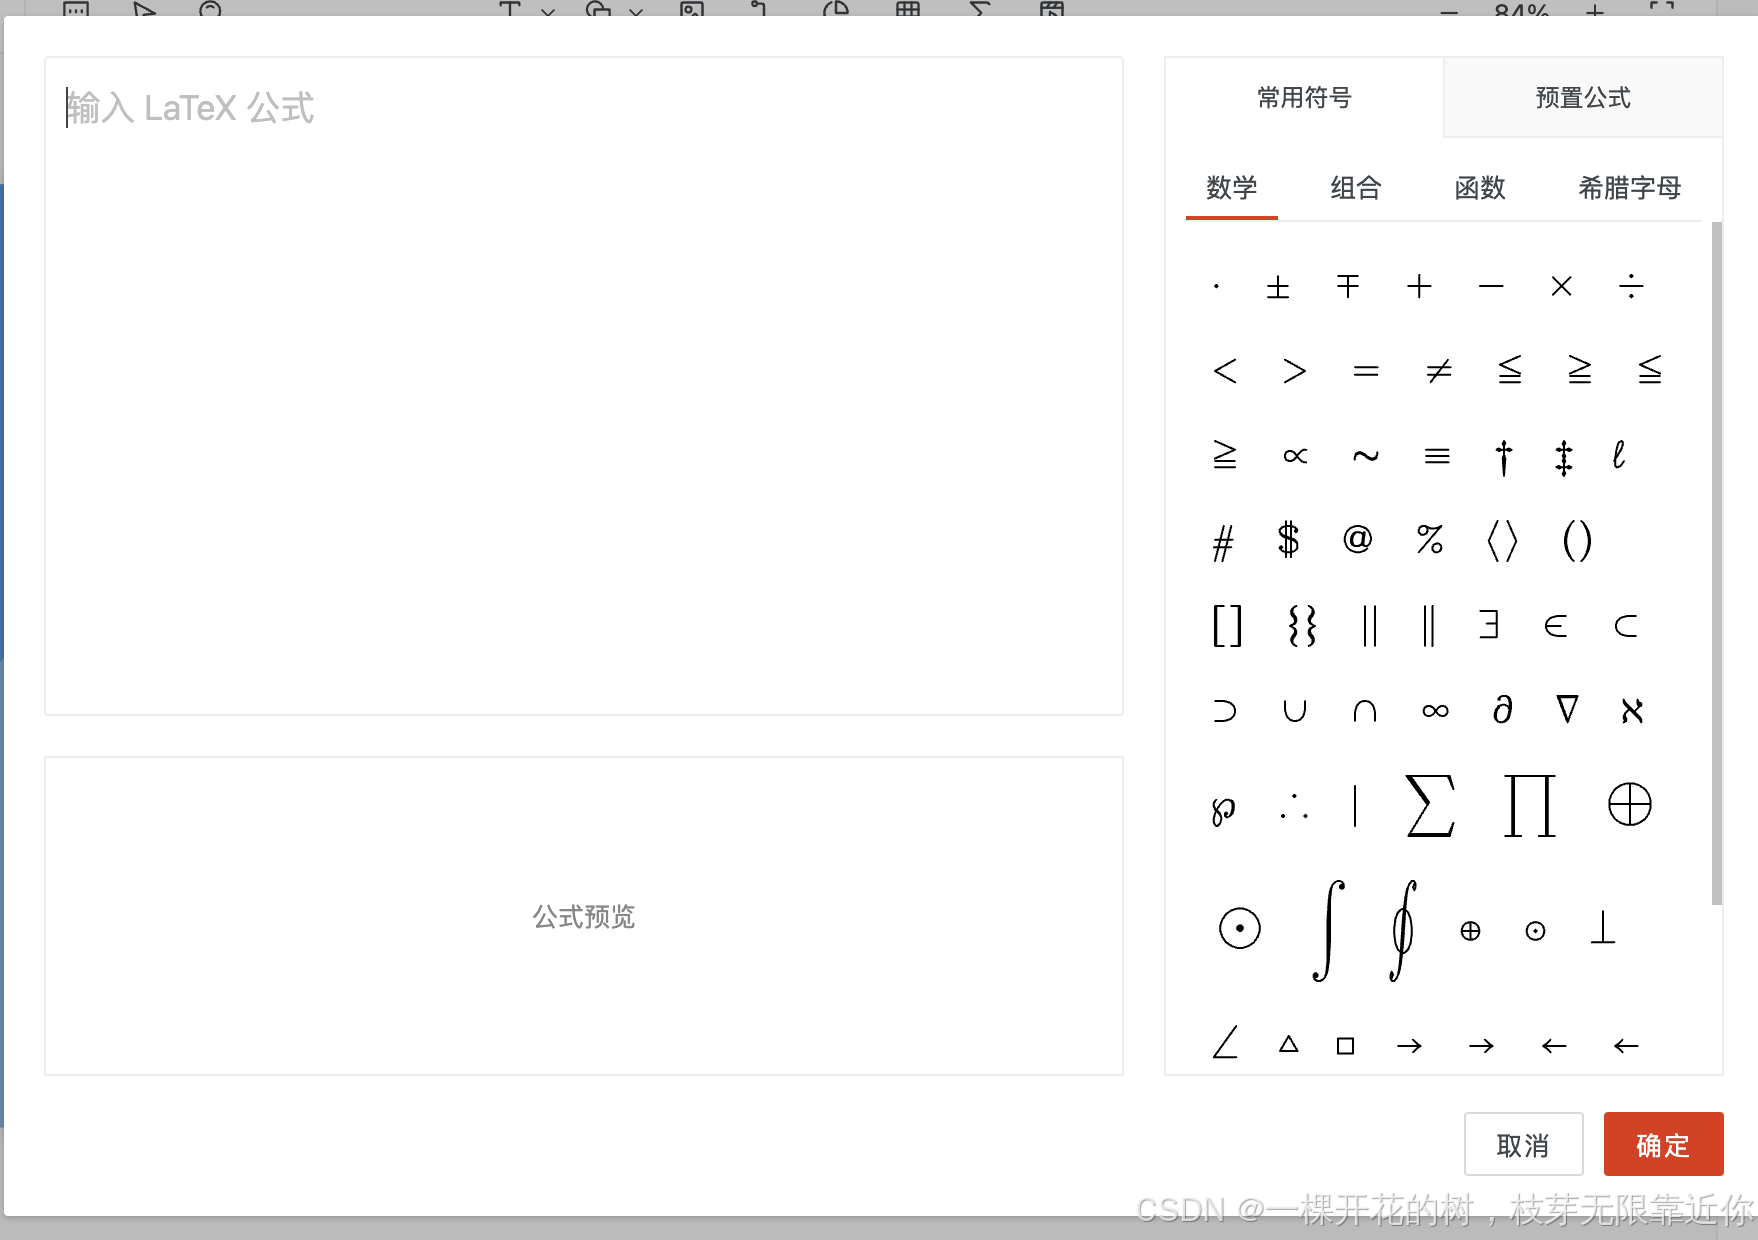
交互的方式:
1、直接输入 latex 公式
2、点击常用符号
3、点击预置公式
都可以自动生成公式预览
1、输入 latex 公式
输入公式的区域是一个自定义组件 src/components/TextArea.vue
输入公式后会触发 update:value 方法
typescript
const handleInput = (e: Event) => {
  emit('update:value', (e.target as HTMLInputElement).value)
}
2、常用符号/预置公式
公式和符号的默认值的定义在 src/configs/latex.ts ,
符号点击的时候触发下面的方法,将符号追加到 latex 的最后
typescript
const insertSymbol = (latex: string) => {
  if (!textAreaRef.value) return
  textAreaRef.value.focus()
  document.execCommand('insertText', false, latex)
}
而公式点击的时候,直接重置 latex 公式 @click="latex = item.latex"
3、公式预览
公式预览组件:src/components/LaTeXEditor/FormulaContent.vue
使用到了 hfmath 将 latex 转成 svg
使用示例:
typescript
new hfmath(
  `f(x)=
    \\frac{1}{2\\sqrt{2\pi} }
    e^{-\\frac{1}{2}(\\frac{x-\\mu}{\\sigma})^2}`
).svg();
会监听 latex ,随时更新公式预览
typescript
watch(() => props.latex, () => {
  const eq = new hfmath(props.latex)
  pathd.value = eq.pathd({})
  box.value = eq.box({})
}, { immediate: true })
二、插入音视频
插入音视频的功能有点简单,不能上传本地文件,只能粘贴一个链接

视频组件:src/views/components/element/VideoElement/index.vue
主要的播放是靠这个
typescript
<video
  class="video"
  ref="videoRef"
  :src="src"
  :autoplay="autoplay"
  :poster="poster"
  webkit-playsinline
  playsinline
  @durationchange="handleDurationchange()"
  @timeupdate="handleTimeupdate()"
  @ended="handleEnded()"
  @progress="handleProgress()"
  @play="autoHideController(); paused = false"
  @pause="autoHideController()"
  @error="handleError()"
></video>
如果要上传本地的文件的话,应该要先上传到服务端,然后给一个服务器上的地址,放到 video 标签里
三、添加动画
来看一下这个炫酷的动画的效果是怎么实现的吧

选择动画的组件是 src/views/Editor/Toolbar/ElementAnimationPanel.vue,点击动画的时候会指定的方法:
typescript
// 添加元素动画,并执行一次预览
const addAnimation = (type: AnimationType, effect: string) => {
  if (handleAnimationId.value) {
    updateElementAnimation(type, effect)
    return
  }

  const animations: PPTAnimation[] = JSON.parse(JSON.stringify(currentSlideAnimations.value))
  animations.push({
    id: nanoid(10),
    elId: handleElementId.value,
    type,
    effect,
    duration: ANIMATION_DEFAULT_DURATION,
    trigger: ANIMATION_DEFAULT_TRIGGER,
  })
  slidesStore.updateSlide({ animations })
  animationPoolVisible.value = false
  addHistorySnapshot()

  setTimeout(() => {
    runAnimation(handleElementId.value, effect, ANIMATION_DEFAULT_DURATION)
  }, 0)
}
如果当前元素已经有自己的动画,就会执行 updateElementAnimation(),更新元素的动画。
如果是新增动画,就执行 slidesStore.updateSlide({ animations }),将动画的数据存到当前幻灯片中,并且会执行一次动画预览。看下怎么执行动画预览的
typescript
// 执行动画预览
const runAnimation = (elId: string, effect: string, duration: number) => {
const elRef = document.querySelector(`#editable-element-${elId} [class^=editable-element-]`)
if (elRef) {
const animationName = `${ANIMATION_CLASS_PREFIX}${effect}`
document.documentElement.style.setProperty('--animate-duration', `${duration}ms`)
elRef.classList.add(`${ANIMATION_CLASS_PREFIX}animated`, animationName)
const handleAnimationEnd = () => {
document.documentElement.style.removeProperty('--animate-duration')
elRef.classList.remove(`${ANIMATION_CLASS_PREFIX}animated`, animationName)
}
elRef.addEventListener('animationend', handleAnimationEnd, { once: true })
}
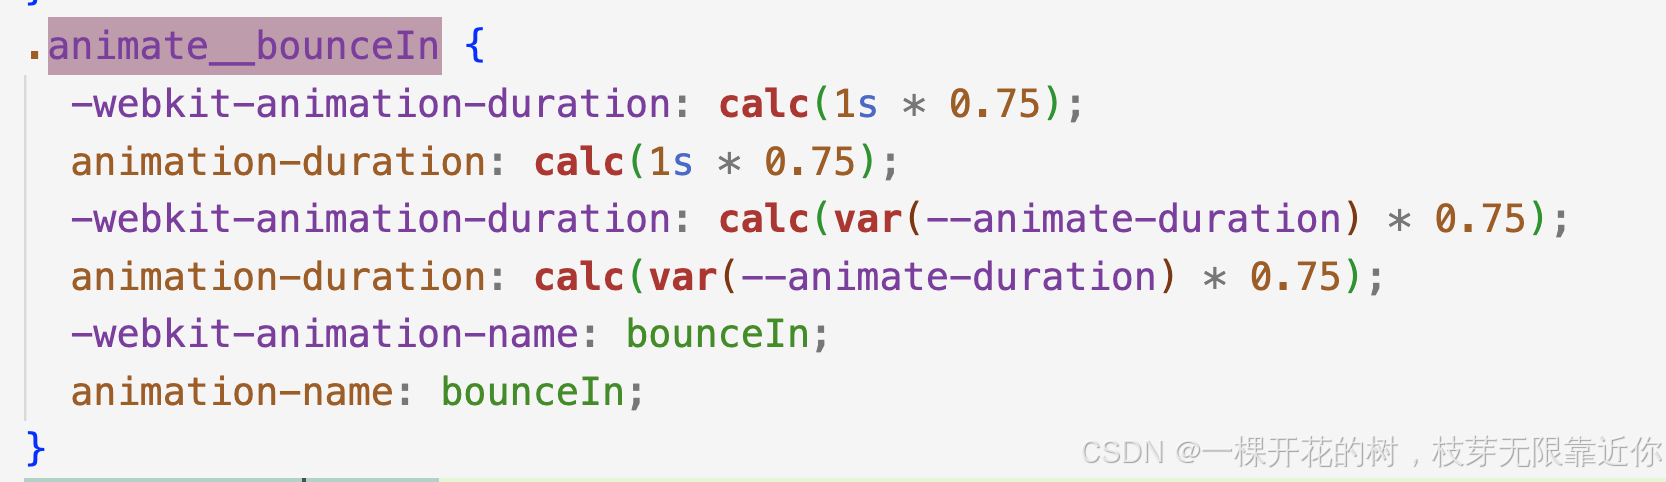
}从代码中可以看到,动画通过 animate 实现。这么一看好像也挺简单的(嚣张.jpg)🌝🌝🌝
动画的样式都在这里:
node_modules/animate.css/animate.css