作者:来自 Elastic Gustavo Llermaly 及 Jeffrey Rengifo

本文分为两部分,第二部分介绍如何使用自定义连接器将 OneLake 数据索引并搜索到 Elastic 中。
在本文中,我们将利用第 1 部分中学到的知识来创建 OneLake 自定义 Elasticsearch 连接器。
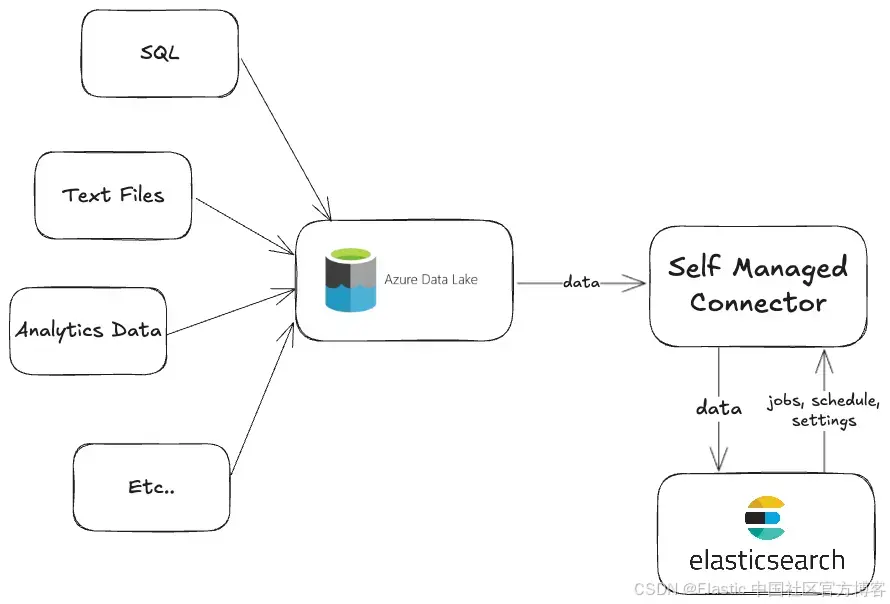
我们已经上传了一些 OneLake 文档并将其索引到 Elasticsearch 中以供搜索。但是,这仅适用于一次性上传。如果我们想要同步数据,那么我们需要开发一个更复杂的系统。
幸运的是,Elastic 有一个连接器框架可用于开发满足我们需求的自定义连接器:
我们现在将根据本文制作一个 OneLake 连接器:如何为 Elasticsearch 创建自定义连接器。
步骤
- 连接器引导
- 实现 BaseDataSource 类
- 身份验证
- 运行连接器
- 配置计划
连接器引导
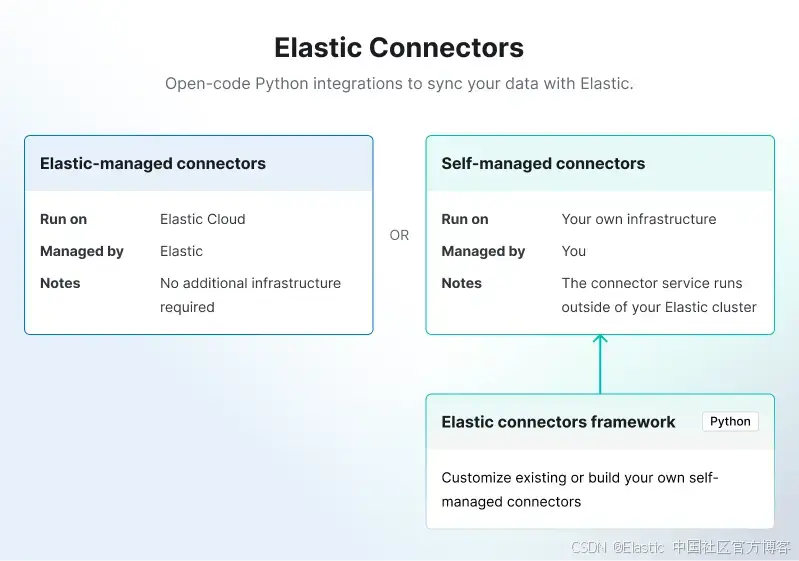
背景信息:Elastic 连接器分为两种类型:
- Elastic 托管连接器:完全由 Elastic Cloud 托管和运行。
- 自托管连接器:由用户自行托管,必须部署在你的基础设施中。
自定义连接器属于 "连接器客户端" 类别,因此我们需要下载并部署连接器框架。
首先,克隆连接器的代码库:
git clone https://github.com/elastic/connectors现在在 requirements/framework.txt 文件末尾添加你将使用的依赖项。在本例中:
azure-identity==1.19.0
azure-storage-file-datalake==12.17.0
这样,存储库就完成了,我们可以开始编码了。
实现 BaseDataSource 类
你可以在此存储库中找到完整的工作代码。
我们将介绍 onelake.py 文件中的核心部分。
在导入和类声明之后,我们必须定义将捕获配置参数的 init 方法。
"""OneLake connector to retrieve data from datalakes"""

from functools import partial

from azure.identity import ClientSecretCredential
from azure.storage.filedatalake import DataLakeServiceClient

from connectors.source import BaseDataSource

ACCOUNT_NAME = "onelake"


class OneLakeDataSource(BaseDataSource):
    """OneLake"""

    name = "OneLake"
    service_type = "onelake"
    incremental_sync_enabled = True

    # Here we can enter the data that we'll later need to connect our connector to OneLake.
    def __init__(self, configuration):
        """Set up the connection to the azure base client

        Args:
            configuration (DataSourceConfiguration): Object of DataSourceConfiguration class.
        """
        super().__init__(configuration=configuration)
        self.tenant_id = self.configuration["tenant_id"]
        self.client_id = self.configuration["client_id"]
        self.client_secret = self.configuration["client_secret"]
        self.workspace_name = self.configuration["workspace_name"]
        self.data_path = self.configuration["data_path"]
然后,你可以配置 UI 将显示的表单,使用返回配置字典的 get_default_configuration 方法填充这些参数。
    # Method to generate the Enterprise Search UI fields for the variables we need to connect to OneLake.
    @classmethod
    def get_default_configuration(cls):
        """Get the default configuration for OneLake

        Returns:
            dictionary: Default configuration
        """
        return {
            "tenant_id": {
                "label": "OneLake tenant id",
                "order": 1,
                "type": "str",
            },
            "client_id": {
                "label": "OneLake client id",
                "order": 2,
                "type": "str",
            },
            "client_secret": {
                "label": "OneLake client secret",
                "order": 3,
                "type": "str",
                "sensitive": True, # To hide sensitive data like passwords or secrets
            },
            "workspace_name": {
                "label": "OneLake workspace name",
                "order": 4,
                "type": "str",
            },
            "data_path": {
                "label": "OneLake data path",
                "tooltip": "Path in format <DataLake>.Lakehouse/files/<Folder path>",
                "order": 5,
                "type": "str",
            },
            "account_name": {
                "tooltip": "In the most cases is 'onelake'",
                "default_value": ACCOUNT_NAME,
                "label": "Account name",
                "order": 6,
                "type": "str",
            },
        }
然后我们配置下载方法,并从 OneLake 文档中提取内容。
async def download_file(self, file_client):
        """Download file from OneLake

        Args:
            file_client (obj): File client

        Returns:
            generator: File stream
        """

        try:
            download = file_client.download_file()
            stream = download.chunks()

            for chunk in stream:
                yield chunk
        except Exception as e:
            self._logger.error(f"Error while downloading file: {e}")
            raise

    async def get_content(self, file_name, doit=None, timestamp=None):
        """Obtains the file content for the specified file in `file_name`.

        Args:
            file_name (obj): The file name to process to obtain the content.
            timestamp (timestamp, optional): Timestamp of blob last modified. Defaults to None.
            doit (boolean, optional): Boolean value for whether to get content or not. Defaults to None.

        Returns:
            str: Content of the file or None if not applicable.
        """

        if not doit:
            return

        file_client = await self._get_file_client(file_name)
        file_properties = file_client.get_file_properties()
        file_extension = self.get_file_extension(file_name)

        doc = {
            "_id": f"{file_client.file_system_name}_{file_properties.name}",  # workspacename_data_path
            "name": file_properties.name.split("/")[-1],
            "_timestamp": file_properties.last_modified,
            "created_at": file_properties.creation_time,
        }

        can_be_downloaded = self.can_file_be_downloaded(
            file_extension=file_extension,
            filename=file_properties.name,
            file_size=file_properties.size,
        )

        if not can_be_downloaded:
            return doc

        extracted_doc = await self.download_and_extract_file(
            doc=doc,
            source_filename=file_properties.name.split("/")[-1],
            file_extension=file_extension,
            download_func=partial(self.download_file, file_client),
        )

        return extracted_doc if extracted_doc is not None else doc
为了让我们的连接器对框架可见,我们需要在 connectors/config.py 文件中声明它。为此,我们将以下代码添加到源中:
 "sources": {
   ...
    "onelake": "connectors.sources.onelake:OneLakeDataSource",
    ...
 }
身份验证
在测试连接器之前,我们需要获取 client_id, tenant_id 和 client_secret,我们将使用它们从连接器访问工作区。
我们将使用 service principals 作为身份验证方法。
Azure service principal是为与应用程序、托管服务和自动化工具一起使用以访问 Azure 资源而创建的身份。
步骤如下:
- 创建应用程序并收集 client_id、tenant_id 和 client_secret
- 在工作区中启用 service principal
- 将 service principal 添加到工作区
你可以逐步遵循本教程。
准备好了吗?现在是测试连接器的时候了!
运行连接器
连接器准备好后,我们现在可以连接到我们的 Elasticsearch 实例。
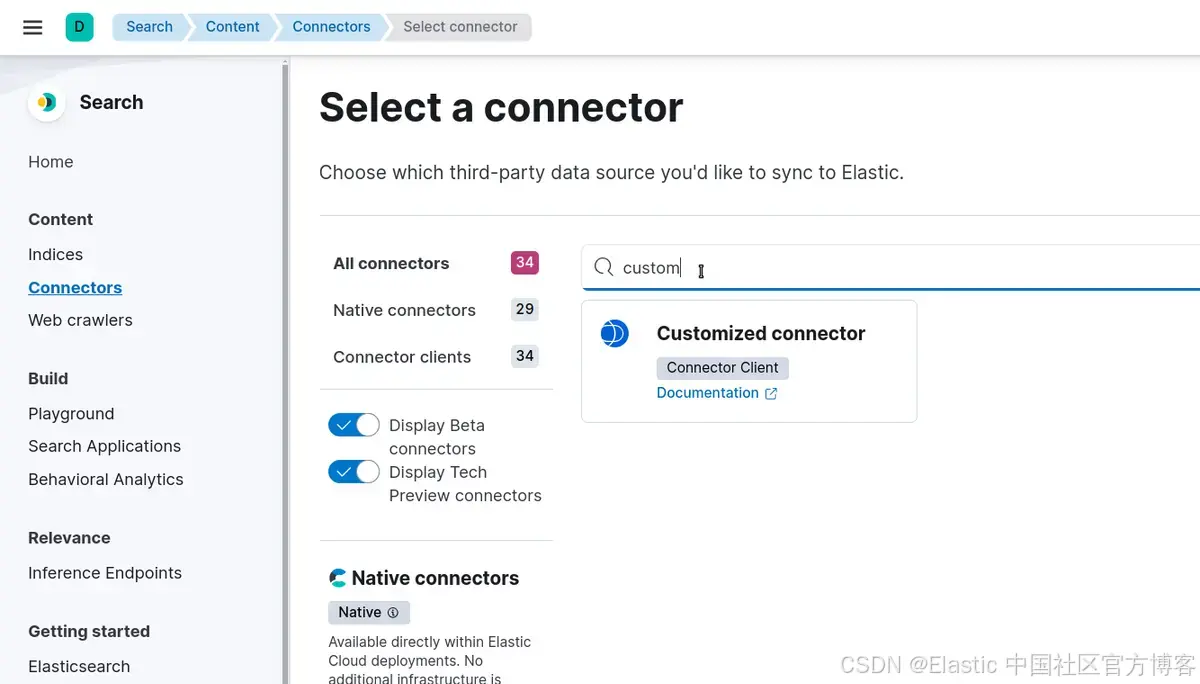
转到: Search > Content > Connectors > New connector 并选择 Customized Connector
选择要创建的名称,然后选择 "Create and attach an index" 以创建与连接器同名的新索引。
你现在可以使用 Docker 运行它或从源代码运行它。在此示例中,我们将使用 "Run from source"。
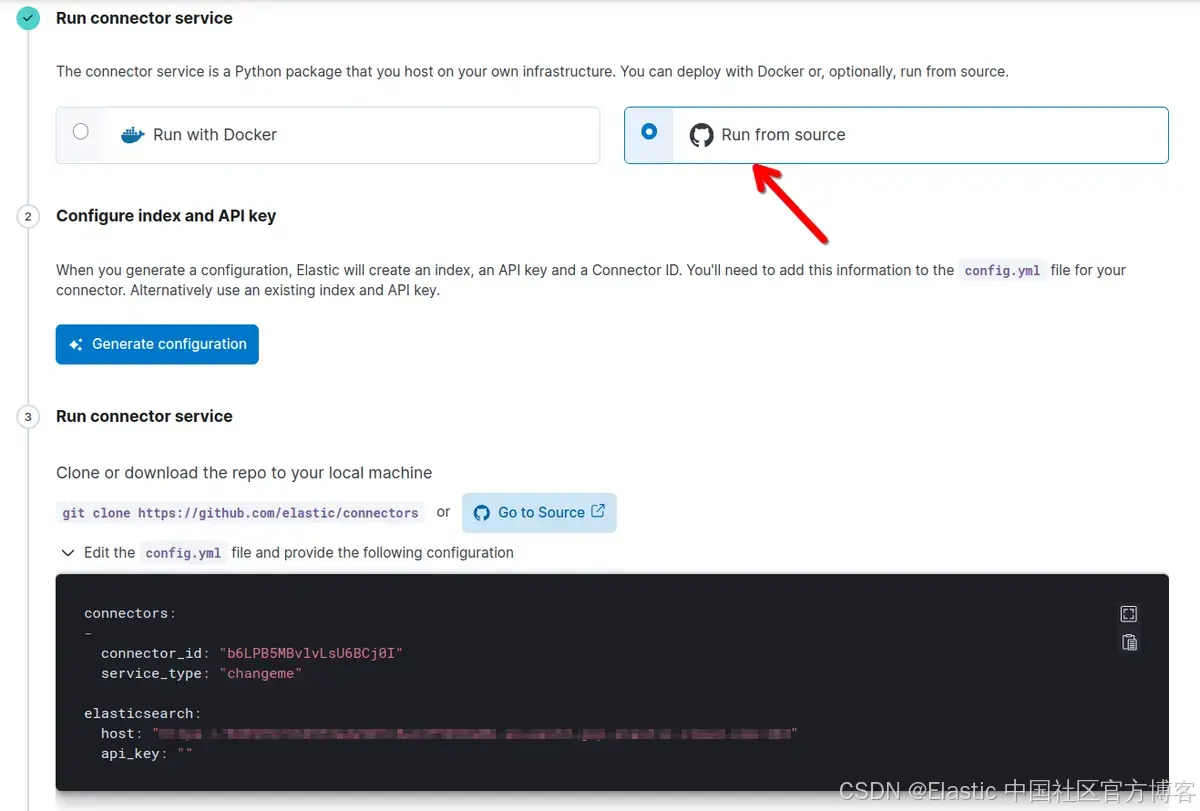
单击 "Generate Configuration",然后将框中的内容粘贴到项目根目录中的 config.yml 文件中。在字段 service_type 上,你必须匹配 Connectors/config.py 中的连接器名称。在本例中,将 changeme 替换为 onelake。
现在,你可以使用以下命令运行连接器:
make install
make run
如果连接器正确初始化,你应该在控制台中看到如下消息:

注意 :如果出现兼容性错误,请检查你的连接器/版本文件并与你的 Elasticsearch 集群版本进行比较:与 Elasticsearch 的版本兼容性。我们建议保持连接器版本和 Elasticsearch 版本同步。在本文中,我们使用 Elasticsearch 和连接器版本 8.15。
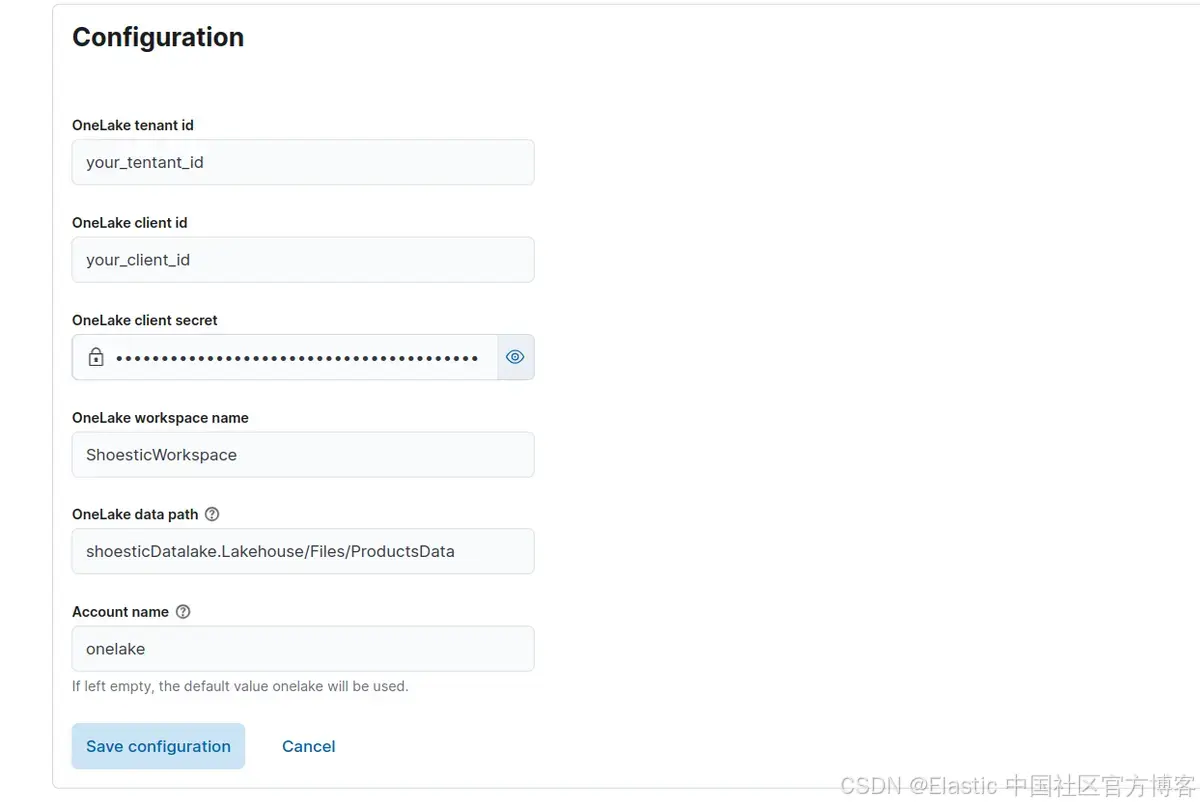
如果一切顺利,我们的本地连接器将与我们的 Elasticsearch 集群通信,我们将能够使用我们的 OneLake 凭据对其进行配置:
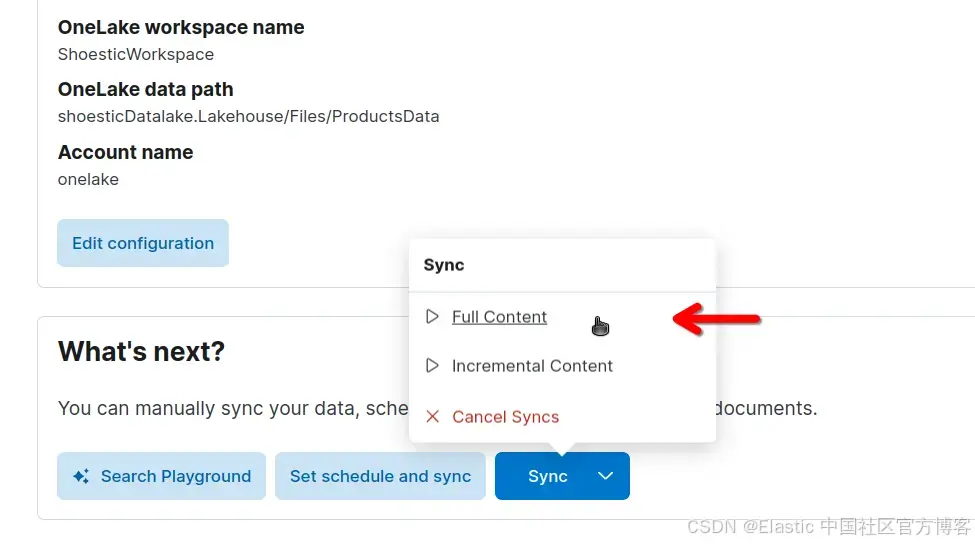
我们现在将索引来自 OneLake 的文档。为此,请单击 Sync > Full Content ,运行完整内容同步:
同步完成后,你应该在控制台中看到以下内容:

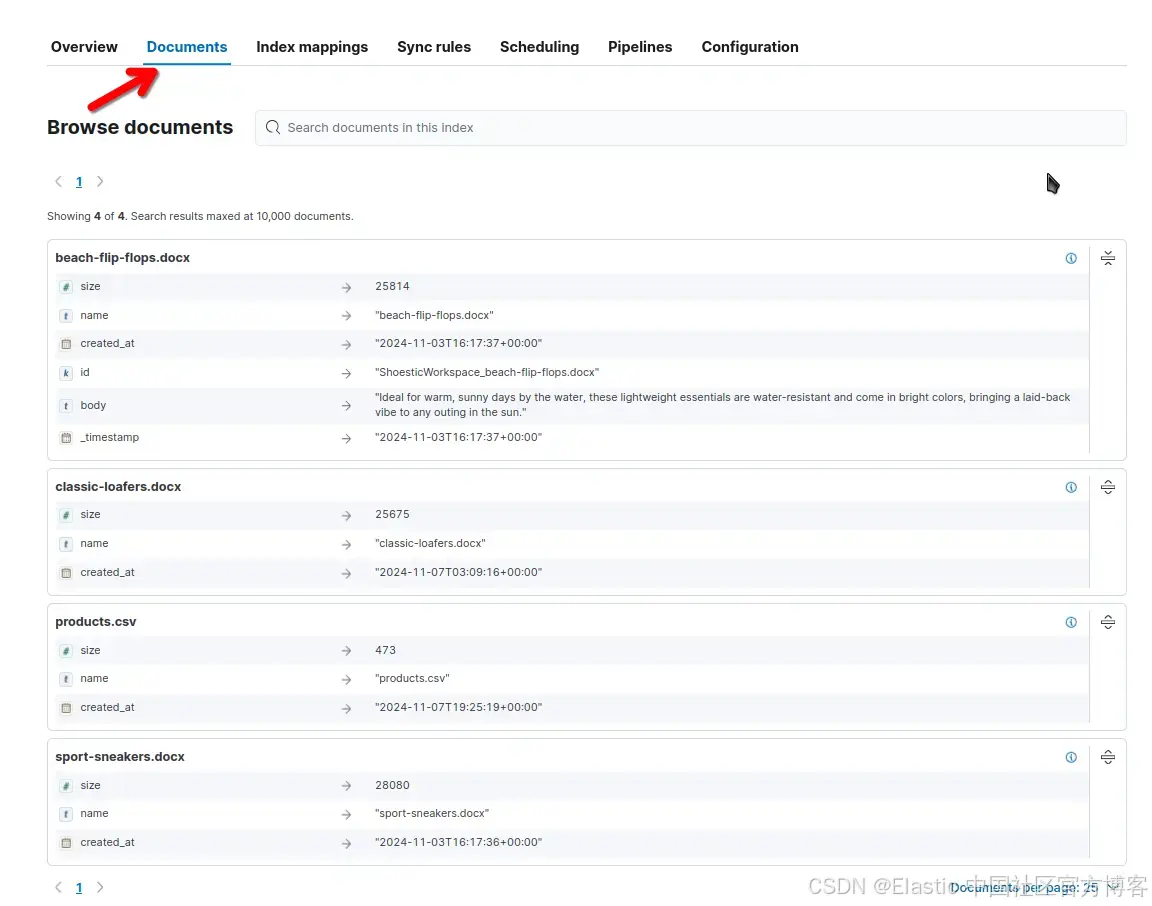
在企业搜索 UI 中,你可以单击 "Documents" 来查看已索引的文档:
配置计划
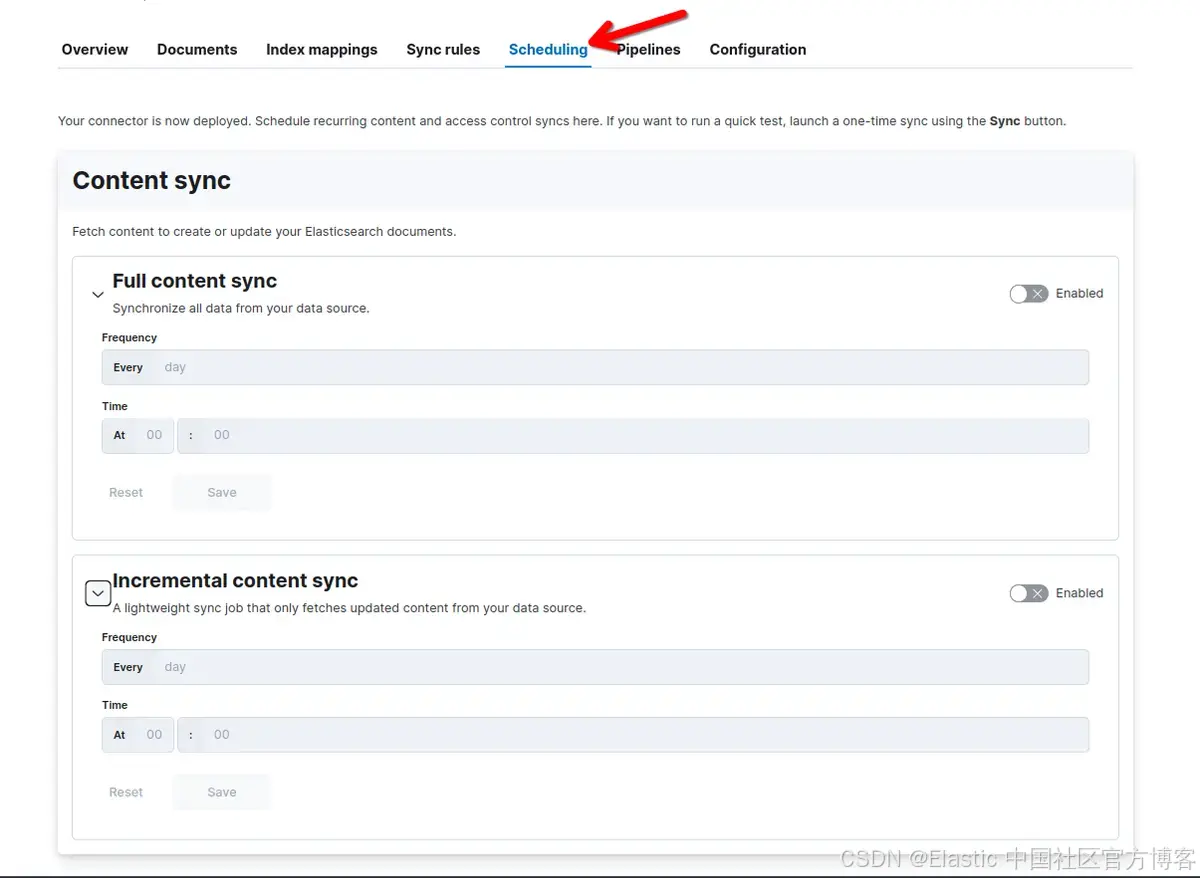
你可以根据需要使用 UI 安排定期内容同步,以使索引保持更新并与 OneLake 同步。
要配置计划同步,请转到 "Search > Content > Connectors ,然后选择你的连接器。然后单击 "scheduling":
或者,你可以使用允许 CRON 表达式的更新连接器调度 API。
结论
在第二部分中,我们通过使用 Elastic 连接器框架并开发我们自己的 OneLake 连接器来轻松与我们的 Elastic Cloud 实例通信,将我们的配置更进一步。
想要获得 Elastic 认证?了解下一次 Elasticsearch 工程师培训何时开始!
Elasticsearch 包含新功能,可帮助你为你的用例构建最佳搜索解决方案。深入了解我们的示例笔记本以了解更多信息,开始免费云试用,或立即在你的本地机器上试用 Elastic。
原文:Indexing OneLake data into Elasticsearch - Part II - Elasticsearch Labs