1、双线性插值概念
双线性插值是一种用于在二维网格上进行插值的方法,适用于图像处理、计算机图形学等领域。它通过利用四个邻近点的已知值,估算出任意点的值。双线性插值在两个方向(通常是水平和垂直)上分别进行线性插值,因此得名"双线性"。双线性插值是一种常用的图像缩放方法,它通过在四个最近邻像素之间进行线性插值来计算新的像素值。以下是双线性插值的详细步骤和公式。
双线性插值的步骤
假设我们有一个源图像 I(x, y),目标是将其缩放到一个新的尺寸 (new_width, new_height)。对于目标图像中的每一个像素 (xx, yy),我们需要找到其在源图像中的对应位置,并使用双线性插值计算该像素的值。
-
确定源图像中的坐标:
- 计算目标图像中每个像素
(xx, yy)对应的源图像坐标(x, y)。 - 使用缩放比例
xRatio = (src_width - 1) / (new_width - 1)和yRatio = (src_height - 1) / (new_height - 1)来计算源图像坐标。 x = floor(xx * xRatio)和y = floor(yy * yRatio)得到最接近的左上角像素坐标。x_l和y_l分别是x和y的整数部分,x_h = min(x_l + 1, src_width - 1)和y_h = min(y_l + 1, src_height - 1)是右下角的像素坐标。
- 计算目标图像中每个像素
-
计算权重:
- 计算小数部分
dx = xx * xRatio - x_l和dy = yy * yRatio - y_l。 - 这些小数部分将用于线性插值。
- 计算小数部分
-
双线性插值公式:
- 使用四个最近邻像素的值
I(x_l, y_l)、I(x_h, y_l)、I(x_l, y_h)和I(x_h, y_h)进行插值。 - 首先在水平方向上进行线性插值:
a = I ( x l , y l ) ⋅ ( 1 − d x ) + I ( x h , y l ) ⋅ d x a = I(x_l, y_l) \cdot (1 - dx) + I(x_h, y_l) \cdot dx a=I(xl,yl)⋅(1−dx)+I(xh,yl)⋅dx b = I ( x l , y h ) ⋅ ( 1 − d x ) + I ( x h , y h ) ⋅ d x b = I(x_l, y_h) \cdot (1 - dx) + I(x_h, y_h) \cdot dx b=I(xl,yh)⋅(1−dx)+I(xh,yh)⋅dx - 然后在垂直方向上进行线性插值:
I ′ ( x x , y y ) = a ⋅ ( 1 − d y ) + b ⋅ d y I'(xx, yy) = a \cdot (1 - dy) + b \cdot dy I′(xx,yy)=a⋅(1−dy)+b⋅dy
- 使用四个最近邻像素的值
2、双线性插值实现代码(NumPy,CV2)
2.1 Python代码
提供了3种实现方式:for-loop、NumPy广播机制、CV2库函数:
python
import numpy as np
from PIL import Image
import matplotlib.pyplot as plt
import time
import cv2

#方式1:for-loop
def bilinear_resize(img, new_shape):
    img = np.array(img)
    height, width, depth = img.shape
    new_height, new_width = new_shape
    result = np.zeros((new_height, new_width, depth))

    x_ratio = float(width - 1) / new_width
    y_ratio = float(height - 1) / new_height

    for i in range(new_height):
        for j in range(new_width):
            x_l, y_l = int(j * x_ratio), int(i * y_ratio)
            x_h, y_h = min(x_l + 1, width - 1), min(y_l + 1, height - 1)

            x_weight = (j * x_ratio) - x_l
            y_weight = (i * y_ratio) - y_l

            a = img[y_l, x_l] * (1 - x_weight) + img[y_l, x_h] * x_weight
            b = img[y_h, x_l] * (1 - x_weight) + img[y_h, x_h] * x_weight

            result[i, j] = a * (1 - y_weight) + b * y_weight

    return Image.fromarray(np.uint8(result))

#方式2:NumPy广播机制
def bilinear_resize_numpy(img, new_shape):
    img = np.array(img)
    height, width, depth = img.shape
    new_height, new_width = new_shape

    # 计算缩放比例
    x_ratio = float(width - 1) / (new_width - 1) if new_width > 1 else 0
    y_ratio = float(height - 1) / (new_height - 1) if new_height > 1 else 0

    # 创建网格坐标
    x_grid = np.linspace(0, width - 1, new_width)
    y_grid = np.linspace(0, height - 1, new_height)

    # 获取每个新像素点在原图中的位置
    x_l = np.floor(x_grid).astype(int)
    y_l = np.floor(y_grid).astype(int)
    x_h = np.minimum(x_l + 1, width - 1)
    y_h = np.minimum(y_l + 1, height - 1)

    # 计算权重
    x_weight = x_grid[:, None] - x_l[:, None]
    y_weight = y_grid[:, None] - y_l[:, None]

    # 使用numpy索引获取四个邻近像素的值
    a = img[y_l[:, None], x_l].reshape(new_height, new_width, depth)
    b = img[y_l[:, None], x_h].reshape(new_height, new_width, depth)
    c = img[y_h[:, None], x_l].reshape(new_height, new_width, depth)
    d = img[y_h[:, None], x_h].reshape(new_height, new_width, depth)

    # 调整权重形状以匹配图像数据
    x_weight = x_weight[:, :, None]
    y_weight = y_weight[:, :, None]

    # 进行双线性插值
    ab = a * (1 - x_weight.transpose((1, 0, 2))) + b * x_weight.transpose((1, 0, 2))
    cd = c * (1 - x_weight.transpose((1, 0, 2))) + d * x_weight.transpose((1, 0, 2))
    result = ab * (1 - y_weight) + cd * y_weight

    return Image.fromarray(np.uint8(result))

#方式3:CV2库函数
def bilinear_resize_cv2(img, new_shape):
    # 将PIL图像转换为numpy数组
    img_array = np.array(img)

    # 计算新的尺寸
    new_height, new_width = new_shape

    # 使用cv2.resize进行双线性插值
    start_time = time.time()
    resized_img = cv2.resize(img_array, (new_width, new_height), interpolation=cv2.INTER_LINEAR)
    processing_time = time.time() - start_time

    print(f"OpenCV processing time: {processing_time:.4f} seconds")

    # 将numpy数组转换回PIL图像并返回
    return Image.fromarray(resized_img)

if __name__ == "__main__":
    # 加载图像
    img_path = 'image.jpg'
    original_img = Image.open(img_path)

    # 设置新的尺寸
    # new_shape = (original_img.size[0] // 2, original_img.size[1] // 2)
    new_shape = (640,640)

    # 使用for循环遍历处理并计时
    start_time = time.time()
    resized_img_for_loop= bilinear_resize(original_img, new_shape)
    numpy_time = time.time() - start_time
    print(f"for-loop  processing time: {numpy_time:.4f} seconds")

    # 使用NumPy广播机制处理并计时
    start_time = time.time()
    resized_img_numpy= bilinear_resize_numpy(original_img, new_shape)
    numpy_time = time.time() - start_time
    print(f"NumPy processing time: {numpy_time:.4f} seconds")

    # 使用OpenCV处理并计时
    resized_img_cv2 = bilinear_resize_cv2(original_img, new_shape)

    # 显示结果(可选)
    # 创建一个包含三个子图的图形,并设置布局
    fig, axes = plt.subplots(1, 3, figsize=(15, 5))
    # 显示第一张图像
    axes[0].imshow(resized_img_for_loop)
    axes[0].set_title("Resized with NumPy")
    axes[0].axis('off')
    # 显示第二张图像
    axes[1].imshow(resized_img_numpy)
    axes[1].set_title("Resized with NumPy (New)")
    axes[1].axis('off')
    # 显示第三张图像
    axes[2].imshow(resized_img_cv2)
    axes[2].set_title("Resized with OpenCV")
    axes[2].axis('off')

    # 调整布局以防止重叠
    plt.tight_layout()
    # 显示图像
    plt.show()
2.2 运行结果
运行结果耗时对比:
bash
for-loop processing time: 3.0354 seconds
NumPy processing time: 0.0666 seconds
OpenCV processing time: 0.0035 seconds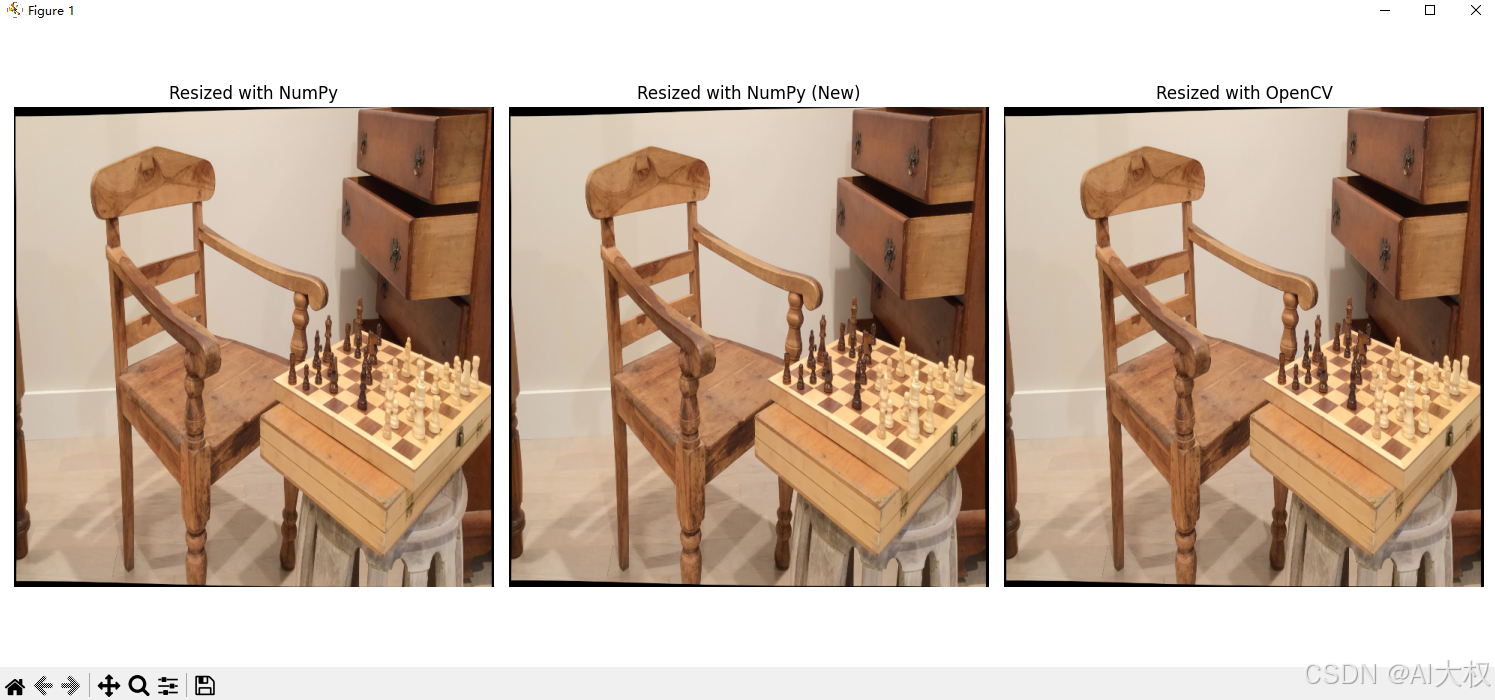
可以看出OpenCV处理速度最快。
- 另外本想尝试支持
OpenCL的pyopencl的加速处理,但是报了点错就没有放代码。