写在前面:Java相对于C/C++来说是更高级的语言,隐藏了指针,可读性更高,更容易学习,但是无法直接操作硬件、运行速度较慢也是不可回避的硬伤。JNI就是Java官方定义的一套标准"接口",用于Java和C/C++之间互相调用 ,注意这里是互相调用,而不是只能用Java去调用C/C++。搞Android开发的,JNI是必须掌握的技术,以前我一直逃避,因为觉得比较难,但是真正学习下来并没有那么难。Java运行速度较慢,有一些对时间要求超高的场景,就必须用到JNI。
每一节文末会附上Demo APP的GitHub链接。
在正式使用JNI之前,我们必须搞清楚两个相关的概念:
Android NDK :这是Google官方提供的工具包,用于将C/C++代码链接它所需要的库,编译成.so或者.a文件。大白话说就是:没有它就不能在Android Studio 这个应用里面编译C/C++代码。
JNI :JNI不是包含于Android NDK里面的,两者相互独立,JNI只要是Java代码都能使用,不局限于Android应用开发,很多人容易把两者混为一潭。
下面开始介绍Android应用中如何使用JNI,以Java调用C/C++这种形式为例子,分两种情况:1、一开始就创建为C/C++项目;2、创建的是一般项目,开发中途想调用C/C++代码。
一、C/C++项目
1.1、创建一个Native C++项目
在new一个项目的时候,选择Native C++,创建一个名为JNI的项目。

创建完之后的项目结构如下:可以看到在java的同级目录,Android Studio已经自动为我们生成了cpp目录,cpp目录下自动生成了cpp文件和CMakeLists文件。

1.2 CMakeLists.txt 讲解
CMakeLists的作用就是告诉Android NDK,这个CPP项目的源文件是哪些,需要链接哪些库,需要生成静态库还是动态库。自动生成的 CMakeLists.txt 如下:
java
# For more information about using CMake with Android Studio, read the
# documentation: https://d.android.com/studio/projects/add-native-code.html.
# For more examples on how to use CMake, see https://github.com/android/ndk-samples.

# Sets the minimum CMake version required for this project.
cmake_minimum_required(VERSION 3.22.1)

# Declares the project name. The project name can be accessed via ${ PROJECT_NAME},
# Since this is the top level CMakeLists.txt, the project name is also accessible
# with ${CMAKE_PROJECT_NAME} (both CMake variables are in-sync within the top level
# build script scope).
project("jni")

# Creates and names a library, sets it as either STATIC
# or SHARED, and provides the relative paths to its source code.
# You can define multiple libraries, and CMake builds them for you.
# Gradle automatically packages shared libraries with your APK.
#
# In this top level CMakeLists.txt, ${CMAKE_PROJECT_NAME} is used to define
# the target library name; in the sub-module's CMakeLists.txt, ${PROJECT_NAME}
# is preferred for the same purpose.
#
# In order to load a library into your app from Java/Kotlin, you must call
# System.loadLibrary() and pass the name of the library defined here;
# for GameActivity/NativeActivity derived applications, the same library name must be
# used in the AndroidManifest.xml file.
add_library(${CMAKE_PROJECT_NAME} SHARED
        # List C/C++ source files with relative paths to this CMakeLists.txt.
        native-lib.cpp)

# Specifies libraries CMake should link to your target library. You
# can link libraries from various origins, such as libraries defined in this
# build script, prebuilt third-party libraries, or Android system libraries.
target_link_libraries(${CMAKE_PROJECT_NAME}
        # List libraries link to the target library
        android
        log)
cmake_minimum_required :用来说明现在使用的CMake的最低版本。
project("jni") :告诉NDK这个CMake的项目名称叫jni,与后续编译关系不大,有点吉祥物的意思。
add_library :这里其实是分三段来看------》${CMAKE_PROJECT_NAME}是规定最后编译产物的名字,这里直接用了上一步的project name jni,也就是说最后编译出来的库名字为 libjni,当然你也可以取其它任意名字,比如Xusu这样。------》SHARED 告诉NDK最后编译的是动态库,生成的是libjni.so,如果需要生成静态库把SHARED更换为STATIC即可,最后生成 libjni.a文件。------》native-lib.cpp 是告诉NDK 需要编译的源文件,这里可以列出来很多个.cpp文件或者.h头文件,每个文件占一行。
target_link_libraries:意思就是将NDK中现成的android库、log库链接到生成的libjni库中,链接到 android 库可以让你的 C/C++ 代码调用一些底层的 Android API,链接到 log 库就是为了打印日志嘛。写法也是固定的target_link_libraries(target_name library1 library2 ...)。
1.3 native-lib.cpp 讲解
自动生成的native-lib.cpp如下:
c
#include <jni.h>
#include <string>

extern "C" JNIEXPORT jstring JNICALL
Java_com_htc_jni_MainActivity_stringFromJNI(
        JNIEnv* env,
        jobject thiz) {
    std::string hello = "Hello from C++"; /*声明一个字符串*/
    return env->NewStringUTF(hello.c_str()); /*将C语言中的字符通过.c_str()和NewStringUTF方法传化为Java中的String返回给Java代码使用*/
}
这里我们贴出MainActivity中声明的方法一起对照更容易理解:
java
package com.htc.jni;

import androidx.appcompat.app.AppCompatActivity;

import android.os.Bundle;
import android.widget.TextView;

import com.htc.jni.databinding.ActivityMainBinding;

public class MainActivity extends AppCompatActivity {

    // Used to load the 'jni' library on application startup.
    static { //固定写法,通过System.loadLibrary加载需要的C/C++动态库
        System.loadLibrary("jni");
    }

    private ActivityMainBinding binding;

    @Override
    protected void onCreate(Bundle savedInstanceState) {
        super.onCreate(savedInstanceState);

        binding = ActivityMainBinding.inflate(getLayoutInflater());
        setContentView(binding.getRoot());

        // Example of a call to a native method
        TextView tv = binding.sampleText;
        tv.setText(stringFromJNI());
    }

    /**
     * A native method that is implemented by the 'jni' native library,
     * which is packaged with this application.
     */
    public native String stringFromJNI();
}
可以看到我们在java代码中通过System.loadLibrary("jni") 去加载了libjni.so库,这是JNI的固定写法,然后我们用public native String stringFromJNI()声明了一个JNI方法,并通过tv.setText(stringFromJNI())去调用了它,Java声明JNI方法一定要用native修饰,这也是固定写法。
我们回到native-lib.cpp,开始就是常规的include头文件不用说,从extern "C"开始说:
extern "C" :是为了确保NDK按照 C 语言的方式来处理函数名称。C++ 和 C 语言在编译时对函数名称的处理方式有所不同,C++ 会进行名称修饰(name mangling),而 C 不会。下面举个例子------》如果没有 extern "C",C++ 编译器会对函数名进行名称修饰,编译器会把函数名 Java_com_example_myapp_MainActivity_stringFromJNI 转换为一个复杂的符号,比如:_ZN12MainActivity13stringFromJNIEv 。 这就是 C++ 的名称修饰。Java 层的 JNI 机制无法识别这个符号,会导致无法正确调用该方法。
JNIEXPORT jstring JNICALL :JNIEXPORT 、JNICALL都是固定写法,它们中间夹着的jstring 是函数的返回值,还记得我们之前声明的native函数吗?public native String stringFromJNI() 这里的jstring对应的就是java中的String。JNI为了实现java和C/C++的通信,规定了一套基本数据类型的对照表:

Java_com_htc_jni_MainActivity_stringFromJNI (JNIEnv* env, jobject thiz):这个是stringFromJNI对应的JNI函数的名称,Java_是固定前缀,com_htc_jni_MainActivity_stringFromJNI是Java中声明的native方法所在的包名+类名+native方法名的组合,组合的顺序也是固定的。方法参数有两个JNIEnv* env, jobject,这里有同学就会问了,我们Java里声明的native方法明明没有参数,怎么这里有参数??public native String stringFromJNI() 是没参数,所以这里的JNIEnv* env, jobject thiz其实固定写法,JNIEnv* env代表的是Java环境,后续可以通过env创建Java中的数据对象,访问Java中的函数,jobect thiz表示调用这个方法的 Java 对象实例,在这个例子中指的就是MainActivity,如果声明成静态方法 public static native String stringFromJNI() ,jobject就需要更换成 jclass。
1.4 总结
如果从一开始就创建一个Native C++ 项目,Android Studio会帮我们把JNI需要的环境和文件都准备好,我们只需要学习它的语法即可,其中有几个需要关注的点:1、cpp目录和java目录是同级。2、Java代码中通过System.loadLibrary加载so动态库、通过native关键字声明JNI方法。3、cpp文件JNI方法的命名规则和参数规范。
点击下载Native C++项目Demo:https://github.com/xuhao120833/JN
二、一般的项目,中途想使用C/C++代码
上面我们讲了用Android Studio创建一般的Native C++项目,Android Studio 已经帮我们做好了准备工作,那么我们APP开发到一半,突然加了个需求对时效性要求很高,必须用C/C++实现,这个时候项目肯定不能推倒重来了,那怎么办???按下面的操作即可:
2.1 自己创建cpp目录和相关文件
选中main目录按右键,在java的同级目录创建cpp目录:

自己创建CMakeLists.txt、编写用到的cpp文件和头文件:

CMakeLists.txt的文件内容如下:
java
# For more information about using CMake with Android Studio, read the
# documentation: https://d.android.com/studio/projects/add-native-code.html

# Sets the minimum version of CMake required to build the native library.

cmake_minimum_required(VERSION 3.10.2)   #说明CMake的最低要求版本

# Declares and names the project.

project("Xctouch")  #CMake项目名称取为Xctouch,随意取的

# Creates and names a library, sets it as either STATIC
# or SHARED, and provides the relative paths to its source code.
# You can define multiple libraries, and CMake builds them for you.
# Gradle automatically packages shared libraries with your APK.

add_library( # Sets the name of the library.
        PxScale     #最后生成的库的名字取为PxScale

         # Sets the library as a shared library.
        SHARED      #设置最后生成库为动态库,即.so文件

         # Provides a relative path to your source file(s).

        scdefine.h   #列出所有的cpp文件和头文件,每个文件占一行
        jz_scale.cpp
        tp_savedata_check.cpp
        scJNIfun.cpp
        )

# Searches for a specified prebuilt library and stores the path as a
# variable. Because CMake includes system libraries in the search path by
# default, you only need to specify the name of the public NDK library
# you want to add. CMake verifies that the library exists before
# completing its build.

find_library( # Sets the name of the path variable.
              log-lib    #找到NDK里面现成的log库,并给它取一个别名log-lib

              # Specifies the name of the NDK library that
              # you want CMake to locate.
              log )

# Specifies libraries CMake should link to your target library. You
# can link multiple libraries, such as libraries you define in this
# build script, prebuilt third-party libraries, or system libraries.

target_link_libraries( # Specifies the target library.  #将log库链接到最后生成的libPxScale.so库中
        PxScale

       # Links the target library to the log library
       # included in the NDK.
       ${log-lib} )
scJNIfun.cpp的文件内容如下:定义了三个方法,前两个相对复杂一些,extern 导入了两个其它cpp文件的方法。
c
#include <jni.h>
#include <string>
#include <android/log.h>
#include <linux/agpgart.h>
#include "scdefine.h"
JNIEXPORT///
extern void ratio_tra_point(int *pRet, int *px4, int *py4, int oldRatio, int newRatio, float scale, int w, int h);
extern int check_bd_data(char *pBuf);
xtouch///
//该方法的功能是将 Java 层的两个 int[] 数组(px4 和 py4)传递到 C++ 层,经过 ratio_tra_point 函数处理后,返回一个计算结果数组。
extern "C"
JNIEXPORT jintArray JNICALL
Java_com_htc_server_PxScale_getpxRatioxy(JNIEnv *env, jobject thiz, jintArray px4, jintArray py4, jint oldRatio, jint newRatio, jfloat scale, jint w, jint h) {
jintArray intArray = env->NewIntArray(20);
jint *intdata = env->GetIntArrayElements(intArray, NULL);
jint *tpx4 = NULL;
jint *tpy4 = NULL;
if(px4!=NULL){
tpx4 = (jint *) env->GetIntArrayElements(px4, 0);
}else{
tpx4 = NULL;
}
if(py4!=NULL){
tpy4 = (jint *) env->GetIntArrayElements(py4, 0);
}else{
tpy4 = NULL;
}
LOGD("CPP: Java_com_htc_server_PxScale_getpxRatioxy");
memset(intdata,0,sizeof(int)*20);
ratio_tra_point(intdata, tpx4, tpy4, oldRatio,newRatio, scale, w, h);
env->ReleaseIntArrayElements(intArray, intdata, 0);
return intArray;
}
//Java 层接收一个字符串,将其进行字符过滤(只保留字母和数字),然后调用 check_bd_data 函数对过滤后的数据进行进一步处理,最终返回一个整型结果。
extern "C"
JNIEXPORT jint JNICALL
Java_com_htc_server_PxScale_checkbddata(JNIEnv *env, jobject thiz, jstring data) {
jint ret = 0;
int i;
char c,checkbuf[2048];
const char *str;
//LOGD("CPP: Java_com_htc_server_PxScale_checkbddata");
str = env->GetStringUTFChars(data, NULL);
if(str == NULL){
return 0;
}else{
memset(checkbuf, 0, 2048);
for(i=0;i<2048;i++){
c = str[i];
if((c>='0' && c<='9') || (c>='a' && c<='z') || (c>='A' && c<='Z')){
checkbuf[i] = c;
}else{
break;
}
}
ret = check_bd_data(checkbuf);
}
return ret;
}
extern "C"
JNIEXPORT jstring JNICALL
Java_com_htc_server_PxScale_sayHello(JNIEnv* env,jobject thiz) {
// 创建 C++ 字符串
std::string message = "I'm JNI, Hello Java.";
// 返回一个 Java 字符串(jstring)
return env->NewStringUTF(message.c_str());
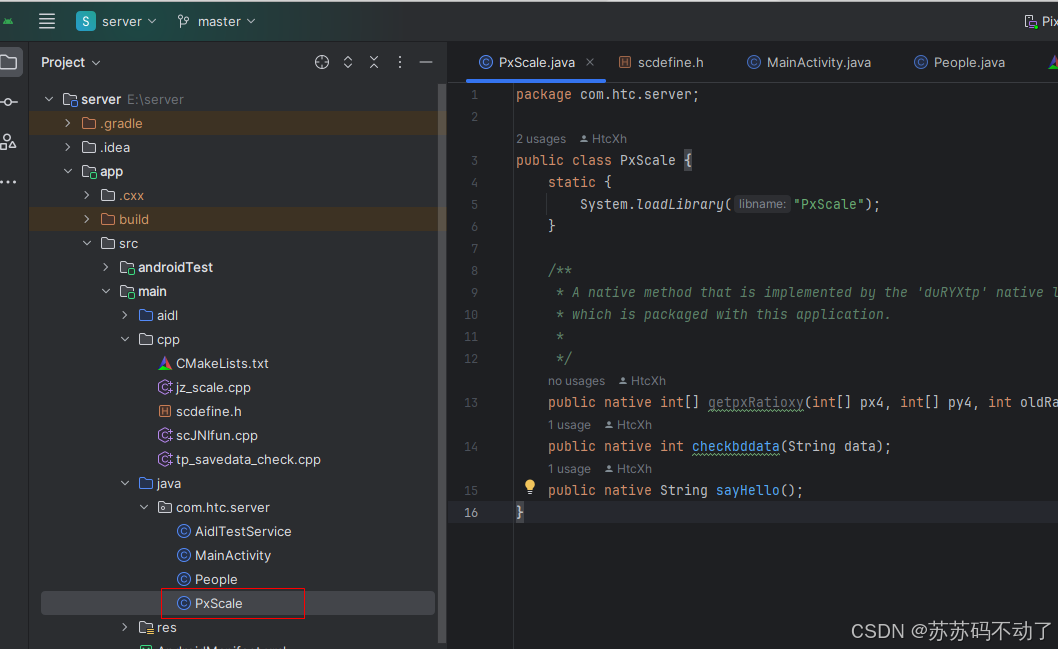
}2.2 java目录下创建PxScale.java文件
java
package com.htc.server;

public class PxScale {
	static {
		System.loadLibrary("PxScale");
	}

	/**
	 * A native method that is implemented by the 'duRYXtp' native library,
	 * which is packaged with this application.
	 *
	 */
	public native int[] getpxRatioxy(int[] px4, int[] py4, int oldRatio, int newRatio, float scale, int w, int h);
	public native int checkbddata(String data);
	public native String sayHello();
}
2.3 build.gradle下添加NDK、JNI配置
我们需要手动指定CMakeLists.txt的位置和版本、ndk的版本、ndk最后编译产物的信息。
defaultConfig标签范围内添加如下标签信息:
xml
		externalNativeBuild {
            cmake {
                cppFlags ""
            }
        }

        ndk {
            ldLibs "log"
            moduleName "PxScale"                   //生成的so名字。
            abiFilters "arm64-v8a", "armeabi-v7a"  //输出指定abi体系结构下的so库。
        }
android标签范围内添加如下标签信息:
xml
	externalNativeBuild {
        cmake {
            path "src/main/cpp/CMakeLists.txt"  //指定CMakeLists的绝对路径。
            version "3.10.2"                    //指定CMake的版本。
        }
    }
    ndkVersion '21.0.6113669'                   //指定ndk的版本。
注意:build.gradle中不要打开代码混淆开关,打开会导致Java函数可以找到C/C++函数,但是C/C++函数执行完毕返回值给Java函数的时候找不到Java函数,导致执行报错。解决办法暂时未知。
java
buildTypes {
        release {
            minifyEnabled false  //true混淆打开
            //zipAlignEnabled true  //优化代码
            //shrinkResources true  //优化资源
            proguardFiles getDefaultProguardFile('proguard-android-optimize.txt'), 'proguard-rules.pro'
        }
    }
2.4 MainActivity调用JNI测试
MainActivity的代码如下:
java
package com.htc.server;

import android.os.Bundle;
import android.widget.Toast;

import androidx.activity.EdgeToEdge;
import androidx.annotation.Px;
import androidx.appcompat.app.AppCompatActivity;
import androidx.core.graphics.Insets;
import androidx.core.view.ViewCompat;
import androidx.core.view.WindowInsetsCompat;

public class MainActivity extends AppCompatActivity {

    private PxScale pxScale;

    @Override
    protected void onCreate(Bundle savedInstanceState) {
        super.onCreate(savedInstanceState);
        setContentView(R.layout.activity_main);

        pxScale = new PxScale();
        pxScale.checkbddata("zojdoifjaoidj");
        String hello = pxScale.sayHello();
        Toast.makeText(this, hello, Toast.LENGTH_SHORT).show();
    }
}
2.5 总结
一般项目和NativeC++项目相比,想要使用JNI需要自己去创建cpp目录、cpp文件、CMakeLists.txt等,这些文件的组成语法都是大同小异的,唯一值得注意的就是需要自己在build.gradle中去声明项目JNI的相关信息,不然无法运行。
点击下载 一般项目使用JNI 的 Demo APP:https://github.com/xuhao120833/Server
三、C/C++调用Java方法
前文举例子一直用的都是Java通过JNI去调用C/C++,那么反过来怎么弄呢???
行文有些疲倦了,后续补充完整第三章。。。。。。