前言
本文是基于rust和tauri,由于tauri是前、后端结合的GUI框架,既可以直接生成包含前端代码的文件,也可以在已有的前端项目上集成tauri框架,将前端页面化为桌面GUI。
发文平台
稀土掘金
环境配置
- 系统:windows 10
- 平台:visual studio code
- 语言:rust、javascript
- 库:tauri2.0
概述
本文是介绍在tauri中,如何将一个tauri项目打包为window下的可执行安装包,exe或者msi格式。
1、创建tauri项目
我们使用以下指令创建一个典型的tauri项目:
bash
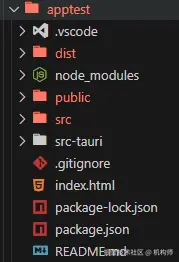
npm create tauri-app@latest项目创建的具体过程就不再赘述,创建完整后,文件结构大致如下:
默认创建的tauri项目,是一个典型的tauri程序,可以使用npm run tauri dev来运行,首次运行时,需要编译rust代码,因此时间可能会比较长。 但我们不使用默认程序,我们稍作修改,为了方便调试,我们安装一下vite,调试时使用vite构建前端服务器。
bash
npm install vite@latest然后要对项目中的package.json 和tauri.config.json两个文件作一些更改。
package.js中添加:
json
"scripts": {
    "dev": "vite",
    "build": "vite build",
"preview": "vite preview",tauri.config.json中添加:
json
  "build": {
    ...
    "devUrl": "http://localhost:5173",
http://localhost:5173 是vite服务器的默认地址。
然后修改index.html和main.js: index.html:
html
<!doctype html>
<html lang="en">
  <head>
    <meta charset="UTF-8" />
    <link rel="stylesheet" href="./src/styles.css" />
    <meta name="viewport" content="width=device-width, initial-scale=1.0" />
    <title>Tauri App</title>
  </head>

  <body>
    <h1>APP</h1>
    <div id="app">
      <button id="greetbtn" type="button">Greet</button>
      <input id="nameinput" type="text" placeholder="Enter your name" />
      <p id="greetingp"></p>
      <img src="./public/app.svg" alt="app svg" width="200" height="200" />
    </div>
    <script type="module" src="./src/main.js" defer></script>
  </body>
</html>
main.js:
javascript
import { invoke } from "@tauri-apps/api/core";

async function loadProcess(){
  const greetbtn = document.querySelector('#greetbtn');
  const greetingp = document.querySelector('#greetingp');
  const nameinput = document.querySelector('#nameinput');

  greetbtn.addEventListener('click', async () => {
    const name = nameinput.value;
    const greettext = await invoke('greet',{name:name})
    greetingp.innerText = greettext;
  })
}

loadProcess();
之所以修改,是为了验证自定义项目的打包。
2、打包
要将tauri项目打包为window下的可执行程序,如exe或者msi,使用以下指令:
bash
npm run tauri build指令是非常简单的,有几个需要注意的地方,首先是需要确认前端文件路径: tauri.config.json:
json
"build": {
    "frontendDist": "../dist",
将frontendDist的值改为../dist。 如果有其他文件资源或者引用路径想要使用,但又希望放在单独的文件夹内,可以在bundle 参数下设置,依然是tauri.config.json文件内:
json
"bundle": {
    "active": true,
    "targets": "all",
    "resources":[
      "../public/*"
],如上,在bundle 中添加resources项,然后将自定义路径绑定进去,如本例中的public文件夹,public文件夹的位置如下:
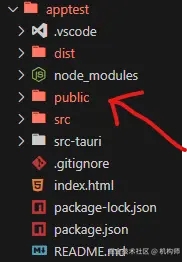
可以在public文件夹内放图片或者文本,甚至js文件。
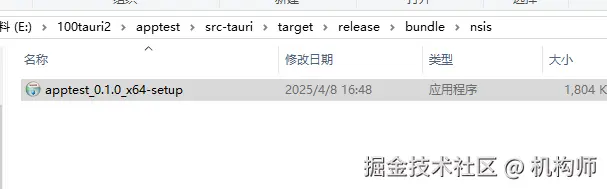
打包成功后,会在src-tauri---target---release文件夹下生成两个可执行安装包,其具体路径如下:
powershell
 E:\100tauri2\apptest\src-tauri\target\release\bundle\msi\apptest_0.1.0_x64_en-US.msi
 E:\100tauri2\apptest\src-tauri\target\release\bundle\nsis\apptest_0.1.0_x64-setup.exe
路径的根路径根据你所在的盘符有所不同。
双击安装即可。 如果你修改了代码之后,重新生成后安装,不需要卸载此前的,可以直接覆盖安装。
以上是在tauri中打包的简单流程,可以实现tauri程序打包为window下的安装包的基本功能实现。 而且tauri的一个优点就是安装包体积很小。