个人博客:https://alive0103.github.io/
代码在GitHub:https://github.com/Alive0103/XDU-CS-lab
能点个Star就更好了,欢迎来逛逛哇~❣
主播写的刚够满足基本功能,多有不足,仅供参考,还请提PR指正,很高兴能帮到你
代码指路:GitHub
一、 实验内容
使用websocket建立网络聊天室,聊天室成员既包括web用户,也包括物联网节点,web用户可对物联网节点进行查询和控制。物联网节点可以是虚拟节点,如:mqtt.fx。
二、实验准备
- 腾讯云虚拟机
- Docker 环境
- EMQX (服务器端)
- Python编译环境 (WEB端)
- 本机
- 下载MQTT.fx (设备端)
注意事项:各个端的对应端口记得在虚拟机里开放。
网络拓扑
text
graph LR
    Web用户 -->|WS:8083| EMQX
    物联网设备 -->|MQTT:1883| EMQX
    Python服务器 -->|HTTP:8080| Web用户
三、核心配置
装好EMQX打开http://你的服务器IP:18083/,开始配置测试用户
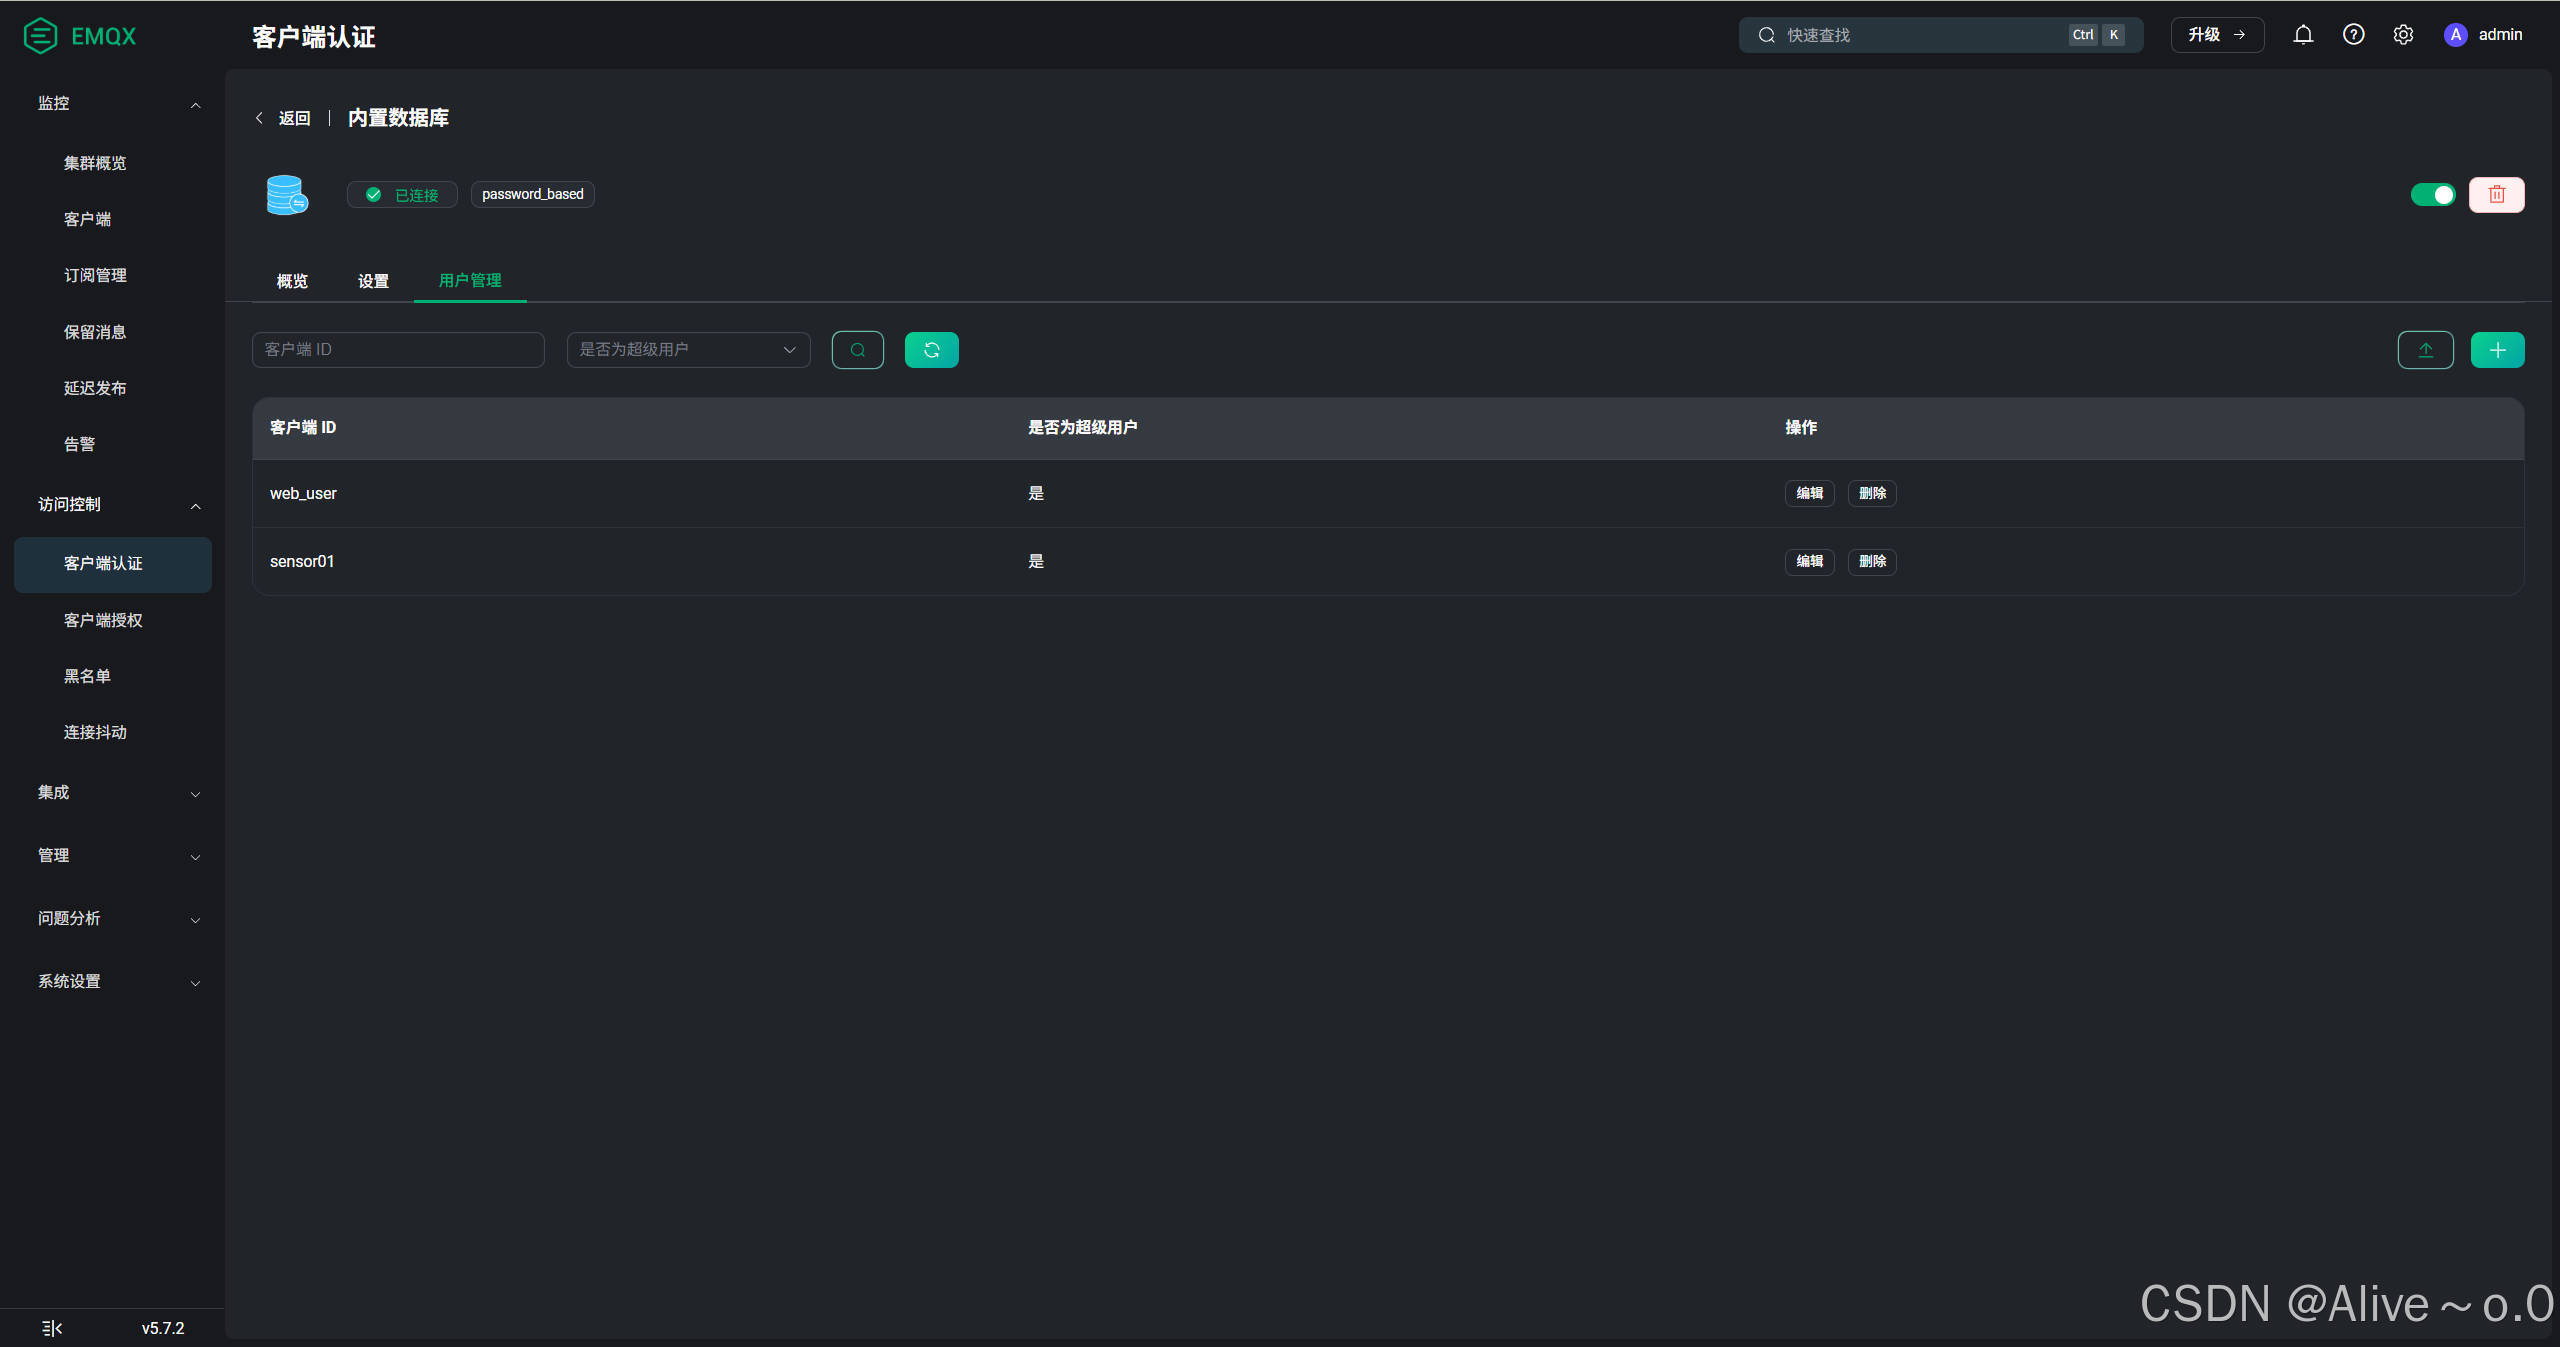
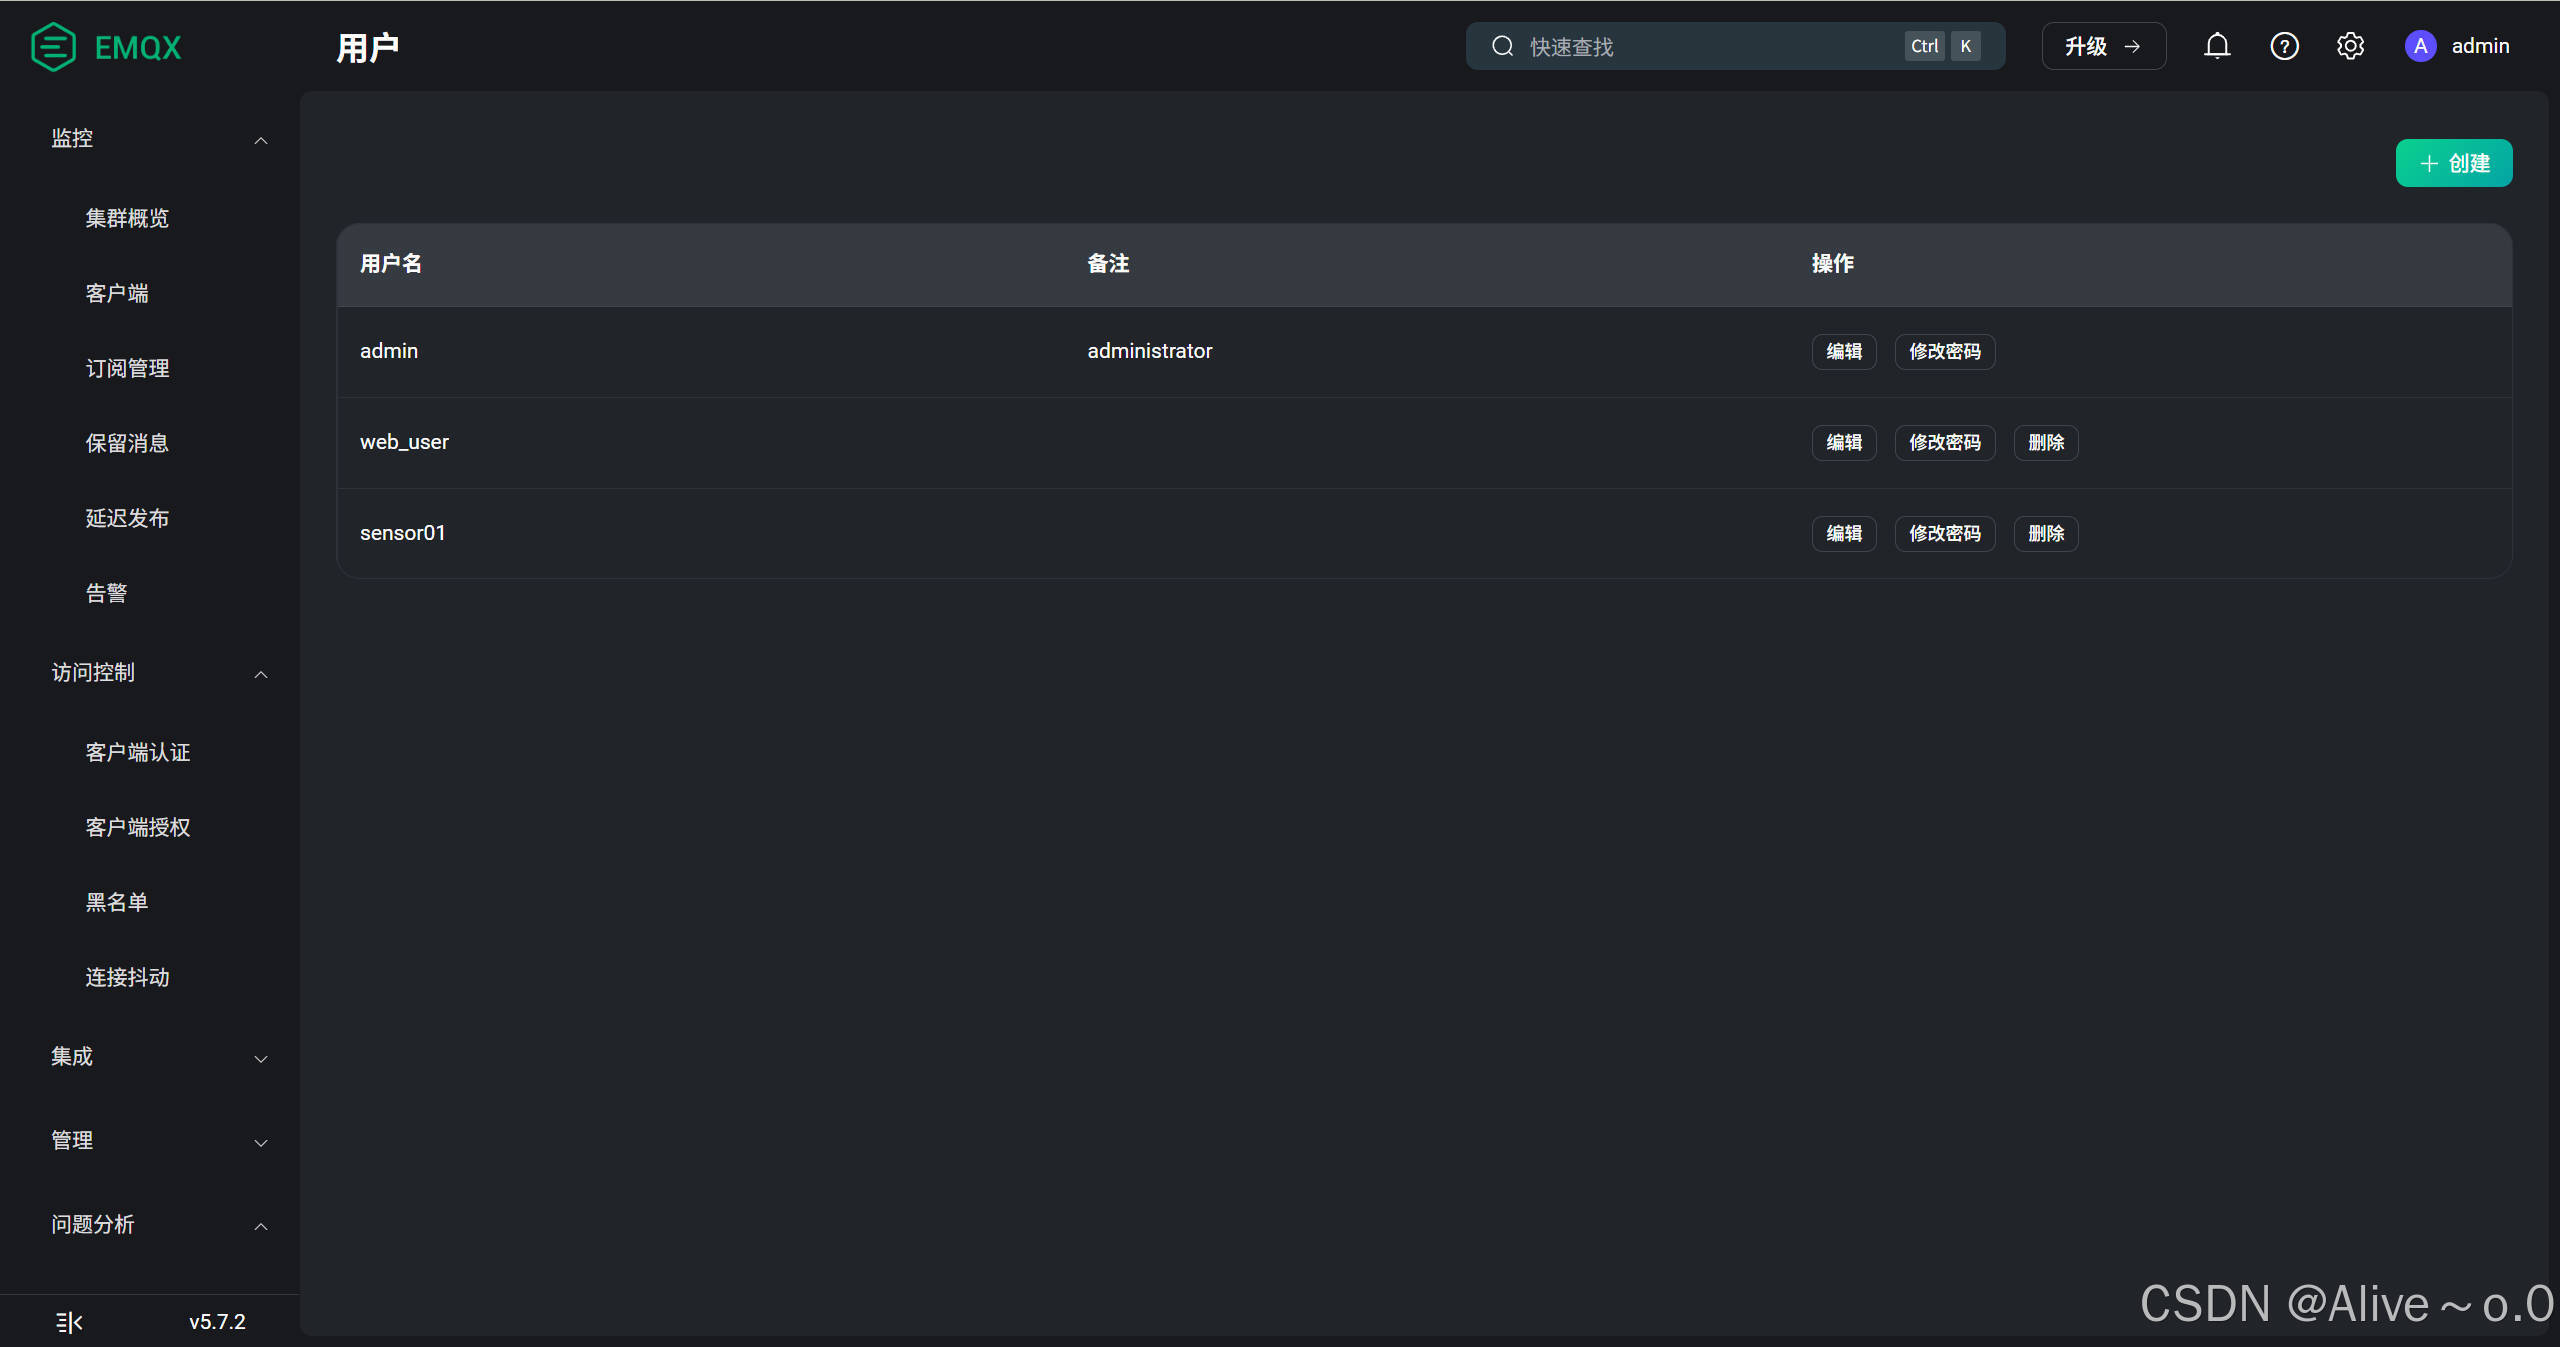
1. 用户认证配置/权限规则配置

text
**用户认证配置表**
| 用户名 | 密码 | 用户类型 |
|------------|--------------|----------------|
| web_user | web_123456 | Web控制端 |
| sensor01 | iot_123456 | 物联网设备 |
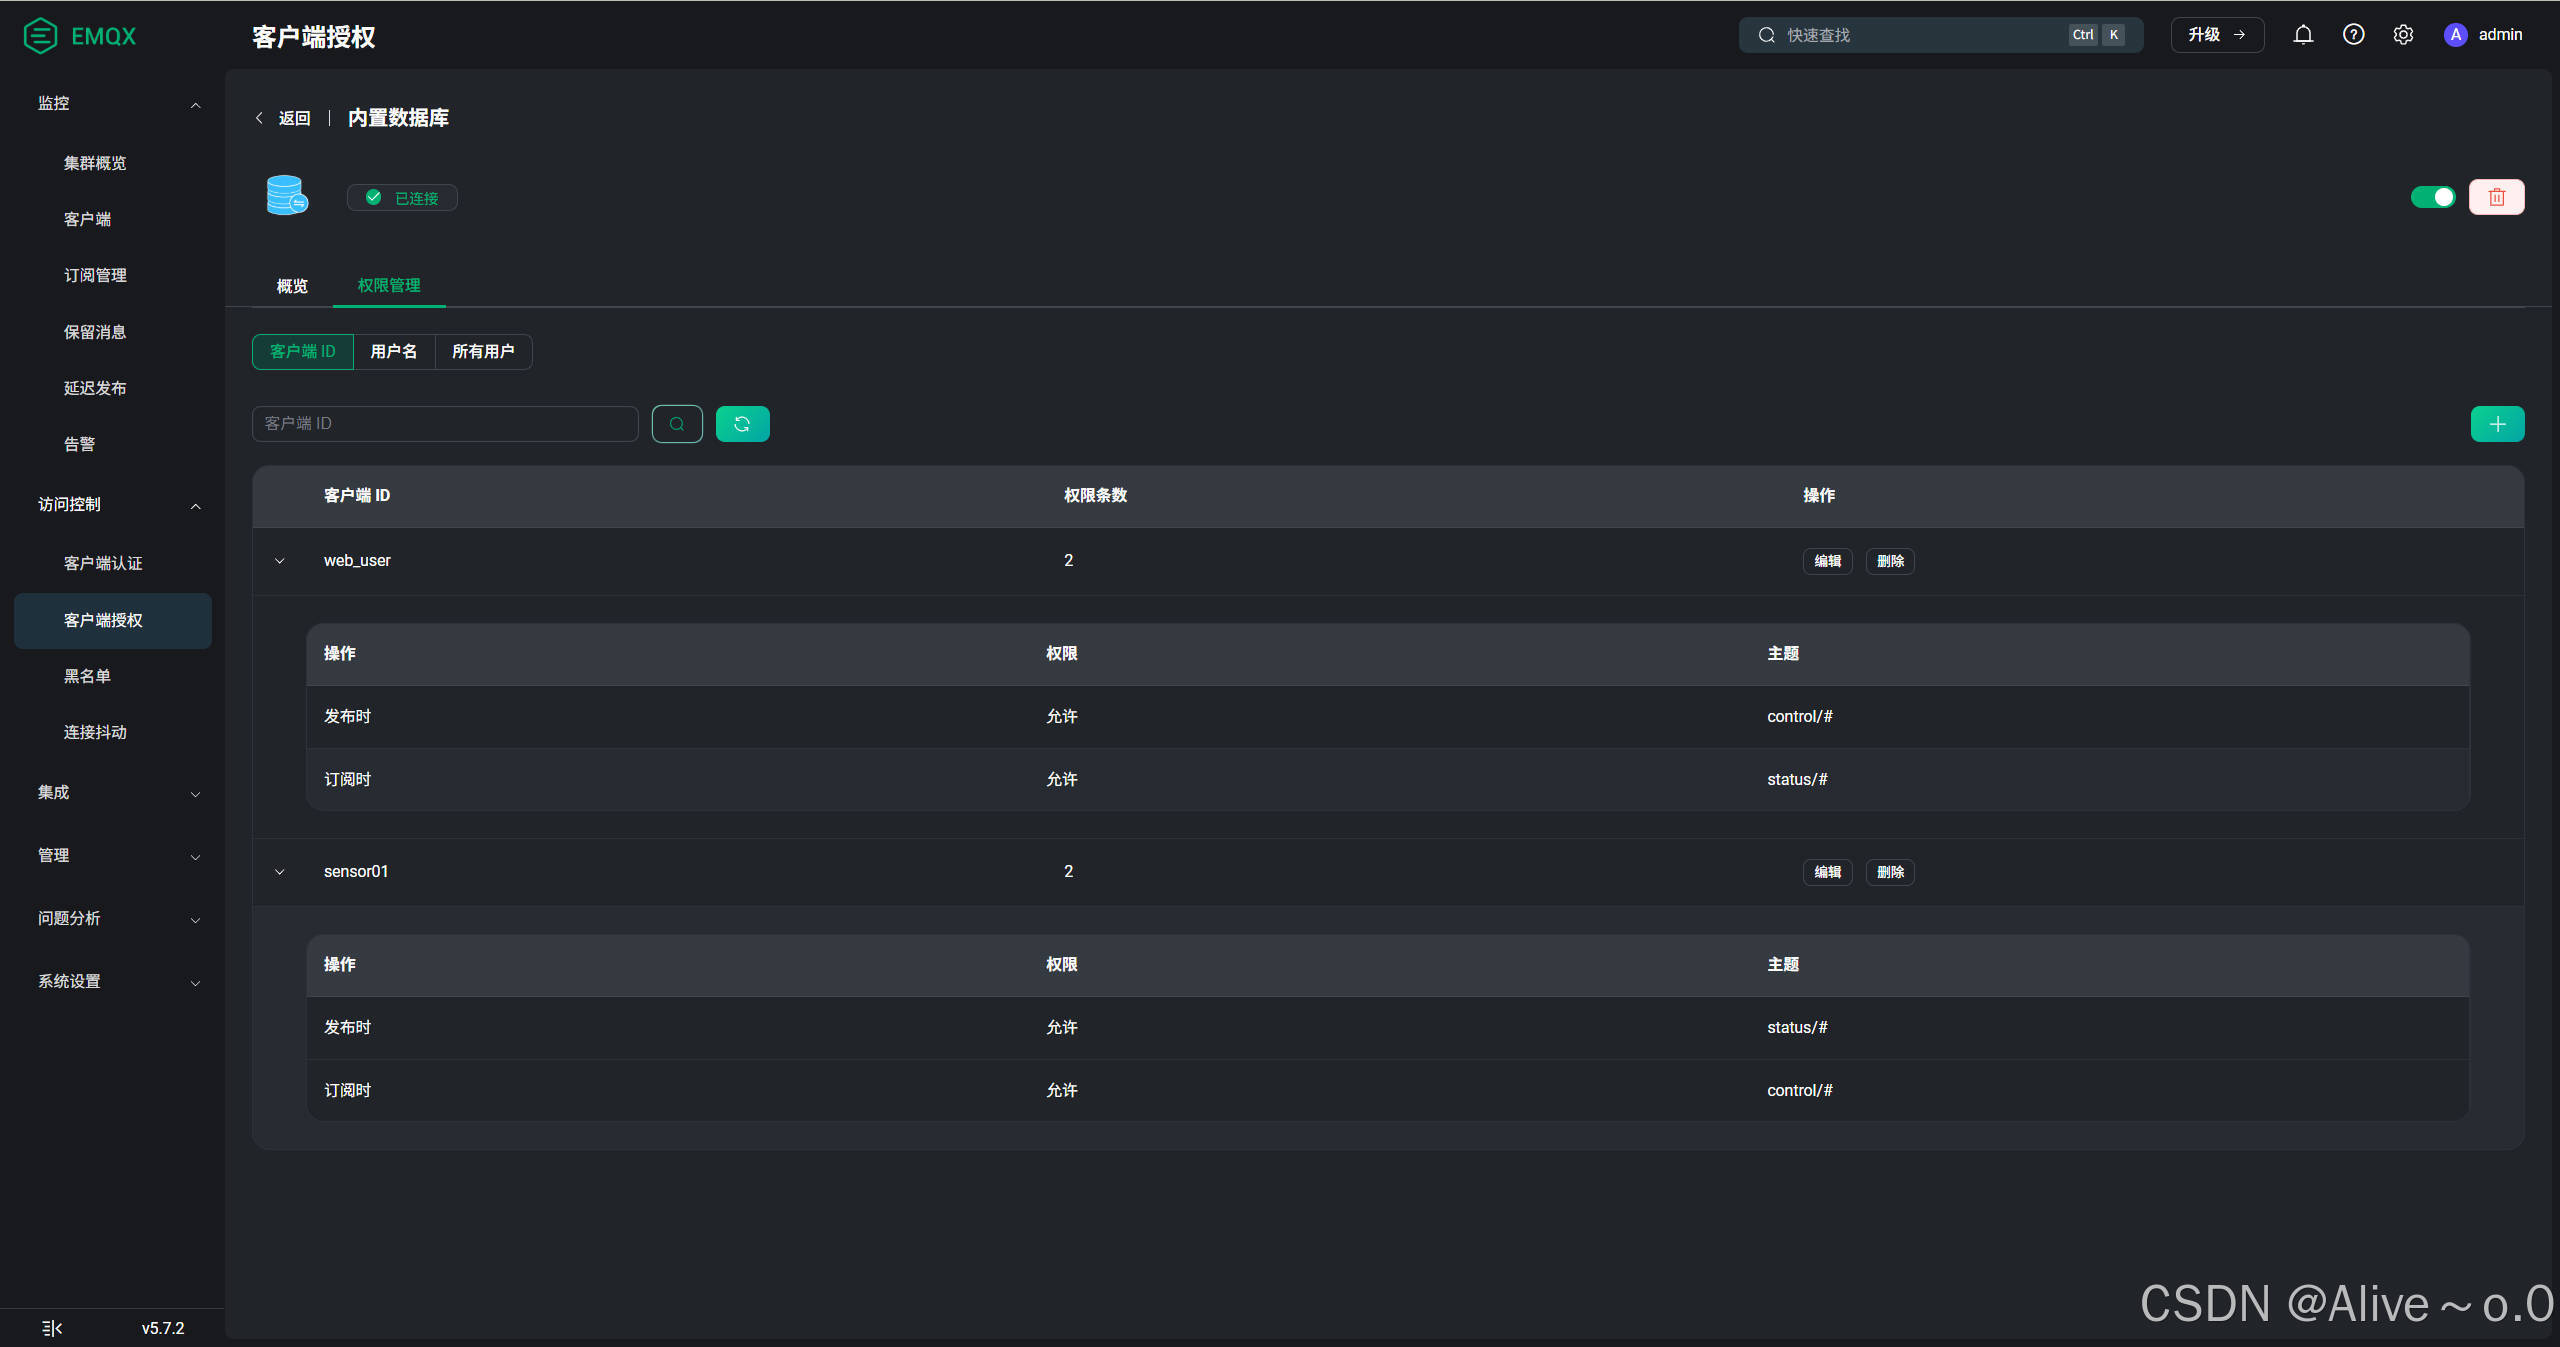
**权限规则配置表**
| 用户名 | 操作类型 | 主题过滤器 | 权限状态 |
|------------|----------|----------------|----------|
| web_user | 发布 | control/# | 允许 |
| web_user | 订阅 | status/# | 允许 |
| sensor01 | 发布 | status/# | 允许 |
| sensor01 | 订阅 | control/# | 允许 |2. MQTT.fx配置

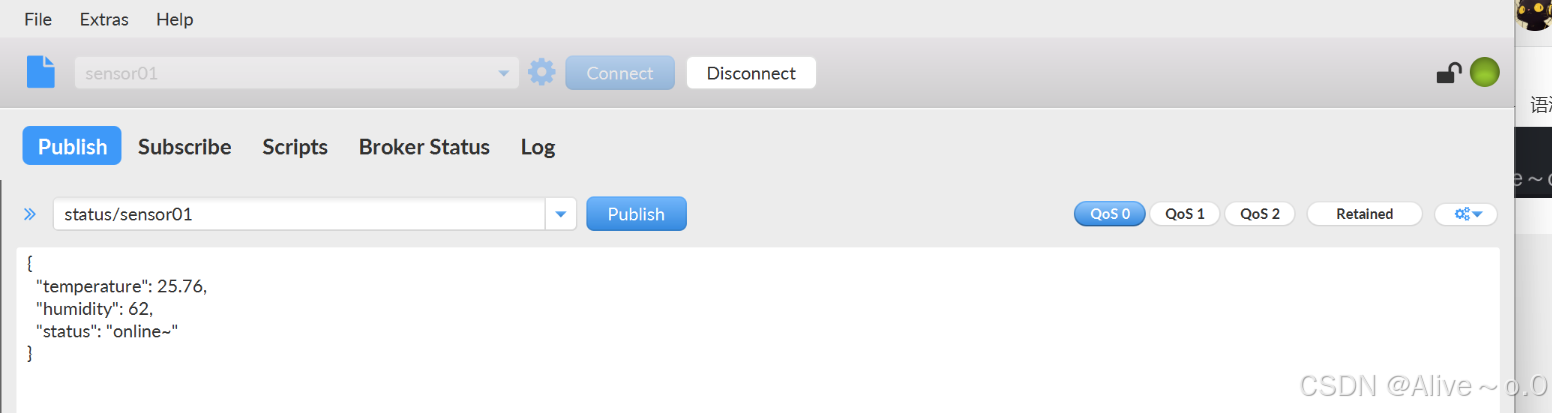
写WEB端服务
核心逻辑
javascript
// MQTT连接配置(对应实验参数)
const client = mqtt.connect('ws://你的服务器IP:8083/mqtt', {
    username: 'web_user',
    password: 'web_123456',
    clientId: `web_${Date.now()}`
});

// 主题订阅管理
const subscribeDevice = (deviceId) => {
    client.subscribe(`status/${deviceId}`, { qos: 1 }, (err) => {
        if (!err) addLog(`已订阅设备${deviceId}状态`);
    });
};

// 指令下发验证
const validateCommand = (input) => {
    const pattern = /^[a-z0-9]{8}:(start|stop|reset|led=(on|off))$/;
    return pattern.test(input);
};
完整代码
html
<!DOCTYPE html>
<html lang="zh-CN">
<head>
    <meta charset="UTF-8">
    <meta name="viewport" content="width=device-width, initial-scale=1.0">
    <title>物联网设备控制台</title>
    <script src="https://unpkg.com/mqtt@5.3.0/dist/mqtt.min.js"></script>
    <style>
        body {
            margin: 0;
            padding: 20px;
            font-family: -apple-system, BlinkMacSystemFont, "Segoe UI", Roboto, sans-serif;
            background-color: #fff;
        }

        .status-bar {
            color: #2ecc71; /* 连接中状态颜色 */
            font-size: 14px;
            margin-bottom: 15px;
        }

        .message-container {
            height: 300px;
            border: 1px solid #e0e0e0;
            border-radius: 4px;
            margin-bottom: 15px;
            overflow-y: auto;
            padding: 10px;
        }

        .input-group {
            display: flex;
            gap: 10px;
        }

        #commandInput {
            flex: 1;
            padding: 8px 12px;
            border: 1px solid #e0e0e0;
            border-radius: 4px;
            font-size: 14px;
        }

        #sendButton {
            background: #007bff;
            color: white;
            border: none;
            padding: 8px 16px;
            border-radius: 4px;
            cursor: pointer;
        }
    </style>
</head>
<body>
    <!-- 状态显示 -->
    <div class="status-bar" id="status">状态:连接中...</div>

    <!-- 消息展示区域 -->
    <div class="message-container" id="messages"></div>

    <!-- 控制输入区 -->
    <div class="input-group">
        <input
            type="text"
            id="commandInput"
            placeholder="输入控制指令(格式:设备ID:指令)"
            value="device01:led=on"
        >
        <button id="sendButton" onclick="sendCommand()">发送</button>
    </div>

    <script>
        // ================= MQTT连接配置 =================
        const client = mqtt.connect('ws://你的服务器IP:8083/mqtt', {
            username: 'web_user',
            password: 'web_user',
            clientId: 'web_user'
        });

        // ================= 连接状态管理 =================
        client.on('connect', () => {
            document.getElementById('status').textContent = '状态:已连接';
            document.getElementById('status').style.color = '#27ae60';

            // 自动订阅设备状态主题
            client.subscribe('status/#', (err) => {
                if (!err) addSystemMessage('成功订阅设备状态主题');
            });
        });

        client.on('error', (err) => {
            document.getElementById('status').textContent = `错误:${err.message}`;
            document.getElementById('status').style.color = '#e74c3c';
        });

        // ================= 消息处理逻辑 =================
        client.on('message', (topic, payload) => {
            const msg = document.createElement('div');
            msg.textContent = `[${new Date().toLocaleTimeString()}] ${topic}: ${payload.toString()}`;
            msg.style.padding = '5px 0';
            msg.style.borderBottom = '1px solid #eee';
            document.getElementById('messages').appendChild(msg);
            messages.scrollTop = messages.scrollHeight; // 自动滚动到底部
        });

        // ================= 设备控制逻辑 =================
        const sendCommand = () => {
            const input = document.getElementById('commandInput').value.trim();
            if (!input) return;

            try {
                const [deviceId, command] = input.split(':');
                if (!deviceId || !command) throw new Error('指令格式错误');

                client.publish(`control/${deviceId}`, command);
                addSystemMessage(`已发送指令到 ${deviceId}`);
            } catch (err) {
                addSystemMessage(`错误:${err.message}`, true);
            }
        }

        // ================= 辅助函数 =================
        const addSystemMessage = (text, isError = false) => {
            const msg = document.createElement('div');
            msg.textContent = `[系统] ${new Date().toLocaleTimeString()} ${text}`;
            msg.style.color = isError ? '#e74c3c' : '#7f8c8d';
            msg.style.fontSize = '12px';
            msg.style.margin = '4px 0';
            document.getElementById('messages').appendChild(msg);
            messages.scrollTop = messages.scrollHeight;
        }
    </script>
</body>
</html>
启动WEB:
bash
# 1. 部署到服务器指定目录
cd /home/lighthouse/chat-server/public
vim index.html # 粘贴上述代码

# 2. 重启HTTP服务
pkill python3
nohup python3 -m http.server 8080 --bind 0.0.0.0 >/dev/null 2>&1 &

# 3. 访问地址
echo "控制台地址:http://你的服务器IP:8080"
建议:用户名和密码全设成一样的,记不住一点。。。
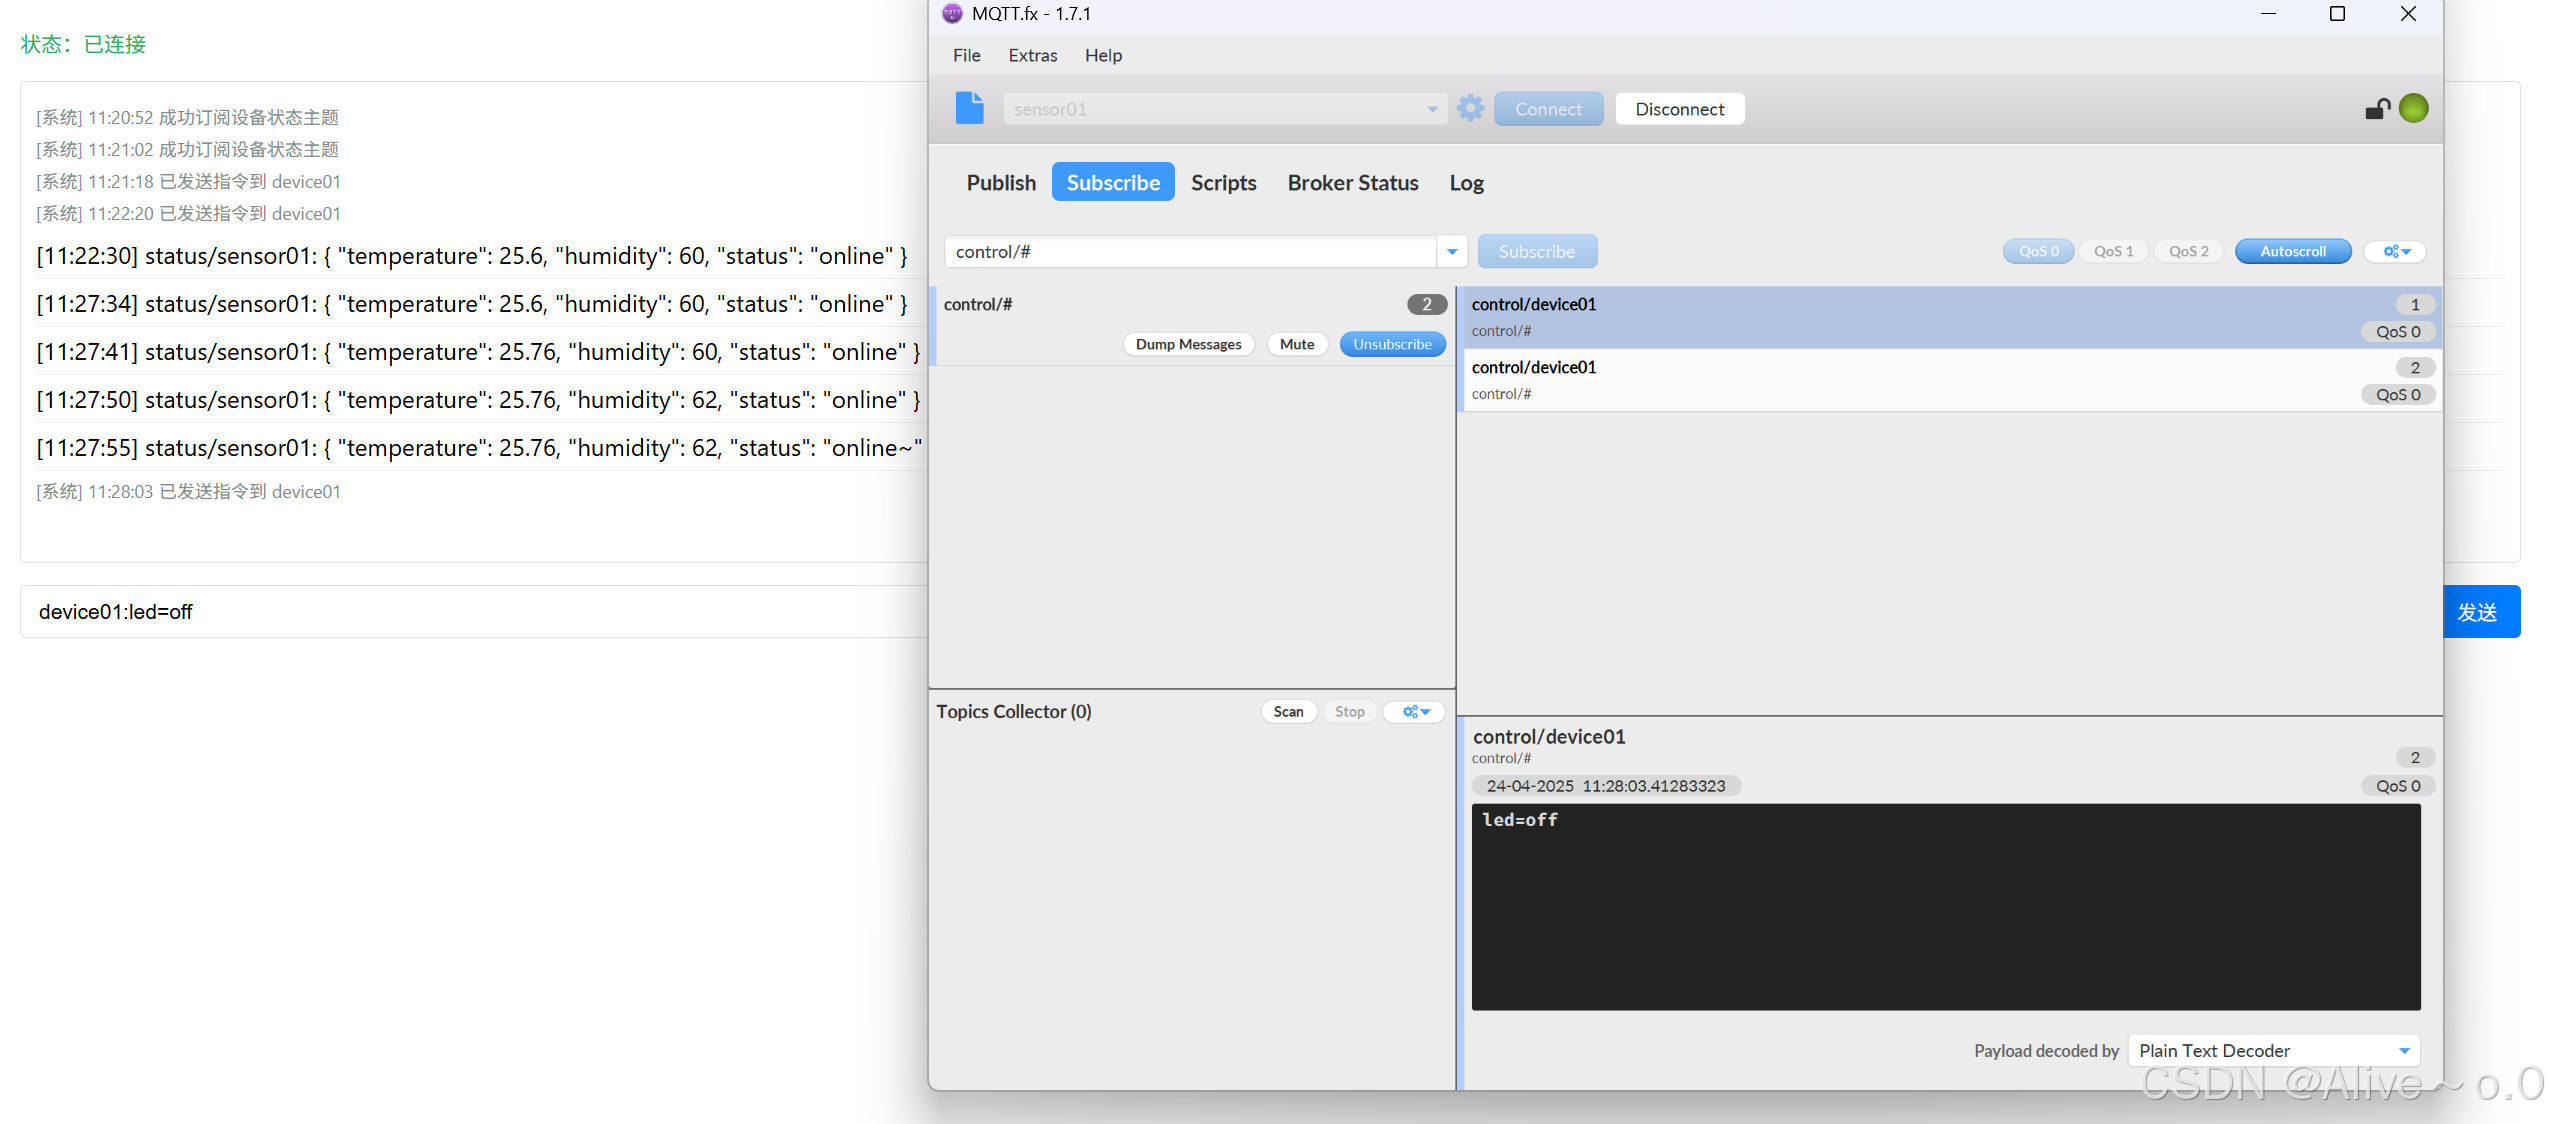
四、实验结果
操作流程:
text
graph TD
A[启动Web服务] --> B[访问http://IP:8080]
B --> C{状态显示"已连接"?}
C -->|是| D[发送测试指令]
C -->|否| E[检查控制台错误]
D --> F[查看EMQX主题监控]
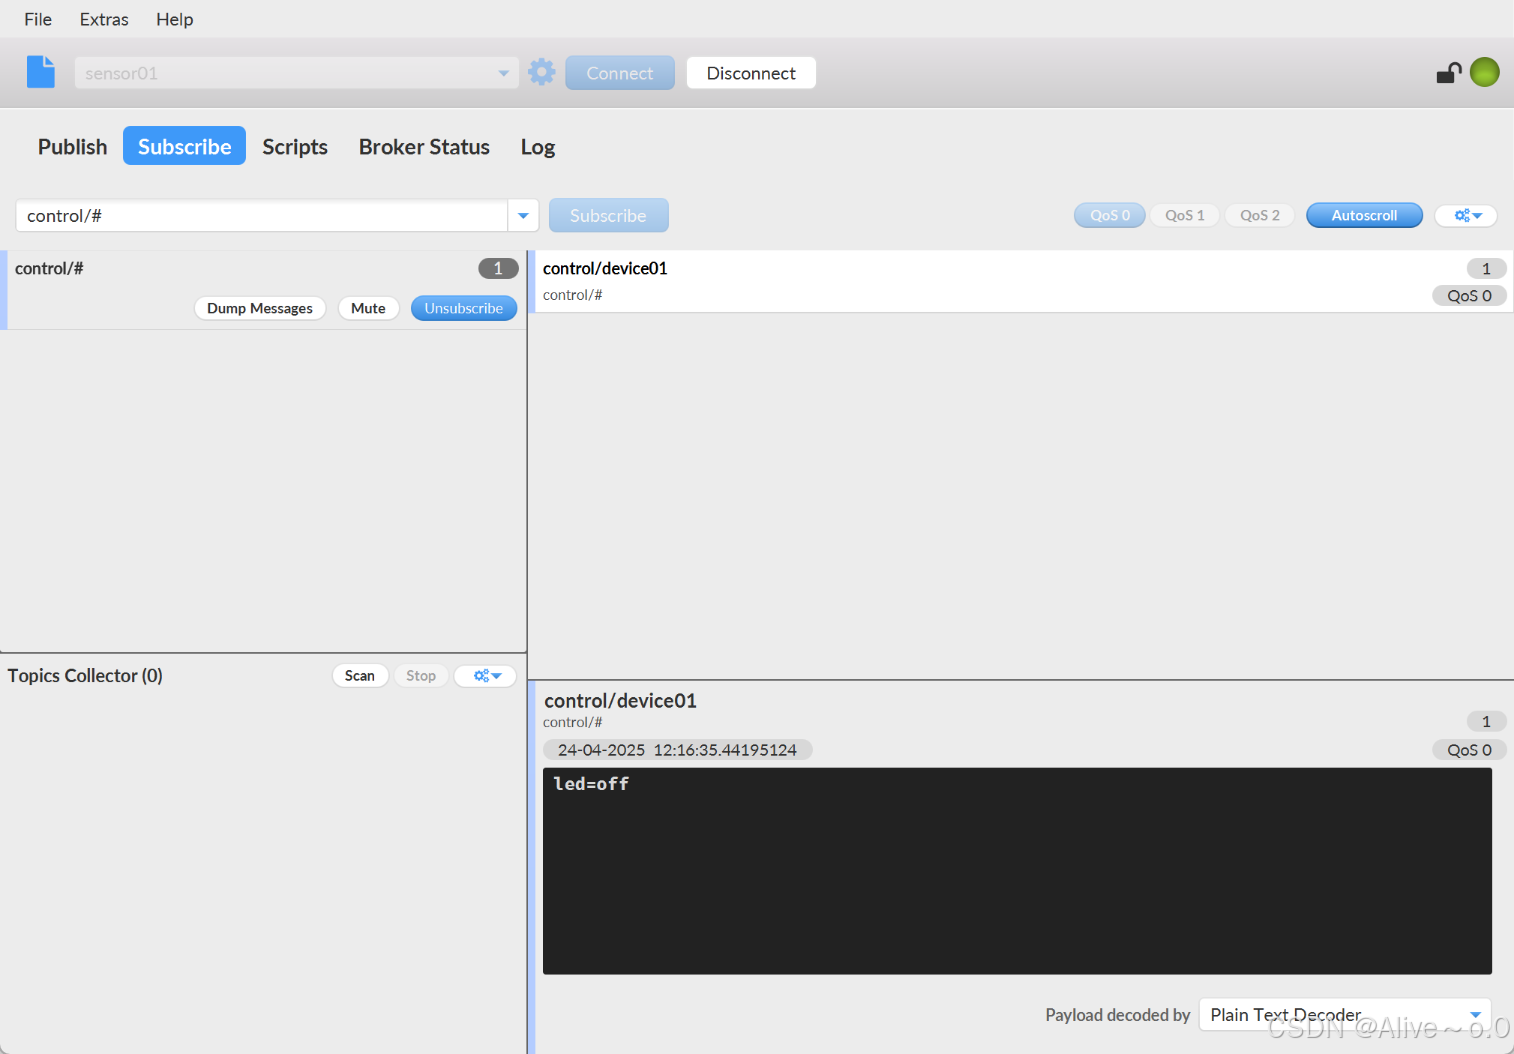
1. 在输入框输入:`device01:led=on`
2. 点击"发送"按钮
3. 在服务器执行:
docker exec emqx_GSsj emqx_ctl topics
# 应看到 control/device01 主题有消息统计功能验证
| 测试场景 | 操作步骤 | 预期结果 |
|---|---|---|
| Web用户订阅状态 | 浏览器控制台输入client.subscribe('status/#') | 成功接收所有设备状态消息 |
| 非法主题发布拦截 | 使用web_user尝试发布到status/device01 | 返回PUBLISH not authorized错误 |
| 设备离线消息保留 | 设备离线时发送控制指令,设备上线后 | 立即执行离线期间最后一条指令 |
| 跨用户权限隔离 | 使用sensor01尝试订阅system/alerts | 连接被立即断开 |

还是很酷炫的hh,撒花撒花!