本次使用图片来源于百度
python
import cv2
import time
import numpy as np
import pywt

from PIL import Image, ImageEnhance

#-i https://pypi.mirrors.ustc.edu.cn/simple

def super_resolution(input_path, output_path, model_path, scale=4):
    # 初始化超分辨率模型
    sr = cv2.dnn_superres.DnnSuperResImpl_create()
    sr.readModel(model_path)
    sr.setModel("edsr", scale)  # 模型类型需与文件名匹配

    # 读取低分辨率图像
    img_lr = cv2.imread(input_path)
    if img_lr is None:
        print("Error: 输入图像加载失败")
        return

    # 执行超分辨率重建
    start_time = time.time()
    img_sr = sr.upsample(img_lr)
    print(f"推理耗时: {time.time() - start_time:.2f}s")

    # 保存结果
    cv2.imwrite(output_path, img_sr)

    print(f"高分辨率图像已保存至: {output_path}")


def wavelet_denoise(image, wavelet='db4', level=1, mode='soft'):
    # 将图像转换为灰度图
    if len(image.shape) == 3:
        image = cv2.cvtColor(image, cv2.COLOR_BGR2GRAY)

    # 进行小波分解
    coeffs = pywt.wavedec2(image, wavelet, level=level)

    # 对每个细节系数应用阈值处理
    threshold = np.std(coeffs[-1]) * np.sqrt(2 * np.log2(image.size))
    new_coeffs = [coeffs[0]]
    for detail_coeffs in coeffs[1:]:
        new_detail_coeffs = [pywt.threshold(d, threshold, mode=mode) for d in detail_coeffs]
        new_coeffs.append(new_detail_coeffs)

    # 进行小波重构
    denoised_image = pywt.waverec2(new_coeffs, wavelet)

    # 将像素值限制在 0 到 255 之间
    denoised_image = np.clip(denoised_image, 0, 255).astype(np.uint8)

    return denoised_image

if __name__ == "__main__":
    # 参数配置
    input_img = "3.jpeg"    # 低分辨率图像路径
    output_img = "high_res3.jpg"  # 输出图像路径
    model_file = "EDSR_x4.pb"    # 预训练模型路径

    # 定义锐化卷积核
    kernel = np.array([[0, -1, 0],
                   [-1, 5, -1],
                   [0, -1, 0]])

    # 执行重建
    super_resolution(input_img, output_img, model_file)

    #打开图片

    image = Image.open('4.jpg')

    #调整对比度

    contrast = ImageEnhance.Contrast(image)

    image = contrast.enhance(1.5)

    #调整亮度

    brightness = ImageEnhance.Brightness(image)


    image = brightness.enhance(1.2)


    #保存处理后的图片

    image.save('enhanced_image.jpg')

    img = cv2.imread("enhanced_image.jpg")

    if img is None:
        print('none')

    denoised_image = wavelet_denoise(img)

    cv2.imwrite('result.png', denoised_image)

    sharpened = cv2.filter2D(denoised_image, -1, kernel)  # 应用卷积核

    #laplacian = cv2.Laplacian(denoised_image, cv2.CV_64F)
    #sharpened = cv2.convertScaleAbs(laplacian - 0.5*laplacian)  # 调节0.7系数控制锐化强度

    cv2.imwrite("output4.jpg", sharpened)

    image = cv2.imread('output4.jpg', cv2.IMREAD_GRAYSCALE)

    #高斯滤波

    gaussian_filtered_image = cv2.GaussianBlur(image, (3, 3), 0.02)

    #保存处理后的图片

    cv2.imwrite('gaussian_filtered_image.jpg', gaussian_filtered_image)

    #中值滤波

    median_filtered_image = cv2.medianBlur(gaussian_filtered_image, 5)

    #保存处理后的图片

    cv2.imwrite('median_filtered_image.jpg', median_filtered_image)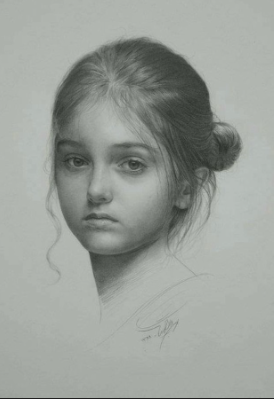
原始图像
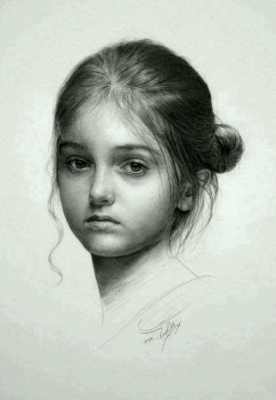
亮度增强

高斯滤波

卷积锐化

中值平滑