最近公司在研究自动化部署的一套流程,下面记录一下配置流程
需要提前准备好Jenkins Harbor Git(其他管理工具也可以)
我这里的打包编译流程是Jenkins上配置打包任务-->自动到git目录下找打包文件---->项目编译后打镜像包------>打完镜像包将镜像上传到harbor仓库----->通过yaml配置文件手动部署(最后一步其实也可以合并到Jenkins中,需要的自行学习)
一.准备打包文件
我的项目是springboot+vue 的所以我把打包文件分开写了,你也可以合并到一起。
文件中标红的内容需要替换自己的信息
1.Spring boot后台项目目录下添加打包文件
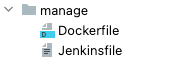
后台Jenkinsfile文件内容
pipeline {
agent {
node {
label 'maven'
}
}
parameters {
gitParameter name: 'BRANCH_NAME', branch: '', branchFilter: '.*',defaultValue: 'master',description: '请选择要发布的分支',quickFilterEnabled: false,type: 'PT_BRANCH_TAG'
choice(name: 'NAMESPACE', choices: 'master', 'fea-alert','dev-sit',description: '命名空间')
string(name: 'TAG_NAME', defaultValue: 'snapshot', description: '标签名称,必须以 v 开头,例如:v1、v1.0.0')
}
environment {
DOCKER_CREDENTIAL_ID = 'harbor-user-pass' // 替换为你的 Docker Hub 凭证 ID
GIT_REPO_URL = '192.168.xxx.xxx' //git地址
GIT_CREDENTIAL_ID = 'private-git-token' //git凭证id
GIT_ACCOUNT = 'usernamexxx' //git账号
REGISTRY = '192.168.xxx.xxx:80' //harbor地址
DOCKERHUB_NAMESPACE = 'zdyxxx' //harbor命名空间 换自己的
APP_NAME = 'itwg-monitor-platformxxx' //应用名称
}
stages {
stage('chechout scm') {
steps {
checkout scmGit(branches: \[name: "$BRANCH_NAME"], extensions: \[\], userRemoteConfigs: \[credentialsId: "$GIT_CREDENTIAL_ID", url: "https://192.168.xxx.xxx/xxx.git"])
}
}
stage('unit test manager') {
steps {
withMaven(jdk: 'jdk17') {
sh 'mvn clean test -f zdy-hertzbeat/pom.xml -P prod'
}
}
}
stage('build & push mamager') {
steps {
withMaven(jdk: 'jdk17') {
sh 'mvn clean package -DskipTests -f zdy-hertzbeat/pom.xml'
}
sh 'docker build -f zdy-hertzbeat/kubernetes/build/manage/Dockerfile -t REGISTRY/DOCKERHUB_NAMESPACE/APP_NAME:SNAPSHOT-BUILD_NUMBER .'
withCredentials(usernamePassword(passwordVariable : 'DOCKER_PASSWORD' ,usernameVariable : 'DOCKER_USERNAME' ,credentialsId : "$DOCKER_CREDENTIAL_ID")) {
sh 'echo "DOCKER_PASSWORD" \| docker login REGISTRY -u "$DOCKER_USERNAME" --password-stdin'
sh 'docker push REGISTRY/DOCKERHUB_NAMESPACE/APP_NAME:SNAPSHOT-BUILD_NUMBER'
}
}
}
stage('push latest manager') {
steps {
sh 'docker tag REGISTRY/DOCKERHUB_NAMESPACE/APP_NAME:SNAPSHOT-BUILD_NUMBER REGISTRY/DOCKERHUB_NAMESPACE/$APP_NAME:latest'
sh 'docker push REGISTRY/DOCKERHUB_NAMESPACE/$APP_NAME:latest'
}
}
}
}
后台Dockerfile
基础镜像
FROM openjdk:17
作者
LABEL org.opencontainers.image.authors="738749649@qq.com"
定义参数
创建并进入工作目录
#RUN mkdir -p /project/hlxx/config
#RUN mkdir -p /project/xcyth
WORKDIR /project/zrq
maven 插件构建时得到 buildArgs 种的值
COPY zdy-hertzbeat/hertzbeat-manager/target/*.jar app.jar
设置 TZ 时区
设置 JAVA_OPTS 环境变量,可通过 docker run -e "JAVA_OPTS=" 进行覆盖
ENV TZ=Asia/Shanghai JAVA_OPTS="-Xms2048m -Xmx4096m"
暴露端口
EXPOSE 1157
容器启动命令
CMD 第一个参数之后的命令可以在运行时被替换
CMD java ${JAVA_OPTS} -Djava.security.egd=file:/dev/./urandom -jar /project/zrq/app.jar
2.vue前台添加打包文件
前端Jenkinsfile内容如下:
pipeline {
agent {
node {
label 'maven'
}
}
parameters {
gitParameter name: 'BRANCH_NAME', branch: '', branchFilter: '.*',defaultValue: 'main',description: '请选择要发布的分支',quickFilterEnabled: false,type: 'PT_BRANCH_TAG'
choice(name: 'NAMESPACE', choices: 'main',description: '命名空间')
string(name: 'TAG_NAME', defaultValue: 'snapshot', description: '标签名称,必须以 v 开头,例如:v1、v1.0.0')
}
environment {
DOCKER_CREDENTIAL_ID = 'harbor-user-pass' // 替换为你的 Docker Hub 凭证 ID
GIT_REPO_URL = '192.168.xxx.xxx' //git地址
GIT_CREDENTIAL_ID = 'private-git-token' //git凭证id
GIT_ACCOUNT = 'usernamexxx' //git账号
REGISTRY = '192.168.xxx.xxx:80' //harbor地址
DOCKERHUB_NAMESPACE = 'zdyxxx' //harbor命名空间 换自己的
WEB_NAME = 'itwg-monitor-webxxx'
}
stages {
stage('chechout scm') {
steps {
checkout scmGit(branches: \[name: "$BRANCH_NAME"], extensions: \[\], userRemoteConfigs: \[credentialsId: "$GIT_CREDENTIAL_ID", url: "https://192.168.xxx.xxx/xxxx.git"])
}
}
//
stage('build & push') {
steps {
nodejs('nodejs20') {
dir('zdy-hertzbeat-ui-vue') {
sh 'pnpm install'
sh 'pnpm run build'
}
}
sh 'docker build -f kubernetes/build/web/Dockerfile -t REGISTRY/DOCKERHUB_NAMESPACE/WEB_NAME:SNAPSHOT-BUILD_NUMBER .'
withCredentials(usernamePassword(passwordVariable : 'DOCKER_PASSWORD' ,usernameVariable : 'DOCKER_USERNAME' ,credentialsId : "$DOCKER_CREDENTIAL_ID")) {
sh 'echo "DOCKER_PASSWORD" \| docker2 login REGISTRY -u "$DOCKER_USERNAME" --password-stdin'
sh 'docker push REGISTRY/DOCKERHUB_NAMESPACE/WEB_NAME:SNAPSHOT-BUILD_NUMBER'
}
}
}
stage('push latest') {
steps {
sh 'docker tag REGISTRY/DOCKERHUB_NAMESPACE/WEB_NAME:SNAPSHOT-BUILD_NUMBER REGISTRY/DOCKERHUB_NAMESPACE/$WEB_NAME:latest'
sh 'docker push REGISTRY/DOCKERHUB_NAMESPACE/$WEB_NAME:latest'
}
}
}
}
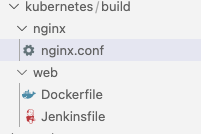
前端Dockerfile文件:
FROM docker.m.daocloud.io/nginx
LABEL org.opencontainers.image.authors="738749649@qq.com"
复制自定义的 Nginx 配置文件到镜像中
COPY kubernetes/build/nginx/nginx.conf /etc/nginx/nginx.conf
ADD dist/ /usr/share/nginx/html/
EXPOSE 80
CMD "/bin/sh", "-c", "nginx -g 'daemon off;'"
前端nginx.conf
user nginx;
worker_processes 1;
error_log /var/log/nginx/error.log warn;
pid /var/run/nginx.pid;
events {
worker_connections 1024;
}
http {
include /etc/nginx/mime.types;
default_type application/octet-stream;
log_format main 'remote_addr - remote_user $time_local "$request" '
'status body_bytes_sent "$http_referer" '
'"http_user_agent" "http_x_forwarded_for"';
access_log /var/log/nginx/access.log main;
sendfile on;
keepalive_timeout 65;
open_file_cache max=1000 inactive=20s;
open_file_cache_valid 30s;
open_file_cache_min_uses 2;
open_file_cache_errors on;
client_max_body_size 用来修改允许客户端上传文件的大小。默认为1m,如果设置为0,表示上传文件大小不受限制。
可以在以下模块设置: http, server, location
client_max_body_size 100m;
include /etc/nginx/conf.d/*.conf;
server {
listen 80 default_server;
listen :::80 default_server;
server_name localhost;
root /usr/share/nginx/html; # Vue 静态文件根目录(Docker 中默认挂载的 dist 目录)
index index.html;
location / {
try_files uri uri/ /index.html; # 支持 Vue Router 的 history 模式
}
location /api {
proxy_set_header Host $host;
proxy_set_header X-Real-IP $remote_addr;
proxy_set_header REMOTE-HOST $remote_addr;
proxy_set_header X-Forwarded-For $proxy_add_x_forwarded_for;
#itwg-monitor-platform kubectl启动后台的服务名:端口
proxy_pass http://itwg-monitor-platform:1157/api;
}
error_page 500 502 503 504 /50x.html;
location = /50x.html {
root /usr/share/nginx/html;
}
}
}
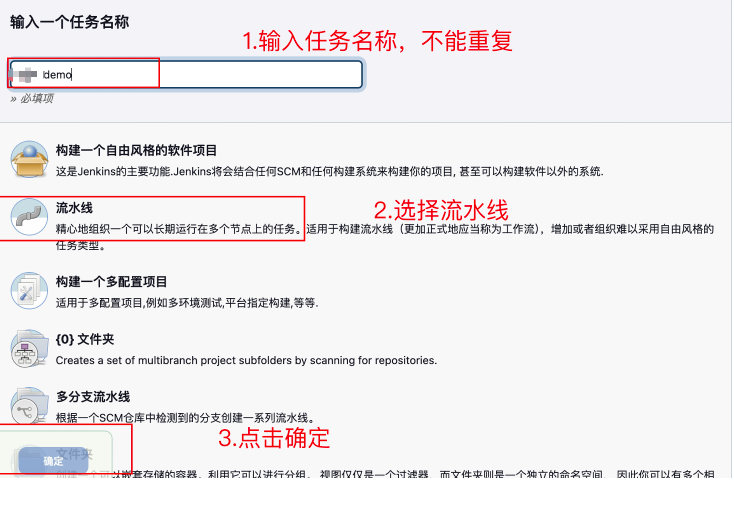
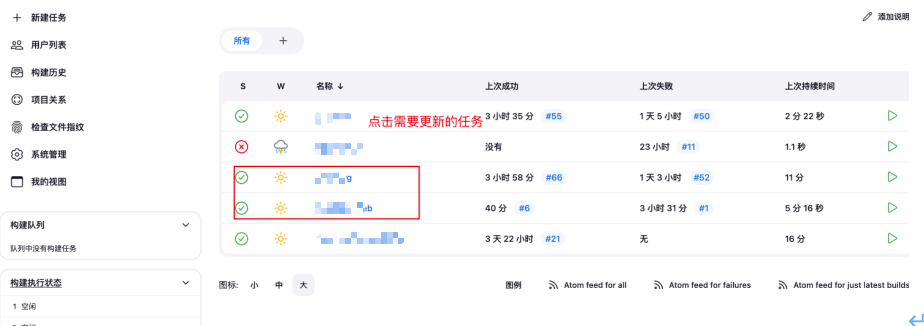
二.Jenkins新建任务
上面我们准备好了我们打包需要的配置文件,这些文件都需要我们上传项目git
到这里我们就可以在Jenkins上配置打包流程了。
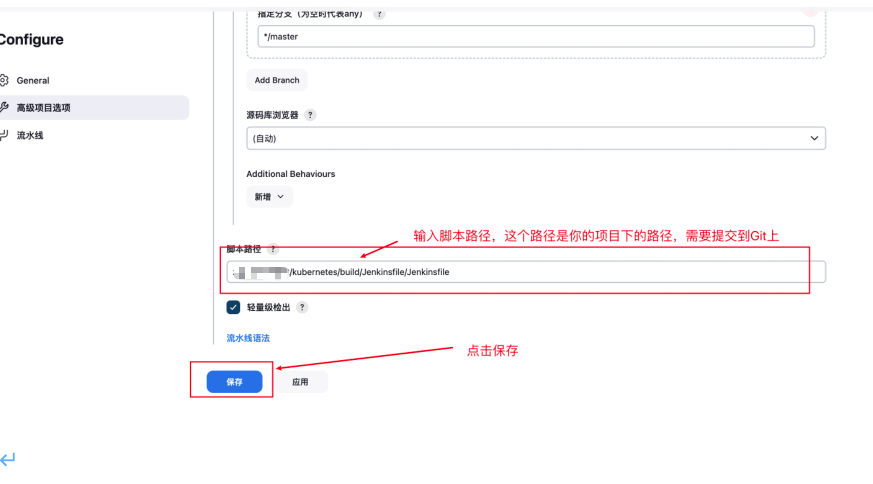
我的项目是前后端分离的所以我配置两个任务,一个后端,一个前端

下面截图只是后端配置任务,前端的一样只需修改对应的Jenkins脚本路径和git配置


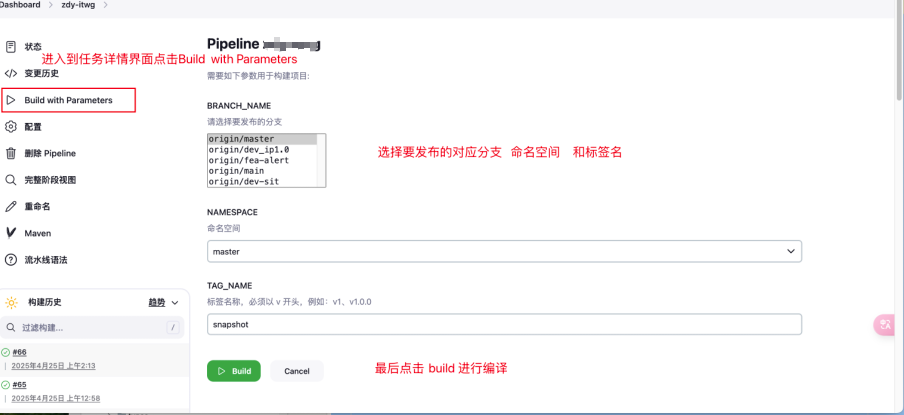
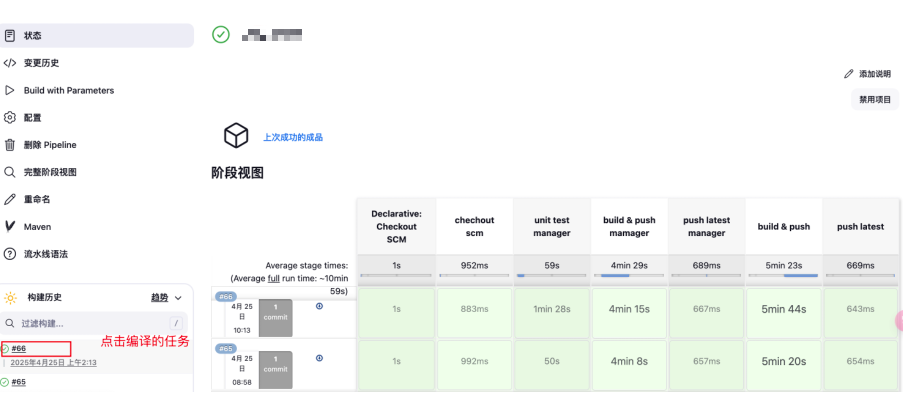
 三.Jenkins编译打包
每个任务都需要编译
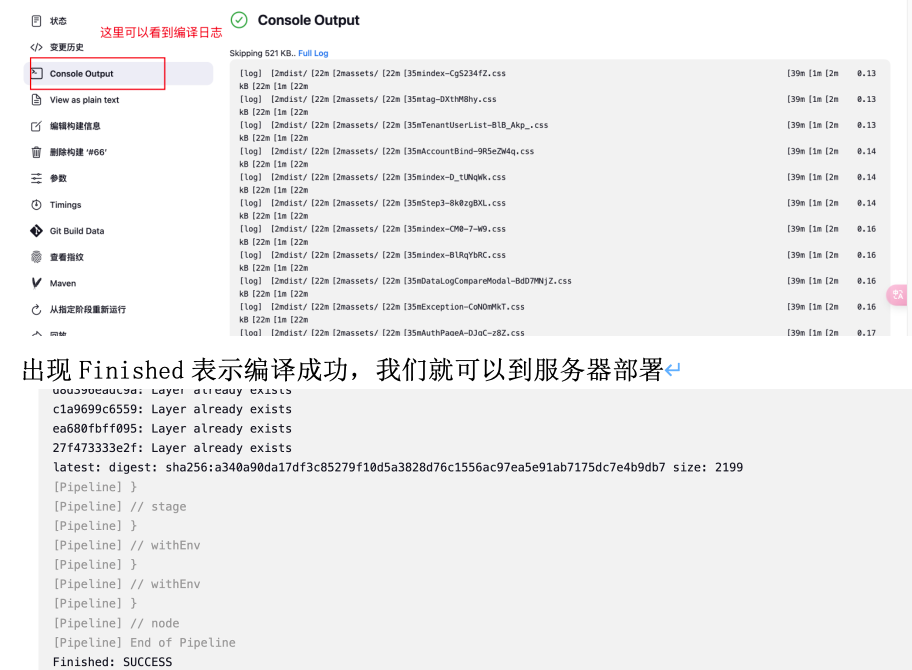
四.在服务器部署
在服务器部署,需要我们写个配置文件
配置文件中的image镜像需要修改为自己的
前台配置文件web.yaml
apiVersion: apps/v1
kind: Deployment
metadata:
  annotations:
  labels:
    app: itwg-monitor-web
  name: itwg-monitor-web
  namespace: hertzbeat
spec:
  replicas: 1
  selector:
    matchLabels:
      app: itwg-monitor-web
  strategy:
    rollingUpdate:
      maxSurge: 25%
      maxUnavailable: 25%
    type: RollingUpdate
  template:
    metadata:
      labels:
        app: itwg-monitor-web
    spec:
      containers:
      - image: itwg-monitor-web  #镜像
        imagePullPolicy: IfNotPresent   # 关键配置!
        name: itwg-monitor-web
        resources: {}
        terminationMessagePath: /dev/termination-log
        terminationMessagePolicy: File
      dnsPolicy: ClusterFirst
      restartPolicy: Always
      schedulerName: default-scheduler
      securityContext: {}
      terminationGracePeriodSeconds: 30
----
apiVersion: v1
kind: Service
metadata:
  labels:
    app: itwg-monitor-web
  name: itwg-monitor-web
  namespace: hertzbeat
spec:
  ports:
  - port: 80
    protocol: TCP
    targetPort: 80
    nodePort: 30000
  selector:
    app: itwg-monitor-web
  type: NodePort
后台service.yaml
apiVersion: apps/v1
kind: Deployment
metadata:
  labels:
    app: itwg-monitor-platform
  name: itwg-monitor-platform
  namespace: hertzbeat
spec:
  replicas: 1
  selector:
    matchLabels:
      app: itwg-monitor-platform
  strategy:
    rollingUpdate:
      maxSurge: 25%
      maxUnavailable: 25%
    type: RollingUpdate
  template:
    metadata:
      creationTimestamp: null
      labels:
        app: itwg-monitor-platform
    spec:
      containers:
      - name: itwg-monitor-platform
        image: 192.168.6.114:80/zdy/itwg-monitor-platform
        imagePullPolicy: Always
        resources: {}
        terminationMessagePath: /dev/termination-log
        terminationMessagePolicy: File
        volumeMounts:
          # 将宿主机的容器日志路径挂载为 /usr/local/logs
          - name: container-logs
            mountPath: /usr/local/logs
            readOnly: true

      volumes:
        - name: container-logs
          hostPath:
            path: /var/log/containers
            type: Directory

      dnsPolicy: ClusterFirst
      restartPolicy: Always
      schedulerName: default-scheduler
      securityContext: {}
      terminationGracePeriodSeconds: 30
----
apiVersion: v1
kind: Service
metadata:
  labels:
    app: itwg-monitor-platform
  name: itwg-monitor-platform
  namespace: hertzbeat
spec:
  ports:
  - port: 1157
    protocol: TCP
    targetPort: 1157
  selector:
    app: itwg-monitor-platform
  type: ClusterIP
部署命令:
kubectl apply -f service.yaml -n 命名空间
kubectl apply -f web.yaml -n 命名空间
查看命令
kubectl get po -n 命名空间
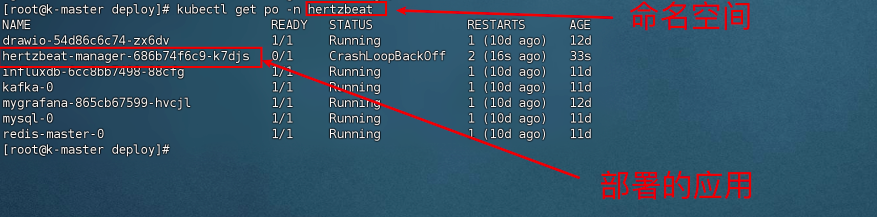
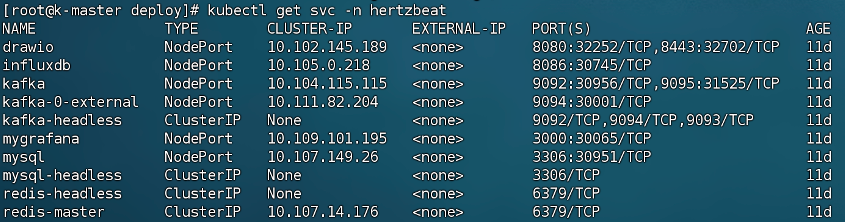
kubectl get svc -n 命名空间
kubectl 常用命令
查看日志
kubectl describe pod <pod-name> -n <namespace>
kubectl logs <pod-name> -n <namespace>
删除
kubectl delete svc hertzbeat-manager -n hertzbeat
kubectl delete deploy hertzbeat-manager -n hertzbeat
五.问题记录
1.如果Jenkins编译前端无法install,编译报错提示
ERR_PNPM_OUTDATED_LOCKFILE Cannot install with "frozen-lockfile" because pnpm-lock.yaml is not up
执行pnpm install --no-frozen-lockfile
命令,然后将pnpm-lock.yaml文件提交后再进行编译
2.如果前台后端都部署到服务器前台无法到服务器
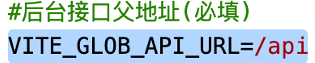
先检查前台打包配置文件env.production中配置地址是否正确
检查挂载到nginx中的代理转发是否正确

3.如果遇到Maven打包后打包镜像运行找不到主类问题,需要在maven打包中添加下面配置
<plugin>
    <groupId>org.springframework.boot</groupId>
    <artifactId>spring-boot-maven-plugin</artifactId>
    <!--加入下面两项配置-->
    <executions>
        <execution>
            <goals>
                <goal>repackage</goal>
            </goals>
        </execution>
    </executions>
    <configuration>
        <includeSystemScope>true</includeSystemScope>
    </configuration>
</plugin>

<!-- Maven Dependency Plugin -->
<plugin>
    <groupId>org.apache.maven.plugins</groupId>
    <artifactId>maven-dependency-plugin</artifactId>
    <version>3.7.0</version>
    <executions>
        <execution>
            <id>copy-dependencies</id>
            <phase>package</phase>
            <goals>
                <goal>copy-dependencies</goal>
            </goals>
            <configuration>
                <outputDirectory>${project.build.directory}/lib</outputDirectory>
            </configuration>
        </execution>
    </executions>
</plugin>