文章目录
前言
尽管我们可以说 Canvas 是 HTML5 之中最棒的功能,不过在实现网络应用程序时,很少会单独使用它。在绝大多数情况下,你都会将一个或更多的 canvas 元素与其他 HTML 控件结合起来使用,以便让用户可以通过输入数值或其他方式来控制应用程序。
要将其他 HTML 控件与 canvas 结合起来使用,首先想到的办法可能是将控件嵌入到 canvas 元素之中。不过这么多不行,因为任何放入 canvas 元素主体部分的东西,只有在浏览器不支持 canvas 元素时,才会被显示出来。
浏览器要么显示 canvas 元素,要么显示放在元素之中的 HTML 控件,它不会将两者同时显示出来。所以,必须将控件放在 canvas 元素之外。
为了让 HTML 控件看上去好像是出现在 canvas 范围内,可以使用 CSS 将这些控件放置在 canvas 之上。
示例-橡皮筋式选取框
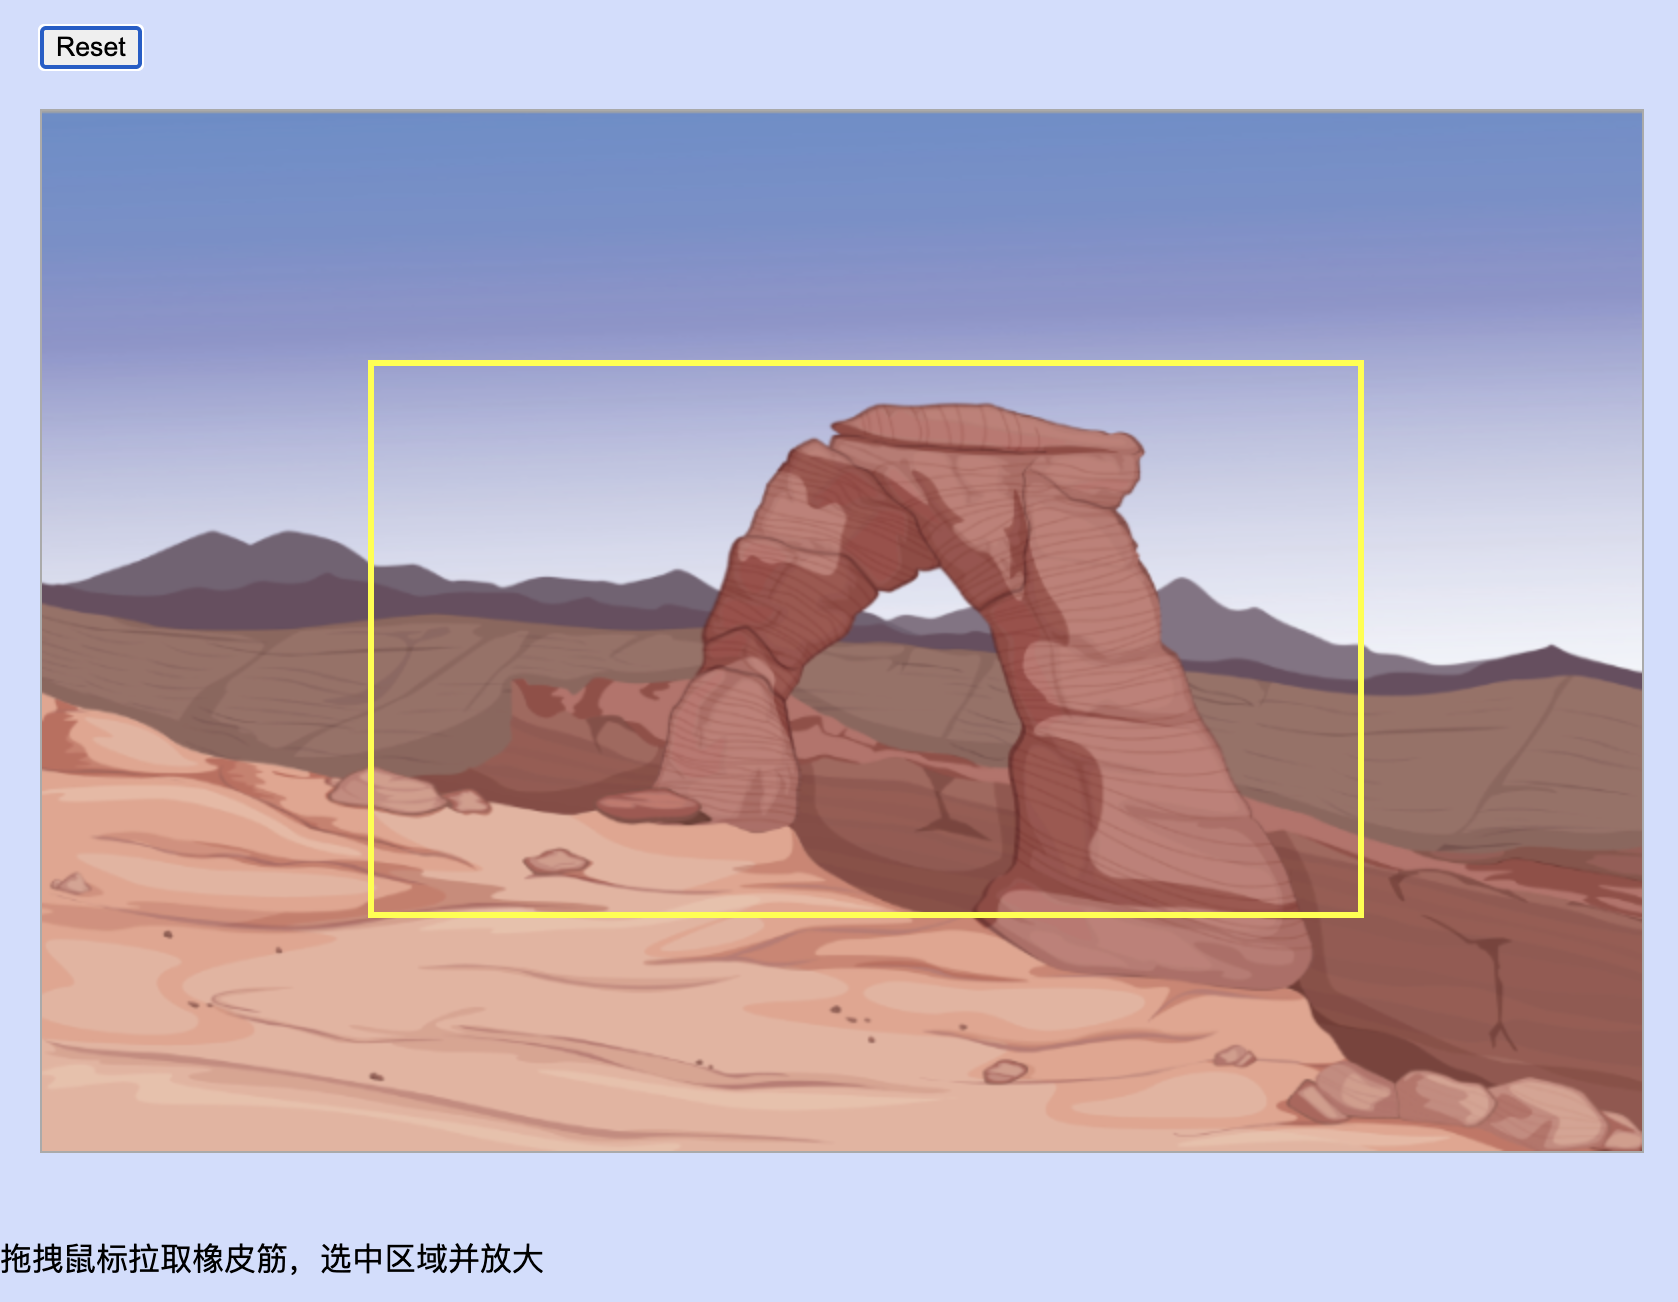
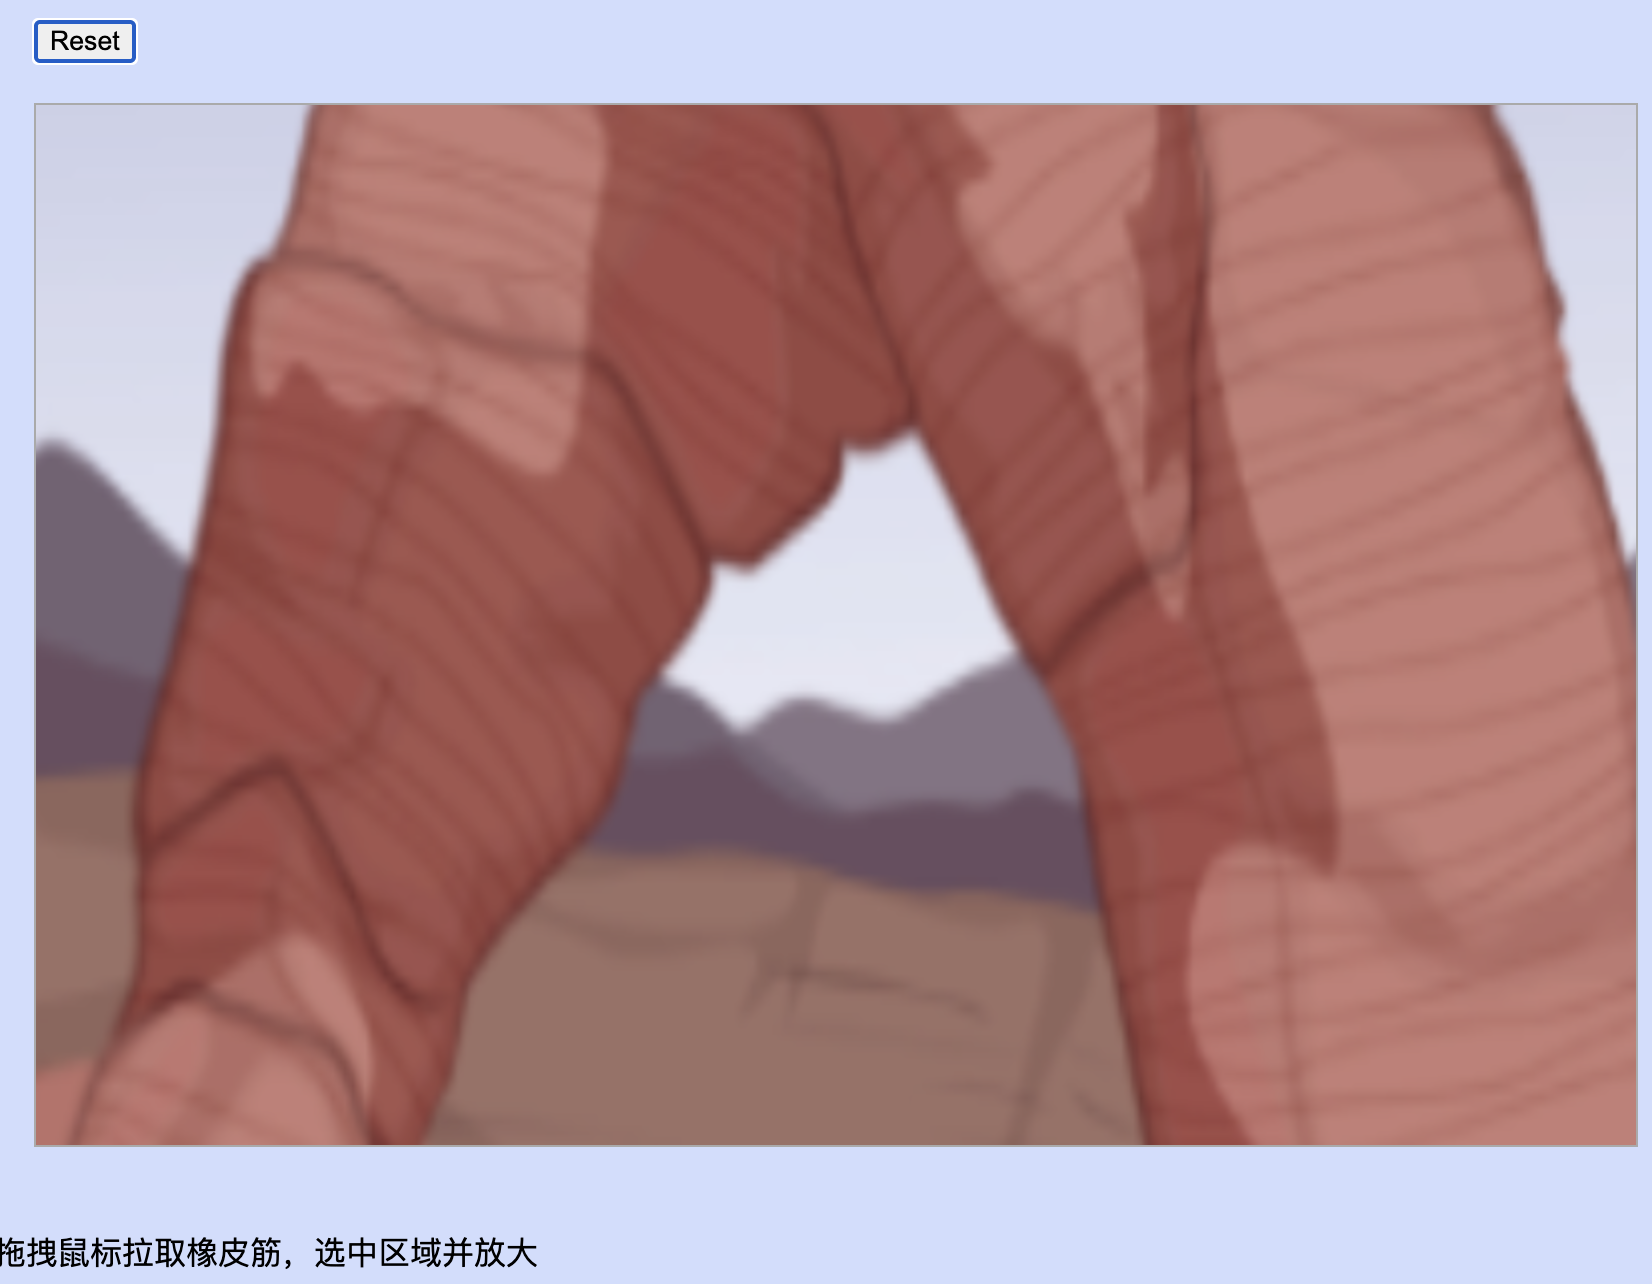
示例采用了一种名为"橡皮筋式"(rubberbanding)选取框的技术来让用户在 canvas 之中选择某个区域。起初,该 canvas 会显示一副图像,然后当选定图像的某一部分时,应用程序会将你所选的这部分区域放大。
示例代码
html
<!DOCTYPE html>
<html lang="zh-CN">
	<head>
		<meta charset="UTF-8" />
		<title>橡皮筋选框放大器</title>
		<style>
			body {
				background: rgba(100, 145, 250, 0.3);
			}

			#canvas {
				margin-left: 20px;
				margin-right: 0;
				margin-bottom: 20px;
				border: thin solid #aaaaaa;
				/*十字瞄准线*/
				cursor: crosshair;
				padding: 0;
			}

			#controls {
				margin: 20px 0px 20px 20px;
			}

			#rubberbandDiv {
				/*绝对定位,方便位置选取*/
				position: absolute;
				border: 3px solid yellow;
				cursor: crosshair;
				display: none;
			}
		</style>
	</head>
	<body>
		<!--控制重置画面的按钮-->
		<div id="controls">
			<input type="button" id="resetButton" value="Reset" />
		</div>
		<!--橡皮筋选取狂div-->
		<div id="rubberbandDiv"></div>
		<canvas id="canvas" width="800" height="520">Canvas not supported</canvas>
		<p>拖拽鼠标拉取橡皮筋,选中区域并放大</p>
	</body>
	<script>
		var canvas = document.getElementById('canvas'),
			context = canvas.getContext('2d'),
			rubberbandDiv = document.getElementById('rubberbandDiv'),
			resetButton = document.getElementById('resetButton'),
			image = new Image(),
			//鼠标按下时刻的对象
			mousedown = {},
			//橡皮筋矩形对象
			rubberbandRectangle = {},
			dragging = false

		//Functions......

		/**
		 * 将#rubberbandDiv的左上角移动到鼠标按下的位置
		 * @param x
		 * @param y
		 */
		function rubberbandStart(x, y) {
			mousedown.x = x
			mousedown.y = y

			rubberbandRectangle.left = mousedown.x
			rubberbandRectangle.top = mousedown.y

			moveRubberbandDiv()
			showRubberbandDiv()

			dragging = true
		}

		/**
		 * 对橡皮筋选取框进行移动和缩放
		 * @param x
		 * @param y
		 */
		function rubberbandStretch(x, y) {
			//「左上」「右下」「左下」「右上」的各种两两组合的拉伸方式
			rubberbandRectangle.left = x < mousedown.x ? x : mousedown.x
			rubberbandRectangle.top = y < mousedown.y ? y : mousedown.y

			rubberbandRectangle.width = Math.abs(x - mousedown.x)
			rubberbandRectangle.height = Math.abs(y - mousedown.y)

			moveRubberbandDiv()
			resizeRubberbandDiv()
		}

		/**
		 * 将选中的区域放大并绘制,并将橡皮筋div隐藏
		 */
		function rubberbandEnd() {
			//返回涵盖元素的大小以及窗口位置的对象
			var bbox = canvas.getBoundingClientRect()

			try {
				//选区放大
				context.drawImage(
					canvas,
					rubberbandRectangle.left - bbox.left,
					rubberbandRectangle.top - bbox.top,
					rubberbandRectangle.width,
					rubberbandRectangle.height,
					0,
					0,
					canvas.width,
					canvas.height
				)
			} catch (e) {
				// suppress error message when mouse is released
				// outside the canvas
				alert('鼠标释放错误警报!')
			}

			resetRubberbandRectangle()

			rubberbandDiv.style.width = 0
			rubberbandDiv.style.height = 0

			hideRubberbandDiv()

			dragging = false
		}

		/**
		 * 让橡皮筋选狂的属性和橡皮筋矩形对象的位置保持一致
		 */
		function moveRubberbandDiv() {
			rubberbandDiv.style.top = rubberbandRectangle.top + 'px'
			rubberbandDiv.style.left = rubberbandRectangle.left + 'px'
		}

		/**
		 * 调整橡皮筋div的宽高
		 */
		function resizeRubberbandDiv() {
			rubberbandDiv.style.width = rubberbandRectangle.width + 'px'
			rubberbandDiv.style.height = rubberbandRectangle.height + 'px'
		}

		/**
		 * 通过display显示橡皮筋
		 */
		function showRubberbandDiv() {
			rubberbandDiv.style.display = 'inline'
		}

		/**
		 * 通过display隐藏橡皮筋
		 */
		function hideRubberbandDiv() {
			rubberbandDiv.style.display = 'none'
		}

		/**
		 * 重置初始化橡皮筋矩形对象
		 */
		function resetRubberbandRectangle() {
			rubberbandRectangle = { top: 0, left: 0, width: 0, height: 0 }
		}

		//Event handlers......

		canvas.onmousedown = function (ev) {
			var x = ev.x || ev.clientX,
				y = ev.y || ev.clientY

			ev.preventDefault()
			rubberbandStart(x, y)
		}

		window.onmousemove = function (ev) {
			var x = ev.x || ev.clientX,
				y = ev.y || ev.clientY

			ev.preventDefault()
			if (dragging) {
				rubberbandStretch(x, y)
			}
		}

		window.onmouseup = function (ev) {
			ev.preventDefault()
			rubberbandEnd()
		}

		image.onload = function (ev) {
			context.drawImage(image, 0, 0, canvas.width, canvas.height)
		}

		resetButton.onclick = function (ev) {
			context.clearRect(0, 0, context.canvas.width, context.canvas.height)
			context.drawImage(image, 0, 0, canvas.width, canvas.height)
		}

		//Initialization......

		image.src = 'arch.png'
	</script>
</html>