本章来学习下漫游相机。
路径动画与相机漫游
本届内容比较简单,其实就是实现物体的运动和相机的运动
当然这两个要一起执行。
贝塞尔曲线
贝塞尔曲线(Bézier curve)是一种在计算机图形学、动画制作、工业设计等领域广泛应用的参数曲线,它由法国工程师皮埃尔・贝塞尔(Pierre Bézier)在 20 世纪 60 年代为汽车工业设计而提出。
大致类似这样:
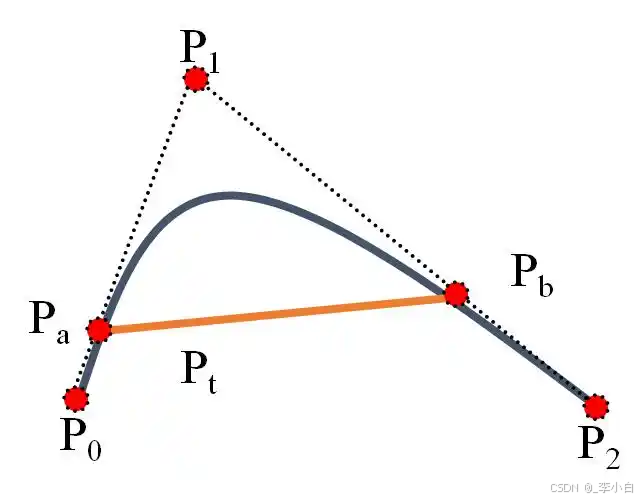
通过控制一些点来定义整个曲线。
实战
使用OpenSceneGraph(OSG)实现沿贝塞尔曲线移动模型以及录制相机路径的示例代码。
代码实现了在OSG中创建一个模型,并让它沿着贝塞尔曲线移动,同时也记录相机的路径。
cpp
#include <osg/Group>
#include <osg/Node>
#include <osg/Geometry>
#include <osg/Geode>
#include <osgViewer/Viewer>
#include <osgGA/TrackballManipulator>
#include <osg/MatrixTransform>
#include <osg/AnimationPath>
#include <osg/Quat>
#include <iostream>
#include <vector>
// 计算贝塞尔曲线上的点
osg::Vec3 bezierPoint(const std::vector<osg::Vec3>& controlPoints, double t) {
int n = controlPoints.size() - 1;
osg::Vec3 result(0.0, 0.0, 0.0);
for (int i = 0; i <= n; ++i) {
double binomial = 1.0;
for (int j = 0; j < i; ++j) {
binomial *= (n - j) / (i - j);
}
binomial *= pow(1 - t, n - i) * pow(t, i);
result += binomial * controlPoints[i];
}
return result;
}
int main() {
// 创建一个场景组
osg::ref_ptr<osg::Group> root = new osg::Group;
// 创建一个简单的模型(这里以一个立方体为例)
osg::ref_ptr<osg::Geometry> geom = osg::createTexturedCubeGeometry(osg::Vec3(0, 0, 0), 1.0);
osg::ref_ptr<osg::Geode> geode = new osg::Geode;
geode->addDrawable(geom);
root->addChild(geode);
// 贝塞尔曲线的控制点
std::vector<osg::Vec3> controlPoints = {
osg::Vec3(-5, 0, 0),
osg::Vec3(-2, 5, 0),
osg::Vec3(2, -5, 0),
osg::Vec3(5, 0, 0)
};
// 创建动画路径
osg::ref_ptr<osg::AnimationPath> animationPath = new osg::AnimationPath;
animationPath->setLoopMode(osg::AnimationPath::LOOP);
// 采样贝塞尔曲线生成动画路径的关键帧
const int numSamples = 100;
for (int i = 0; i < numSamples; ++i) {
double t = static_cast<double>(i) / (numSamples - 1);
osg::Vec3 position = bezierPoint(controlPoints, t);
osg::Quat orientation; // 这里简单设置为无旋转
osg::Vec3 scale(1, 1, 1);
osg::AnimationPath::ControlPoint cp(static_cast<double>(i) * 0.1, position, orientation, scale);
animationPath->insert(cp);
}
// 创建一个矩阵变换节点来应用动画路径
osg::ref_ptr<osg::MatrixTransform> mt = new osg::MatrixTransform;
mt->addChild(geode);
osg::ref_ptr<osg::AnimationPathCallback> callback = new osg::AnimationPathCallback(animationPath);
mt->setUpdateCallback(callback);
root->addChild(mt);
// 创建相机路径记录器
osg::ref_ptr<osg::Group> cameraPathGroup = new osg::Group;
osg::ref_ptr<osg::Vec3Array> cameraPathVertices = new osg::Vec3Array;
osg::ref_ptr<osg::Geometry> cameraPathGeom = new osg::Geometry;
cameraPathGeom->setVertexArray(cameraPathVertices);
osg::ref_ptr<osg::Geode> cameraPathGeode = new osg::Geode;
cameraPathGeode->addDrawable(cameraPathGeom);
cameraPathGroup->addChild(cameraPathGeode);
root->addChild(cameraPathGroup);
// 创建查看器
osgViewer::Viewer viewer;
viewer.setSceneData(root);
viewer.setCameraManipulator(new osgGA::TrackballManipulator);
// 记录相机路径
bool recording = false;
osg::Vec3 lastCameraPosition;
viewer.setCameraManipulator(new osgGA::TrackballManipulator);
viewer.realize();
while (!viewer.done()) {
osg::Matrix cameraMatrix = viewer.getCamera()->getViewMatrix();
osg::Vec3 cameraPosition = osg::Vec3(cameraMatrix.getTrans());
if (recording) {
cameraPathVertices->push_back(cameraPosition);
osg::ref_ptr<osg::DrawArrays> drawArrays = new osg::DrawArrays(osg::PrimitiveSet::LINE_STRIP, 0, cameraPathVertices->size());
cameraPathGeom->setDrawArray(drawArrays);
}
// 简单的按键控制记录开始和结束
const osgGA::GUIEventAdapter& ea = viewer.getEventQueue()->getCurrentEvent();
if (ea.getEventType() == osgGA::GUIEventAdapter::KEYDOWN && ea.getKey() == osgGA::GUIEventAdapter::KEY_R) {
recording =!recording;
if (recording) {
lastCameraPosition = cameraPosition;
}
}
viewer.frame();
}
return 0;
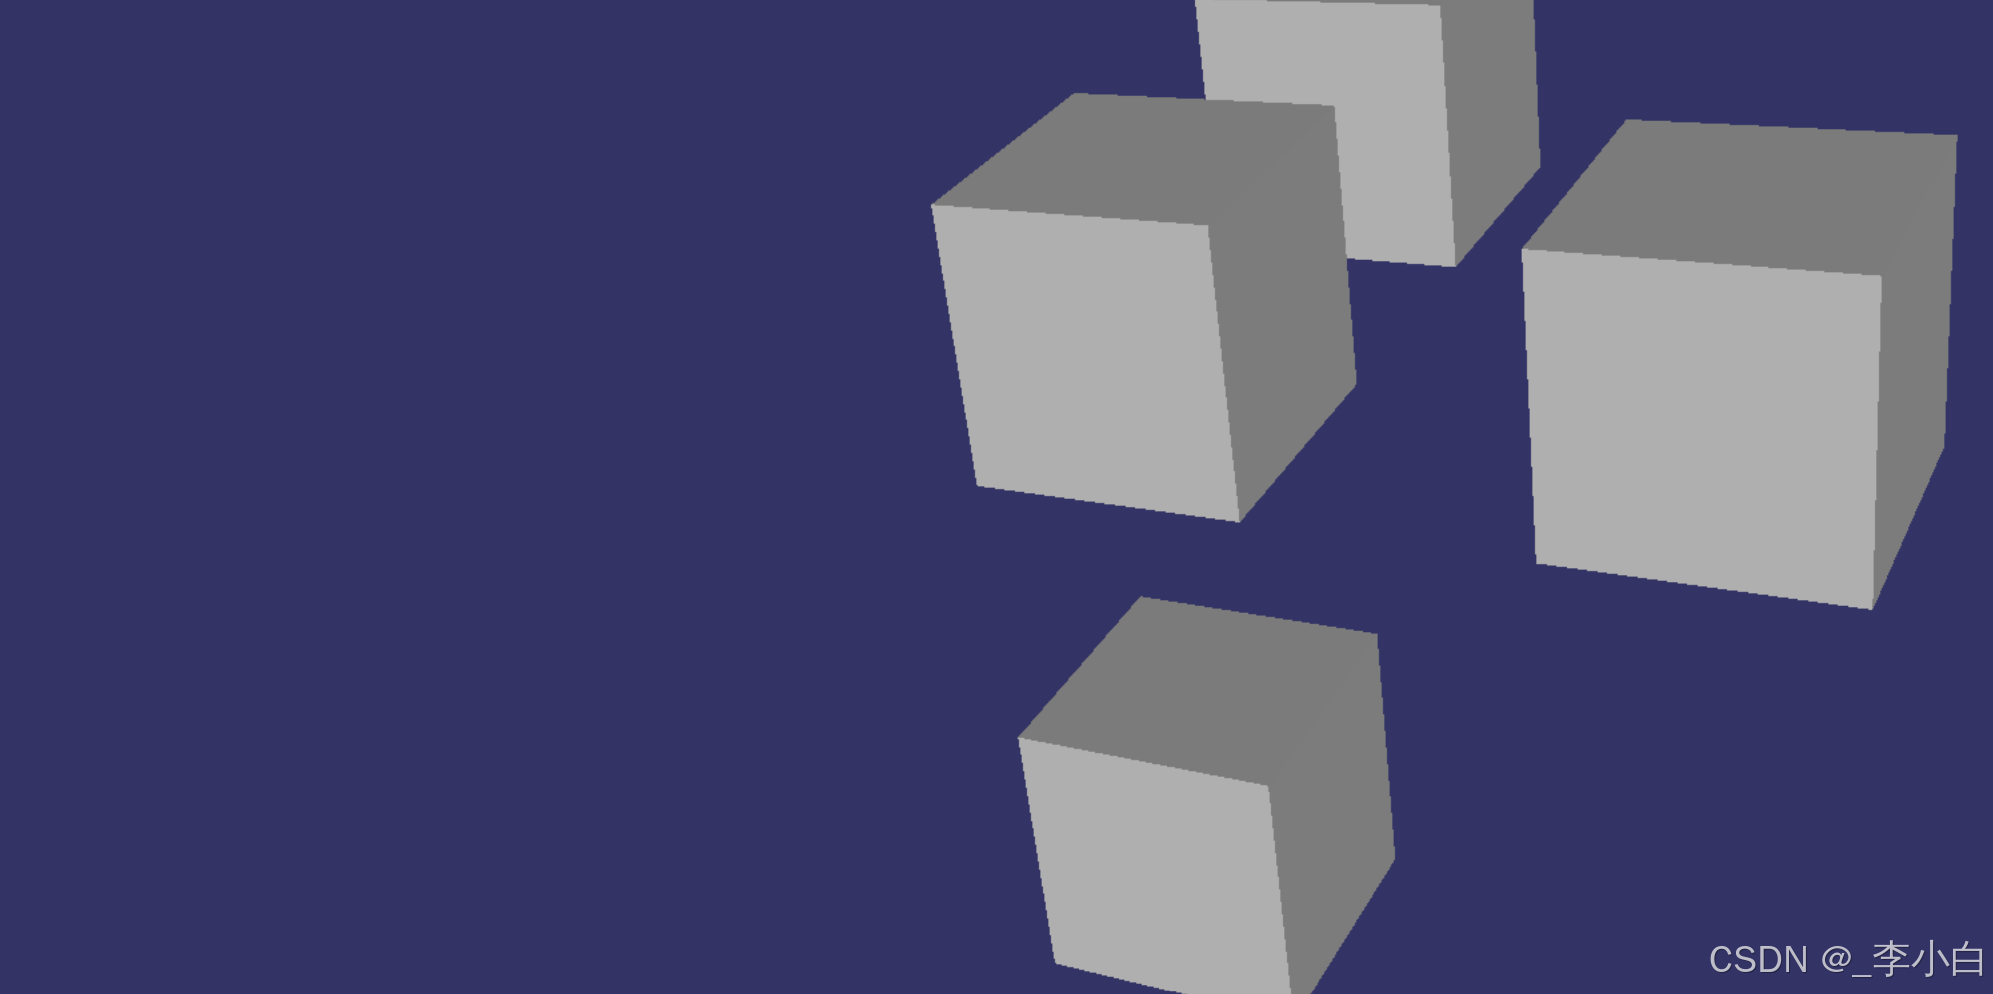
}执行效果
ok,今天就到这里。明天继续!