第二章 控件学习
QDialog 是 Qt 框架中用于创建对话框窗口的基础类,它继承自 QWidget。对话框通常用于短期任务或获取用户输入,分为模态对话框(必须关闭才能继续操作应用程序)和非模态对话框(可在不关闭的情况下继续操作应用程序)。
1. 最简单的 QDialog 示例
从一个最基本的 QDialog 开始,创建一个带有 "确定" 按钮的对话框:
python
import sys
from PyQt5.QtWidgets import QApplication, QDialog, QPushButton, QVBoxLayout

# 创建应用实例
app = QApplication(sys.argv)

# 创建对话框实例
dialog = QDialog()
dialog.setWindowTitle("简单对话框")
dialog.resize(300, 200)

# 创建按钮
button = QPushButton("确定")
button.clicked.connect(dialog.accept)  # 点击按钮关闭对话框并返回Accepted状态

# 设置布局
layout = QVBoxLayout(dialog)
layout.addWidget(button)

# 显示对话框(模态方式)
result = dialog.exec_()

# 根据结果判断
if result == QDialog.Accepted:
    print("对话框被接受")
else:
    print("对话框被拒绝")

sys.exit(app.exec_())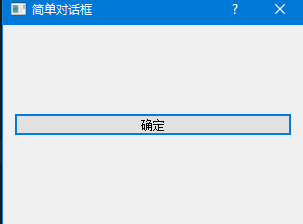
代码解读:
QDialog()创建一个对话框窗口dialog.exec_()以模态方式显示对话框,阻塞主窗口直到对话框关闭button.clicked.connect(dialog.accept)将按钮的点击事件连接到对话框的accept()方法,点击后对话框关闭并返回QDialog.Acceptedresult获取对话框的返回结果,可以是QDialog.Accepted或QDialog.Rejected
2. 创建带输入功能的对话框
下面创建一个带输入框的对话框,用于获取用户输入的文本:
python
import sys
from PyQt5.QtWidgets import QApplication, QDialog, QVBoxLayout, QLabel, QLineEdit, QPushButton
class InputDialog(QDialog):
def __init__(self, parent=None):
super().__init__(parent)
self.setWindowTitle("输入对话框")
# 创建UI组件
self.label = QLabel("请输入您的姓名:")
self.input = QLineEdit()
self.button = QPushButton("确定")
# 设置布局
layout = QVBoxLayout(self)
layout.addWidget(self.label)
layout.addWidget(self.input)
layout.addWidget(self.button)
# 连接信号和槽
self.button.clicked.connect(self.onButtonClick)
def onButtonClick(self):
# 获取输入的文本
text = self.input.text()
if text:
# 如果输入不为空,存储文本并接受对话框
self.user_input = text
self.accept()
else:
self.label.setText("输入不能为空,请重新输入!")
# 使用示例
if __name__ == "__main__":
app = QApplication(sys.argv)
dialog = InputDialog()
if dialog.exec_() == QDialog.Accepted:
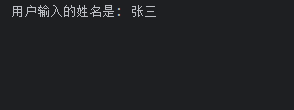
print(f"用户输入的姓名是: {dialog.user_input}")
else:
print("操作已取消")
sys.exit(app.exec_())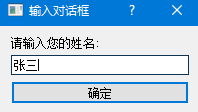
代码解读:
- 创建了一个自定义对话框类
InputDialog,继承自QDialog- 添加了标签、输入框和按钮,并使用垂直布局管理器排列它们
- 当用户点击 "确定" 按钮时,检查输入是否为空:
- 不为空则将输入存储到
user_input属性并接受对话框- 为空则显示错误提示
- 在主程序中,可以通过
dialog.user_input获取用户输入的内容
3. 使用标准按钮和信号
Qt 提供了 QDialogButtonBox 类来简化标准按钮的创建,下面是一个使用标准按钮的示例:
python
import sys
from PyQt5.QtWidgets import (QApplication, QDialog, QVBoxLayout,
                             QLabel, QLineEdit, QDialogButtonBox)

class LoginDialog(QDialog):
    def __init__(self, parent=None):
        super().__init__(parent)
        self.setWindowTitle("登录")

        # 创建UI组件
        self.username_label = QLabel("用户名:")
        self.username_input = QLineEdit()
        self.password_label = QLabel("密码:")
        self.password_input = QLineEdit()
        self.password_input.setEchoMode(QLineEdit.Password)  # 密码模式

        # 创建标准按钮盒(包含确定和取消按钮)
        self.button_box = QDialogButtonBox(
            QDialogButtonBox.Ok | QDialogButtonBox.Cancel
        )

        # 设置布局
        layout = QVBoxLayout(self)
        layout.addWidget(self.username_label)
        layout.addWidget(self.username_input)
        layout.addWidget(self.password_label)
        layout.addWidget(self.password_input)
        layout.addWidget(self.button_box)

        # 连接信号和槽
        self.button_box.accepted.connect(self.accept)  # 点击确定按钮
        self.button_box.rejected.connect(self.reject)  # 点击取消按钮

    def get_credentials(self):
        """获取用户名和密码"""
        return self.username_input.text(), self.password_input.text()

# 使用示例
if __name__ == "__main__":
    app = QApplication(sys.argv)
    dialog = LoginDialog()

    if dialog.exec_() == QDialog.Accepted:
        username, password = dialog.get_credentials()
        print(f"登录信息 - 用户名: {username}, 密码: {password}")
    else:
        print("登录已取消")

    sys.exit(app.exec_())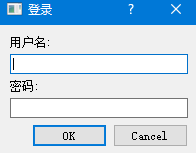
代码解读:
- 使用
QDialogButtonBox创建标准按钮,包含 "确定" 和 "取消" 按钮- 自动连接按钮的点击事件到对话框的
accept()和reject()方法- 添加了密码输入框,并设置为密码模式(显示圆点)
- 通过
get_credentials()方法获取用户输入的用户名和密码
4. 非模态对话框示例
前面的例子都是使用模态对话框,下面看一个非模态对话框的例子:
python
import sys
from PyQt5.QtWidgets import QApplication, QDialog, QPushButton, QVBoxLayout, QLabel

class NonModalDialog(QDialog):
    def __init__(self, parent=None):
        super().__init__(parent)
        self.setWindowTitle("非模态对话框")

        # 创建UI组件
        self.counter = 0
        self.label = QLabel(f"计数器: {self.counter}")
        self.button = QPushButton("增加计数")

        # 设置布局
        layout = QVBoxLayout(self)
        layout.addWidget(self.label)
        layout.addWidget(self.button)

        # 连接信号和槽
        self.button.clicked.connect(self.onButtonClick)

    def onButtonClick(self):
        self.counter += 1
        self.label.setText(f"计数器: {self.counter}")

# 使用示例
if __name__ == "__main__":
    app = QApplication(sys.argv)

    # 创建主窗口(这里用QDialog代替)
    main_window = QDialog()
    main_window.setWindowTitle("主窗口")
    main_window.resize(300, 200)

    # 创建显示对话框的按钮
    show_dialog_button = QPushButton("显示非模态对话框")
    layout = QVBoxLayout(main_window)
    layout.addWidget(show_dialog_button)

    # 创建非模态对话框
    dialog = NonModalDialog()

    # 连接按钮点击事件
    show_dialog_button.clicked.connect(dialog.show)  # 使用show()方法显示非模态对话框

    main_window.show()
    sys.exit(app.exec_())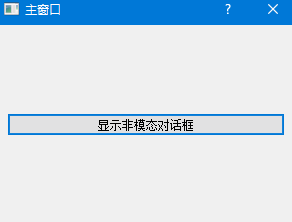
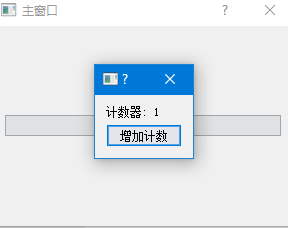
代码解读:
- 使用
show()方法显示对话框,而不是exec_()- 非模态对话框显示后,用户可以继续与主窗口交互
- 点击 "增加计数" 按钮会更新对话框中的计数器,而不影响主窗口
5. QRubberBand 简介与使用
QRubberBand 是 Qt 中用于创建橡皮筋选择框的类,常用于图像选择、区域标记等场景。它可以显示一个矩形或椭圆选择框,用户可以拖动调整大小。
QRubberBand 的常用方法:
| 方法 | 描述 |
|---|---|
setGeometry() |
设置选择框的位置和大小 |
show() |
显示选择框 |
hide() |
隐藏选择框 |
move() |
移动选择框到指定位置 |
resize() |
调整选择框大小 |
setShape() |
设置选择框形状(矩形或椭圆) |
size() |
获取选择框大小 |
pos() |
获取选择框位置 |
QRubberBand 的常用信号:
| 信号 | 描述 |
|---|---|
rubberBandChanged |
当选择框的几何形状发生变化时发出 |
6. QRubberBand 示例代码
下面是一个使用 QRubberBand 的完整示例,允许用户在窗口中拖动鼠标选择区域:
python
import sys
from PyQt5.QtWidgets import QApplication, QWidget, QRubberBand
from PyQt5.QtCore import Qt, QRect
from PyQt5.QtGui import QPixmap, QPainter, QColor

class RubberBandDemo(QWidget):
    def __init__(self):
        super().__init__()
        self.setWindowTitle("QRubberBand 示例")
        self.setGeometry(100, 100, 800, 600)

        # 初始化变量
        self.rubber_band = None
        self.selection_start = None
        self.selection_rect = QRect()

        # 创建一个背景图(这里使用纯色填充)
        self.background = QPixmap(self.size())
        self.background.fill(QColor(240, 240, 240))

        # 启用鼠标追踪
        self.setMouseTracking(True)

    def paintEvent(self, event):
        # 绘制背景
        painter = QPainter(self)
        painter.drawPixmap(0, 0, self.background)

        # 如果有选择区域,绘制半透明覆盖层
        if not self.selection_rect.isNull():
            painter.setBrush(QColor(0, 120, 215, 50))  # 半透明蓝色
            painter.setPen(Qt.NoPen)
            painter.drawRect(self.selection_rect)

    def mousePressEvent(self, event):
        # 鼠标按下时开始选择
        if event.button() == Qt.LeftButton:
            self.selection_start = event.pos()
            if self.rubber_band is None:
                self.rubber_band = QRubberBand(QRubberBand.Rectangle, self)
            self.rubber_band.setGeometry(QRect(self.selection_start, QRect().size()))
            self.rubber_band.show()

    def mouseMoveEvent(self, event):
        # 鼠标移动时更新选择框
        if self.selection_start is not None:
            self.selection_rect = QRect(self.selection_start, event.pos()).normalized()
            self.rubber_band.setGeometry(self.selection_rect)

    def mouseReleaseEvent(self, event):
        # 鼠标释放时完成选择
        if event.button() == Qt.LeftButton and self.selection_start is not None:
            self.selection_rect = QRect(self.selection_start, event.pos()).normalized()
            self.rubber_band.hide()

            # 输出选择区域信息
            print(f"选择区域: 左上角({self.selection_rect.x()}, {self.selection_rect.y()}) "
                  f"大小({self.selection_rect.width()}, {self.selection_rect.height()})")

            # 可以在这里处理选择区域,例如截图、处理选中的内容等

            self.selection_start = None

if __name__ == "__main__":
    app = QApplication(sys.argv)
    window = RubberBandDemo()
    window.show()
    sys.exit(app.exec_())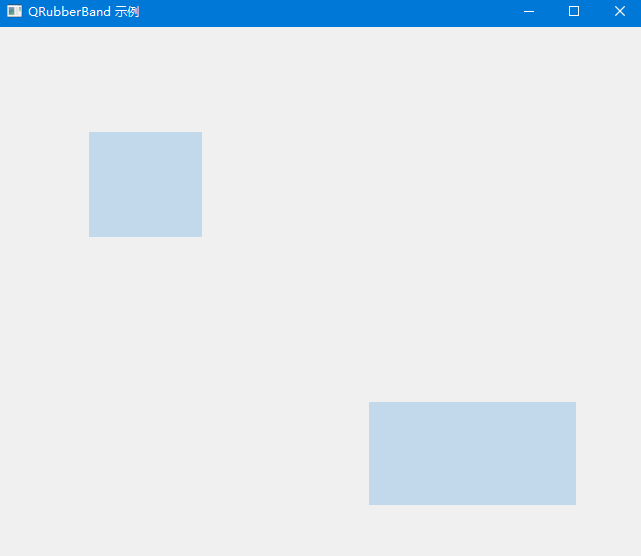
代码解读:
- 创建了一个继承自 QWidget 的窗口类
RubberBandDemo- 在
mousePressEvent中初始化并显示 QRubberBand- 在
mouseMoveEvent中根据鼠标位置更新选择框的大小和位置- 在
mouseReleaseEvent中完成选择并隐藏选择框- 使用
paintEvent绘制半透明的选择区域覆盖层- 打印选择区域的位置和大小信息
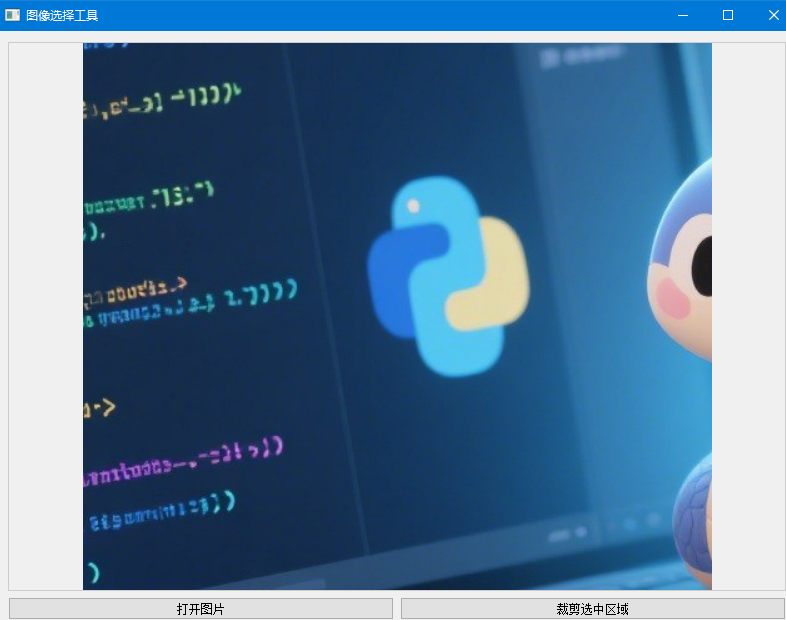
7. 高级应用:图像选择工具
下面是一个更实用的例子,结合 QLabel 和 QRubberBand 创建一个图像选择工具:
python
import sys
from PyQt5.QtWidgets import (QApplication, QWidget, QLabel, QVBoxLayout,
                             QHBoxLayout, QPushButton, QFileDialog, QRubberBand)
from PyQt5.QtCore import Qt, QRect
from PyQt5.QtGui import QPixmap, QPainter, QColor

class ImageSelector(QWidget):
    def __init__(self):
        super().__init__()
        self.setWindowTitle("图像选择工具")
        self.resize(800, 600)

        # 初始化UI
        self.initUI()

        # 初始化变量
        self.rubber_band = None
        self.selection_start = None
        self.current_image = None

    def initUI(self):
        # 创建主布局
        main_layout = QVBoxLayout(self)

        # 创建图像显示区域
        self.image_label = QLabel("请打开一张图片")
        self.image_label.setAlignment(Qt.AlignCenter)
        self.image_label.setMinimumSize(400, 400)
        self.image_label.setStyleSheet("border: 1px solid #cccccc;")
        main_layout.addWidget(self.image_label)

        # 创建按钮区域
        button_layout = QHBoxLayout()

        self.open_button = QPushButton("打开图片")
        self.open_button.clicked.connect(self.openImage)
        button_layout.addWidget(self.open_button)

        self.crop_button = QPushButton("裁剪选中区域")
        self.crop_button.clicked.connect(self.cropImage)
        self.crop_button.setEnabled(False)
        button_layout.addWidget(self.crop_button)

        main_layout.addLayout(button_layout)

    def openImage(self):
        file_path, _ = QFileDialog.getOpenFileName(
            self, "打开图片", "", "图像文件 (*.png *.jpg *.jpeg *.bmp)"
        )

        if file_path:
            self.current_image = QPixmap(file_path)
            self.image_label.setPixmap(self.current_image.scaled(
                self.image_label.size(), Qt.KeepAspectRatio, Qt.SmoothTransformation
            ))
            self.crop_button.setEnabled(True)

    def resizeEvent(self, event):
        # 窗口大小改变时重绘图像
        if self.current_image:
            self.image_label.setPixmap(self.current_image.scaled(
                self.image_label.size(), Qt.KeepAspectRatio, Qt.SmoothTransformation
            ))
        super().resizeEvent(event)

    def mousePressEvent(self, event):
        # 只在图像区域内响应鼠标事件
        if self.current_image and self.image_label.geometry().contains(event.pos()):
            # 计算在图像上的相对位置
            pos_in_image = event.pos() - self.image_label.pos()

            # 确保位置在图像内
            pixmap_size = self.image_label.pixmap().size()
            if (0 <= pos_in_image.x() < pixmap_size.width() and
                0 <= pos_in_image.y() < pixmap_size.height()):

                self.selection_start = pos_in_image
                if self.rubber_band is None:
                    self.rubber_band = QRubberBand(QRubberBand.Rectangle, self.image_label)

                # 转换为label坐标系
                self.rubber_band.setGeometry(QRect(self.selection_start, QRect().size()))
                self.rubber_band.show()

    def mouseMoveEvent(self, event):
        # 只在图像区域内响应鼠标事件
        if (self.current_image and self.selection_start is not None and
            self.image_label.geometry().contains(event.pos())):

            # 计算在图像上的相对位置
            pos_in_image = event.pos() - self.image_label.pos()

            # 确保位置在图像内
            pixmap_size = self.image_label.pixmap().size()
            if (0 <= pos_in_image.x() < pixmap_size.width() and
                0 <= pos_in_image.y() < pixmap_size.height()):

                # 更新选择框
                self.rubber_band.setGeometry(QRect(self.selection_start, pos_in_image).normalized())

    def mouseReleaseEvent(self, event):
        if self.selection_start is not None:
            self.selection_start = None

    def cropImage(self):
        if self.rubber_band and not self.rubber_band.geometry().isNull():
            # 获取选择框在label中的位置
            selection = self.rubber_band.geometry()

            # 获取当前显示的pixmap
            display_pixmap = self.image_label.pixmap()

            # 计算选择区域相对于原始图像的比例
            scale_x = self.current_image.width() / display_pixmap.width()
            scale_y = self.current_image.height() / display_pixmap.height()

            # 转换选择区域到原始图像坐标
            original_rect = QRect(
                int(selection.x() * scale_x),
                int(selection.y() * scale_y),
                int(selection.width() * scale_x),
                int(selection.height() * scale_y)
            )

            # 裁剪图像
            cropped_pixmap = self.current_image.copy(original_rect)

            # 显示裁剪后的图像
            self.image_label.setPixmap(cropped_pixmap.scaled(
                self.image_label.size(), Qt.KeepAspectRatio, Qt.SmoothTransformation
            ))

            # 隐藏选择框
            self.rubber_band.hide()

if __name__ == "__main__":
    app = QApplication(sys.argv)
    window = ImageSelector()
    window.show()
    sys.exit(app.exec_())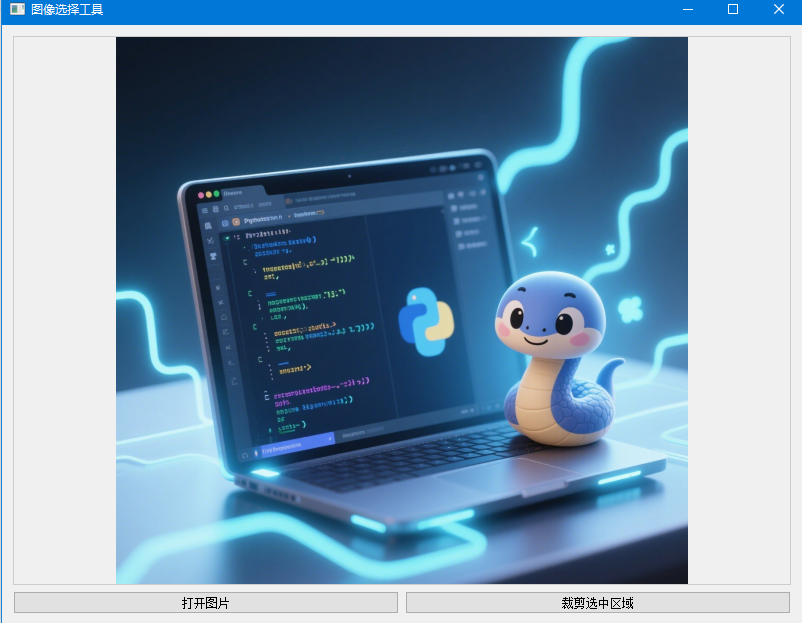
代码解读:
- 创建了一个功能完整的图像选择工具,支持打开图片、选择区域和裁剪
- 使用 QRubberBand 实现图像上的区域选择
- 处理了图像缩放和坐标转换问题,确保选择区域能正确映射到原始图像
- 提供了裁剪功能,将选中区域保存为新图像