背景:打造AI智能体,加速企业AI应用建设
此次从入门到实战,框架若依plus,JDK17,SpringBoot版本3.4.1
Tinyflow介绍
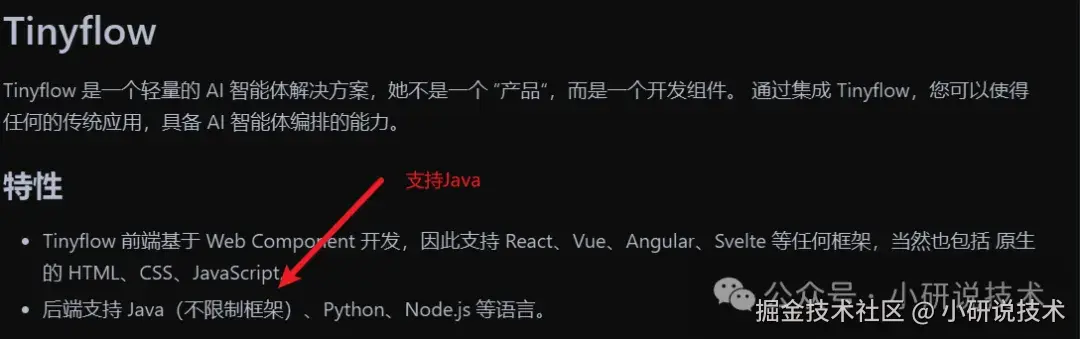 Tinyflow支持Java,引入对应的依赖即可;同时也支持前端,如Vue、React,一个好用的组件!
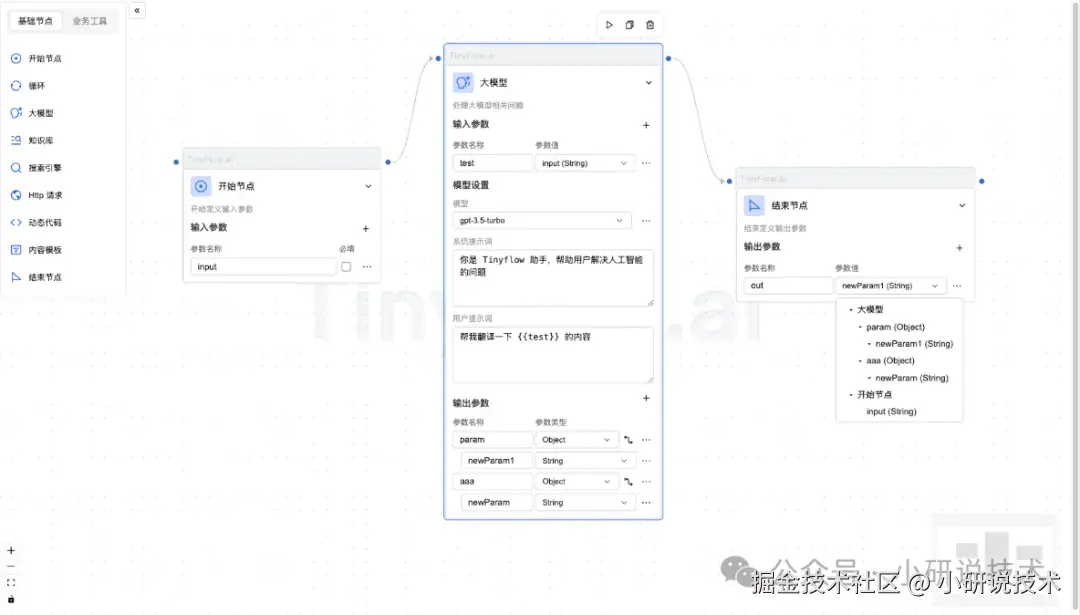 智能体编排类似Dify、Coze的工作流,支持自定义节点
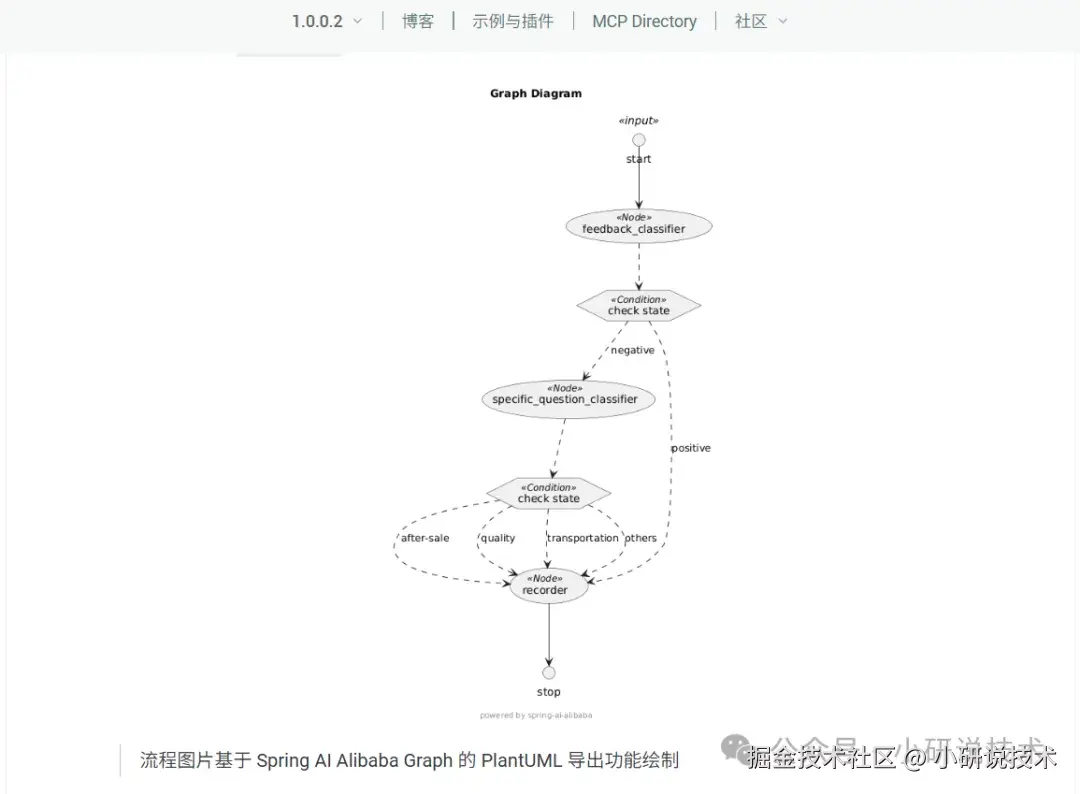 Spring AI Alibaba也支持工作流搭建,基于Spring AI Alibaba Graph实现,但还在完善阶段!
demo版
需要源码加入技术群获取!
 启动成功后,浏览器访问"http://localhost:port"
 新增节点并测试
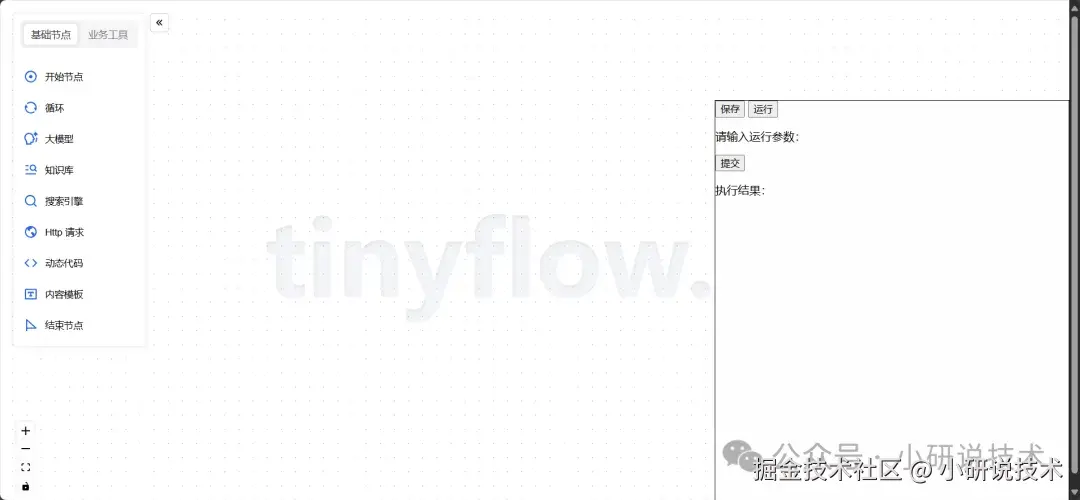
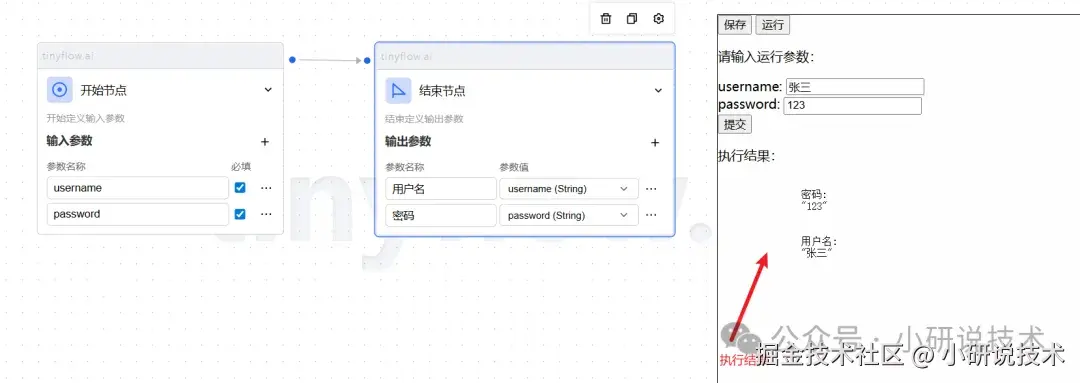
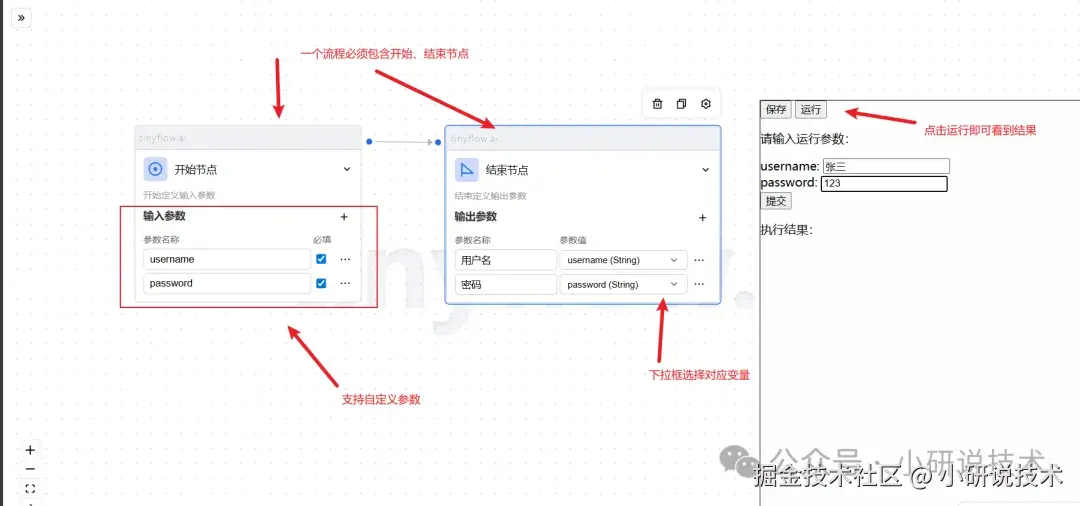 点击运行
点击运行
 点击保存
点击保存
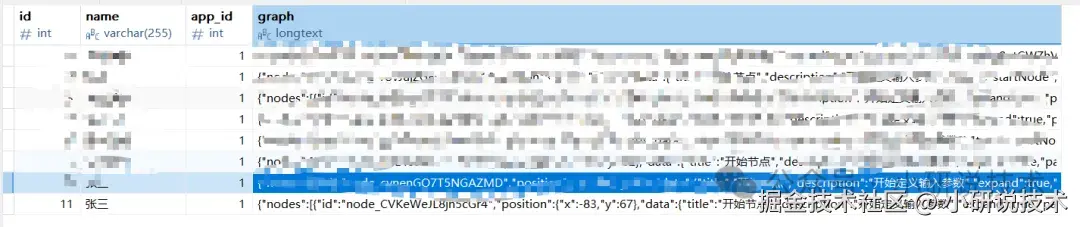 表中成功插入数据,执行成功!
结果解析
json
{"nodes": [{"id": "node_CVKeWeJL8jn5cGr4","position": {"x": -83,"y": 67},"data": {"title": "开始节点","description": "开始定义输入参数","expand": true,"parameters": [{"name": "username","dataType": "String","refType": "input","id": "YtkNFKFFC5hh4zAh","required": true}, {"name": "password","dataType": "String","refType": "input","id": "YW0JonLnPtsDVRlp","required": true}]},"type": "startNode","selected": false,"measured": {"width": 305,"height": 238},"dragging": false}, {"id": "node_Lmg446ujJkBFTq7s","position": {"x": 333,"y": 68},"data": {"title": "结束节点","description": "结束定义输出参数","expand": true,"outputDefs": [{"name": "用户名","dataType": "String","refType": "ref","id": "0FqjBTXWXwmNHvOm","ref": "node_CVKeWeJL8jn5cGr4.username"}, {"name": "密码","dataType": "String","refType": "ref","id": "jdXNtiAiLAqP1uto","ref": "node_CVKeWeJL8jn5cGr4.password"}]},"type": "endNode","selected": true,"measured": {"width": 368,"height": 238},"dragging": false}],"edges": [{"markerEnd": {"type": "arrowclosed","width": 20,"height": 20},"source": "node_CVKeWeJL8jn5cGr4","target": "node_Lmg446ujJkBFTq7s","id": "p1QfMcJuAkHG9XN7","selected": false}],"viewport": {"x": 269.9146606773976,"y": 109.93970251055521,"zoom": 0.8705505632961242}}完整的json结构,非常友好!
步骤一:引入依赖
1pom.xml
xml
<tinyflow.version>1.0.8</tinyflow.version>引入版本
xml
<dependency>
    <groupId>dev.tinyflow</groupId>
    <artifactId>tinyflow-java-core</artifactId>
    <version>${tinyflow.version}</version>
</dependency>
步骤二:表设计
2ai_workflow
sql
CREATE TABLE `ai_workflow` ( `flow_id` bigint NOT NULL COMMENT '流程id', `flow_name` varchar(50) DEFAULT NULL COMMENT '流程名称', `graph` json DEFAULT NULL COMMENT '节点数据', `status` int DEFAULT '0' COMMENT '状态 0->草稿 1->发布', `description` varchar(255) DEFAULT NULL COMMENT '描述内容', `tenant_id` varchar(20) DEFAULT NULL COMMENT '租户id', `create_dept` bigint DEFAULT NULL COMMENT '创建部门', `create_by` bigint DEFAULT NULL COMMENT '创建者', `create_time` datetime DEFAULT NULL COMMENT '创建时间', `update_by` bigint DEFAULT NULL COMMENT '更新者', `update_time` datetime DEFAULT NULL COMMENT '更新时间', `del_flag` char(1) DEFAULT '0' COMMENT '删除标志(0代表存在 2代表删除)', PRIMARY KEY (`flow_id`)) COMMENT='AI流程编排';步骤三:代码生成
 下载后,拷贝到对应的目录即可
步骤四:执行流程接口
3AiWorkflowController
less
@PostMapping("/excute")
public R<Map<String, Object>> excute(@RequestBody AiWorkflowExcuteBo bo) {
    return R.ok(aiWorkflowService.excute(bo));
}4IAiWorkflowService
javascript
 /**
 * 执行流程
 *
 * @param bo
 * @return
 */
Map<String, Object> excute(AiWorkflowExcuteBo bo);5AiWorkflowServiceImpl
typescript
 @Override
 public Map<String, Object> excute(AiWorkflowExcuteBo bo)
 {
     "请加入技术群获取"
 }
步骤五:保存结果接口
3AiWorkflowController
less
  /**
  * 保存结果
  *
  * @param bo
  * @return
  */
  @PostMapping("/saveResult")
  public R<Void> saveResult(@RequestBody AiWorkflowBo bo)
  {
      return toAjax(aiWorkflowService.saveResult(bo));
  }
步骤六:发布流程接口
3AiWorkflowController
less
 /**
 * 发布流程
 *
 * @param flowId 流程id
 * @return
 */
 @PutMapping("/release/{flowId}")
 public R<Void> release(@PathVariable("flowId") Long flowId)
 {
     return toAjax(aiWorkflowService.release(flowId));
 }
步骤七:功能测试
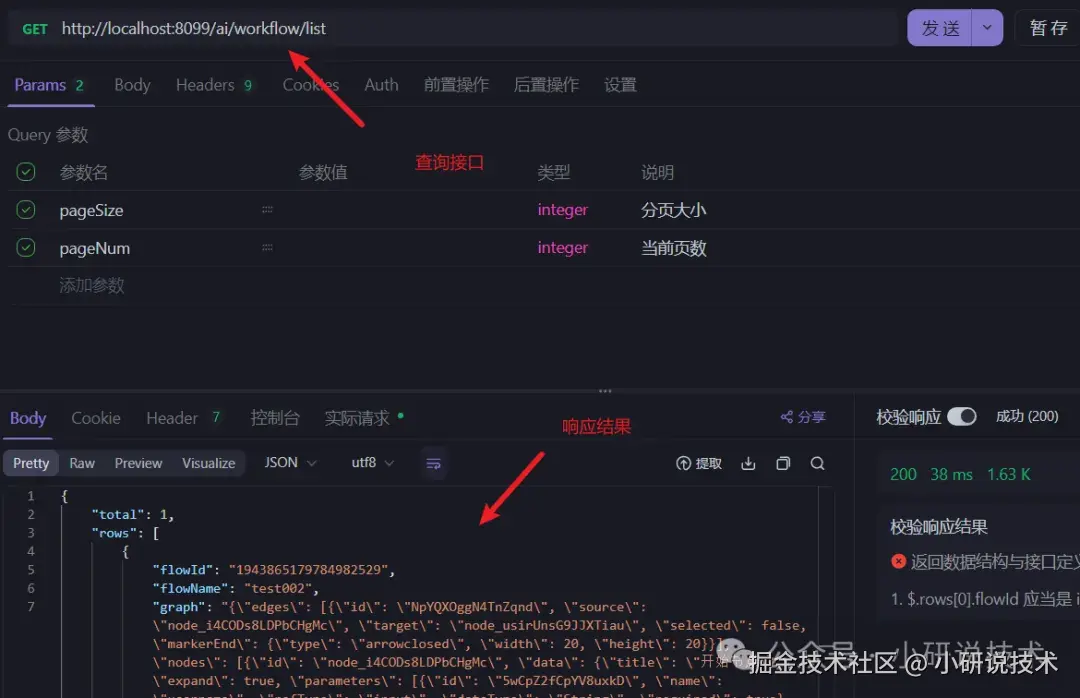
查询接口
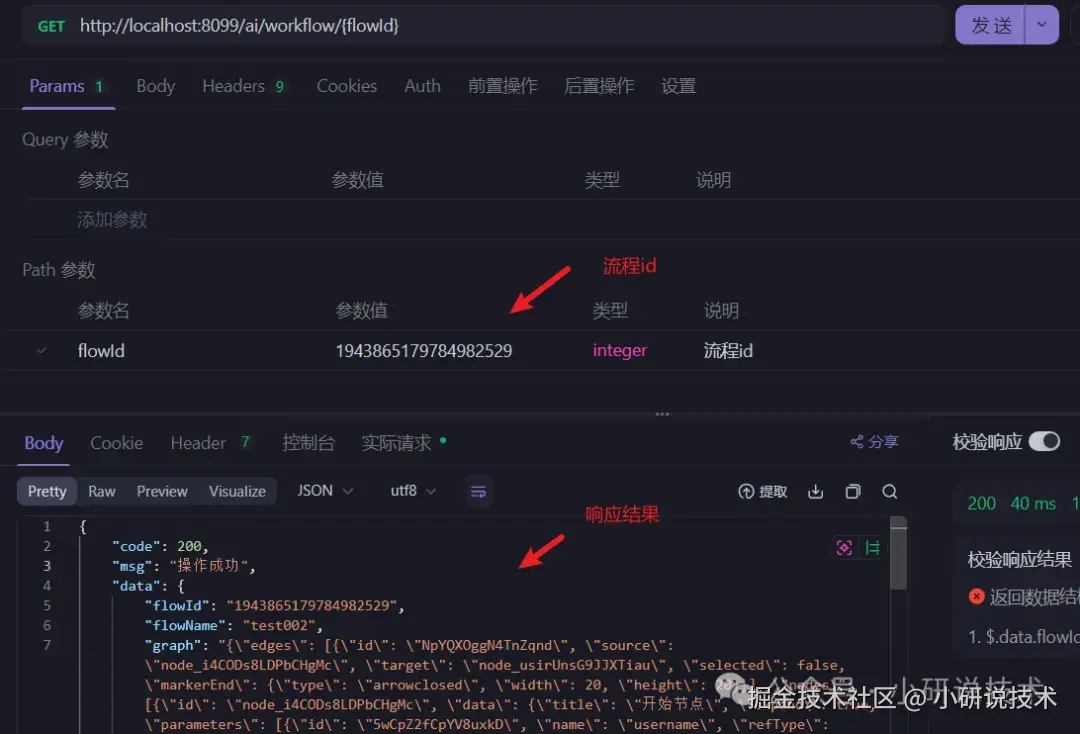
 流程详情接口
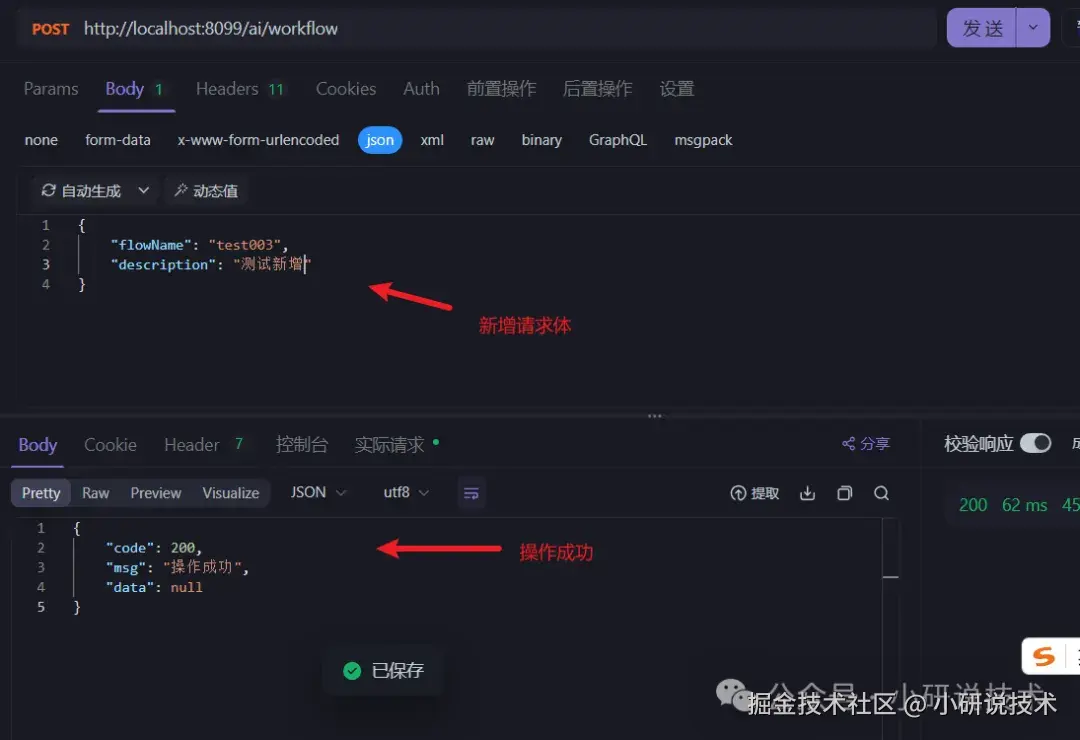
 新增接口
新增接口
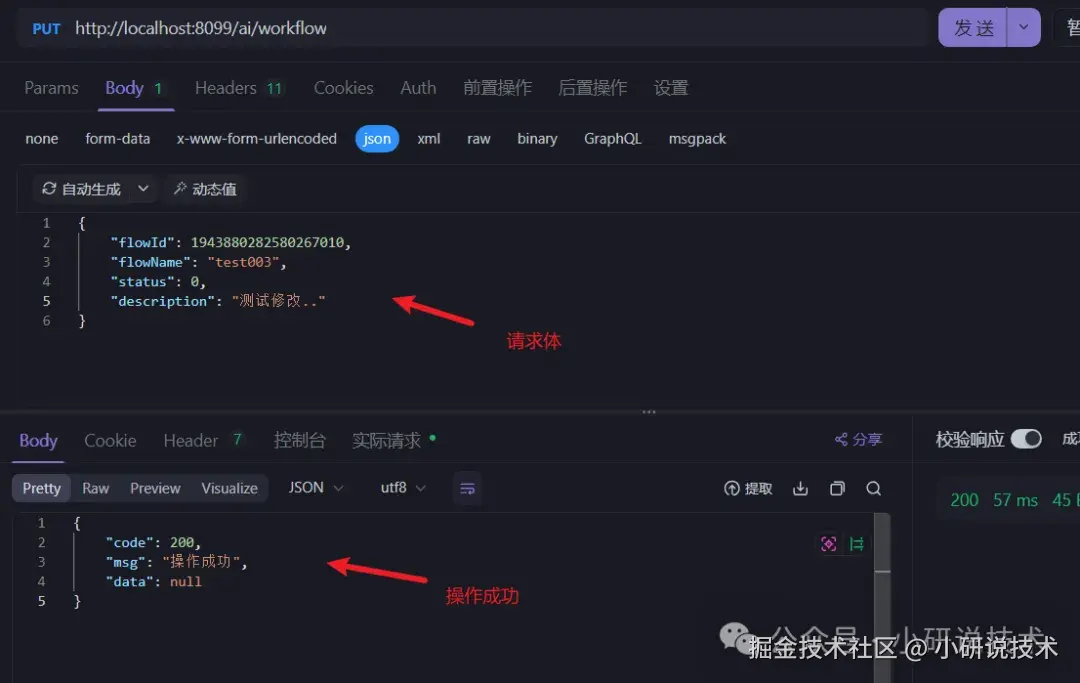
 修改接口
修改接口
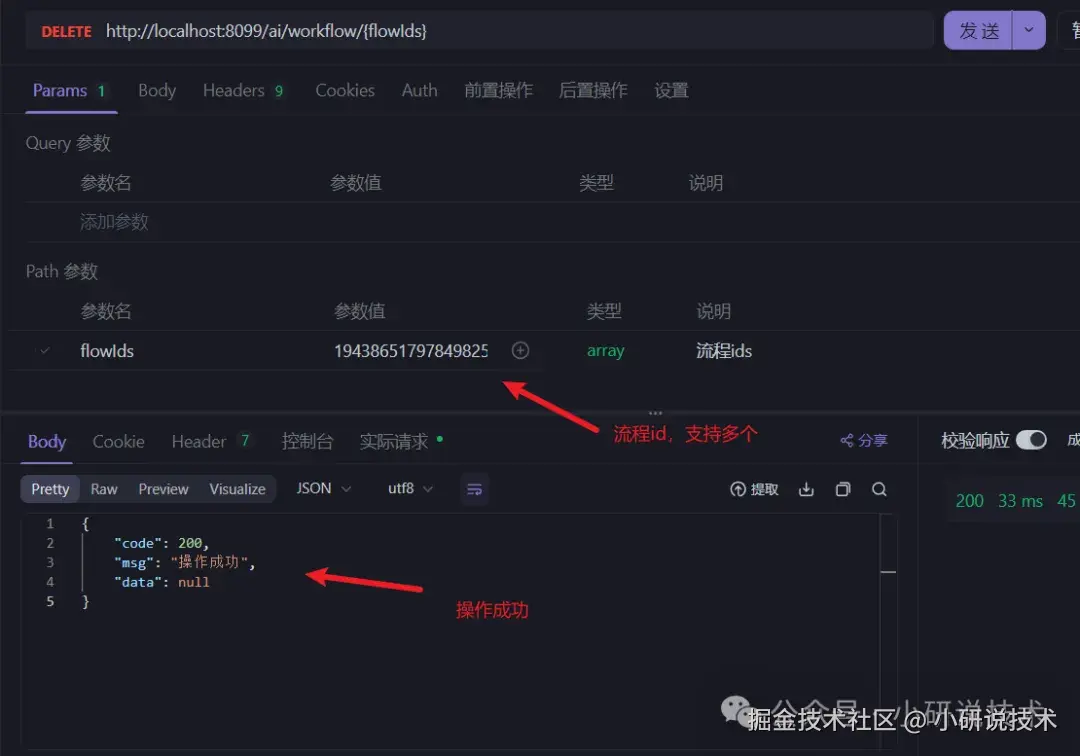
 删除接口
删除接口
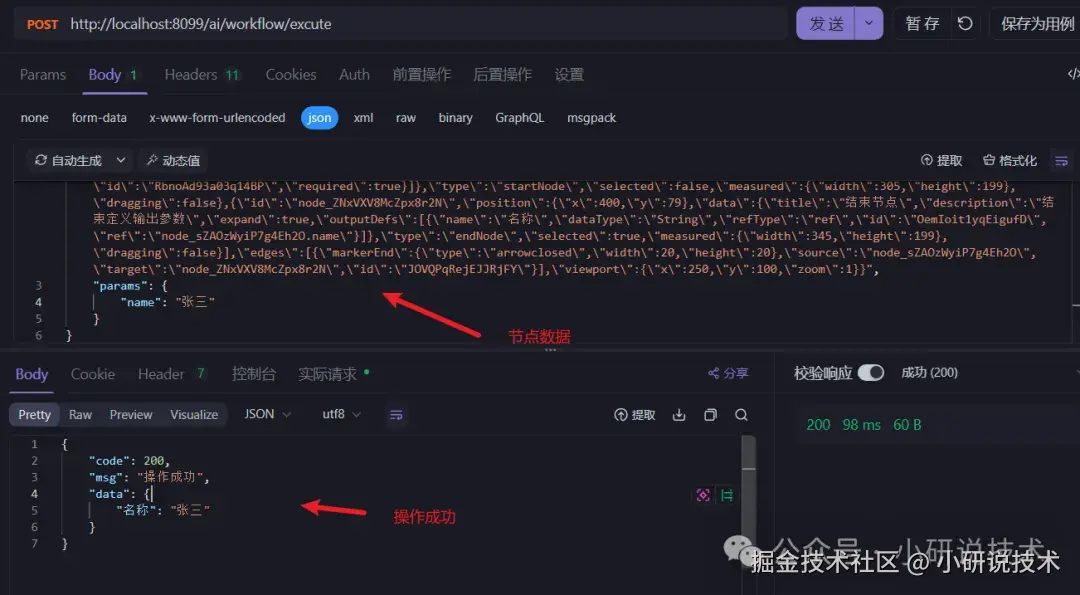
 执行流程接口
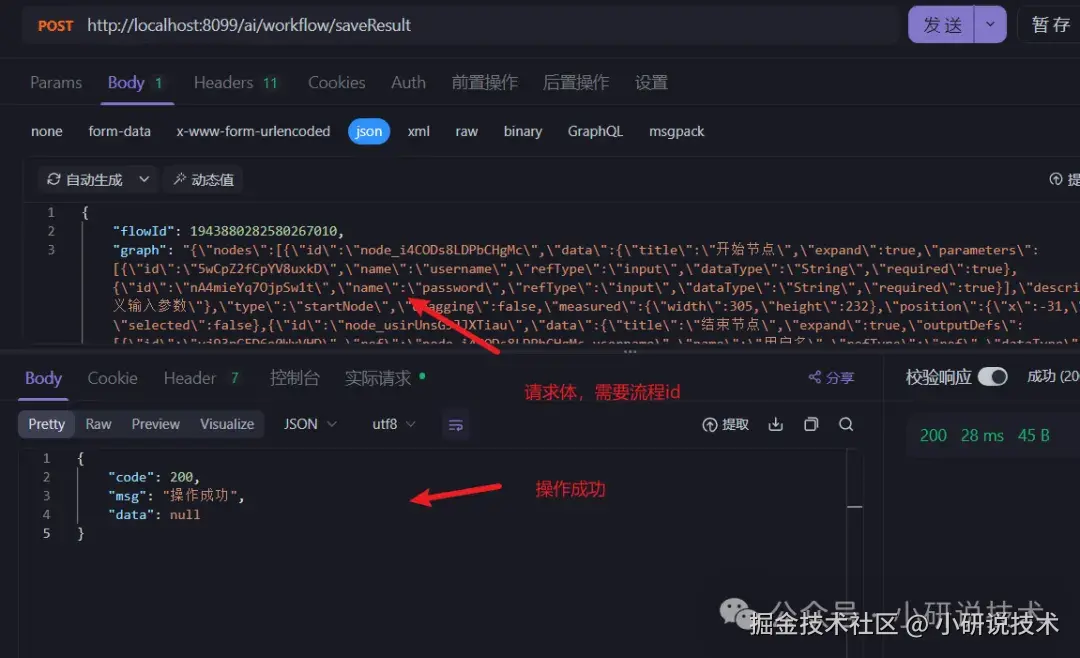
 保存结果接口
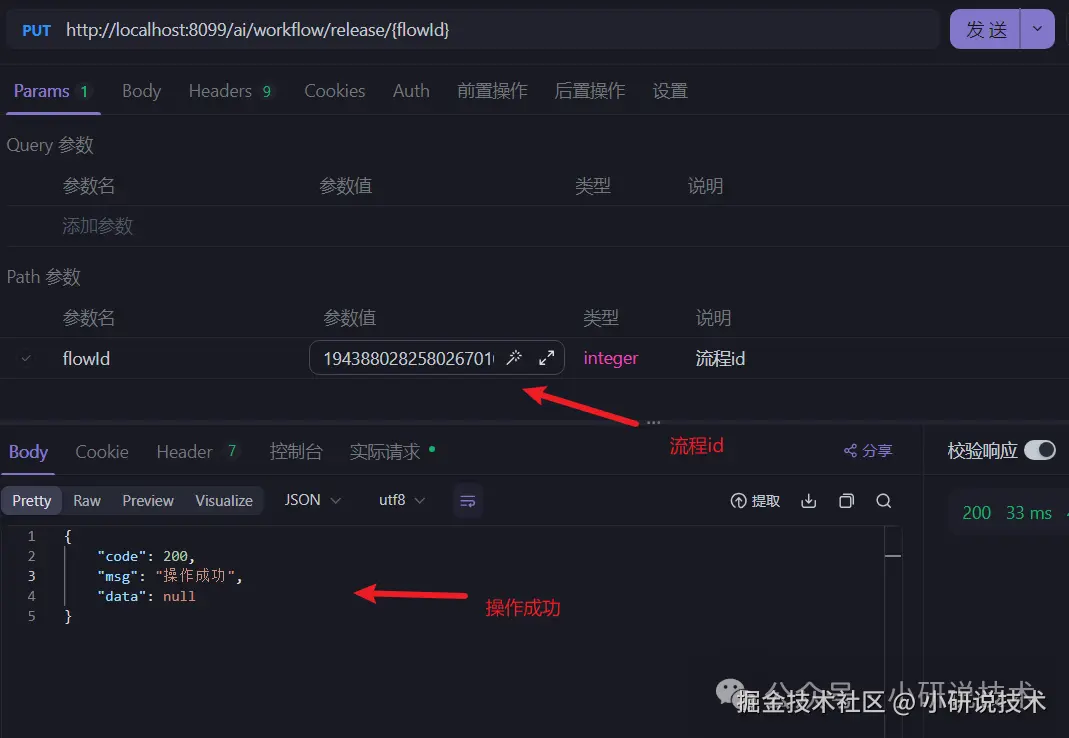
 发布流程接口
 表中数据验证

至此,使用Tinyflow实现AI流程编程已完成
需要的伙伴们可以加入技术群获取,如加入微信交流群,含解答服务!
本人正在打造技术交流群,欢迎志同道合的朋友一起探讨,一起努力,通过自己的努力,在技术岗位这条道路上走得更远。QQ群号:914683950 备注:技术交流 即可通过!