TensorFlow深度学习实战------DeepDream详解与实现
-
- [0. 前言](#0. 前言)
- [1. DeepDream 技术原理](#1. DeepDream 技术原理)
- [2. DeepDream 模型分析](#2. DeepDream 模型分析)
- [3. DeepDream 算法实现](#3. DeepDream 算法实现)
- 相关链接
0. 前言
DeepDream 利用训练完成的深度卷积神经网络,仅需要优化模型卷积层某个通道的激活值即可生成令人印象深刻的图像。本节首先介绍了 DeepDream 的基本原理,并使用 TensorFlow 实现了 DeepDream 生成模型,不仅能够生成富有艺术感的图像,同时加深对卷积神经网络的背后运行机制的理解。
1. DeepDream 技术原理
假设我们想知道神经网络中间的卷积层究竟学到了什么,只需要最大化卷积层某一通道的输出,由于在大多数卷积层中都包含多个通道,因此卷积的一个通道就可以代表一种学习到的"信息"。以某个通道的值作为优化目标,就可以明白这个通道究竟学习到了什么,这也就是 DeepDream 的基本原理。
我们通过预训练的模型传递图像,并使用我们希望获得激活的神经网络层。神经网络会调整输入像素值,直到令所选网络层的激活值最大。同时,我们还需要确保激活的最大值不超过设定的阈值,因为我们不希望生成的图像与原始图像有巨大差异。
简单而言,DeepDream 使用卷积神经网络 (Convolutional Neural Network, CNN)发现和增强图像中的模式,得到的结果是梦幻般的幻觉效果。使用预训练网络来提取特征,增强图像中的模式,这意味着我们需要最大化网络的激活值,因此需要使用梯度上升而不是下降。
2. DeepDream 模型分析
对 DeepDream 有了简单的了解后,接下来,我们制定实现 DeepDream 算法的策略:
- 选择需要最大化激活的神经网络层,并给这些网络层分配更大的权重以增加它们在总损失中的比重
- 提取给定神经网络层得到的图像特征,并计算每一层的损失值:
- 当该层中图像输出的平方和最高时,该图像在该层的激活值最大
- 提取输入像素值相对于损失的梯度变化
- 根据提取的梯度变化更新输入图像像素值
- 为更新的输入图像像素值计算所有选定网络层上的损失值,即网络层激活值的平方和
- 如果损失值大于预定义的阈值,则停止更新图像
3. DeepDream 算法实现
首先进行图像预处理:
python
import tensorflow as tf
import numpy as np
import matplotlib as mpl
import PIL.Image

url = 'https://storage.googleapis.com/download.tensorflow.org/example_images/YellowLabradorLooking_new.jpg'

# Download an image and read it into a NumPy array.
def download(url, max_dim=None):
    name = url.split('/')[-1]
    image_path = tf.keras.utils.get_file(name, origin=url)
    img = PIL.Image.open(image_path)
    if max_dim:
        img.thumbnail((max_dim, max_dim))
    return np.array(img)

# Normalize an image
def deprocess(img):
    img = 255*(img + 1.0)/2.0
    return tf.cast(img, tf.uint8)

# Display an image
def show(img):
    plt.figure(figsize=(12,12))
    plt.grid(False)
    plt.axis('off')
    plt.imshow(img)
    plt.show()

# Downsizing the image makes it easier to work with.
original_img = download(url, max_dim=500)
show(original_img)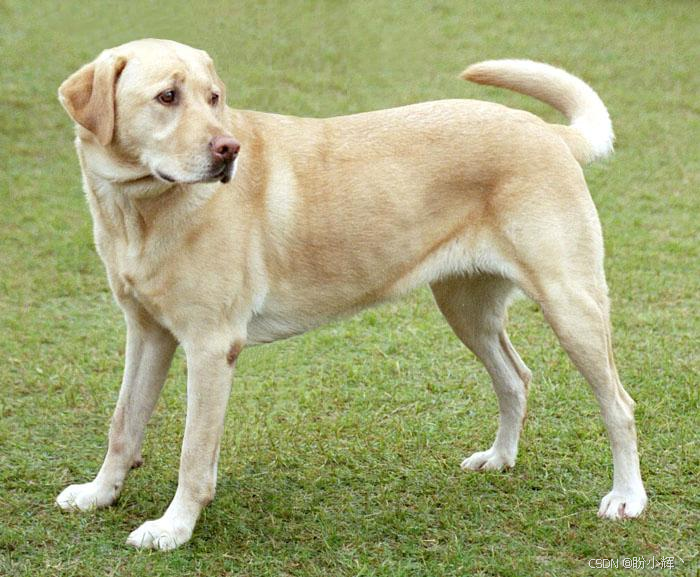
准备特征提取模型。下载并准备预训练的图像分类模型,本节中使用 InceptionV3,需要注意的是,任何预训练模型均可使用,但如果对其进行了更改,则后续需要调整层名称:
python
base_model = tf.keras.applications.InceptionV3(include_top=False, weights='imagenet')DeepDream 通过选择一个或多个层,并以渐增的方式最大化损失。融入特征的复杂性取决于所选择的层,即较低的层会产生笔触或简单的图案,而较深的层则会使图像甚至整个对象呈现出复杂的特征。
对于 DeepDream,目标层是将卷积串联在一起的层。InceptionV3 中有 11 层,使用不同的层将产生不同的梦幻图像。较深的层响应较高级的特征(例如,眼睛和面部),而较浅的层则响应较简单的特征(例如,边缘、形状和纹理)。可以任意选择不同的层组合,但需要注意的是,由于梯度计算的深度较大,较深的层将需要较长的训练时间:
python
# Maximize the activations of these layers
names = ['mixed3', 'mixed5']
layers = [base_model.get_layer(name).output for name in names]

# Create the feature extraction model
dream_model = tf.keras.Model(inputs=base_model.input, outputs=layers)
计算损失。损失是所选层中激活的总和。损失在每一层均会进行归一化,因此较大层的贡献不会超过较小层。通常,深度学习模型通过梯度下降来实现损失最小化。但在 DeepDream 中,将通过梯度上升使损失最大化:
python
def calc_loss(img, model):
    # Pass forward the image through the model to retrieve the activations.
    # Converts the image into a batch of size 1.
    img_batch = tf.expand_dims(img, axis=0)
    layer_activations = model(img_batch)
    if len(layer_activations) == 1:
        layer_activations = [layer_activations]

    losses = []
    for act in layer_activations:
        loss = tf.math.reduce_mean(act)
        losses.append(loss)

    return  tf.reduce_sum(losses)
梯度上升。所选层的损失计算完成后,只需相对于图像计算梯度,并将梯度添加到原始图像即可:
python
class DeepDream(tf.Module):
    def __init__(self, model):
        self.model = model

    @tf.function(
        input_signature=(
            tf.TensorSpec(shape=[None,None,3], dtype=tf.float32),
            tf.TensorSpec(shape=[], dtype=tf.int32),
            tf.TensorSpec(shape=[], dtype=tf.float32),)
    )
    def __call__(self, img, steps, step_size):
        print("Tracing")
        loss = tf.constant(0.0)
        for n in tf.range(steps):
            with tf.GradientTape() as tape:
                # This needs gradients relative to `img`
                # `GradientTape` only watches `tf.Variable`s by default
                tape.watch(img)
                loss = calc_loss(img, self.model)

            # Calculate the gradient of the loss with respect to the pixels of the input image.
            gradients = tape.gradient(loss, img)

            # Normalize the gradients.
            gradients /= tf.math.reduce_std(gradients) + 1e-8

            # In gradient ascent, the "loss" is maximized so that the input image increasingly "excites" the layers.
            # You can update the image by directly adding the gradients (because they're the same shape!)
            img = img + gradients*step_size
            img = tf.clip_by_value(img, -1, 1)

        return loss, img

deepdream = DeepDream(dream_model)
基于梯度变化修改图像,并对图像进行逆向处理并进行可视化:
python
def run_deep_dream_simple(img, steps=100, step_size=0.01):
    # Convert from uint8 to the range expected by the model.
    img = tf.keras.applications.inception_v3.preprocess_input(img)
    img = tf.convert_to_tensor(img)
    step_size = tf.convert_to_tensor(step_size)
    steps_remaining = steps
    step = 0
    while steps_remaining:
        if steps_remaining>100:
            run_steps = tf.constant(100)
        else:
            run_steps = tf.constant(steps_remaining)
        steps_remaining -= run_steps
        step += run_steps

        loss, img = deepdream(img, run_steps, tf.constant(step_size))

        # show(deprocess(img))
        print ("Step {}, loss {}".format(step, loss))

        result = deprocess(img)
        show(result)

    return result

dream_img = run_deep_dream_simple(img=original_img, steps=100, step_size=0.01)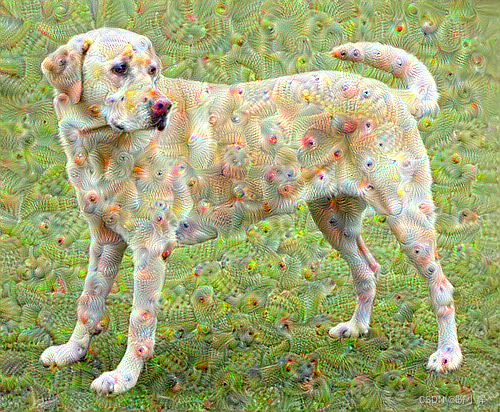
观察以上输出图像,可以发现存在以下问题:
- 输出有噪声(可以使用
tf.image.total_variation损失解决) - 图像分辨率低
- 图案粒度基本相同
解决上述问题的方法是以不同比例应用梯度上升。这将使在较小比例下生成的图案能够融合到较大比例的图案中,并附加其他细节。因此,可以通过执行梯度上升方法,然后增大图像尺寸,并对多个图像尺寸重复此过程:
python
OCTAVE_SCALE = 1.30

img = tf.constant(np.array(original_img))
base_shape = tf.shape(img)[:-1]
float_base_shape = tf.cast(base_shape, tf.float32)

for n in range(-2, 3):
    new_shape = tf.cast(float_base_shape*(OCTAVE_SCALE**n), tf.int32)
    img = tf.image.resize(img, new_shape).numpy()
    img = run_deep_dream_simple(img=img, steps=50, step_size=0.01)

img = tf.image.resize(img, base_shape)
img = tf.image.convert_image_dtype(img/255.0, dtype=tf.uint8)
show(img)
相关链接
TensorFlow深度学习实战(1)------神经网络与模型训练过程详解
TensorFlow深度学习实战(2)------使用TensorFlow构建神经网络
TensorFlow深度学习实战(3)------深度学习中常用激活函数详解
TensorFlow深度学习实战(4)------正则化技术详解
TensorFlow深度学习实战(5)------神经网络性能优化技术详解
TensorFlow深度学习实战(6)------回归分析详解
TensorFlow深度学习实战(7)------分类任务详解
TensorFlow深度学习实战(8)------卷积神经网络
TensorFlow深度学习实战(9)------构建VGG模型实现图像分类
TensorFlow深度学习实战(10)------迁移学习详解
TensorFlow深度学习实战(11)------风格迁移详解
TensorFlow深度学习实战(23)------自编码器详解与实现
TensorFlow深度学习实战(24)------卷积自编码器详解与实现
TensorFlow深度学习实战(25)------变分自编码器详解与实现
TensorFlow深度学习实战(26)------生成对抗网络详解与实现