背景
注:当前状态无业游民,如有合适工作岗位求捞:个人简历。
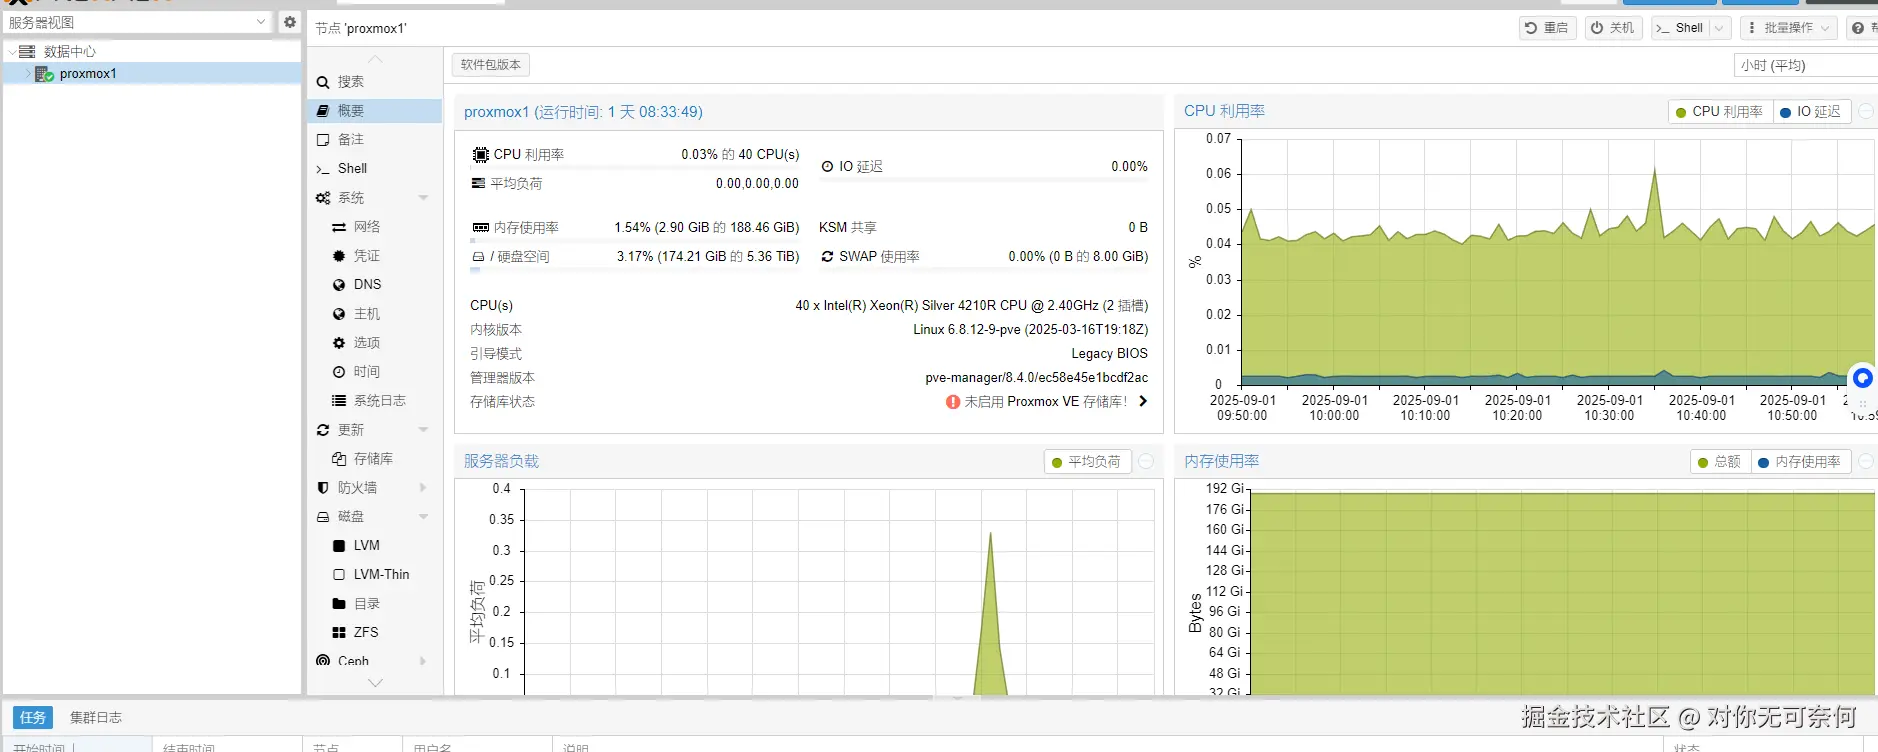
个人有一台R740服务器,安装了proxmox8操作系统:从Proxmox VE开始:安装与配置指南。跑了几个简单的vm实例,安装了2080ti的显卡,尝试做了显卡网卡的直通:
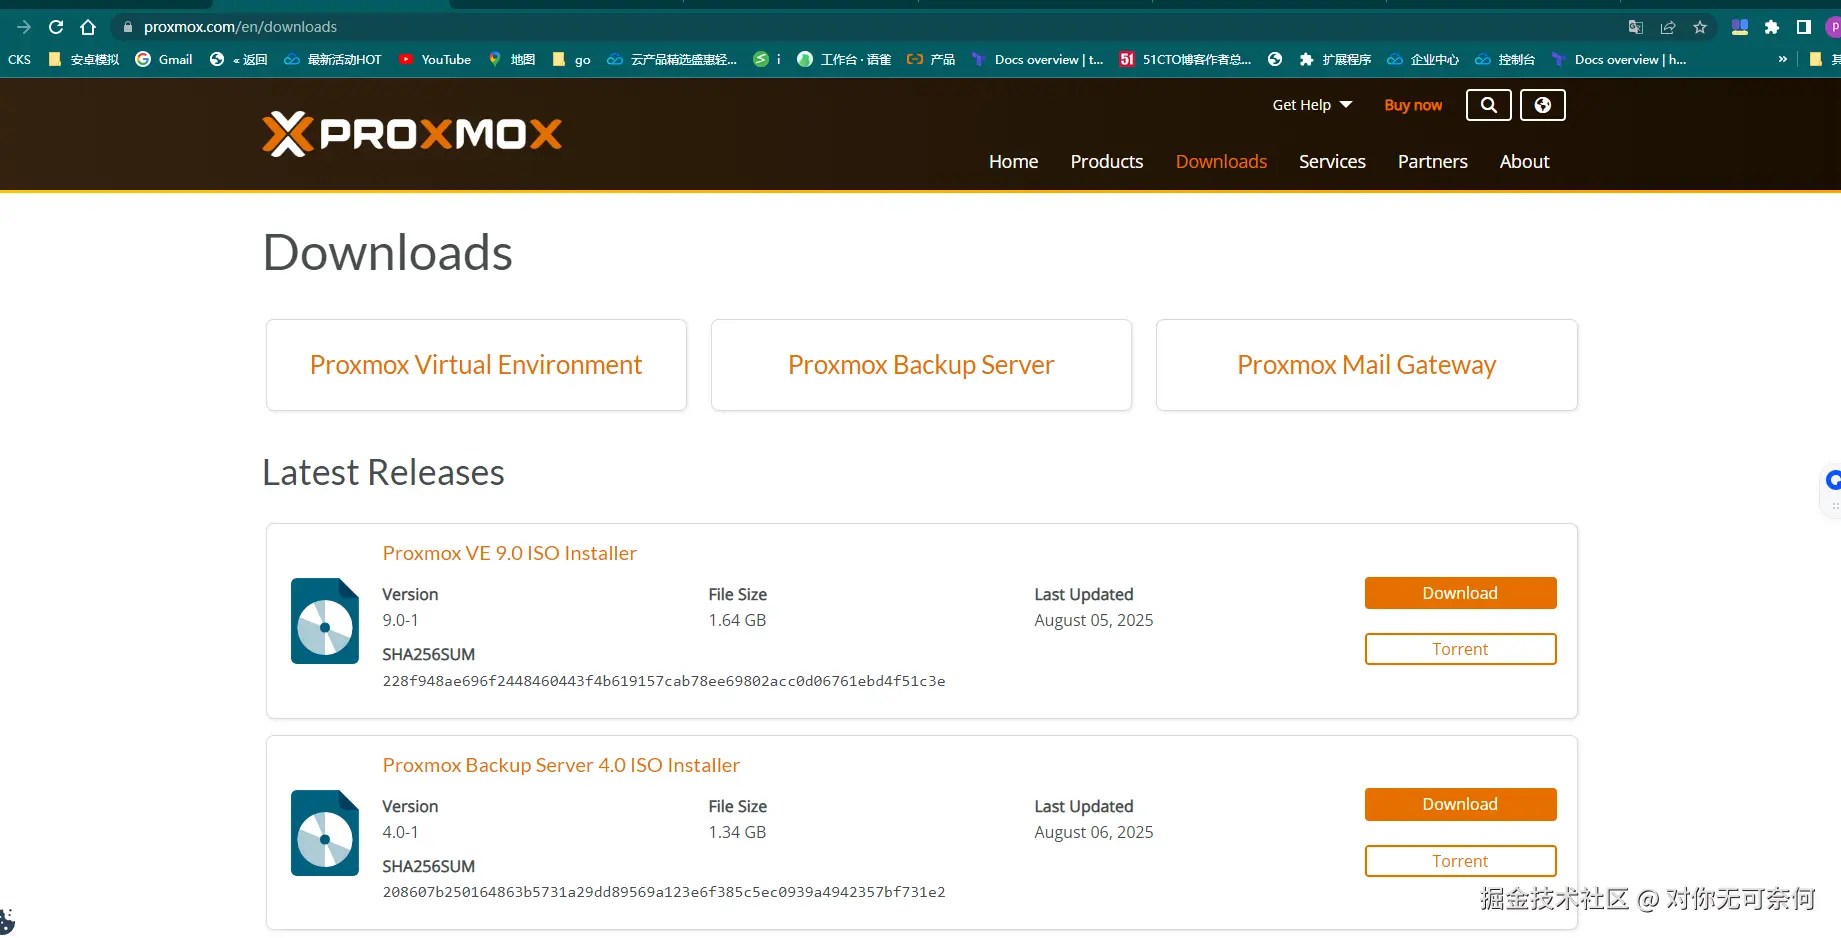
最近偶然看到一遍文章,proxmox的系统更新到了proxmox9版本。
个人也比较喜欢折腾,就想将宿主机操作系统升级一下,下面记录一下折腾的过程!
注意:升级操作系统还是有一定风险,请衡量是否有升级必要。如有升级必要,请在测试环境进行升级验证后进行升级。将重要应用(vm实例)进行备份后,在每一步升级操作变更操作时进行bak备份。
升级过程可以参照官方文档:pve.proxmox.com/wiki/Upgrad...
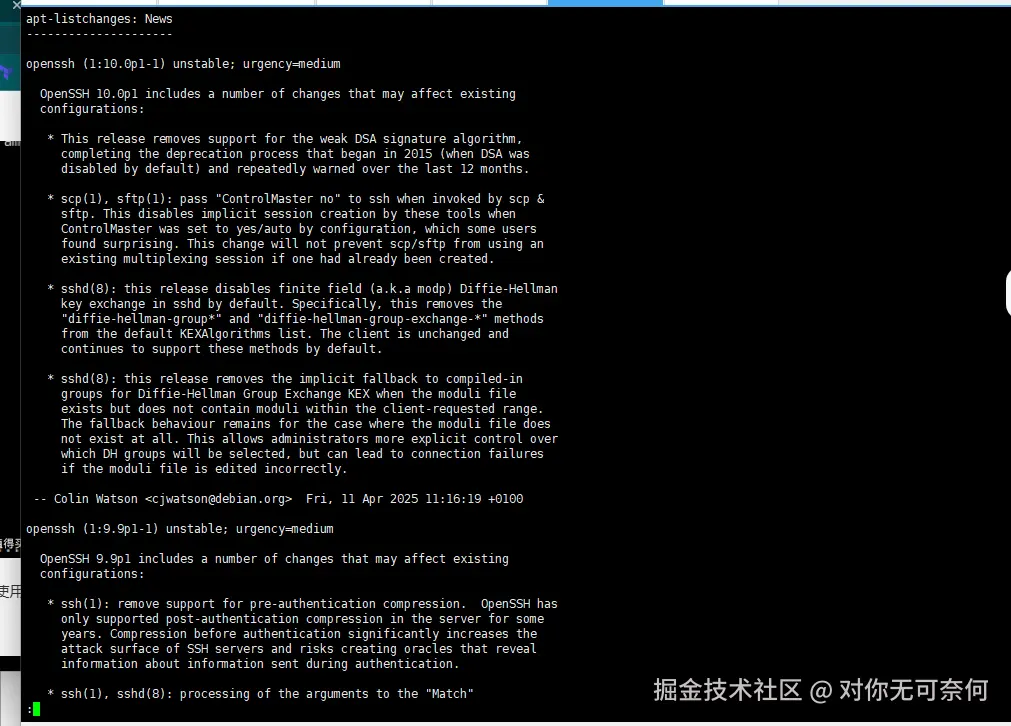
proxmox8 update to proxmox9
前置准备
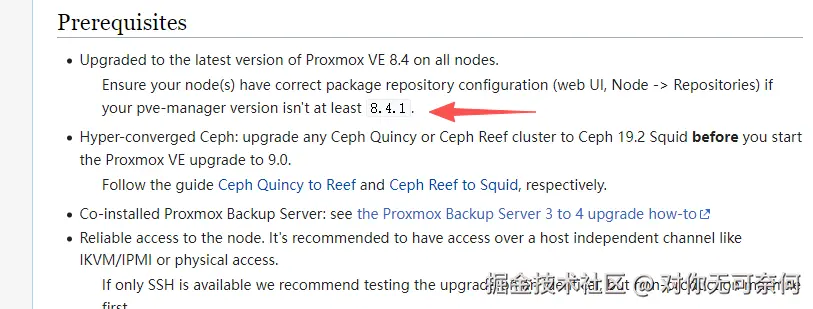
升级proxmox8最新版本支持pve8to9
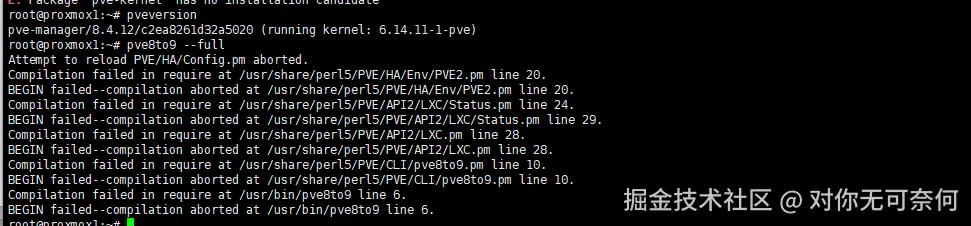
proxmox8升级,需要使用pve8to9进行升级。执行pveversion确认当前的 Proxmox版本,当前pveversion版本为8.4.0,执行pve8to9 会报错,需要update升级系统到8.4.1之后的版本的:
直接升级版本到proxmox8的最新版本:
plain
pveversion
apt update
apt list --upgrade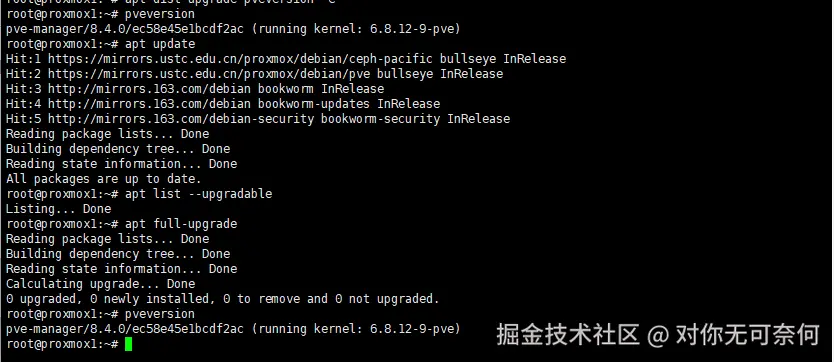
pveversion没有发生改变,仍然是8.4.0版本。这是为什么呢?

想了一下:我在从Proxmox VE开始:安装与配置指南操作中删除了proxmox企业源,没有源,也就更新不了此版本了:
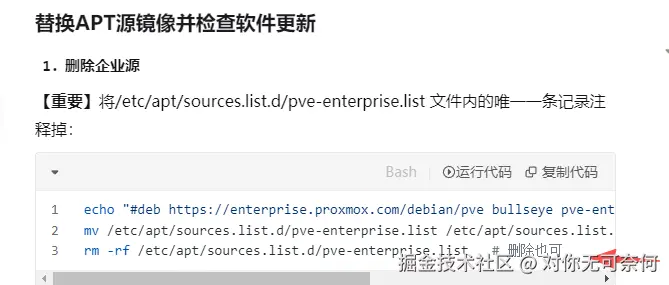
这里先恢复 pve-enterprise.list, 使用国内清华源:
plain
cat /etc/apt/sources.list.d/pve-enterprise.list
deb https://mirrors.tuna.tsinghua.edu.cn/proxmox/debian/pve bookworm pve-no-subscription
继续update 更新一下系统:
plain
apt update

apt dist-upgrade 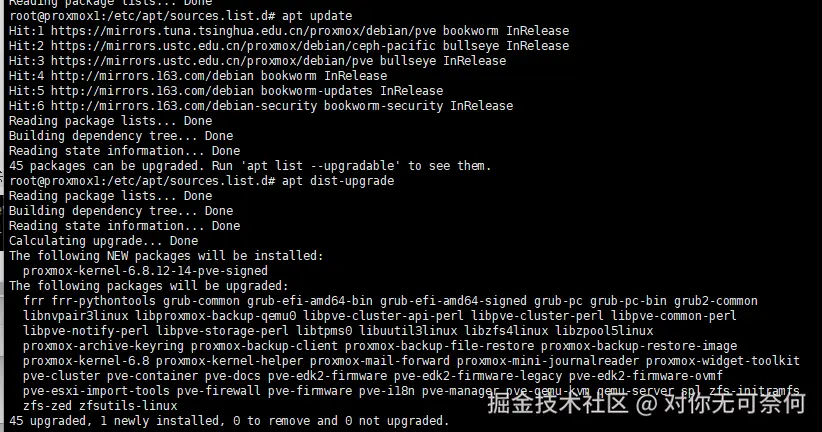
继续执行pveversion确认一下当前的版本更新到了8.4版本的最新的12版本:
plain
pveversion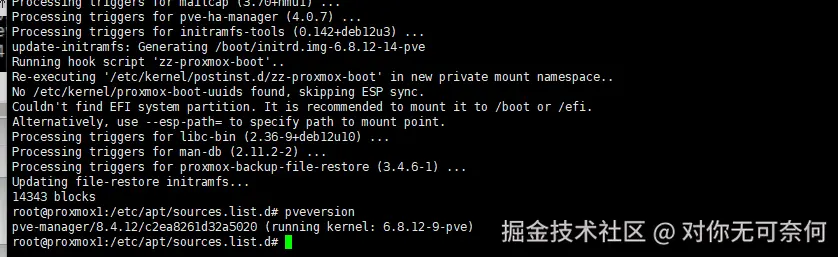
执行pve8to9命令,检查是否满足升级条件:
更新到8最新版本之后,先运行以下命令,检查更新后是否兼容
plain
pve8to9 --full
主要是apt 软件源的一些报错,下面修复一下进行升级!
升级过程
备份 apt软件源
先备份一下proxmox的 apt源:
plain
cp /etc/apt/sources.list /etc/apt/sources.list.pve-old
cp /etc/apt/sources.list.d/pve-enterprise.list /etc/apt/sources.list.d/pve-enterprise.list.old
切换 Debian 源到 Trixie
将pve8的bookworm源替换为pve9的trixie
plain
sed -i 's/bookworm/trixie/g' /etc/apt/sources.list
sed -i 's/bookworm/trixie/g' /etc/apt/sources.list.d/pve-enterprise.list
刷新软件包索引,开始升级
plain
apt update
apt dist-upgrade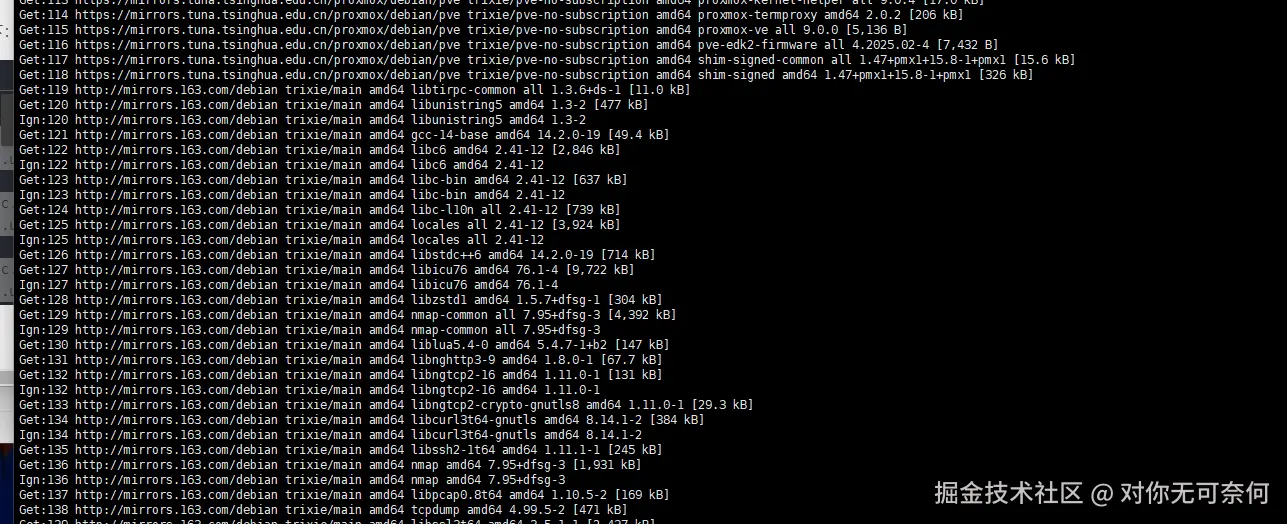
注意:由于我这里debian 系统使用了163源,不知道为什么更新的超级慢,我修改了/etc/apt/sources.list中163源为清华源:
ctrl+c中断一下update升级,继续执行upgrade升级:
plain
apt update
apt dist-upgrade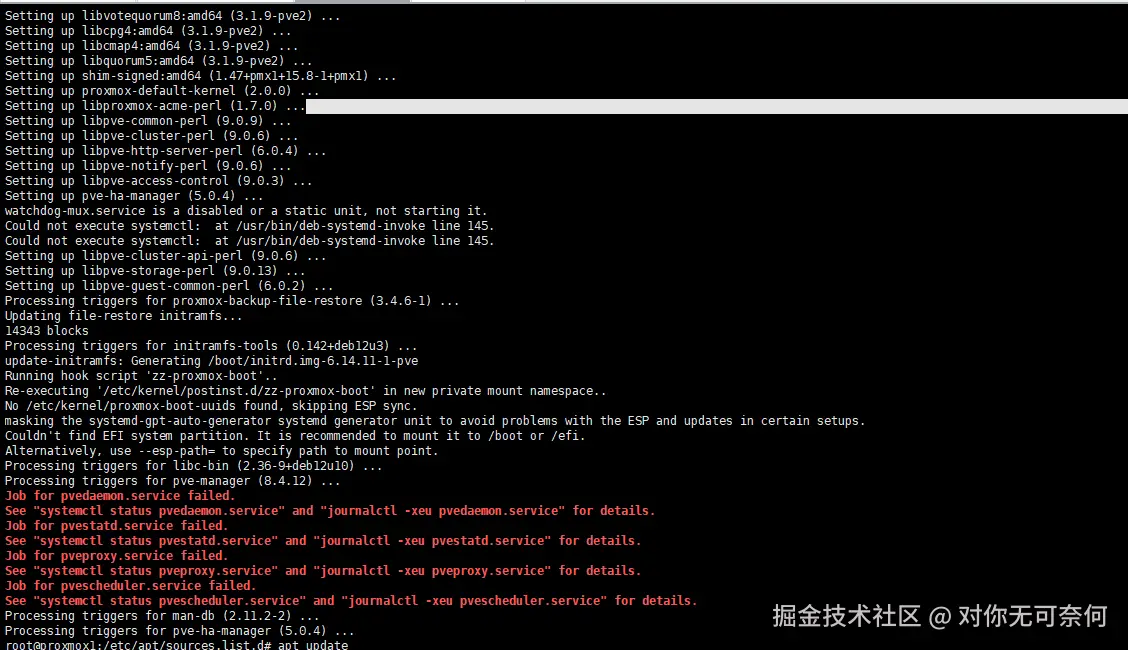
升级完成过程中出现了上面红色的报错。先执行一下pveversion 确认一下版本是否升级成功:
版本未能更新成功,仍然是原来的版本,并且执行pve8to9 命令会报错!
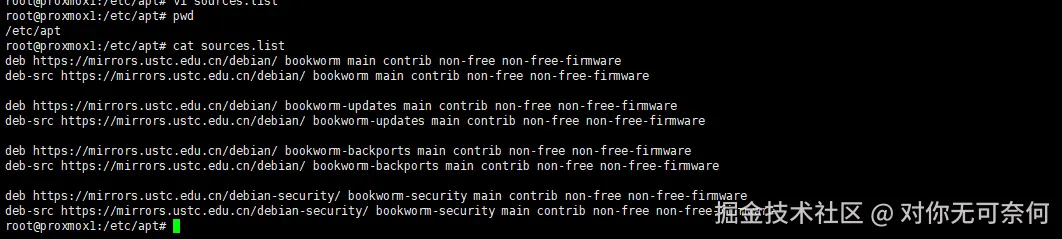
先恢复一下所有的apt源吧:
plain
cat /etc/apt/sources.list
deb https://mirrors.ustc.edu.cn/debian/ bookworm main contrib non-free non-free-firmware
deb-src https://mirrors.ustc.edu.cn/debian/ bookworm main contrib non-free non-free-firmware

deb https://mirrors.ustc.edu.cn/debian/ bookworm-updates main contrib non-free non-free-firmware
deb-src https://mirrors.ustc.edu.cn/debian/ bookworm-updates main contrib non-free non-free-firmware

deb https://mirrors.ustc.edu.cn/debian/ bookworm-backports main contrib non-free non-free-firmware
deb-src https://mirrors.ustc.edu.cn/debian/ bookworm-backports main contrib non-free non-free-firmware

deb https://mirrors.ustc.edu.cn/debian-security/ bookworm-security main contrib non-free non-free-firmware
deb-src https://mirrors.ustc.edu.cn/debian-security/ bookworm-security main contrib non-free non-free-firmware


cat /etc/apt/sources.list.d/pve-enterprise.list
#deb https://enterprise.proxmox.com/debian/pve bookworm pve-enterprise
deb https://mirrors.tuna.tsinghua.edu.cn/proxmox/debian/pve bookworm pve-no-subscription
重新更新源并升级到最新PVE8,确认pve8to9命令可用:
plain
apt update
apt upgrade
apt dist-upgrade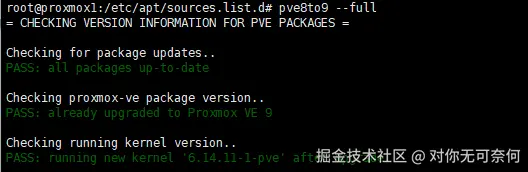
继续重新更换源重新升级:
plain
sed -i 's/bookworm/trixie/g' /etc/apt/sources.list
sed -i 's/bookworm/trixie/g' /etc/apt/sources.list.d/pve-enterprise.list
由于我并没有使用ceph,这里就直接删除了:
plain
cd /etc/apt/sources.list
/etc/apt/sources.list.d/ceph.list
当然删除了如果需要使用ceph源可以如下配置:
plain
cat > /etc/apt/sources.list.d/ceph.sources << EOF
Types: deb
URIs: http://download.proxmox.com/debian/ceph-squid
Suites: trixie
Components: no-subscription
Signed-By: /usr/share/keyrings/proxmox-archive-keyring.gpg
EOF
#添加ceph最新版无订阅源
至于**.list** 与** .sources **可以自行百度!
继续更新升级proxmox:
plain
apt update
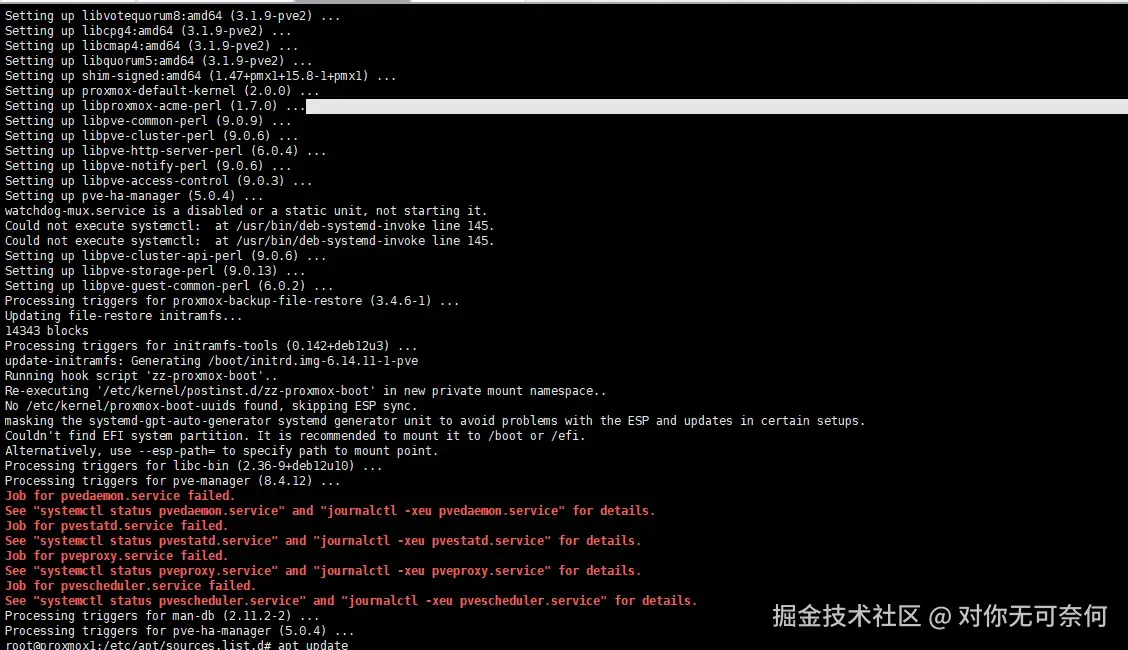
apt dist-upgrade会出现下面的 阅读协议的文本,选择q退出:
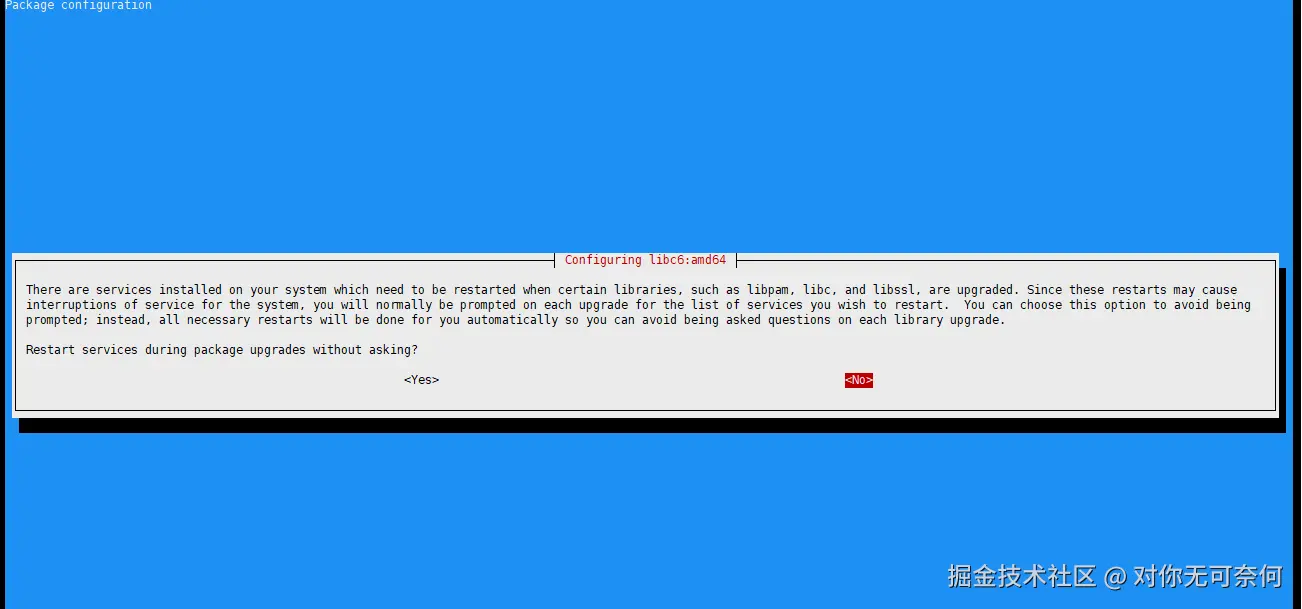
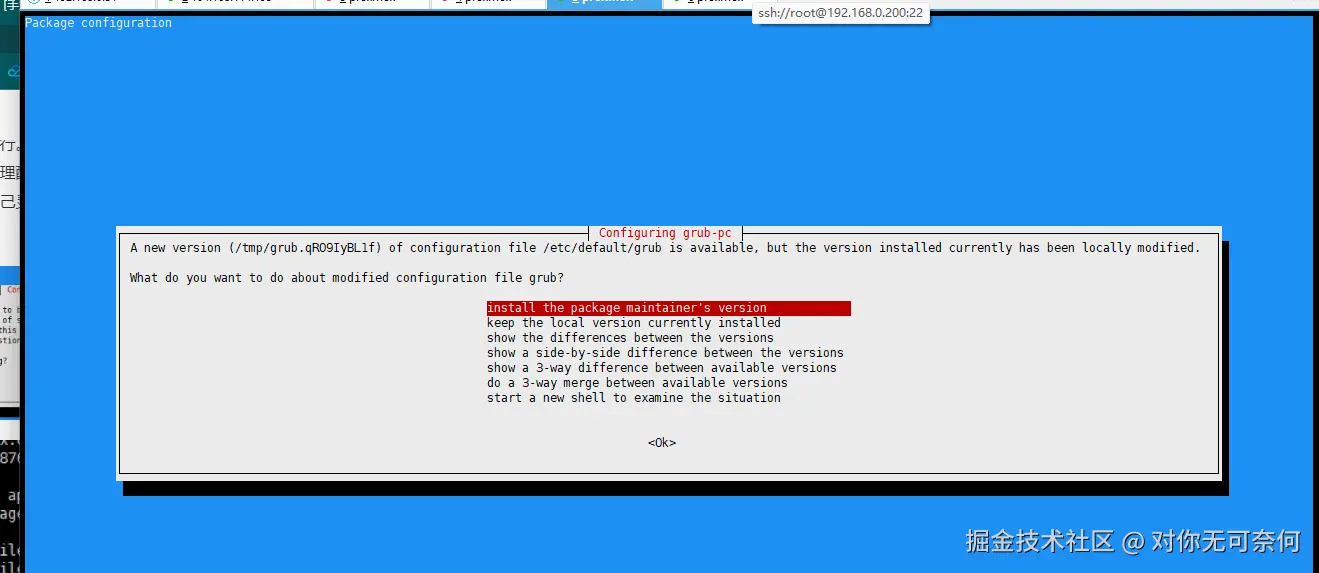
下面这种处理配置文件的选项我默认都选择了Y,这个要根据自己实际状况选择:

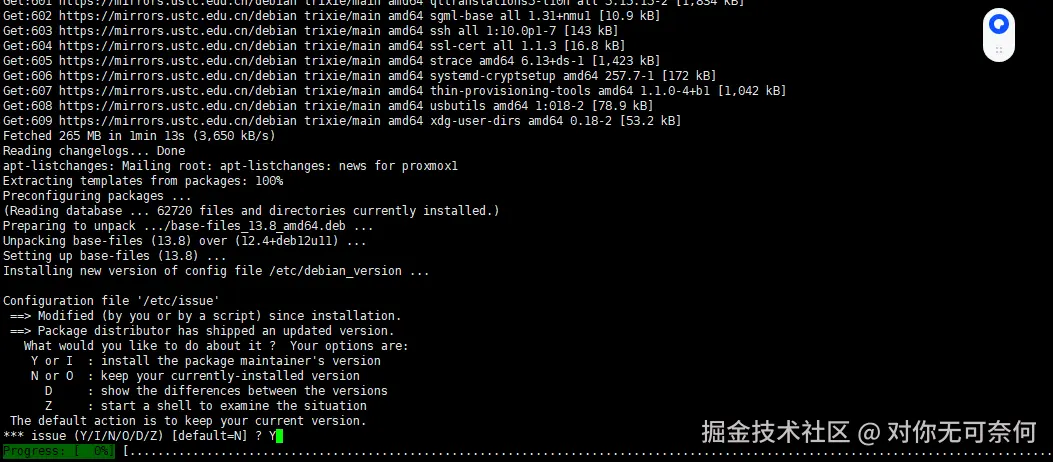 下面这种config配置的也需要根据个人实际状况进行选择:
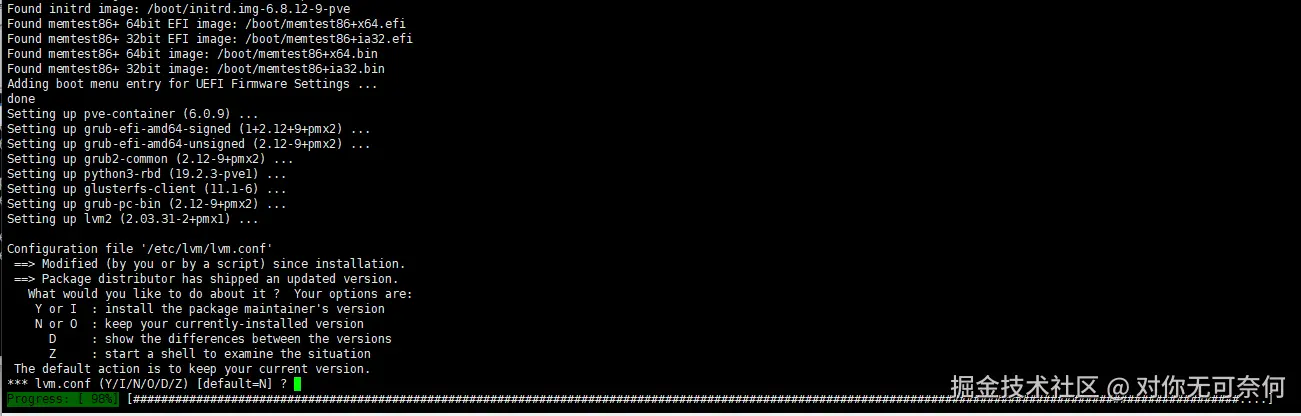
升级完成的使用出现了下面的截图,进程kill掉了:
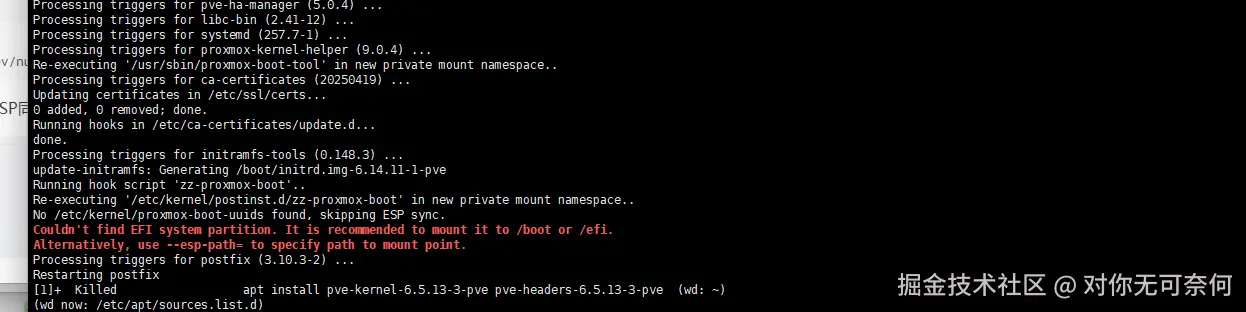
莫慌,执行pveversion命令可以看到升级已经成功:

验证升级是否成功
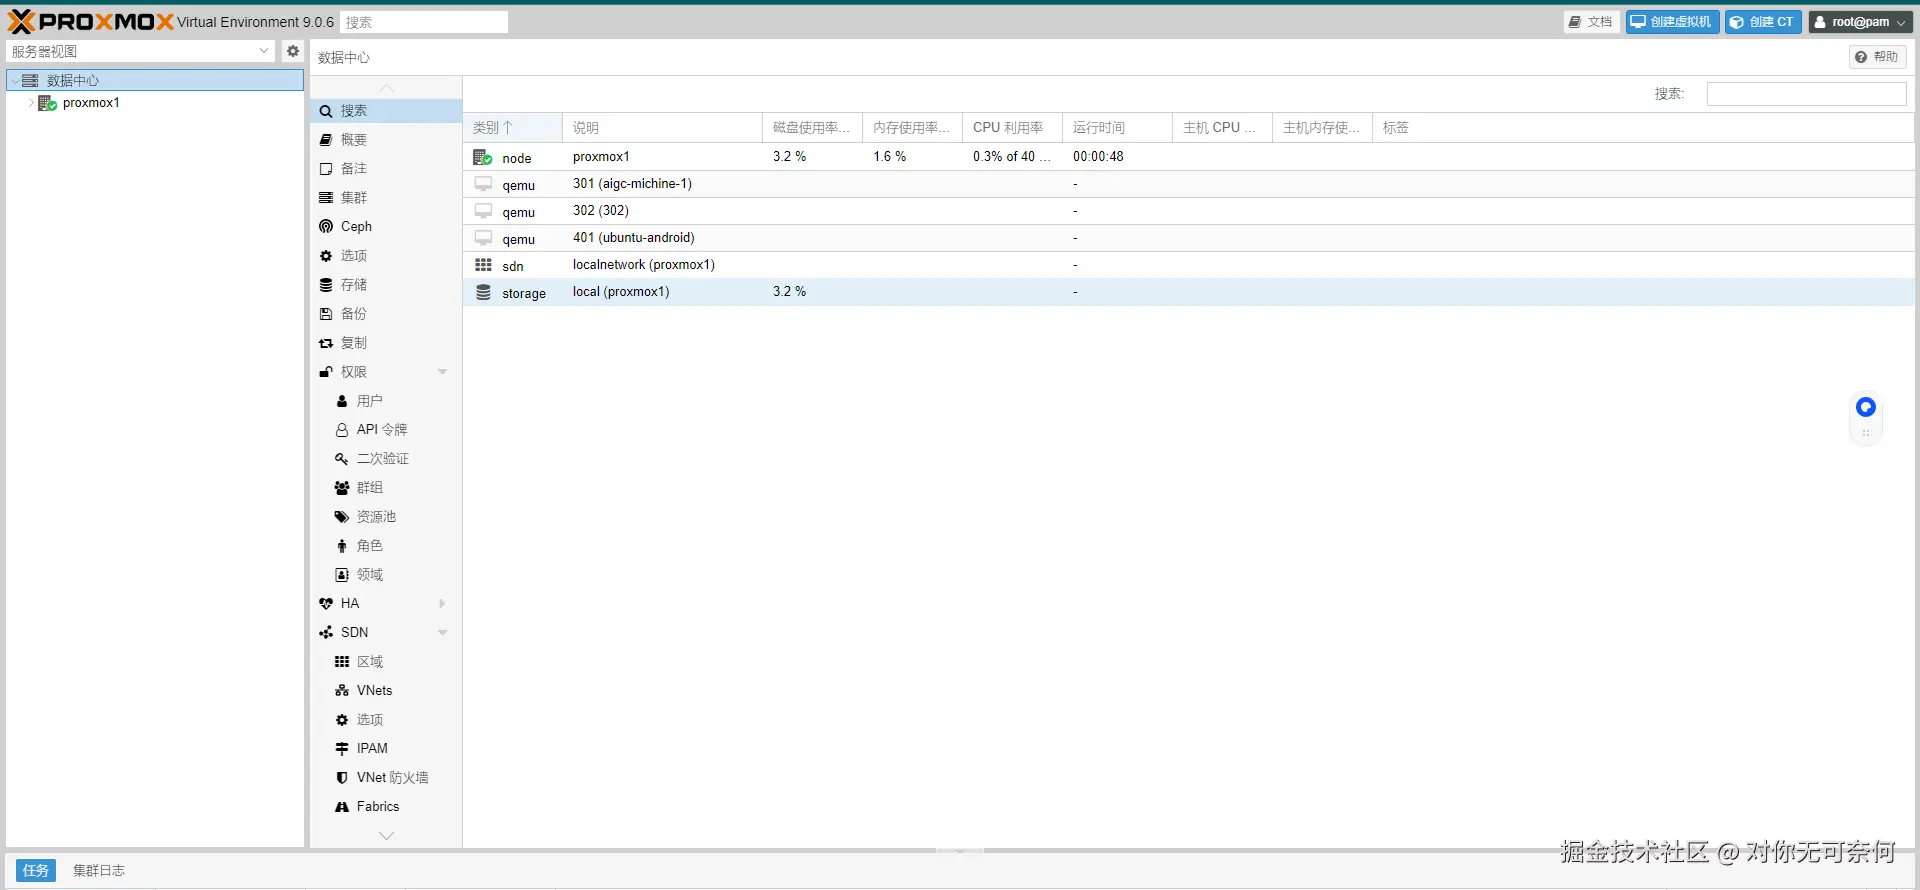
除了使用上面的pveversion验证,当然也可以刷新webui,通过浏览器看一下:
当然,最好也重启一下proxmox主机,启动vm实例进行验证一下~
升级过程中出现的问题
apt源改的不彻底
升级出现问题的时候,后知后觉,我的etc/apt/sources.list.d中有些其他的配置未能修改完整,ceph的相关源也未能修改:
升级切换源操作 出现 apt进程占用,dpkg锁文件
出现如下报错关键词:Could not get lock /var/lib/dpkg/lock-frontend.
plain
root@proxmox1:/etc/apt/sources.list.d# apt dist-upgrade ^Citing for cache lock: Could not get lock /var/lib/dpkg/lock-frontend. It is held by process 7053 (apt)... 34s 执行了如下操作:
plain
# 先检查进程状态
ps -fp 7053

# 如果确实是卡住的进程,再终止
sudo kill -9 7053

# 等待几秒钟,然后清理锁文件
sudo rm -f /var/lib/dpkg/lock-frontend
sudo rm -f /var/lib/dpkg/lock

# 修复状态
sudo dpkg --configure -a
sudo apt --fix-broken install

# 最后继续升级
sudo apt dist-upgrade