新到一台服务器,4090显卡,需要投喂文件, 搭建个RAG, AI对话框出来,过程:
1 Ubuntu
下载: https://cn.ubuntu.com/download 24.4 记住这个版本号
注意:企业级硬盘要做raid1+raid5.
2 安装显卡驱动和CUDA Toolkit,
bash
watch -n 3 -d nvidia-smi #每隔3秒刷新一次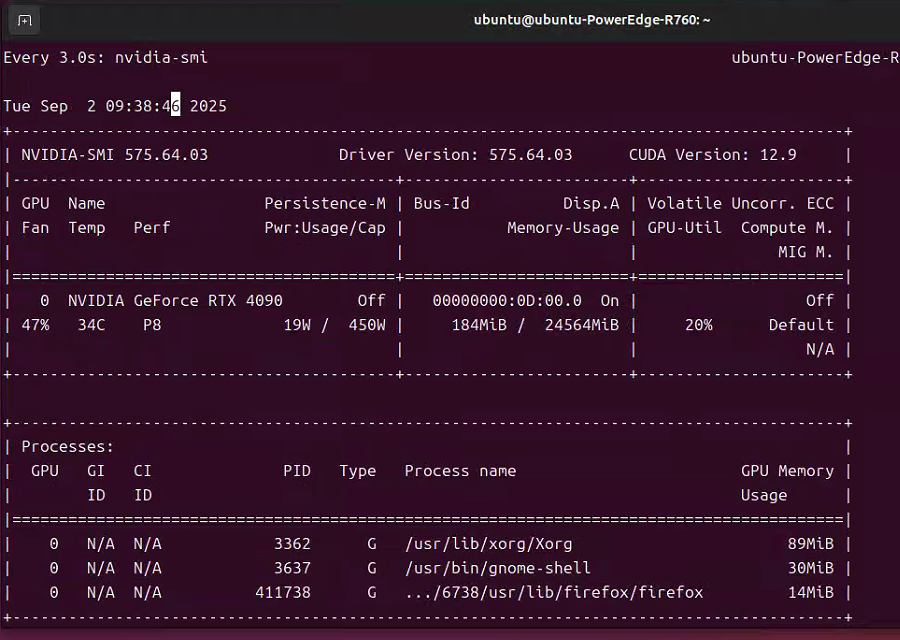
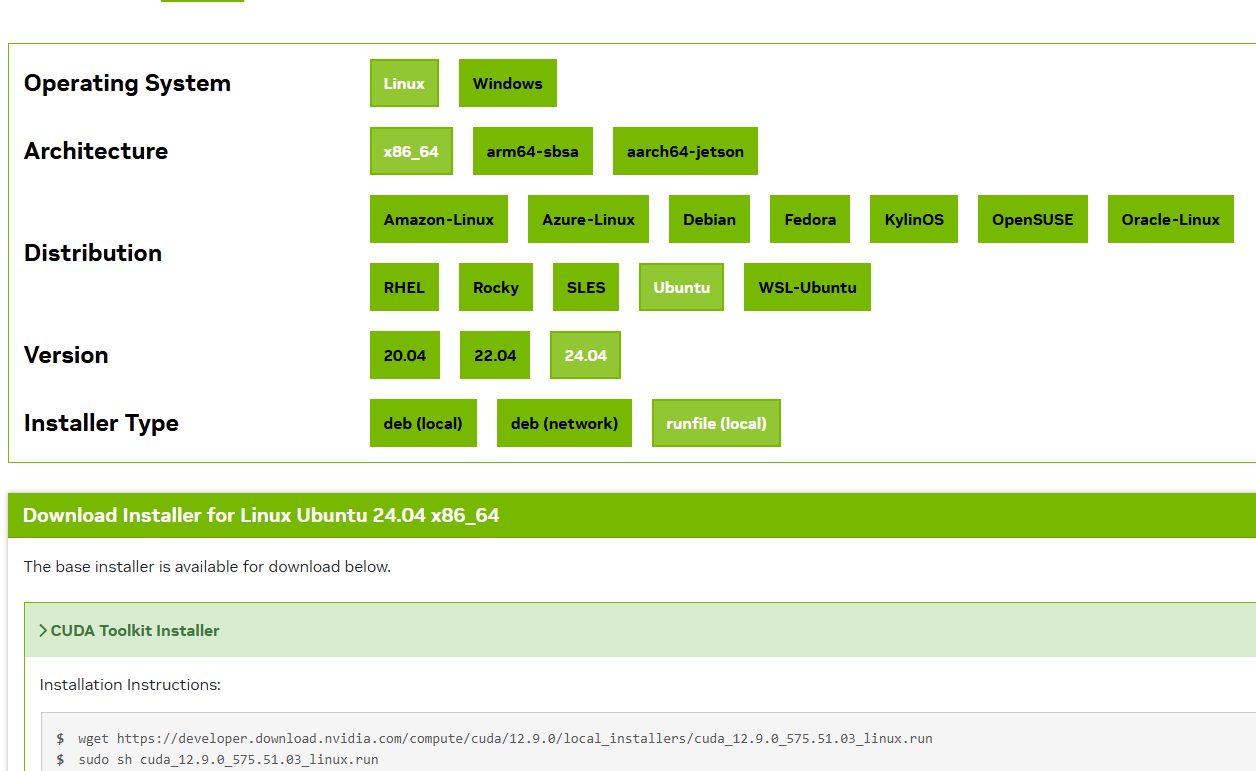
选择到合适的版本
bash
wget https://developer.download.nvidia.com/compute/cuda/12.9.0/local_installers/cuda_12.9.0_575.51.03_linux.run
sudo sh cuda_12.9.0_575.51.03_linux.run
打开终端,配置环境:
bash
vim ~/.bashrc最后添加:
bash
export PATH=$PATH:/usr/local/cuda-12.9/bin
export LD_LIBRARY_PATH=$LD_LIBRARY_PATH:/usr/local/cuda-12.9/lib64
打开终端输入:
bash
source ~/.bashrc最后终端输入nvcc -V即可查看CUDA版本:
3 安装 VPN
参考:
1 https://www.youtube.com/watch?v=1d-HT_xF94w
2 https://github.com/kjfx/vpn/releases/tag/linux
bash
sudo apt update
sudo apt install bzip2 tar
sudo apt-get install curl
sudo -i #切换到root用户
bash
export url='https://fastly.jsdelivr.net/gh/juewuy/ShellCrash@master' && wget -q --no-check-certificate -O /tmp/install.sh $url/install.sh  && bash /tmp/install.sh && source /etc/profile &> /dev/null

iptables -I INPUT -p tcp --dport 9999 -j ACCEPT #如果开不了网页要放行端口Clash管理地址(将IP替换成自己服务器IP):http://192.168.1.1:9999/ui
4 安装Miniconda
bash
wget https://repo.anaconda.com/miniconda/Miniconda3-latest-Linux-x86_64.sh
bash Miniconda3-latest-Linux-x86_64.sh
按照提示完成安装:
按 Enter 阅读许可协议。
输入 yes 接受许可协议。
选择安装路径(默认路径为 ~/miniconda3)。
输入 yes 初始化 Miniconda。
bash
source ~/.bashrc  #激活 Conda
conda --version   #检查 Conda 是否安装成功

conda list
conda create -n myenv python=3.9

rm -rf ~/miniconda3   #卸载 Miniconda
5 安装 Git, 方法从github里拉文件
bash
sudo apt install git有时会提示:
已安装 gitlab-jh 软件包 post-installation 脚本 子进程返回错误状态 1 在处理时有错误发生: gitlab-jh
原因是系统里残留的 gitlab-jh 包阻塞了 apt,使安装或更新 git 时报错。
解决方案就是 移除 gitlab-jh,保持系统干净:
bash
sudo dpkg --remove --force-remove-reinstreq gitlab-jh
sudo apt autoremove
git --version 查看安装是否正常

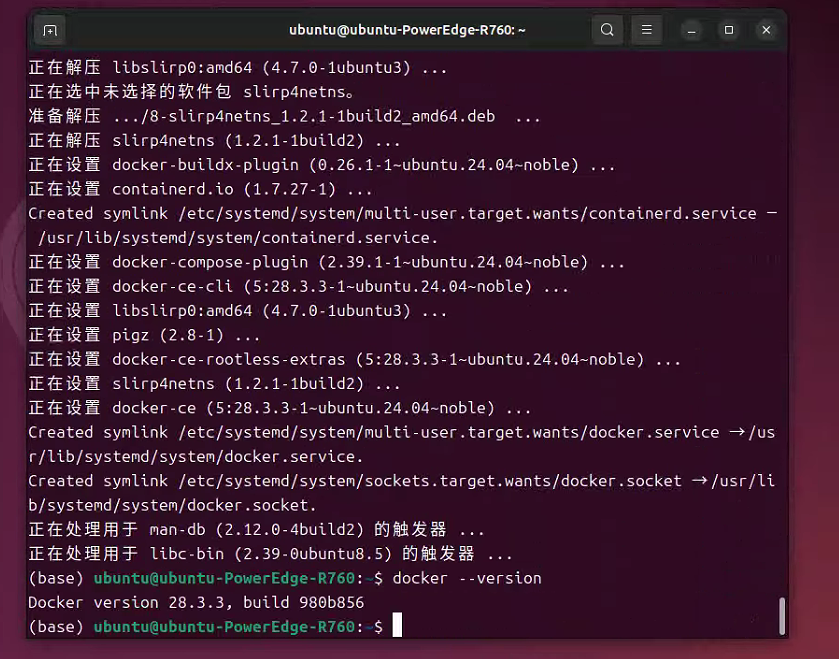
6 安装docker
bash
sudo apt install apt-transport-https ca-certificates curl software-properties-common  #更新你的包列表并安装一些必要的包
curl -fsSL https://download.docker.com/linux/ubuntu/gpg | sudo apt-key add -  #添加 Docker 的官方 GPG 密钥
sudo add-apt-repository "deb [arch=amd64] https://download.docker.com/linux/ubuntu $(lsb_release -cs) stable" #添加 Docker 的存储库
sudo apt install docker-ce   #安装 Docker
参考:
https://blog.csdn.net/m0_57236802/article/details/131818211
7 安装 dify
bash
git clone https://github.com/langgenius/dify.git
cd dify/docker
cp .env.example .env
docker compose up -d
有的提示80 ,443端口被占用:
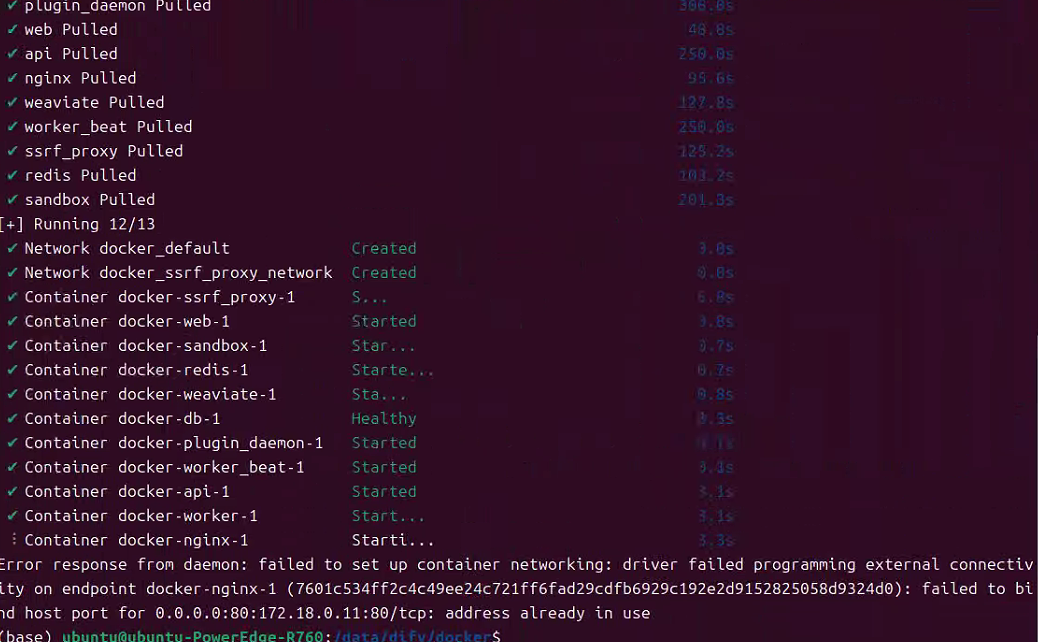
改一下 .env文件:
bash
EXPOSE_NGINX_PORT=8081
EXPOSE_NGINX_SSL_PORT=4431
这里很有意思的是,它也提示443端口也被占用:

一起改了, 再运行:
bash
docker compose up -d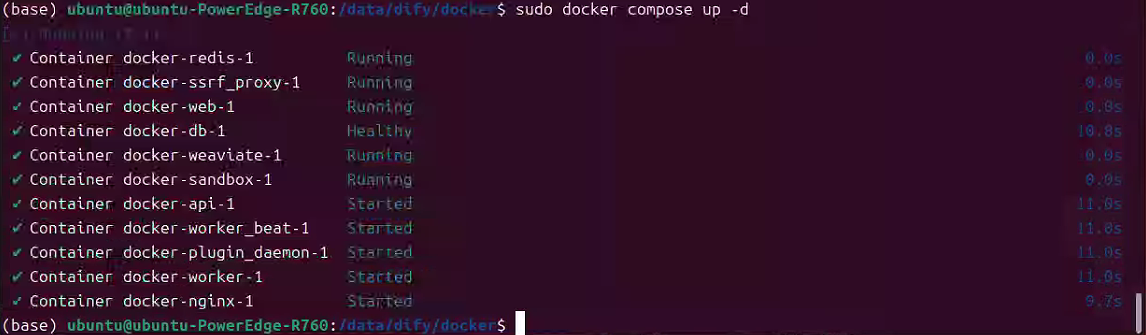
bash
有问题可以link q:316853809