文章目录
- 前言
- [一、UIViewController 生命周期有关函数](#一、UIViewController 生命周期有关函数)
- [二、UIViewController 中函数的执行顺序](#二、UIViewController 中函数的执行顺序)
- 三、总结
前言
UIViewController 是在 iOS 开发中一个非常重要的角色,他是 view 和 model 的桥梁,通过 UIViewController 的管理将数据展示在视图上。与此同时作为 uikit 中最基本的一个类,一般复杂的项目都离不开 UIViewController 作为基类,所以了解 UIViewController 的生命周期是很重要的。
一、UIViewController 生命周期有关函数
下图是 UIViewController 生命周期方法的调用函数
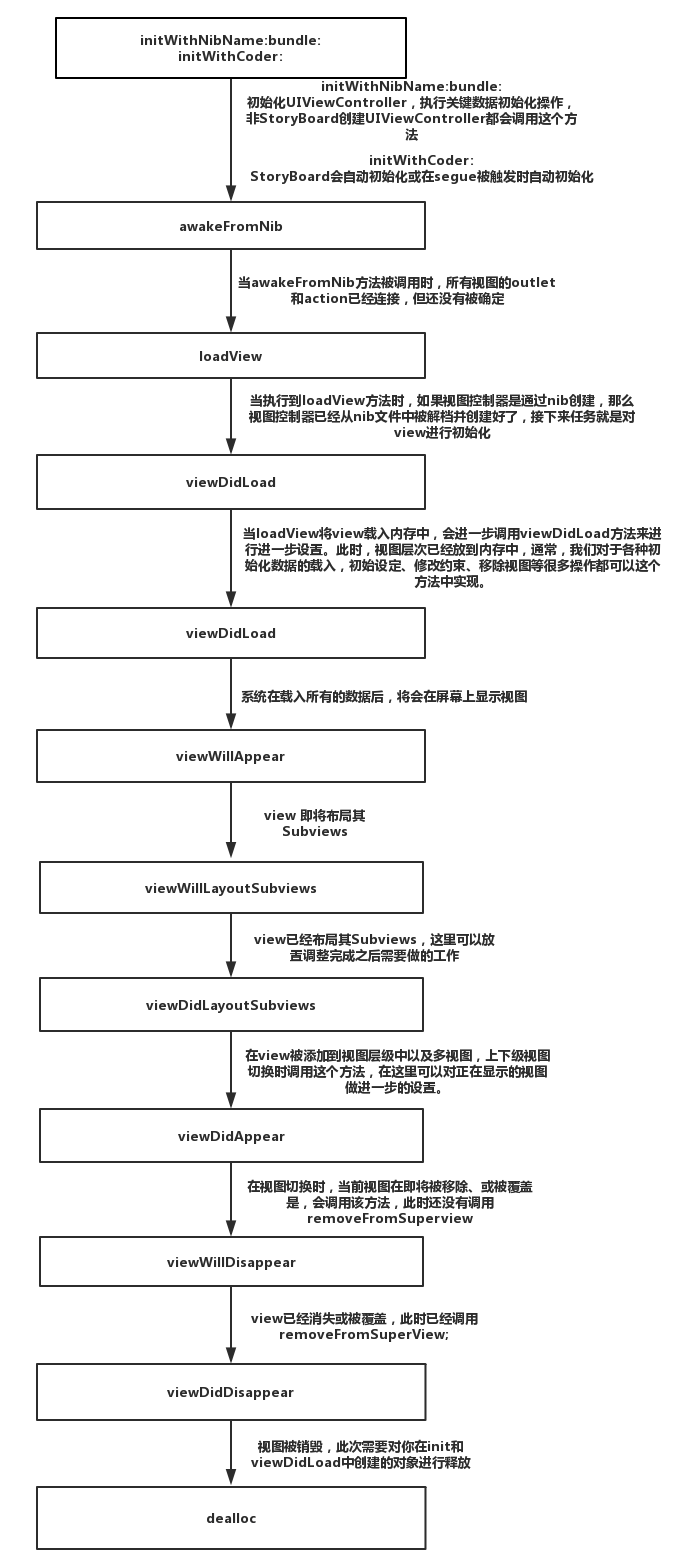
二、UIViewController 中函数的执行顺序
下面我会给出代码这段代码是将两个视图之间进行转换,同时打印相关的函数名来观察他的生命周期。在这里我给了两种方式来展示出他的转换,一个是 push 一个是 present。
objc
#import "ViewControllerA.h"
#import "ViewControllerB.h"
@interface ViewControllerA ()
@property (nonatomic, strong) UIButton *btn1;
@property (nonatomic, strong) UIButton *btn2;
@end
@implementation ViewControllerA
- (void)viewDidLoad {
[super viewDidLoad];
self.view.backgroundColor = [UIColor blueColor];
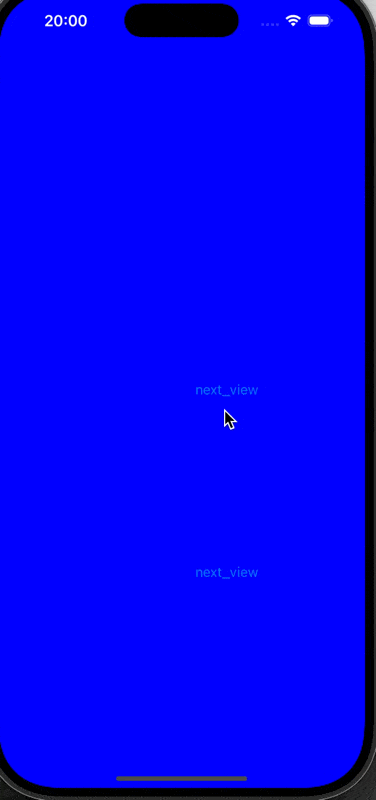
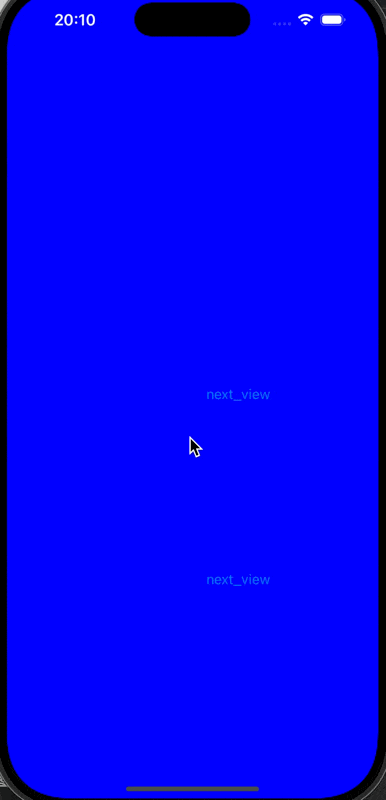
_btn1 = [UIButton buttonWithType:UIButtonTypeSystem];
[_btn1 setTitle:@"next_view" forState:UIControlStateNormal];
_btn1.frame = CGRectMake(self.view.frame.size.width / 2 - 50, self.view.frame.size.height / 2 - 50, 200, 100);
[self.view addSubview:_btn1];
[_btn1 addTarget:self action:@selector(Next_present) forControlEvents:UIControlEventTouchUpInside];
_btn2 = [UIButton buttonWithType:UIButtonTypeSystem];
[_btn2 setTitle:@"next_view" forState:UIControlStateNormal];
_btn2.frame = CGRectMake(self.view.frame.size.width / 2 - 50, self.view.frame.size.height / 2 + 150, 200, 100);
[self.view addSubview:_btn2];
[_btn2 addTarget:self action:@selector(Next_push) forControlEvents:UIControlEventTouchUpInside];
NSLog(@"%s", __func__);
}
- (void) Next_present {
ViewControllerB *b = [[ViewControllerB alloc] init];
NSLog(@"--------a->b---------");
b.modalPresentationStyle = UIModalPresentationFullScreen;
[self presentViewController:b animated:YES completion:nil];
}
- (void) Next_push {
ViewControllerB *b = [[ViewControllerB alloc] init];
NSLog(@"--------a->b---------");
[self.navigationController pushViewController:b animated:YES];
}
- (void)loadView {
[super loadView];
NSLog(@"%s", __func__);
}
- (void)viewWillAppear:(BOOL)animated {
NSLog(@"%s", __func__);
}
- (void)viewWillLayoutSubviews {
NSLog(@"%s", __func__);
}
- (void)viewDidLayoutSubviews {
NSLog(@"%s", __func__);
}
- (void)viewDidAppear:(BOOL)animated {
NSLog(@"%s",__func__);
}
- (void)viewWillDisappear:(BOOL)animated {
NSLog(@"%s", __func__);
}
- (void)viewDidDisappear:(BOOL)animated {
NSLog(@"%s", __func__);
}
/*
#pragma mark - Navigation
// In a storyboard-based application, you will often want to do a little preparation before navigation
- (void)prepareForSegue:(UIStoryboardSegue *)segue sender:(id)sender {
// Get the new view controller using [segue destinationViewController].
// Pass the selected object to the new view controller.
}
*/
@end
objc
#import "ViewControllerB.h"
#import "ViewControllerA.h"
@interface ViewControllerB ()
@property (nonatomic, strong) UIButton *btn1;
@property (nonatomic, strong) UIButton *btn2;
@end

@implementation ViewControllerB

- (void)viewDidLoad {
    [super viewDidLoad];
    self.view.backgroundColor = [UIColor redColor];
    _btn1 = [UIButton buttonWithType:UIButtonTypeSystem];
    [_btn1 setTitle:@"next_dismiss" forState:UIControlStateNormal];
    _btn1.frame = CGRectMake(self.view.frame.size.width / 2 - 50, self.view.frame.size.height / 2 - 50, 200, 100);
    [self.view addSubview:_btn1];
    [_btn1 addTarget:self action:@selector(Next_dismiss) forControlEvents:UIControlEventTouchUpInside];
    _btn2 = [UIButton buttonWithType:UIButtonTypeSystem];
    [_btn2 setTitle:@"next_pop" forState:UIControlStateNormal];
    _btn2.frame = CGRectMake(self.view.frame.size.width / 2 - 50, self.view.frame.size.height / 2 + 150, 200, 100);
    [self.view addSubview:_btn2];
    [_btn2 addTarget:self action:@selector(Next_pop) forControlEvents:UIControlEventTouchUpInside];
    NSLog(@"%s", __func__);
}
- (void) Next_dismiss {
    NSLog(@"--------b->a---------");
    [self dismissViewControllerAnimated:YES completion:nil];
}
- (void) Next_pop {
    NSLog(@"--------b->a---------");
    [self.navigationController popViewControllerAnimated:YES];
}
- (void)loadView {
    [super loadView];
    NSLog(@"%s", __func__);
}
- (void)viewWillAppear:(BOOL)animated {
    NSLog(@"%s", __func__);
}
- (void)viewWillLayoutSubviews {
    NSLog(@"%s", __func__);
}
- (void)viewDidLayoutSubviews {
    NSLog(@"%s", __func__);
}
- (void)viewDidAppear:(BOOL)animated {
    NSLog(@"%s",__func__);
}
- (void)viewWillDisappear:(BOOL)animated {
    NSLog(@"%s", __func__);
}
- (void)viewDidDisappear:(BOOL)animated {
    NSLog(@"%s", __func__);
}
/*
#pragma mark - Navigation

// In a storyboard-based application, you will often want to do a little preparation before navigation
- (void)prepareForSegue:(UIStoryboardSegue *)segue sender:(id)sender {
    // Get the new view controller using [segue destinationViewController].
    // Pass the selected object to the new view controller.
}
*/

@end
运行结果
1.present和dismiss
下面是函数打印的结果
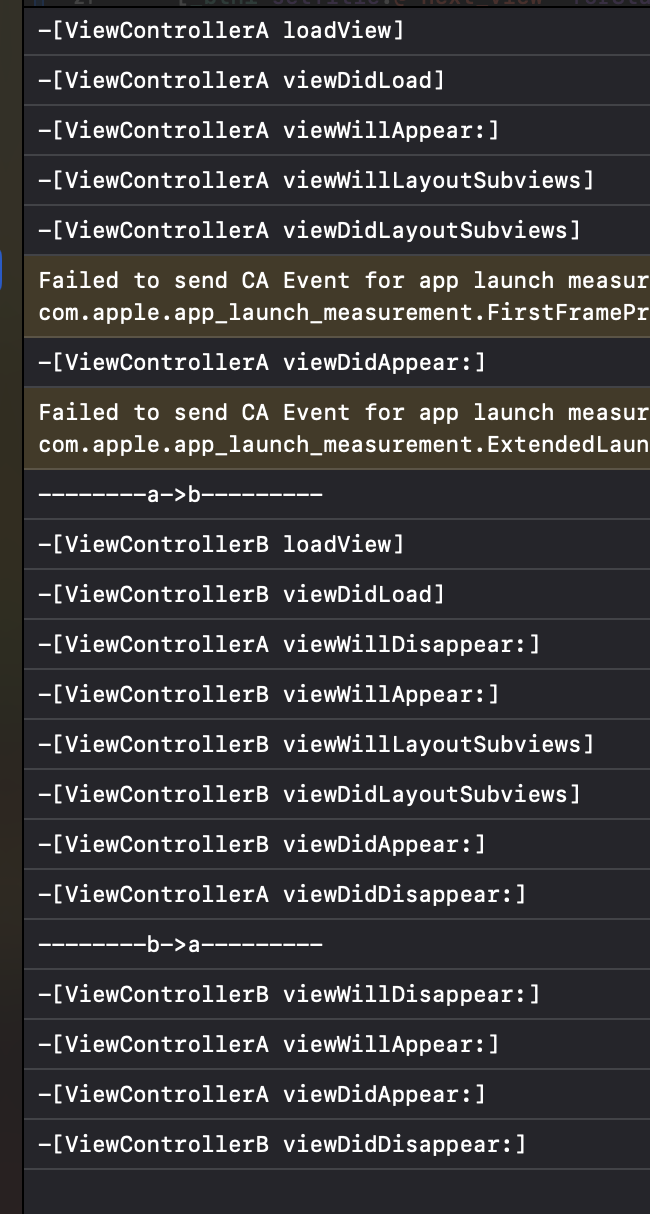
在这里就是这样一个顺序,就是先执行loadview 这一步把View 载入到内存中,然后再用viewDidload 这个方法把控件加载到view 上,然后就是调用viewwilllayoutsubview 和viewdidlayoutsubview这两个方法来进行布局,最后会执行 viewdidappear 这个方法完成所有视图的加载。
这是弹出的部分,在后面我们把 push 和 pop 这一对展示完后我会去结合 present 和 dismis解释视图消失相关的内容。
2.push和pop
代码和上面相同
下面是打印结果
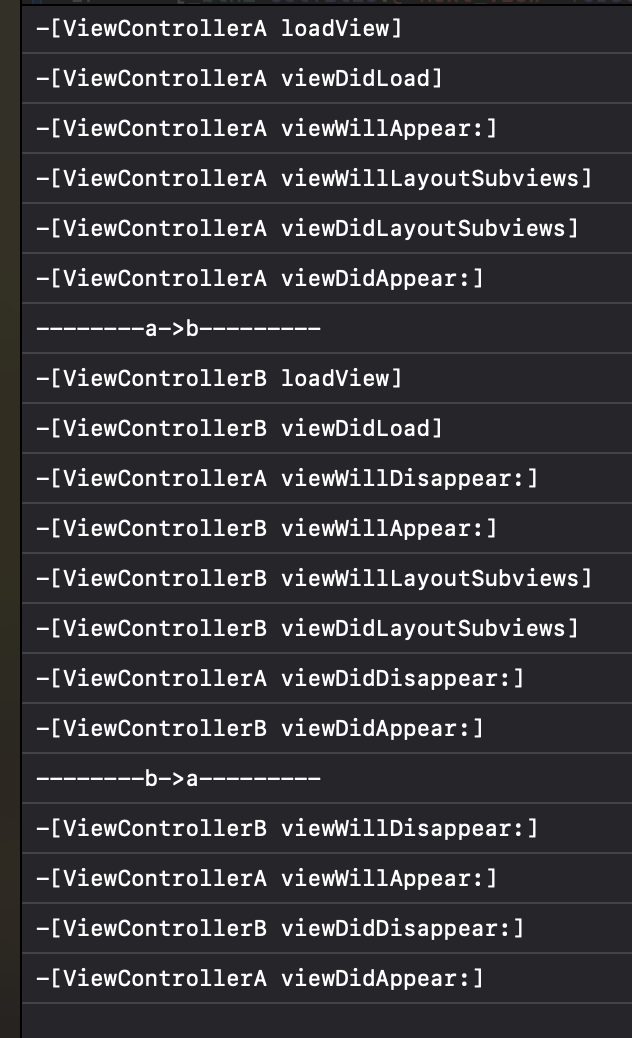
在这里我去着重介绍一下他的消失顺序,push 和 pop 的消失与 present 和 dismiss 的消失最大的不同就是push 中的 viewDidDisappear 是在下一个视图的 viewDidAppear 之前的然而你像在 present 中 viewDidDisappear是在下一个视图 viewDidAppear 之后的。
在这里最重要的原因就是
- 因为 push 是栈结构,A 被"挤下去",所以它会走消失的生命周期。
- B 被放在最顶上,执行"将要出现"和"已经出现"。
- present 时,B 的 didAppear 在 A 的 didDisappear 之前执行。
- 也就是说,新控制器(B)已经展示成功了,旧控制器(A)才真正被认为消失。
- 这是因为 present 是模态展示,A 并没有被销毁,只是被 B 遮挡了,系统优先保证 B 先可见。
三、总结
objc
init / loadView -> viewDidLoad -> viewWillAppear -> viewDidAppear
-> viewWillDisappear -> viewDidDisappear -> dealloc
这就是一个非常简单的流程图他也展示了UIViewController 的生命周期。
在这里我想补充一点就是
objc
- (void)loadView {
    [super loadView];
    NSLog(@"%s", __func__);
}在这之中我们必须要使用**super loadView**因为这样他就可以帮助我们自动生成 View 。如果我们找不到 View ,程序就会一直调用loadView方法来寻找。