目录
[一、label studio 安装启动](#一、label studio 安装启动)
[1、建议是通过 pip 安装,其配置更清晰方便。环境安装完成后在任意位置打开命令行:](#1、建议是通过 pip 安装,其配置更清晰方便。环境安装完成后在任意位置打开命令行:)
[2、使用以下命令启动 label studio](#2、使用以下命令启动 label studio)
[二、label studio ml 安装](#二、label studio ml 安装)
[1、 GitHub 安装(再起env一个环境,要不然会冲突)](#1、 GitHub 安装(再起env一个环境,要不然会冲突))
[2、pip 安装(这种方式缺东西,不可用):](#2、pip 安装(这种方式缺东西,不可用):)
一、label studio 安装启动
1、建议是通过 pip 安装,其配置更清晰方便。环境安装完成后在任意位置打开命令行:
  #最好是创建一个新的env
  pip install label-studio
2、使用以下命令启动 label studio
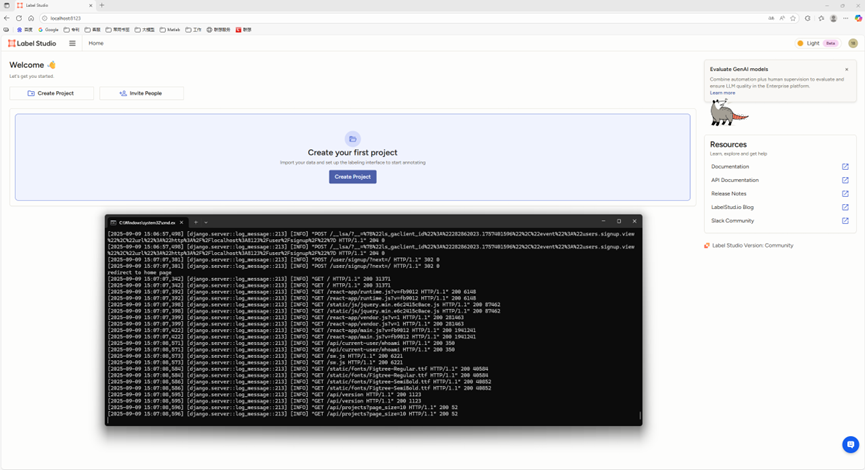
label-studio --data-dir LabelStudio -p 8123其中 --data-dir 用于指定工作目录, -p 用来指定运行端口,运行成功后会当前目录会生成 LabelStudio 目录。
3、运行后会启动如下界面:
二、label studio ml 安装
label studio ml 是 label studio 的后端配置,其主要提供了一种能够快速将AI模型封装为 label studio 可使用的预标记服务(提供模型预测服务)。其安装方法有以下几种:
1、 GitHub 安装(再起env一个环境,要不然会冲突)
python
git clone https://github.com/HumanSignal/label-studio-ml-backend.git
#离线下载地址:https://download.csdn.net/download/zhulong1984/91906097

cd label-studio-ml-backend/

pip install -e . -i https://pypi.tuna.tsinghua.edu.cn/simple
报错解决 Failed to connect to github.com port 443 after ***** ms: Couldn't connect to server,这种错误需要修改git的代理端口和本电脑一致。具体操作如下:
1)参考网址:https://blog.csdn.net/m0_64007201/article/details/129628363
2)查看电脑的端口号:
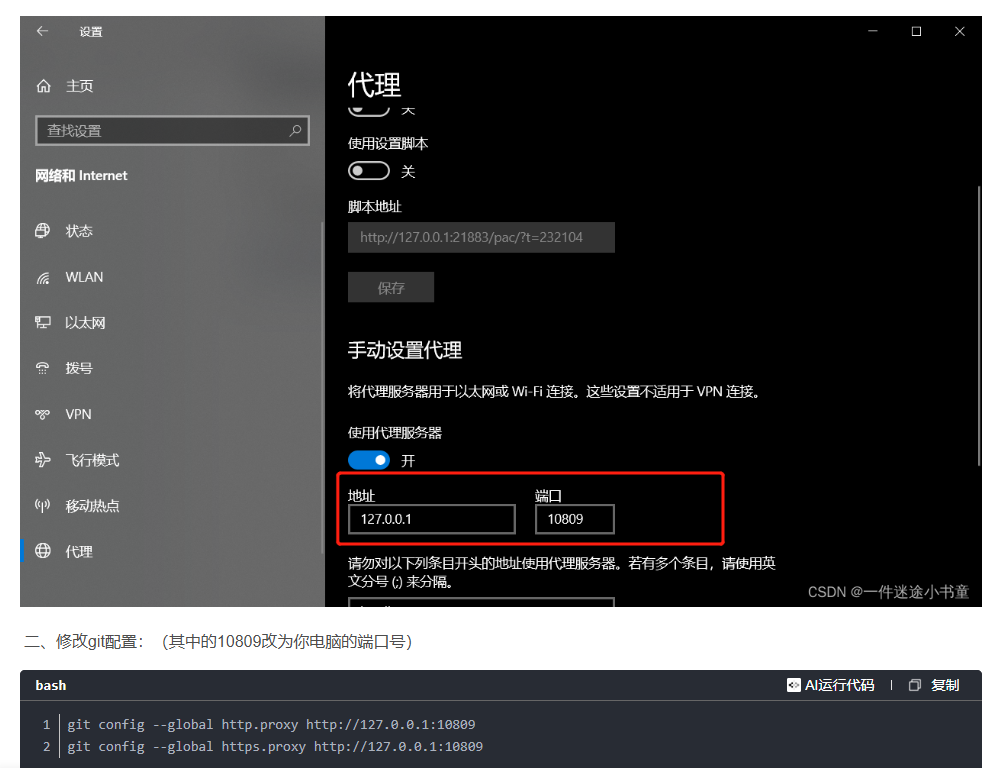
3)修改如下,7897是我的另一个电脑端口号
python
git config --global http.proxy http://127.0.0.1:7897
git config --global https.proxy http://127.0.0.1:7897
2、pip 安装(这种方式缺东西,不可用):
pip install label-studio-ml(暂时不用)
仍然建议通过 pip 安装,GitHub 安装可能会有依赖问题。安装完成后使用 label-studio-ml -h 命令检查是否安装成功。
三、前端配置
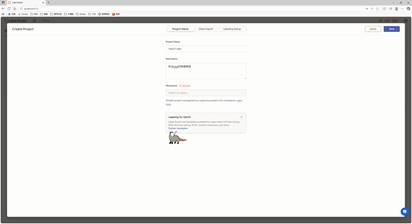
在 label studio 前端主页中选择创建项目:
1、项目基本信息
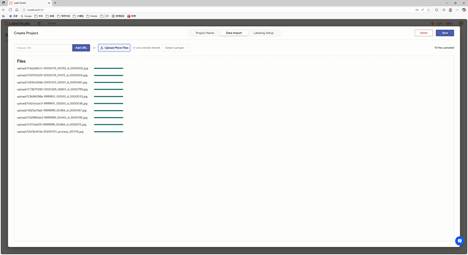
2、导入数据
直接将图片选中拖入数据框即可。
3、选择标记模板
label studio 内置了很多常见的深度学习标记模板,本示例是车辆、人等,所以选择 Object Detection with Bounding Boxes 模板,确定后将模板内自带的 Airplane 、 Car 标签删除,然后添加自定义的标签 people、car (标签的类别数量可以比后端支持的类别多,也可以更少,但是同类别的标签名必须一致)。
此时我们已经可以通过 label studio 进行普通的图片标记工作,如果要使用其提供的辅助预标记功能,则需要进行后续配置。
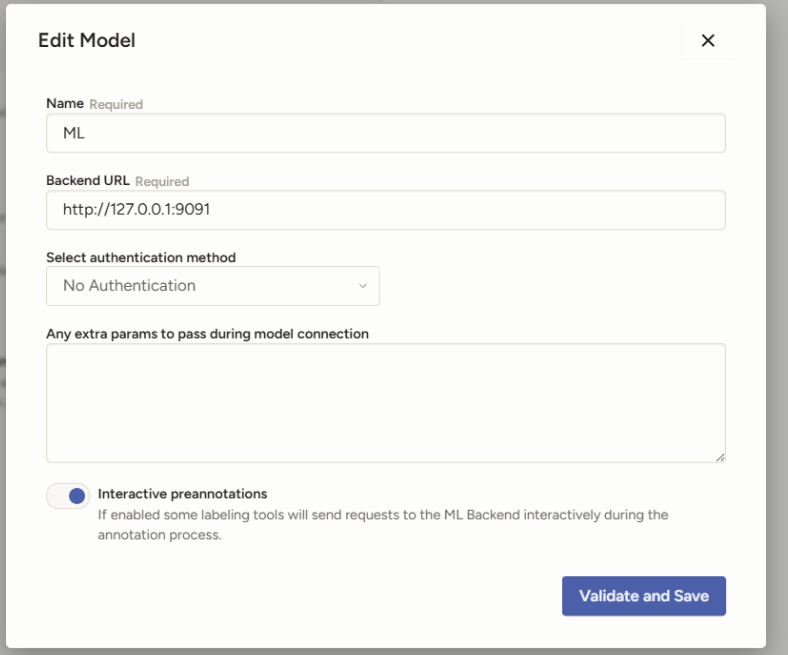
4、Model配置
需要按照以下进行配置:
四、后端配置
由于图像技术方面目标检测任务对预标注功能较为需求,以下目标检测任务为例。
1)编写后端项目的推理代码,实现模型预测功能;
2)继承label_studio_ml.model.LabelStudioMLBase类,重写方法:
针对自动预标注功能,主要重写predict方法,将输出格式化成label studio所需的json格式(参考官方文档:https://labelstud.io/guide/predictions.html)。
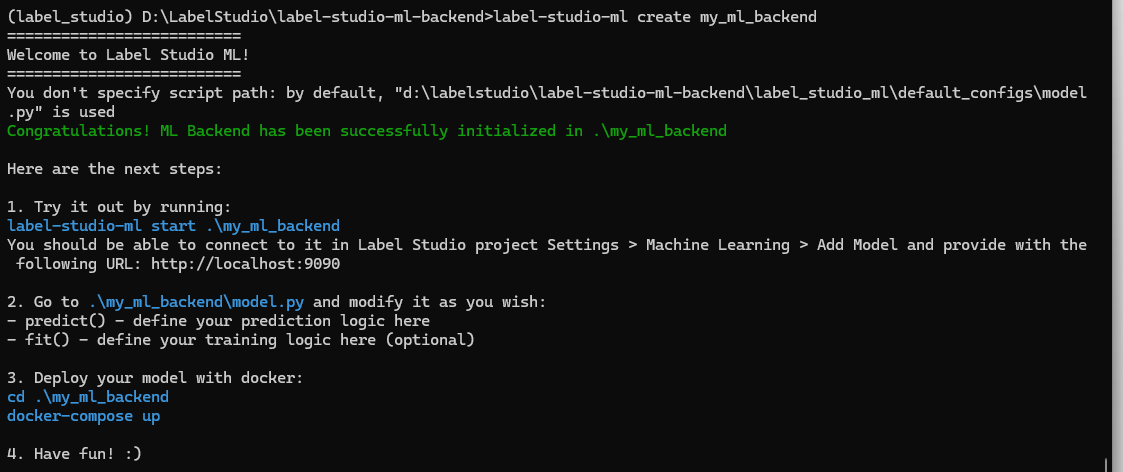
1、先创建自己的my_ml_backend
先进入自己的conda的env环境,执行以下指令:
python
#创建自己的后端服务
label-studio-ml create my_ml_backend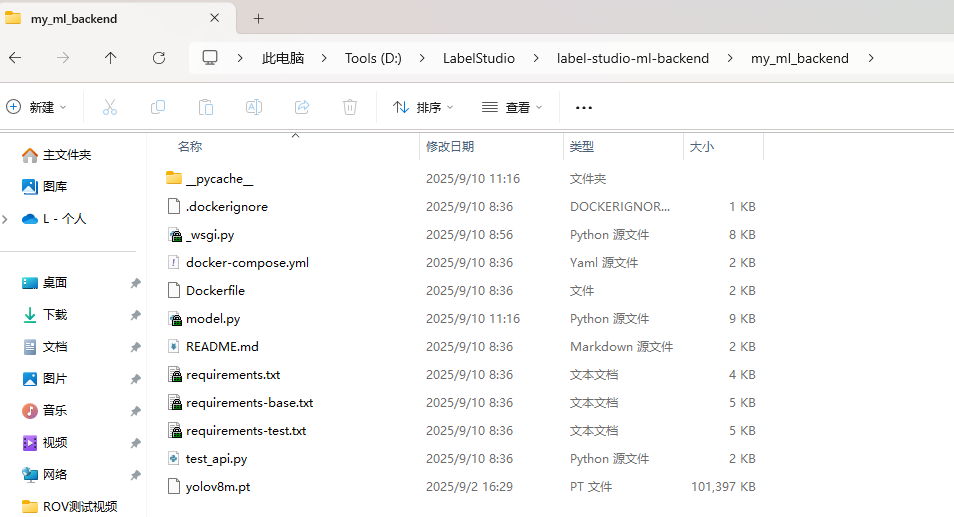 my_ml_backend内容
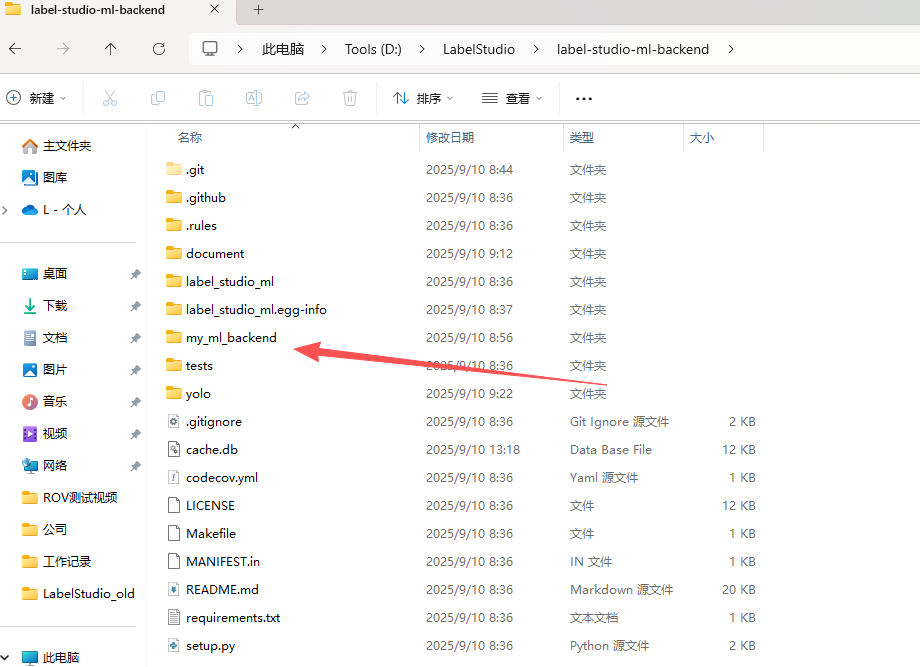 在label-studio-ml-backend目录下
 创建过去信息
2、修改自己的model.py
my_ml_backend下的其他内容不动,只需要修改model.py,修改内容如下:
python
from typing import List, Dict, Optional
from label_studio_ml.model import LabelStudioMLBase
from label_studio_ml.response import ModelResponse
from label_studio_ml.utils import get_single_tag_keys, get_local_path
import requests, os
from ultralytics import YOLO
from PIL import Image
from io import BytesIO

LS_URL = "http://192.168.1.100:8123"
LS_API_TOKEN = "1864bad90941079c1d18e251bcb29cf2243fa46f"

class YOLOv8Model(LabelStudioMLBase):
    """Custom ML Backend model
    """

    def setup(self):
        """Configure any parameters of your model here
        """
        self.set("model_version", "0.0.1")
        self.from_name, self.to_name, self.value, self.classes = get_single_tag_keys(
            self.parsed_label_config, 'RectangleLabels', 'Image')
        self.model = YOLO("./my_ml_backend/yolov8m.pt")
        self.labels = self.model.names

    def predict(self, tasks: List[Dict], context: Optional[Dict] = None, **kwargs) -> ModelResponse:
        task = tasks[0]

        # header = {
        #     "Authorization": "Token " + LS_API_TOKEN}
        # image = Image.open(BytesIO(requests.get(
        #     LS_URL + task['data']['image'], headers=header).content))
        # url = tasks[0]['data']['image']
        # print(f'url is: {url}')
        # image_path = self.get_local_path(url=url,ls_host=LS_URL,task_id=tasks[0]['id'])
        # print(f'image_path: {image_path}')

        # image = Image.open(image_path)
        # original_width, original_height = image.size

        url = task['data']['image']
        headers = {"Authorization": "Token " + LS_API_TOKEN}
        response = requests.get(LS_URL + url, headers=headers)
        response.raise_for_status()  # 如果401会直接抛异常
        image = Image.open(BytesIO(response.content))
        original_width, original_height = image.size


        predictions = []
        score = 0
        i = 0

        results = self.model.predict(image,conf=0.5)

        for result in results:
            for i, prediction in enumerate(result.boxes):
                xyxy = prediction.xyxy[0].tolist()
                predictions.append({
                    "id": str(i),
                    "from_name": self.from_name,
                    "to_name": self.to_name,
                    "type": "rectanglelabels",
                    "score": prediction.conf.item(),
                    "original_width": original_width,
                    "original_height": original_height,
                    "image_rotation": 0,
                    "value": {
                        "rotation": 0,
                        "x": xyxy[0] / original_width * 100,
                        "y": xyxy[1] / original_height * 100,
                        "width": (xyxy[2] - xyxy[0]) / original_width * 100,
                        "height": (xyxy[3] - xyxy[1]) / original_height * 100,
                        "rectanglelabels": [self.labels[int(prediction.cls.item())]]
                    }
                })
                score += prediction.conf.item()
        print(f"Prediction Score is {score:.3f}.")
        final_prediction = [{
            "result": predictions,
            "score": score / (i + 1),
            "model_version": "v8n"
        }]
        return ModelResponse(predictions=final_prediction)

    def fit(self, event, data, **kwargs):
        """
        This method is called each time an annotation is created or updated
        You can run your logic here to update the model and persist it to the cache
        It is not recommended to perform long-running operations here, as it will block the main thread
        Instead, consider running a separate process or a thread (like RQ worker) to perform the training
        :param event: event type can be ('ANNOTATION_CREATED', 'ANNOTATION_UPDATED', 'START_TRAINING')
        :param data: the payload received from the event (check [Webhook event reference](https://labelstud.io/guide/webhook_reference.html))
        """

        # use cache to retrieve the data from the previous fit() runs
        old_data = self.get('my_data')
        old_model_version = self.get('model_version')
        print(f'Old data: {old_data}')
        print(f'Old model version: {old_model_version}')

        # store new data to the cache
        self.set('my_data', 'my_new_data_value')
        self.set('model_version', 'my_new_model_version')
        print(f'New data: {self.get("my_data")}')
        print(f'New model version: {self.get("model_version")}')

        print('fit() completed successfully.')
之后在label-studio-ml-backend下启动my_ml_backend:
label-studio-ml start my_ml_backend -p 90913、注意事项
1)、环境变量
LABEL_STUDIO_URL:LS的IP端口号,如:127.0.0.1:8080
LABEL_STUDIO_API_KEY:LS中个人账户的秘钥
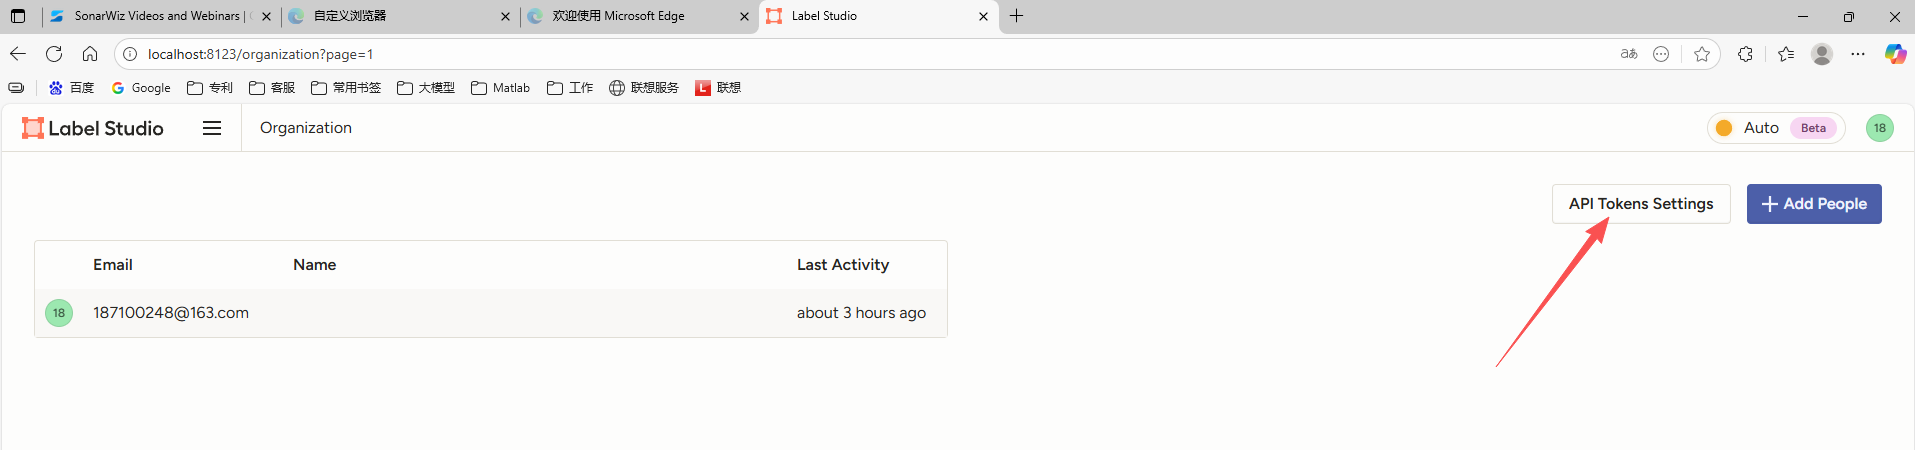
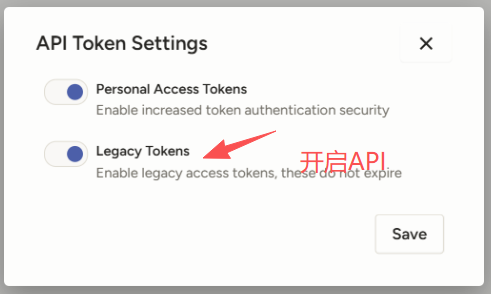
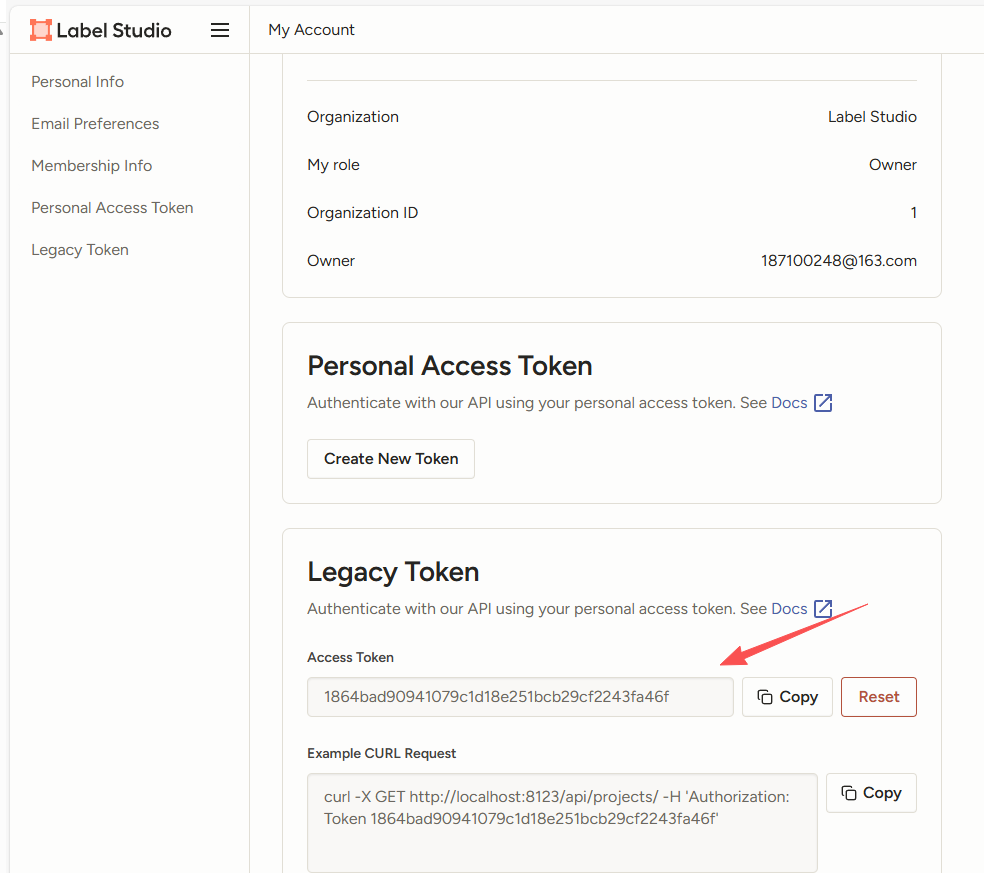 经过上面的配置可以获取KEY
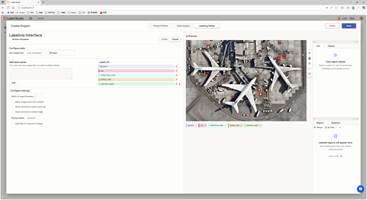
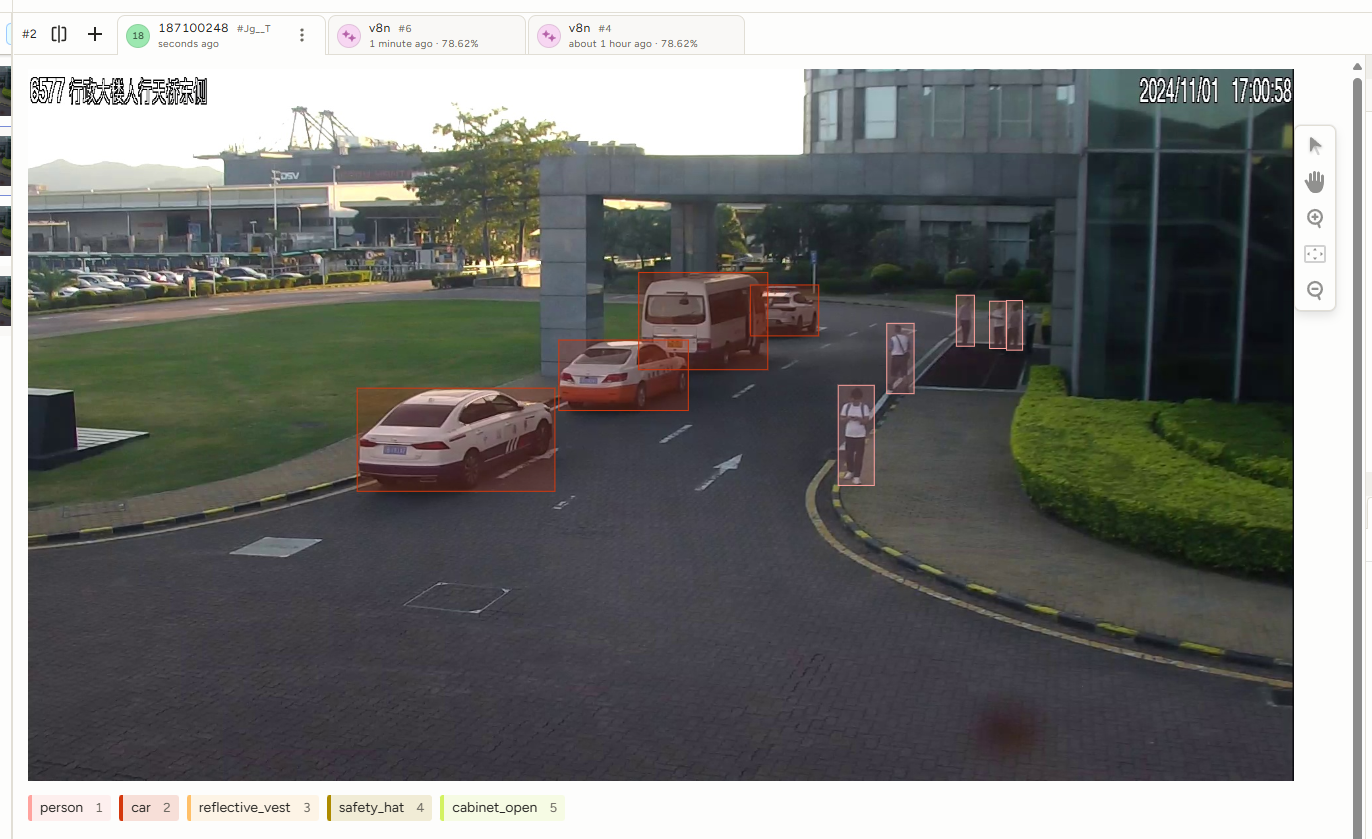
2)、自动标注
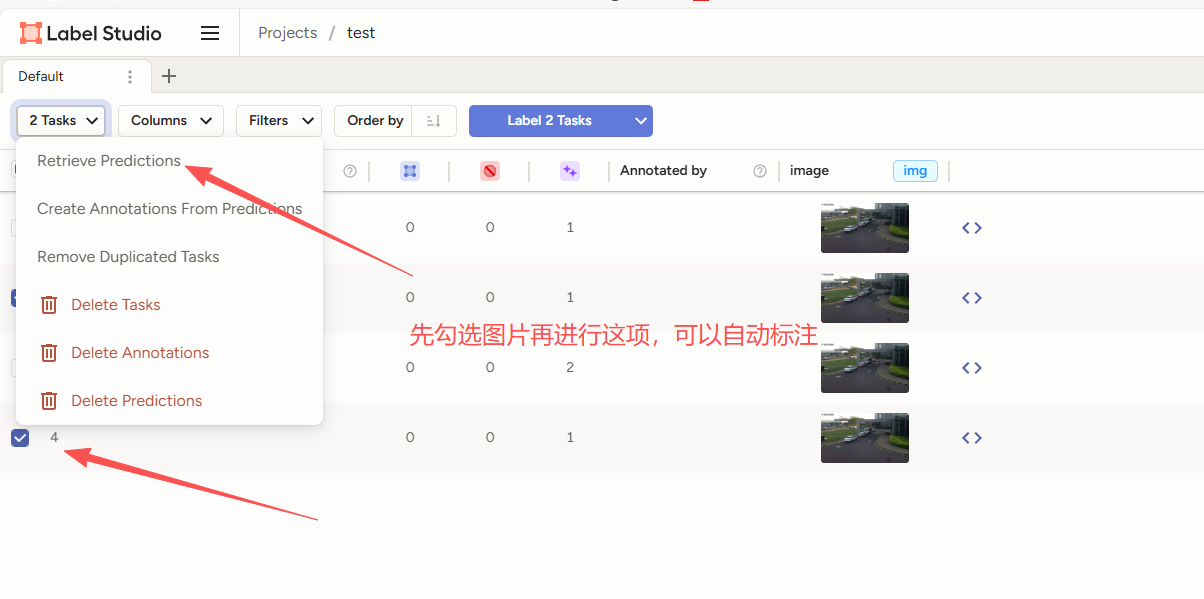
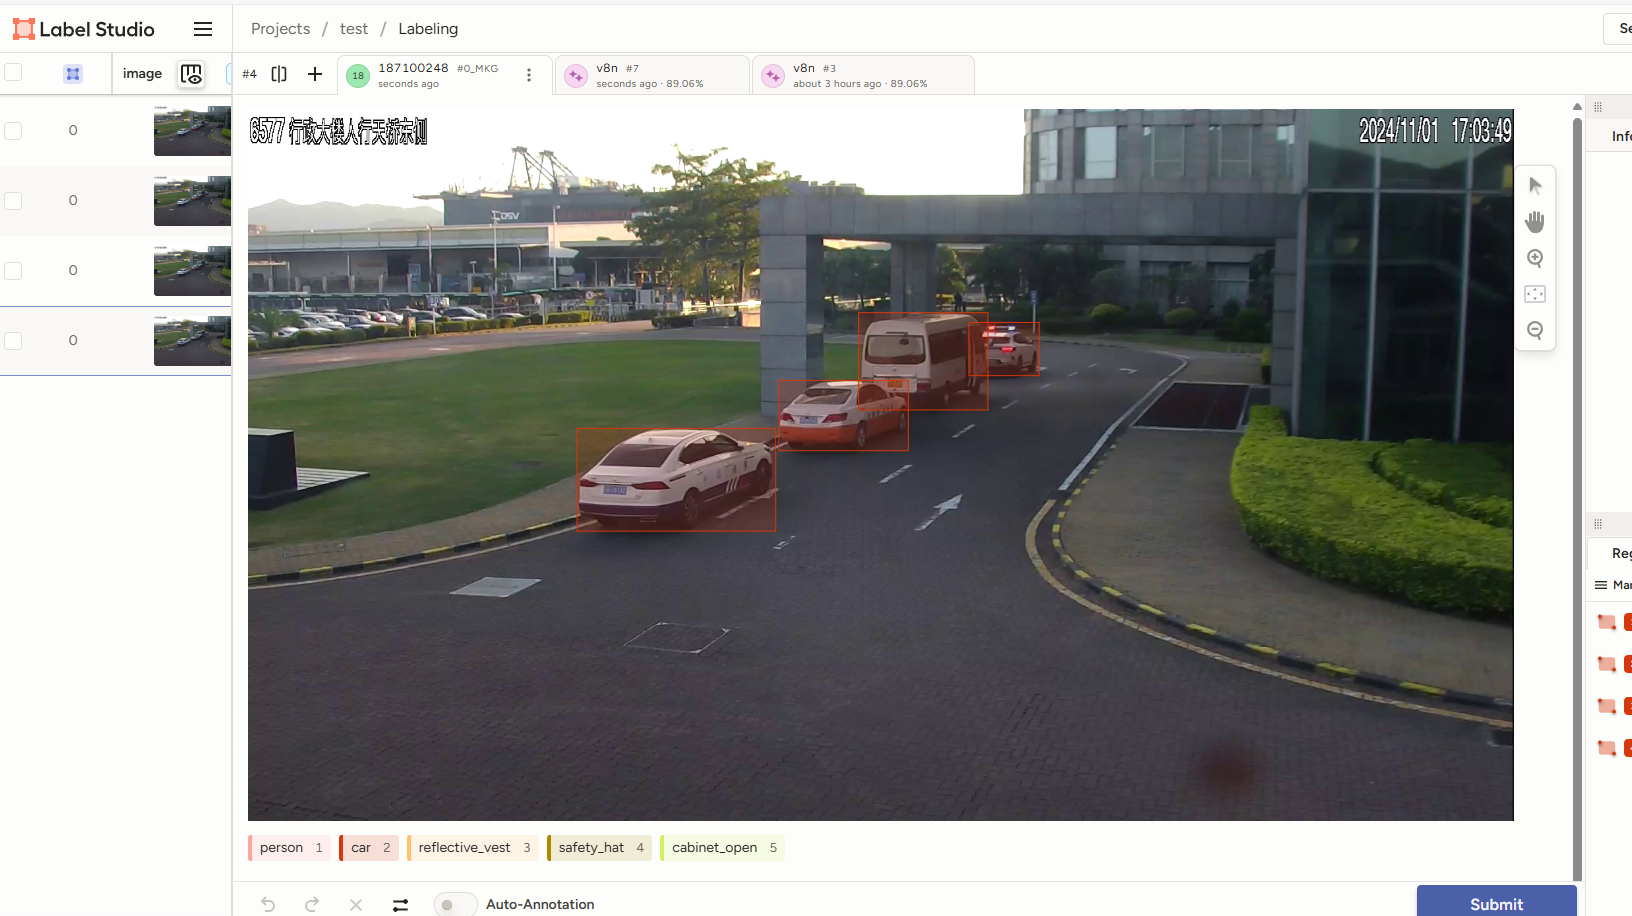 自动标注效果标注
至此整个流程完成,把所有的坑都解决。
参考文档:https://blog.csdn.net/qq_40260565/article/details/141418885