文章目录
概念简述
Elasticsearch,简称 ES,它是个开源分布式搜索引擎,它的特点有:分布式、零配置、自动发现、索引自动分片、索引副本机制、restful 风格接口、多数据源、自动搜索负载等。ES类似数据库,相比数据库,它在搜索功能上更为实用、高效。
在搜索上与数据库的区别?
数据库的搜索策略类似二叉搜索树,但在文本搜索场景下,只能使用like模糊匹配,效率较低。而es主要做分词搜索,比如"你好,世界",会被分成:"你"、"好"、"世"、"界"、"你好"、"世界"...
es核心概念
- 索引:一个索引就是一个拥有几分相似特征的文档的集合,类似于mysql数据库中的库。
- 类型:一个类型是索引的一个逻辑上的分类/分区,类似于mysql数据库中库结构下的表。
- 字段:相当于 MySQL 数据库中的列,对文档数据根据不同属性进行的分类标识。
字段类型:
| 分类 | 类型 | 备注 |
|---|---|---|
| 字符串 | text, keyword |
text会被分词生成索引;keyword不会被分词生成索引,只能精确值搜索 |
| 整形 | integer, long, short, byte |
- |
| 浮点 | double, float |
- |
| 逻辑 | boolean |
true 或 false |
| 日期 | date, date_nanos |
"2018-01-13"或"2018-01-13 12:10:30"或者时间戳,即1970到现在的秒数/毫秒数 |
| 二进制 | binary |
二进制通常只存储,不索引 |
| 范围 | range |
- |
字符串是最常用的字段类型

提示:es中的类型基本上已经被弃用,通常是一个es索引管理一种数据。
映射
它定义了每条数据记录(文档)中的每个字段(Field)应该是什么类型,以及应该如何被处理,对数据的处理方式和规则做一些限制。
比如该字段是否做搜索分析,比如我们在搜索好友时不会通过性别或个性签名去搜索到好友,所以这些字段不用做搜索分析。(通过enabled设置)
又或者在音乐软件上做搜索,那么用户想搜的不一定是歌名,也可以把歌手,用户名,歌词等等进行搜索分析,而我们可以为这些字段设置权重,把歌名做最高权重,然后依次根据需要做不同权重。(通过boost设置)
这就是映射的意义与重要性,如下es的 映射参数:
| 名称 | 数值 | 备注 |
|---|---|---|
enabled |
true(默认) | false | 是否仅作存储,不做搜索和分析 |
index |
true(默认) | false | 是否构建倒排索引(决定了是否分词,是否被索引) |
index_option |
- | - |
dynamic |
true(缺省)| false | 控制 mapping 的自动更新 |
doc_value |
true(默认) | false | 是否开启 doc_value,用于聚合和排序分析,分词字段不能使用 |
fielddata |
"fielddata": {"format": "disabled"} | 是否为 text 类型启动 fielddata,实现排序和聚合分析针对分词字段,参与排序或聚合时能提高性能,不分词字段统一建议使用 doc_value |
store |
true | false(默认) | 是否单独设置此字段的是否存储而从_source 字段中分离,只能搜索,不能获取值 |
coerce |
true(默认) | false | 是否开启自动数据类型转换功能,比如:字符串转数字,浮点转整型 |
analyzer |
"analyzer":"ik" | 指定分词器,默认分词器为 standard analyzer |
boost |
"boost": 1.23 | 字段级别的分数加权,默认值是 1.0 |
fields |
"fields": { "raw": { "type": "text", "index": "not_analyzed" } } | 对一个字段提供多种索引模式,同一个字段的值可对应两种索引模式,一种分词索引,一种不分词索引 |
data_detection |
true(默认) | false | 是否自动识别日期类型 |
安装与配置
# 添加仓库秘钥
wget -qO - https://artifacts.elastic.co/GPG-KEY-elasticsearch |
sudo apt-key add -
# 上边的添加方式会导致一个 apt-key 的警告,如果不想报警告使用下边这个
curl -s https://artifacts.elastic.co/GPG-KEY-elasticsearch | sudo
gpg --no-default-keyring --keyring gnupgring:/etc/apt/trusted.gpg.d/icsearch.gpg --import
# 添加镜像源仓库
echo "deb https://artifacts.elastic.co/packages/7.x/apt stable
main" | sudo tee /etc/apt/sources.list.d/elasticsearch.list
# 更新软件包列表
sudo apt update
# 安装 es
sudo apt-get install elasticsearch=7.17.21
# 启动 es
sudo systemctl start elasticsearch
# 安装 ik 分词器插件
sudo /usr/share/elasticsearch/bin/elasticsearch-plugin install
https://get.infini.cloud/elasticsearch/analysis-ik/7.17.21
启动es
bash
sudo systemctl start elasticsearch配置外网访问
vim /etc/elasticsearch/elasticsearch.yml
# 新增配置
network.host: 0.0.0.0
http.port: 9200
cluster.initial_master_nodes: ["node-1"]
Kibana 是 Elastic Stack 技术栈中的一个开源数据分析与可视化平台。它作为一个基于 Web 的图形界面,为用户提供了对存储在 Elasticsearch 中的数据进行探索、可视化、交互和管理的能力。
安装 Kibana:
#使用 apt 命令安装 Kibana。
sudo apt install kibana
#配置 Kibana(可选):
#根据需要配置 Kibana。配置文件通常位于 /etc/kibana/kibana.yml。可能需要
#设置如服务器地址、端口、 Elasticsearch URL 等。
sudo vim /etc/kibana/kibana.yml
#例如,你可能需要设置 Elasticsearch 服务的 URL: 大概 32 行左右
elasticsearch.host: "http://localhost:9200"
#启动 Kibana 服务:
#安装完成后,启动 Kibana 服务。
sudo systemctl start kibana
#设置开机自启(可选):
#如果你希望 Kibana 在系统启动时自动启动,可以使用以下命令来启用自启动。
sudo systemctl enable kibana
#验证安装:
#使用以下命令检查 Kibana 服务的状态。
sudo systemctl status kibana
#访问 Kibana:
#在浏览器中访问 Kibana,通常是 http://<your-ip>:5601
测试示例
通过网页访问Kibana

json
POST /user/_doc
{
    "settings" : {
        "analysis" : {
            "analyzer" : {
                "ik" : {
                    "tokenizer" : "ik_max_word"
                }
            }
        }
    },
    "mappings" : {
        "dynamic" : true,
        "properties" : {
            "昵称" : {
                "type" : "text",
                "analyzer" : "ik_max_word"
            },
            "用户ID" : {
                "type" : "keyword",
                "analyzer" : "standard"
            },
            "手机号" : {
                "type" : "keyword",
                "analyzer" : "standard"
            },
            "描述" : {
                "type" : "text",
                "enabled" : false
            },
            "头像ID" : {
                "type" : "keyword",
                "enabled" : false
            }
        }
    }
}
-
post:以请求的方式提交数据 -
user:索引名称(存储用户数据的库) -
_doc:类型(此处为文档类型标识) -
analyzer:分词器设置,ik为中文分词器,tokenizer用于指定分词粒度,ik_max_word表示以最大的粒度进行分词。 -
mapping:表示下面要描述的映射关系 -
dynamic:true表示未定义的字段会自动添加到映射并使用默认配置 -
typetext:是一个文本类型keyword:是一个文本类型,但是是关键字不进行分词
-
analyzerstandard:默认标准分词器ik_max_word:中文分词器
数据插入
json
POST /user/_doc/_bulk
{"index":{"_id":"1"}}
{"user_id":"USER4b8a2aaa-2df8654a-7eb4bb65-e3507f66","nickname":"昵称 1","phone":"手机号1","description":"签名 1","avatar_id":"头像 1"}
{"index":{"_id":"2"}}
{"user_id":"USER14eeea5-442771b9-0262e455-e4663d1d","nickname":"昵称 2","phone":"手机号 2","description":"签名 2","avatar_id":"头像 2"}
{"index":{"_id":"3"}}
{"user_id":"USER4b8a6734-03a124f0-996c169d-d05c1869","nickname":"昵称 3","phone":"手机号3","description":"签名 3","avatar_id":"头像 3"}
{"index":{"_id":"4"}}
{"user_id":"USER186ade83-4460d4a6-8c08068f-83127b5d","nickname":"昵称 4","phone":"手机号4","description":"签名 4","avatar_id":"头像 4"}
{"index":{"_id":"5"}}
{"user_id":"USER6f1d9074-c33891cf-23bf5a83-57189a19","nickname":"昵称 5","phone":"手机号5","description":"签名 5","avatar_id":"头像 5"}
{"index":{"_id":"6"}}
{"user_id":"USER97605c64-9833ebb7-d0455353-35a59195","nickname":"昵称 6","phone":"手机号6","description":"签名 6","avatar_id":"头像 6"}
注意:每条数据需按'索引声明行 + 数据行'的格式书写,且每行需单独占一行。
数据搜索
搜索所有数据:
json
POST /user/_doc/_search
{
		"query": {
		"match_all":{}
		}
}
以昵称这个"关键词"进行条件搜索:
json
GET /user/_doc/_search?pretty
{
    "query": {
        "bool": {
            "must_not": [
                {
                    "terms": {
                        "user_id.keyword": [
                            "USER4b862aaa-2df8654a-7eb4bb65-e3597766",
                            "USER14eeeaa5-442771b9-0262e455-e4663d1d",
                            "USER484a6734-93a124f0-996c169d-d05c1869"
                        ]
                    }
                }
            ],
            "should": [
                {
                    "match": {
                        "user_id": "昵称"
                    }
                },
                {
                    "match": {
                        "nickname": "昵称"
                    }
                },
                {
                    "match": {
                        "phone": "昵称"
                    }
                }
            ]
        }
    }
}must_not:描述必须不包含的项,方向搜索should:描述应该遵循的条件,表示在以下任意一个字段中出现"昵称"则匹配成功。
注意:如上过滤条件中,user_id,需要加keyword,表示不进行分词。不加该字段默认是分词匹配,分词字段与不分词字段无法直接匹配。
客户端API使用
- 构造函数
cppexplicit Client(const std::vector<std::string> &hostUrlList, std::int32_t timeout = 6000);该接口用于创建和初始化
Elasticsearch客户端实例
hostUrlList:传入地址列表,即http://ip:port如果有多个地址,可以传入列表。timeout:为连接超时时间,通常用缺省值。
- 查询数据
cppsearch(const std::string &indexName, const std::string &docType, const std::string &body, const std::string &routing =std::string())
search接口用于在指定索引中执行搜索查询,根据查询条件返回匹配的文档列表。
- 创建索引和新增数据
cppindex(const std::string &indexName, const std::string &docType, const std::string &id, const std::string &body, const std::string &routing = std::string())
index接口用于在Elasticsearch中创建索引,或新增数据和更新数据,通过指定索引名称、文档ID和内容来存储数据。
- 删除数据
cppremove(const std::string &indexName, const std::string &docType, const std::string &id, const std::string &routing = std::string())
remove接口用于从Elasticsearch索引中删除指定ID的文档,永久移除目标数据。关于以上三个接口的参数:
indexName:索引名称docType:指定文档类型id:用于标识一个索引内键值的唯一性body:正文部分,用于创建索引、搜索或添加数据的JSON 字符串routing:路由键,用于控制文档存储到哪个分片,通常就用缺省值返回值类型为
cpr::Response,通常会使用它的status_code字段(是一个状态码,用于判断函数执行是否成功)和text字段(返回的正文部分,是一个Json字符串)。
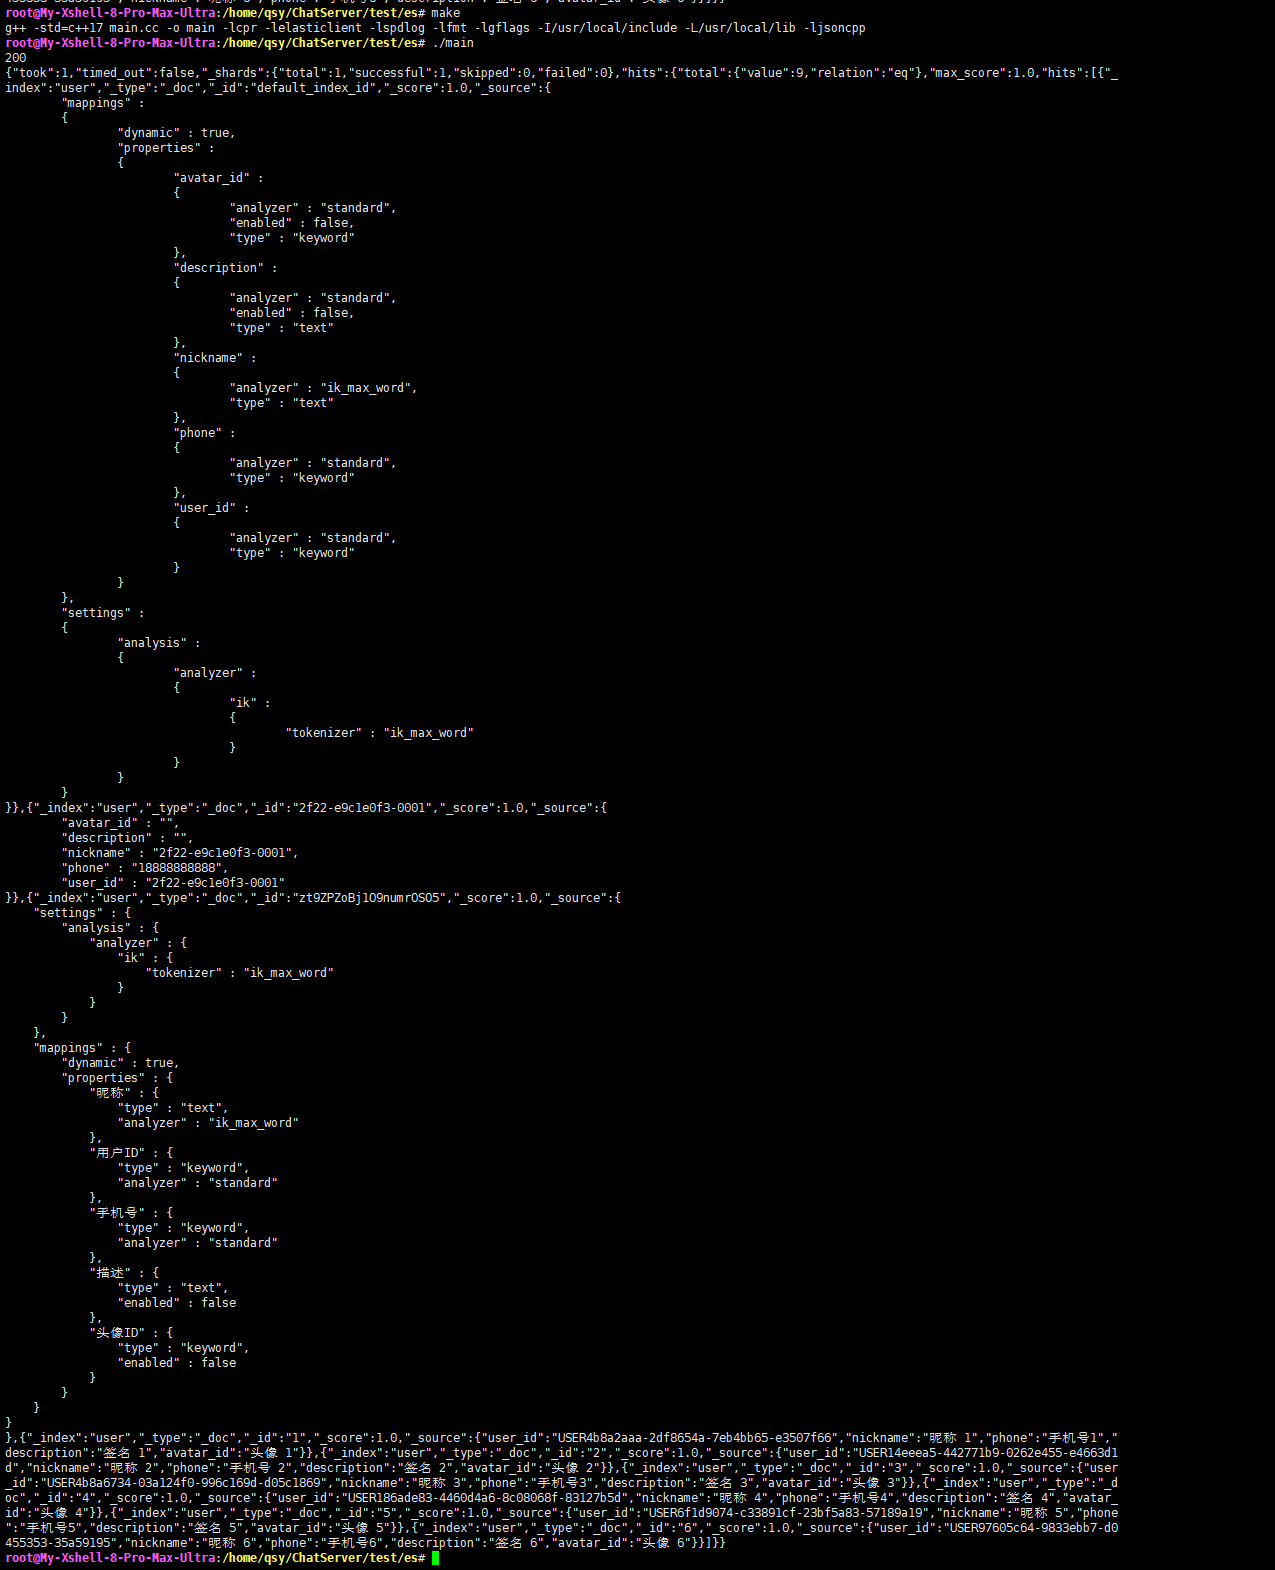
搜索接口的使用测试:
c
#include <elasticlient/client.h>
#include <cpr/cpr.h>
#include <iostream>
int main()
{
    elasticlient::Client client({"http://127.0.0.1:9200"});
    try{
        //注意需要在 9200 后加 / 或在 user 前面加 /,要不然会成为无效的URI
        auto ret = client.search("/user", "_doc", "{\"query\": { \"match_all\":{} }}");
        std::cout<<ret.status_code<<std::endl;
        std::cout<<ret.text<<std::endl;
    }catch(std::exception& ex){
        std::cout<<"请求失败:"<<ex.what()<<std::endl;
        return -1;
    }
    return 0;
}
效果:
二次封装源码
Elasticsearch 原生 API 需要开发者手动构造复杂的 JSON 查询语句,成本高且容易出错。我们可以对它进行二次封装,通过简洁的方法链式调用完成复杂查询,大大降低使用门槛,提升开发效率。
jsoncpp序列化与反序列化,参考文章:Linux系统C++开发工具(四)------ jsoncpp 使用指南
由于索引创建、数据查询、数据删除等操作可能分布在不同服务器执行,因此将它们拆分为多个类分别实现。如下:
cpp
#include <elasticlient/client.h>
#include <json/json.h>
#include <cpr/cpr.h>
#include <iostream>
#include <vector>
#include "../spdlog/logger.hpp"
//序列化
bool Serialize(const Json::Value &val, std::string &out)
{
    // 通过工厂类构建StreamWriter
    auto nsw = Json::StreamWriterBuilder().newStreamWriter(); // 因为工厂类在该场景中不在使用,所以构造临时对象。
    std::stringstream ss;
    int ret = nsw->write(val, &ss);
    if (ret != 0)
    {
        std::cout << "序列化失败";
        return false;
    }
    out = ss.str();
    return true;
}
//反序列化
bool UnSerialize(const std::string &str, Json::Value &val)
{
    auto crb = Json::CharReaderBuilder().newCharReader();
    std::string erro;
    bool ret = crb->parse(str.c_str(), str.c_str() + str.size(), &val, &erro);
    if (ret == false)
    {
        std::cout << "反序列化失败" << std::endl;
        return false;
    }
    return true;
}
//创建索引
class ESIndex
{
public:
    ESIndex(const std::shared_ptr<elasticlient::Client> client,
            std::string name,
            const std::string type = "_doc")
        : _client(client), _name(name), _type(type)
    {
        Json::Value ik;
        ik["tokenizer"] = "ik_max_word";
        Json::Value analyzer;
        analyzer["ik"] = ik;
        Json::Value analysis;
        analysis["analyzer"] = analyzer;
        Json::Value settings;
        settings["analysis"] = analysis;
        _index["settings"] = settings;
    }
    ESIndex append(const std::string &key,
                const std::string &type = "text",
                const std::string &analyzer = "ik_max_word",
                bool enabled = true) // 添加字段
    {
        Json::Value data;
        data["type"] = type;
        data["analyzer"] = analyzer;
        data["enabled"] = enabled;
        _properties[key] = data;
        return *this;
    }
    bool create()
    {
        Json::Value mappings;
        mappings["dynamic"] = true;
        mappings["properties"] = _properties;
        _index["mappings"] = mappings;
        std::string body;
        Serialize(_index, body);
        try
        {
            auto ret = _client->index(_name, _type, "", body);
            if(ret.status_code<200||ret.status_code>=300)
            {
                LOG_ERR("创建索引 {} 失败",_name);
                return false;
            }
        }
        catch (std::exception &e)
        {
                LOG_ERR("创建索引 {} 失败:{}",_name,e.what());
                return false;
        }
        //std::cout << _index << std::endl;
        return true;
    }
private:
    std::string _name;
    std::string _type;
    Json::Value _properties;
    Json::Value _index;
    std::shared_ptr<elasticlient::Client> _client;
};

//插入数据
class ESInsert
{
public:
    ESInsert(const std::shared_ptr<elasticlient::Client> client,
                std::string name,
                const std::string type = "_doc")
            : _client(client), _name(name), _type(type)
    {}
    template<typename T>
    ESInsert& append(const std::string& key,const T& val)
    {
        _item[key] = val;
        return *this;
    }
    bool insert(const std::string& id = "")
    {
        std::string data;
        bool ret = Serialize(_item,data);
        if(ret == false)
            return false;
        try
        {
            auto rsp = _client->index(_name,_type,id,data);
            if(rsp.status_code < 200 || rsp.status_code >= 300)
            {
                LOG_ERR("数据插入失败:{}",rsp.status_code);
                return false;
            }
        }
        catch(std::exception& e)
        {
            LOG_ERR("数据插入失败:{}",e.what());
            return false;
        }
        return true;
    }
private:
    std::string _name;
    std::string _type;
    Json::Value _item;
    std::shared_ptr<elasticlient::Client> _client;
};

//删除数据
class ESRemove
{
public:
    ESRemove(const std::shared_ptr<elasticlient::Client> client,
                    std::string name,
                    const std::string type = "_doc")
                : _client(client), _name(name), _type(type)
    {}
    bool remove(std::string id)
    {
        try
        {
            auto rsp = _client->remove(_name,_type,id);
            if(rsp.status_code < 200 || rsp.status_code >= 300)
            {
                LOG_ERR("数据删除失败:{}",rsp.status_code);
                return false;
            }
        }
        catch(std::exception& e)
        {
            LOG_ERR("数据删除失败:{}",e.what());
            return false;
        }
        return true;
    }
private:
    std::string _name;
    std::string _type;
    std::shared_ptr<elasticlient::Client> _client;
};

//查询数据
class ESSearch
{
public:
    ESSearch(const std::shared_ptr<elasticlient::Client> client,
                    std::string name,
                    const std::string type = "_doc")
                : _client(client), _name(name), _type(type)
    {}
    ESSearch& append_must_not_terms(const std::string& key,const std::vector<std::string>& data)
    {
        Json::Value mnt;
        for(auto x:data)
            mnt[key].append(x);
        Json::Value terms;
        terms["terms"] = mnt;
        _must_not.append(terms);
        return *this;
    }
    ESSearch& append_must_terms(const std::string& key,const std::string& val)
    {
        Json::Value mt;
        mt[key]=val;
        Json::Value terms;
        terms["terms"] = mt;
        _must.append(terms);
        return *this;
    }
    ESSearch& append_must_match(const std::string& key,const std::string& val)
    {
        Json::Value mm;
        mm[key] = val;
        Json::Value match;
        match["match"] = mm;
        _must.append(match);
        return *this;
    }
    ESSearch& append_should_match(const std::string& key,const std::string& val)
    {
        Json::Value sm;
        sm[key] = val;
        Json::Value match;
        match["match"] = sm;
        _should.append(match);
        return *this;
    }
    Json::Value search()
    {
        Json::Value data;
        if(!_must_not.empty()) data["must_not"] = _must_not;
        if(!_must.empty()) data["must"] = _must;
        if(!_should.empty()) data["should"] = _should;
        Json::Value bl;
        bl["bool"] = data;
        Json::Value query;
        query["query"] = bl;
        std::string body;
        bool ret = Serialize(query,body);
        if(ret==false)
        {
            LOG_ERR("序列化失败");
            return Json::Value();
        }
        cpr::Response rsp;
        try
        {
            rsp = _client->search(_name,_type,body);
            if(rsp.status_code<200||rsp.status_code>=300)
            {
                LOG_ERR("搜索失败:{}",rsp.status_code);
                return Json::Value();
            }
        }
        catch(std::exception& e)
        {
            LOG_ERR("搜索失败:{}",e.what());
            return Json::Value();
        }
        Json::Value val;
        ret = UnSerialize(rsp.text,val);
        if(ret == false)
        {
            LOG_ERR("反序列化失败");
            return Json::Value();
        }
        return val["hits"]["hits"];
    }
private:
    std::string _name;
    std::string _type;
    Json::Value _must_not;
    Json::Value _must;
    Json::Value _should;
    std::shared_ptr<elasticlient::Client> _client;
};
非常感谢您能耐心读完这篇文章。倘若您从中有所收获,还望多多支持呀!