面向对象中,对数据集的遍历通常使用迭代器 (iterator) 实现;
迭代器是专为遍历集合的每个元素而构建的类,隐藏了对给定集合的每个元素的迭代是如何具体完成的。这种信息隐藏原理的应用,使得遍历数据集合变得更加容易和安全。
标准模板库(STL)有一个与它的每个集合类关联的迭代器类。OpenCV随后提供了与c++ STL中的标准迭代器兼容的cv::MatIterator 类。
迭代器遍历像素
继续使用之前的 均匀颜色量化 示例,在这里使用迭代器类来重新实现。可以使用 cv::MatIterator_ 来定义一个迭代器对象。(与 cv::Mat_ 一样,下划线结尾,表示这是个模板子类)
这个迭代器对象,是用来访问图片像素数据的。元素数据类型,必须要在编译时即指明。声明方式如下:
cpp
cv::MatIterator_<cv::Vec3b> it;另一种使用cv::Mat_ 定义的迭代器写法:
cpp
cv::Mat_<cv::Vec3b>::iterator it;与 普通的 迭代器使用方式一样,需要获取数据集合的开始和结束位置,用于循环的控制。
cpp
cv::Mat_<cv::Vec3b>::iterator it_begin = image.begin<cv::Vec3b>();
cv::Mat_<cv::Vec3b>::iterator it_end = image.end<cv::Vec3b>();
完整实现如下:
cpp
#include <iostream>
#include <opencv2/opencv.hpp>
void colorReduce(cv::Mat/*&*/ image, int div)
{
int row, col;
//只是对彩色图像的处理
cv::Mat_<cv::Vec3b>::iterator it = image.begin<cv::Vec3b>();
cv::Mat_<cv::Vec3b>::iterator it_end = image.end<cv::Vec3b>();
for ( ; it != it_end; it++)
{
//对每个通道进行计算
(*it)[0] = ((*it)[0] / div) * div + div / 2;
(*it)[1] = ((*it)[1] / div) * div + div / 2;
(*it)[2] = ((*it)[2] / div) * div + div / 2;
}
}
int main(int argc, char *argv[])
{
// 检查命令行参数
if (argc != 4)
{
std::cerr << "Usage: " << argv[0] << " <input_image> <colorReduce> <output_image>" << std::endl;
return -1;
}
// 读取输入图像和logo图像
cv::Mat input_image = cv::imread(argv[1]);
// 检查输入图像和logo图像是否成功读取
if (input_image.empty())
{
std::cerr << "Error: Could not open or find input image" << std::endl;
}
cv::namedWindow("input_image", cv::WINDOW_NORMAL);
cv::imshow("input_image", input_image);
cv::waitKey(0);
int reduce = std::stof(argv[2]);
if (reduce < 0 || reduce > 255)
{
std::cerr << "Error: colorReduce must be between 0 and 255" << std::endl;
return -1;
}
colorReduce(input_image, reduce);
cv::imwrite(argv[3], input_image);
cv::namedWindow("output_image", cv::WINDOW_NORMAL);
cv::imshow("output_image", input_image);
cv::waitKey(0);
return 0;
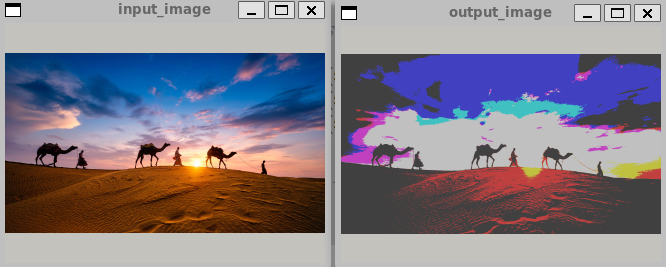
}处理结果如下:
shell
./build/document_processor build/2.jpg 128 build/2_out.jpg