基础知识:
1.SDF 有符号距离场,且通过正负可以判断在物体外部还是内部,通常外正内负
这是RayMarching的灵魂支撑,能够通过一个数学函数,输入一个空间中的点,输出这个点到物体表面的最短距离(带符号)。可以使复杂的几何形状可以通过简单的 SDF运算来组合。比如,两个球体的 SDF 可以通过 min() 操作来融合,通过 max() 来相交,通过 abs()和减法来创造出"镂空"效果。
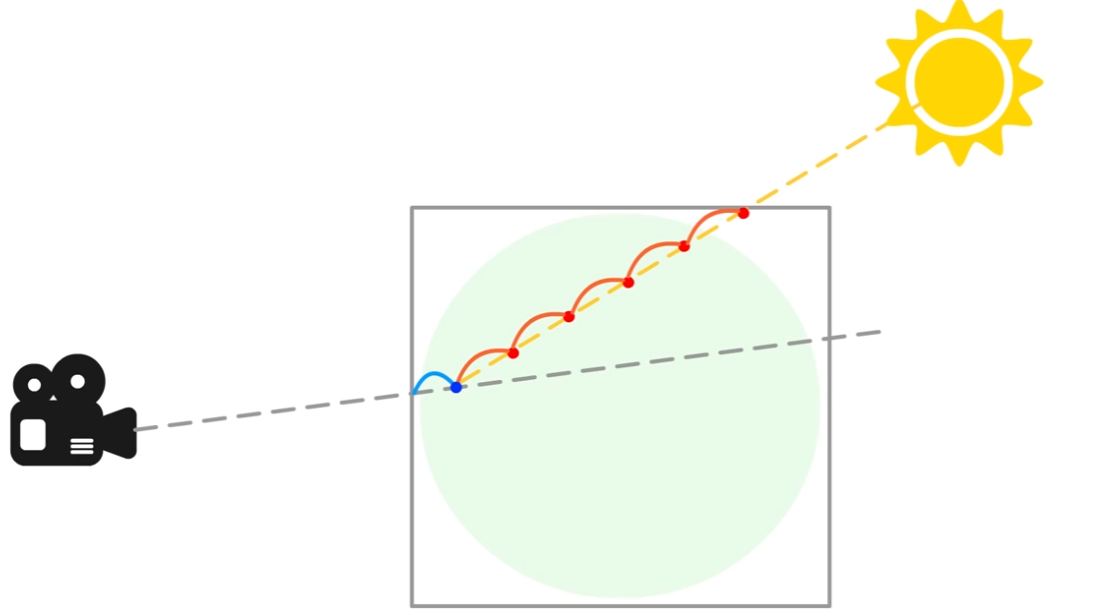
RayMarching 区别于正常的射线求交,根据他的中文翻译名,光线步进,可以比较生动的理解。
光并非直接打到物体表面求交然后渲染,而是每一步都计算和物体表面的SDF,从而安全前进,循环直道命中物体或者超出最大步数结束。
第一种制作方法:
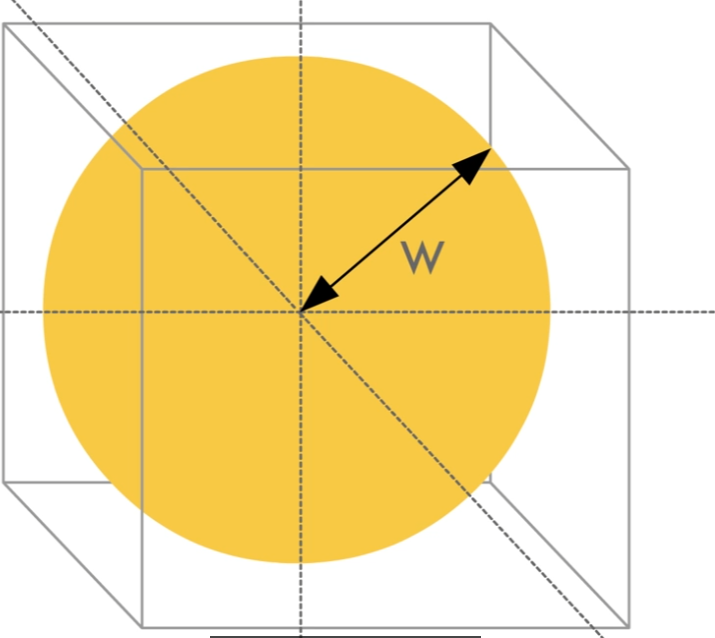
球体采用XYZW四维向量,W表示球体半径
csharp
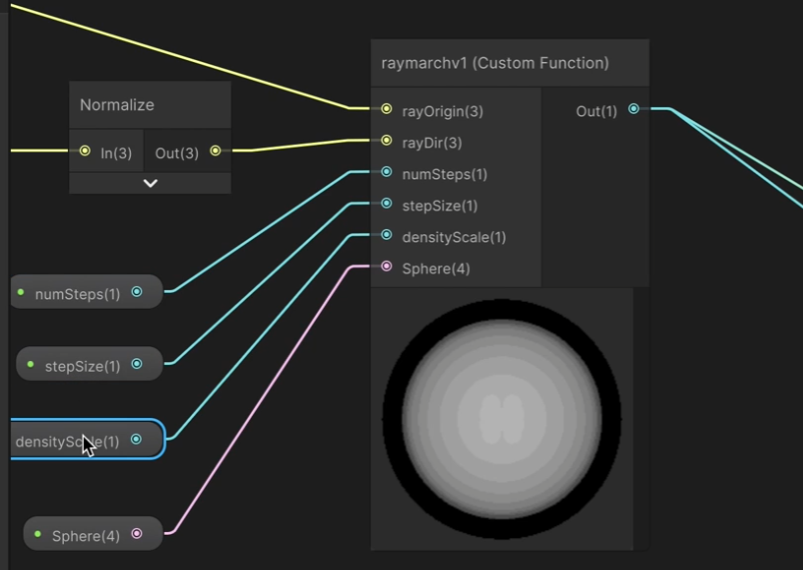
// 版本1:简单的球体密度测试
void raymarchv1_float(
    float3 rayOrigin,        // 光线起点
    float3 rayDirection,     // 光线方向
    float numSteps,          // 步进次数
    float stepSize,          // 步长
    float densityScale,      // 密度缩放
    float4 Sphere,           // 球体数据:xyz=中心位置, w=半径
    out float result         // 输出:累积密度
)
{
    float density = 0;

    // 简单步进循环
    for (int i = 0; i < numSteps; i++)
    {
        // 沿光线方向移动
        rayOrigin += (rayDirection * stepSize);

        // 计算到球心的距离
        float sphereDist = distance(rayOrigin, Sphere.xyz);

        // 如果点在球体内,增加密度
        if (sphereDist < Sphere.w)
        {
            density += 0.1; // 固定密度值
        }
    }

    // 应用密度缩放
    result = density * densityScale;
}
在此基础上能输出一个白色的圆环
光线步进-经典的三个参数:
numstep是步数,步数越大,光线越容易走出圆圈的范围,渲染出的效果越淡
stepSize是步长,步长越长,分层越明显, 越小,分层越不明显,越偏向全白
densityScale是密度缩放数值, result = density * densityScale;
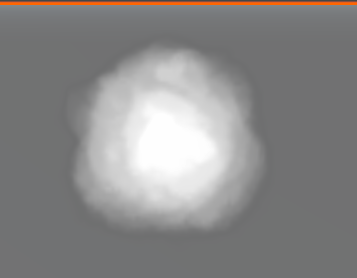
然后把球的节点更换增加一个3D体积纹理就可以变得更像云一些了
csharp
// 版本2:使用3D纹理的基本实现
void raymarchv2_float(
    float3 rayOrigin,        // 光线起点
    float3 rayDirection,     // 光线方向
    float numSteps,          // 步进次数
    float stepSize,          // 步长
    float densityScale,      // 密度缩放
    UnityTexture3D volumeTex, // 3D体积纹理
    UnitySamplerState volumeSampler, // 采样器
    float3 offset,           // 纹理偏移
    out float result         // 输出:累积密度
)
{
    float density = 0;
    float transmission = 0;

    // 基本步进循环
    for (int i = 0; i < numSteps; i++)
    {
        // 沿光线方向移动
        rayOrigin += (rayDirection * stepSize);

        // 从3D纹理采样密度
        float sampledDensity = SAMPLE_TEXTURE3D(volumeTex, volumeSampler, rayOrigin + offset).r;

        // 累积密度
        density += sampledDensity;
    }

    // 应用密度缩放
    result = density * densityScale;
}
参数还是同理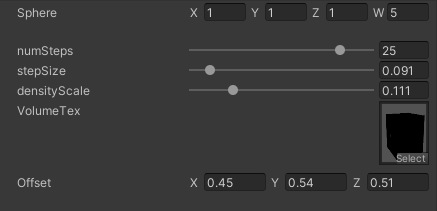
sphere四个参数控制圆心位置和半径
numsteps 确定步数,步长太少根本画不出圆,只有能走过圆的步长才能有形状,step数量确定有没有
step size 确定步长,步长越长数值越大
density scale 确定每一步的值的缩放尺寸
云越多,光线照射到物体上的光线方向数量就越少
最终版本的代码如下
csharp
void raymarch_float(float3 rayOrigin, float3 rayDirection, float numSteps, float stepSize,
                    float densityScale, UnityTexture3D volumeTex, UnitySamplerState volumeSampler,
                    float3 offset, float numLightSteps, float lightStepSize, float3 lightDir,
                    float lightAbsorb, float darknessThreshold, float transmittance, out float3 result)
{
    float density = 0;
    float transmission = 0;
    float lightAccumulation = 0;
    float finalLight = 0;


    for (int i = 0; i < numSteps; i++)
    {
        rayOrigin += (rayDirection * stepSize);

        //The blue dot position
        float3 samplePos = rayOrigin + offset;
        float sampledDensity = SAMPLE_TEXTURE3D(volumeTex, volumeSampler, samplePos).r;
        density += sampledDensity * densityScale;

        //light loop   numLightSteps 数量直接影响性能
        float3 lightRayOrigin = samplePos;

        for (int j = 0; j < numLightSteps; j++)
        {
            //The red dot position
            lightRayOrigin += -lightDir * lightStepSize;
            float lightDensity = SAMPLE_TEXTURE3D(volumeTex, volumeSampler, lightRayOrigin).r;
            //The accumulated density from samplePos to the light - the higher this value the less light reaches samplePos
            lightAccumulation += lightDensity;
        }

        //The amount of light received along the ray from param rayOrigin in the direction rayDirection
        float lightTransmission = exp(-lightAccumulation);
        //shadow tends to the darkness threshold as lightAccumulation rises
        float shadow = darknessThreshold + lightTransmission * (1.0 - darknessThreshold);
        //The final light value is accumulated based on the current density, transmittance value and the calculated shadow value
        finalLight += density * transmittance * shadow;
        //Initially a param its value is updated at each step by lightAbsorb, this sets the light lost by scattering
        transmittance *= exp(-density * lightAbsorb);
    }

    transmission = exp(-density);

    result = float3(finalLight, transmission, transmittance);
}