作者@小郭
SMB 服务器
SMB 服务介绍
Samba 是在Linux和UNIX系统上实现SMB协议(Server Messages Block,信息服务块),是一种在局域网上共享文件和打印机的一种通信协议。曾用名CIFS(通用互联网文件系统 Common Internet File System), 公元1983年诞生于IBM。SMB协议是C/S架构,通过该协议客户机(包括Windows、linux、Unix系统)可以访问服务器(包括Windows、linux、Unix系统)上的共享文件系统、打印机及其他资源。
Linux既可以充当服务器提供SMB文件共享,也可以充当客户端访问SMB共享。
-
客户端挂载SMB文件共享,需要安装cifs-utils软件包。
-
服务器端提供SMB共享,需要安装samba程序包。
本课程介绍如何将Samba配置为独立服务器。 在该配置中,服务器使用Samba数据库管理Samba用户帐户,并向本地工作组的成员提供文件共享。
提示:Windows server 2016 以及之后的版本都可以配置samba服务器。
安装Samba并准备共享目录
bash
#安装软件,安装服务,和客户端工具
#samba 提供共享服务,samba-client 可用于本地测试共享是否可用。
[root@server ~ 08:31:53]# yum install -y samba samba-client

#创建共享目录。
[root@server ~ 09:10:36]# mkdir -p /shares/webapp
准备 Samba 用户
每个Samba帐户必须具有一个具有相同用户名的关联Linux帐户。 要创建仅Samba的用户帐户,请锁定其Linux密码,并将其登录Shell设置为/sbin/nologin。 此配置可防止用户使用SSH或从控制台登录Linux系统。
例如,要为operator1用户创建一个锁定的Linux帐户,请运行以下命令。
bash
#创建operator1用户
[root@server ~ 09:10:59]# useradd operator1

#禁止operator1登录系统(仅用于Samba访问)
[root@server ~ 09:27:21]# usermod -s /sbin/nologin operator1

#彻底删除operator1(含家目录),重新创建
[root@server ~ 09:27:38]# userdel -r operator1

#重建operator1:指定UID=1010,禁止系统登录
[root@server ~ 09:27:54]# useradd operator1 -u 1010 -s /sbin/noin创建Linux帐户后,使用samba-common-tools 软件包中的smbpasswd命令将它们添加到Samba数据库中。
要将用户添加到Samba数据库,请使用带有-a选项的smbpasswd命令,并将用户名作为参数。 该命令提示输入密码。
bash
[root@server ~ 09:30:10]# smbpasswd -a operator1
New SMB password:
Retype new SMB password:
Added user operator1.
要从Samba数据库中删除用户,请使用-x选项。
实验环境就不删除该用户了。
bash
[root@server ~]# smbpasswd -x operator1
Deleted user operator1.
Samba在/var/lib/samba/private/目录下维护其数据库。 切勿直接修改该目录中的文件。
bash
#创建用户组developers(用于统一授权开发人员)
[root@server ~ 09:28:16]# groupadd developers

#创建2个开发用户:指定UID、加入developers组、禁止系统登录
[root@server ~ 09:28:34]# useradd  -s /sbin/nologin -u 1001 -G elopers developer1
[root@server ~ 09:29:11]# useradd  -s /sbin/nologin -u 1002 -G elopers developer2

#更改共享目录的所属组为developers
[root@server ~ 09:29:23]# chgrp developers /shares/webapp/

#设置目录权限为2775,确保developers组用户有读写权限。
[root@server ~ 09:30:02]# chmod 2775 /shares/webapp/

#配置密码
[root@server ~ 09:31:04]# smbpasswd -a developer1
New SMB password:`123
Retype new SMB password:
Added user developer1.
[root@server ~ 09:31:18]# smbpasswd -a developer2
New SMB password:`123`
Retype new SMB password:
Added user developer2.

# 也可以使用以下命令设置密码,非交互式
[root@server ~]# echo -e "123\n123" | smbpasswd -a -s developer2
Added user developer2.

#验证用户列表,确认已经添加成功。
[root@server ~ 09:31:23]# pdbedit -L
operator1:1010:
developer2:1002:
developer1:1001:
设置 SELinux 上下文类型
bash
[root@server ~]# semanage fcontext -a -t samba_share_t '/shares/samba(/.*)?'
[root@server ~]# restorecon -Rv /shares/sambaSamba还可以提供带有public_content_t (只读)和public_content_rw_t(读/写)类型的文件。 使用public_content_rw_t类型,启用SELinux smbd_anon_write布尔值以允许读/写访问。 当您希望Apache HTTP Server或NGINX服务能够写入共享目录内容时,这两种SELinux类型非常有用。
提示:不要使用Samba共享NFS文件系统或FTP共享。 这样做可能导致文件损坏或其他文件访问问题。
配置 Samba
Samba的配置文件是**/etc/samba/smb.conf**。
/etc/samba/smb.conf配置文件以global节开头。 该部分提供了常规服务器配置和默认值,您可以在随后的部分中将其覆盖。接下来的部分定义文件或打印机共享。
要注释掉一行,请使用分号(;)或井号(#)字符。
配置 global
global 部分定义Samba服务器的基本配置。 在该部分中,常用的参数如下:
-
workgroup 参数,指定服务器的Windows工作组。 当客户端系统查询服务器时,该名称将显示在客户端系统上。 默认值为 SAMBA。
-
security 参数,控制Samba如何验证客户端。默认security = user,客户端使用用户名和密码登录,本地Samba服务器在其数据库中管理该用户名和密码。
-
**server min protocol **参数,指定服务器支持的最低SMB版本。 默认情况下,服务器支持协议的所有版本,并与客户端协商该版本。 由于第一个版本SMB1(或CIFS)存在安全问题,因此Red Hat建议将该参数设置为SMB2来排除该版本。 但是,使用该配置,Microsoft Windows XP或更早版本的客户端将无法使用您的服务器,因为它们仅支持SMB1。 SMB协议的当前版本为版本3。
-
smb crypty 参数,激活流量加密。 默认情况下,服务器和客户端协商加密。 要强制加密,请将smb crypty参数设置为required,并将服务器min协议设置为SMB3。 仅SMB3提供对加密的支持。 Microsoft Windows 8,Microsoft Windows Server 2012和更高版本的操作系统支持具有加密功能的SMB3。
-
hosts allow 参数,设置允许访问Samba服务器的客户端列表(以逗号、空格或制表符分隔)。如果未指定,则所有主机均可访问Samba。如果global块中未指定此设置,则可以单独在每个共享中设置。如果在global块中指定此设置,则适用于所有共享。
配置共享块
在global部分之后,定义共享部分。 括号中的名称定义了共享的名称,客户端可以看到。 该部分中常用的指令如下:
-
**path **指令,提供要在您的服务器上共享的目录的全名。
-
writeable 指令,指示经过身份验证的用户是否对共享具有读/写访问权限(设置为yes或no)。 默认设置为no。
writeable ,writable 和write ok 指令含义相同。read only = no 指令与writeable = yes指令含义相同。
-
write list ,当writeable指令的值为no(默认值)时,可以使用write list指令提供以逗号分隔的用户列表,列表中的用户对共享具有读/写访问权限,不在列表中的用户仅具有读取访问权限。在列表中,您可以通过在组名前面加上@字符来指定本地Linux组。
以下示例将对operator1用户和developers组成员的读写权限授予。
write list = operator1, @developers -
valid users,默认情况下,所有经过身份验证的用户都可以访问共享。 如果要限制该访问,请使用该指令。 该指令采用逗号分隔的应具有访问权限的用户列表。
以下示例声明devcode共享,并授予对/shares/samba目录的访问权限。 所有经过身份验证的用户都具有对该共享的读取访问权限,但是只有开发人员组的成员具有读/写访问权限
ini[devcode] comment = wordpress valid users = operator1,@developers path = /shares/wordpress write list = @developers hosts allow = 10.1.8.0/24
本次实验实例
声明devcode共享,并授予了对/shares/samba目录的访问权限:
- 只有developers组中成员和operator1用户可以访问。
- operator1用户可以读访问。
- developers组中成员具有读取/写入访问权限。
bash
#配置Samba共享规则,实现"谁能访问,谁能修改"的权限控制。
[root@server ~ 09:31:32]# vim /etc/samba/smb.conf

......
# 文件最后添加如下内容
[webapp]#共享名称
	path = /shares/webapp#共享文件路径
	valid users = operator1 @developers#允许访问的用户/组(@表示组)
	write list = @developers#允许写入的组
验证配置文件
要验证/etc/samba/smb.conf文件中是否没有错误,请运行不带参数的testparm命令。
bash
[root@server ~ 09:34:33]# testparm
Load smb config files from /etc/samba/smb.conf
Loaded services file OK.
Server role: ROLE_STANDALONE
Press enter to see a dump of your service definitions
Enter
# 按回车继续
...output omitted...
启动 Samba
bash
[root@server ~ 09:34:44]# systemctl enable smb.service --nowSamba会定期检查/etc/samba/smb.conf是已更改。 如果配置文件已更改,则Samba会自动重新加载它。已经与Samba服务建立的任何连接不受影响。 运行systemctl reload smb命令立即重新加载配置文件,或者运行systemctl restart smb命令完全重新启动Samba。
Linux 客户端挂载
Microsoft Windows和Linux系统都可以从Samba服务器访问SMB共享。
在Linux系统上,安装 cifs-utils 软件包,以便可以在本地系统上挂载SMB共享。
- 在Linux上,您可以使用**//servername/sharename**访问共享。
- 标准的 Microsoft Windows 使用统一命名约定(UNC-Uniform Naming Convention),格式
\\servername\sharename,代表网络资源。 但由于\字符是shell中的转义字符,因此Linux实用程序通常改用/字符。
要挂载SMB共享,必须提供用户凭据以通过Samba服务器进行身份验证。 这些凭据确定对共享上文件的访问权限。 对于手动挂载,您可以使用username挂载选项。 该命令提示用户输入密码。
bash
# 安装 cifs-utisl,客户端samba
[root@client ~ 08:31:56]# yum install -y cifs-utils samba-client
#cifs-utils:Linux 挂载 CIFS(Samba)共享的核心工具(提供mount.cifs命令)。
#samba-client:客户端用于测试服务端共享是否可用

# 查看服务端提供的共享
[root@client ~ 09:18:33]# smbclient -L //10.1.8.10 -U operator1
Enter SAMBA\operator1's password: '123'

	Sharename       Type      Comment
	---------       ----      -------
	print$          Disk      Printer Drivers
	webapp          Disk
	IPC$            IPC       IPC Service (Samba 4.10.16)
	operator1       Disk      Home Directories
Reconnecting with SMB1 for workgroup listing.

	Server               Comment
	---------            -------

	Workgroup            Master
	---------            -------

#安装nginx,目的是:作为web服务器,使其网站根目录将挂载 Samba 共享,实现 "共享目录 = 网站目录"。
[root@client ~ 09:35:38]# yum install -y nginx

#手动挂载Smada共享,-o 指定挂在使用的samba用户名
[root@client ~ 09:39:10]# mount -o username=developer1 //10.1.8.10/webapp /usr/share/nginx/html/
Password for developer1@//10.1.8.10/webapp:  ***
#目的是:验证 "共享目录→Nginx 目录" 的映射关系,确保网站文件能通过 Nginx 访问

#查看挂载结果
[root@client ~ 09:46:45]# df -h /usr/share/nginx/html/
Filesystem          Size  Used Avail Use% Mounted on
//10.1.8.10/webapp   50G  1.7G   49G   4% /usr/share/nginx/html

# 准备测试文件
[root@client ~ 09:39:48]# echo hello world > /usr/share/nginx/html/index.html

#验证
[root@client ~ 09:46:22]# curl 10.1.8.11
hello world
配置开发人员都可写
bash
#配置文件增加权限
[root@server ~ 10:10:03]# tail /etc/samba/smb.conf
......
[webapp]
       path=/shares/webapp
       write list=@developers
       valid users=operator1,@developers
        create mask = 0664
	directory mask = 0775

#重启服务
[root@server ~ 10:17:03]# systemctl restart smb.service

#先卸载developer1的挂载
[root@client ~ 10:15:58]# !umount
umount /usr/share/nginx/html/

#客户端developer2挂载
[root@client ~ 10:16:23]# mount -o username=developer2 //10.1.8.10/webapp /usr/share/nginx/html/
Password for developer2@//10.1.8.10/webapp:  ***
[root@client ~ 10:16:28]# echo hello dev2 > /usr/share/nginx/html/index.html


#这里需要注意的是重新挂载developer2,需要将原先的index.html删除,不然重新挂载创建文件时如果还是index.html依旧会显示不成功。
[root@client ~ 10:14:35]# cd /usr/share/nginx/html/
[root@client html 10:15:35]# ls
index.html
[root@client html 10:15:37]# rm -fr index.html 要自动挂载共享,使用credentials 选项。
bash
#编辑文件,credentials=/etc/samba/samba.secrets:指定 Samba 账号密码文件(避免开机挂载时手动输入密码)
[root@client ~ 10:16:34]# vim /etc/fstab
[root@client ~ 10:40:42]# tail -1 /etc/fstab
//10.1.8.10/webapp /usr/share/nginx/html/ cifs  credentials=/etc/samba/samba.secrets        0 0

#创建Samba凭据文件(安全存储密码)
[root@client ~ 10:38:39]# vim /etc/samba/samba.secrets
[root@client ~ 10:40:47]# cat /etc/samba/samba.secrets
username=operator1
password=123

#设置文件权限,仅root可读,避免密码泄露
[root@client ~ 10:42:44]# chmod 600 /etc/samba/samba.secrets

# 验证开机自动挂载
[root@client ~ 10:45:21]# umount /usr/share/nginx/html/
[root@client ~ 10:46:16]# mount /usr/share/nginx/html/
[root@client ~ 10:46:22]# df /usr/share/nginx/html/
Filesystem         1K-blocks    Used Available Use% Mounted on
//10.1.8.10/webapp  52403200 1691132  50712068   4% /usr/share/nginx/html

# 重启验证
[root@client ~ 10:44:49]# reboot
[root@client ~ 10:45:10]# df /usr/share/nginx/html/
Filesystem         1K-blocks    Used Available Use% Mounted on
//10.1.8.10/webapp  52403200 1691132  50712068   4% /usr/share/nginx/html
核心目标是:
在服务端搭建 Samba 共享目录 /shares/webapp,客户端通过 CIFS 协议挂载该共享作为 Nginx 网站根目录,实现网站文件的集中存储与自动挂载。
多用户挂载
核心目标是让不同用户(developer1/2)能通过各自账号访问已挂载的 Samba 共享目录(/usr/share/nginx/html),实现权限隔离的文件操作
客户端准备用户
bash
# 添加用户operator1

[root@client ~ 11:03:10]# useradd -u 1010 operator1


# 添加用户组 developers 和用户developer1、developer2
[root@client ~ 11:03:07]# groupadd -g 1011 developers
[root@client ~ 11:12:58]# useradd -G developers -u 1001 developer1
[root@client ~ 11:22:21]# useradd -G developers -u 1002 developer2

# 设置用户密码
[root@client ~ 11:05:58]# echo 456 |passwd --stdin operator1
Changing password for user operator1.
passwd: all authentication tokens updated successfully.
[root@client ~ 11:06:29]# echo 456 |passwd --stdin developer1
Changing password for user developer1.
passwd: all authentication tokens updated successfully.
[root@client ~ 11:06:42]# echo 456 |passwd --stdin developer2
Changing password for user developer2.
passwd: all authentication tokens updated successfully.使用credentials 或username 选项挂载SMB共享时,本地系统上的所有用户都将使用这些凭据。 理想情况下,您希望每个用户都使用自己的SMB凭据来确定对已装载共享上文件的访问。 您可以使用multiuser挂载选项进行设置。
使用multiuser 挂载选项时,可以使用对共享具有最小访问权限的凭据来根安装SMB共享。 用户登录时,他们使用cifscreds命令将其SMB密码临时添加到安全内核密钥环中。 然后,客户端的Linux内核将使用其SMB凭据来确定对共享的访问,而不是用于安装共享的根目录。
以下步骤描述了针对多用户选项的系统配置:
-
创建用于装载SMB共享的凭据文件。 您在凭据文件中使用的用户必须对SMB共享具有最小的访问权限,并且对共享目录只具有读取访问权限。
-
在挂载命令中添加多用户选项。 以下/etc/fstab条目使用凭据和多用户选项。 该条目在一行中,没有换行符。
bash[root@client ~ 11:06:45]# vim /etc/fstab # 修改挂载记录,新增multiuser参数(多用户挂载模式) //10.1.8.10/webapp /usr/share/nginx/html cifs credentials=/etc/samba/credentials,multiuser 0 0 # 卸载后,再次挂载 [root@client ~ 11:07:49]# umount /usr/share/nginx/html [root@client ~ 11:07:58]# mount /usr/share/nginx/html使用mount命令挂载SMB共享。
bash#切换到operator1用户 [root@client ~ 11:32:04]# su - operator1 #尝试列出Samba挂载目录(/usr/share/nginx/html),这里的Permission denied不是 "文件系统权限"(如chmod设置),而是 "未通过 Samba 身份验证" 导致的访问拒绝。 [operator1@client ~ 11:32:13]$ ls /usr/share/nginx/html ls: cannot access /usr/share/nginx/html: Permission denied # 运行cifscreds命令配置凭据。 [operator1@client ~ 11:32:37]$ cifscreds add 10.1.8.10 Password: `123` #成功看到文件。 [operator1@client ~ 11:33:02]$ ls /usr/share/nginx/html d1.html index.htmlcifscreds 命令将子命令作为其第一个参数,并将Samba服务器名称作为第二个参数。
- add 子命令,将SMB凭据加载到内核密钥环。
- clear 子命令,从用户的特定主机的内核密钥环中删除凭证。
- update 子命令,将您在内核密钥环中的凭据替换为新用户和密码的凭据。
默认情况下,cifscreds假定要与SMB凭据一起使用的用户名与当前Linux用户名匹配。 您可以在add或clear子命令后使用**-u username**选项为SMB凭据指定其他用户名。
-
使用 developer1 账户测试
bash#切换到developer1用户 [root@client ~ 11:10:13]# su - developer1 #首次操作共享目录:权限不足(未授权自身Samba账号) [developer1@client ~ 11:10:20]$ echo xxx > /usr/share/nginx/html/d1.html -bash: /usr/share/nginx/html/d1.html: Permission denied #用自身Samba账号授权(输入developer1的Samba密码,服务端已配置) [developer1@client ~ 11:10:38]$ cifscreds add 10.1.8.10 Password: `123` #输入的密码必须是服务端为该用户设置的 Samba 密码 #授权后成功创建文件(权限生效) [developer1@client ~ 11:10:51]$ echo xxx > /usr/share/nginx/html/d1.html [developer2@client ~ 11:11:53]$ cifscreds add 10.1.8.10 Password: `123` #覆盖文件成功 [developer2@client ~ 11:12:11]$ echo yyy > /usr/share/nginx/html/d1.html #验证结果:输出yyy [developer2@client ~ 11:12:27]$ cat /usr/share/nginx/html/d1.html yyy
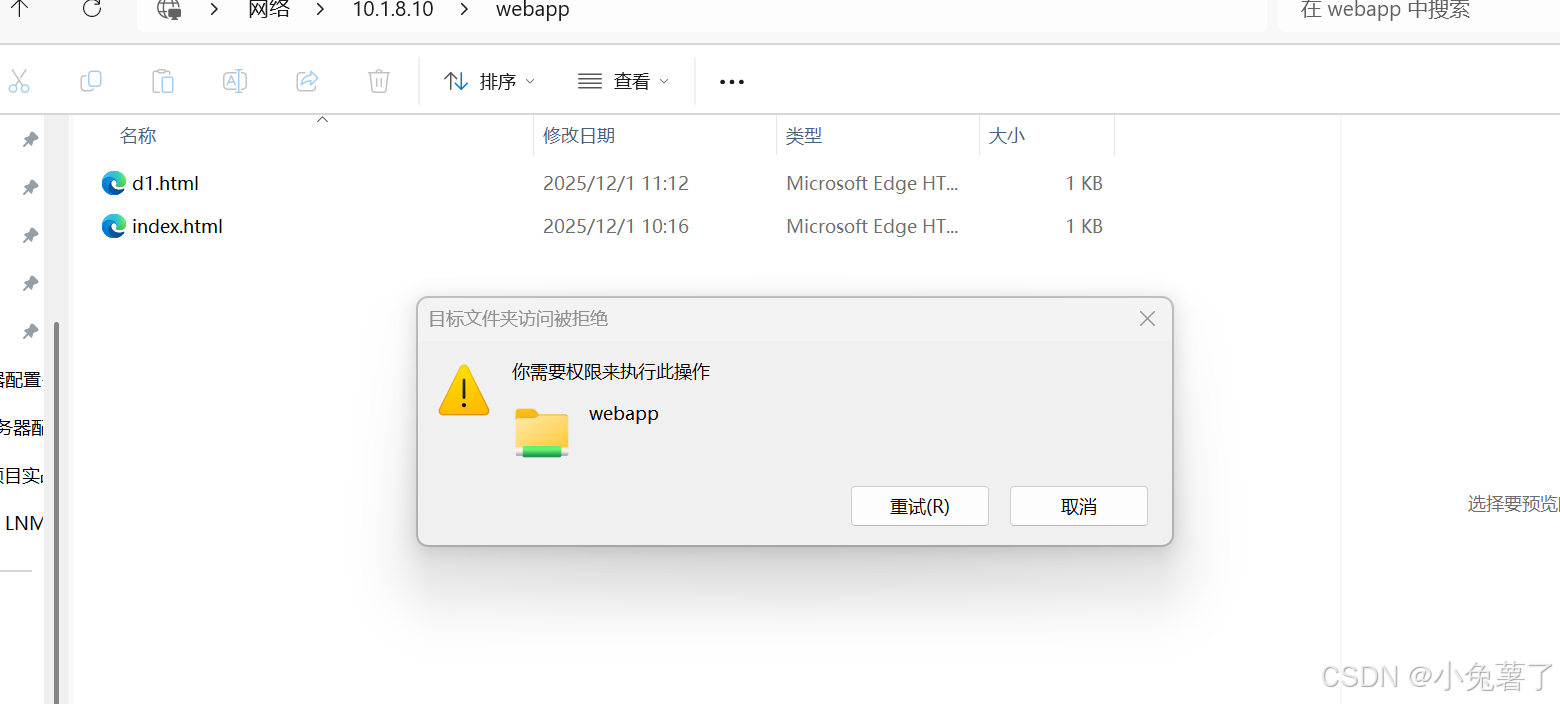
权限变化逻辑:
未执行cifscreds:用户操作共享目录时,使用挂载时的operator1账号权限,若operator1未授权普通用户写入,则报错。
执行cifscreds后:用户以自身 Samba 账号身份访问服务端共享,服务端会根据smb.conf配置(如write list = @developers)允许写入,因此操作成功。
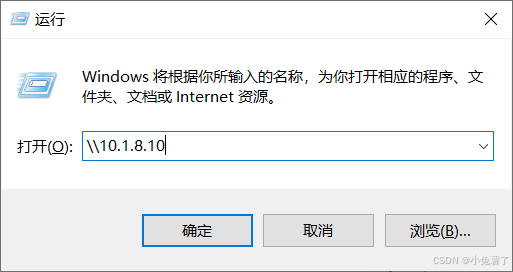
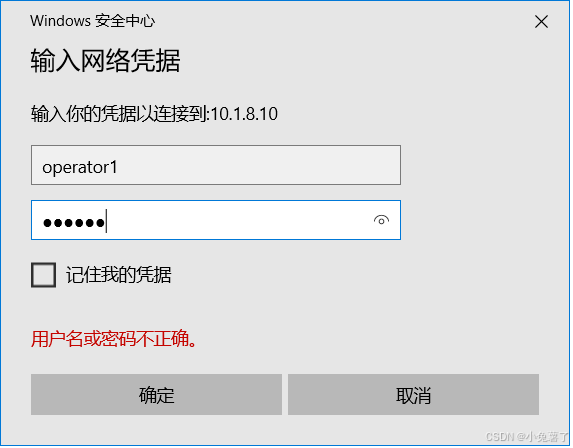
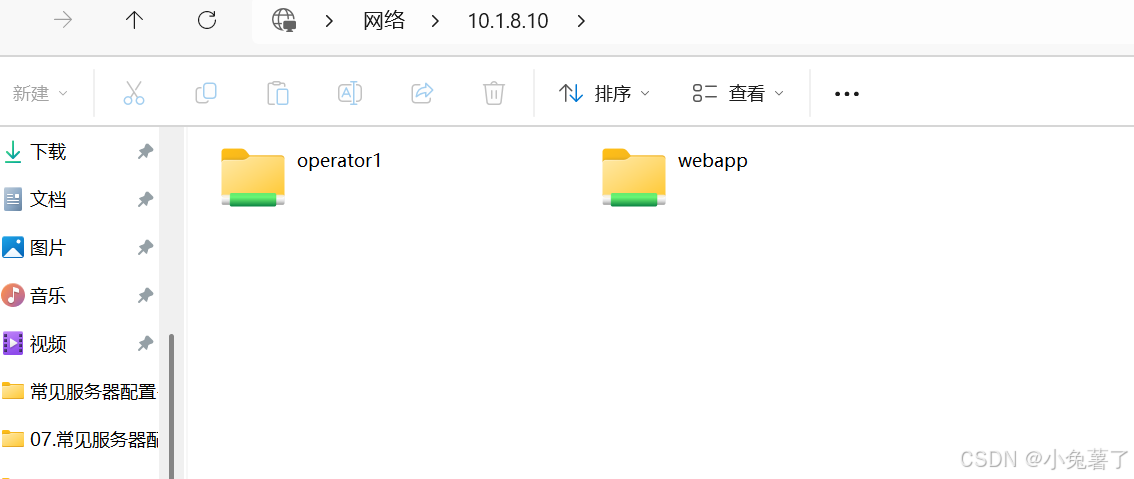
Windows 客户端挂载
使用 win+R 快捷键弹出运行对话框,输入\\10.1.8.10
重要的挂载选项
bash
# 重要说明
# FILE AND DIRECTORY OWNERSHIP AND PERMISSIONS
    The core CIFS protocol does not provide unix ownership information or mode for files and directories. Because of this, files and directories will generally appear to be owned by whatever values the uid= or gid= options are set, and will have permissions set to the default file_mode and dir_mode for the mount.
    Attempting to change these values via chmod/chown will return success but have no effect.
    When the client and server negotiate unix extensions, files and directories will be assigned the uid, gid, and mode provided by the server. Because CIFS mounts are generally single-user, and the same credentials are used no matter what user accesses the mount, newly created files and directories will generally be given ownership corresponding to whatever credentials were used to mount the share.

# uid=arg,sets the uid that will own all files or directories on the mounted
filesystem when the server does not provide ownership information.

# gid=arg,sets the gid that will own all files or directories on the mounted
filesystem when the server does not provide ownership information.

# file_mode=arg,If the server does not support the CIFS Unix extensions this overrides the default file mode.

# dir_mode=arg,If the server does not support the CIFS Unix extensions this overrides the default mode for directories.

# forceuid,instructs the client to ignore any uid provided by the server for files and directories and to always assign the owner to be the value of the uid= option.

# forcegid,instructs the client to ignore any gid provided by the server for files and directories and to always assign the owner to be the value of the gid= option.