文章目录
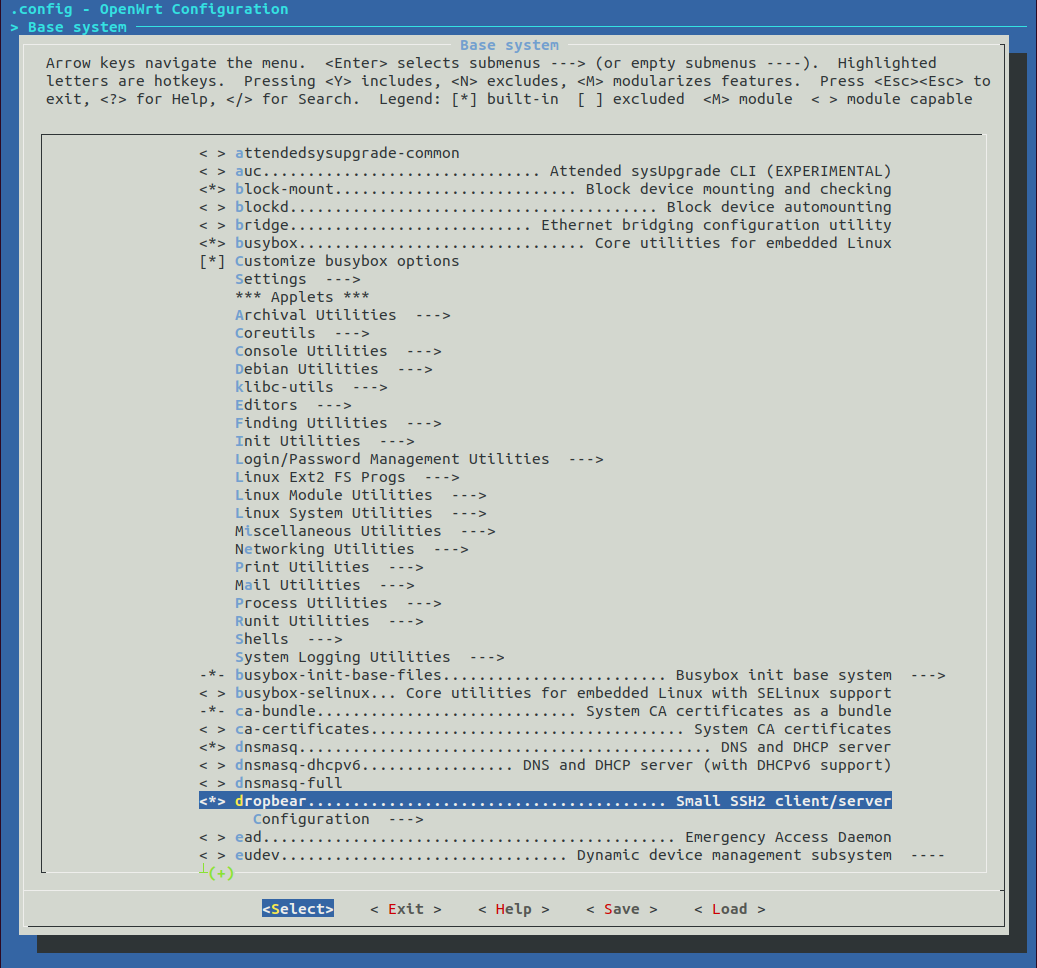
- 一、文件系统支持--编译前支持
- 二、嵌入式Linux设备端
-
- [0. 修改ssh的配置文件](#0. 修改ssh的配置文件)
- [1. 在开发板上生成SSH密钥对](#1. 在开发板上生成SSH密钥对)
- [2. 将公钥授权给本机](#2. 将公钥授权给本机)
- [3. 启动SSH服务器](#3. 启动SSH服务器)
- [4. 除错处理](#4. 除错处理)
-
- [a. 报错 procd_add_mdns](#a. 报错 procd_add_mdns)
- [b. 报错 Privilege separation user sshd does not exist](#b. 报错 Privilege separation user sshd does not exist)
- 三、Ubuntu虚拟机端
一、文件系统支持--编译前支持
bash
make menuconfig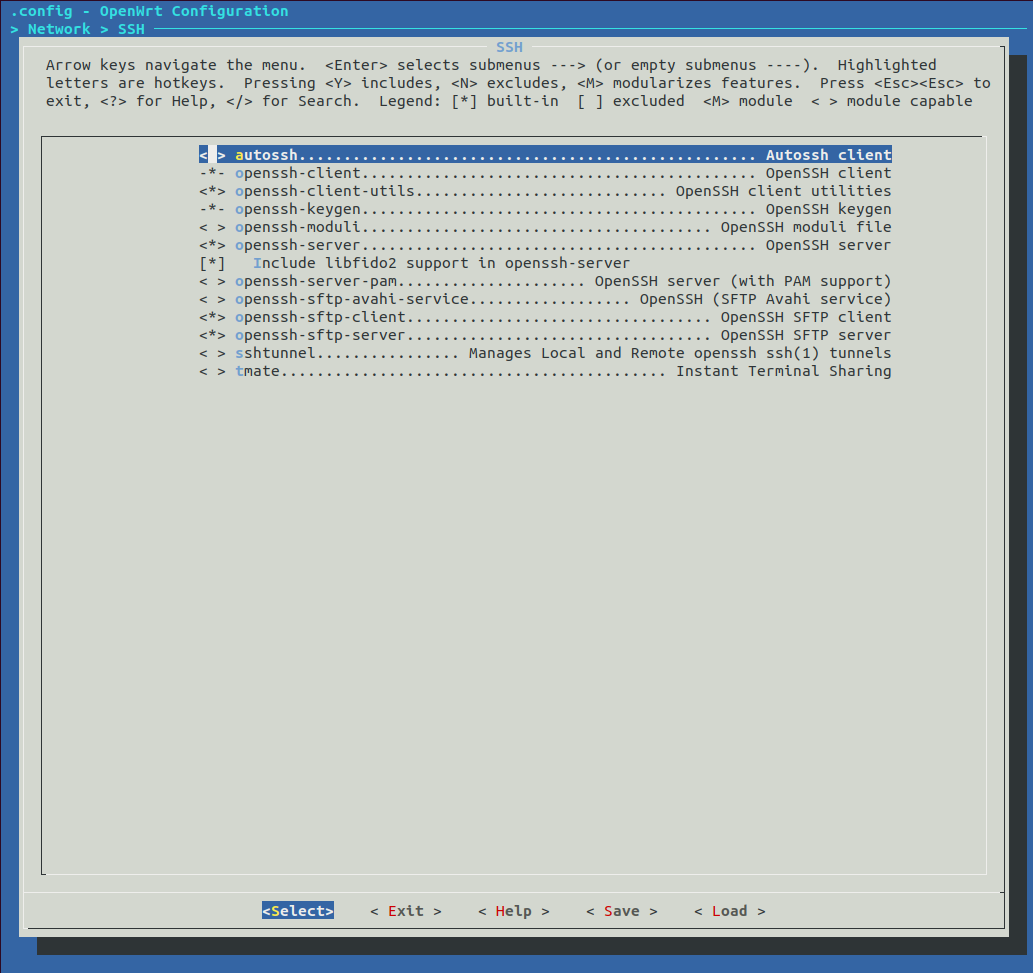
二、嵌入式Linux设备端
0. 修改ssh的配置文件
bash
vi /etc/ssh/sshd_config找到并修改以下行,确保它们是这样的:
bash
# 启用公钥认证
PubkeyAuthentication yes

# 指定公钥文件位置(通常这行已存在且正确)
AuthorizedKeysFile .ssh/authorized_keys

# 禁用密码认证 - 这是实现无密码登录的关键
PasswordAuthentication no

# 禁止空密码登录(可选,但推荐)
PermitEmptyPasswords no
1. 在开发板上生成SSH密钥对
首先,在您的Arm Linux开发板的终端里,运行以下命令来生成密钥对:
bash
ssh-keygen -t ed25519 -C "for_ssh_login"-
系统会提示你 Enter file in which to save the key (/home/your_user/.ssh/id_ed25519):,直接按回车,使用默认路径。
-
系统会提示 Enter passphrase (empty for no passphrase):,直接按回车,不要设置密码。这样才是真正的无密码登录。
-
再次提示 Enter same passphrase again:,再次直接按回车。
这样就在 ~/.ssh/ 目录下生成了两个文件:私钥 id_ed25519 和公钥 id_ed25519.pub。
2. 将公钥授权给本机
接下来,把刚刚生成的公钥添加到授权密钥文件中:
bash
# 确保 .ssh 目录存在且权限正确
mkdir -p ~/.ssh
chmod 700 ~/.ssh

# 将公钥内容添加到 authorized_keys 文件
cat ~/.ssh/id_ed25519.pub >> ~/.ssh/authorized_keys

# 设置 authorized_keys 文件的权限为 600
chmod 600 ~/.ssh/authorized_keys
3. 启动SSH服务器
bash
/etc/init.d/sshd start4. 除错处理
a. 报错 procd_add_mdns
vi /etc/init.d/sshd
注释掉如下代码:
bash
#procd_add_mdns "ssh" "tcp" "$lport"b. 报错 Privilege separation user sshd does not exist
bash
vi /etc/passwd在末尾添加一行:
bash
sshd:x:109:65534::/var/run/sshd:/usr/sbin/nologin三、Ubuntu虚拟机端
虚拟机事先生成秘钥。
bash
$ ssh-keygen -t rsa
Generating public/private rsa key pair.
Enter file in which to save the key (/home/liefyuan/.ssh/id_rsa):
Enter passphrase (empty for no passphrase):
Enter same passphrase again:
Your identification has been saved in /home/liefyuan/.ssh/id_rsa.
Your public key has been saved in /home/liefyuan/.ssh/id_rsa.pub.
The key fingerprint is:
SHA256:hMjV1l/QIxAi7S6C1X5w23u103cvZNI5/uCirEFsbgs liefyuan@ubuntu
The key's randomart image is:
+---[RSA 2048]----+
|      oo..oo.o   |
|   . o o+.. . +  |
|    o..o.  . o . |
|    . ooo   .    |
|   o . +So   . . |
|  . . o++ . . B  |
|     .Eo+  . *.+ |
|       o +. o.=.+|
|        o.oo ..+*|
+----[SHA256]-----+
虚拟机的秘钥位置:
~/.ssh/id_rsa.pub输入命令后三个回车
拷贝公钥到设备端:vim ~/.ssh/id_rsa.pub
设备端粘贴公钥
bash
echo "你的密钥" >> ~/.ssh/authorized_keys- 杀死 sshd:
killall sshd - 开始 sshd:
/etc/init.d/sshd start
虚拟机发送文件到设备端--带秘钥
bash
scp -i ~/.ssh/id_rsa demo root@192.168.1.106:/opt/例子:
bash
$ scp -i ~/.ssh/id_rsa demo root@192.168.1.106:/opt/
demo                                                                                100% 3517KB 446.0KB/s   00:07