【笔记】把已有的 ComfyUI 插件仓库发布到 Comfy Registry(官方节点商店)全流程实录
关键词:ComfyUI、Comfy Registry、节点发布、comfy-cli、pyproject.toml
一、为什么要上架
- 别人不用再
git clone,直接在 ComfyUI-Manager 里搜索即可一键安装/更新。 - 版本号、依赖、系统兼容性信息一目了然,官方自动扫描安全漏洞。
- 发布后全球可见,方便社区反馈和贡献。
二、前置条件
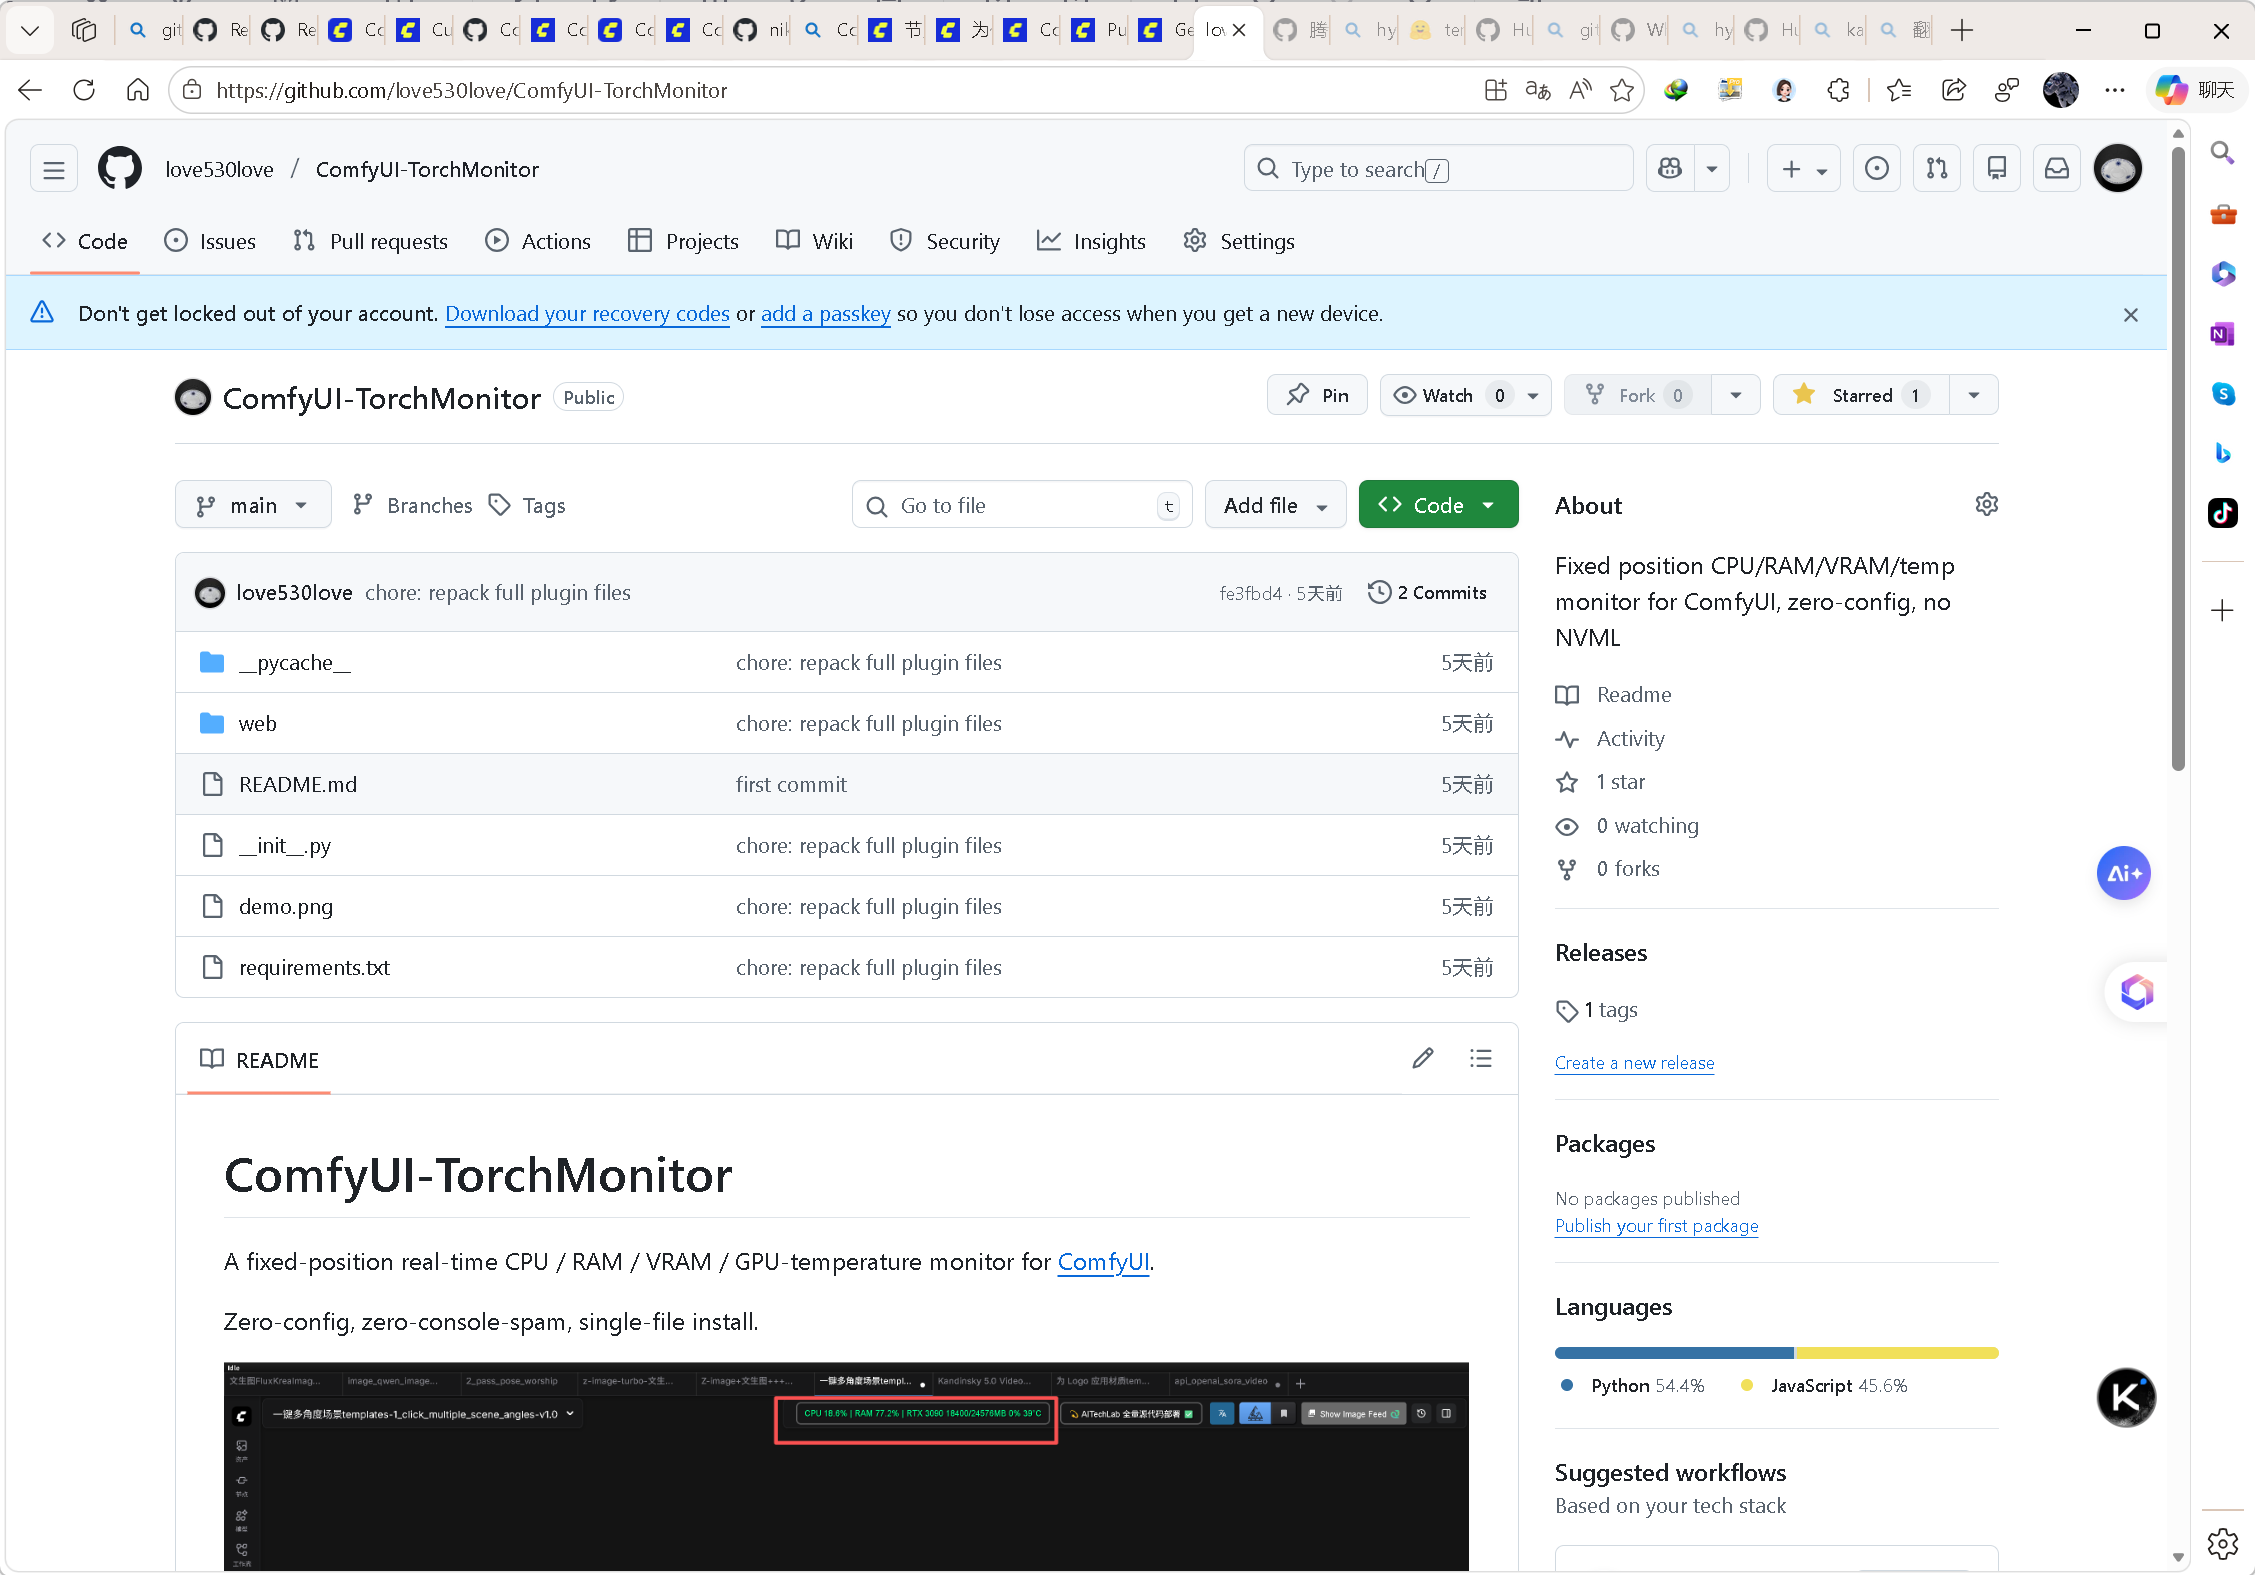
- 节点代码已推送到 公开 GitHub 仓库(本文示例:
https://github.com/love530love/ComfyUI-TorchMonitor)。 - 另一种发布方式请见官方文档 《发布节点文档》
- 本地装有最新版 ComfyUI (如 0.5.1+)和最新版 ComfyUI-Manager (如 3.39.0+)并激活了虚拟环境(
.venv)。
ComfyUI 官方(源代码 0.5.1 版)
ComfyUI 官方桌面 .exe 版
ComfyUI-Manager 官方(3.39.0 源代码版)
ComfyUI 官方注册节点版本:3.0.1
官方推荐 ComfyUI-Manager 安装方式:
# 安装 comfy-cli 工具
pip install comfy-cli

# 安装 ComfyUI-Manager
comfy node install comfyui-manager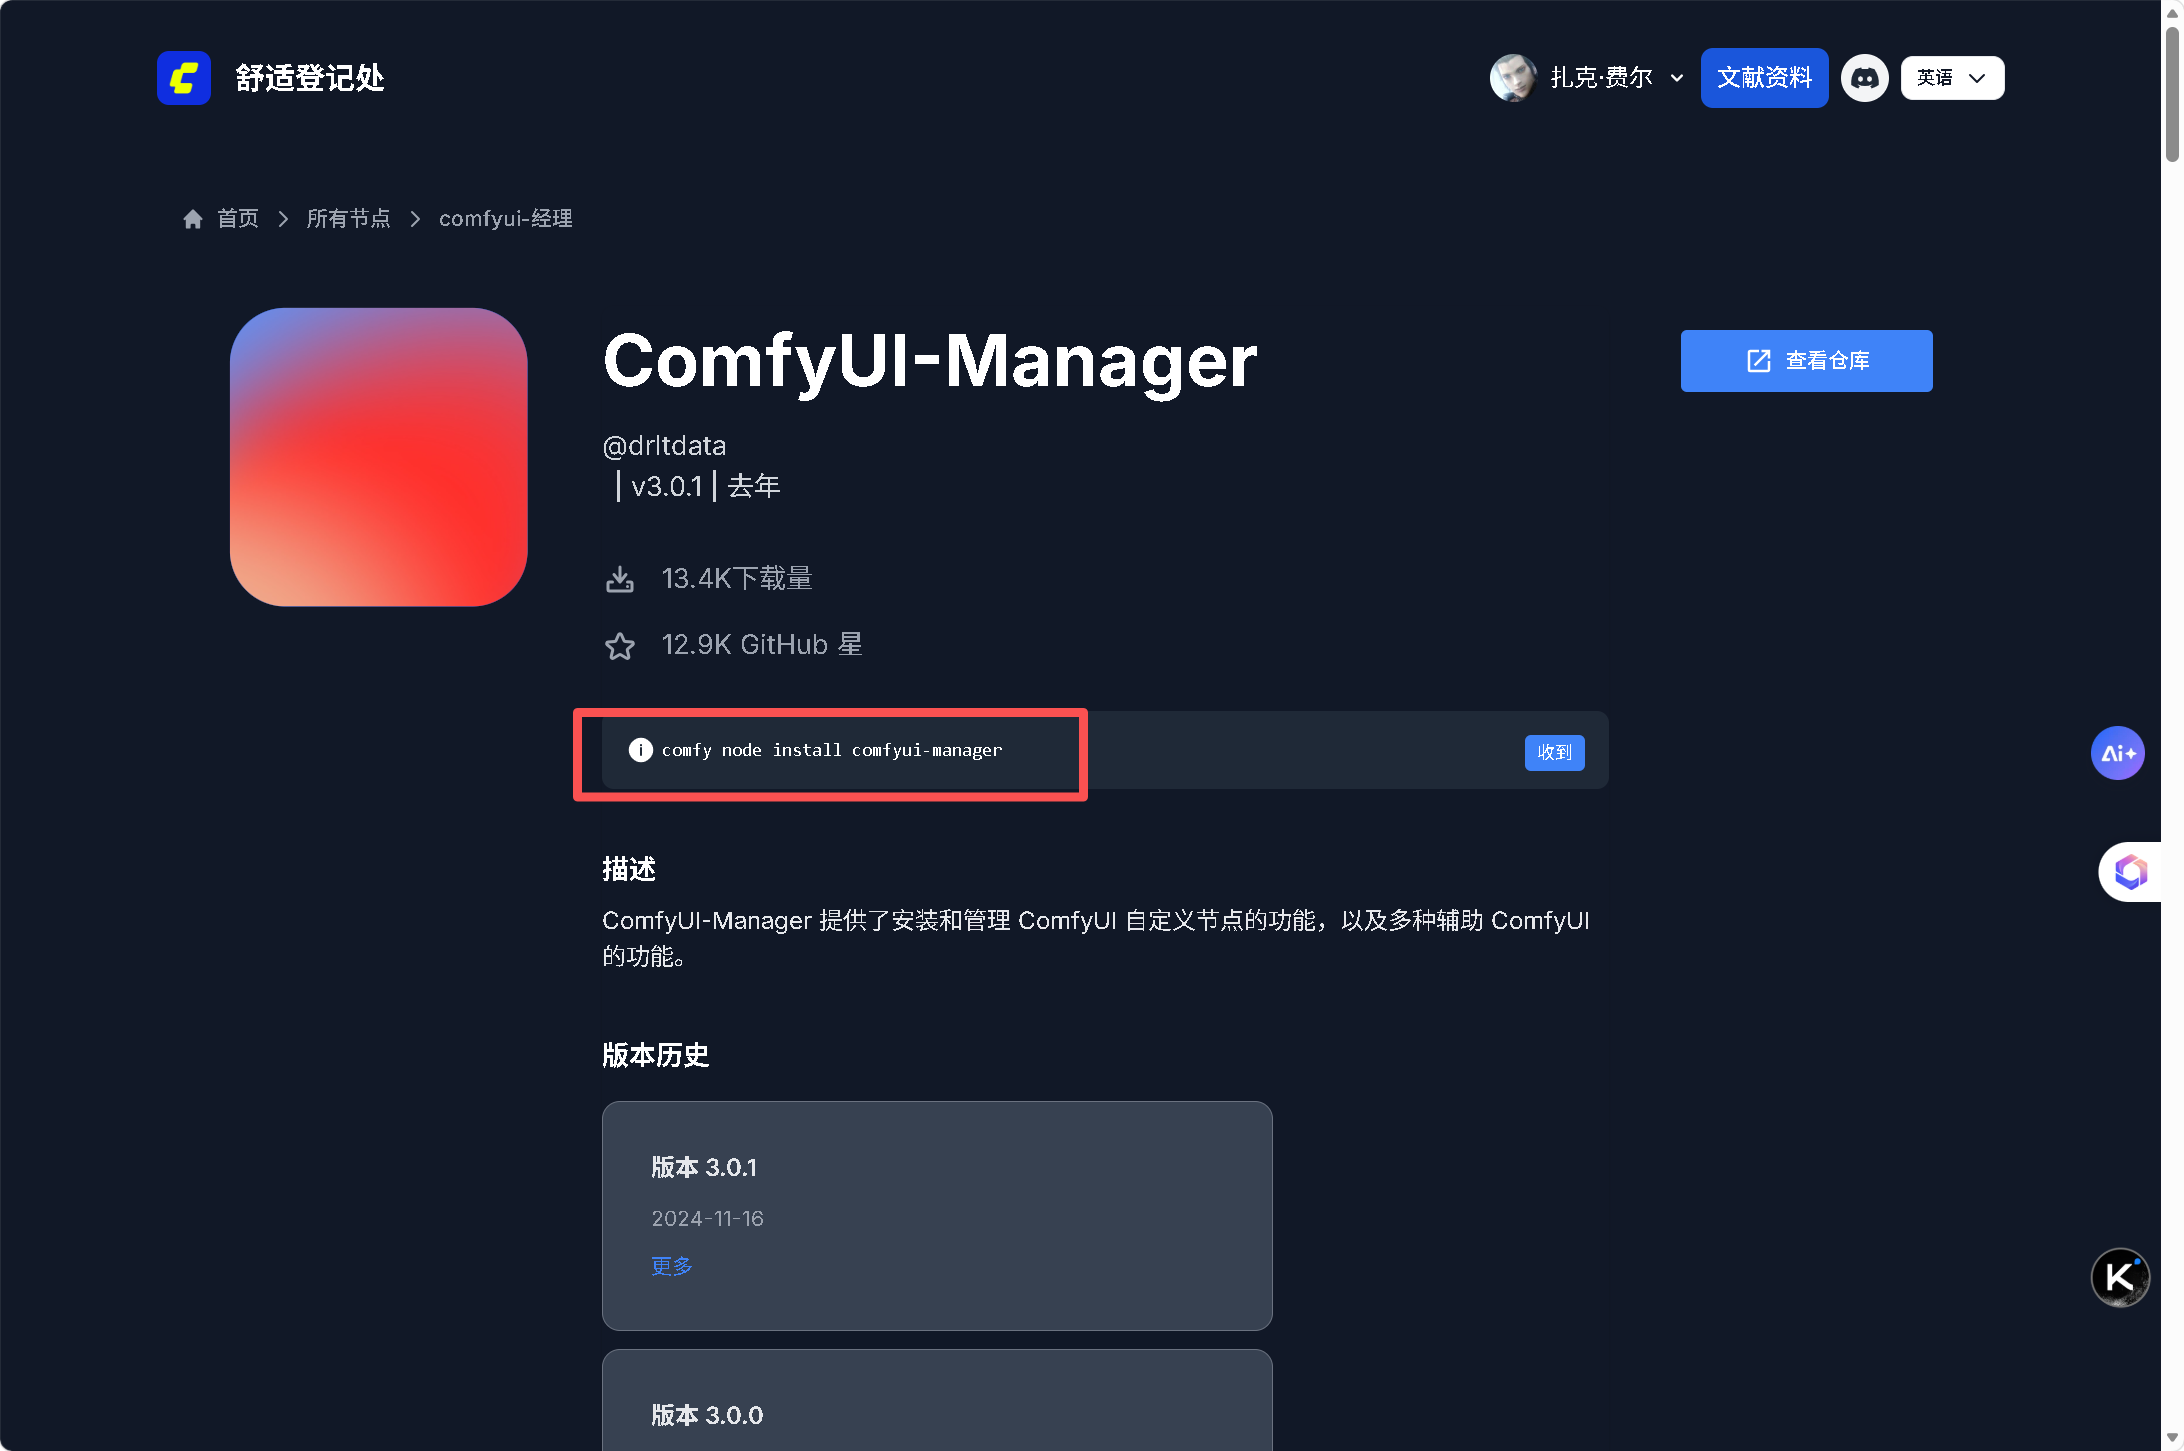
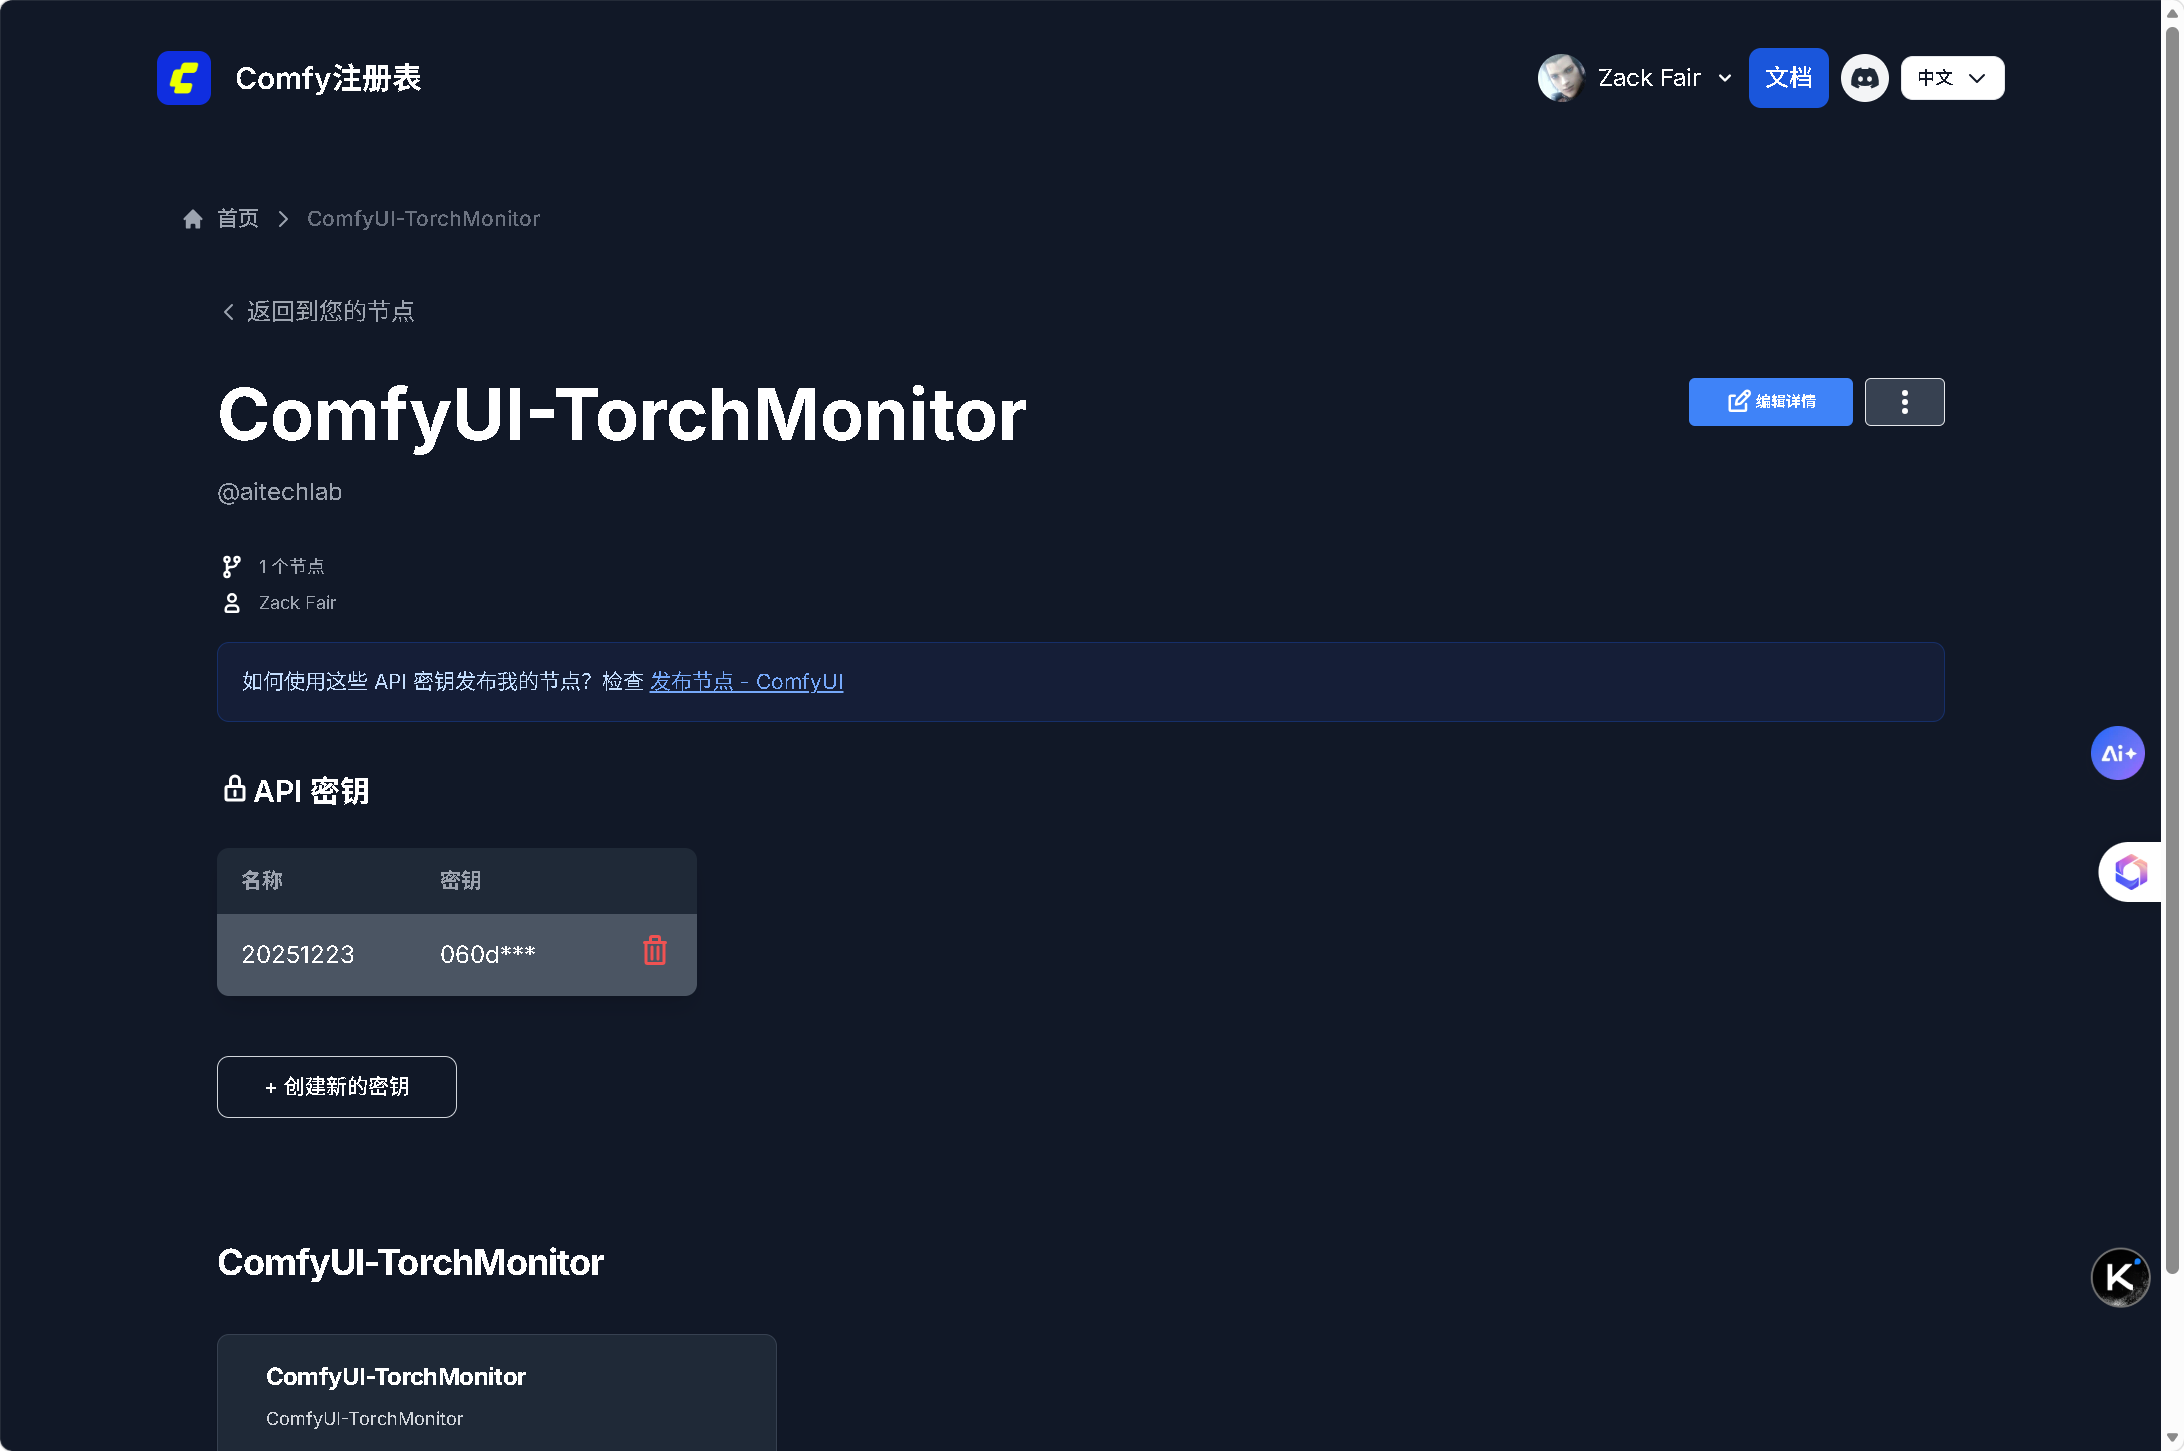
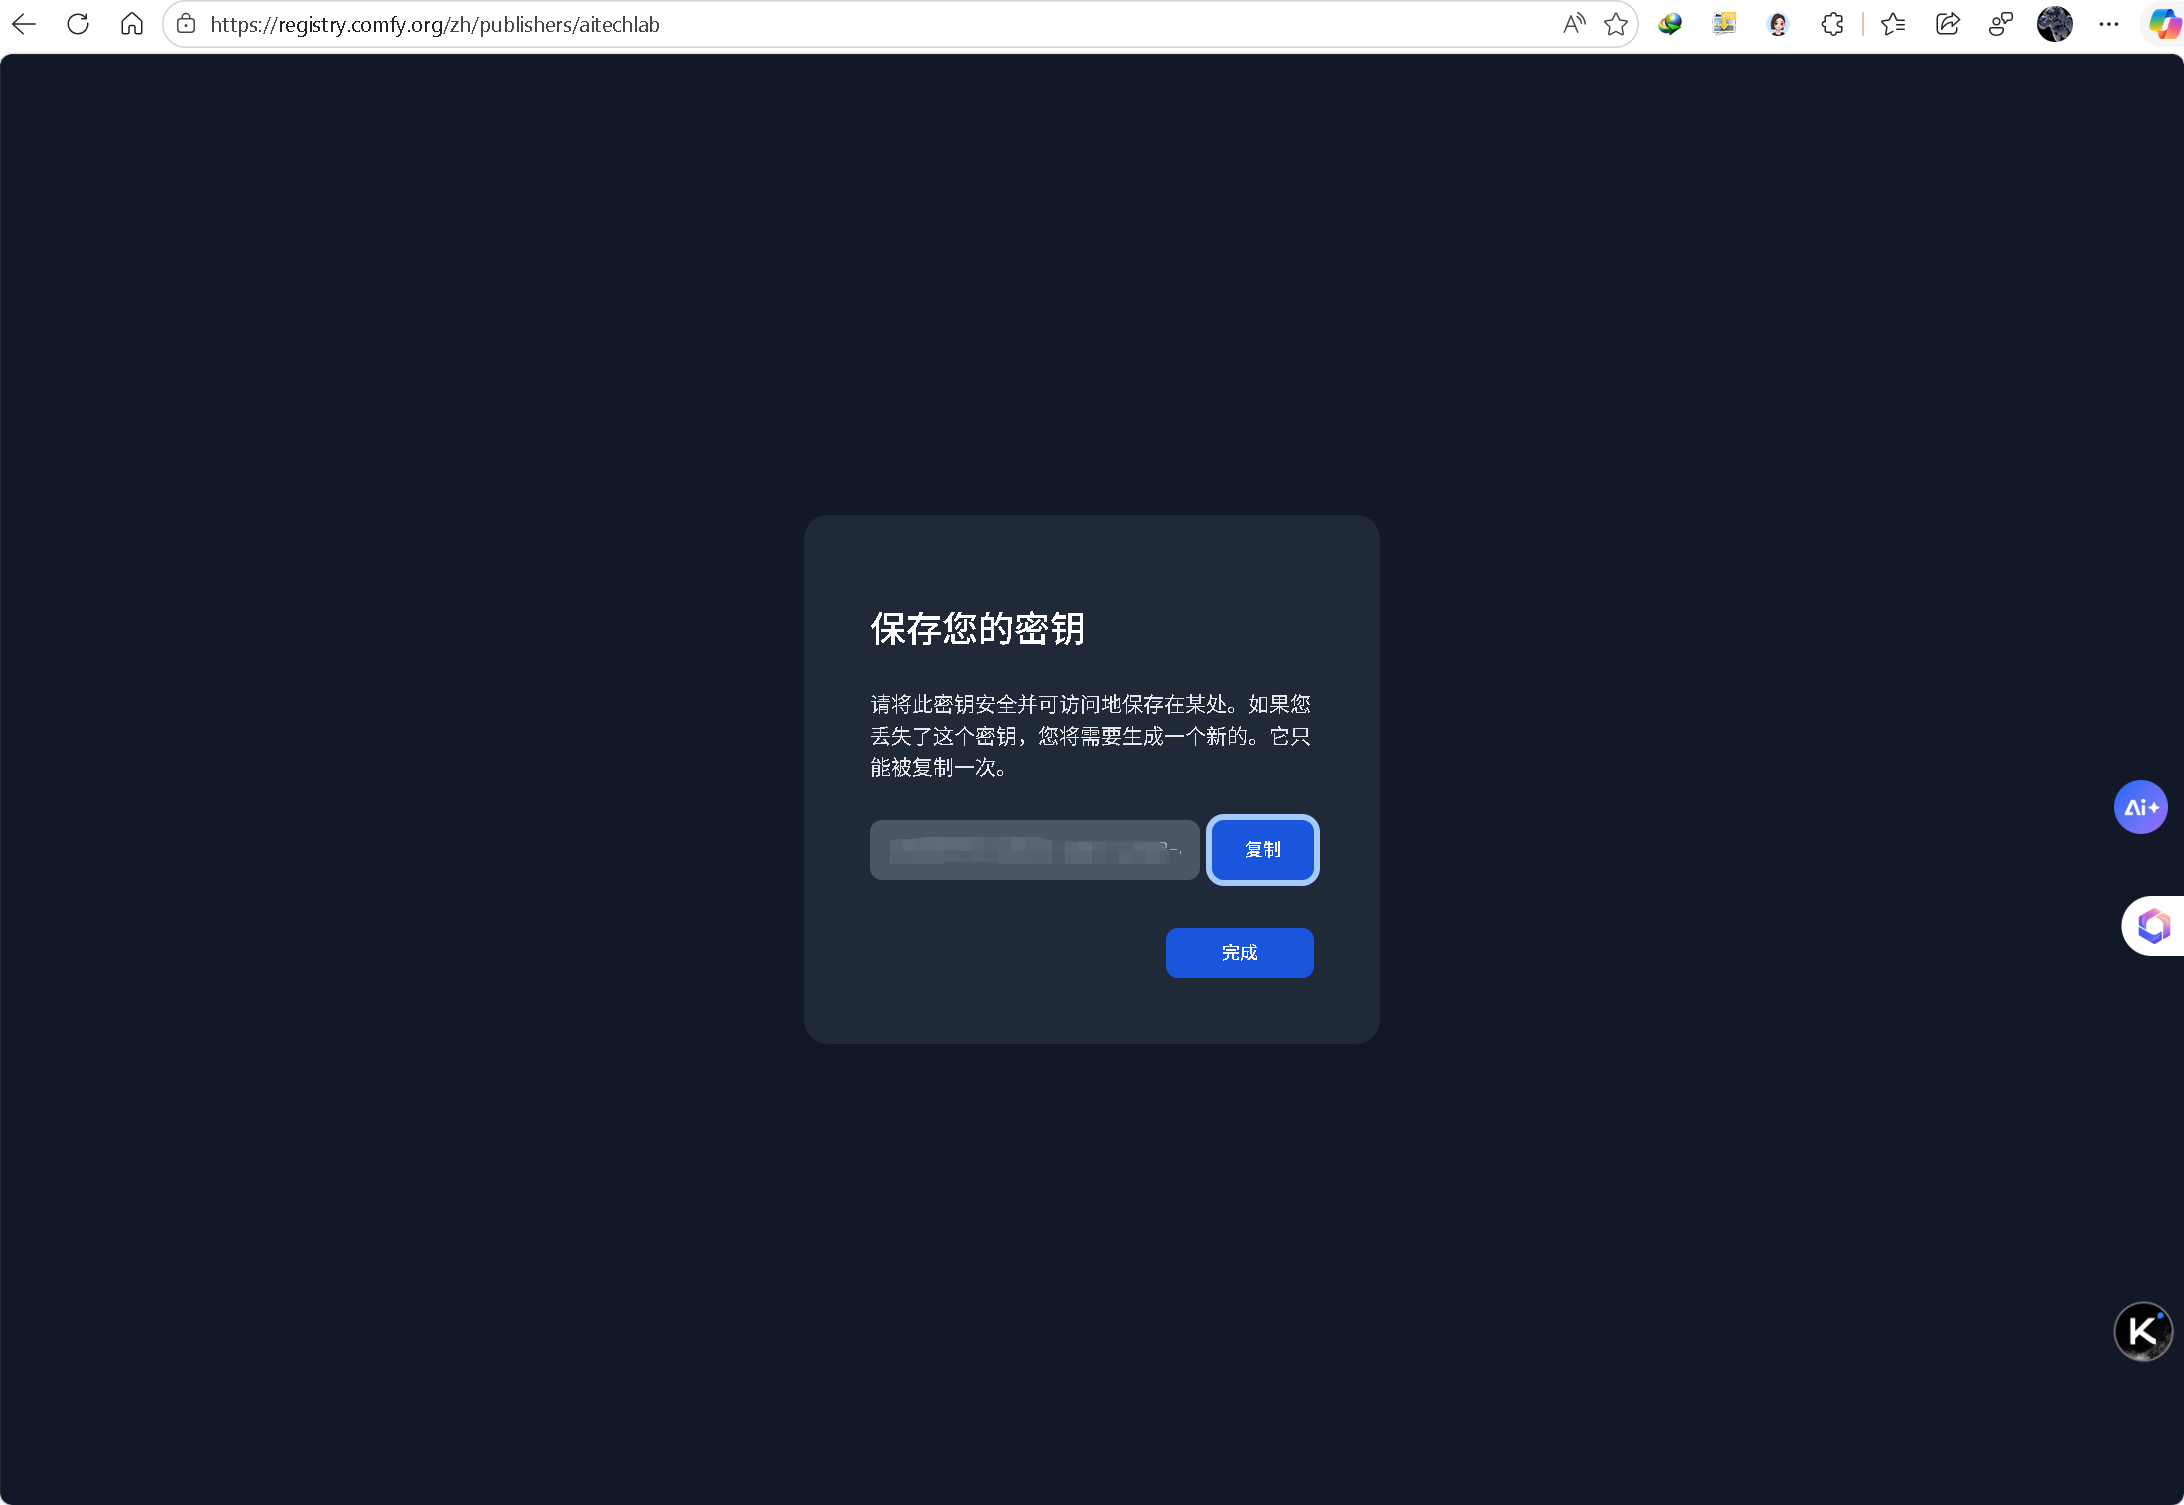
- 已注册 Comfy Registry 并创建 Publisher 与 API Token。
三、实操步骤(跟着敲即可)
| 步骤 | 命令 / 操作 | 说明 |
|---|---|---|
| 1 | cd 你的仓库根目录 |
必须与 __init__.py 同级 |
| 2 | comfy node init |
交互式生成标准 pyproject.toml |
| 3 | 编辑 pyproject.toml |
把 PublisherId = "" 改成 PublisherId = "你的publisher名" |
| 4 | comfy node pack |
本地打包校验,通过会生成 node.zip |
| 5 | comfy node publish --token cnr_xxxxx |
上传至 Registry;看到 Upload successful. 即成功 |
| 6 | 打开 ComfyUI-Manager → Install Custom Nodes → 搜索 你的节点名 → Install |
3-5 分钟后就能搜到 |
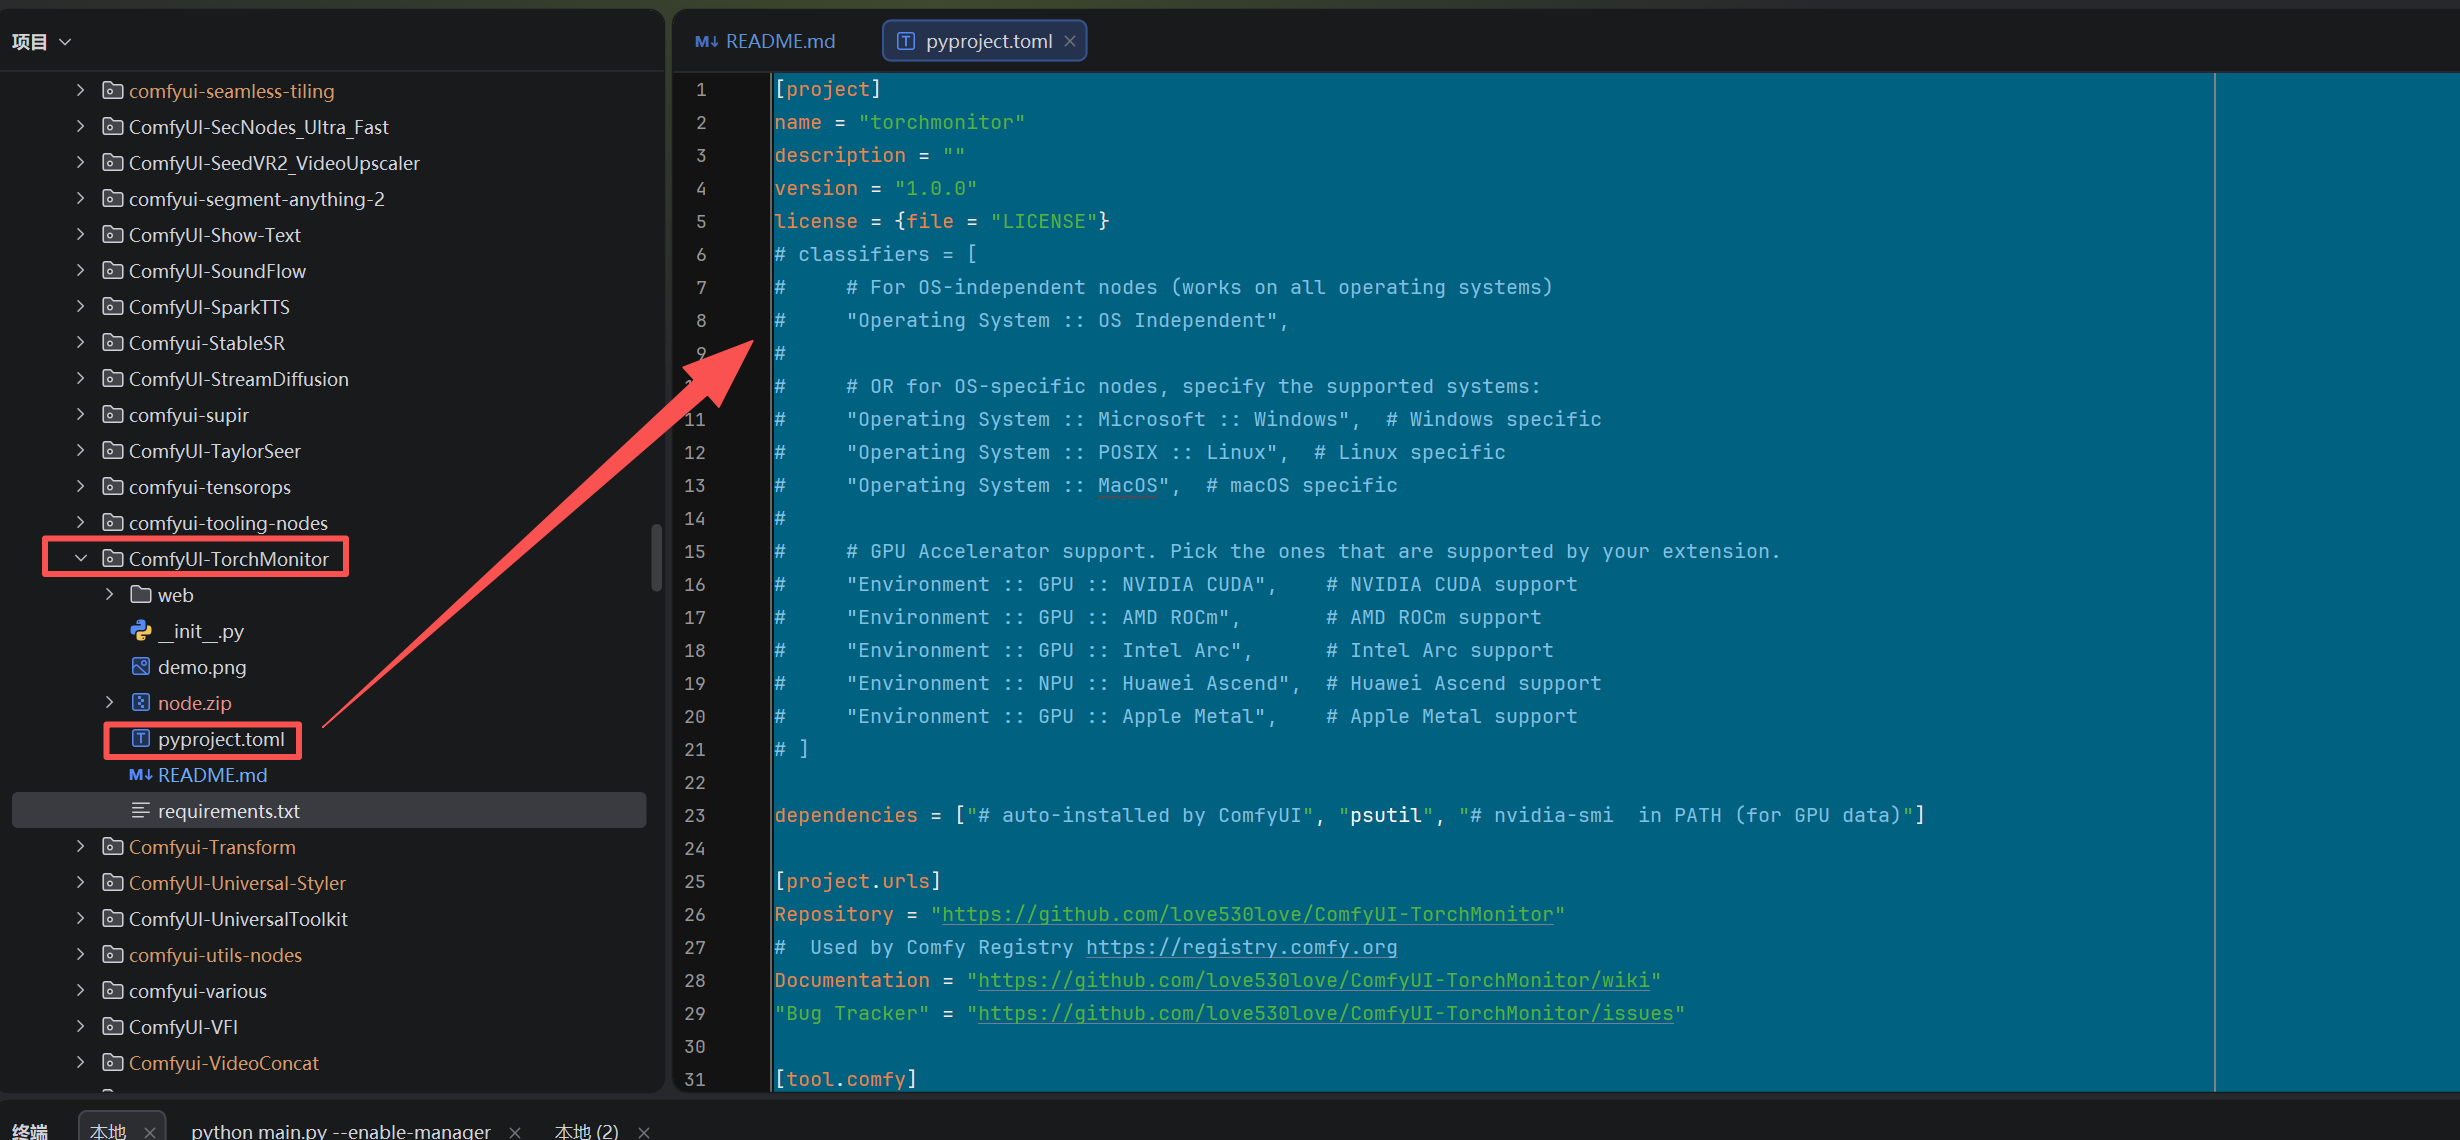
四、生成的最小可用 pyproject.toml 模板
推荐用命令操作,然后再手动补齐缺失的必要信息(如用户名):
comfy node init
生成的内容示例如下:
toml
[project]
name = "torchmonitor"
description = ""
version = "1.0.0"
license = {file = "LICENSE"}
# classifiers = [
#     # For OS-independent nodes (works on all operating systems)
#     "Operating System :: OS Independent",
#
#     # OR for OS-specific nodes, specify the supported systems:
#     "Operating System :: Microsoft :: Windows",  # Windows specific
#     "Operating System :: POSIX :: Linux",  # Linux specific
#     "Operating System :: MacOS",  # macOS specific
#
#     # GPU Accelerator support. Pick the ones that are supported by your extension.
#     "Environment :: GPU :: NVIDIA CUDA",    # NVIDIA CUDA support
#     "Environment :: GPU :: AMD ROCm",       # AMD ROCm support
#     "Environment :: GPU :: Intel Arc",      # Intel Arc support
#     "Environment :: NPU :: Huawei Ascend",  # Huawei Ascend support
#     "Environment :: GPU :: Apple Metal",    # Apple Metal support
# ]

dependencies = ["# auto-installed by ComfyUI", "psutil", "# nvidia-smi  in PATH (for GPU data)"]

[project.urls]
Repository = "https://github.com/love530love/ComfyUI-TorchMonitor"
#  Used by Comfy Registry https://registry.comfy.org
Documentation = "https://github.com/love530love/ComfyUI-TorchMonitor/wiki"
"Bug Tracker" = "https://github.com/love530love/ComfyUI-TorchMonitor/issues"

[tool.comfy]
PublisherId = "aitechlab"
DisplayName = "ComfyUI-TorchMonitor"
Icon = ""
includes = []
# "requires-comfyui" = ">=1.0.0"  # ComfyUI version compatibility
提示:手动写
toml时 千万别用中文引号、括号或多余空格,否则 CLI 会读不到字段!
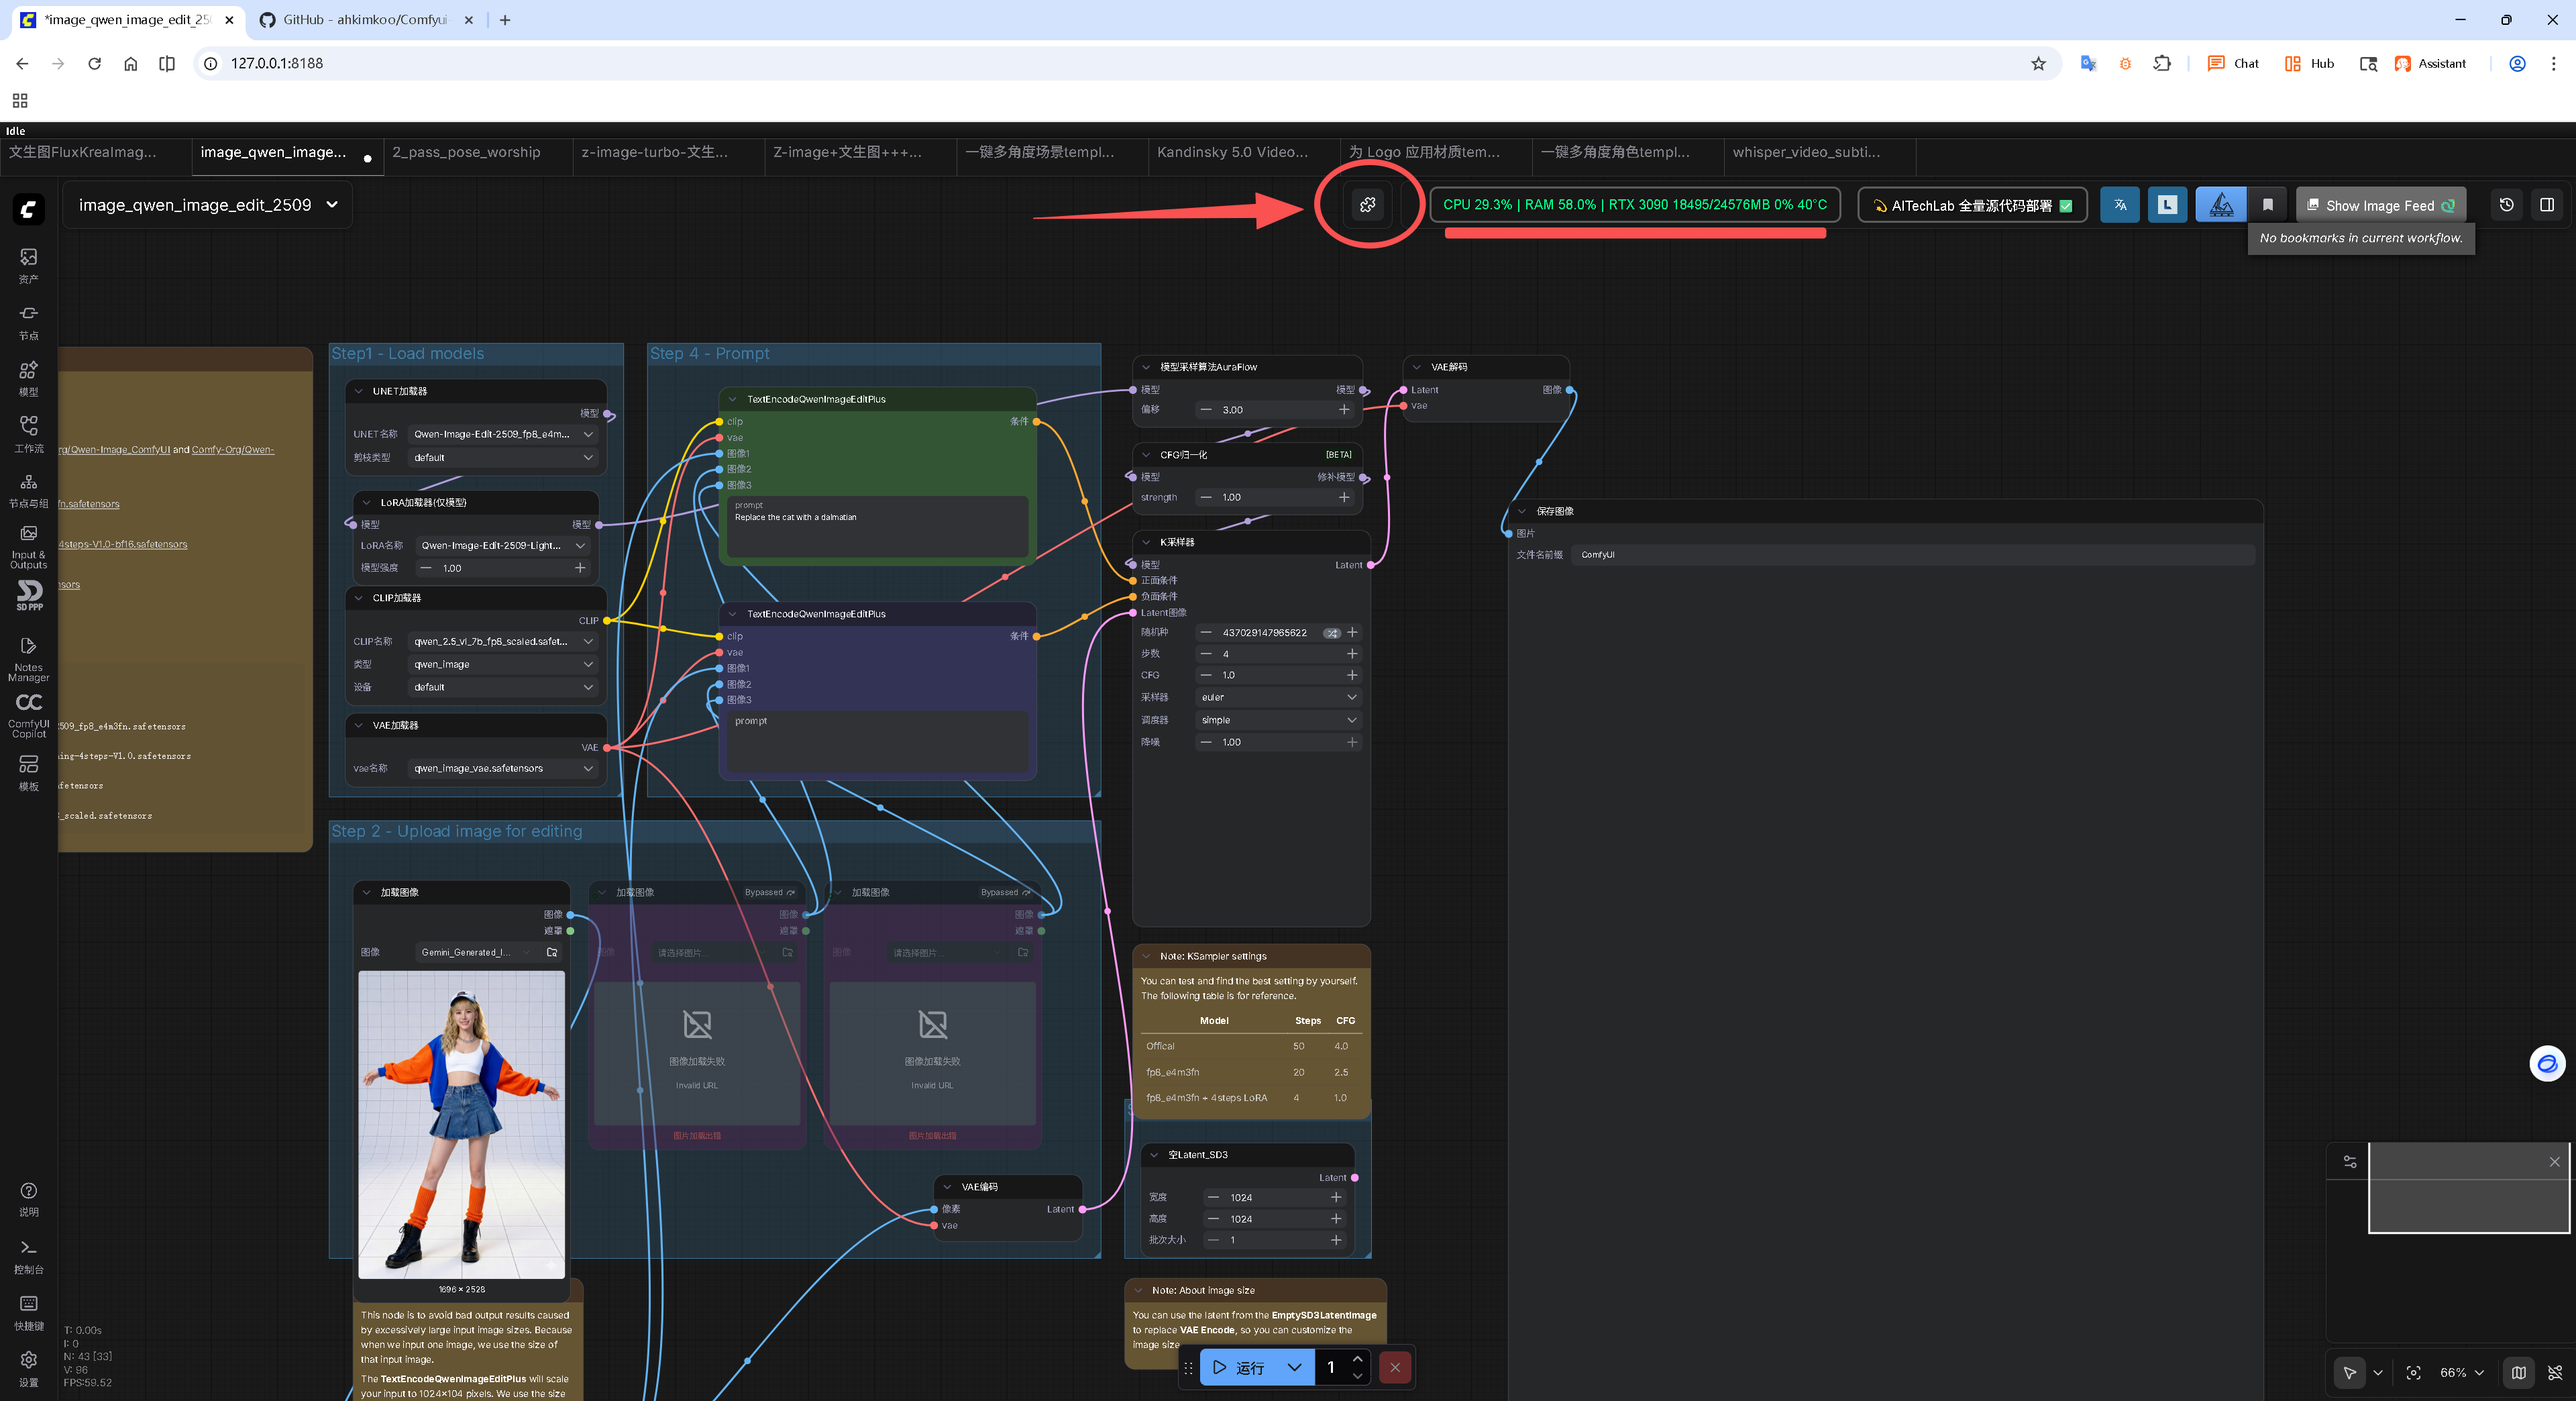
五、推送/注册节点插件到 ComfyUI
comfy node publish --token <API Token 值>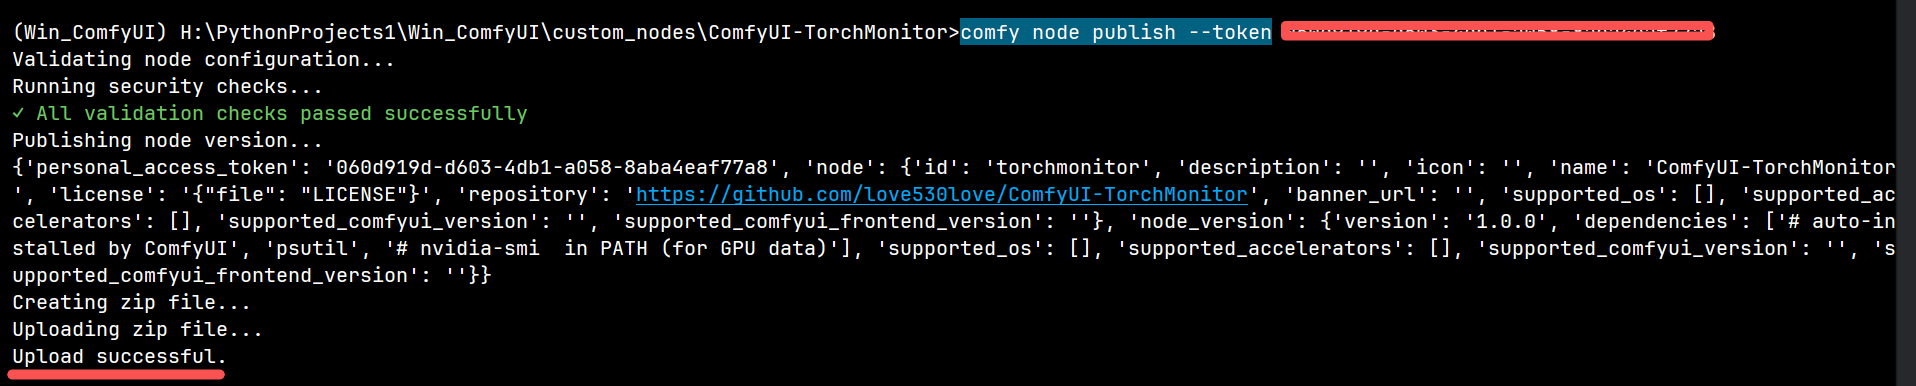
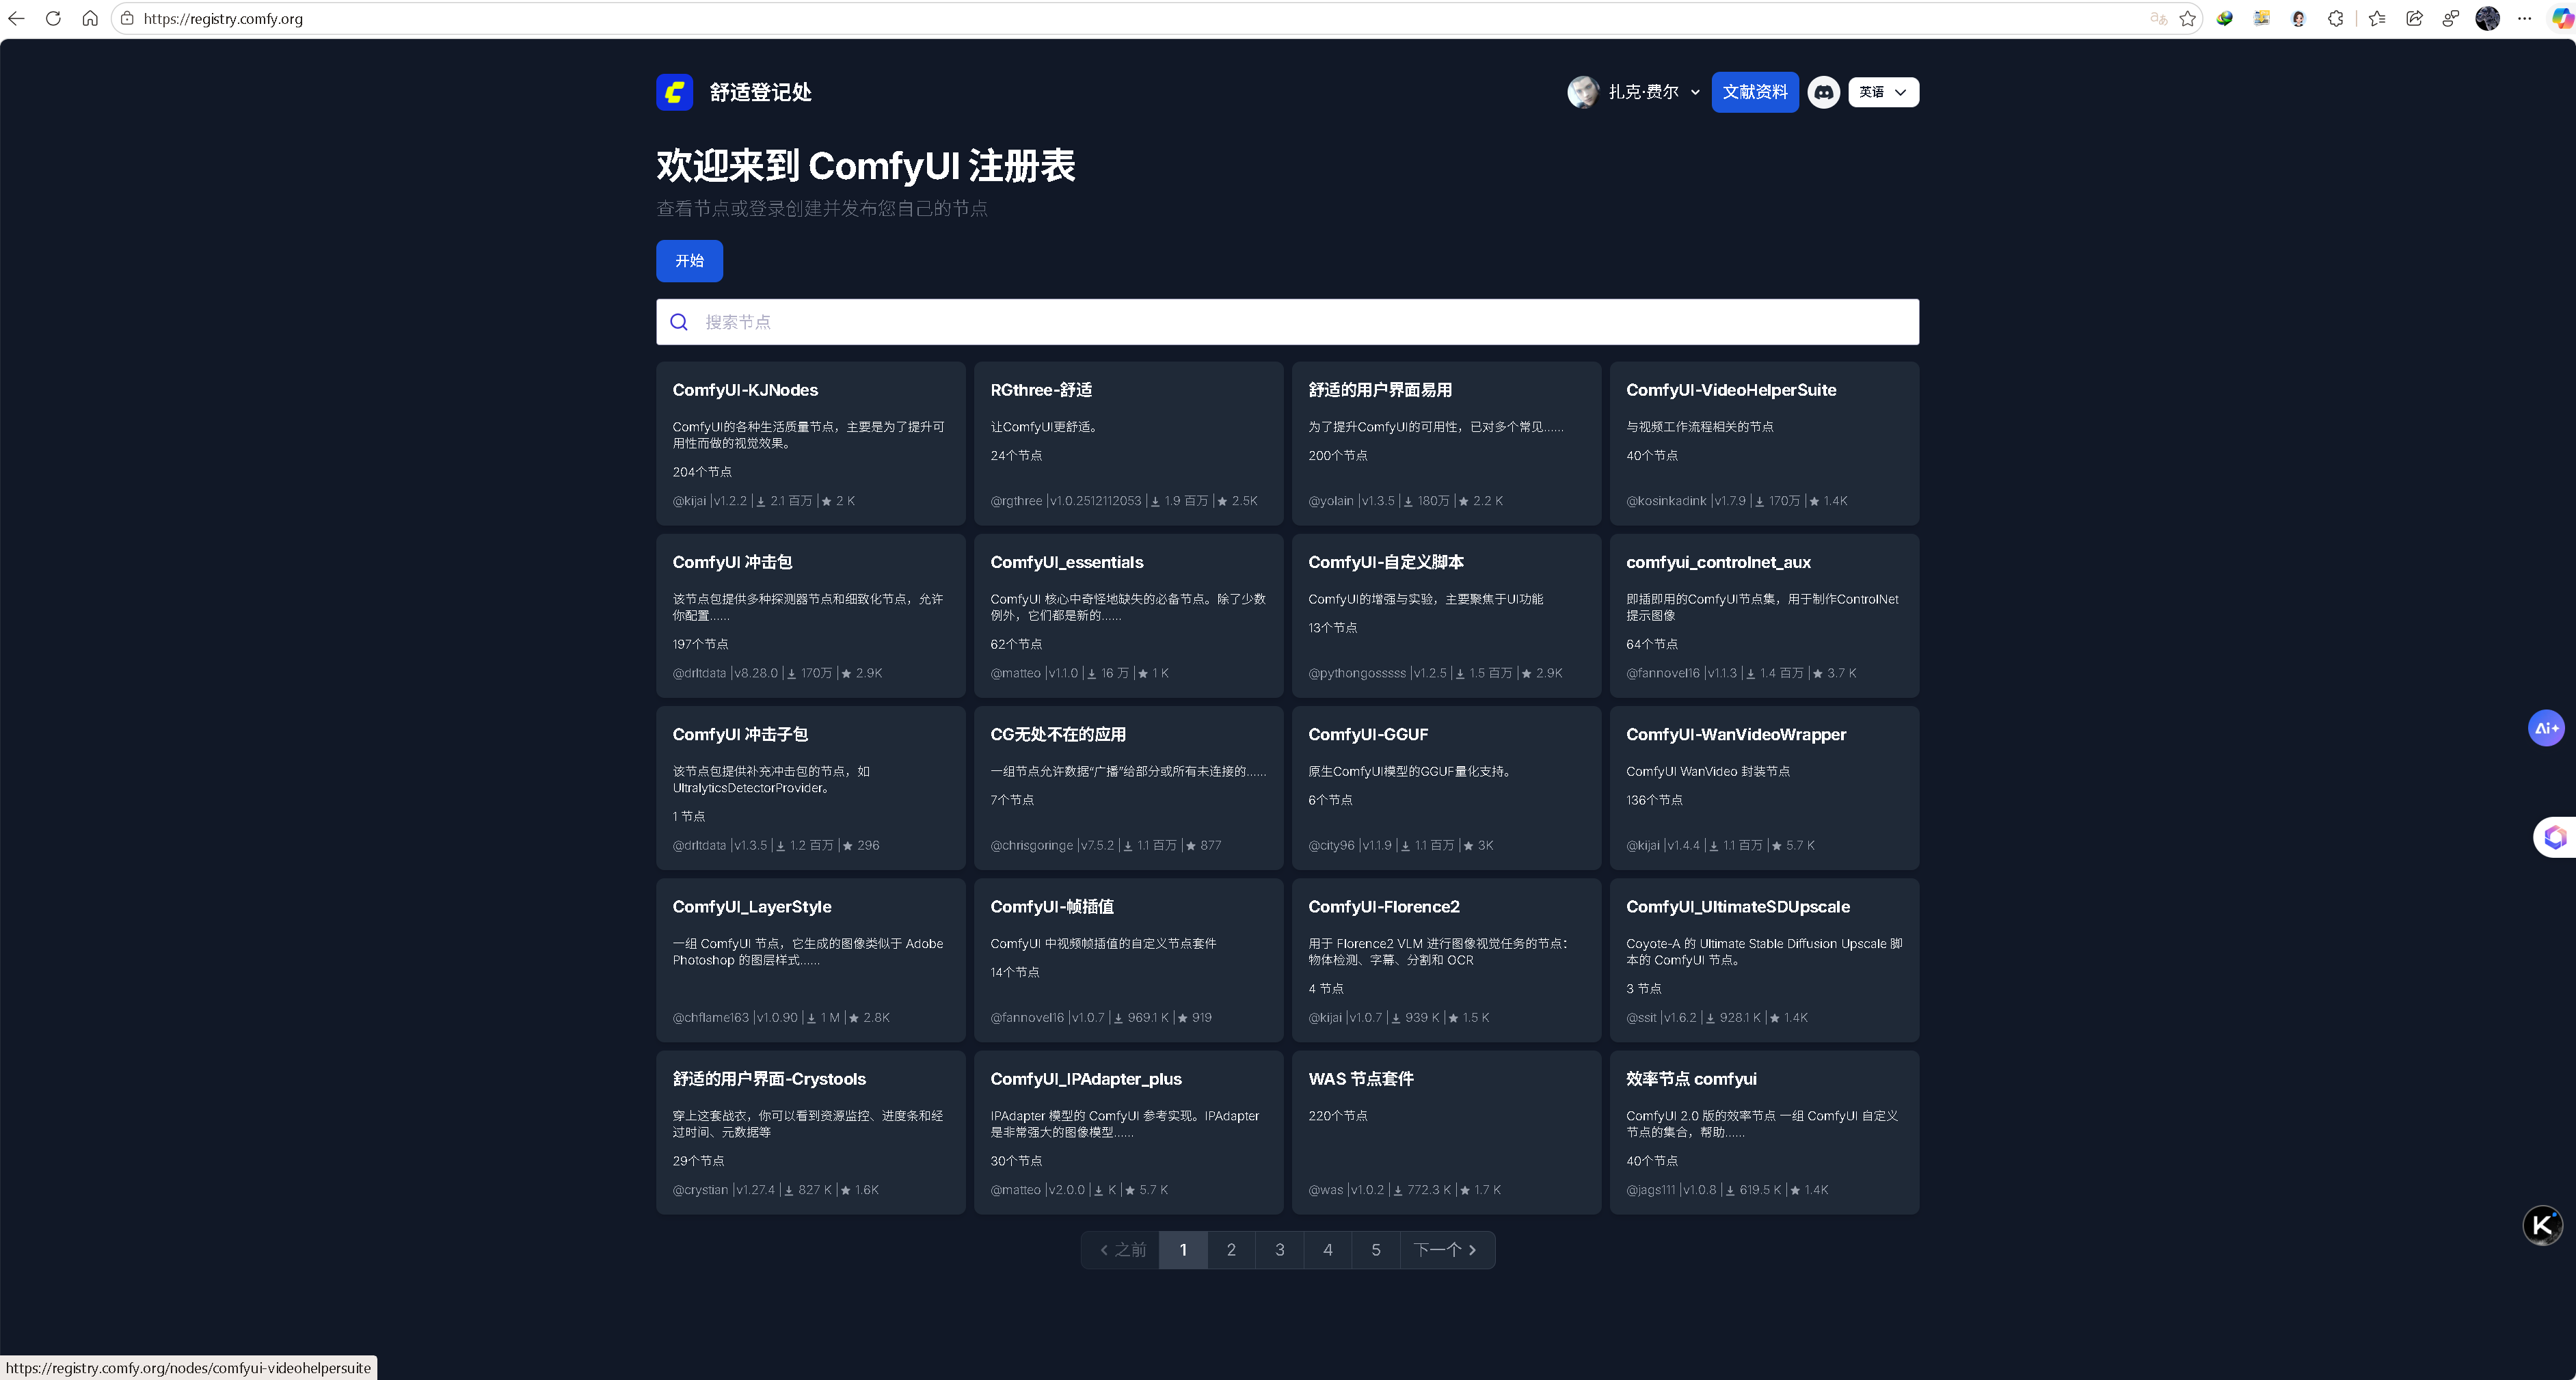
推送成功后,过一会(有审核)尝试搜索自己推送的插件:
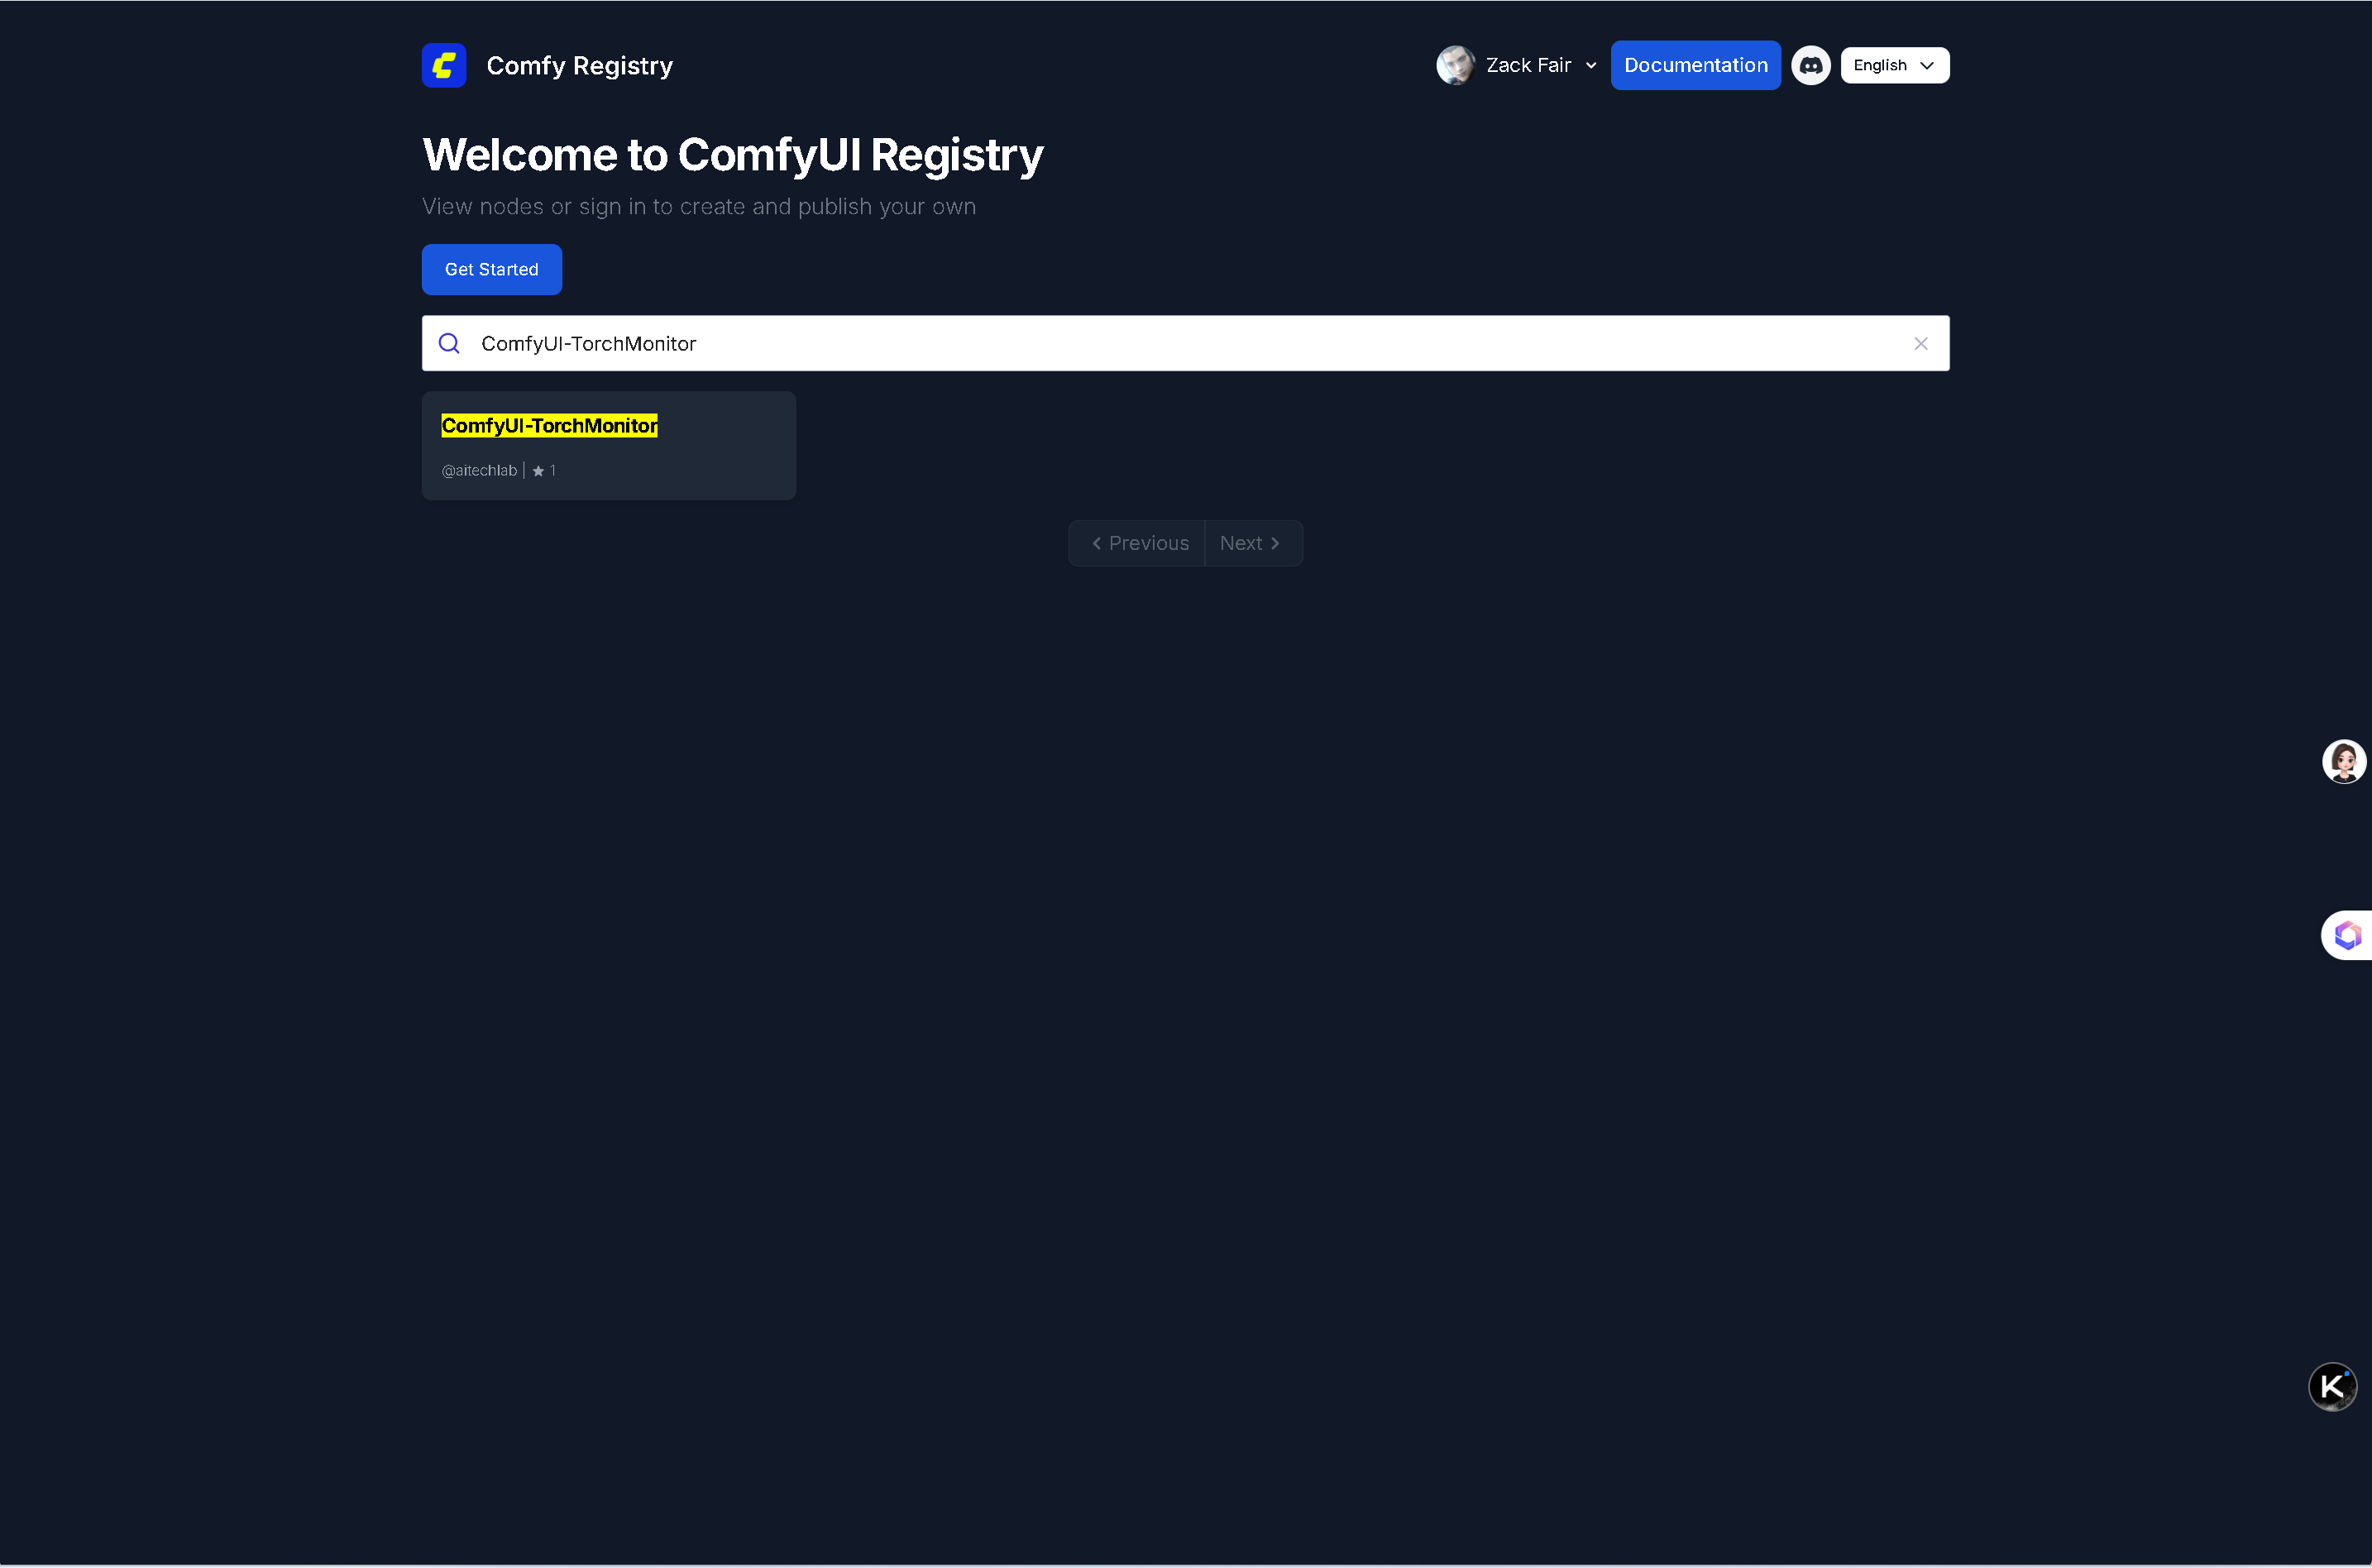
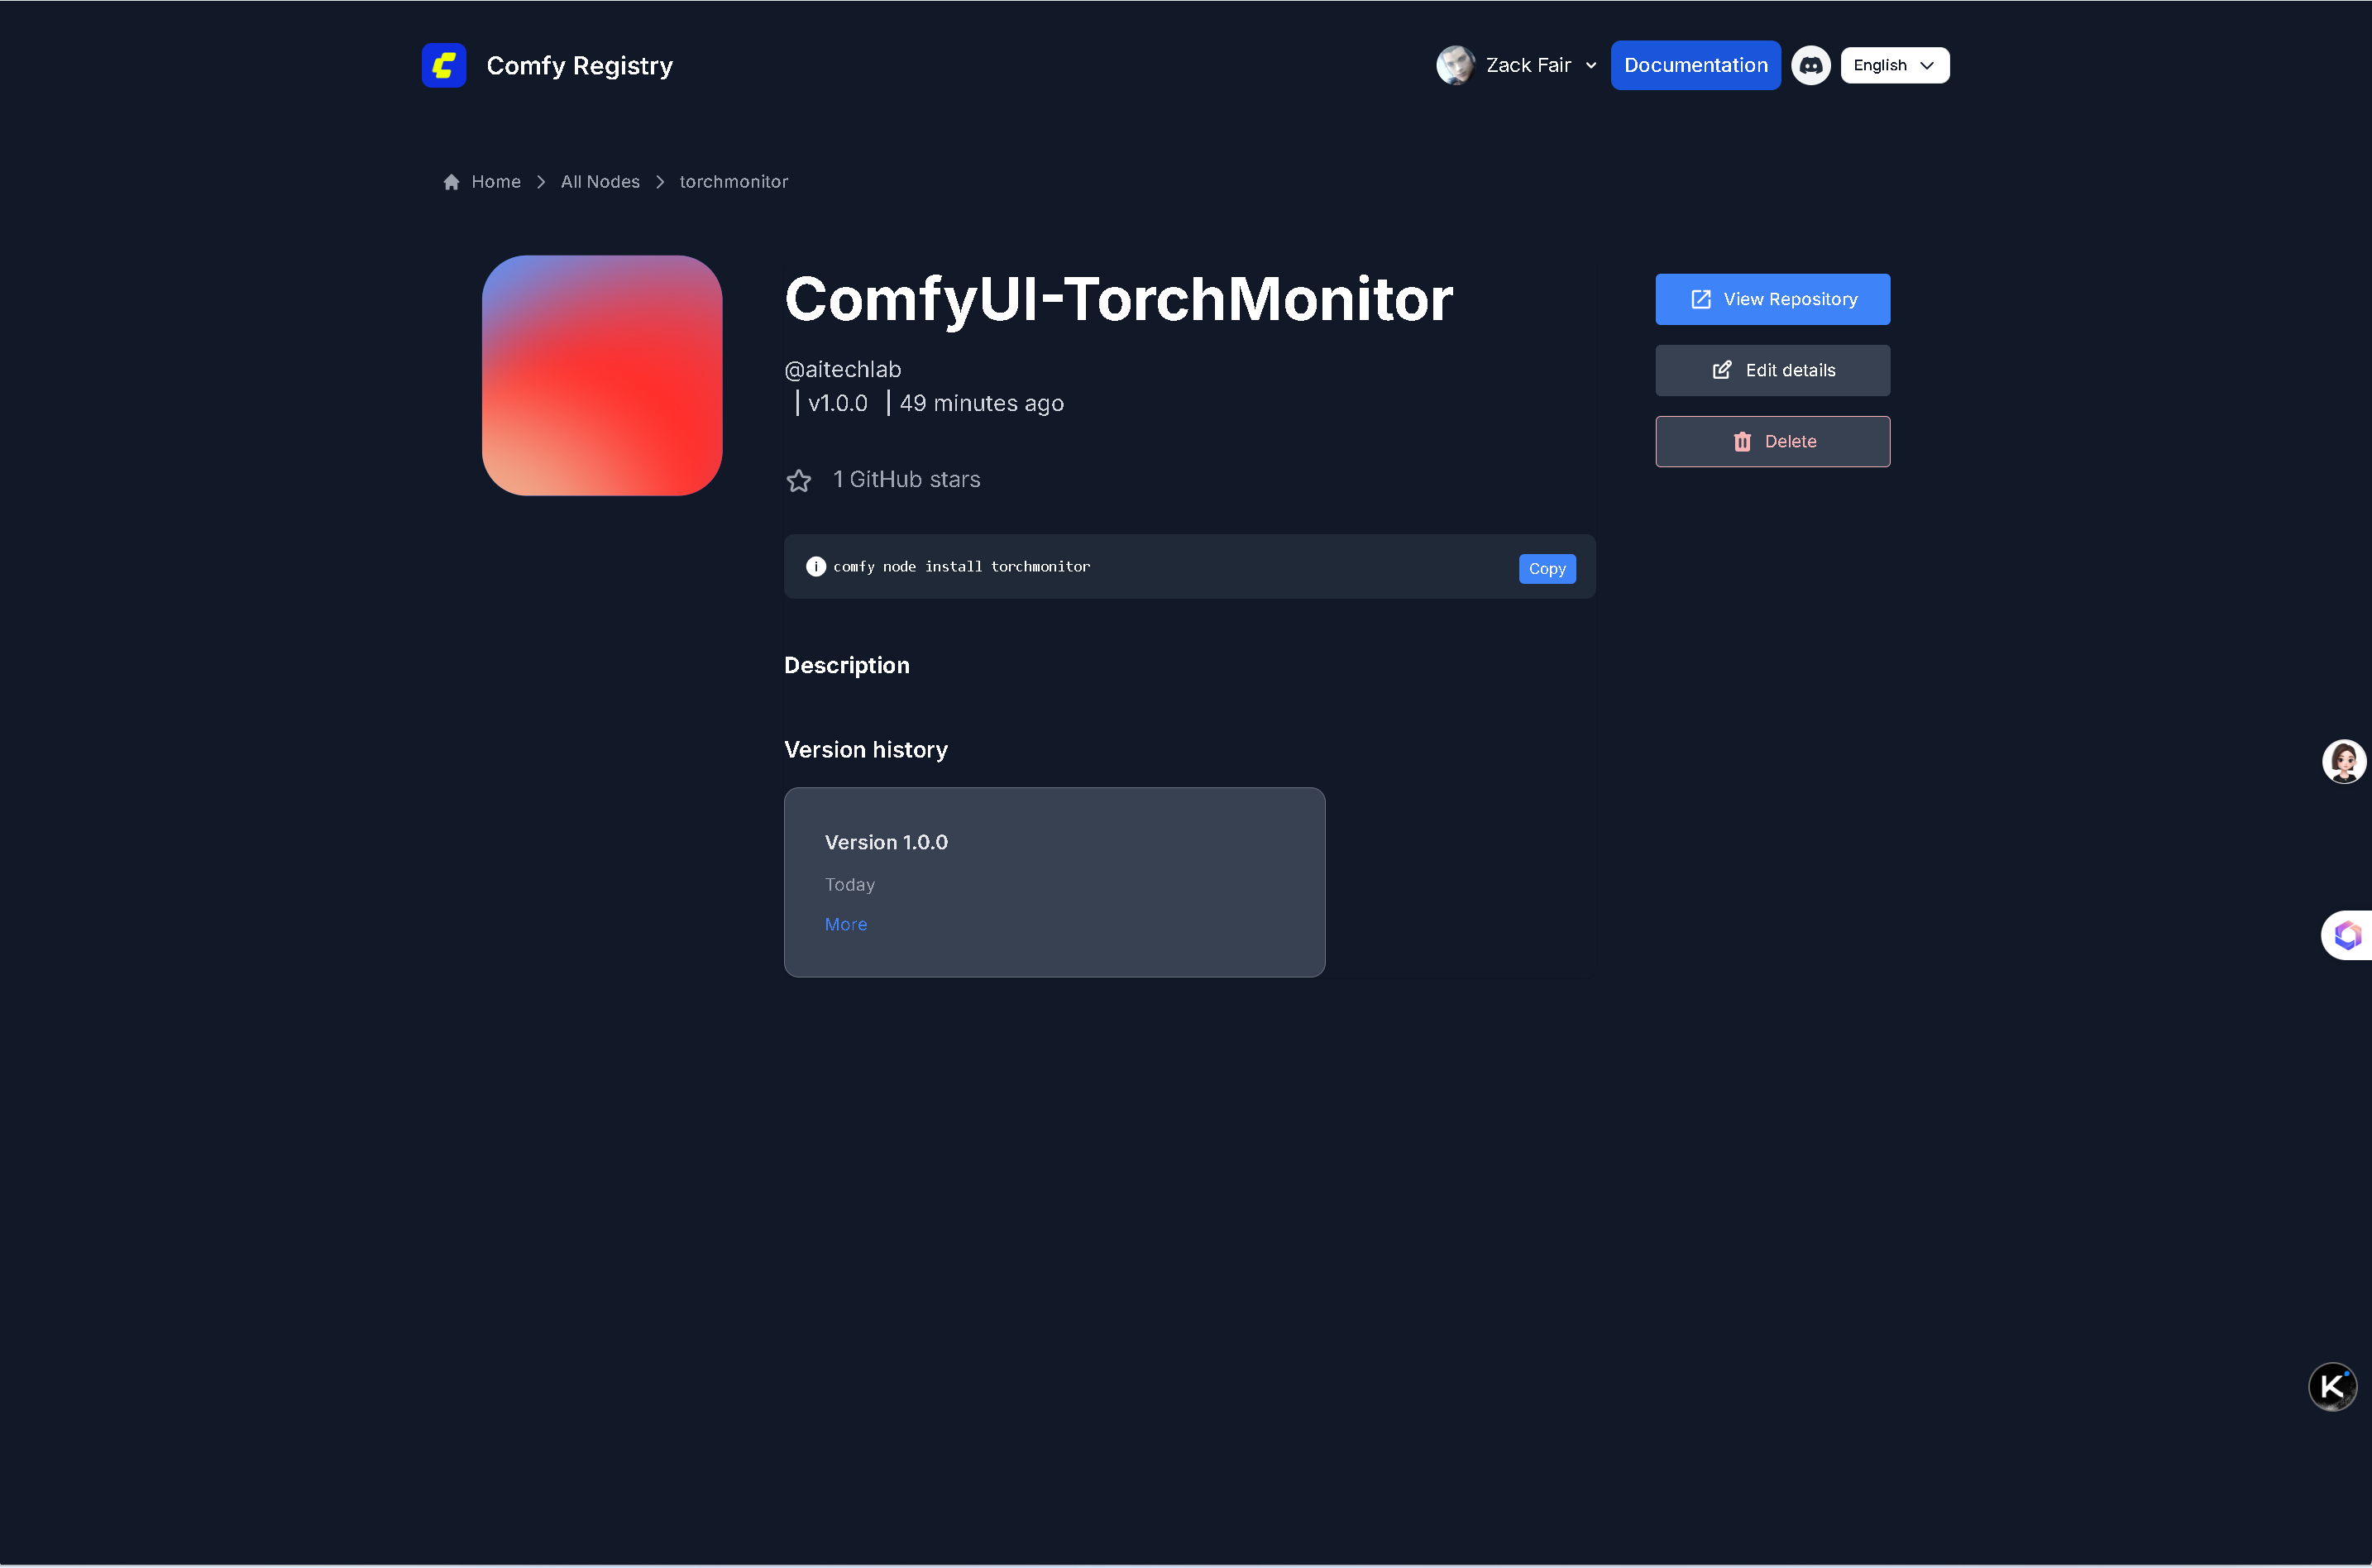
该插件的推荐安装方式:
comfy node install torchmonitor或者在最新版 ComfyUI-Manager 中搜索:"torchmonitor"
能在插件商店搜索到表明注册插件成功

六、常见报错与秒解
现象 原因 解决
Publisher ID is required toml 没写对或没提交 确认 [tool.comfy] 段 PublisherId = "你的ID"
Invalid personal access token token 写错/已删 到 registry 后台重新生成并复制完整 cnr_xxx
UnicodeDecodeError 文件含中文符号或非 UTF-8 用 VSCode/Notepad++ 另存为 UTF-8(无 BOM)
七、更新版本(后续迭代)
- 改
pyproject.toml里的version(例如1.1.0) comfy node pack && comfy node publish --token cnr_xxx- 用户侧在 Manager 点 Update 即可。
八、小结
整套流程就 5 行命令 + 1 次网页复制 token,比传统 git clone 分发省力太多。
把这篇备忘贴桌面,下次再发新节点 3 分钟搞定!🎉