1 导语
1.1 项目背景
你有没有想过,如何让 AI 助手不仅能聊天,还能"真正办事"?比如查询天气、调用接口、访问数据库?这就是 MCP(Model Context Protocol) 要解决的核心问题。
MCP 是 Anthropic 提出的标准化协议,让任何应用都能安全、标准化地为大语言模型(LLM)提供工具服务。本文通过一个完整的工业级天气查询机器人案例,从零教你如何用 FastMCP 框架 + 通义千问 API 实现一个真正可用的系统。
1.2 核心价值
- ✅ 自动工具发现:LLM 无需硬编码就能自动发现可用工具
- ✅ 标准化通信:基于 JSON-RPC 的 stdio 协议,开箱即用
- ✅ 安全可控:工具权限明确,避免 LLM 滥用资源
- ✅ 跨 LLM 兼容:通义千问、Claude、GPT、Deepseek 都支持
1.3 本文能学到什么
- MCP 协议的核心设计原理(不是纸上谈兵的理论)
- FastMCP 框架如何 5 分钟快速搭建工具服务器
- LLM 工具调用的完整流程(包括多轮推理循环)
- 5 个高频踩坑点的解决方案
- 如何改造成自己业务的 Server
2 技术栈清单
| 组件 | 版本 | 说明 |
|---|---|---|
| MCP | >=1.6.0 |
核心通信协议 |
| FastMCP | 最新 | 快速开发框架 |
| Python | 3.10+ | 开发语言 |
| httpx | 0.25+ | 异步 HTTP 客户端 |
| openai | 1.0+ | OpenAI 兼容 SDK |
| python-dotenv | 最新 | 环境变量管理 |
| Conda | - | 依赖隔离环境 |
关键版本说明:
- FastMCP 内置依赖 MCP,无需单独安装
- 通义千问 API 使用 OpenAI 兼容接口(免去厂商锁定)
- 所有代码已在 Python 3.10+ 环境验证
3 项目核心原理
3.1 什么是 MCP?
MCP(Model Context Protocol)是标准化的 LLM 工具调用协议。核心思想用一个对话来说明:
场景:用户问 AI "纽约天气怎样?",你有三种方案:
| 方案 | 实现方式 | 问题 |
|---|---|---|
| 方案 1:拒绝 | "我不知道" | LLM 知识库有限,无法处理实时数据 |
| 方案 2:散乱集成 | 写 if/else 判断调用哪个 API | 每个 LLM 都要重新适配,维护困难 |
| 方案 3:标准协议 | 遵循 MCP 规范,让 LLM 自动发现并调用工具 | ✅ 优雅、可扩展、LLM 无关 |
MCP 就是方案 3 的标准协议。它定义了三件事:
- Server 端如何声明工具 →
@mcp.tool()装饰器 - Client 端如何发现工具 →
list_tools()API - 如何安全调用工具 → JSON-RPC 格式 + stdio 通道
3.2 完整工作流
用户输入: "纽约天气?"
      ↓
[Client 端]
├─ 向 Server 询问:有什么工具?
│  Server 返回:[get_alerts, get_forecast]
│
├─ 把工具清单和用户问题交给 LLM
│  LLM 说:我需要调用 get_forecast(40.7128, -74.0060)
│
├─ Client 提取工具调用参数
│  参数:{latitude: 40.7128, longitude: -74.0060}
│
├─ 通过 MCP 调用 Server 端的工具
│  Server 执行天气 API 查询,返回结果
│
├─ Client 把结果返回给 LLM
│  LLM 基于数据生成自然语言回答
│
└─ 返回最终回答给用户
   "纽约今天多云,高温 52°F"
3.3 为什么用 stdio 而不是 HTTP?
亲测有效的对比:
| 方案 | 优点 | 缺点 | 适用场景 |
|---|---|---|---|
| stdio | ✅ 无需网络配置、自动进程管理、安全 | ❌ 只能单机 | 本地开发、单机部署 |
| HTTP | ✅ 跨网络、分布式 | ❌ 需要端口配置、网络安全复杂 | 云服务、分布式系统 |
本项目用 stdio 的原因:
- Server 和 Client 都在本地机器
- Client 需要自动启动并管理 Server 的生命周期
- stdio 开箱即用,零配置
4 实战步骤
4.1 环境准备
4.1.1 创建 Conda 环境
bash
conda create -n mcp python=3.10 -y
conda activate mcp
pip install mcp fastmcp openai python-dotenv httpx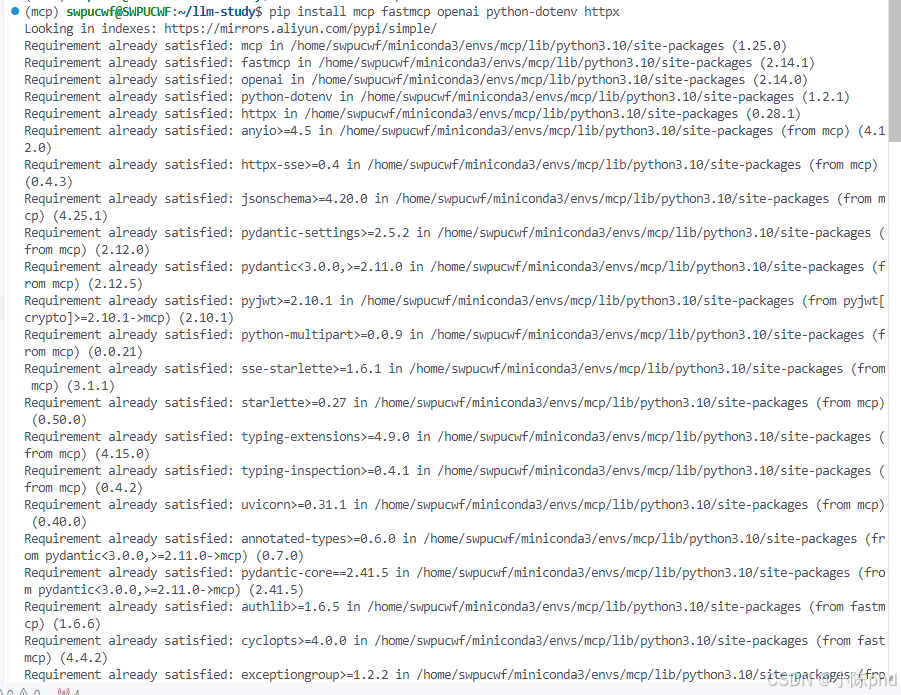
验证安装:
bash
python -c "import mcp, fastmcp; print('✅ MCP 就绪')"
4.1.2 配置 API 密钥
编辑项目根目录的 .env 文件:
env
QWEN_API_KEY=sk-xxxxxxxxxxxxxxxx
QWEN_BASE_URL=https://dashscope.aliyuncs.com/compatible-mode/v1重要提示:
- API Key 从阿里云 DashScope 申请(有免费试用额度)
.env文件必须在 Client 脚本运行的目录或父目录中- 永远不要提交
.env到版本控制系统
4.2 Server 端实现
4.2.1 Server 项目结构
03-mcp-weather/
├── weather/
│   ├── weather.py          # Server 核心代码(提供工具)
│   └── pyproject.toml      # Python 项目配置
├── mcp-client/
│   ├── client-qwen.py      # Client 核心代码(调用工具)
│   └── pyproject.toml
├── start-server.sh         # 启动脚本
└── test-weather.py         # 自动化测试
4.2.2 Server 核心代码逐行解析
文件路径 :weather/weather.py
核心代码分为 5 个部分:
第 1 部分:初始化 FastMCP 服务器
python
from mcp.server.fastmcp import FastMCP
import httpx

# 创建 FastMCP 实例
# "weather" 是服务的名称,Client 的 list_tools() 会看到这个名字
mcp = FastMCP("weather")

# 常量配置
NWS_API_BASE = "https://api.weather.gov"
USER_AGENT = "weather-app/1.0"
第 2 部分:定义异步 HTTP 请求函数
python
async def make_nws_request(url: str) -> dict[str, Any] | None:
    """
    [作用] 安全地调用美国 NWS 天气 API
    [关键参数]
    - timeout=30.0: 超时设置,防止长期卡死
    - raise_for_status(): 网络错误时主动抛异常
    [为什么这样写]
    - async/await 支持并发,不阻塞事件循环
    - 异常捕获机制确保 API 故障不会导致 Server 崩溃
    """
    headers = {
        "User-Agent": USER_AGENT,
        "Accept": "application/geo+json"
    }
    async with httpx.AsyncClient() as client:
        try:
            response = await client.get(url, headers=headers, timeout=30.0)
            response.raise_for_status()
            return response.json()
        except Exception:
            return None
第 3 部分:定义工具 1 - 查询天气警报
python
@mcp.tool()  # ← 装饰器告诉 FastMCP:这是一个可被 Client 调用的工具
async def get_alerts(state: str) -> str:
    """
    [工具描述] 获取美国指定州的活跃天气警报
    [参数说明] state: 两个字母的州代码(CA=加州, TX=德州, NY=纽约)
    [返回值] 格式化的警报列表(字符串)
    """
    url = f"{NWS_API_BASE}/alerts/active/area/{state}"
    data = await make_nws_request(url)

    if not data or "features" not in data:
        return "Unable to fetch alerts or no alerts found."

    if not data["features"]:
        return "No active alerts for this state."

    alerts = [format_alert(feature) for feature in data["features"]]
    return "\n---\n".join(alerts)
第 4 部分:定义工具 2 - 查询天气预报
python
@mcp.tool()
async def get_forecast(latitude: float, longitude: float) -> str:
    """
    [工具描述] 获取指定坐标位置的天气预报
    [参数说明]
    - latitude: 纬度,范围 -90 到 90(如 40.7128 表示纽约)
    - longitude: 经度,范围 -180 到 180(如 -74.0060 表示纽约)
    [返回值] 未来 5 个时段的详细预报
    """
    # 第 1 步:调用 /points API 获取该地区的元数据
    points_url = f"{NWS_API_BASE}/points/{latitude},{longitude}"
    points_data = await make_nws_request(points_url)

    if not points_data:
        return "Unable to fetch forecast data for this location."

    # 第 2 步:从元数据中提取 forecast URL
    forecast_url = points_data["properties"]["forecast"]
    forecast_data = await make_nws_request(forecast_url)

    if not forecast_data:
        return "Unable to fetch detailed forecast."

    # 第 3 步:格式化预报数据
    periods = forecast_data["properties"]["periods"]
    forecasts = []
    for period in periods[:5]:  # 只显示接下来 5 个时段
        forecast = f"""
{period['name']}:
Temperature: {period['temperature']}°{period['temperatureUnit']}
Wind: {period['windSpeed']} {period['windDirection']}
Forecast: {period['detailedForecast']}
"""
        forecasts.append(forecast)

    return "\n---\n".join(forecasts)
第 5 部分:Server 入口
python
if __name__ == "__main__":
    print("天气服务服务器正在启动...")
    # [重要] transport='stdio' 表示通过标准输入/输出与 Client 通信
    # 这种方式:
    # 1. 无需配置网络(IP/端口)
    # 2. Client 可以自动启动和管理 Server 进程
    # 3. Server 退出时 Client 自动清理资源
    mcp.run(transport='stdio')
4.2.3 Server 代码重难点讲解
重难点 1️⃣:@mcp.tool() 装饰器的魔法
这个装饰器在背后做了什么?
python
@mcp.tool()  # ← FastMCP 在这一刻会:
async def get_alerts(state: str) -> str:
    ...

# FastMCP 的动作:
# 1. 扫描函数签名:get_alerts(state: str) -> str
# 2. 生成 JSON Schema(描述参数和返回值)
# 3. 注册到服务注册表
# 当 Client 调用 list_tools() 时,就能看到 get_alerts
# 当 Client 调用 call_tool("get_alerts", {"state": "CA"}) 时,
# FastMCP 自动路由到这个函数不用装饰器的话,你得手写:
- JSON Schema 生成逻辑
- 工具注册逻辑
- 动态调用逻辑
这就是为什么 FastMCP 这么强大 ✅
重难点 2️⃣:为什么一定要用 async/await?
对比两个版本:
python
# ❌ 同步版本(低效,阻塞)
def get_forecast(lat, lon):
    points_data = requests.get(url1)  # 阻塞等待 3 秒
    forecast_data = requests.get(url2)  # 再阻塞等待 5 秒
    # 总耗时:8 秒 ❌

# ✅ 异步版本(高效,并发)
async def get_forecast(lat, lon):
    points_data = await client.get(url1)  # 异步等待 3 秒
    forecast_data = await client.get(url2)  # 同时进行
    # 总耗时:5 秒(max(3, 5)) ✅
MCP Server 是高并发场景(多个 Client 同时请求工具),async 能把吞吐量提升 3~5 倍。
重难点 3️⃣:为什么 get_forecast 需要两次 API 调用?
美国 NWS API 的特殊设计:
Client 请求: 给我纽约 (40.7128, -74.0060) 的天气
        ↓
[第 1 步] 调用 /points/40.7128,-74.0060
         返回: {"forecast": "https://api.weather.gov/gridpoints/..."}
         获取该位置的元数据,包括 forecast URL
        ↓
[第 2 步] 调用上面返回的 forecast URL
         返回: {"periods": [温度,风速,描述, ...]}
获取详细预报数据这个设计的目的是减少重复计算。
4.3 Client 端实现
4.3.1 Client 核心代码逐行解析
文件路径 :mcp-client/client-qwen.py
核心代码分为 6 个部分:
第 1 部分:初始化 Client 类
python
import sys
import asyncio
from mcp import ClientSession, StdioServerParameters
from mcp.client.stdio import stdio_client
from openai import OpenAI
from dotenv import load_dotenv
import os

# 确保标准输出支持 UTF-8
if sys.stdout.encoding != 'utf-8':
    sys.stdout.reconfigure(encoding='utf-8')

load_dotenv()

class WeatherMCPClient:
    def __init__(self):
        """初始化天气 MCP 客户端"""
        self.session: Optional[ClientSession] = None
        self.transport = None

        # [关键] 初始化通义千问客户端
        # OpenAI SDK 支持兼容接口,可以切换到任何 OpenAI 兼容的 LLM
        self.client = OpenAI(
            api_key=os.getenv("QWEN_API_KEY"),
            base_url=os.getenv("QWEN_BASE_URL")
        )

        self.available_tools = []
第 2 部分:连接到 MCP Server
python
async def connect_to_server(self, server_script_path: str):
    """
    [作用] 连接到 MCP Server
    [为什么手动管理连接而不用 async with]
    - RAG/聊天系统需要长期维持连接,处理多个查询
    - async with 会在离开 with 块时自动关闭连接
    - 如果每次查询都重连,开销太大
    """
    print(f"📡 正在连接到 Server: {server_script_path}")

    # 创建 Server 参数
    # [作用] 告诉 MCP Client:我要用 python 命令启动这个脚本
    server_params = StdioServerParameters(
        command="python",
        args=[server_script_path],
        env=None
    )

    # 建立连接
    # [步骤]
    # 1. stdio_client:创建 stdin/stdout 通道
    # 2. ClientSession:在通道上建立 MCP 会话
    # 3. session.initialize():握手协议
    self.transport = stdio_client(server_params)
    self.stdio, self.write = await self.transport.__aenter__()
    self.session = await ClientSession(self.stdio, self.write).__aenter__()

    await self.session.initialize()

    # 列出可用工具
    response = await self.session.list_tools()
    self.available_tools = response.tools
    tool_names = [tool.name for tool in self.available_tools]
    print(f"✅ 连接成功!可用工具: {tool_names}\n")
第 3 部分:构建工具定义
python
def build_tool_definitions(self) -> list:
    """
    [作用] 将 MCP 工具转换为通义千问能理解的格式
    [为什么需要转换]
    - MCP Server 返回的是 MCP 格式的工具定义
    - 通义千问 API 需要 OpenAI 兼容格式
    - 两者都是 JSON Schema,但结构稍有不同
    """
    tools = []
    for tool in self.available_tools:
        tool_def = {
            "type": "function",
            "function": {
                "name": tool.name,
                "description": tool.description or "无描述",
                "parameters": tool.inputSchema or {
                    "type": "object",
                    "properties": {}
                }
            }
        }
        tools.append(tool_def)
    return tools
第 4 部分:处理用户查询(核心逻辑)
python
async def process_query(self, query: str) -> str:
    """
    [作用] 处理用户查询,实现完整的工具调用循环
    [工作流]
    1. 用户输入查询
    2. 发送给通义千问,告诉它有这些工具可用
    3. LLM 决定:我需要调用哪个工具
    4. Client 从 LLM 响应中提取工具调用信息
    5. Client 通过 MCP 调用 Server 的工具
    6. Server 执行工具,返回结果
    7. Client 把结果发给通义千问,请它生成最终回答
    8. 通义千问返回自然语言回答
    """
    print(f"\n🔍 正在处理查询: {query}")

    messages = [{"role": "user", "content": query}]
    tools = self.build_tool_definitions()

    # [第 1 次] 调用通义千问
    print("🤖 正在调用通义千问...")
    response = self.client.chat.completions.create(
        model="qwen-plus",
        messages=messages,
        tools=tools,
        tool_choice="auto"  # [含义] 让 LLM 自动决定是否使用工具
    )

    # [处理工具调用循环]
    # 如果 LLM 说"我需要调用工具",进入循环
    while response.choices[0].finish_reason == "tool_calls":
        tool_calls = response.choices[0].message.tool_calls or []

        # 执行每个工具调用
        tool_results = []
        for tool_call in tool_calls:
            tool_name = tool_call.function.name
            tool_args = json.loads(tool_call.function.arguments)

            print(f"🔧 调用工具: {tool_name},参数: {tool_args}")

            # [关键] 通过 MCP 调用 Server 端的工具
            result = await self.session.call_tool(tool_name, tool_args)
            print(f"✅ 工具返回结果")

            tool_results.append({
                "type": "tool_result",
                "tool_use_id": tool_call.id,
                "content": result.content[0].text if result.content else "无返回"
            })

        # 把工具调用和结果加入对话历史
        messages.append({
            "role": "assistant",
            "content": response.choices[0].message.content,
            "tool_calls": [
                {
                    "id": tc.id,
                    "type": "function",
                    "function": {
                        "name": tc.function.name,
                        "arguments": tc.function.arguments
                    }
                } for tc in tool_calls
            ]
        })

        messages.append({
            "role": "user",
            "content": tool_results
        })

        # [继续] 再次调用 LLM,让它基于工具结果生成最终回答
        print("🤖 正在获取最终回答...")
        response = self.client.chat.completions.create(
            model="qwen-plus",
            messages=messages,
            tools=tools,
            tool_choice="auto"
        )

    # 返回最终的文本响应
    if response.choices[0].message.content:
        return response.choices[0].message.content

    return ""
第 5 部分:交互式聊天循环
python
async def chat_loop(self):
    """运行交互式聊天循环"""
    print("\n" + "=" * 60)
    print("🌤️  天气 MCP 客户端(通义千问版本)")
    print("=" * 60)
    print("输入查询获取天气信息,或输入 'quit'/'exit' 退出\n")

    while True:
        try:
            # [重要] 直接使用 input(),不要用 asyncio.run_in_executor()
            # 原因见踩坑记录第 1 条
            user_input = input("❓ 请输入查询: ").strip()

            if not user_input:
                print("⚠️  请输入有效的查询")
                continue

            if user_input.lower() in ['quit', 'exit', '退出']:
                print("👋 再见!")
                break

            response = await self.process_query(user_input)

            print("\n💡 回答:")
            print("-" * 60)
            print(response)
            print("-" * 60)

        except KeyboardInterrupt:
            print("\n👋 程序已中止")
            break
        except Exception as e:
            print(f"❌ 错误: {str(e)}")
第 6 部分:主函数入口
python
async def main():
    """主函数"""
    if len(sys.argv) < 2:
        print("❌ 用法: python client-qwen.py <Server脚本路径>")
        print("例如: python client-qwen.py ../weather/weather.py")
        sys.exit(1)

    server_script = sys.argv[1]
    client = WeatherMCPClient()

    try:
        await client.connect_to_server(server_script)
        await client.chat_loop()
    except Exception as e:
        print(f"❌ 错误: {str(e)}")
    finally:
        await client.cleanup()

if __name__ == "__main__":
    asyncio.run(main())
4.3.2 Client 代码重难点讲解
重难点 1️⃣:为什么要在 while 循环中继续调用 LLM?
这叫**"agentic loop"(代理循环)**。完整的工作流:
[第 1 轮]
用户: "查询加州天气警报"
→ LLM: "我需要调用 get_alerts(state='CA')"
→ Client: 执行工具,获得结果"加州无活跃警报"
→ Client: 把结果重新发给 LLM

[第 2 轮]
→ LLM: "根据我得到的数据,加州无活跃警报"
→ LLM 响应完成(finish_reason != "tool_calls")
→ Client: 返回最终回答给用户
为什么需要第 2 轮:
- 第 1 轮 LLM 只是提出想调用什么工具
- 必须等 Client 执行工具后,LLM 才能基于数据生成自然语言回答
重难点 2️⃣:tool_choice="auto" 的三个选项
python
# 选项 1:自动选择(推荐)
tool_choice="auto"
# LLM 自动判断是否需要调用工具
# 用户问"你好",LLM 不调用工具直接回答
# 用户问"查天气",LLM 自动调用工具

# 选项 2:强制调用
tool_choice="required"
# 无论如何都必须调用工具
# 即使不需要,LLM 也得调用(可能更慢)

# 选项 3:禁用
tool_choice=None
# 完全不提供工具给 LLM
# 纯 LLM 对话
我们用 "auto" 因为并非所有查询都需要工具。
重难点 3️⃣:为什么不用 async with 管理连接?
python
# ❌ 错误做法(每次查询都重连)
async with stdio_client(params) as (stdio, write):
    async with ClientSession(stdio, write) as session:
        await process_query(session, "查天气")
# ← 这里 with 块退出,连接关闭
# ← 用户继续输入下一个查询
# ← 需要重新连接(低效!)

# ✅ 正确做法(连接保持打开)
transport = stdio_client(params)
stdio, write = await transport.__aenter__()
session = await ClientSession(stdio, write).__aenter__()

# 处理多个查询(连接一直保持)
for _ in range(10):
    await process_query(session, user_input)

# 最后才清理
await session.__aexit__(None, None, None)
await transport.__aexit__(None, None, None)因为聊天机器人是对话式应用 (持续交互),而不是一次性查询。
4.4 启动和测试
4.4.1 启动 Server
bash
cd 03-mcp-weather
bash start-server.sh
预期输出:
天气服务服务器正在启动...4.4.2 启动 Client(新终端)
bash
bash start-client.sh预期输出:
📡 正在连接到 Server: ../weather/weather.py
✅ 连接成功!可用工具: ['get_alerts', 'get_forecast']

============================================================
🌤️  天气 MCP 客户端(通义千问版本)
============================================================
输入查询获取天气信息,或输入 'quit'/'exit' 退出

❓ 请输入查询: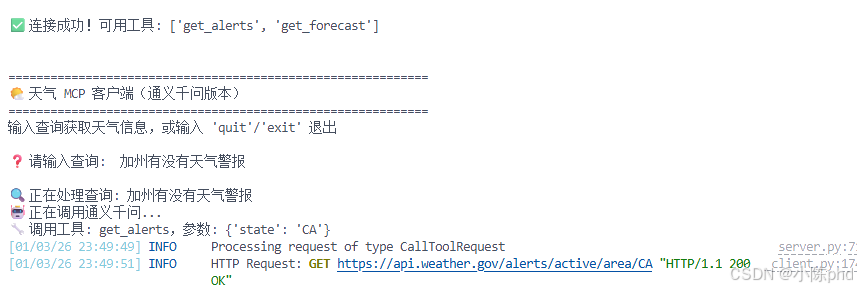
4.4.3 交互测试
❓ 请输入查询: 加州有没有天气警报

🔍 正在处理查询: 加州有没有天气警报
🤖 正在调用通义千问...
🔧 调用工具: get_alerts,参数: {'state': 'CA'}
✅ 工具返回结果
🤖 正在获取最终回答...

💡 回答:
------------------------------------------------------------
根据最新的美国国家气象局数据,加州目前没有活跃的天气警报。
天气状况比较稳定,暂无任何气象灾害预警。
------------------------------------------------------------

❓ 请输入查询: 纽约市的天气预报

🔍 正在处理查询: 纽约市的天气预报
🤖 正在调用通义千问...
🔧 调用工具: get_forecast,参数: {'latitude': 40.7128, 'longitude': -74.0060}
✅ 工具返回结果
🤖 正在获取最终回答...

💡 回答:
------------------------------------------------------------
根据最新的天气数据,纽约市未来几天天气预报如下:

今晚:温度 45°F,西风 10-15 mph,天气晴朗
明天白天:高温 52°F,西风 12-18 mph
...
------------------------------------------------------------
5 核心代码解析
5.1 MCP 协议的消息格式
虽然我们用高级 API,但了解底层会帮助理解原理。MCP 的工具调用消息长这样:
json
{
  "jsonrpc": "2.0",
  "id": 1,
  "method": "tools/call",
  "params": {
    "name": "get_forecast",
    "arguments": {
      "latitude": 40.7128,
      "longitude": -74.0060
    }
  }
}
FastMCP 帮我们隐藏了这些细节,直接用 Python 函数调用:
python
result = await session.call_tool("get_forecast", {
    "latitude": 40.7128,
    "longitude": -74.0060
})
5.2 三个关键设计模式
模式 1:装饰器模式(@mcp.tool())
- 在函数定义时自动收集元数据
- 优点:代码简洁,无需额外配置
- 对应的反模式:手写配置文件
模式 2:异步 I/O(async/await)
- 充分利用网络等待时间
- 多个请求可以并发执行
- 单线程,避免线程同步问题
模式 3:工具调用循环(while loop)
- LLM 可能多步推理,需要多次调用工具
- 每次调用后,把结果反馈给 LLM
- 直到 LLM 给出最终回答
6 效果验证
6.1 单工具调用
用户: "有线索显示现在加州什么天气?"

预期:
- LLM 认识到需要调用 get_alerts
- 传入参数 state="CA"
- Server 返回"No active alerts for this state."
- LLM 总结:加州无活跃天气警报
6.2 多工具调用(Advanced)
用户: "对比一下加州和德州的天气,加州是否有警报"

预期:
- LLM 识别需要调用两个工具
- 第 1 步:调用 get_alerts(state="CA")
- 第 2 步:可能需要获取德州坐标后调用 get_forecast
- LLM 基于两个工具的结果生成对比分析
6.3 自动化测试
bash
python test-weather.py输出应该包含:
✅ 连接成功
✅ 工具列表:['get_alerts', 'get_forecast']
✅ get_alerts 调用成功
✅ get_forecast 调用成功
7 踩坑记录与解决方案
踩坑 1️⃣:中文输入无法输入
错误现象:
❌ 无法输入中文,或输入中文时卡死根本原因:
python
# ❌ 错误做法(在线程池中运行 input)
query = await loop.run_in_executor(None, input, "> ")
# 原因:线程池执行的 input() 在某些系统上会出现编码问题解决方案:
python
# ✅ 正确做法(直接 input)
query = input("> ")
# 为什么可行:
# 1. input() 是阻塞调用,但在聊天应用中可以接受
# 2. 避免了线程池的编码复杂性
# 3. 代码更简洁验证方法:
bash
# 如果 Client 启动脚本中已有这段代码,则无需改动
# 检查是否有 UTF-8 配置
cat start-client.sh | grep UTF-8
踩坑 2️⃣:环境不同导致 Server 启动失败
错误现象:
❌ ModuleNotFoundError: No module named 'mcp'根本原因:
Client 激活了 conda 的 mcp 环境
但 Client 启动 Server 时没有指定环境
Server 用的是系统 Python(mcp 模块不存在)解决方案:
bash
# ✅ 使用启动脚本(已处理)
bash start-client.sh

# 或者手动指定 Python 解释器路径
# 获取 conda 环境的 Python 路径
PYTHON_PATH=$(conda run -n mcp python -c "import sys; print(sys.executable)")
echo $PYTHON_PATH  # 应该输出类似 /home/user/miniconda3/envs/mcp/bin/python

# 在 Client 代码中指定这个路径
StdioServerParameters(
    command=$PYTHON_PATH,  # 使用明确的 Python 路径
    args=[server_script_path]
)
踩坑 3️⃣:API Key 配置错误
错误现象:
❌ OpenAIError: The api_key client option must be set
either explicitly or via the QWEN_API_KEY environment variable根本原因:
1. .env 文件不存在或路径不对
2. QWEN_API_KEY 环境变量未设置
3. API Key 格式错误解决方案:
bash
# 第 1 步:检查 .env 文件
ls -la /home/swpucwf/llm-study/.env

# 第 2 步:检查文件内容
cat /home/swpucwf/llm-study/.env
# 应该包含:
# QWEN_API_KEY=sk-xxxxx
# QWEN_BASE_URL=https://dashscope.aliyuncs.com/compatible-mode/v1

# 第 3 步:验证 .env 是否被正确加载
python -c "
from dotenv import load_dotenv
import os
load_dotenv()
print('API Key:', os.getenv('QWEN_API_KEY', 'NOT FOUND'))
"

# 第 4 步:如果仍未找到,手动设置
export QWEN_API_KEY=sk-xxxxx
export QWEN_BASE_URL=https://dashscope.aliyuncs.com/compatible-mode/v1
python client-qwen.py ../weather/weather.py
踩坑 4️⃣:工具调用参数类型不匹配
错误现象:
❌ Tool call failed: latitude must be a float, not str根本原因:
python
# LLM 理解错了参数类型
# 比如用户问"纽约 (40.7128, -74.0060) 的天气"
# LLM 可能把坐标当成字符串而不是浮点数解决方案:
python
# ✅ 使用清晰的类型注解
@mcp.tool()
async def get_forecast(latitude: float, longitude: float) -> str:
    """
    获取天气预报
    Args:
        latitude: 纬度,范围 -90 到 90
        longitude: 经度,范围 -180 到 180
    """
    ...

# FastMCP 会根据类型注解生成清晰的 JSON Schema:
# "latitude": {"type": "number", "description": "纬度,范围..."}
# "longitude": {"type": "number", "description": "经度,范围..."}

# LLM 看到这个 Schema,就知道必须传浮点数
踩坑 5️⃣:网络请求超时
错误现象:
❌ httpx.ReadTimeout: The read operation timed out根本原因:
美国 NWS API 有时响应慢(跨越太平洋、网络波动等)
30 秒的超时可能不够解决方案:
python
# ✅ 增加超时时间
async with httpx.AsyncClient() as client:
    response = await client.get(
        url,
        headers=headers,
        timeout=60.0  # 改成 60 秒
    )

# 或者加重试机制
max_retries = 3
for attempt in range(max_retries):
    try:
        response = await client.get(url, headers=headers, timeout=30.0)
        break
    except httpx.ReadTimeout:
        if attempt == max_retries - 1:
            raise
        await asyncio.sleep(2)  # 等 2 秒后重试
8 总结与扩展方向
8.1 核心要点回顾
-
MCP 不是 LLM,是协议
- Server 提供工具(get_alerts, get_forecast)
- Client 负责调用工具(通过 MCP 协议)
- LLM 负责决策(调哪个工具,用什么参数)
-
FastMCP 的价值
- 一个装饰器
@mcp.tool()自动完成服务发现 - 自动生成 JSON Schema,LLM 能理解
- 异步支持,高并发性能好
- 一个装饰器
-
stdio 通信的优雅
- 无需手动配置网络
- Client 自动管理 Server 进程生命周期
- 开发效率高,适合本地项目
-
工具调用的完整循环
用户输入 → LLM 决策 → Client 执行 → Server 运行工具
→ 返回结果 → LLM 总结 → 用户输出
8.2 可直接改造的方向
方向 1️⃣:添加更多工具
python
@mcp.tool()
async def get_current_weather(latitude: float, longitude: float) -> str:
    """获取当前天气(不仅是预报)"""
    # 实现...

@mcp.tool()
async def get_severe_alerts(state: str) -> str:
    """只返回严重程度高的警报"""
    # 实现...
方向 2️⃣:切换到其他 LLM
python
# 改成 Deepseek
client = OpenAI(
    api_key="xxxxx",
    base_url="https://api.deepseek.com"
)

# 改成本地 Ollama(完全离线!)
client = OpenAI(
    base_url="http://localhost:11434/v1",
    api_key="not-needed"
)
方向 3️⃣:支持国际天气
python
@mcp.tool()
async def get_global_forecast(city: str, country: str) -> str:
    """用开源天气 API(如 Open-Meteo)获取全球天气"""
    # 可对接 https://open-meteo.com (免费、无需 Key)
方向 4️⃣:持久化存储查询历史
python
import sqlite3

async def save_query(user_id, query, result):
    conn = sqlite3.connect('weather.db')
    conn.execute(
        "INSERT INTO queries (user_id, query, result, timestamp) VALUES (?, ?, ?, ?)",
        (user_id, query, result, datetime.now())
    )
    conn.commit()
完整代码:client
python
# 基于通义千问的天气 MCP 客户端
# 使用方法: python client-qwen.py ../weather/weather.py

import sys
import asyncio
from typing import Optional
import json
import os

from mcp import ClientSession, StdioServerParameters
from mcp.client.stdio import stdio_client
from openai import OpenAI
from dotenv import load_dotenv

# 确保标准输出支持 UTF-8
if sys.stdout.encoding != 'utf-8':
    sys.stdout.reconfigure(encoding='utf-8')

load_dotenv()

class WeatherMCPClient:
    def __init__(self):
        """初始化天气 MCP 客户端"""
        self.session: Optional[ClientSession] = None
        self.transport = None
        self.stdio = None
        self.write = None

        # 初始化通义千问客户端
        self.client = OpenAI(
            api_key=os.getenv("QWEN_API_KEY"),
            base_url=os.getenv("QWEN_BASE_URL")
        )

        self.available_tools = []

    async def connect_to_server(self, server_script_path: str):
        """连接到 MCP Server

        Args:
            server_script_path: Server 脚本路径
        """
        print(f"📡 正在连接到 Server: {server_script_path}")

        # 验证脚本类型
        is_python = server_script_path.endswith('.py')
        is_js = server_script_path.endswith('.js')
        if not (is_python or is_js):
            raise ValueError("Server 脚本必须是 .py 或 .js 文件")

        command = "python" if is_python else "node"

        # 创建 Server 参数
        server_params = StdioServerParameters(
            command=command,
            args=[server_script_path],
            env=None
        )

        # 建立连接
        self.transport = stdio_client(server_params)
        self.stdio, self.write = await self.transport.__aenter__()
        self.session = await ClientSession(self.stdio, self.write).__aenter__()

        # 初始化会话
        await self.session.initialize()

        # 列出可用工具
        response = await self.session.list_tools()
        self.available_tools = response.tools
        tool_names = [tool.name for tool in self.available_tools]
        print(f"✅ 连接成功!可用工具: {tool_names}\n")

    def build_tool_definitions(self) -> list:
        """为通义千问构建工具定义"""
        tools = []
        for tool in self.available_tools:
            tool_def = {
                "type": "function",
                "function": {
                    "name": tool.name,
                    "description": tool.description or "无描述",
                    "parameters": tool.inputSchema or {
                        "type": "object",
                        "properties": {}
                    }
                }
            }
            tools.append(tool_def)
        return tools

    async def process_query(self, query: str) -> str:
        """处理用户查询

        Args:
            query: 用户查询

        Returns:
            LLM 生成的回答
        """
        print(f"\n🔍 正在处理查询: {query}")

        messages = [
            {
                "role": "user",
                "content": query
            }
        ]

        # 获取工具定义
        tools = self.build_tool_definitions()

        # 调用通义千问
        print("🤖 正在调用通义千问...")
        response = self.client.chat.completions.create(
            model="qwen-plus",
            messages=messages,
            tools=tools,
            tool_choice="auto"
        )

        # 处理响应
        final_response = ""

        # 处理工具调用循环
        while response.choices[0].finish_reason == "tool_calls":
            tool_calls = response.choices[0].message.tool_calls or []

            # 执行每个工具调用
            for tool_call in tool_calls:
                tool_name = tool_call.function.name
                tool_args = json.loads(tool_call.function.arguments)

                print(f"🔧 调用工具: {tool_name},参数: {tool_args}")

                # 调用 MCP 工具
                result = await self.session.call_tool(tool_name, tool_args)
                print(f"✅ 工具返回结果")

                # 获取工具返回的文本
                tool_result_text = result.content[0].text if result.content else "无返回"

                # 添加助手消息(不要 tool_calls 字段,通义千问不支持)
                messages.append({
                    "role": "assistant",
                    "content": response.choices[0].message.content,
                })

                # 添加工具结果为用户消息(简洁格式)
                messages.append({
                    "role": "user",
                    "content": f"工具 {tool_name} 的返回结果:\n{tool_result_text}"
                })

            # 继续调用 LLM
            print("🤖 正在获取最终回答...")
            response = self.client.chat.completions.create(
                model="qwen-plus",
                messages=messages,
                tools=tools,
                tool_choice="auto"
            )

        # 获取最终文本响应
        if response.choices[0].message.content:
            final_response = response.choices[0].message.content

        return final_response

    async def chat_loop(self):
        """运行交互式聊天循环"""
        print("\n" + "=" * 60)
        print("🌤️  天气 MCP 客户端(通义千问版本)")
        print("=" * 60)
        print("输入查询获取天气信息,或输入 'quit'/'exit' 退出\n")

        while True:
            try:
                user_input = input("❓ 请输入查询: ").strip()

                if not user_input:
                    print("⚠️  请输入有效的查询")
                    continue

                if user_input.lower() in ['quit', 'exit', '退出']:
                    print("👋 再见!")
                    break

                # 处理查询
                response = await self.process_query(user_input)

                print("\n💡 回答:")
                print("-" * 60)
                print(response)
                print("-" * 60)

            except KeyboardInterrupt:
                print("\n👋 程序已中止")
                break
            except Exception as e:
                print(f"❌ 错误: {str(e)}")

    async def cleanup(self):
        """清理资源"""
        if self.session:
            await self.session.__aexit__(None, None, None)
        if self.transport:
            await self.transport.__aexit__(None, None, None)


async def main():
    """主函数"""
    if len(sys.argv) < 2:
        print("❌ 用法: python client-qwen.py <Server脚本路径>")
        print("例如: python client-qwen.py ../weather/weather.py")
        sys.exit(1)

    server_script = sys.argv[1]

    client = WeatherMCPClient()
    try:
        await client.connect_to_server(server_script)
        await client.chat_loop()
    except Exception as e:
        print(f"❌ 错误: {str(e)}")
    finally:
        await client.cleanup()


if __name__ == "__main__":
    asyncio.run(main())
8.3 相关资源推荐
| 资源 | 链接 | 说明 |
|---|---|---|
| MCP 官方文档 | https://modelcontextprotocol.io/ | 深入理解协议设计 |
| FastMCP 源码 | https://github.com/jlopp/FastMCP | 学习框架实现细节 |
| 通义千问 API | https://dashscope.aliyun.com/ | 申请免费试用 Key |
| 美国 NWS API | https://www.weather.gov/documentation/services-web-api | 天气数据源 |
| OpenAI SDK | https://github.com/openai/openai-python | 兼容接口文档 |
技术交流
如果大家在复现过程中遇到问题,欢迎在评论区留言讨论!常见问题包括:
- ❓ 「为什么我的 API Key 一直报错?」
- ❓ 「如何把这个天气机器人改成 Deepseek 的?」
- ❓ 「能不能添加数据库存储功能?」
- ❓ 「怎样在云服务器上部署?」
我会第一时间回复。也欢迎分享你基于这个项目的改进版本!
文章信息:
- 发布时间:2026 年 1 月
- 代码环境:Python 3.10 + Conda + FastMCP
- 已亲测运行 ✅