1、日志管理
1.1、基本介绍
(1)日志文件是重要的系统信息文件,其中记录了许多重要的系统事件,包括用户的登录信息、系统的启动信息、系统的安全信息、邮件相关信息、各种服务相关信息等。
(2)日志对于安全来说也很重要,它记录了系统每天发生的各种事情,通过日志来检查错误发生的原因,或者受到攻击时攻击者留下的痕迹。
(3)可以这样理解 日志是用来记录重大事件 的工具
1.2、系统常用的日志
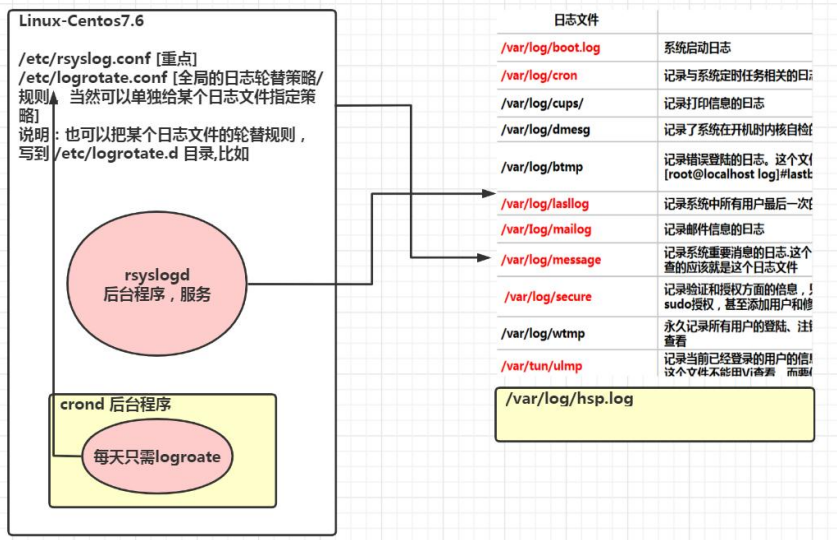
- /var/log/ 目录就是系统日志文件的保存位置,看张图

- 系统常用的日志
| 日志文件 | 说 明 |
|---|---|
| /var/log/boot.log | 系统启动日志 |
| /var/log/cron | 记录与系统定时任务相关的日志 |
| /var/log/cups/ | 记录打印信息的日志 |
| /var/log/dmesg | 记录了系统在开机时内核自检的信总。也可以使用dmesg命令直接查看内核自检信息 |
| /var/log/btmp | 记录错误登陆的日志。这个文件是二进制文件,不能直接用Vi查看,而要使用lastb命令查看。命令如下:root@localhost log#lastb |
| /var/log/lastlog | 记录系统中所有用户最后一次的登录时间的日志。这个文件也是二进制文件。要使用lastlog命令查看 |
| /var/log/maillog | 记录邮件信息的日志 |
| /var/log/message | 记录系统重要消息的日志.这个日志文件中会记录Linux系统的绝大多数重要信息。如果系统出现问题,首先要检查的应该就是这个日志文件 |
| /var/log/secure | 记录验证和授权方面的倍息,只要涉及账户和密码的程序都会记录,比如系统的登录、ssh的登录、su切换用户,sudo授权,甚至添加用户和修改用户密码都会记录在这个日志文件中 |
| /var/log/wtmp | 永久记录所有用户的登陆、注销信息,同时记录系统的后动、重启、关机事件。是二进制文件.而要使用last命令查看 |
| /var/run/utmp | 记录当前已经登录的用户的信息。这个文件会随着用户的登录和注销而不断变化,只记录当前登录用户的信息。这个文件不能用Vi查看,而要使用w、who、users等命令查看 |
- 应用案例
使用 root 用户通过 xshell 登陆, 第一次使用错误的密码,第二次使用正确的密码登录成功,看看在日志文件/var/log/secure 里有没有记录相关信息。
bash
[root@lingbo ~]# cat /var/log/secure

Dec 29 12:34:07 lingbo unix_chkpwd[10673]: password check failed for user (root)
Dec 29 12:34:07 lingbo sshd[10671]: pam_unix(sshd:auth): authentication failure; logname= uid=0 euid=0 tty=ssh ruser= rhost=pc  user=root
Dec 29 12:34:07 lingbo sshd[10671]: pam_succeed_if(sshd:auth): requirement "uid >= 1000" not met by user "root"
Dec 29 12:34:09 lingbo sshd[10671]: Failed password for root from 192.168.200.1 port 9098 ssh2
Dec 29 12:34:13 lingbo sshd[10671]: error: Received disconnect from 192.168.200.1 port 9098:0:  [preauth]
Dec 29 12:34:13 lingbo sshd[10671]: Disconnected from 192.168.200.1 port 9098 [preauth]
Dec 29 12:34:29 lingbo sshd[10675]: Accepted password for root from 192.168.200.1 port 5543 ssh2
Dec 29 12:34:29 lingbo sshd[10675]: pam_unix(sshd:session): session opened for user root by (uid=0)
1.3、日志管理服务 rsyslogd
CentOS7.6 日志服务是 rsyslogd , CentOS6.x 日志服务是 syslogd 。rsyslogd 功能更强大。rsyslogd 的使用、日志文件的格式,和 syslogd 服务兼容的。
-
查询 Linux 中的 rsyslogd 服务是否启动
ps -aux | grep "rsyslog" | grep -v "grep"grep指令有-v选项后,会选中反向选择不匹配的条件,这样可以过滤我们在这条查询指令中使用的grep指令本身。 -
查询 rsyslogd 服务的自启动状态
systemctl list-unit-files | grep "rsyslog" -
配置文件:
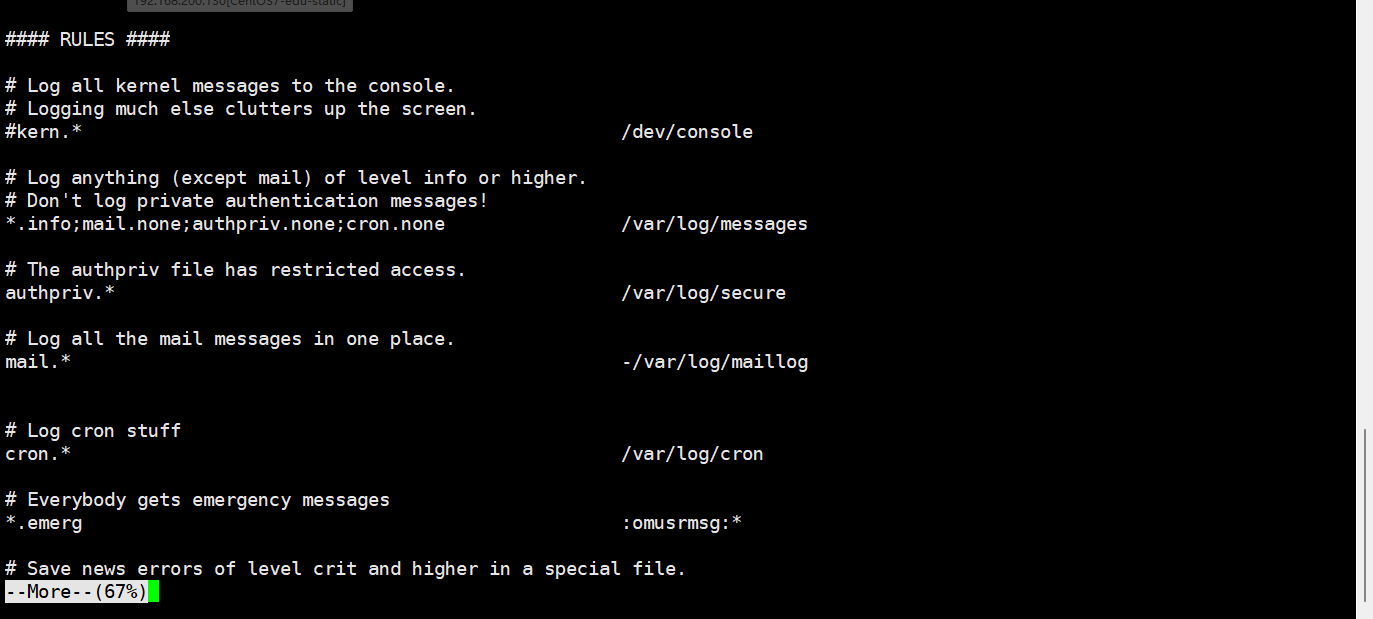
/etc/rsyslog.conf
配置文件中编辑文件时的格式为: *.* 存放日志文件
其中第一个*代表日志类型,第二个*代表日志级别
(1)日志类型分为:
| 日志类型 | 注释 |
|---|---|
| auth | pam 产生的日志 |
| authpriv | ssh、ftp 等登录信息的验证信息 |
| cron | 时间任务相关 |
| kern | 内核 |
| lpr | 打印 |
| 邮件 | |
| mark(syslog)-rsyslog | 服务内部的信息,时间标识 |
| news | 新闻组 |
| user | 用户程序产生的相关信息 |
| uucp | unix to unix copy 主机之间相关的通信 |
| local 1-7 | 自定义的日志设备 |
(2)日志级别分为:
| 日志级别 | 注释 |
|---|---|
| debug | 有调试信息的,日志通信最多 |
| info | 一般信息日志,最常用 |
| notice | 最具有重要性的普通条件的信息 |
| warning | 警告级别 |
| err | 错误级别,阻止某个功能或者模块不能正常工作的信息 |
| crit | 严重级别,阻止整个系统或者整个软件不能正常工作的信息 |
| alert | 需要立刻修改的信息 |
| emerg | 内核崩溃等重要信息 |
| none | 什么都不记录 |
注意:从上到下,级别从低到高,记录信息越来越少
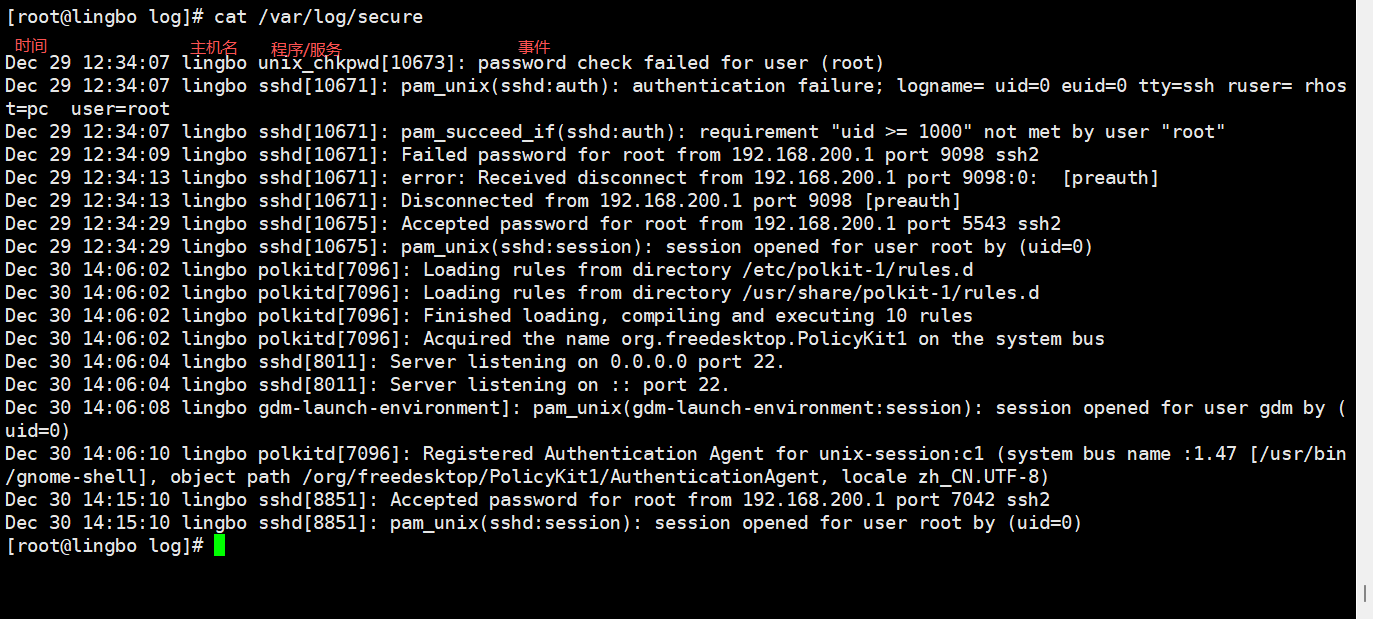
- 由日志服务 rsyslogd 记录的日志文件,日志文件的格式包含以下 4 列:
(1)事件产生的时间
(2)产生事件的服务器的主机名
(3)产生事件的服务名或程序名
(4)事件的具体信息
- 日志如何查看实例
查看一下 /var/log/secure 日志,这个日志中记录的是用户验证和授权方面的信息。
- 日志管理服务应用实例
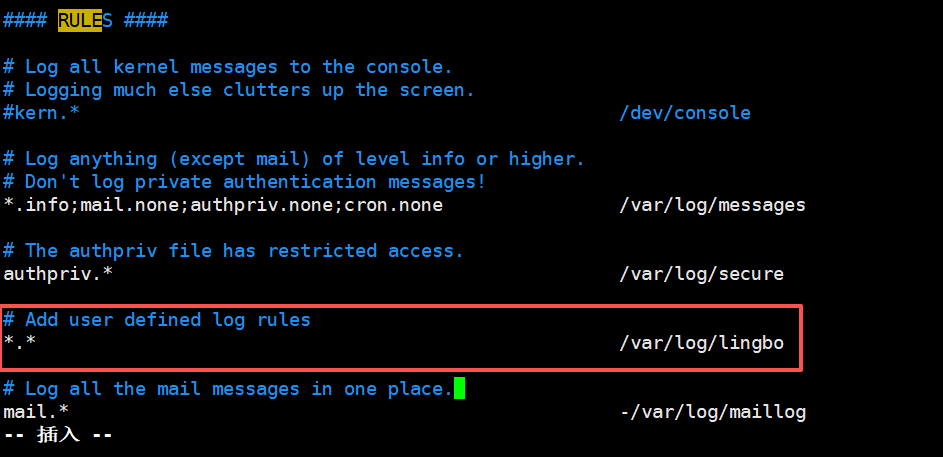
在/etc/rsyslog.conf 中添加一个用户自定义日志文件/var/log/lingbo,当有事件发送时(比如 sshd 服务相关事件),该文件会接收到信息并保存。重启,登录SSH 查看情况,看看是否有日志保存。

1.4、日志轮替
1.4.1、基本介绍
日志轮替就是把旧的日志文件移动并改名,同时建立新的空日志文件,当旧日志文件超出保存的范围之后,就会进行删除。
1.4.2、日志轮替文件命名
(1)CentOS7 使用 logrotate 进行日志轮替管理,要想改变日志轮替文件名字,通过 /etc/logrotate.conf 配置文件中"dateext"参数。
(2)如果配置文件中有"dateext"参数,那么日志会用日期来作为日志文件的后缀,例如 "secure-20201010"。这样日志文件名不会重叠,也就不需要日志文件的改名, 只需要指定保存日志个数,删除多余的日志文件即可。
(3)如果配置文件中没有"dateext"参数,日志文件就需要进行改名了。当第一次进行日志轮替时,当前的"secure"日志会自动改名为"secure.1",然后新建"secure"日志, 用来保存新的日志。当第二次进行日志轮替时,"secure.1"会自动改名为"secure.2", 当前的"secure"日志会自动改名为"secure.1",然后也会新建"secure"日志,用来保存新的日志,以此类推。
1.4.3、logrotate 配置文件
/etc/logrotate.conf为logrotate的全局配置文件
bash
# rotate log files weekly, 每周对日志文件进行一次轮替
weekly
# keep 4 weeks worth of backlogs, 共保存 4 份日志文件,当建立新的日志文件时,旧的将会被删除
rotate 4
# create new (empty) log files after rotating old ones, 创建新的空的日志文件,在日志轮替后
create
# use date as a suffix of the rotated file, 使用日期作为日志轮替文件的后缀
dateext
# uncomment this if you want your log files compressed, 日志文件是否压缩。如果取消注释,则日志会在转储的同时进行压缩
# compress

# RPM packages drop log rotation information into this directory,RPM所管理的包会把日志轮替信息保存在此目录下
# 包含 /etc/logrotate.d/ 目录中所有的子配置文件。也就 是说会把这个目录中所有子配置文件读取进来,
include /etc/logrotate.d

#下面是单独设置,优先级更高。
# no packages own wtmp and btmp -- we'll rotate them here
/var/log/wtmp {
	monthly # 每月对日志文件进行一次轮替
	create 0664 root utmp # 建立的新日志文件,权限是 0664 ,所有者是 root ,所属组是utmp 组
	minsize 1M # 日志文件最小轮替大小是 1MB 。也就是日志一定要超过 1MB 才会轮替,否则就算时间达到一个月,也不进行日志转储
	rotate 1 # 仅保留一个日志备份。也就是只有 wtmp 和 wtmp.1 日志保留而已
}
/var/log/btmp {
	missingok # 如果日志不存在,则忽略该日志的警告信息
	monthly
	create 0600 root utmp
	rotate 1
}- 参数说明
| 参数 | 参数说明 |
|---|---|
| daily | 日志的轮替周期是每天 |
| weekly | 日志的轮替周期是每周 |
| monthly | 日志的轮替周期是每月 |
| rotate 数字 | 保留的日志文件的个数。0 指没有备份。 |
| compress | 日志轮替时,旧的日志进行压缩 |
| create mode owner group | 建立新日志,同时指定新日志的权限与所有者和所属组。 |
| mail address | 当日志轮替时,输出内容通过邮件发送到指定的邮件地址。 |
| missingok | 如果日志不存在,则忽略该日志的警告信息 |
| notifempty | 如果日志为空文件,则不进行日志轮替 |
| minsize 大小 | 日志轮替的最小值。也就是日志一定要达到这个最小值才会轮替,否则就算时间达到也不轮替 |
| size 大小 | 日志只有大于指定大小才进行日志轮替,而不是按照时间轮替。 |
| dateext | 使用日期作为日志轮替文件的后缀。 |
| sharedscripts | 在此关键字之后的脚本只执行一次。 |
| prerotate/endscript | 在日志轮替之前执行脚本命令。 |
| postrotate/endscript | 在日志轮替之后执行脚本命令。 |
1.4.4、把自己的日志加入日志轮替
(1)第一种方法是直接在/etc/logrotate.conf 配置文件中写入该日志的轮替策略
(2)第二种方法是在/etc/logrotate.d/目录中新建立该日志的轮替文件,在该轮替文件中写入正确的轮替策略,因为该目录中的文件都会被"include"到主配置文件中,所以也可以把日志加入轮替。
(3)推荐使用第二种方法,因为系统中需要轮替的日志非常多,如果全都直接写 入/etc/logrotate.conf 配置文件,那么这个文件的可管理性就会非常差,不利于此文件的维护。
(4)在/etc/logrotate.d/ 配置轮替文件一览

1.4.5、应用实例
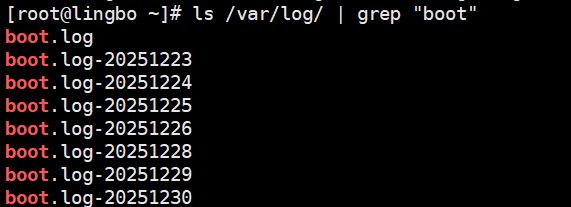
看一个案例, 在/etc/logrotate.conf 进行配置, 或者直接在 /etc/logrotate.d/下创建文件 lingbolog 编写如下内容, 具体轮替的效果 可以参考 /var/log 下的 boot.log 情况。
bash
/var/log/lingbo
{
	missingok
	daily
	copytruncate
	rotate 7
	notifempty
}
1.5、日志轮替机制原理
日志轮替之所以可以在指定的时间备份日志,是依赖系统定时任务。在 /etc/cron.daily/目录,就会发现这个目录中是有 logrotate 文件(可执行),logrotate 通过这个文件依赖定时任务执行的。

1.6、查看内存日志
journalctl 可以查看内存日志, 这里我们看看常用的指令。
| 指令 | 说明 |
|---|---|
| journalctl | 查看全部 |
| journalctl -n 3 | 查看最新 3 条 |
| journalctl --since 19:00 --until 19:10:10 | 查看起始时间到结束时间的日志可加日期 |
| journalctl -p err | 查看报错日志 |
| journalctl -o verbose | 日志详细内容 |
| journalctl _PID=1245 _COMM=sshd | 查看包含这些参数的日志(在详细日志查看) |
注意 : journalctl 查看的是内存日志, 重启清空。
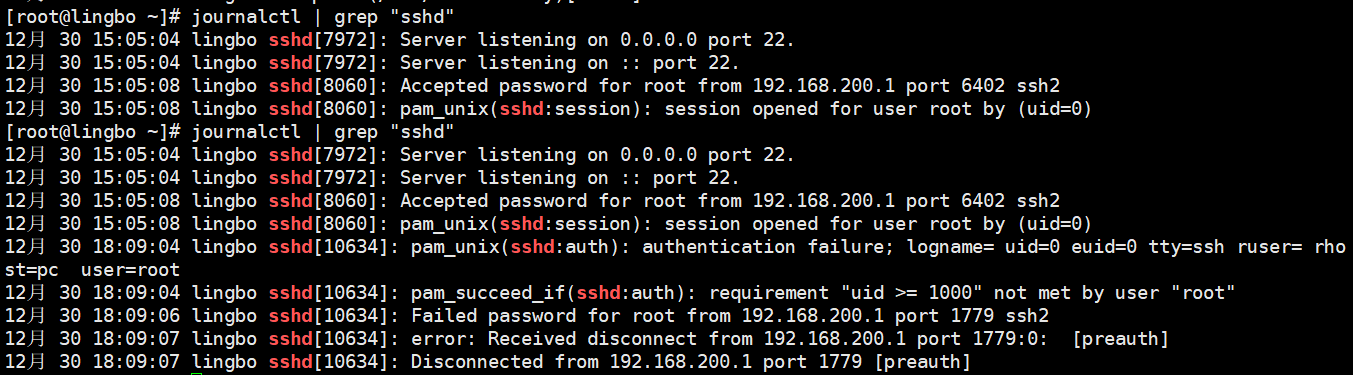
演示案例:
使用 journalctl | grep sshd 来看看用户登录清空, 重启系统,再次查询,看看日志有什么变化没有。
2、制作自己的min linux
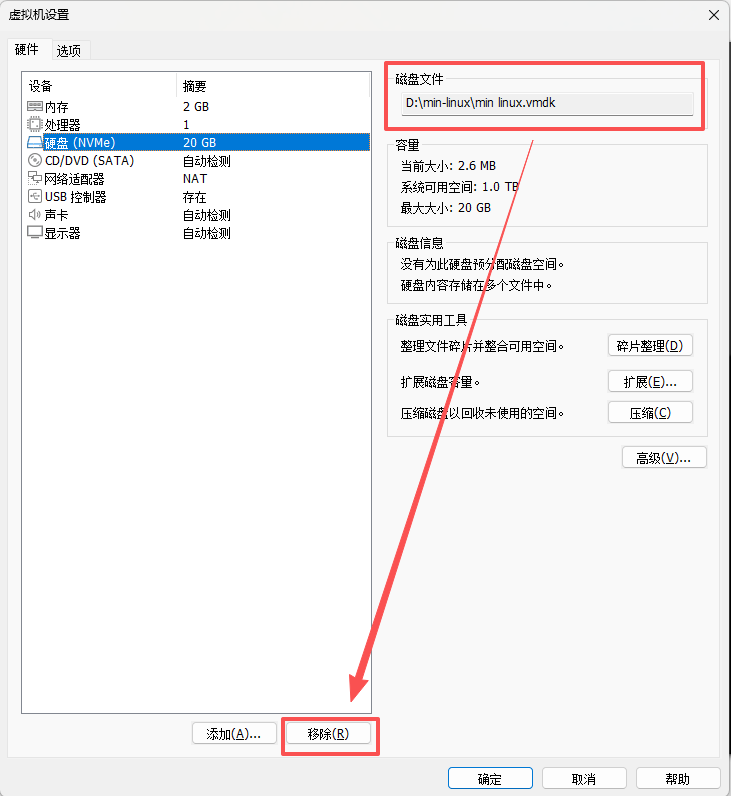
2.1、移除sdb硬盘
首先,移除之前在CentOS系统中添加的sdb硬盘。
因为本人在操作此步操作时忘记先用umount 卸载对应挂载点,再把 fstab 里对应行注释或删除;而是直接在VM Ware中移除了硬盘2,导致开机失败,只能暂时进入紧急模式。
1、在紧急模式中,先让根文件系统可写:
mount -o remount,rw /
2、编辑 fstab
vi /etc/fstab
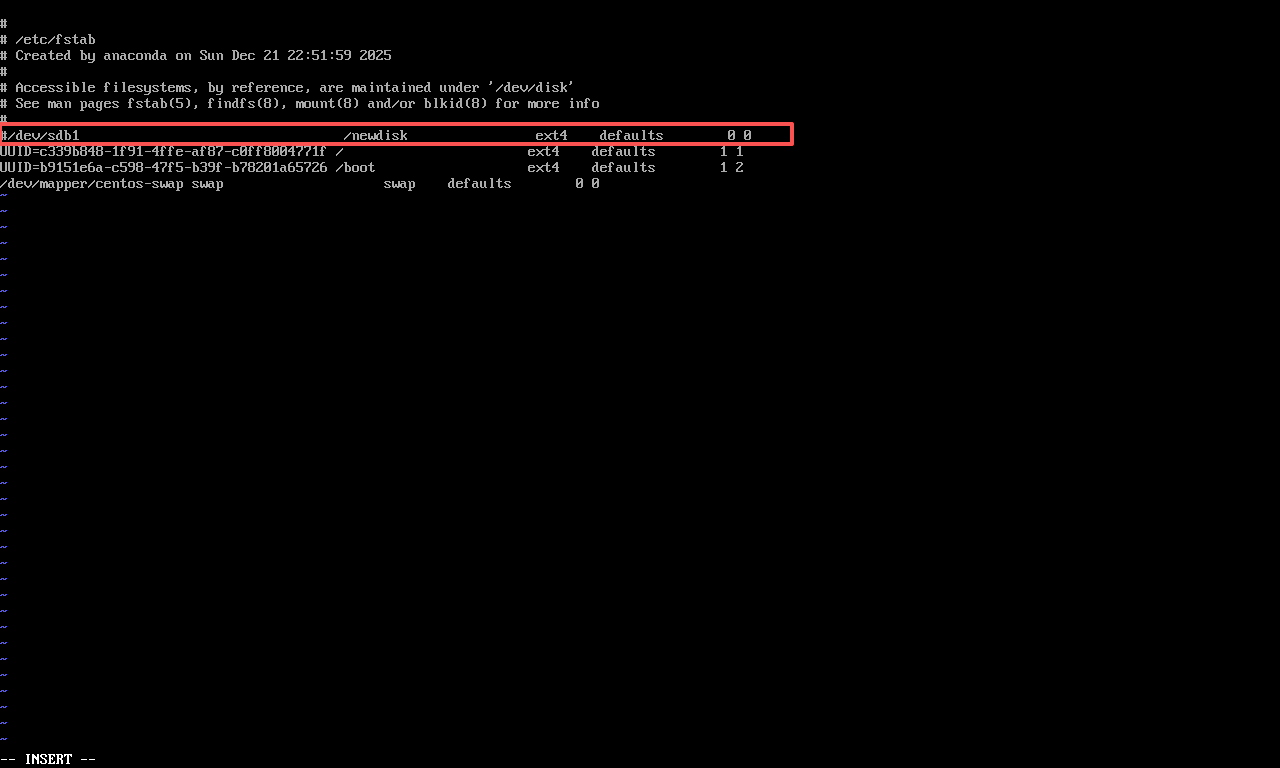
3、保存并退出后,重启reboot
2.2、基本介绍
通过裁剪现有 Linux 系统(CentOS7.6),创建属于自己的 min Linux 小系统,可以加深我们对linux 的理解。
2.3、基本原理
启动流程介绍:
制作 Linux 小系统之前,再了解一下 Linux 的启动流程:
1、首先 Linux 要通过自检,检查硬件设备有没有故障
2、如果有多块启动盘的话,需要在 BIOS 中选择启动磁盘
3、启动 MBR 中的 bootloader 引导程序
4、加载内核文件
5、执行所有进程的父进程、老祖宗 systemd
6、欢迎界面
在 Linux 的启动流程中,加载内核文件时关键文件:
(1)kernel 文件: vmlinuz-3.10.0-957.el7.x86_64
(2)initrd 文件: initramfs-3.10.0-957.el7.x86_64.img
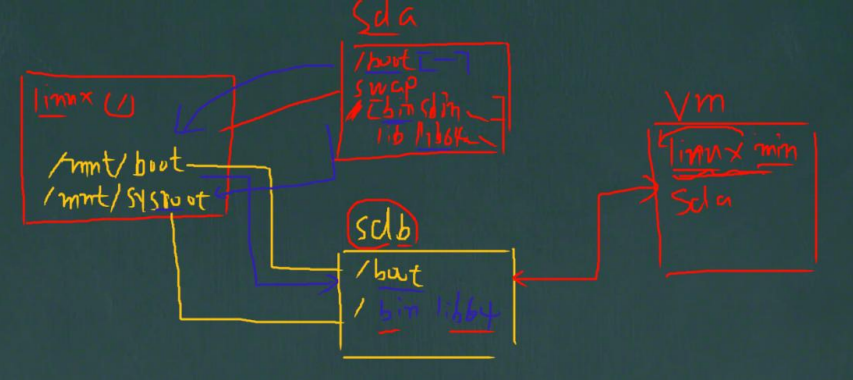
2.4、制作 min linux 思路分析
(1)在现有的 Linux 系统(CentOS7.6)上加一块硬盘/dev/sdb,在硬盘上分两个分区,一个是/boot,一个是/,并将其格式化。需要明确的是,现在加的这个硬盘在现有的 Linux 系统中是/dev/sdb,但是,当我们把东西全部设置好时,要把这个硬盘拔除,放在新系统上,此时,就是/dev/sda。
(2)在/dev/sdb 硬盘上,将其打造成独立的 Linux 系统,里面的所有文件是需要拷贝进去的.
(3)作为能独立运行的 Linux 系统,内核是一定不能少,要把内核文件和 initramfs 文件也一起拷到/dev/sdb 上
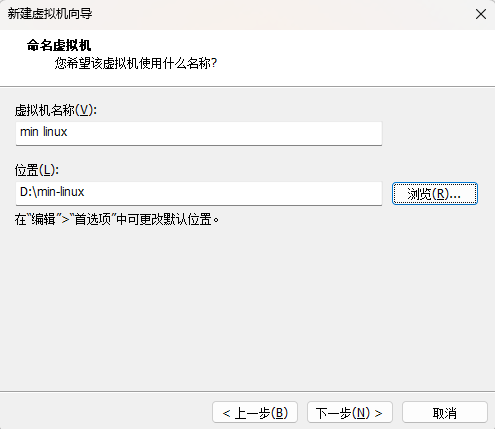
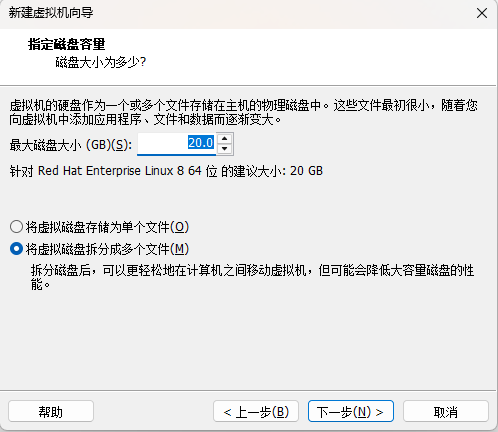
(4)以上步骤完成,我们的自制 Linux 就完成, 创建一个新的 linux 虚拟机,将其硬盘指向我们创建的硬盘,启动即可。
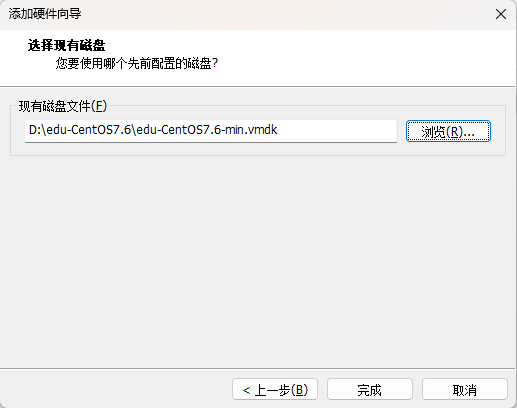
2.5、操作步骤
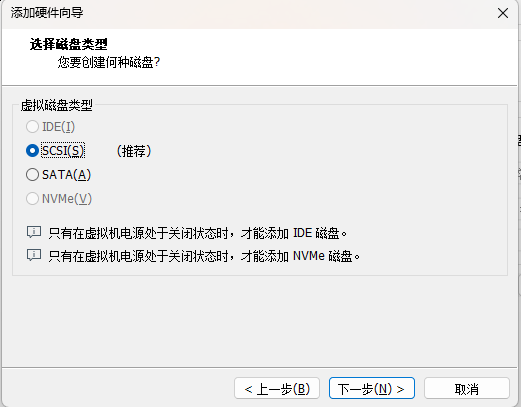
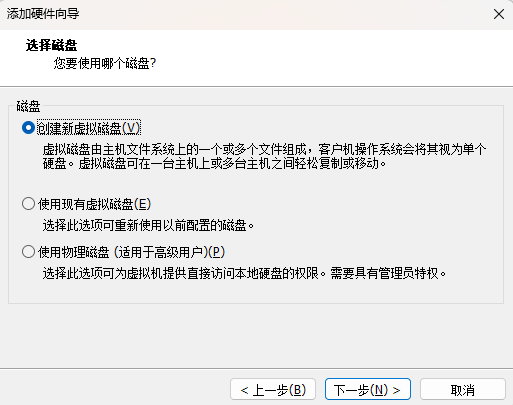
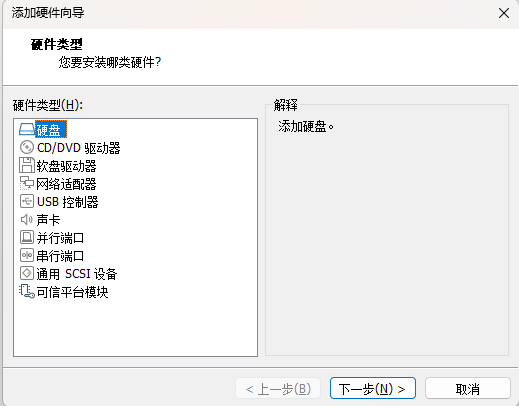
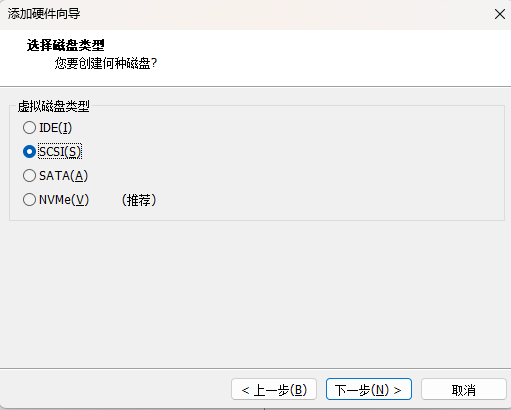
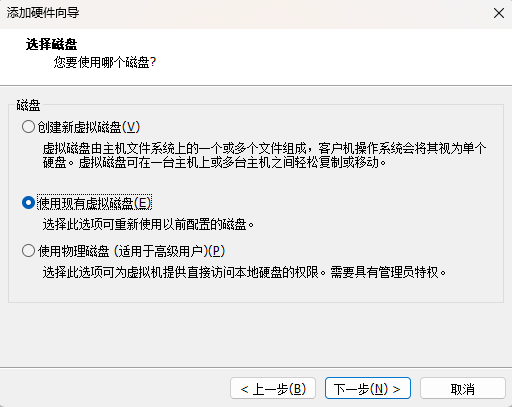
1、首先,我们在现有的linux添加一块大小为20G的硬盘
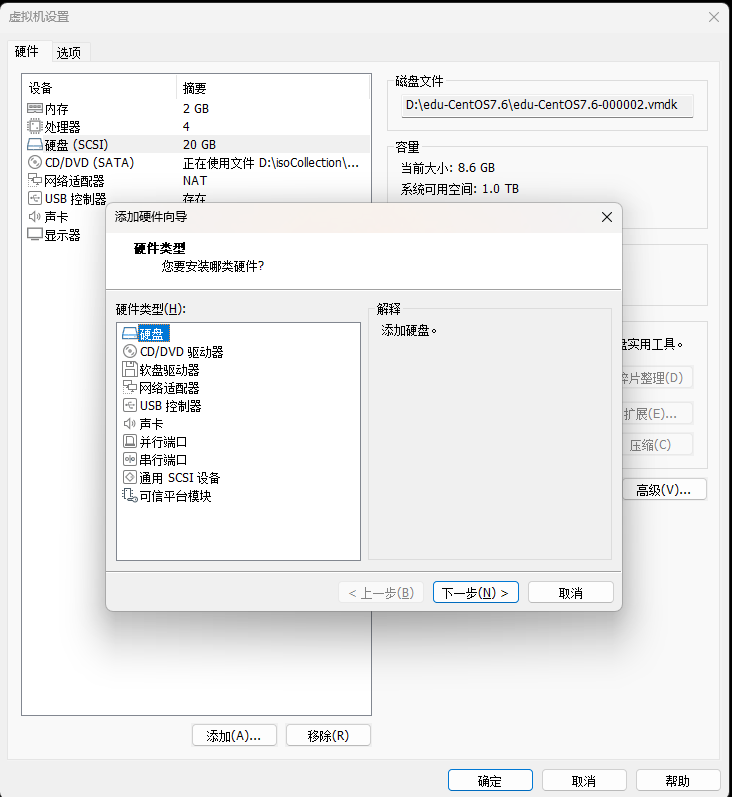
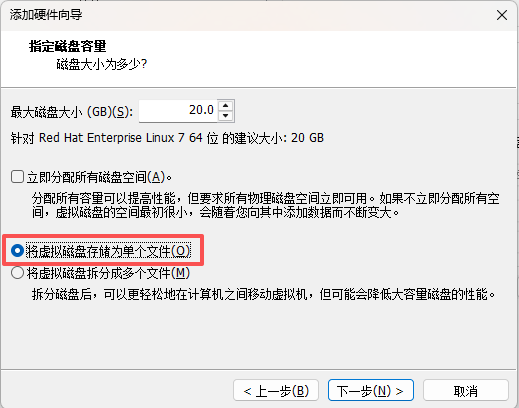

点击完成,就OK了, 可以使用 lsblk 查看,需要重启
2、添加完成后,点击确定,然后启动现有的linux(CentOS7.6)。 通过fdisk来给我们的/dev/sdb进行分区
bash
[root@lingbo ~]# lsblk
NAME            MAJ:MIN RM  SIZE RO TYPE MOUNTPOINT
sda               8:0    0   20G  0 disk
├─sda1            8:1    0    1G  0 part /boot
├─sda2            8:2    0    2G  0 part
│ └─centos-swap 253:0    0    2G  0 lvm  [SWAP]
└─sda3            8:3    0   17G  0 part /
sdb               8:16   0   20G  0 disk
sr0              11:0    1  4.3G  0 rom
[root@lingbo ~]# fdisk /dev/sdb
欢迎使用 fdisk (util-linux 2.23.2)。

更改将停留在内存中,直到您决定将更改写入磁盘。
使用写入命令前请三思。

Device does not contain a recognized partition table
使用磁盘标识符 0x3577051d 创建新的 DOS 磁盘标签。

# 第一次磁盘分区 500M
命令(输入 m 获取帮助):n
Partition type:
   p   primary (0 primary, 0 extended, 4 free)
   e   extended
Select (default p): p
分区号 (1-4,默认 1):1
起始 扇区 (2048-41943039,默认为 2048):
将使用默认值 2048
Last 扇区, +扇区 or +size{K,M,G} (2048-41943039,默认为 41943039):+500M
分区 1 已设置为 Linux 类型,大小设为 500 MiB

# 第二次磁盘分区 剩余空间
命令(输入 m 获取帮助):n
Partition type:
   p   primary (1 primary, 0 extended, 3 free)
   e   extended
Select (default p): p
分区号 (2-4,默认 2):2
起始 扇区 (1026048-41943039,默认为 1026048):
将使用默认值 1026048
Last 扇区, +扇区 or +size{K,M,G} (1026048-41943039,默认为 41943039):
将使用默认值 41943039
分区 2 已设置为 Linux 类型,大小设为 19.5 GiB

# w 保存并退出
命令(输入 m 获取帮助):w
The partition table has been altered!

Calling ioctl() to re-read partition table.
正在同步磁盘。
3、接下来,我们对/dev/sdb的分区进行格式化
bash
# 格式化第一块sdb1
[root@lingbo ~]# mkfs.ext4 /dev/sdb1
mke2fs 1.42.9 (28-Dec-2013)
文件系统标签=
OS type: Linux
块大小=1024 (log=0)
分块大小=1024 (log=0)
Stride=0 blocks, Stripe width=0 blocks
128016 inodes, 512000 blocks
25600 blocks (5.00%) reserved for the super user
第一个数据块=1
Maximum filesystem blocks=34078720
63 block groups
8192 blocks per group, 8192 fragments per group
2032 inodes per group
Superblock backups stored on blocks:
	8193, 24577, 40961, 57345, 73729, 204801, 221185, 401409

Allocating group tables: 完成
正在写入inode表: 完成
Creating journal (8192 blocks): 完成
Writing superblocks and filesystem accounting information: 完成

# 格式化第二块sdb2
[root@lingbo ~]# mkfs.ext4 /dev/sdb2
mke2fs 1.42.9 (28-Dec-2013)
文件系统标签=
OS type: Linux
块大小=4096 (log=2)
分块大小=4096 (log=2)
Stride=0 blocks, Stripe width=0 blocks
1281120 inodes, 5114624 blocks
255731 blocks (5.00%) reserved for the super user
第一个数据块=0
Maximum filesystem blocks=2153775104
157 block groups
32768 blocks per group, 32768 fragments per group
8160 inodes per group
Superblock backups stored on blocks:
	32768, 98304, 163840, 229376, 294912, 819200, 884736, 1605632, 2654208,
	4096000

Allocating group tables: 完成
正在写入inode表: 完成
Creating journal (32768 blocks): 完成
Writing superblocks and filesystem accounting information: 完成
4、创建目录,并挂载新的磁盘
bash
[root@lingbo ~]# mkdir -p /mnt/boot /mnt/sysroot
[root@lingbo ~]# mount /dev/sdb1 /mnt/boot/
[root@lingbo ~]# mount /dev/sdb2 /mnt/sysroot/
5、安装grub, 将内核文件拷贝至目标磁盘
bash
[root@lingbo ~]# grub2-install --root-directory=/mnt /dev/sdb
Installing for i386-pc platform.
Installation finished. No error reported.
# 查看二进制文件,确认安装是否成功
[root@lingbo ~]# hexdump -C -n 512 /dev/sdb
00000000 eb 63 90 00 00 00 00 00 00 00 00 00 00 00 00 00 |.c..............|
00000010 00 00 00 00 00 00 00 00 00 00 00 00 00 00 00 00 |................|
*
00000050 00 00 00 00 00 00 00 00 00 00 00 80 01 00 00 00 |................|
00000060 00 00 00 00 ff fa 90 90 f6 c2 80 74 05 f6 c2 70 |...........t...p|
00000070 74 02 b2 80 ea 79 7c 00 00 31 c0 8e d8 8e d0 bc |t....y|..1......|
00000080 00 20 fb a0 64 7c 3c ff 74 02 88 c2 52 be 05 7c |. ..d|<.t...R..||
00000090 b4 41 bb aa 55 cd 13 5a 52 72 3d 81 fb 55 aa 75 |.A..U..ZRr=..U.u|
000000a0 37 83 e1 01 74 32 31 c0 89 44 04 40 88 44 ff 89 |7...t21..D.@.D..|
000000b0 44 02 c7 04 10 00 66 8b 1e 5c 7c 66 89 5c 08 66 |D.....f..\|f.\.f|
000000c0 8b 1e 60 7c 66 89 5c 0c c7 44 06 00 70 b4 42 cd |..`|f.\..D..p.B.|
000000d0 13 72 05 bb 00 70 eb 76 b4 08 cd 13 73 0d 5a 84 |.r...p.v....s.Z.|
000000e0 d2 0f 83 de 00 be 85 7d e9 82 00 66 0f b6 c6 88 |.......}...f....|
000000f0 64 ff 40 66 89 44 04 0f b6 d1 c1 e2 02 88 e8 88 |d.@f.D..........|
00000100 f4 40 89 44 08 0f b6 c2 c0 e8 02 66 89 04 66 a1 |.@.D.......f..f.|
00000110 60 7c 66 09 c0 75 4e 66 a1 5c 7c 66 31 d2 66 f7 |`|f..uNf.\|f1.f.|
00000120 34 88 d1 31 d2 66 f7 74 04 3b 44 08 7d 37 fe c1 |4..1.f.t.;D.}7..|
00000130 88 c5 30 c0 c1 e8 02 08 c1 88 d0 5a 88 c6 bb 00 |..0........Z....|
00000140 70 8e c3 31 db b8 01 02 cd 13 72 1e 8c c3 60 1e |p..1......r...`.|
00000150 b9 00 01 8e db 31 f6 bf 00 80 8e c6 fc f3 a5 1f |.....1..........|
00000160 61 ff 26 5a 7c be 80 7d eb 03 be 8f 7d e8 34 00 |a.&Z|..}....}.4.|
00000170 be 94 7d e8 2e 00 cd 18 eb fe 47 52 55 42 20 00 |..}.......GRUB .|
00000180 47 65 6f 6d 00 48 61 72 64 20 44 69 73 6b 00 52 |Geom.Hard Disk.R|
00000190 65 61 64 00 20 45 72 72 6f 72 0d 0a 00 bb 01 00 |ead. Error......|
000001a0 b4 0e cd 10 ac 3c 00 75 f4 c3 00 00 00 00 00 00 |.....<.u........|
000001b0 00 00 00 00 00 00 00 00 1d 05 77 35 00 00 00 20 |..........w5... |
000001c0 21 00 83 dd 1e 3f 00 08 00 00 00 a0 0f 00 00 dd |!....?..........|
000001d0 1f 3f 83 d4 a2 32 00 a8 0f 00 00 58 70 02 00 00 |.?...2.....Xp...|
000001e0 00 00 00 00 00 00 00 00 00 00 00 00 00 00 00 00 |................|
000001f0 00 00 00 00 00 00 00 00 00 00 00 00 00 00 55 aa |..............U.|
00000200
# 拷贝boot文件
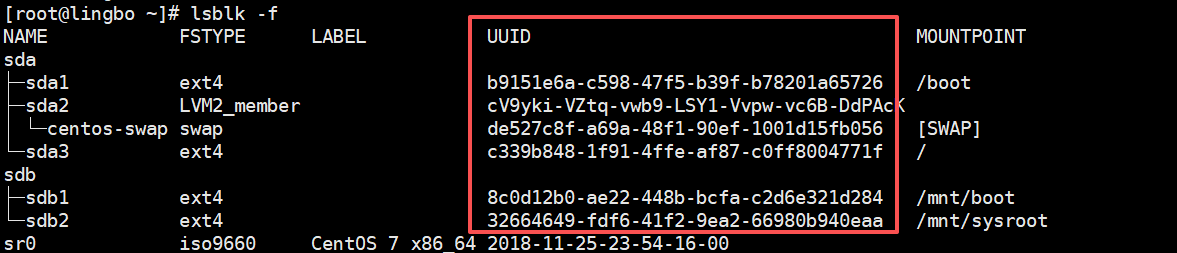
[root@lingbo ~]# \cp -rf /boot/* /mnt/boot/6、修改 grub2/grub.cfg 文件, UUID 是需要使用 -f 指令来查看的
10、这时,很多指令都不能使用,比如 ls , reboot 等,可以将需要的指令拷贝到对应的目录即可
11、如果要拷贝指令,重新进入到原来的 linux系统拷贝相应的指令即可,比较将 /bin/ls 拷贝到 /mnt/sysroot/bin 将/sbin/reboot 拷贝到 /mnt/sysroot/sbin
bash
mount /dev/sdb2 /mnt/sysroot/
cp /bin/ls /mnt/sysroot/bin/
cp /bin/systemctl /mnt/sysroot/bin/
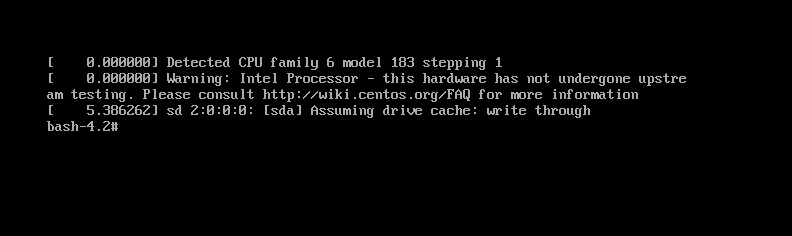
cp /sbin/reboot /mnt/sysroot/sbin/12、再重新启动新的min linux系统,就可以使用 ls , reboot 指令了
3、Linux 内核源码介绍&内核升级
3.1、为什么要阅读 linux 内核?
(1)想深入理解 linux 底层运行机制,对操作系统有深入理解
(2)阅读 Linux 内核,你会对整个计算机体系有一个更深刻的认识。作为开发者,不管你从事的是驱动开发,应用开发还是后台开发,你都需要了解操作系统内核的运行机制,这样才能写出更好的代码。
(3)作为开发人员不应该只局限在自己的领域,你设计的模块看起来小,但是你不了解进程的调用机制,你不知道进程为什么会阻塞、就绪、执行几个状态。那么很难写出优质的代码。
(4)找工作面试的需要
3.2、linux0.01 内核源码
3.2.1、基本介绍
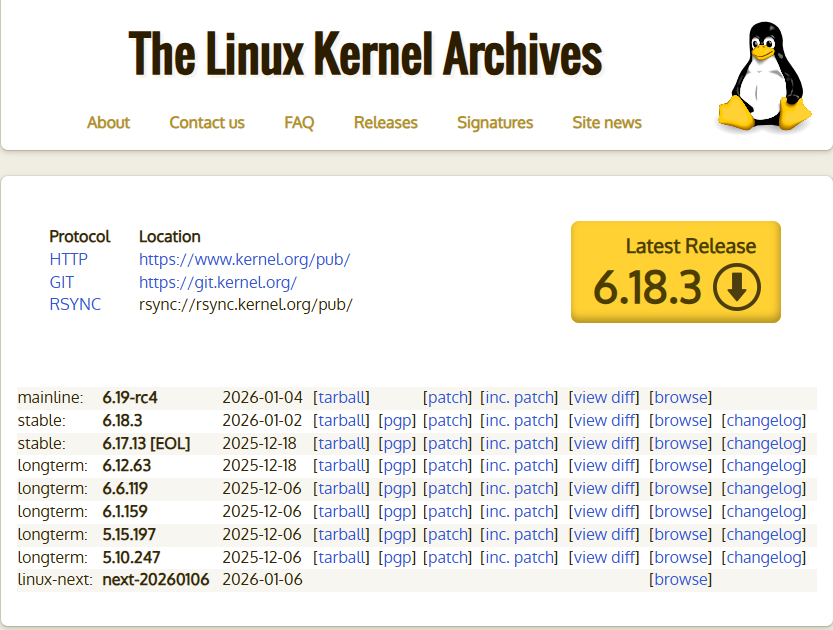
Linux 的内核源代码可以从网上下载, 解压缩后文件一般也都位于 linux 目录下。内核源代码有很多版本,可以从linux0.01 内核入手,总共的代码 1w 行左右, 最新版本 6.18.3 总共代码超过 700w 行,非常庞大。
很多人害怕读 Linux 内核,Linux 内核这样大而复杂的系统代码,阅读起来确实有很多困难,但是也不象想象的那么高不可攀。建议可以从 linux0.01 入手。
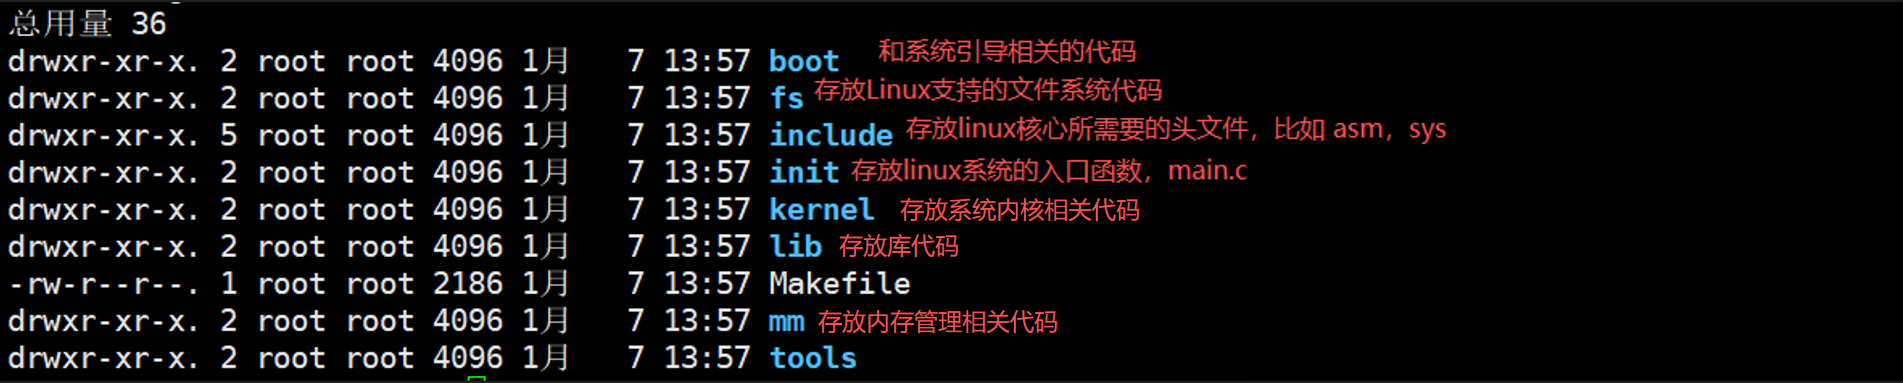
3.2.2、linux0.01 内核源码目录&阅读
阅读内核源码技巧
(1)linux0.01 的阅读需要懂 C 语言
(2)阅读源码前,应知道 Linux 内核源码的整体分布情况。现代的操作系统一般由进程管理、内存管理、文件系统、驱动程序和网络等组成。Linux 内核源码的各个目录大致与此相对应。
(3)在阅读方法或顺序上,有纵向与横向之分。所谓纵向就是顺着程序的执行顺序逐步进行;所谓横向,就是按模块进行。它们经常结合在一起进行。
(4)对于 Linux 启动的代码可顺着 Linux 的启动顺序一步步来阅读;对于像内存管理部分,可以单独拿出来进行阅读分析。实际上这是一个反复的过程,不可能读一遍就理解
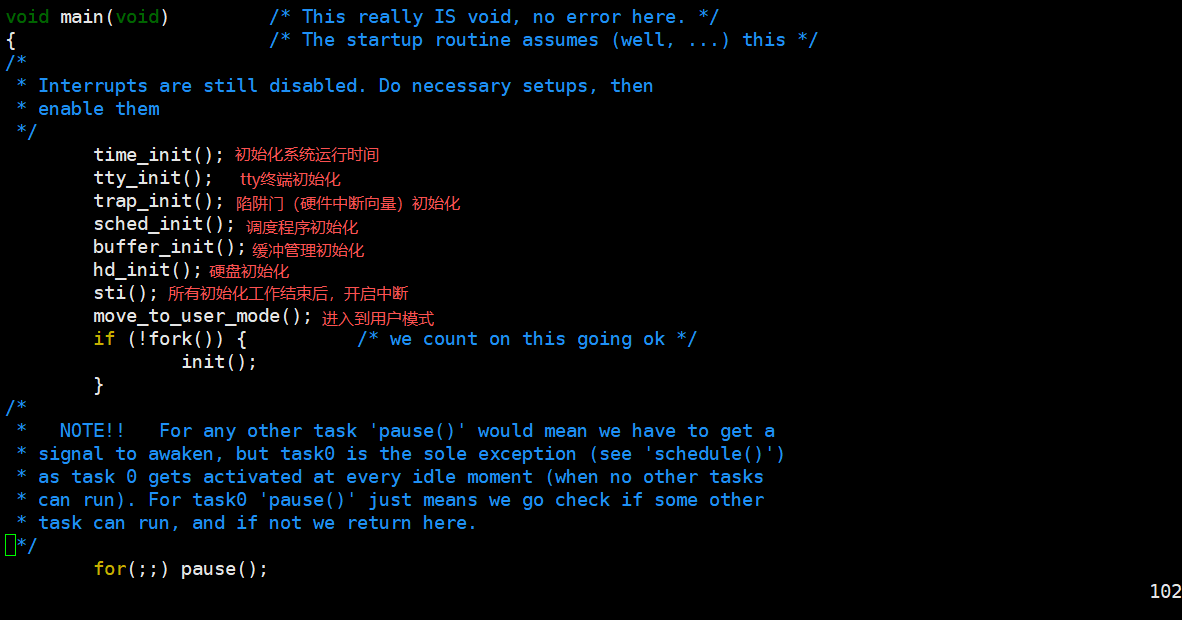
- linux 内核源码阅读&目录介绍&main.c 说明
目录介绍
main.c
3.3、linux 内核最新版和内核升级
3.3.1、内核地址:https://www.kernel.org/ 查看
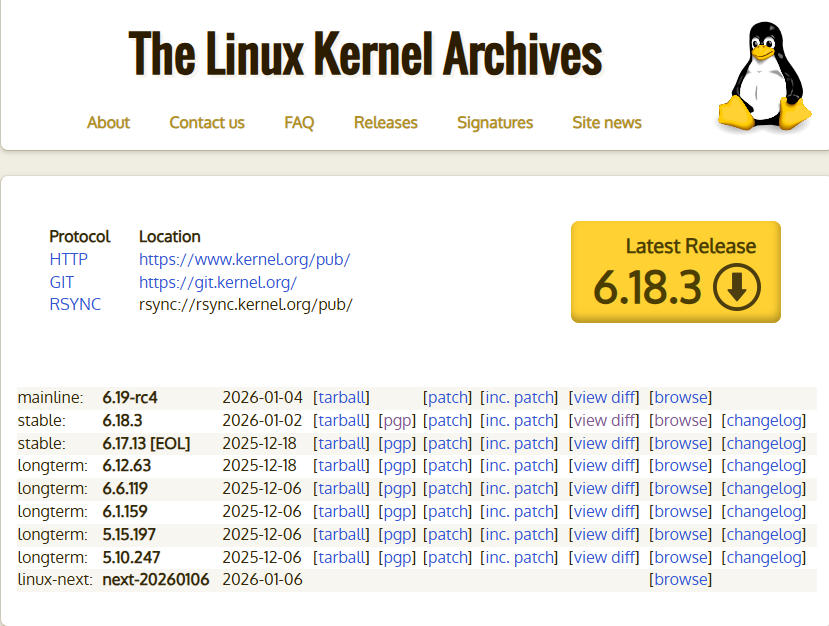
3.3.2、下载&解压最新版
wget https://cdn.kernel.org/pub/linux/kernel/v6.x/linux-6.18.3.tar.gz
tar -zxvf linux-6.18.3.tar.gz
3.3.3、linux 内核升级应用实例
将 Centos 系统从 7.6 内核升级到 7.8 版本内核(兼容性问题)

3.3.4、具体步骤
bash
# 查看当前的内核版本
[root@lingbo linux-5.8.16]# uname -a
Linux lingbo 3.10.0-957.el7.x86_64 #1 SMP Thu Nov 8 23:39:32 UTC 2018 x86_64 x86_64 x86_64 GNU/Linux
# 检测内核版本,显示可以升级的内核
[root@lingbo linux-5.8.16]# yum info kernel -q
已安装的软件包
名称    :kernel
架构    :x86_64
版本    :3.10.0
发布    :957.el7
大小    :63 M
源    :installed
来自源:anaconda
简介    : The Linux kernel
网址    :http://www.kernel.org/
协议    : GPLv2
描述    : The kernel package contains the Linux kernel (vmlinuz), the core of any
         : Linux operating system.  The kernel handles the basic functions
         : of the operating system: memory allocation, process allocation, device
         : input and output, etc.

可安装的软件包
名称    :kernel
架构    :x86_64
版本    :3.10.0
发布    :1160.119.1.el7
大小    :52 M
源    :updates/7/x86_64
简介    : The Linux kernel
网址    :http://www.kernel.org/
协议    : GPLv2
描述    : The kernel package contains the Linux kernel (vmlinuz), the core of any
         : Linux operating system.  The kernel handles the basic functions
         : of the operating system: memory allocation, process allocation, device
         : input and output, etc.

# 升级内核
[root@lingbo linux-5.8.16]# yum update kernel
已加载插件:fastestmirror, langpacks
Loading mirror speeds from cached hostfile
 * base: mirrors.aliyun.com
 * extras: mirrors.aliyun.com
 * updates: mirrors.aliyun.com
base                                                                                               | 3.6 kB  00:00:00
extras                                                                                             | 2.9 kB  00:00:00
updates                                                                                            | 2.9 kB  00:00:00
正在解决依赖关系
--> 正在检查事务
---> 软件包 kernel.x86_64.0.3.10.0-1160.119.1.el7 将被 安装
--> 正在处理依赖关系 linux-firmware >= 20190429-72,它被软件包 kernel-3.10.0-1160.119.1.el7.x86_64 需要
--> 正在检查事务
---> 软件包 linux-firmware.noarch.0.20180911-69.git85c5d90.el7 将被 升级
---> 软件包 linux-firmware.noarch.0.20200421-83.git78c0348.el7_9 将被 更新
--> 解决依赖关系完成

依赖关系解决

==========================================================================================================================
 Package                      架构                 版本                                       源                     大小
==========================================================================================================================
正在安装:
 kernel                       x86_64               3.10.0-1160.119.1.el7                      updates                52 M
为依赖而更新:
 linux-firmware               noarch               20200421-83.git78c0348.el7_9               updates                80 M

事务概要
==========================================================================================================================
安装  1 软件包
升级           ( 1 依赖软件包)

总计:132 M
Is this ok [y/d/N]: y
Downloading packages:
Running transaction check
Running transaction test
Transaction test succeeded
Running transaction
警告:RPM 数据库已被非 yum 程序修改。
** 发现 3 个已存在的 RPM 数据库问题, 'yum check' 输出如下:
libkkc-0.3.1-9.el7.x86_64 有缺少的需求 libmarisa.so.0()(64bit)
2:postfix-2.10.1-7.el7.x86_64 有缺少的需求 libmysqlclient.so.18()(64bit)
2:postfix-2.10.1-7.el7.x86_64 有缺少的需求 libmysqlclient.so.18(libmysqlclient_18)(64bit)
  正在更新    : linux-firmware-20200421-83.git78c0348.el7_9.noarch                                                    1/3
  正在安装    : kernel-3.10.0-1160.119.1.el7.x86_64                                                                   2/3
  清理        : linux-firmware-20180911-69.git85c5d90.el7.noarch                                                      3/3
  验证中      : kernel-3.10.0-1160.119.1.el7.x86_64                                                                   1/3
  验证中      : linux-firmware-20200421-83.git78c0348.el7_9.noarch                                                    2/3
  验证中      : linux-firmware-20180911-69.git85c5d90.el7.noarch                                                      3/3

已安装:
  kernel.x86_64 0:3.10.0-1160.119.1.el7

作为依赖被升级:
  linux-firmware.noarch 0:20200421-83.git78c0348.el7_9

完毕!
# 查看已经安装的内核
[root@lingbo linux-5.8.16]# yum list kernel -q
已安装的软件包
kernel.x86_64                                       3.10.0-957.el7                                               @anaconda
kernel.x86_64                                       3.10.0-1160.119.1.el7                                        @updates
4、Linux 系统-备份与恢复
4.1、基本介绍
实体机无法做快照,如果系统出现异常或者数据损坏,后果严重, 要重做系统,还会造成数据丢失。所以我们可以使用备份和恢复技术
Linux 的备份和恢复很简单 , 有两种方式:
(1)把需要的文件(或者分区)用 TAR 打包就行,下次需要恢复的时候,再解压开覆盖即可
(2)使用 dump 和 restore 命令
4.2、安装 dump 和 restore
如果 linux 上没有 dump 和 restore 指令,需要先按照
yum -y install dump
4.3、使用dump完成备份
4.3.1、基本介绍
dump 支持分卷和增量备份(所谓增量备份是指备份上次备份后 修改/增加过的文件,也称差异备份)。
4.3.2、dump 语法说明
dump [ -cu] [-123456789] [ -f <备份后文件名>] [-T <日期>] [ 目录或文件系统]
dump []-wW
-c : 创建新的归档文件,并将由一个或多个文件参数(即-0123456789)所指定的内容写入归档文件的开头。
-0123456789:备份的层级。0 为最完整备份,会备份所有文件。若指定 0 以上的层级,则备份至上一次备份以来修改或新增的文件(进行增量备份), 到 9 后,可以再次轮替。
-f <备份后文件名>:指定备份后文件名。
-j:调用 bzlib 库压缩备份文件,也就是将备份后的文件压缩成 bz2 格式,让文件更小。
-T<日期>:指定开始备份的时间与日期。
-u:备份完毕后,在/etc/dumpdares 中记录备份的文件系统,层级,日期与时间等。
-t:指定文件名,若该文件已存在备份文件中,则列出名称。
-W:显示需要备份的文件及其最后一次备份的层级,时间 ,日期。
-w:与-W 类似,但仅显示需要备份的文件。
4.3.3、 dump 应用案例 1
将/boot 分区所有内容备份到/opt/boot.bak0.bz2 文件中,备份层级为"0"
bash
# -0uj 进行首次完整备份
[root@lingbo opt]# dump -0uj -f /opt/boot.bak0.bz2 /boot
  DUMP: Date of this level 0 dump: Wed Jan  7 17:17:17 2026
  DUMP: Dumping /dev/sda1 (/boot) to /opt/boot.bak0.bz2
  DUMP: Label: none
  DUMP: Writing 10 Kilobyte records
  DUMP: Compressing output at compression level 2 (bzlib)
  DUMP: mapping (Pass I) [regular files]
  DUMP: mapping (Pass II) [directories]
  DUMP: estimated 178671 blocks.
  DUMP: Volume 1 started with block 1 at: Wed Jan  7 17:17:17 2026
  DUMP: dumping (Pass III) [directories]
  DUMP: dumping (Pass IV) [regular files]
  DUMP: Closing /opt/boot.bak0.bz2
  DUMP: Volume 1 completed at: Wed Jan  7 17:17:30 2026
  DUMP: Volume 1 took 0:00:13
  DUMP: Volume 1 transfer rate: 12404 kB/s
  DUMP: Volume 1 179290kB uncompressed, 161254kB compressed, 1.112:1
  DUMP: 179290 blocks (175.09MB) on 1 volume(s)
  DUMP: finished in 13 seconds, throughput 13791 kBytes/sec
  DUMP: Date of this level 0 dump: Wed Jan  7 17:17:17 2026
  DUMP: Date this dump completed:  Wed Jan  7 17:17:30 2026
  DUMP: Average transfer rate: 12404 kB/s
  DUMP: Wrote 179290kB uncompressed, 161254kB compressed, 1.112:1
  DUMP: DUMP IS DONE
# 查看备份文件大小
[root@lingbo opt]# ll -h
总用量 308M
-rw-r--r--.  1 root root 1.7M 12月 23 13:20 8dd0774b1728cf7bdbd5184360f573e94445941.jpg
-rw-r--r--.  1 root root 158M 1月   7 17:17 boot.bak0.bz2
-rw-r--r--.  1 root root  91M 10月  9 2018 firefox-60.2.2-1.el7.centos.x86_64.rpm
drwxr-xr-x.  3 root root 4.0K 12月 26 15:59 idea
drwxr-xr-x.  2 root root 4.0K 12月 26 13:47 jdk
drwxr-xr-x. 10 root root 4.0K 1月   7 13:57 linux-0.01
drwxr-xr-x.  2 root root 4.0K 12月 26 16:12 mysql
drwxr-xr-x.  2 root root 4.0K 10月 31 2018 rh
drwxr-xr-x.  3 root root 4.0K 12月 24 16:17 tmp
drwxr-xr-x.  3 root root 4.0K 12月 24 16:40 tmp2
drwxr-xr-x.  3 root root 4.0K 12月 26 15:59 tomcat
-rw-r--r--.  1 root root  54M 7月  18 2020 VMwareTools-10.3.23-16594550.tar.gz
drwxr-xr-x.  9 root root 4.0K 7月  18 2020 vmware-tools-distrib
-rw-r--r--.  1 root root 3.5M 12月 24 11:30 杂文.txt
4.3.4、dump 应用案例 2
在/boot 分区下增加新文件,备份层级为"1"(只备份上次使用层次"0"备份后发生过改变的数据), 注意比较看看这次生成的备份文件 boot.bak1.bz2 有多大
bash
# 在/boot下创建新文件
[root@lingbo boot]# touch hello.java
[root@lingbo boot]# vim hello.java
# -1uj 进行增量备份(只有在-0uj时才是完整备份)
[root@lingbo boot]# dump -1uj -f /opt/boot.bak1.bz2 /boot/
  DUMP: Date of this level 1 dump: Wed Jan  7 17:19:53 2026
  DUMP: Date of last level 0 dump: Wed Jan  7 17:17:17 2026
  DUMP: Dumping /dev/sda1 (/boot) to /opt/boot.bak1.bz2
  DUMP: Label: none
  DUMP: Writing 10 Kilobyte records
  DUMP: Compressing output at compression level 2 (bzlib)
  DUMP: mapping (Pass I) [regular files]
  DUMP: mapping (Pass II) [directories]
  DUMP: estimated 39 blocks.
  DUMP: Volume 1 started with block 1 at: Wed Jan  7 17:19:53 2026
  DUMP: dumping (Pass III) [directories]
  DUMP: dumping (Pass IV) [regular files]
  DUMP: Closing /opt/boot.bak1.bz2
  DUMP: Volume 1 completed at: Wed Jan  7 17:19:53 2026
  DUMP: 40 blocks (0.04MB) on 1 volume(s)
  DUMP: finished in less than a second
  DUMP: Date of this level 1 dump: Wed Jan  7 17:19:53 2026
  DUMP: Date this dump completed:  Wed Jan  7 17:19:53 2026
  DUMP: Average transfer rate: 0 kB/s
  DUMP: Wrote 40kB uncompressed, 11kB compressed, 3.637:1
  DUMP: DUMP IS DONE
# 增量备份文件bak1明显小于完整备份文件bak0
[root@lingbo boot]# ll -h /opt/
总用量 308M
-rw-r--r--.  1 root root 1.7M 12月 23 13:20 8dd0774b1728cf7bdbd5184360f573e94445941.jpg
-rw-r--r--.  1 root root 158M 1月   7 17:17 boot.bak0.bz2
-rw-r--r--.  1 root root  12K 1月   7 17:19 boot.bak1.bz2
-rw-r--r--.  1 root root  91M 10月  9 2018 firefox-60.2.2-1.el7.centos.x86_64.rpm
drwxr-xr-x.  3 root root 4.0K 12月 26 15:59 idea
drwxr-xr-x.  2 root root 4.0K 12月 26 13:47 jdk
drwxr-xr-x. 10 root root 4.0K 1月   7 13:57 linux-0.01
drwxr-xr-x.  2 root root 4.0K 12月 26 16:12 mysql
drwxr-xr-x.  2 root root 4.0K 10月 31 2018 rh
drwxr-xr-x.  3 root root 4.0K 12月 24 16:17 tmp
drwxr-xr-x.  3 root root 4.0K 12月 24 16:40 tmp2
drwxr-xr-x.  3 root root 4.0K 12月 26 15:59 tomcat
-rw-r--r--.  1 root root  54M 7月  18 2020 VMwareTools-10.3.23-16594550.tar.gz
drwxr-xr-x.  9 root root 4.0K 7月  18 2020 vmware-tools-distrib
-rw-r--r--.  1 root root 3.5M 12月 24 11:30 杂文.txt
提醒: 通过 dump 命令在配合 crontab 可以实现无人值守备份。
4.3.5、dump -W
显示需要备份的文件及其最后一次备份的层级,时间 ,日期

4.3.6、查看备份时间文件
cat /etc/dumpdates

4.3.7、dump 备份文件或者目录
前面我们在备份分区 时,是可以支持增量备份的,如果备份文件或者目录,不再支持增量备份, 即只能使用0级别备份
案例, 使用 dump 备份 /etc 整个目录
bash
# 备份目录
[root@lingbo boot]# dump -0j /opt/etc.bak0.bz2 /etc/
  DUMP: Date of this level 0 dump: Wed Jan  7 17:38:55 2026
  DUMP: Dumping /dev/sda3 (/ (dir opt/etc.bak0.bz2)) to /dev/tape
  DUMP: Label: none
  DUMP: Writing 10 Kilobyte records
  DUMP: Compressing output at compression level 2 (bzlib)
  DUMP: mapping (Pass I) [regular files]
  DUMP: File cannot be accessed (/opt/etc.bak0.bz2).
  DUMP: The ENTIRE dump is aborted.
下面写法会报错:
bash
# 目录不接受增量备份,只能-0完整备份
[root@lingbo boot]# dump -1j /opt/etc.bak1.bz2 /etc/
  DUMP: Only level 0 dumps are allowed on a subdirectory
  DUMP: The ENTIRE dump is aborted.
# 目录不接受增量备份,自然不接受-u参数
[root@lingbo boot]# dump -0ju /opt/etc.bak1.bz2 /etc/
dump: illegal compress level -- u
4.3.8、提醒
如果是重要的备份文件, 比如数据区,建议将文件上传到其它服务器保存,不要将鸡蛋放在同一个篮子。
4.4、使用 restore 完成恢复
4.4.1、基本介绍
restore 命令用来恢复已备份的文件,可以从 dump 生成的备份文件中恢复原文件
4.4.2、restore 基本语法
restore [模式选项] [选项]
说明下面四个模式, 不能混用,在一次命令中, 只能指定一种。
-C :使用对比模式,将备份的文件与已存在的文件相互对比。
-i:使用交互模式,在进行还原操作时,restors 指令将依序询问用户
-r:进行还原模式
-t : 查看模式,看备份文件有哪些文件
选项
-f <备份设备>:从指定的文件中读取备份数据,进行还原操作
4.4.3、应用案例 1
restore 命令比较模式,比较备份文件和原文件的区别
测试案例
bash
# 修改hello.java文件名
[root@lingbo boot]# mv /boot/hello.java /boot/hello100.java
# 通过restore的命令比较模式,发现 1 compare error
[root@lingbo boot]# restore -C -f /opt/boot.bak1.bz2
Dump tape is compressed.
Dump   date: Wed Jan  7 17:19:53 2026
Dumped from: Wed Jan  7 17:17:17 2026
Level 1 dump of /boot on lingbo:/dev/sda1
Label: none
filesys = /boot
restore: unable to stat ./hello.java: No such file or directory
Some files were modified!  1 compare errors
# 把hello.java的文件名修改回来
[root@lingbo boot]# mv /boot/hello100.java /boot/hello.java
# 通过restore比较模式发现没有错误
[root@lingbo boot]# restore -C -f /opt/boot.bak1.bz2
Dump tape is compressed.
Dump   date: Wed Jan  7 17:19:53 2026
Dumped from: Wed Jan  7 17:17:17 2026
Level 1 dump of /boot on lingbo:/dev/sda1
Label: none
filesys = /boot
4.4.4、应用案例 2
restore 命令查看模式,看备份文件有哪些数据/文件
测试案例
bash
# 通过restore查看模式查看备份文件
[root@lingbo boot]# restore -t -f /opt/boot.bak1.bz2
Dump tape is compressed.
Dump date: Wed Jan 7 17:19:53 2026
Dumped from: Wed Jan 7 17:17:17 2026
Level 1 dump of /boot on lingbo:/dev/sda1
Label: none
2 .
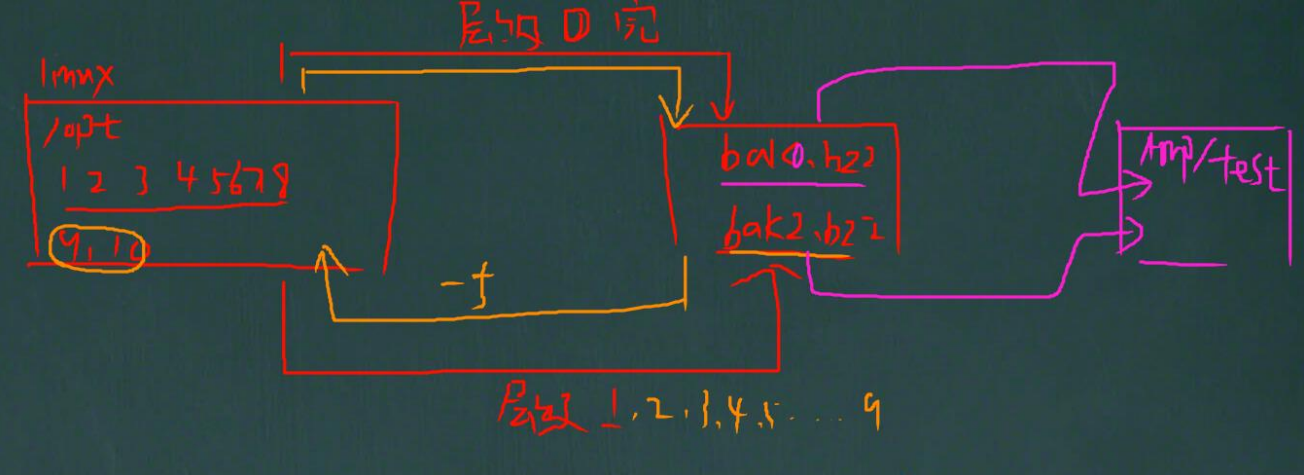
355 ./hello.java4.4.5、应用案例 3
restore 命令还原模式,注意细节: 如果你有增量备份,需要把增量备份文件也进行恢复,有几个增量备份文件,就要恢复几个,按顺序来恢复即可。
bash
# 新建boottmp临时目录用于还原备份文件
[root@lingbo boot]# mkdir /opt/boottmp
[root@lingbo boot]# cd /opt/boottmp/
# 按照增量备份顺序依次还原文件,先还原bak0
[root@lingbo boottmp]# restore -r -f /opt/boot.bak0.bz2
Dump tape is compressed.
# 按照增量备份顺序依次还原文件,再还原bak1
[root@lingbo boottmp]# restore -r -f /opt/boot.bak1.bz2
Dump tape is compressed.
# 备份后boottmp和/boot中的内容相同
[root@lingbo boottmp]# ll
总用量 162132
-rw-r--r--. 1 root root   153661 6月   4 2024 config-3.10.0-1160.119.1.el7.x86_64
-rw-r--r--. 1 root root   151918 11月  9 2018 config-3.10.0-957.el7.x86_64
drwx------. 3 root root     4096 11月  9 2018 efi
drwxr-xr-x. 2 root root     4096 12月 21 22:52 grub
drwx------. 5 root root     4096 1月   7 16:35 grub2
-rw-r--r--. 1 root root       15 1月   7 17:19 hello.java
-rw-------. 1 root root 74304879 12月 21 22:57 initramfs-0-rescue-cee8f7cd3e3d423a8c409a4b8e69d1b3.img
-rw-------. 1 root root 31454153 1月   7 16:35 initramfs-3.10.0-1160.119.1.el7.x86_64.img
-rw-------. 1 root root 31625996 12月 21 22:59 initramfs-3.10.0-957.el7.x86_64.img
drwx------. 2 root root     4096 12月 21 22:51 lost+found
-rw-------. 1 root root   145872 1月   7 18:13 restoresymtable
-rw-r--r--. 1 root root   320800 6月   4 2024 symvers-3.10.0-1160.119.1.el7.x86_64.gz
-rw-r--r--. 1 root root   314036 11月  9 2018 symvers-3.10.0-957.el7.x86_64.gz
-rw-------. 1 root root  3624910 6月   4 2024 System.map-3.10.0-1160.119.1.el7.x86_64
-rw-------. 1 root root  3543471 11月  9 2018 System.map-3.10.0-957.el7.x86_64
-rwxr-xr-x. 1 root root  6639904 12月 21 22:57 vmlinuz-0-rescue-cee8f7cd3e3d423a8c409a4b8e69d1b3
-rwxr-xr-x. 1 root root  7051880 6月   4 2024 vmlinuz-3.10.0-1160.119.1.el7.x86_64
-rwxr-xr-x. 1 root root  6639904 11月  9 2018 vmlinuz-3.10.0-957.el7.x86_64
4.4.6、应用案例 4
restore 命令恢复备份的文件,或者整个目录的文件
基本语法: restore -r -f 备份好的文件
测试案例
bash
# 给/etc目录备份
[root@lingbo opt]# dump -0j -f /opt/etc.bak0.bz2 /etc/
  DUMP: Date of this level 0 dump: Wed Jan  7 18:17:14 2026
  DUMP: Dumping /dev/sda3 (/ (dir etc)) to /opt/etc.bak0.bz2
  DUMP: Label: none
  DUMP: Writing 10 Kilobyte records
  DUMP: Compressing output at compression level 2 (bzlib)
  DUMP: mapping (Pass I) [regular files]
  DUMP: mapping (Pass II) [directories]
  DUMP: estimated 67728 blocks.
  DUMP: Volume 1 started with block 1 at: Wed Jan  7 18:17:14 2026
  DUMP: dumping (Pass III) [directories]
  DUMP: dumping (Pass IV) [regular files]
  DUMP: Closing /opt/etc.bak0.bz2
  DUMP: Volume 1 completed at: Wed Jan  7 18:17:19 2026
  DUMP: Volume 1 took 0:00:05
  DUMP: Volume 1 transfer rate: 4865 kB/s
  DUMP: Volume 1 77340kB uncompressed, 24327kB compressed, 3.180:1
  DUMP: 77340 blocks (75.53MB) on 1 volume(s)
  DUMP: finished in 5 seconds, throughput 15468 kBytes/sec
  DUMP: Date of this level 0 dump: Wed Jan  7 18:17:14 2026
  DUMP: Date this dump completed:  Wed Jan  7 18:17:19 2026
  DUMP: Average transfer rate: 4865 kB/s
  DUMP: Wrote 77340kB uncompressed, 24327kB compressed, 3.180:1
  DUMP: DUMP IS DONE
# 创建etctmp临时目录用于恢复文件
[root@lingbo opt]# mkdir etctmp
[root@lingbo opt]# cd etctmp/
# 恢复etc备份文件
[root@lingbo etctmp]# restore -r -f /opt/etc.bak0.bz2
Dump tape is compressed.
./lost+found: (inode 11) not found on tape
./boot: (inode 655361) not found on tape
./dev: (inode 131073) not found on tape
./proc: (inode 786433) not found on tape
./run: (inode 524289) not found on tape
./sys: (inode 917505) not found on tape
./root: (inode 393217) not found on tape
./var: (inode 131074) not found on tape
./tmp: (inode 262150) not found on tape
./newdisk: (inode 275708) not found on tape
./data: (inode 538506) not found on tape
./usr: (inode 655362) not found on tape
./bin: (inode 17) not found on tape
./sbin: (inode 16) not found on tape
./lib: (inode 13) not found on tape
./lib64: (inode 15) not found on tape
./home: (inode 393218) not found on tape
./media: (inode 524290) not found on tape
./mnt: (inode 917506) not found on tape
./opt: (inode 393219) not found on tape
./srv: (inode 917507) not found on tape
./.bash_history: (inode 11232) not found on tape
[root@lingbo etctmp]# ll
总用量 2172
drwxr-xr-x. 144 root root   12288 1月   7 16:45 etc
-rw-------.   1 root root 2211640 1月   7 18:18 restoresymtable
[root@lingbo etctmp]# cd etc/
# 恢复后与/etc目录下的内容相同
[root@lingbo etc]# ls
abrt                        dnsmasq.d           ipsec.d                   oddjobd.conf      security
adjtime                     dracut.conf         ipsec.secrets             oddjobd.conf.d    selinux
aliases                     dracut.conf.d       iscsi                     openldap          services
aliases.db                  drirc               issue                     opt               sestatus.conf
alsa                        dumpdates           issue.net                 os-release        setroubleshoot
alternatives                e2fsck.conf         java                      PackageKit        setuptool.d
anacrontab                  egl                 jvm                       pam.d             sgml
...
5、Linux 可视化管理-webmin 和bt 运维工具
5.1、webmin
5.1.1、基本介绍
Webmin 是功能强大的基于 Web 的 Unix/linux 系统管理工具。管理员通过浏览器访问Webmin 的各种管理功能并完成相应的管理操作。除了各版本的 linux 以外还可用于:AIX、HPUX、Solaris、Unixware、Irix 和FreeBSD等系统。
5.1.2、安装 webmin&配置
(1)下载地址 : http://download.webmin.com/download/yum/ , 用下载工具下载即可
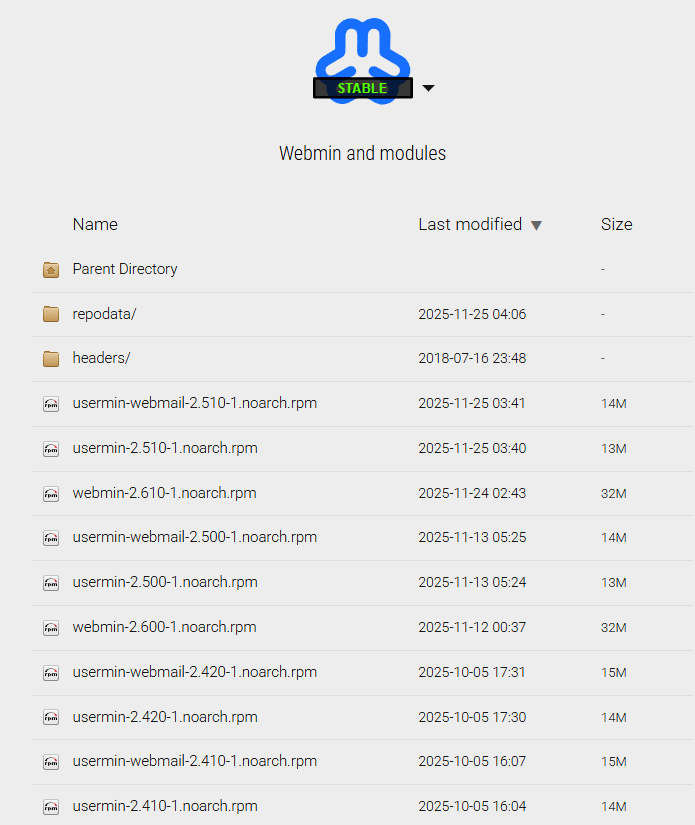
也可以使用 wget http://download.webmin.com/download/yum/webmin-1.700-1.noarch.rpm
(2)安装: rpm -ivh webmin-1.700-1.noarch.rpm
(3)重置密码 /usr/libexec/webmin/changepass.pl /etc/webmin root test
root 是 webmin 的用户名,不是 OS 的 , 这里就是把 webmin 的 root 用户密码改成了test
(4)修改 webmin 服务的端口号(默认是 10000 出于安全目的)
vim /etc/webmin/miniserv.conf # 修改端口
(5)将 port/listen=10000 修改为其他端口号,如 port/listen=6666
(6)重启 webmin
/etc/webmin/restart # 重启
/etc/webmin/start # 启动
/etc/webmin/stop # 停止
(7)防火墙放开 6666 端口
firewall-cmd --zone=public --add-port=6666/tcp --permanent # 配置防火墙开放 6666 端口
firewall-cmd --reload # 更新防火墙配置
firewall-cmd --zone=public --list-ports # 查看已经开放的端口号
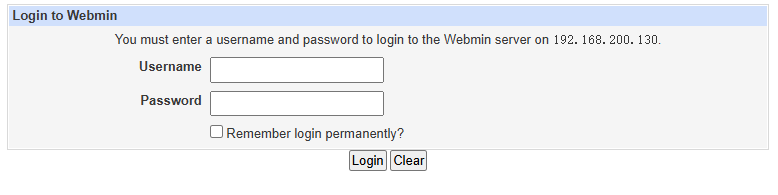
(8)登录 webmin
http://ip:6666 可以访问了
用 root 账号和重置的新密码 test
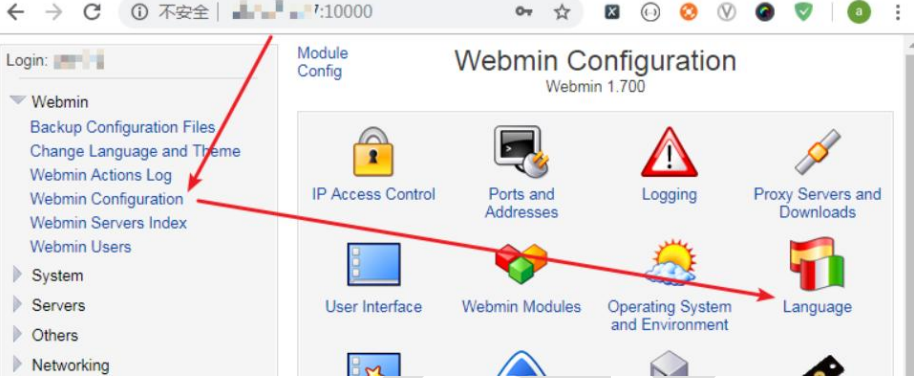
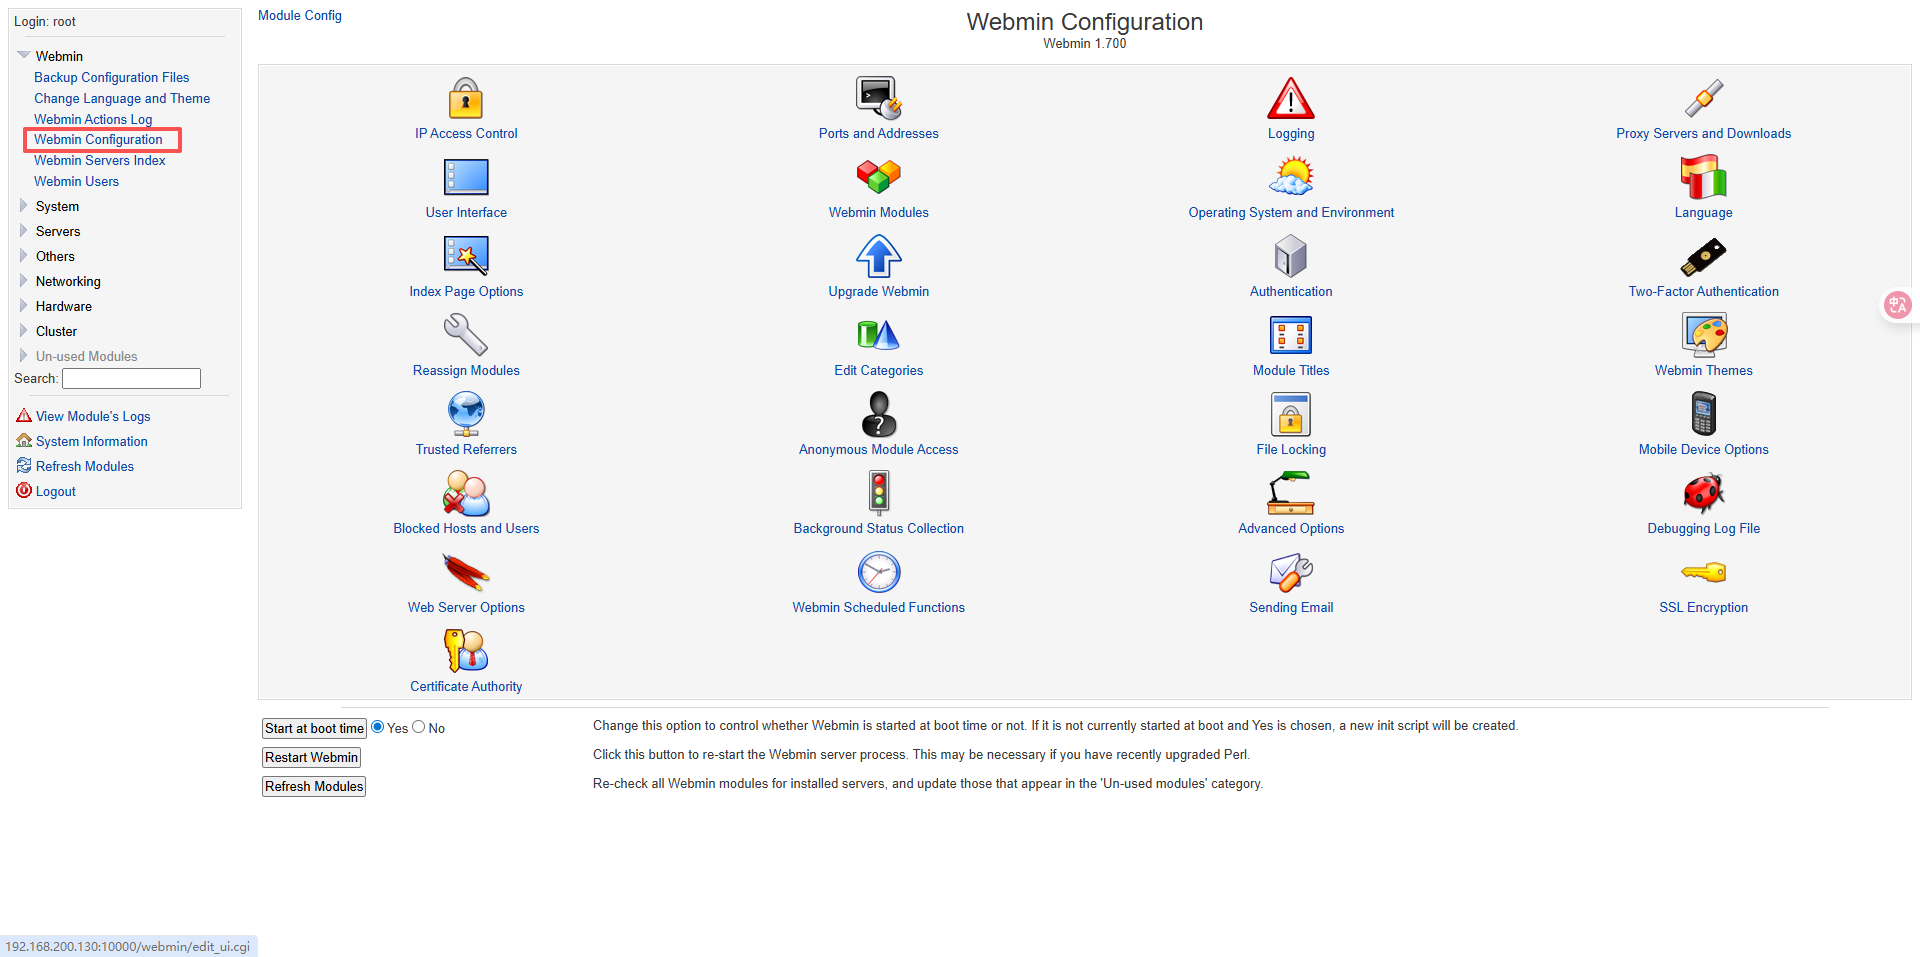
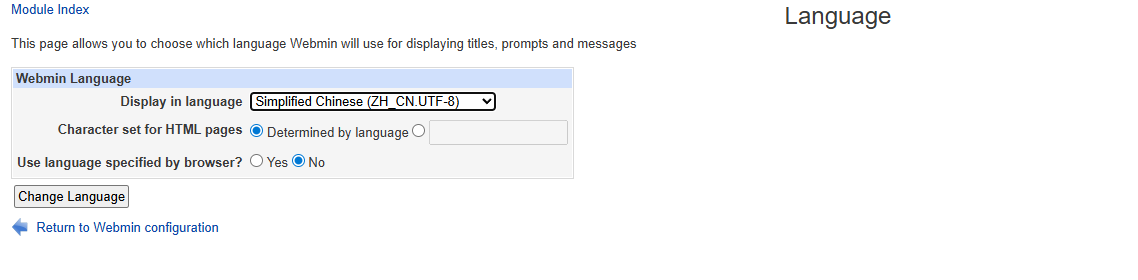
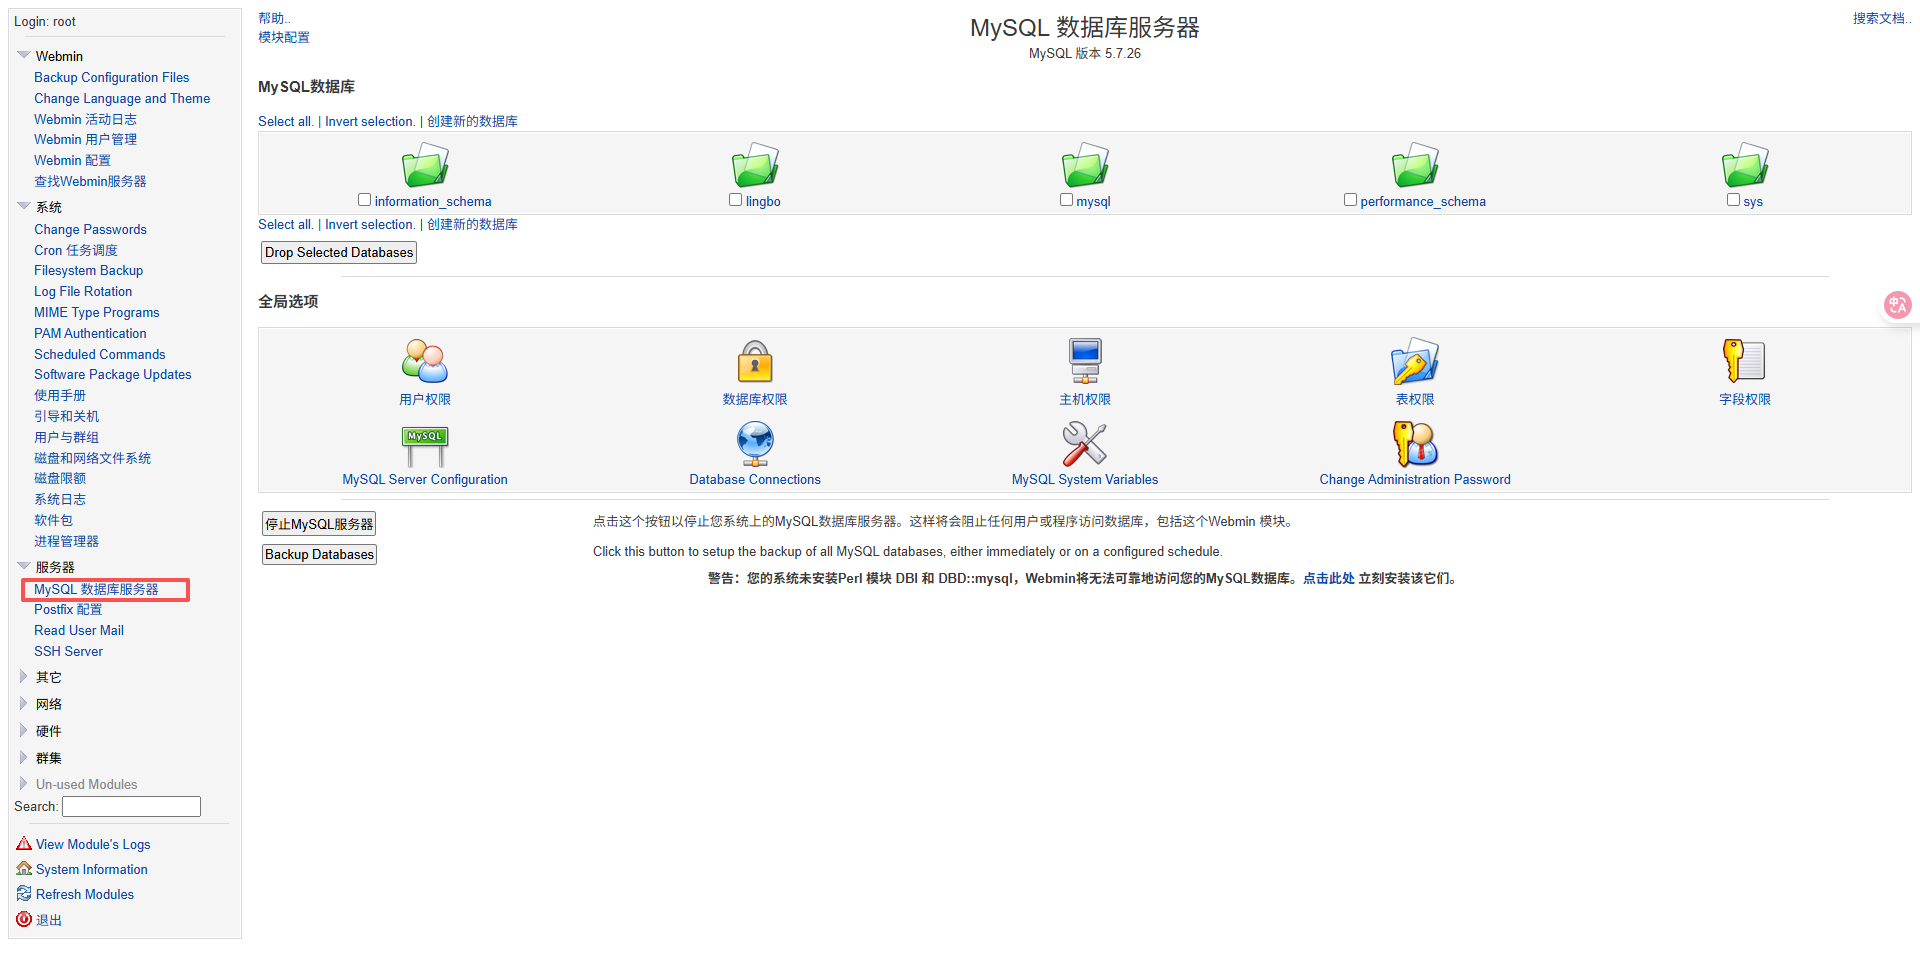
5.1.3、简单使用演示
比如修改 语言设置,IP 访问控制,查看进程, 修改密码, 任务调度,mysql 等。
修改用户密码

数据库管理
5.2、bt(宝塔)
5.2.1、基本介绍
bt 宝塔 Linux 面板是提升运维效率的服务器管理软件,支持一键 LAMP/LNMP/集群/监控/网站/FTP/数据库/JAVA等多项服务器管理功能。
5.2.2、安装和使用
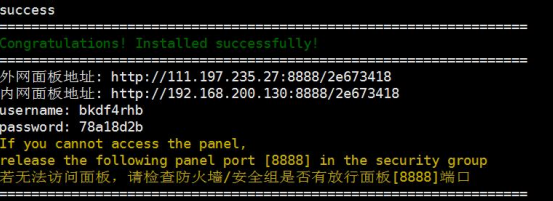
(1)安装 :yum install -y wget && wget -O install.sh http://download.bt.cn/install/install_6.0.sh && sh install.sh
(2)安装成功后控制台会显示登录地址,账户密码,复制浏览器打开登录
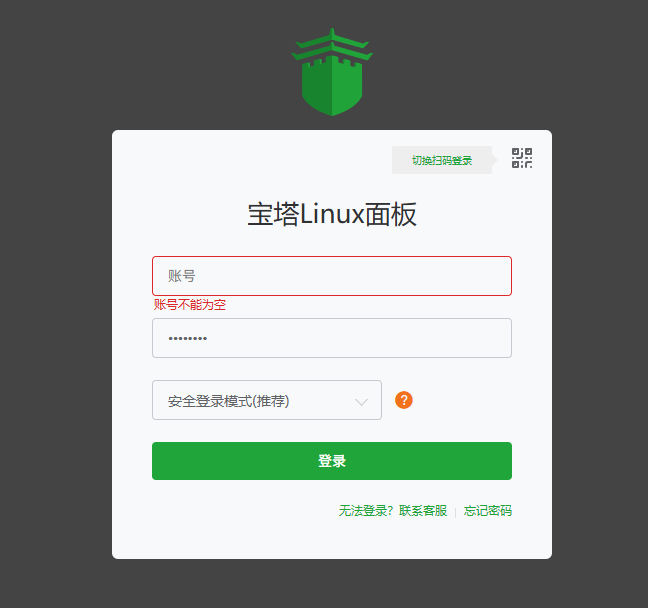
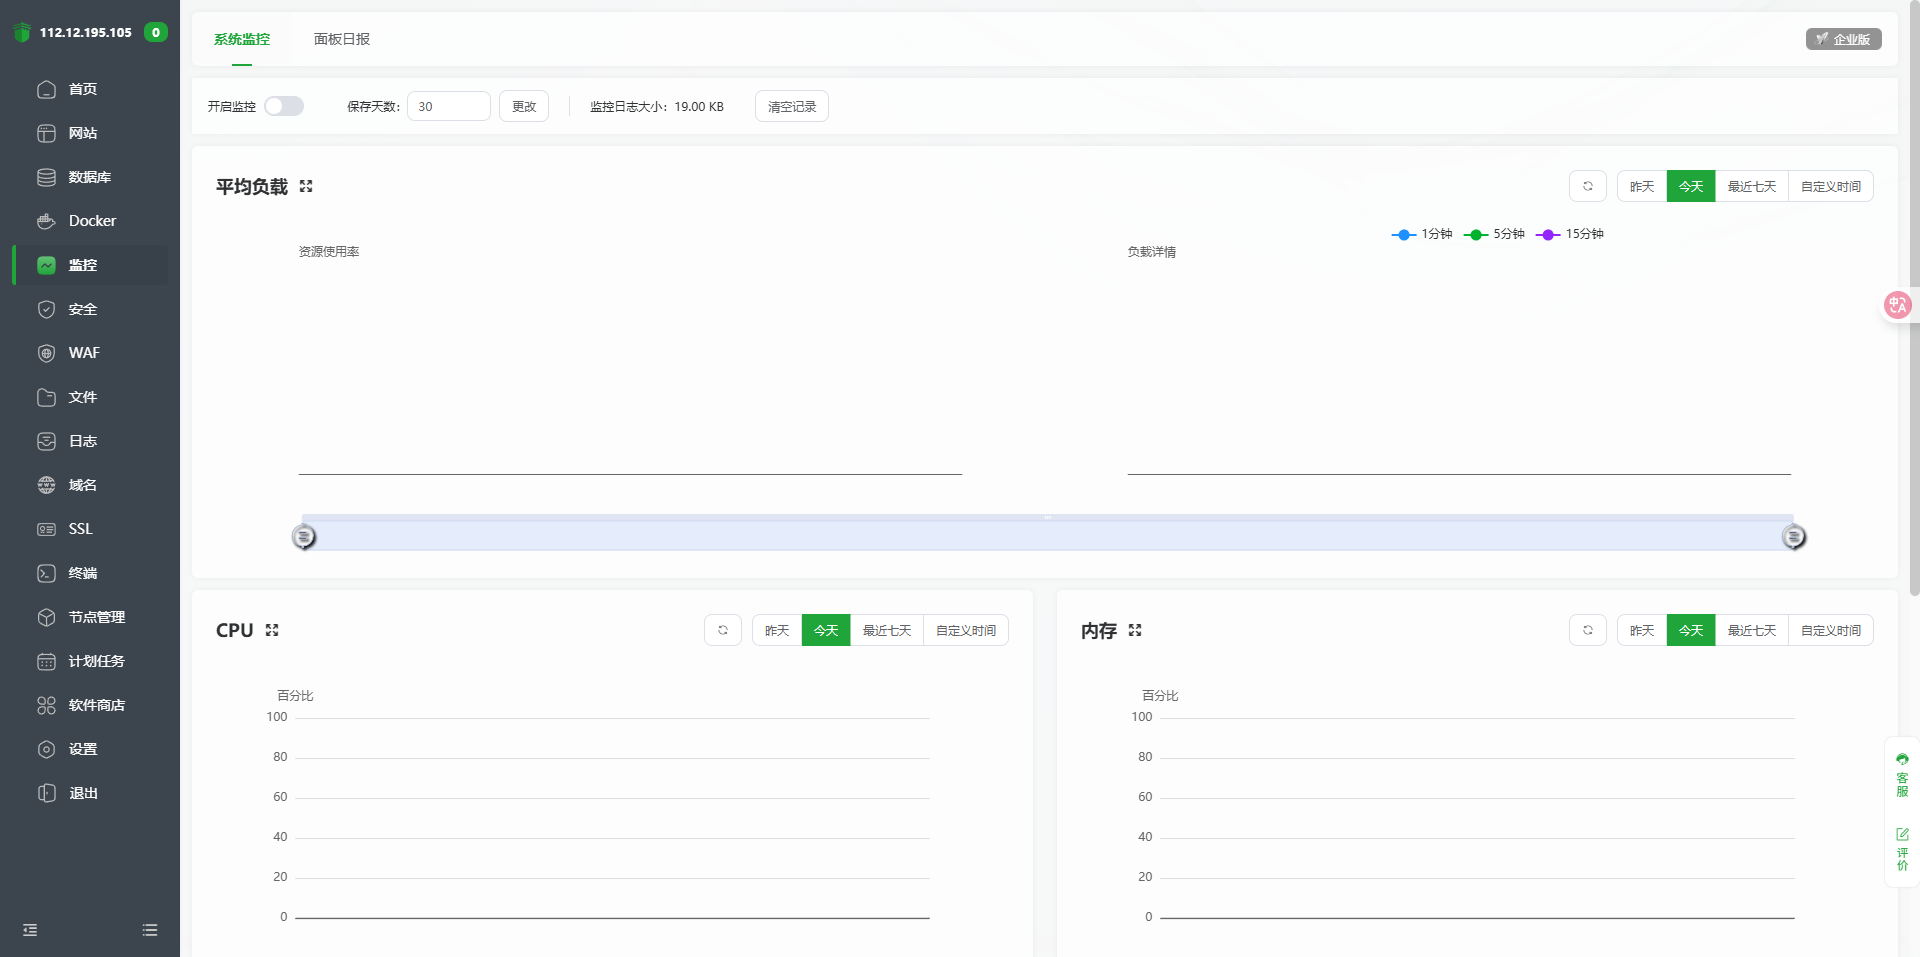
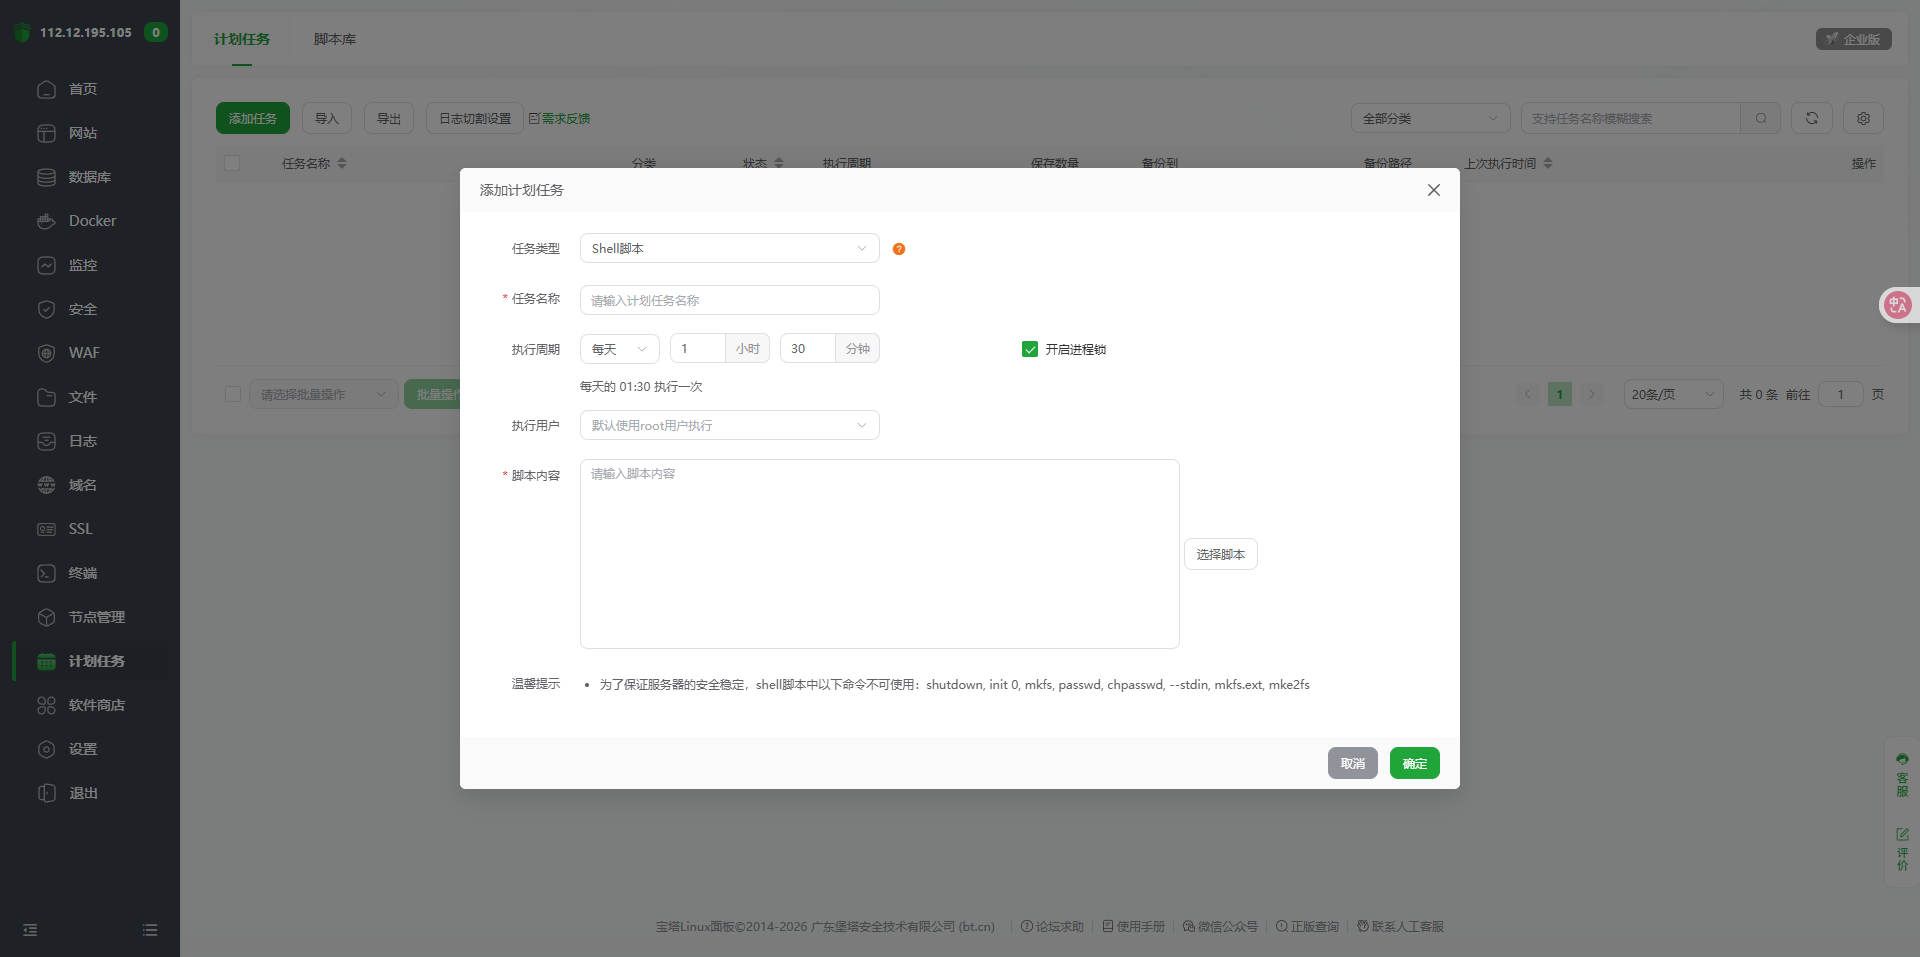
5.2.3、使用介绍
登陆面板
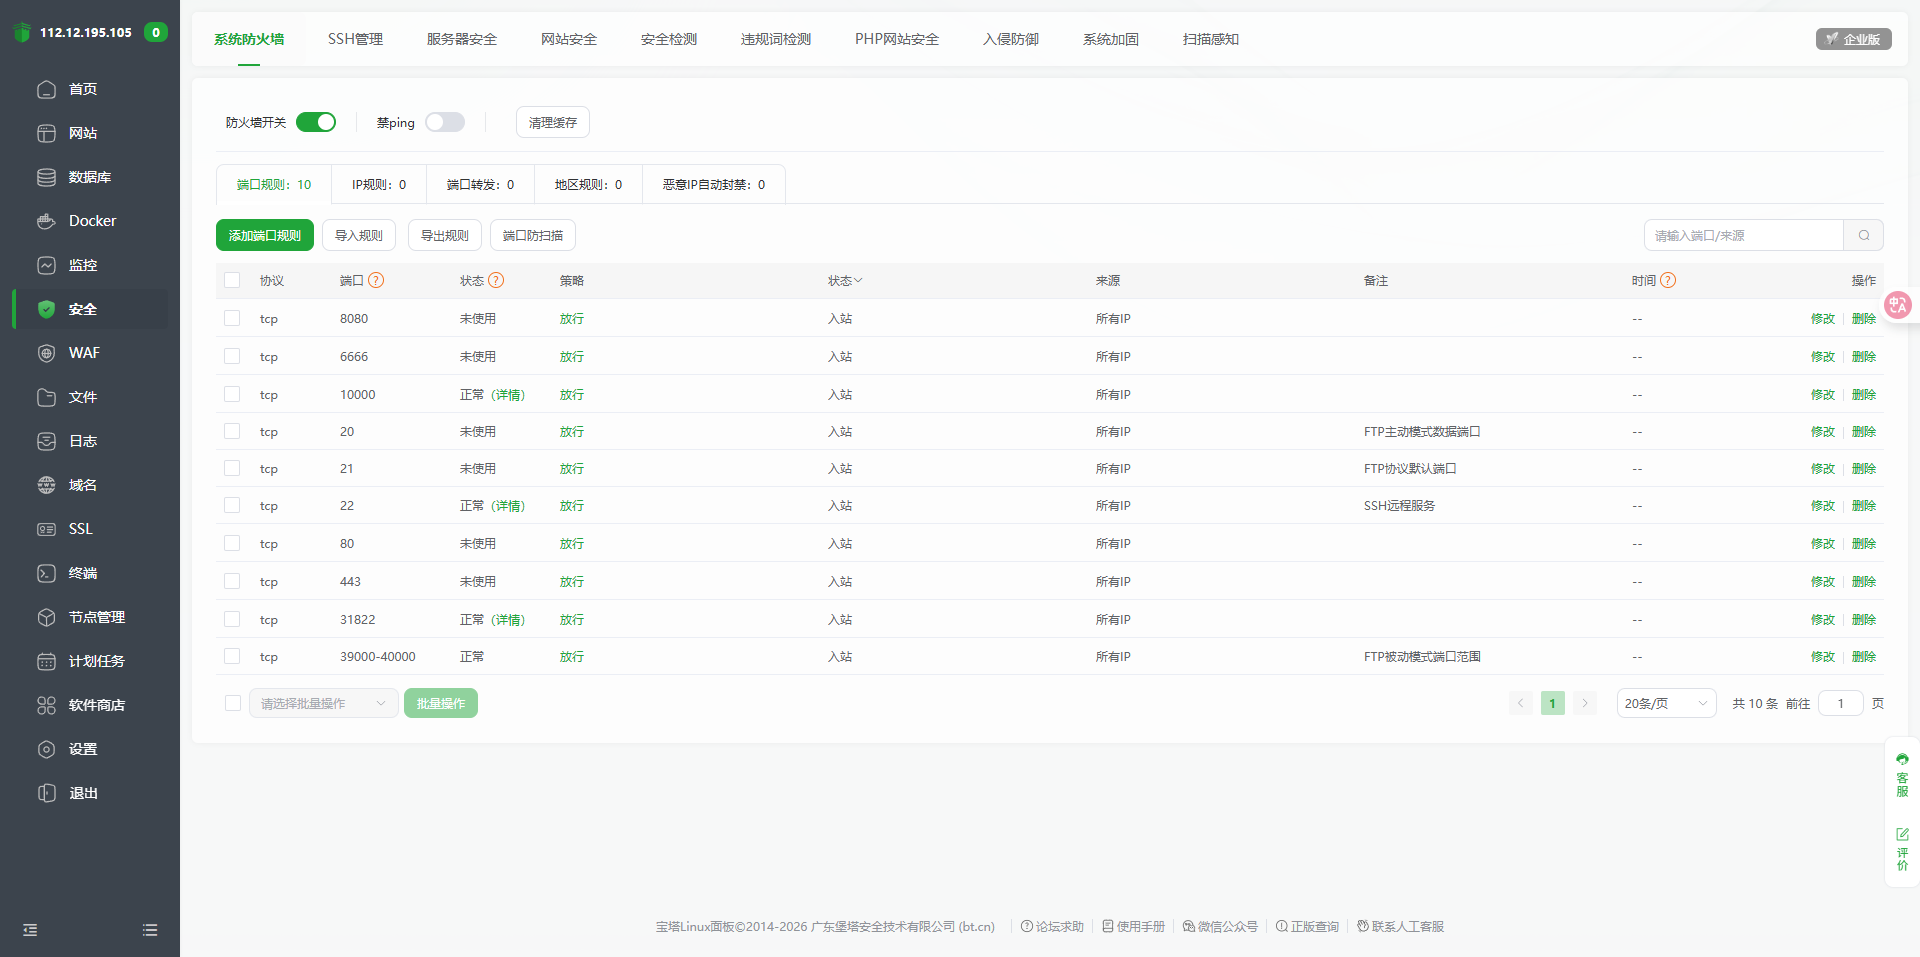
查看放行的端口
资源监控
软件安装

Cron定时任务
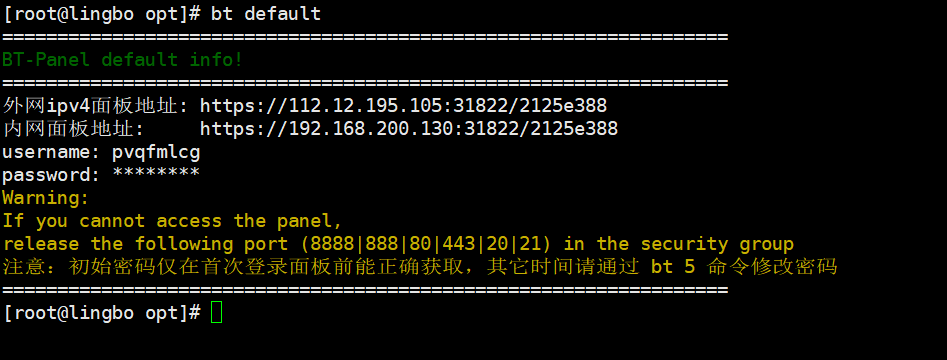
5.2.4、如果 bt 的用户名,密码忘记了,使用 bt default 可以查看
bt default