1.设置开发环境
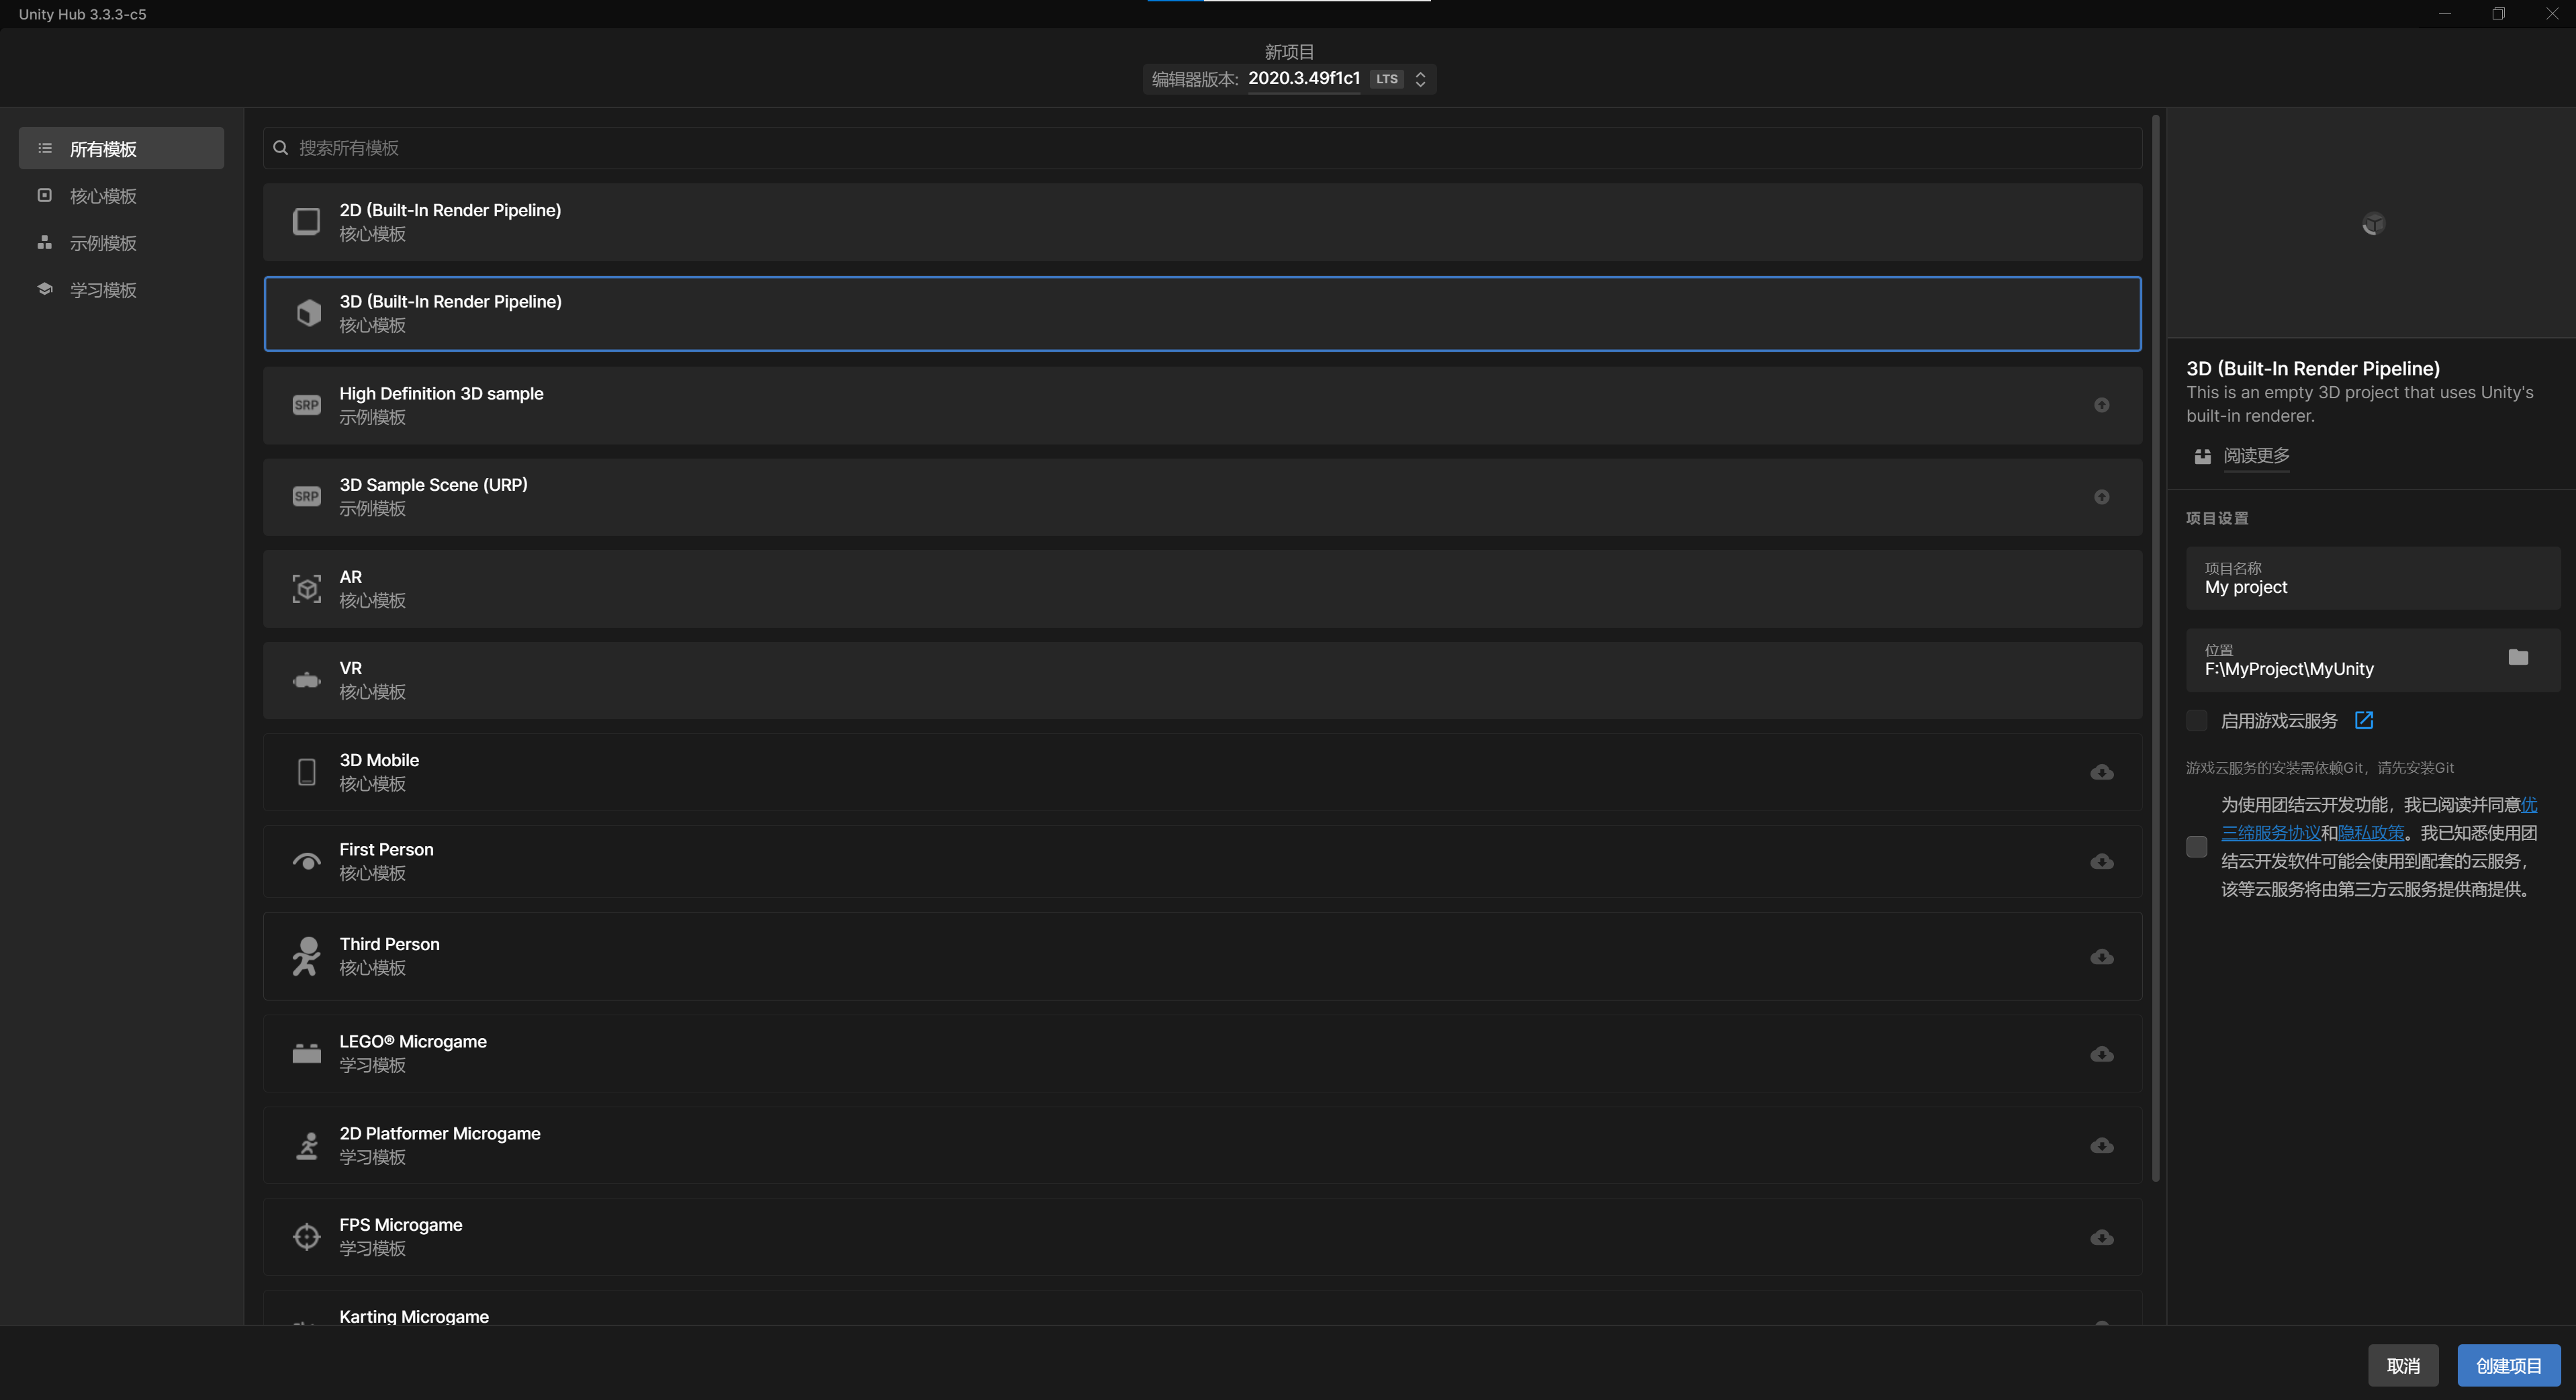
1.1通过UnityHub新建一个U3D项目,普通BRP渲染管线项目
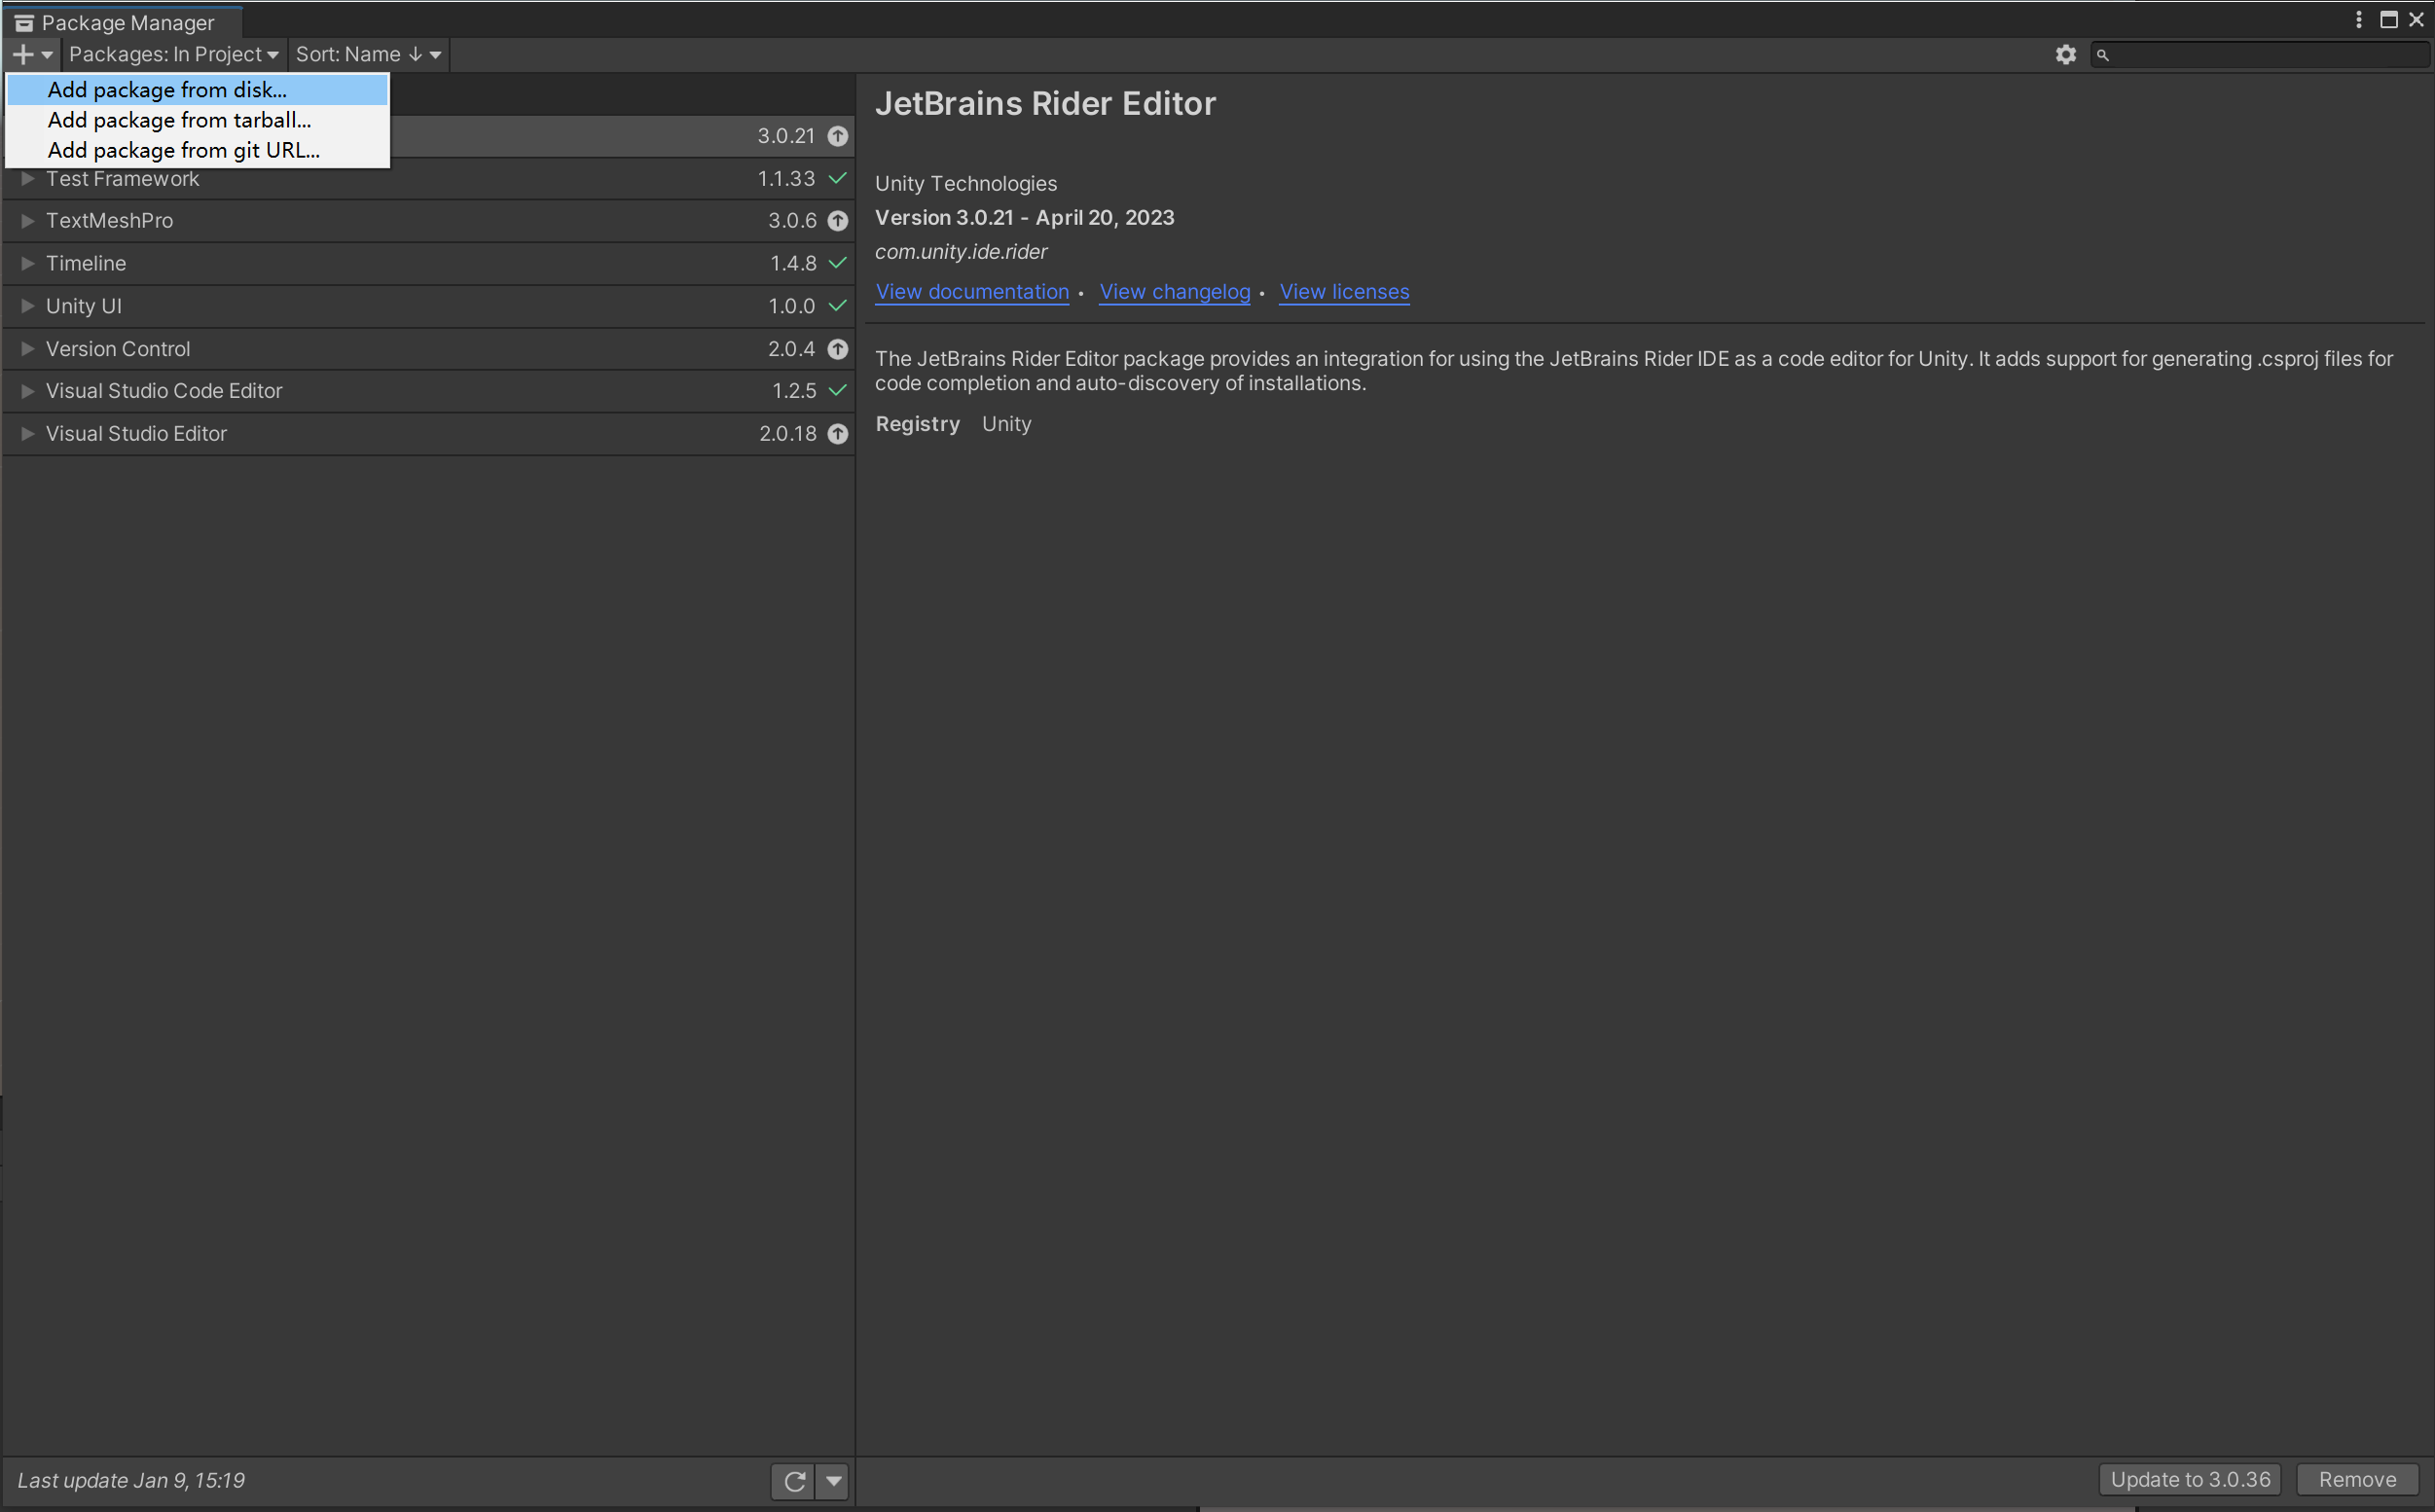
1.2通过unity的PackageManager安装Pico的unity SDK,我安装的是UnityXR-2.0.4_B62
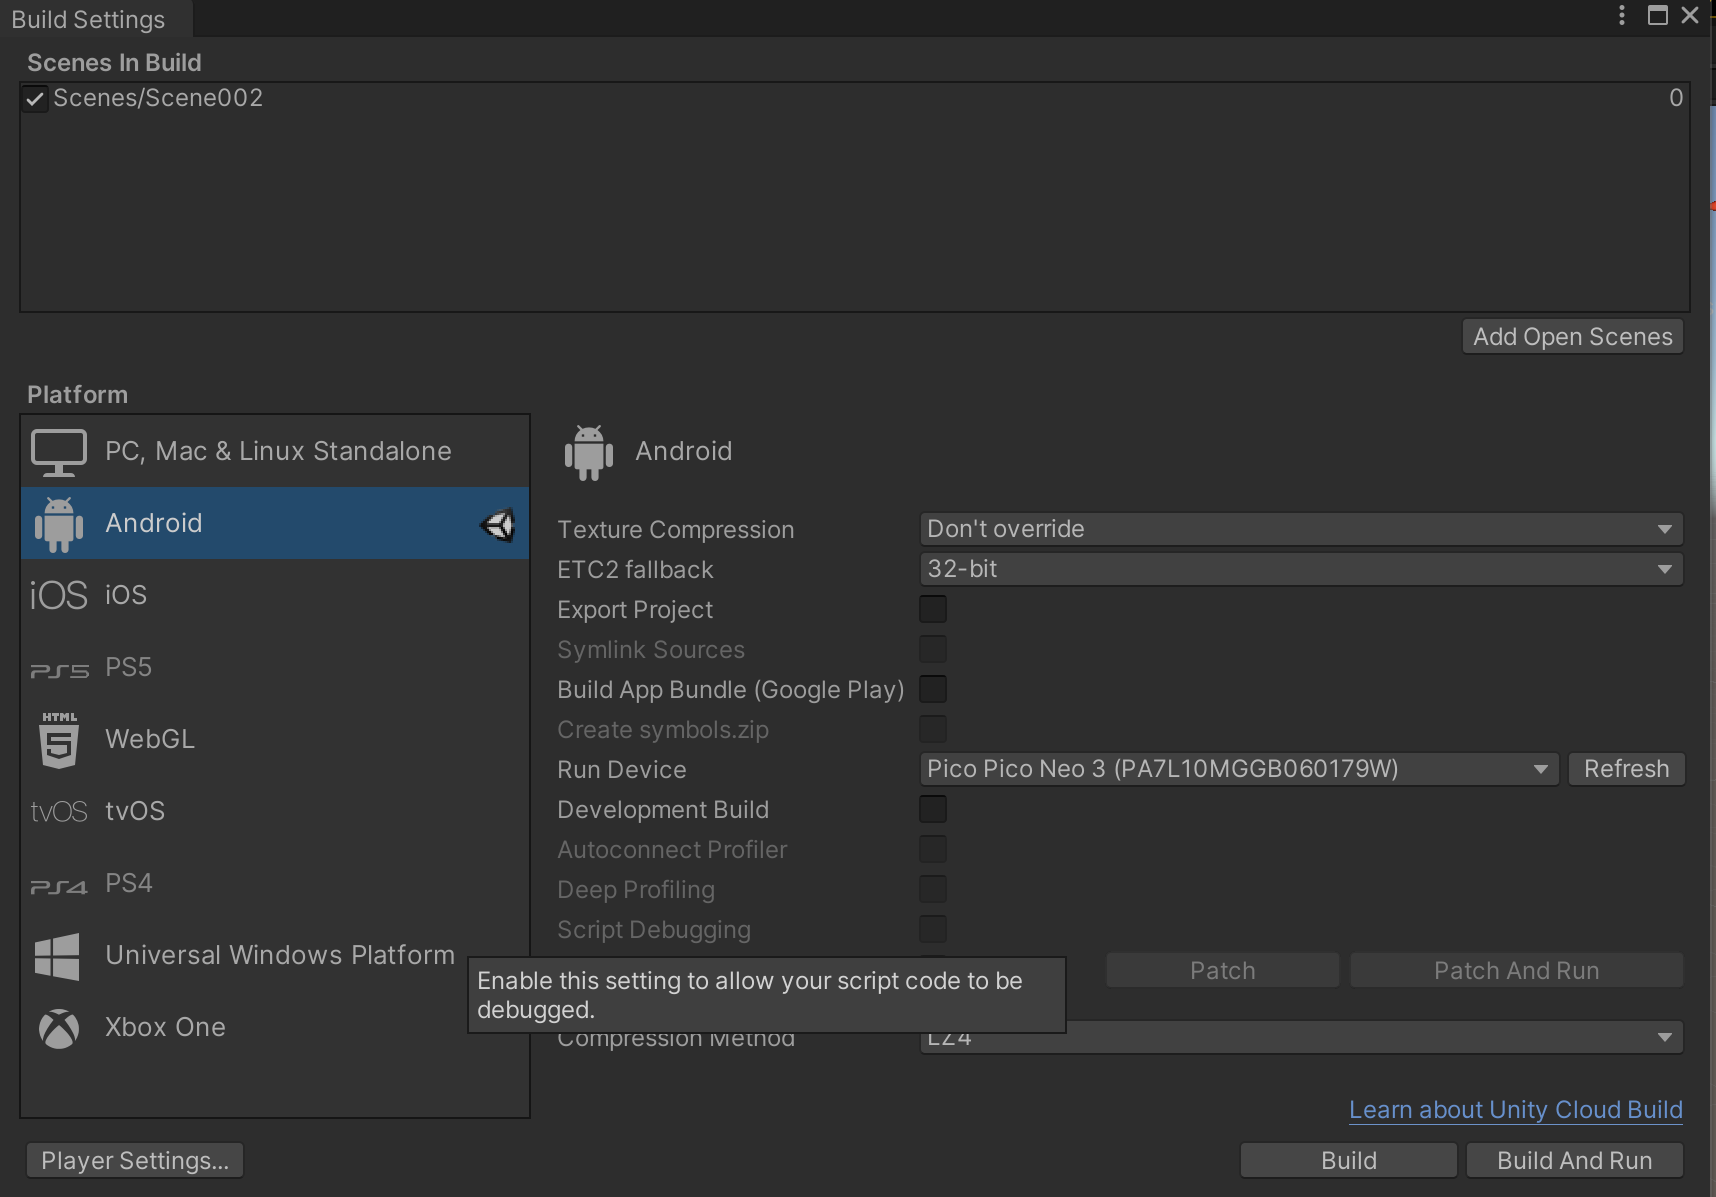
1.3通过File→BuildSetting,把打包平台设置为Android平台
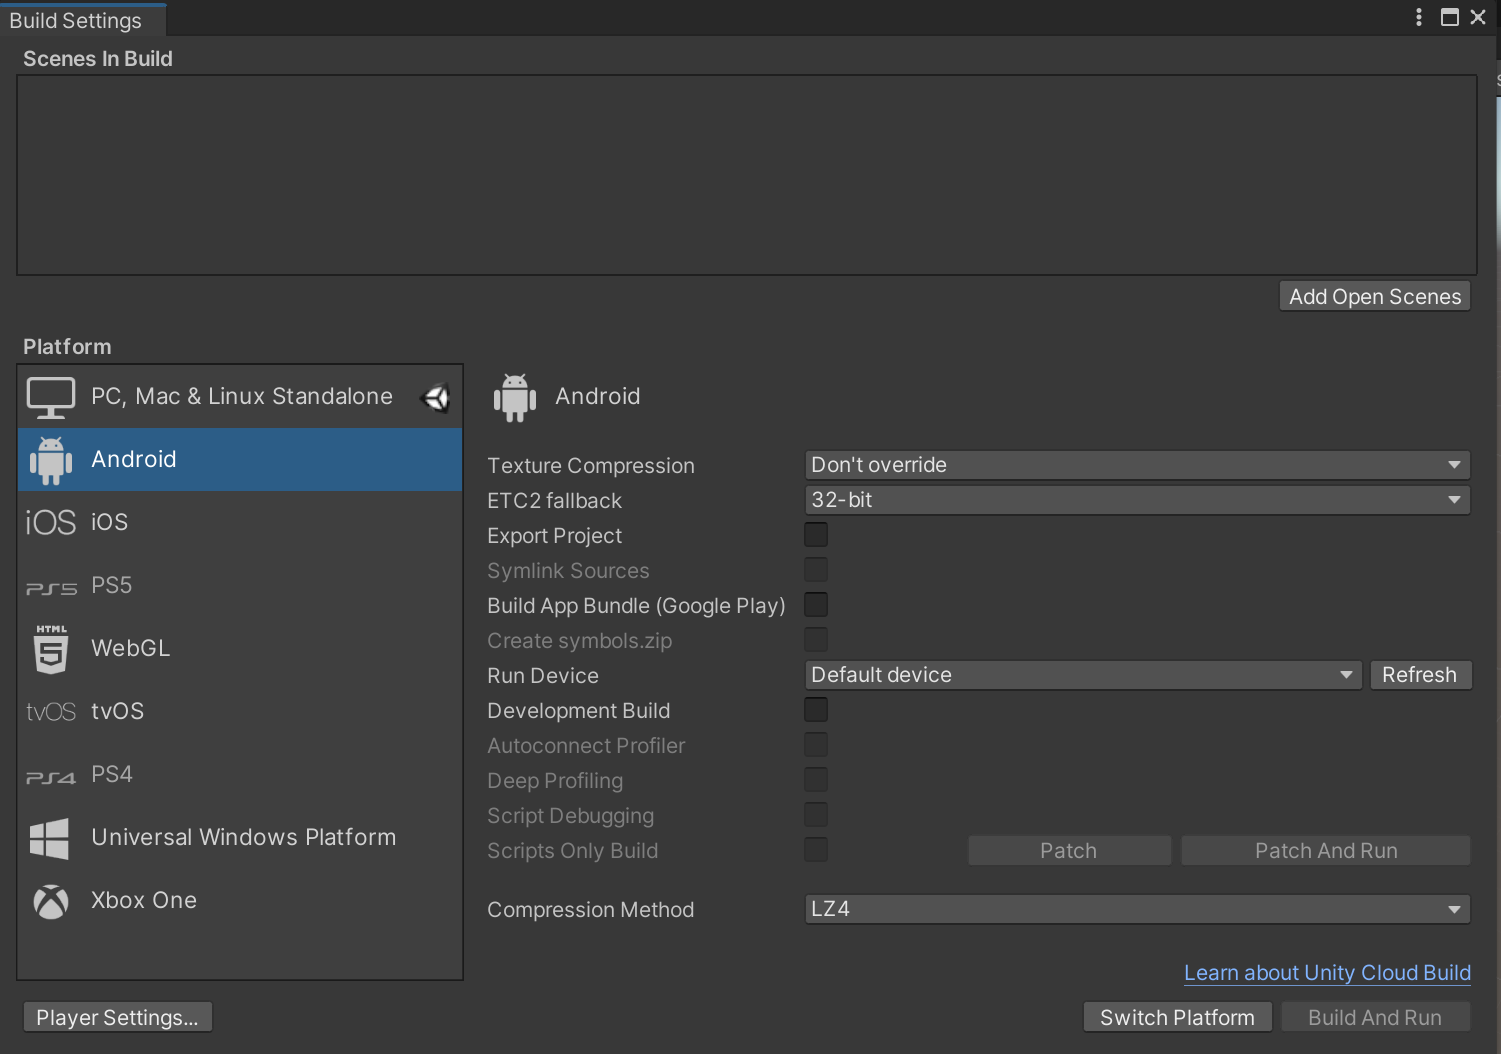
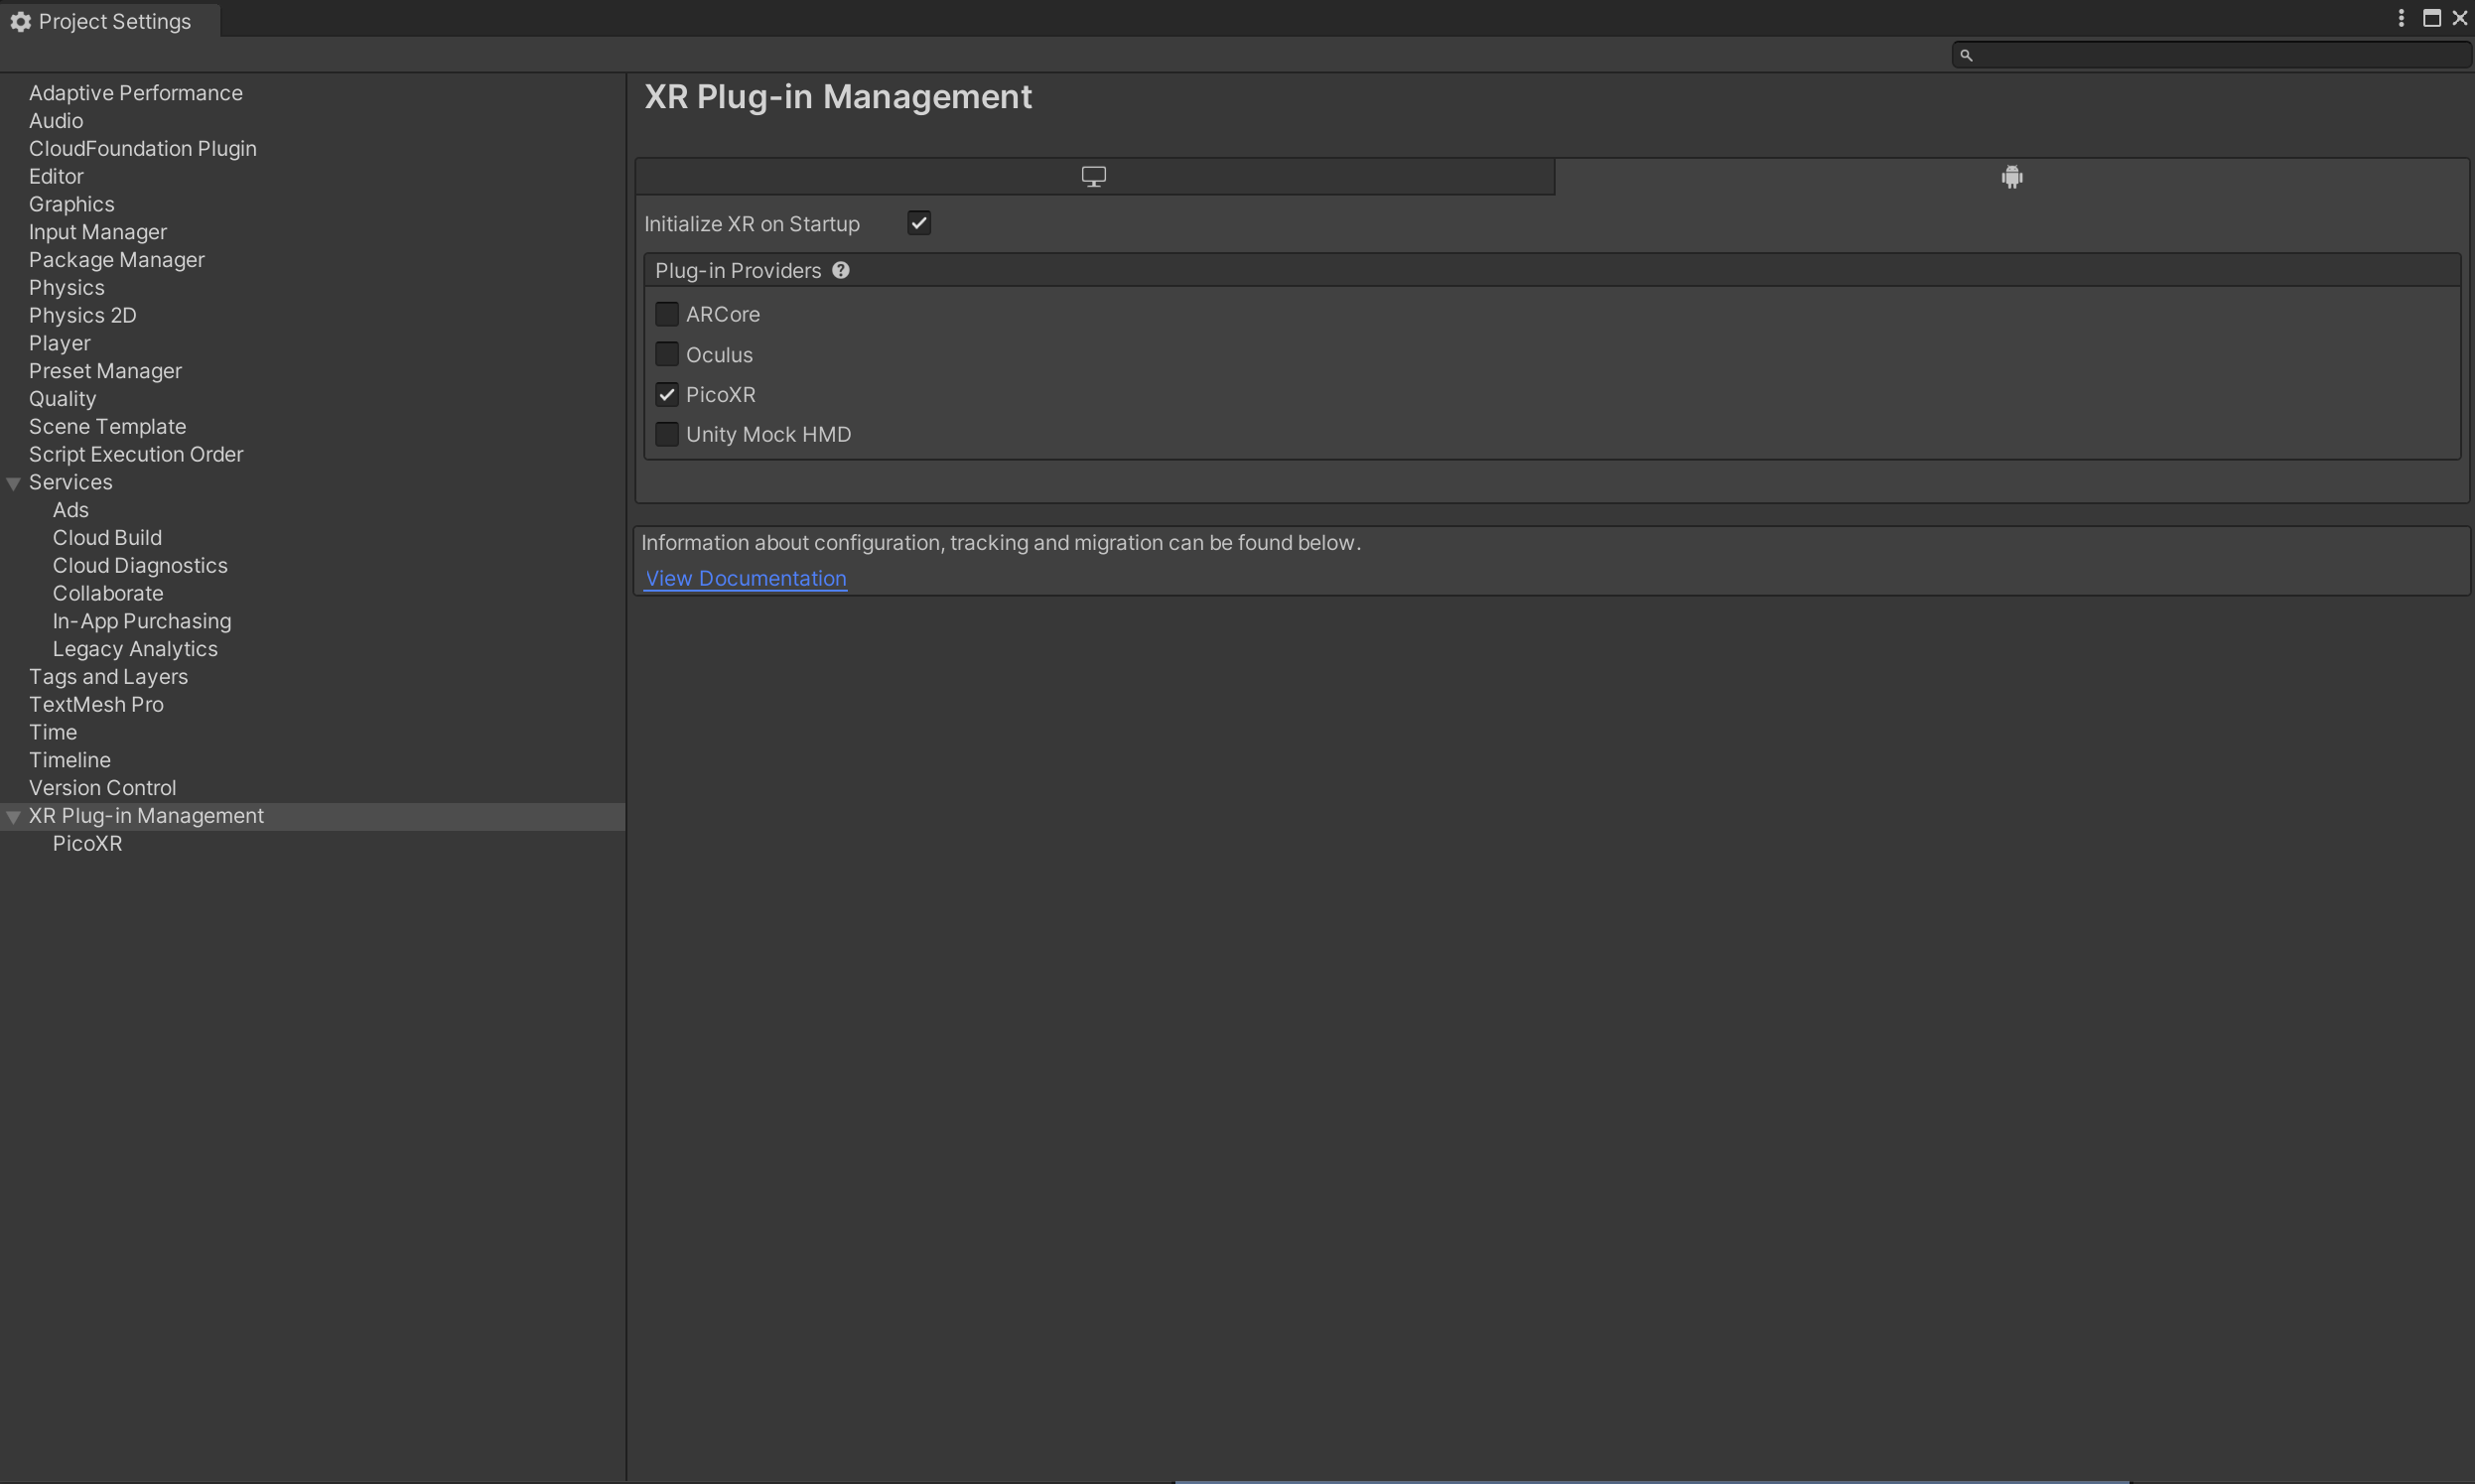
1.4点击PlayerSettings按钮,进入ProjectSetting页面,选择XR Plugin Management,给Windows平台和Android平台都勾选上Pico XR
1.5点击Player,进入Other Settings部分
把Color Space设置为Gamma

把Minimum APILevel设置为Android 8.0 'Oreo'(API Level26)

把Active Input Handling设置为Input System Package(new),这一步设置完会重启Unity Editor

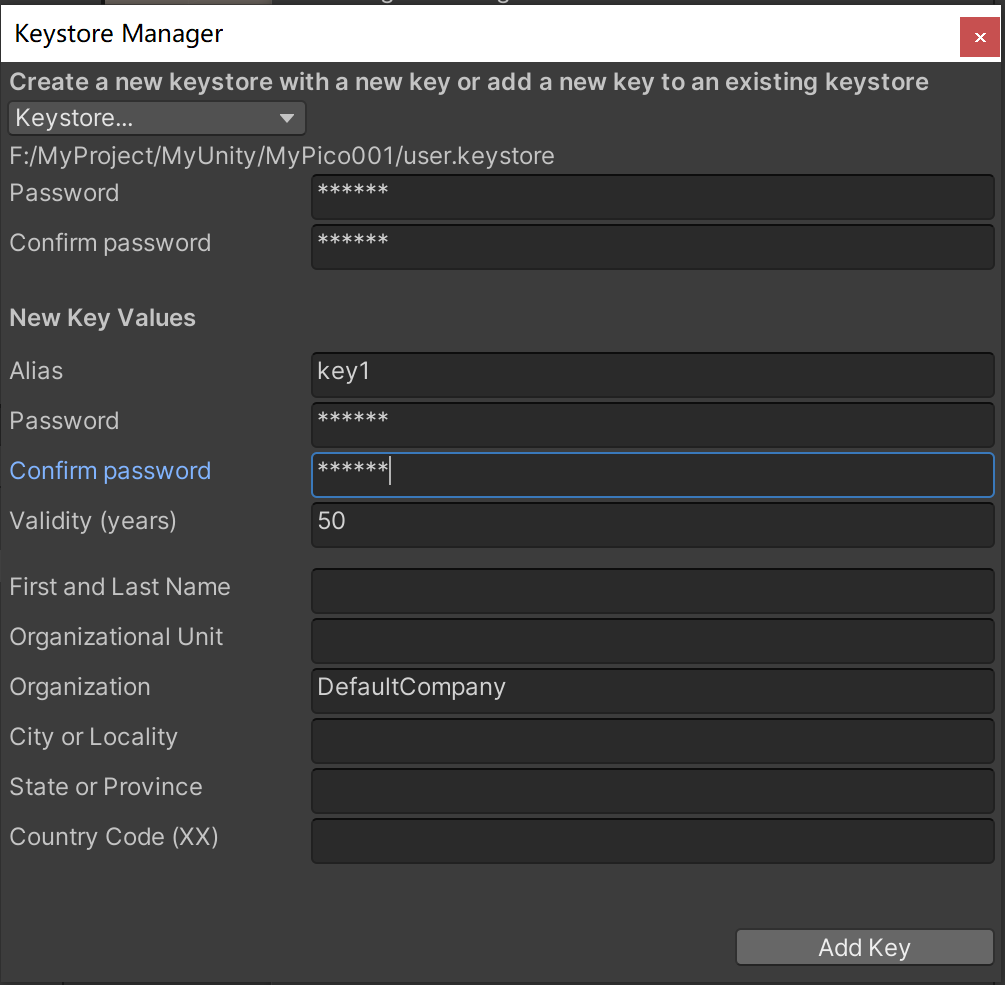
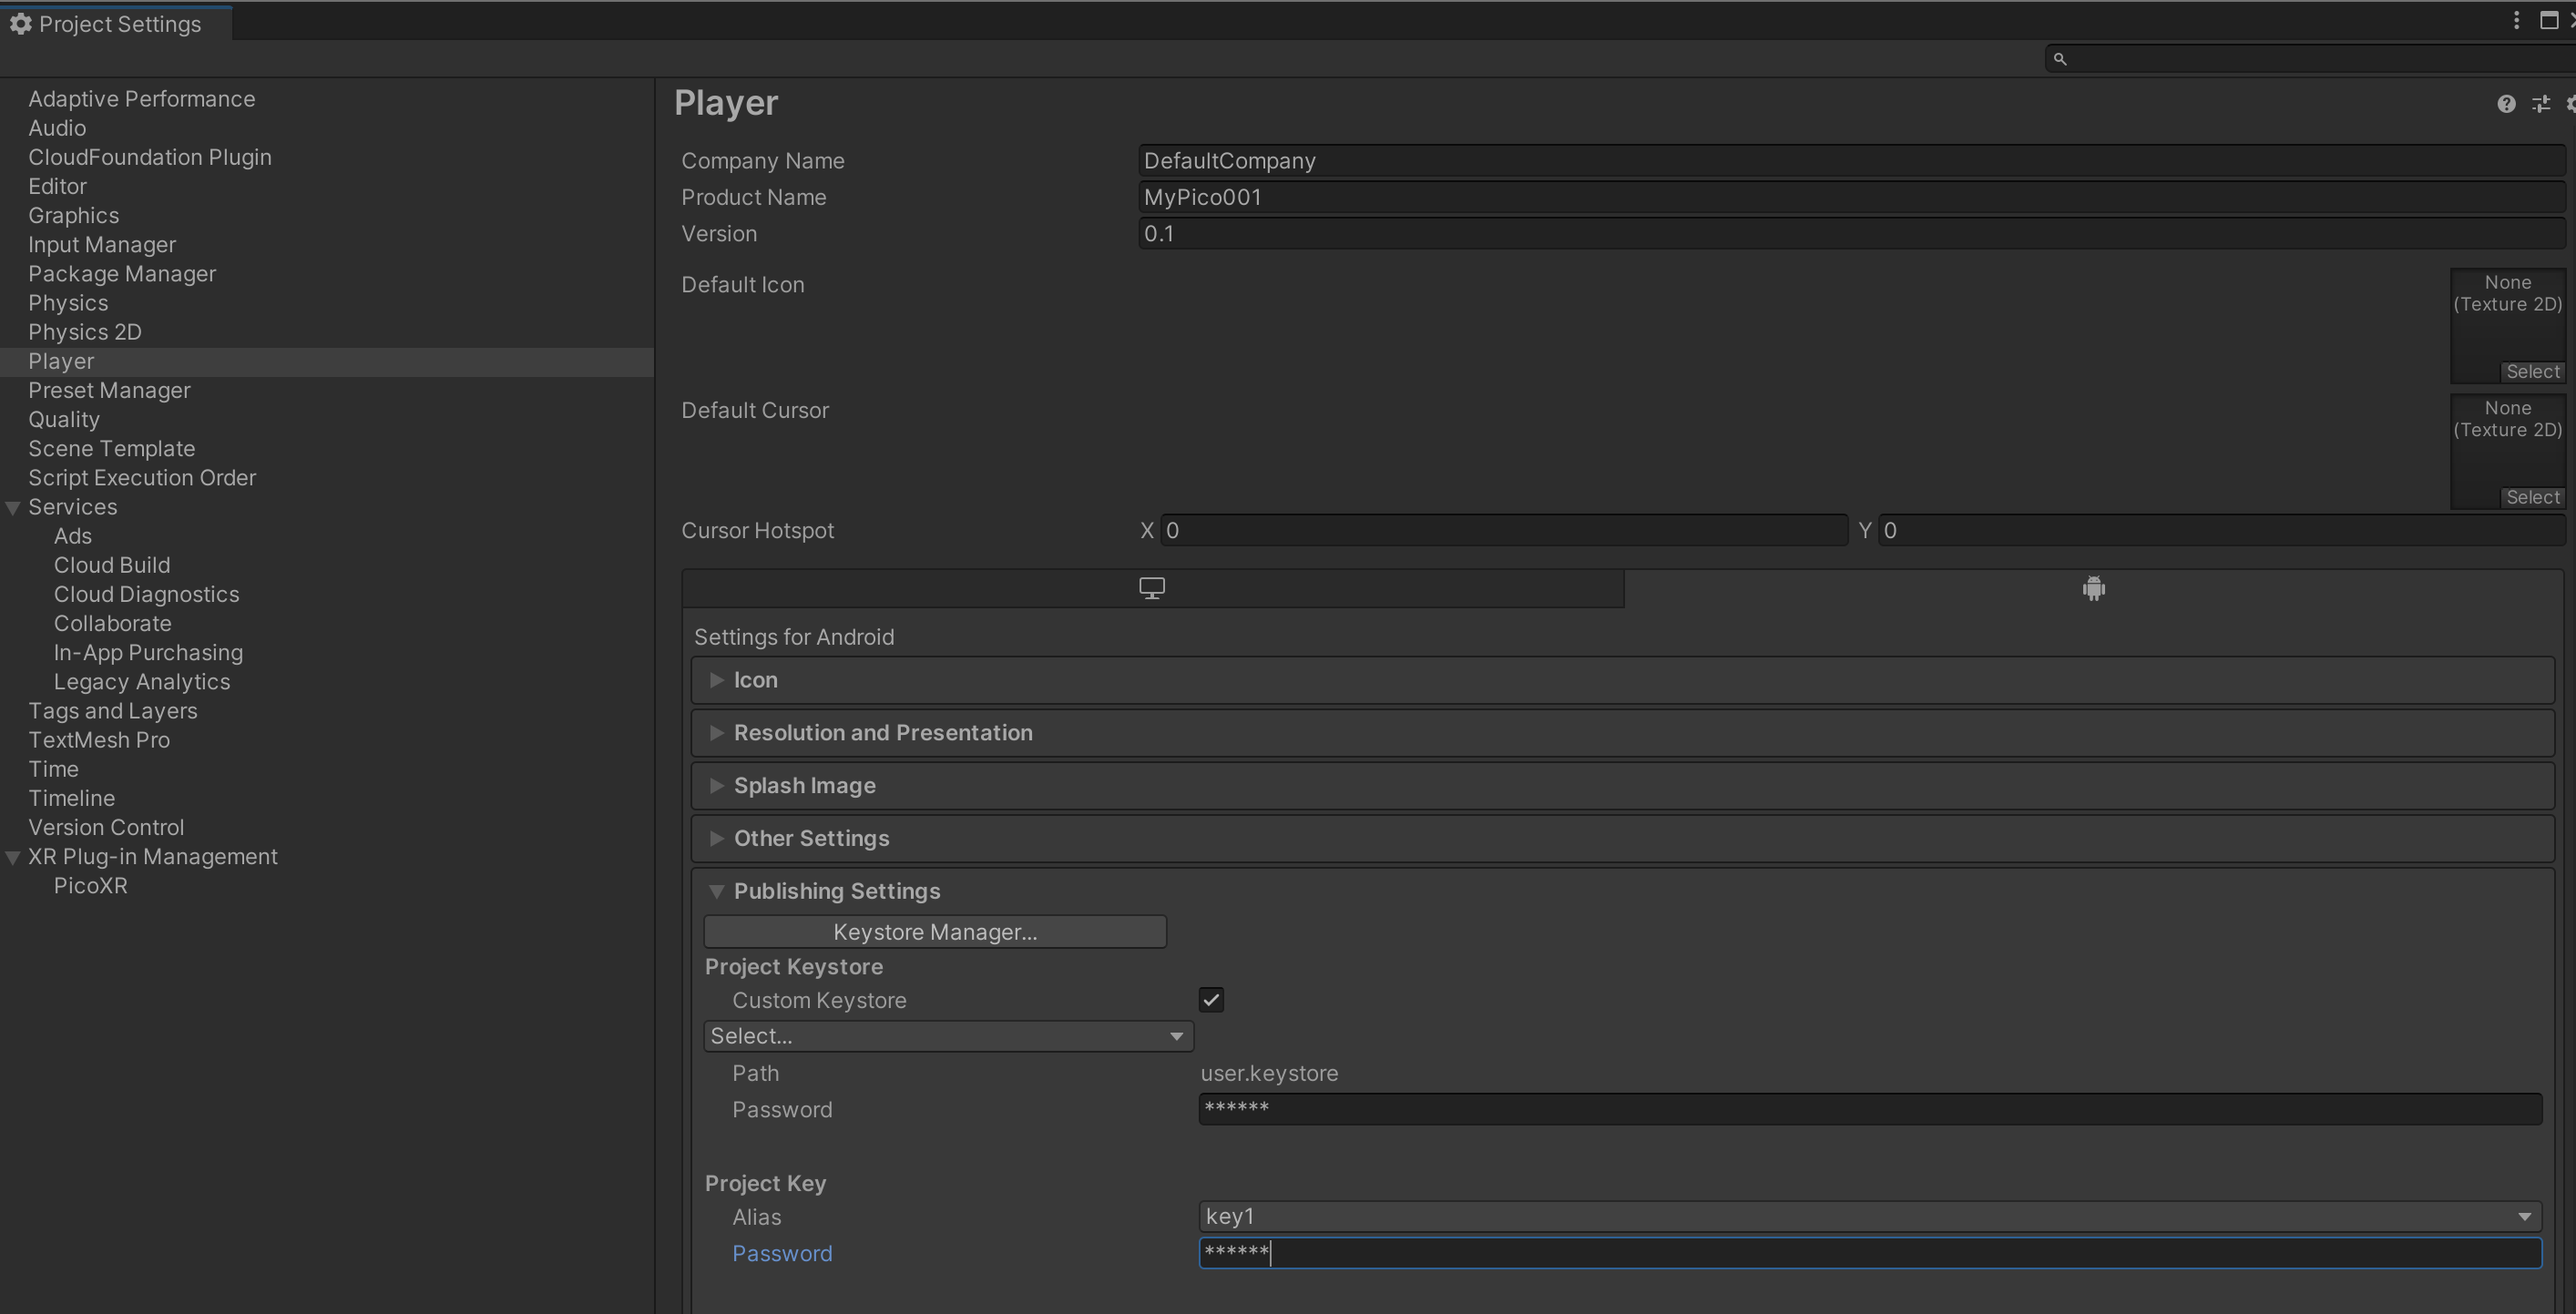
1.6设置项目key,进入Player选项的Publishing Settings部分
勾选Custom Keystore,然后点击Keystore Manager按钮,在弹出窗口中点击Keystore按钮,选择Create New→Anywhere,然后随便找个位置并取个文件名,存放Keystore文件

设置Keystore密码、确认密码;设置Alias为任意名称,并设置其密码和确认密码,点击Apply Key按钮;在弹出窗口中点击yes按钮,完成Keystore设置和Project Key应用
1.7关闭Project Settings窗口、Build Settings窗口即可完成开发环境设置
2.开发切割方块VR游戏
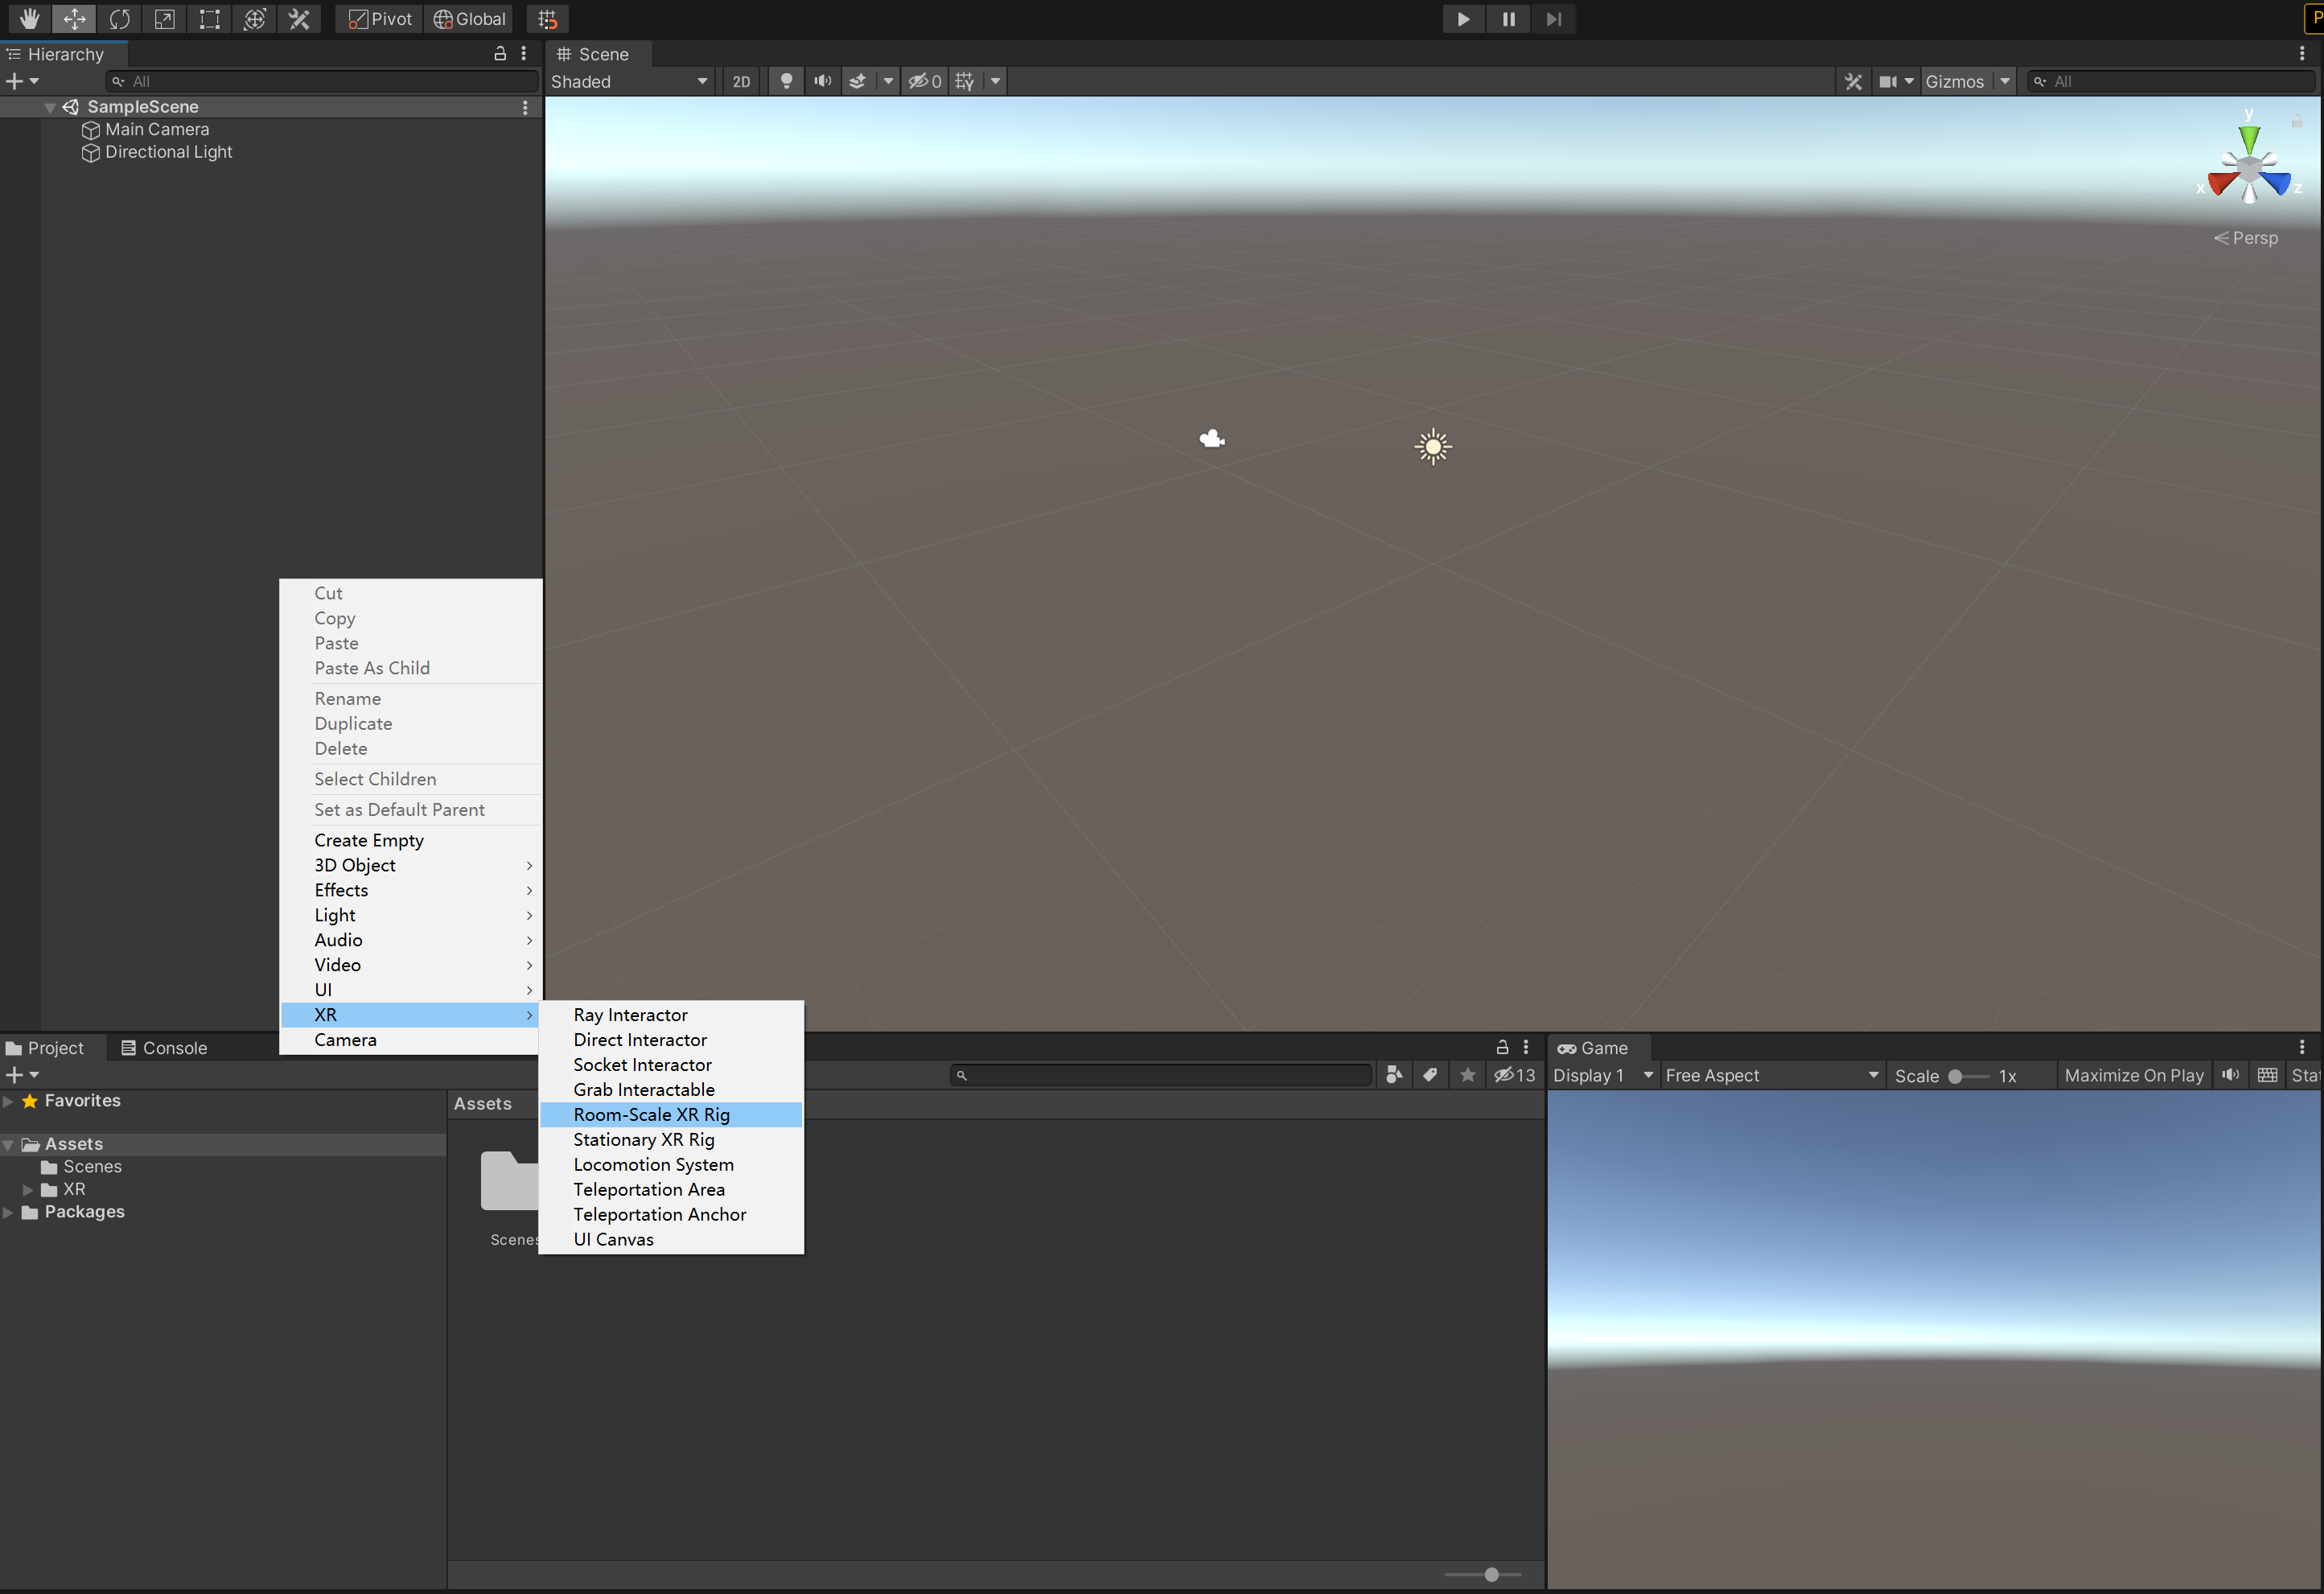
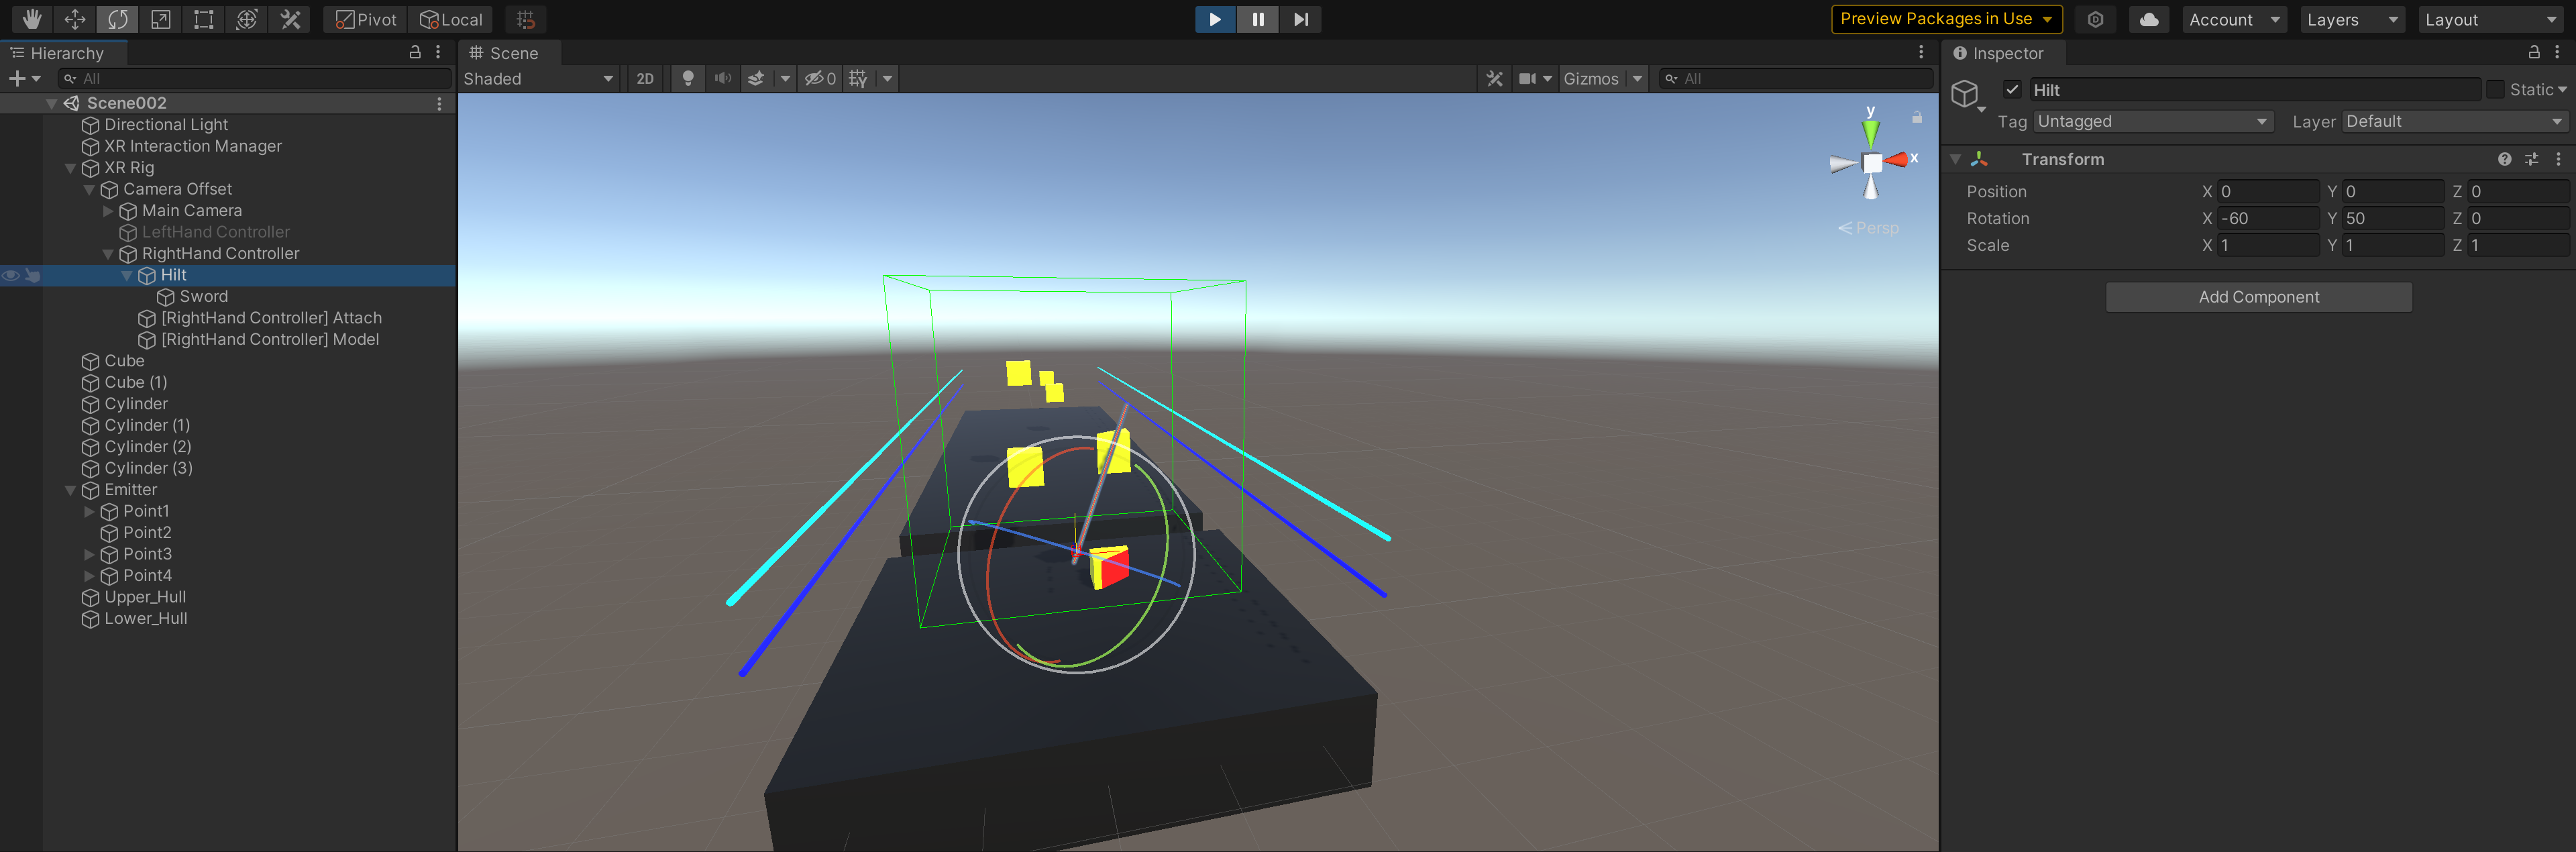
2.1在Hierarchy面板中右键,在菜单XR中选择Room-Scale XR Rig,在场景中添加一个XR玩家物体,把它的Position参数设置为(0,1.2,0)
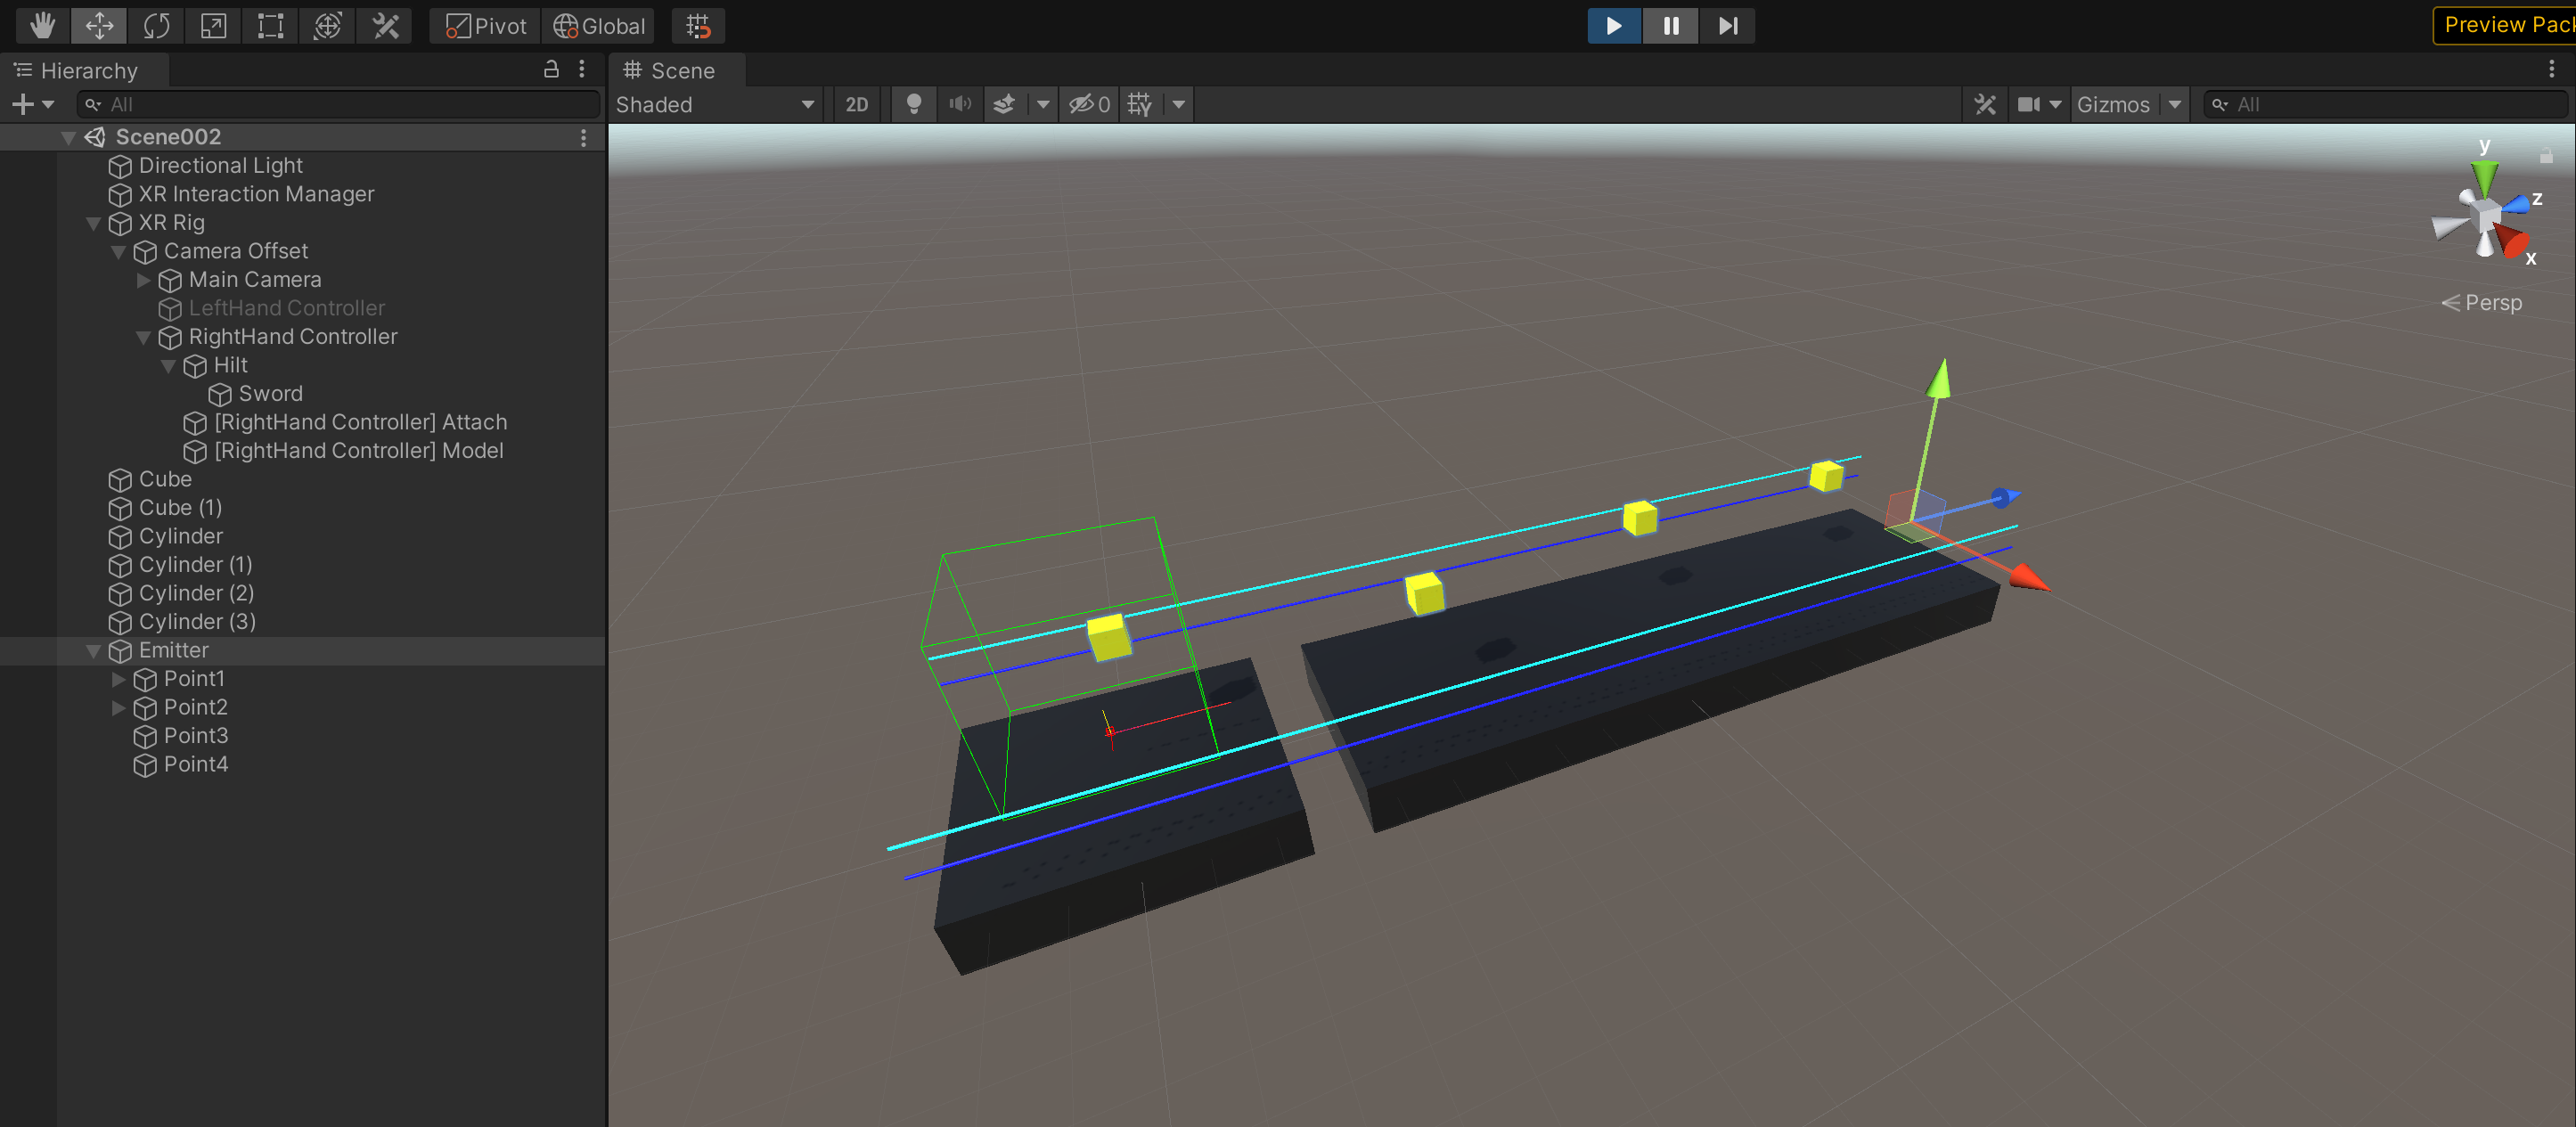
2.2构建场景:在场景中添加两个Cube,一个作为舞台在XR Rig下方,Position参数为(0,0,0),Scale为(5,1,5);一个作为方块出现和运动的场地在XR Rig前方,高度和舞台平齐,Position参数为(0,0,11),Scale为(5,1,15)。

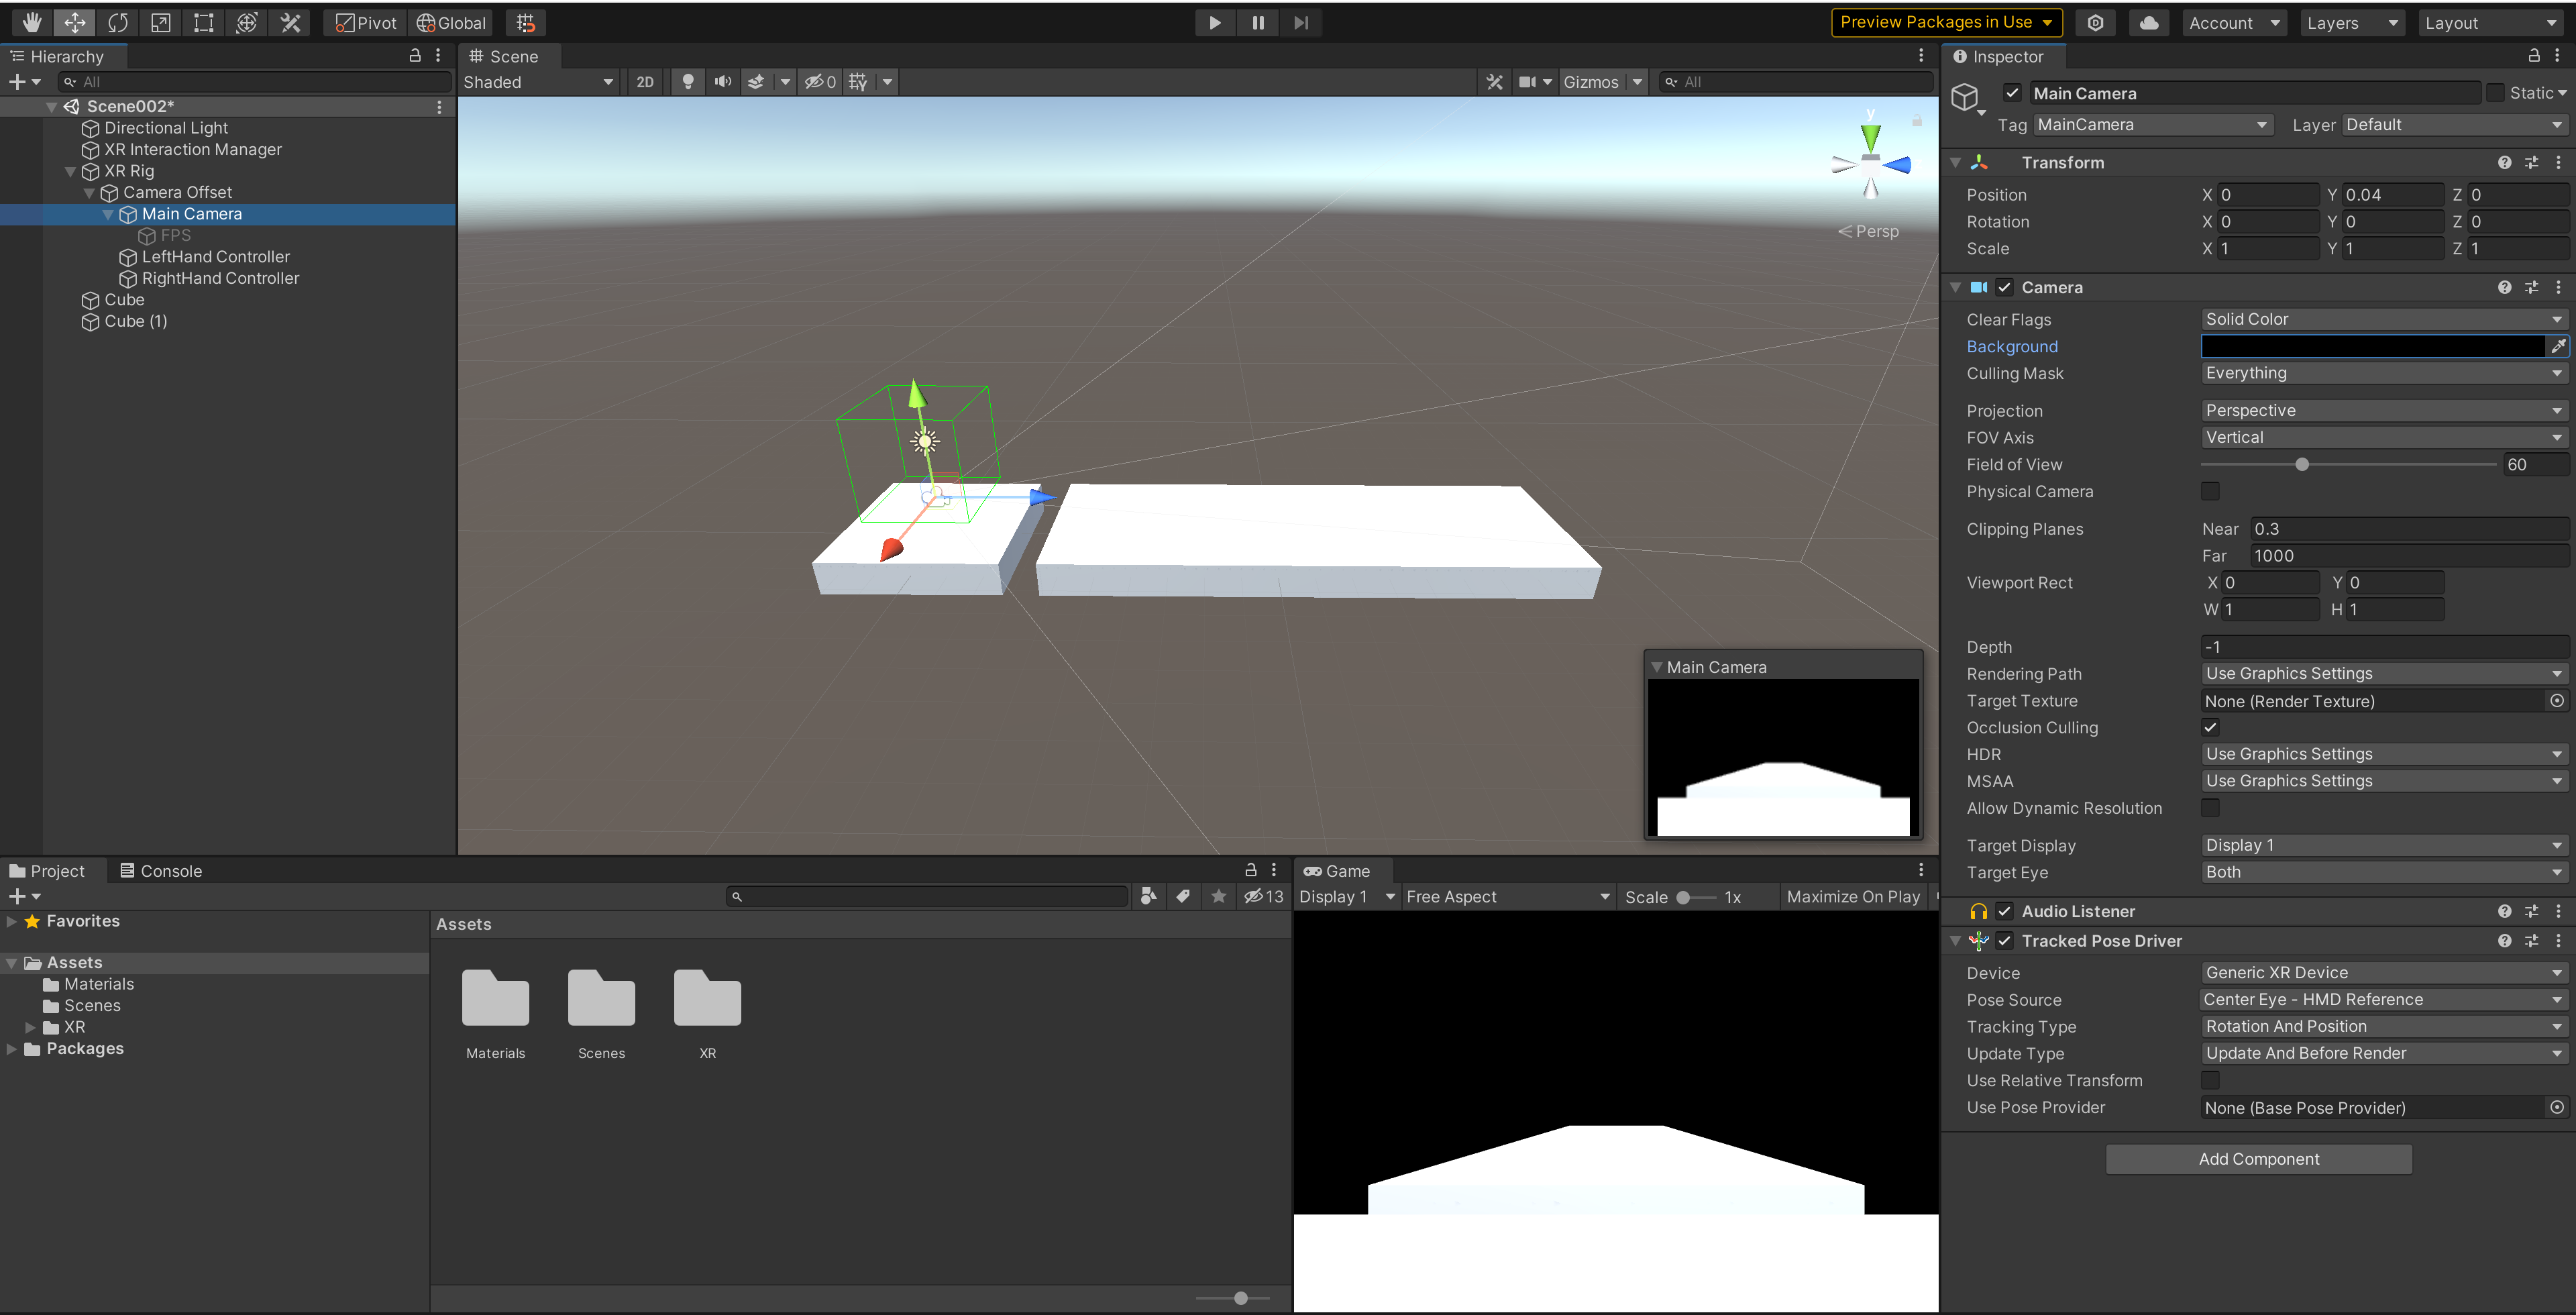
2.3关闭环境光源:关闭或删除场景中的Directional Light,然后选中XR Rig物体的子物体MainCamera,把Clear Flags设置为Solid Color,把Background设置为黑色
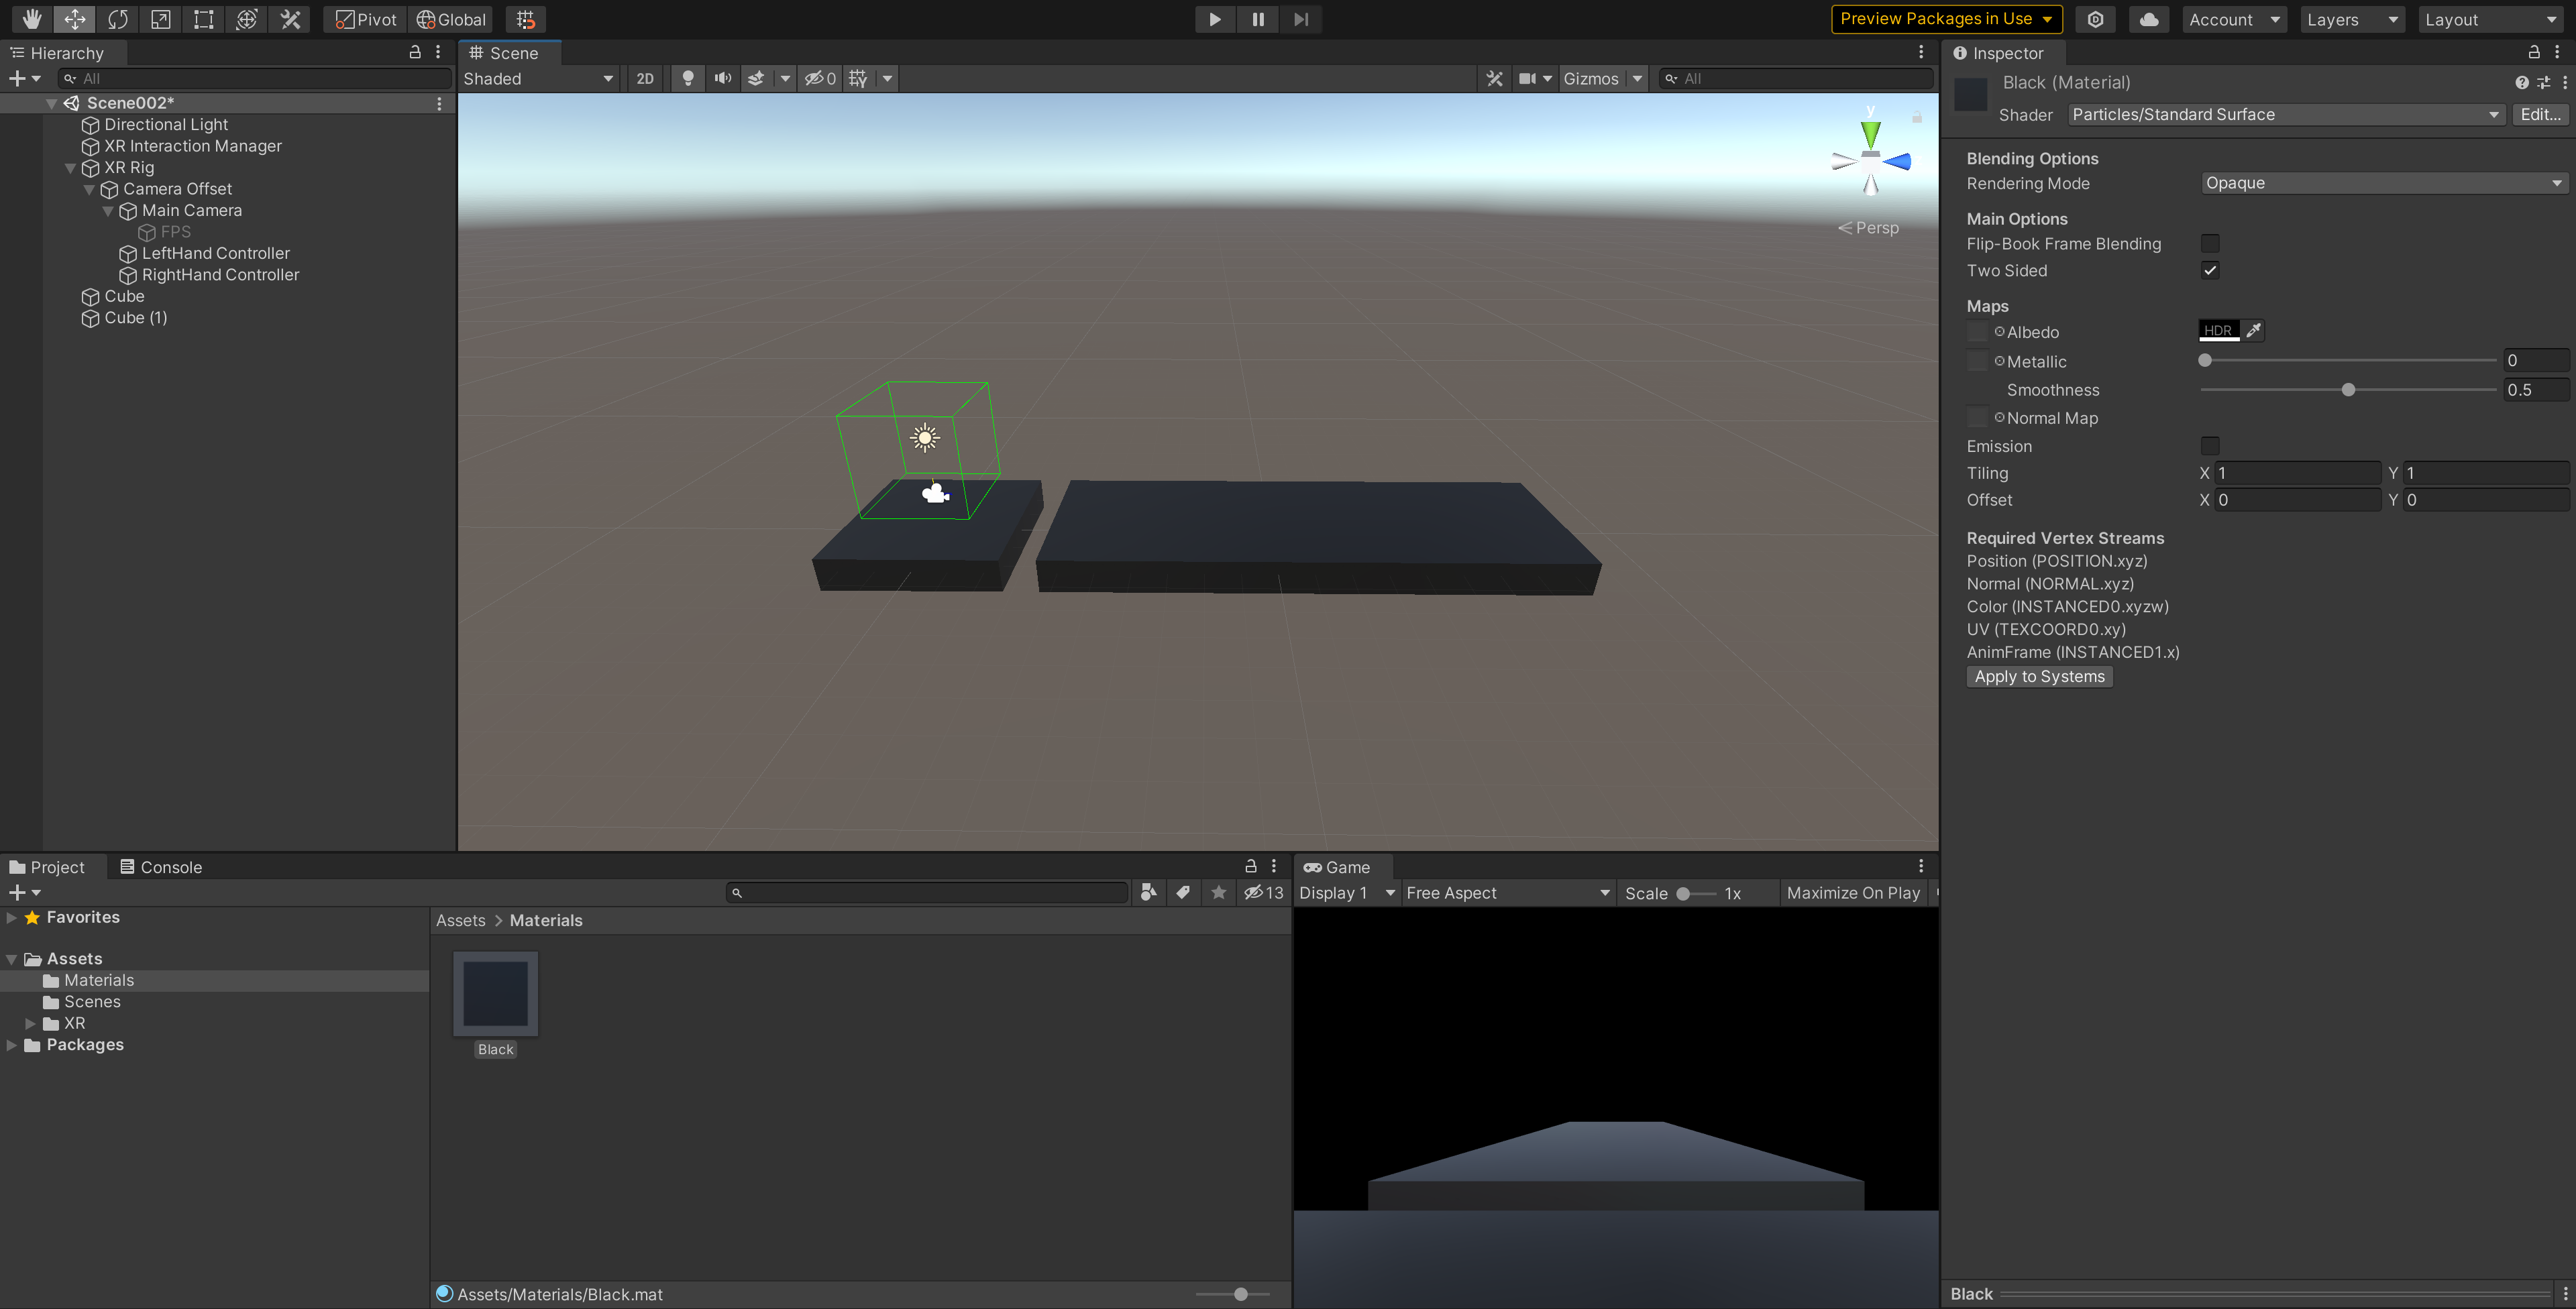
2.3设置环境光和材质:给两个Cube设置为黑色可发光材质,新建一个材质球,命名为Black_E,然后把它的Shader设置为Particles→Standard Surface,并勾选Two Sides;然后把Albedo设置为黑色;最后把这个材质赋予给两个Cube
2.4布置舞台灯光:在场景中添加一个圆柱体,Transform参数为Position(2.5,2,8),Rotation(90,0,0),Scale(0.05,10.5,0.05),从而使其位于舞台一侧;然后新建一个材质球,命名为Cyan_E,按照上面设置Black_E材质球的方法设置Shader,Albedo设置为青色,RGBA参数为(0,255,255,0),勾选Emission,把Color也设置为青色,并把这个材质球赋予刚才的圆柱体;最后按照这个方法设置4个圆柱体,使其分别位于舞台两侧(材质颜色可以选自己喜欢的)

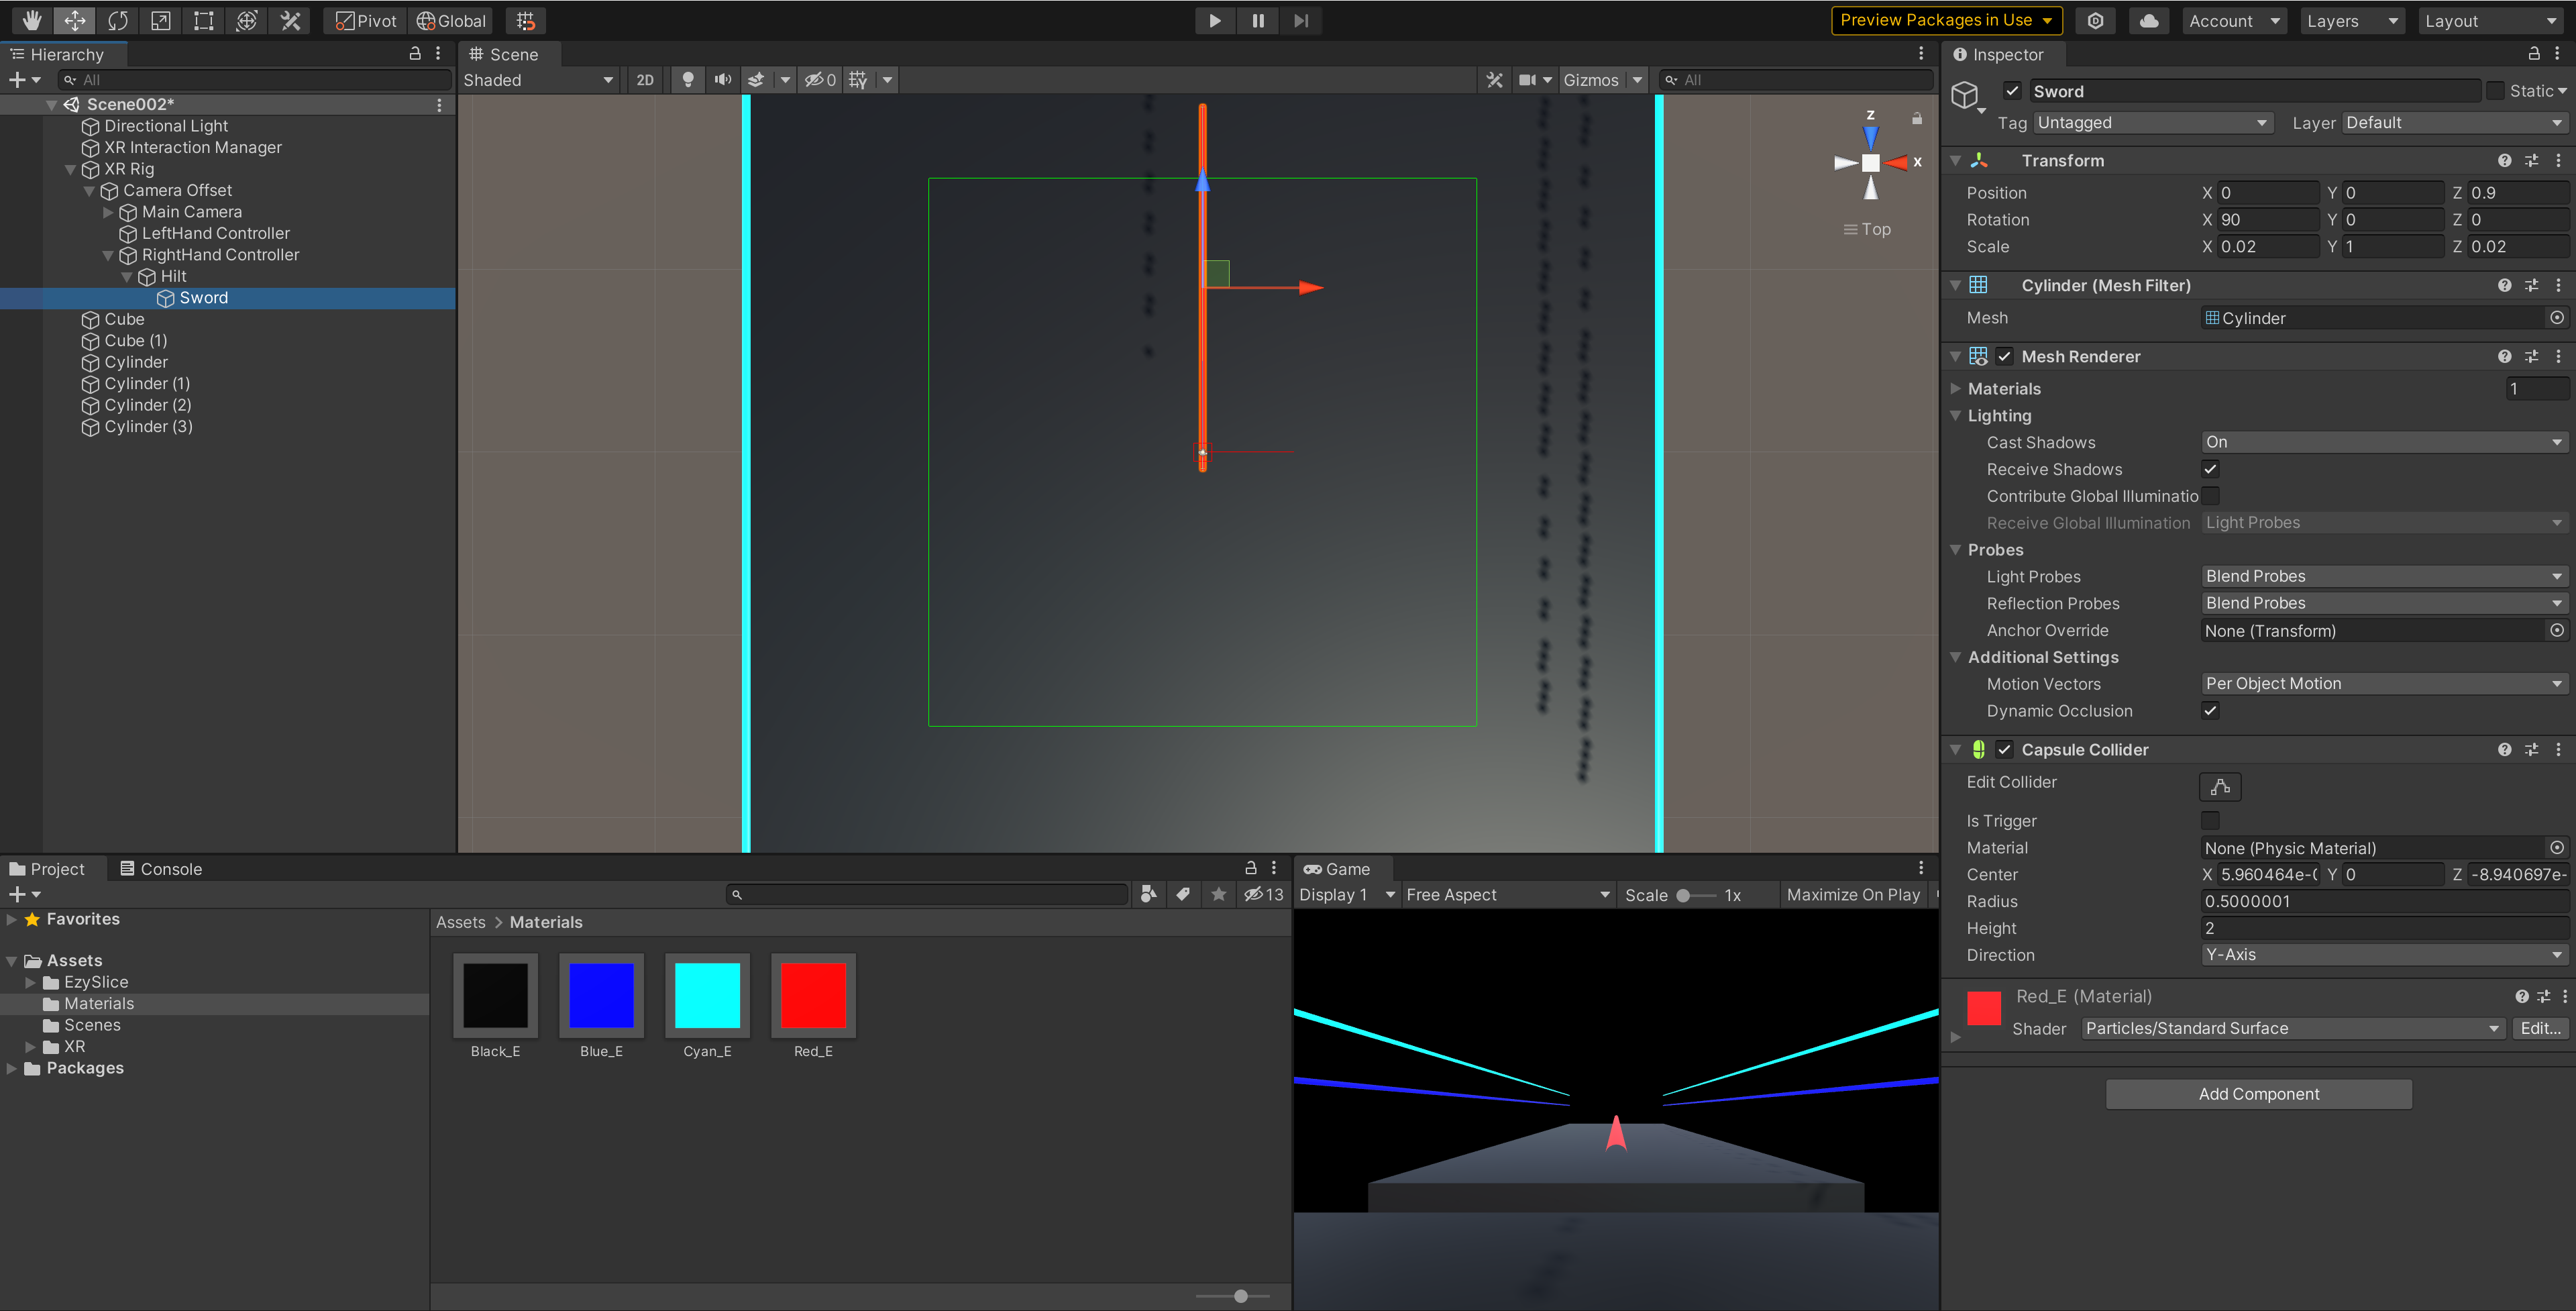
2.5制作光剑:在XR Rig的子物体RightHand Controller下面添加一个空的子物体,命名为Hilt,作为剑柄,位置、旋转、和缩放都归零,在Hilt下面添加一个圆柱体(也可以复制一个刚才的灯光圆柱体),命名为Sword,把它的大小和位置修改为Position(0,0,0.9),Rotation(90,0,0),Scale(0.02,1,0.02),赋予它一个红色发光材质,最后给它的Capsule Collider组件勾选Is Trigger
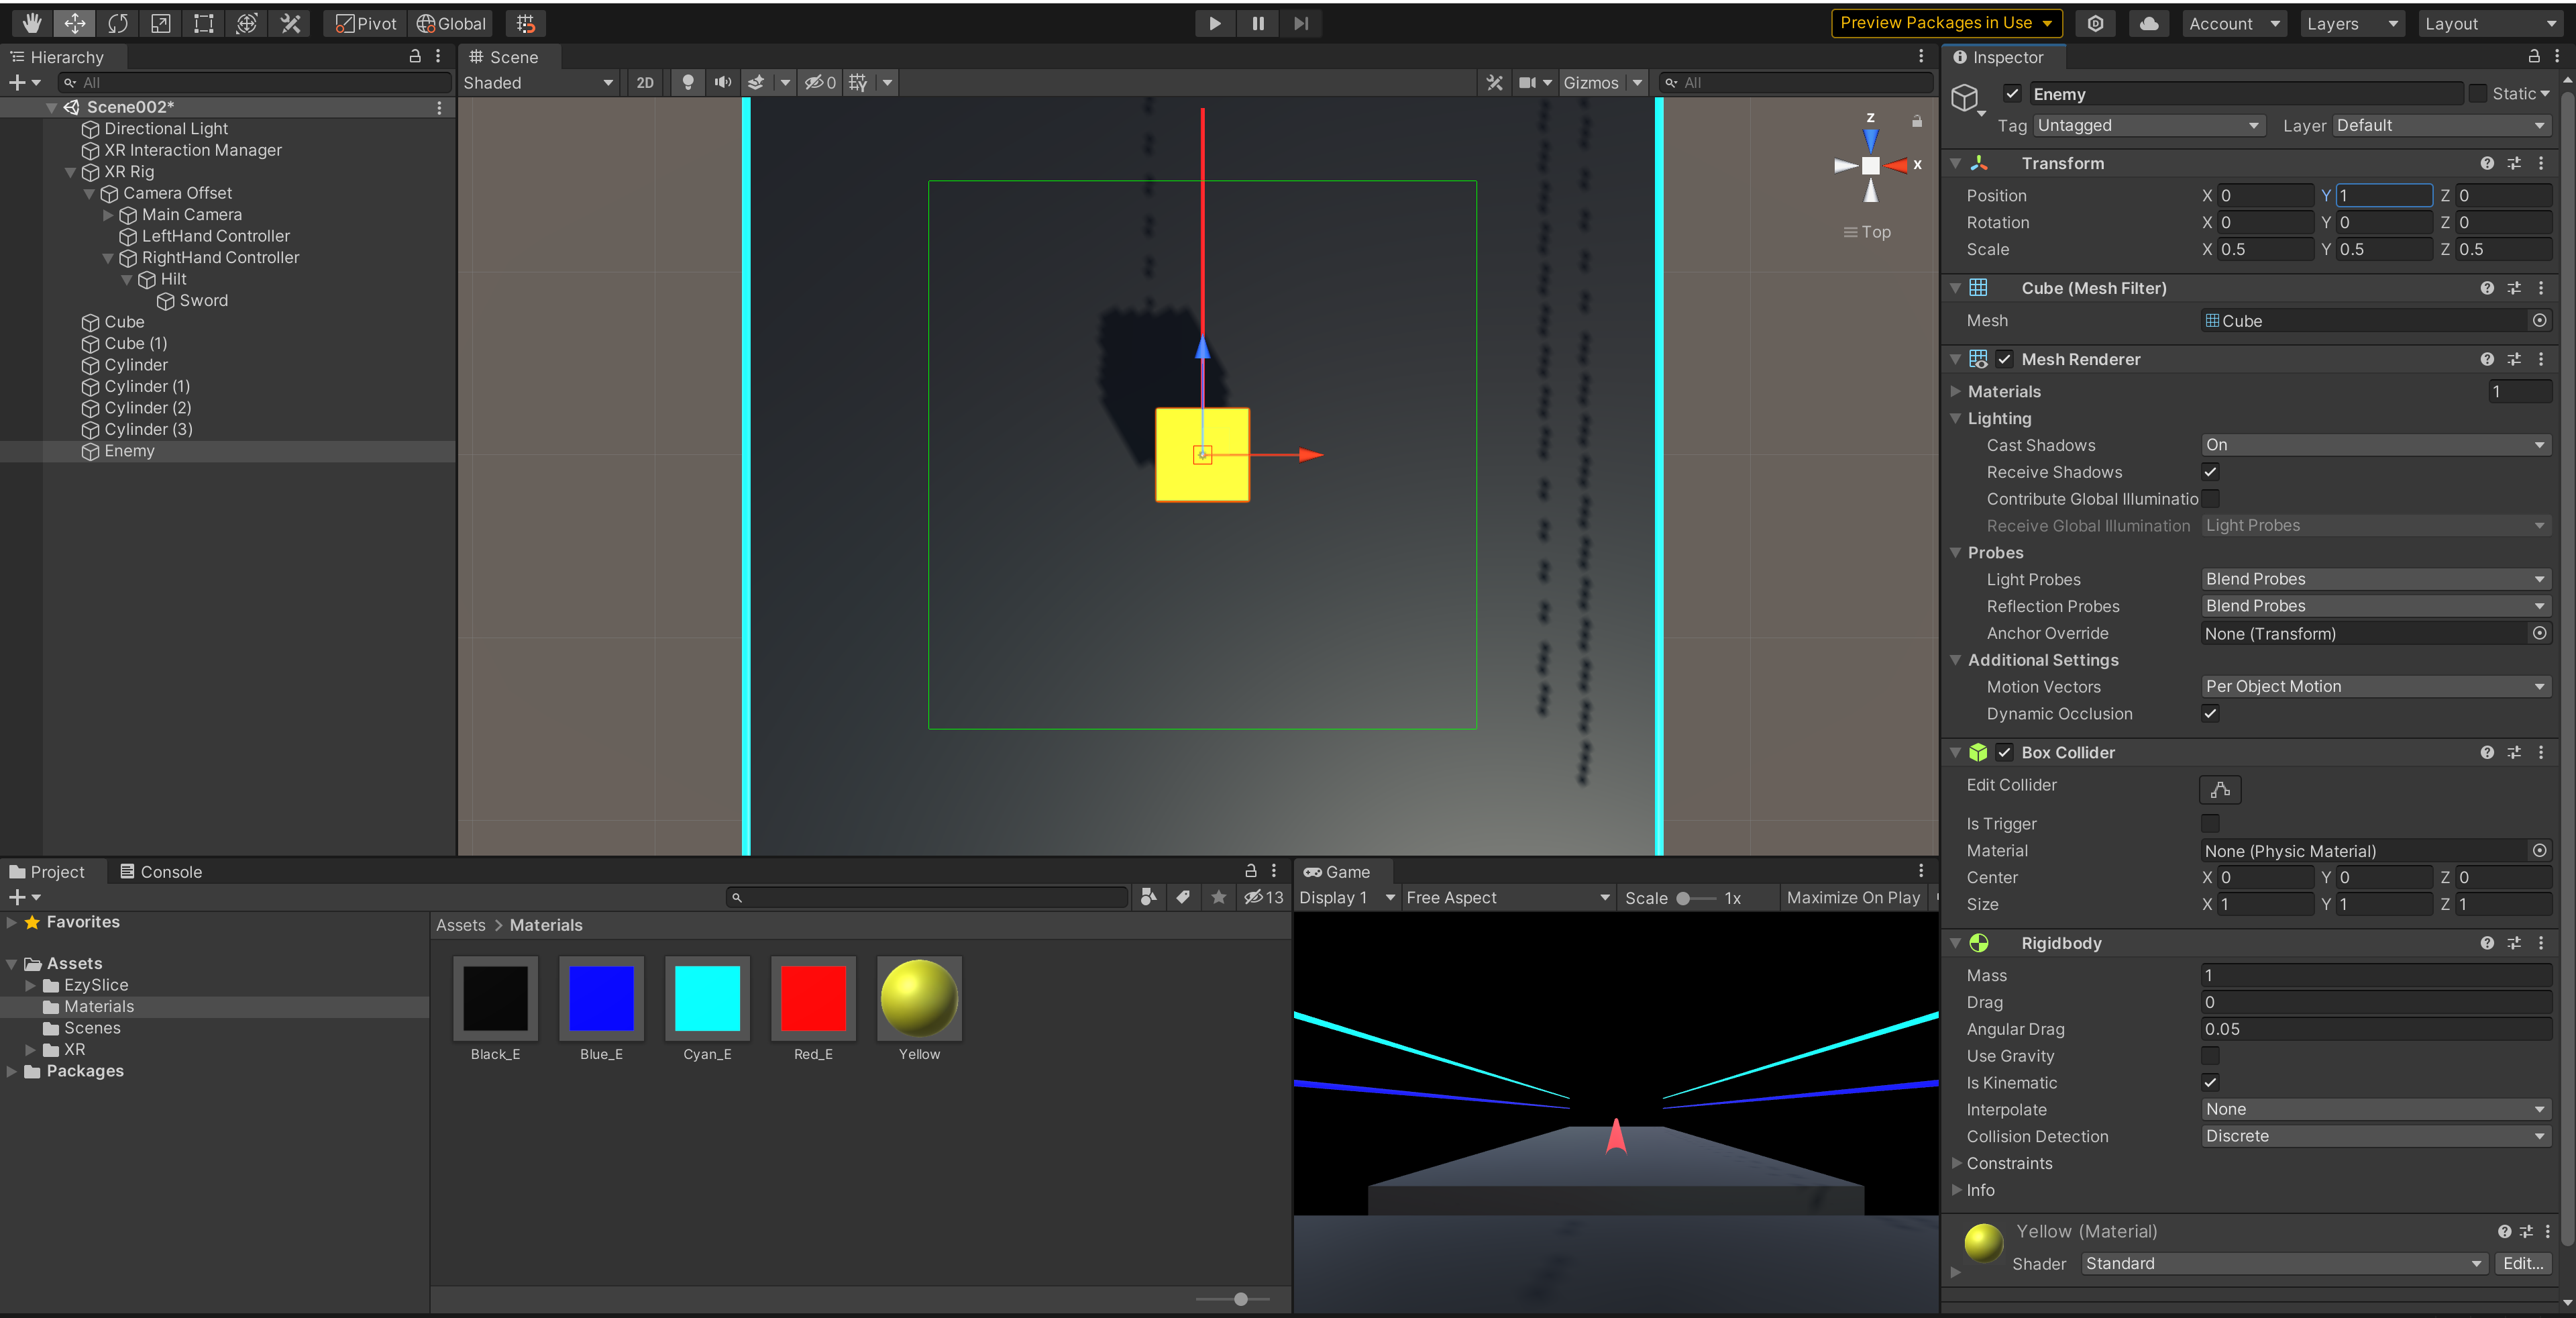
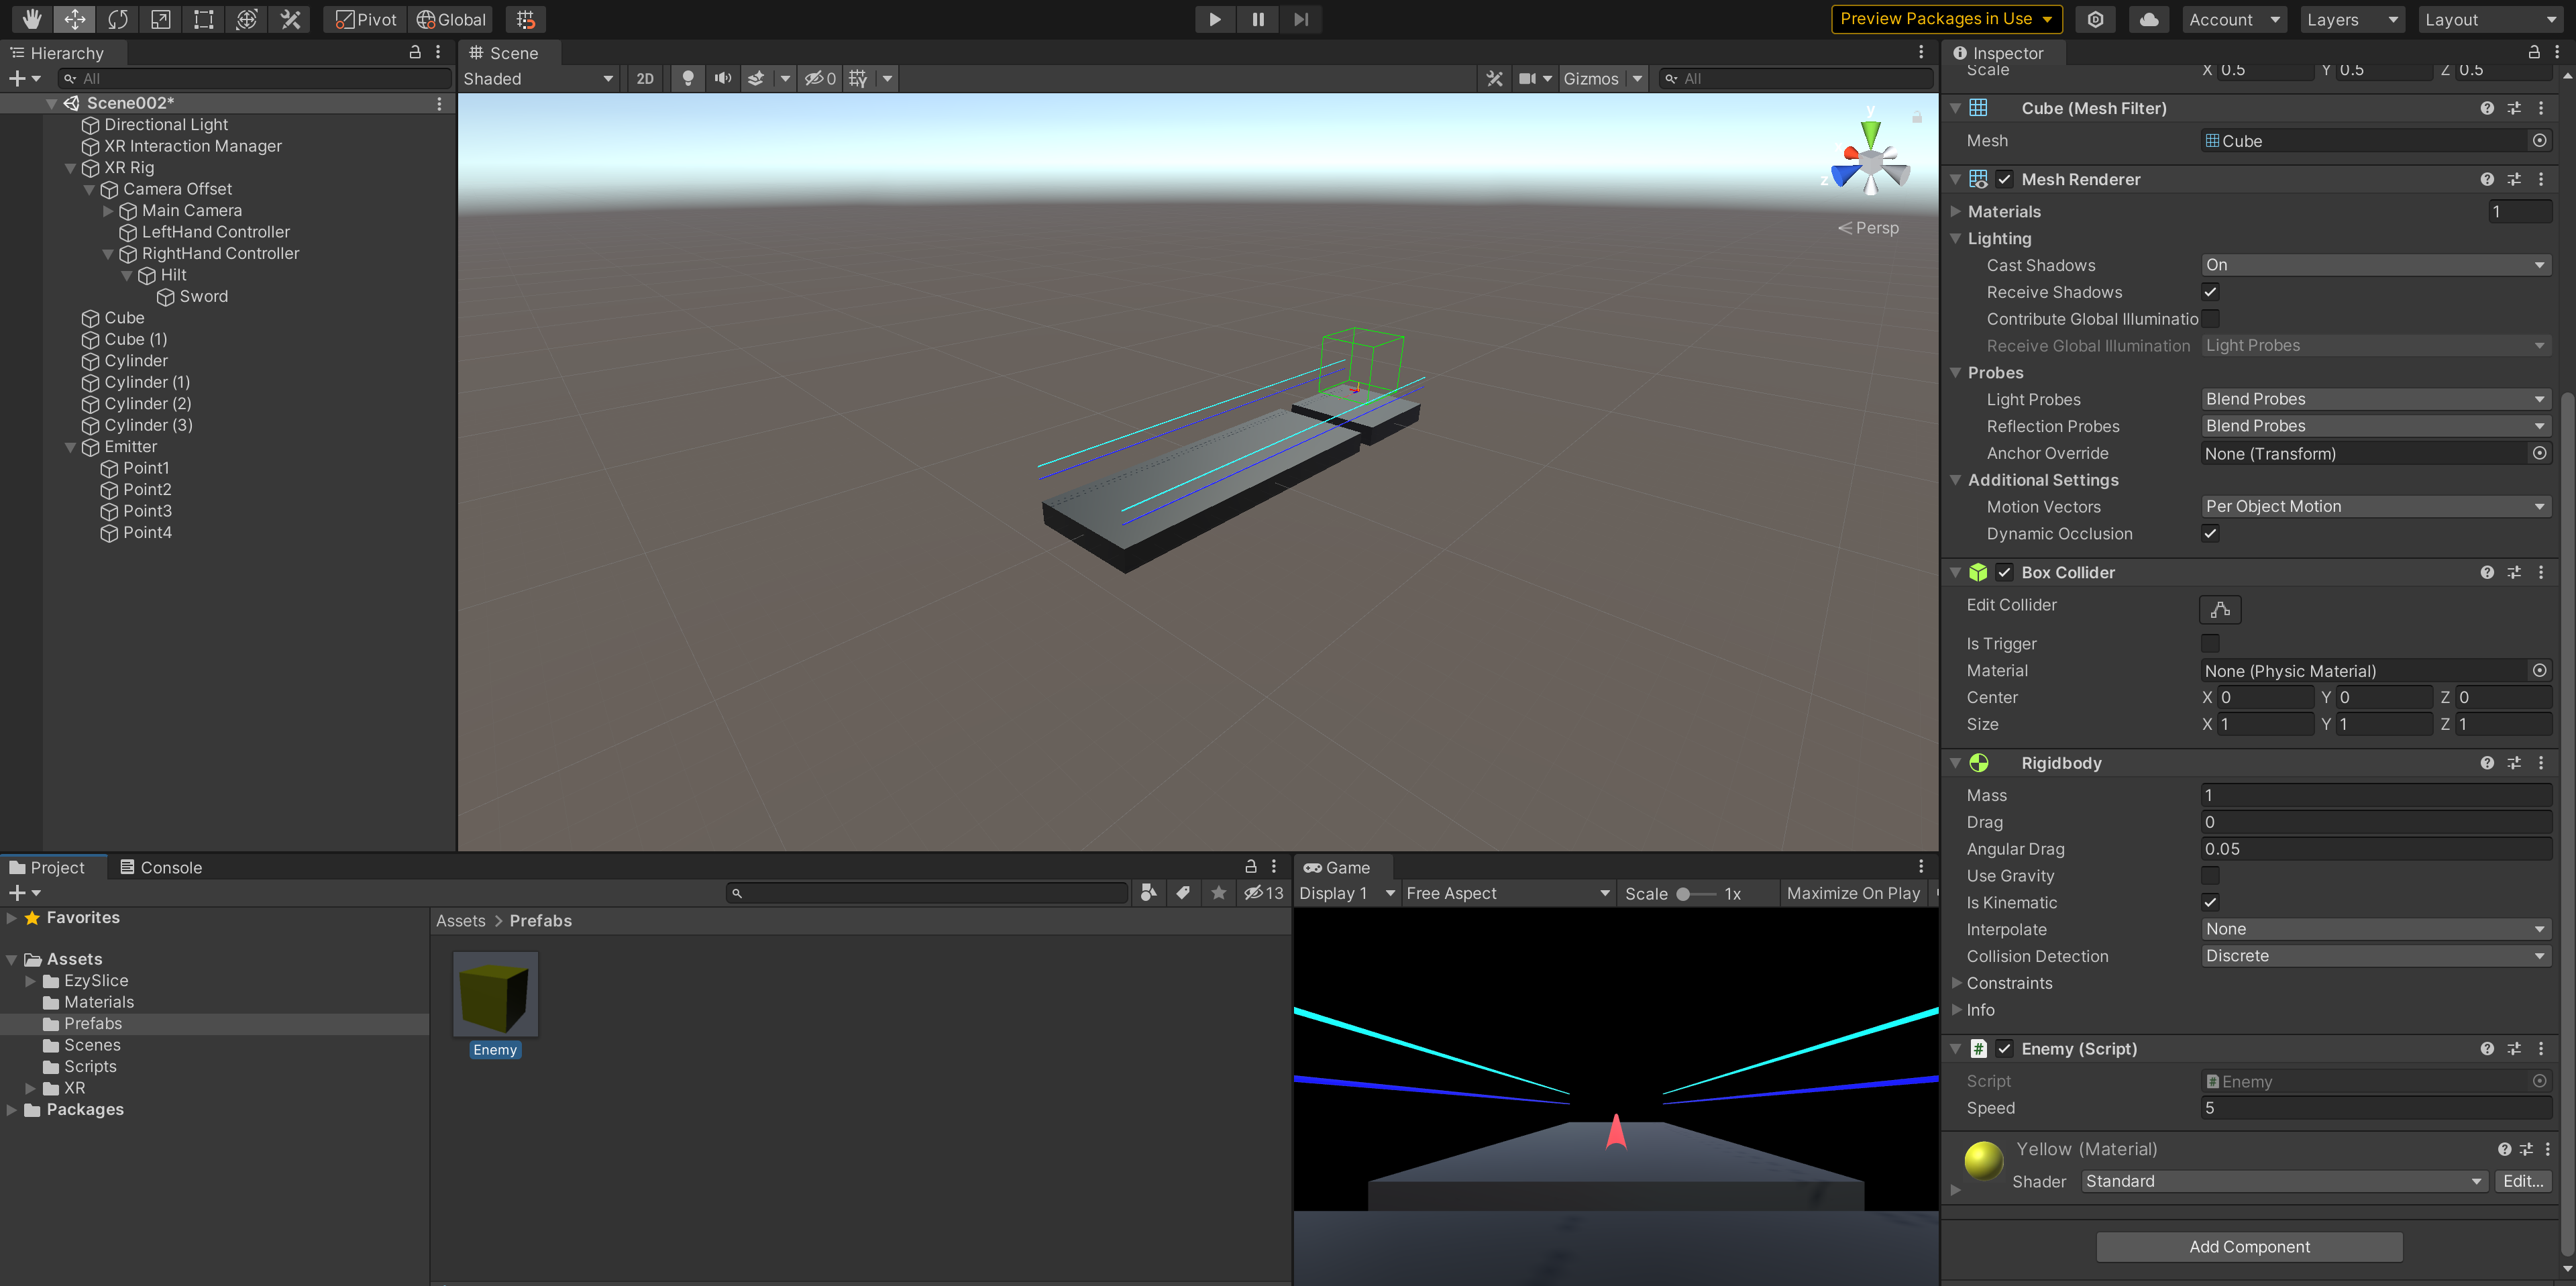
2.6制作敌人:在场景中添加一个Cube,命名为Enemy,Scale参数调整为(0.5,0.5,0.5),赋予它一个普通的黄色材质,给它添加一个Rigibody,取消Use Gravity勾选,添加Is Kinematic勾选
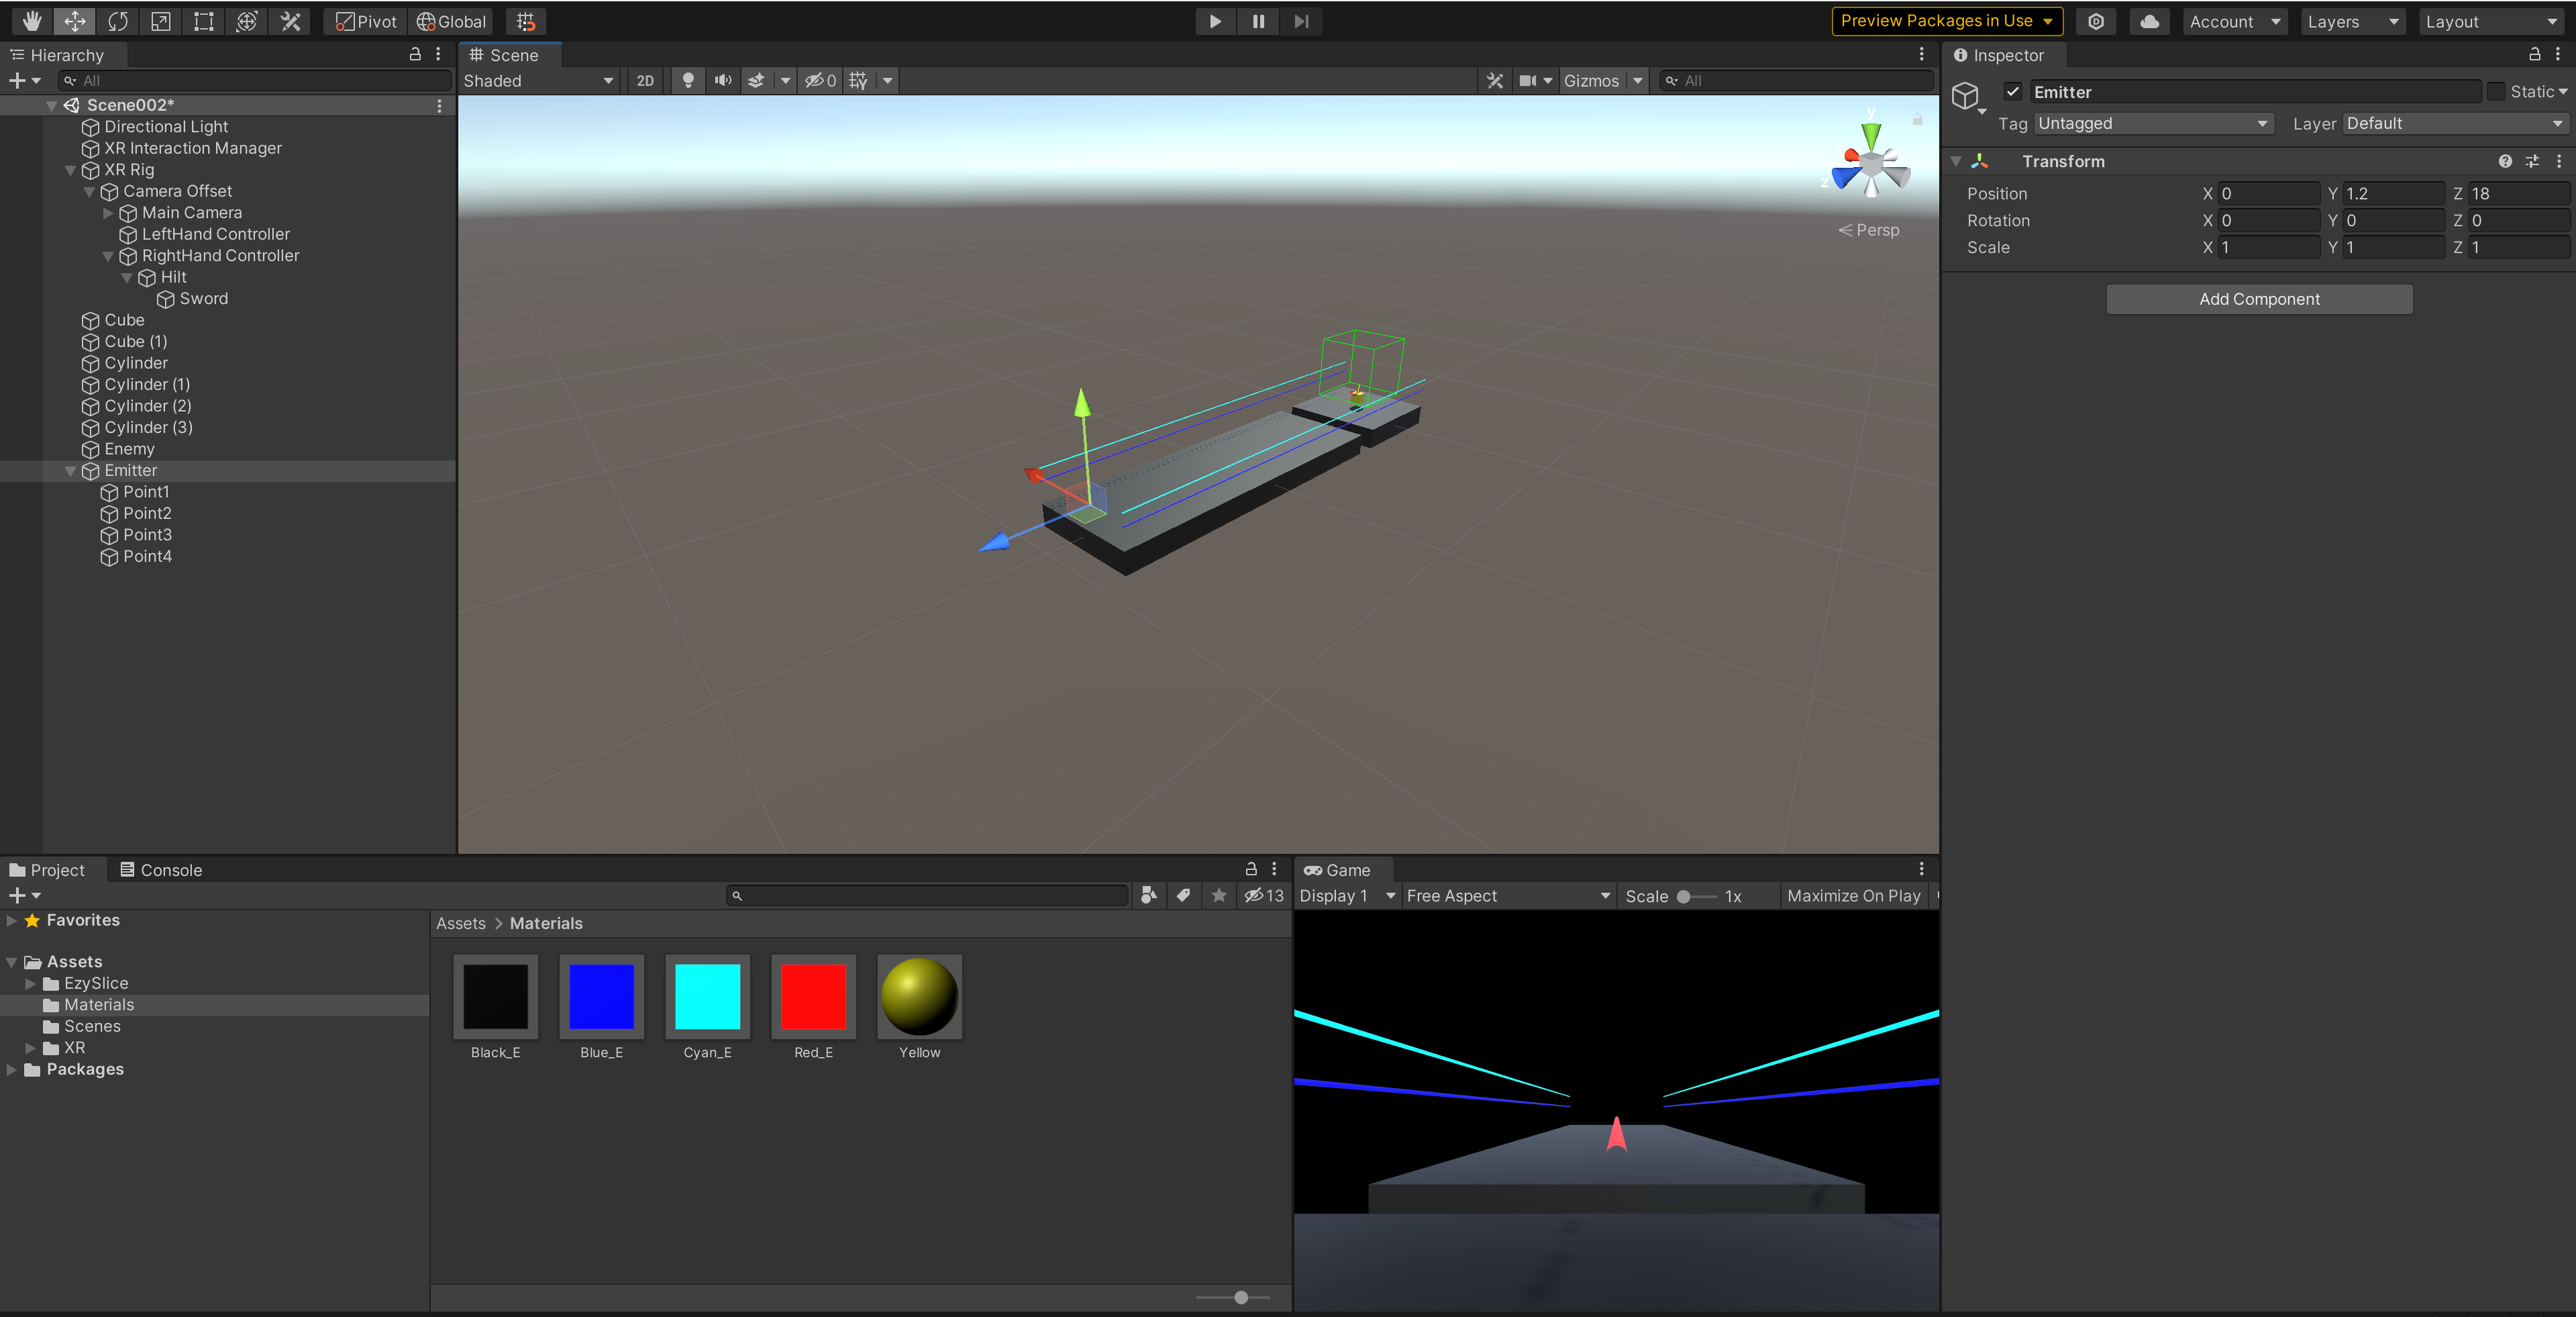
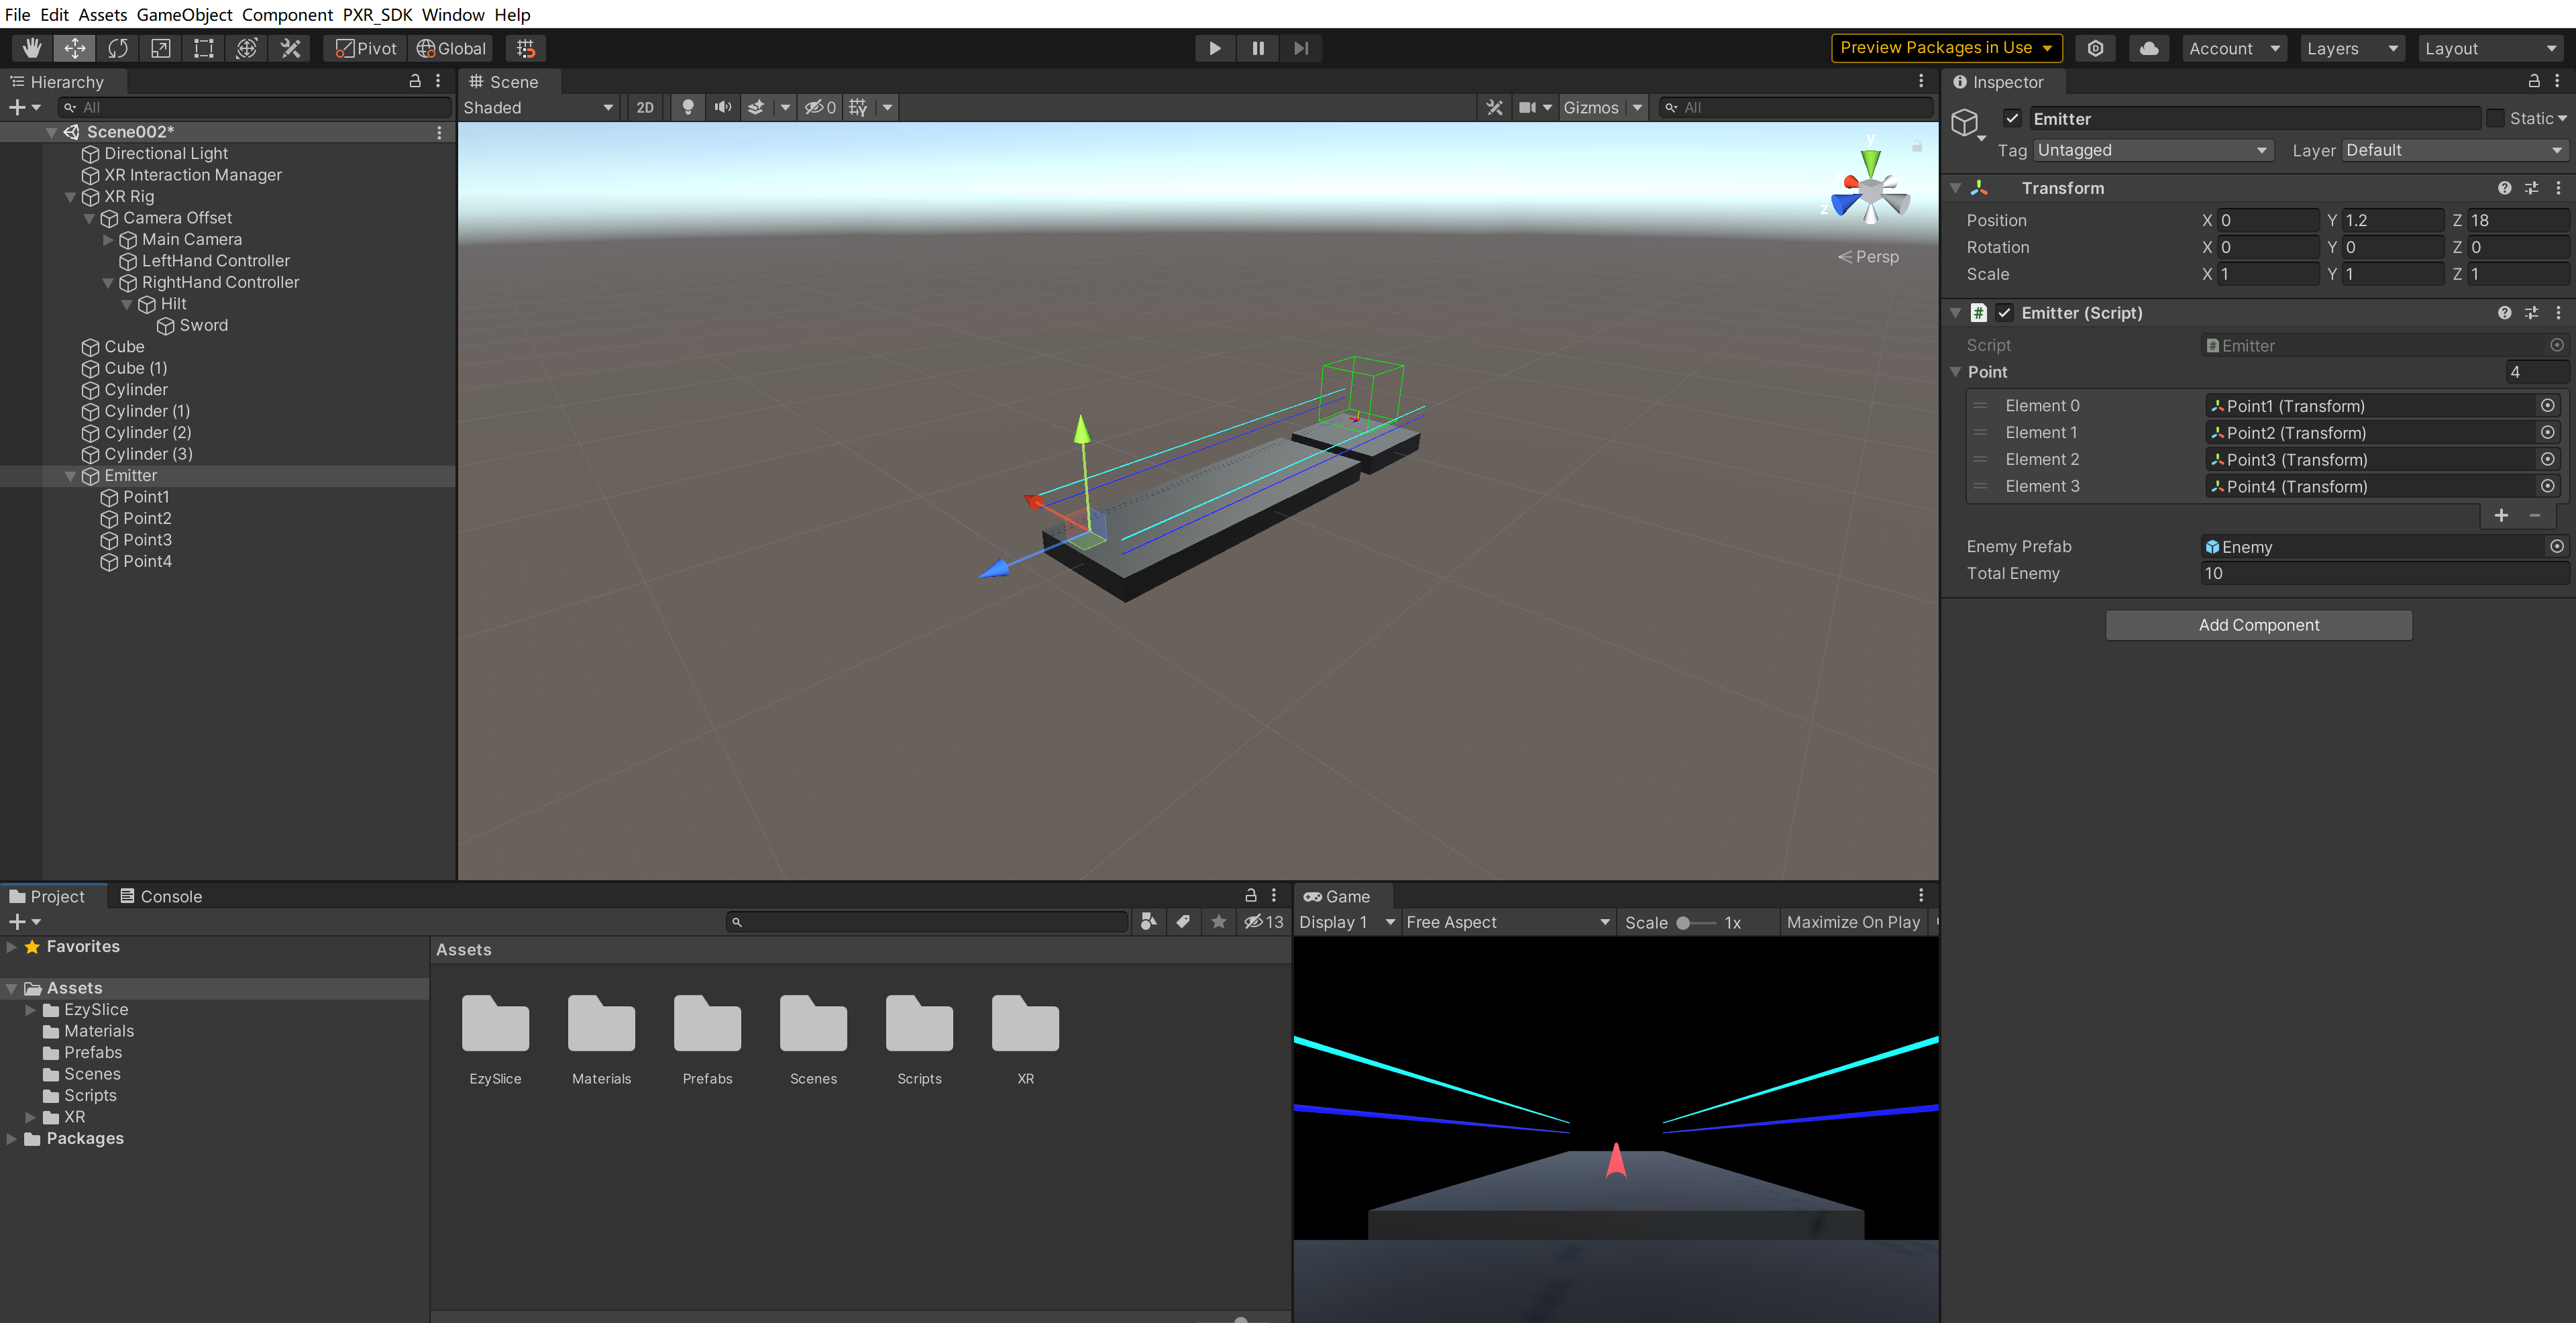
2.7制作发射器:在场景中添加一个空物体,命名为Emitter,Position参数设置为(0,1.2,18);然后给Emitter添加4个空的子物体,分别命名为Point1-4,Position参数分别为(-0.5,0.5,0)(0.5,0.5,0)(-0.5,-0.5,0)(0.5,-0.5,0)
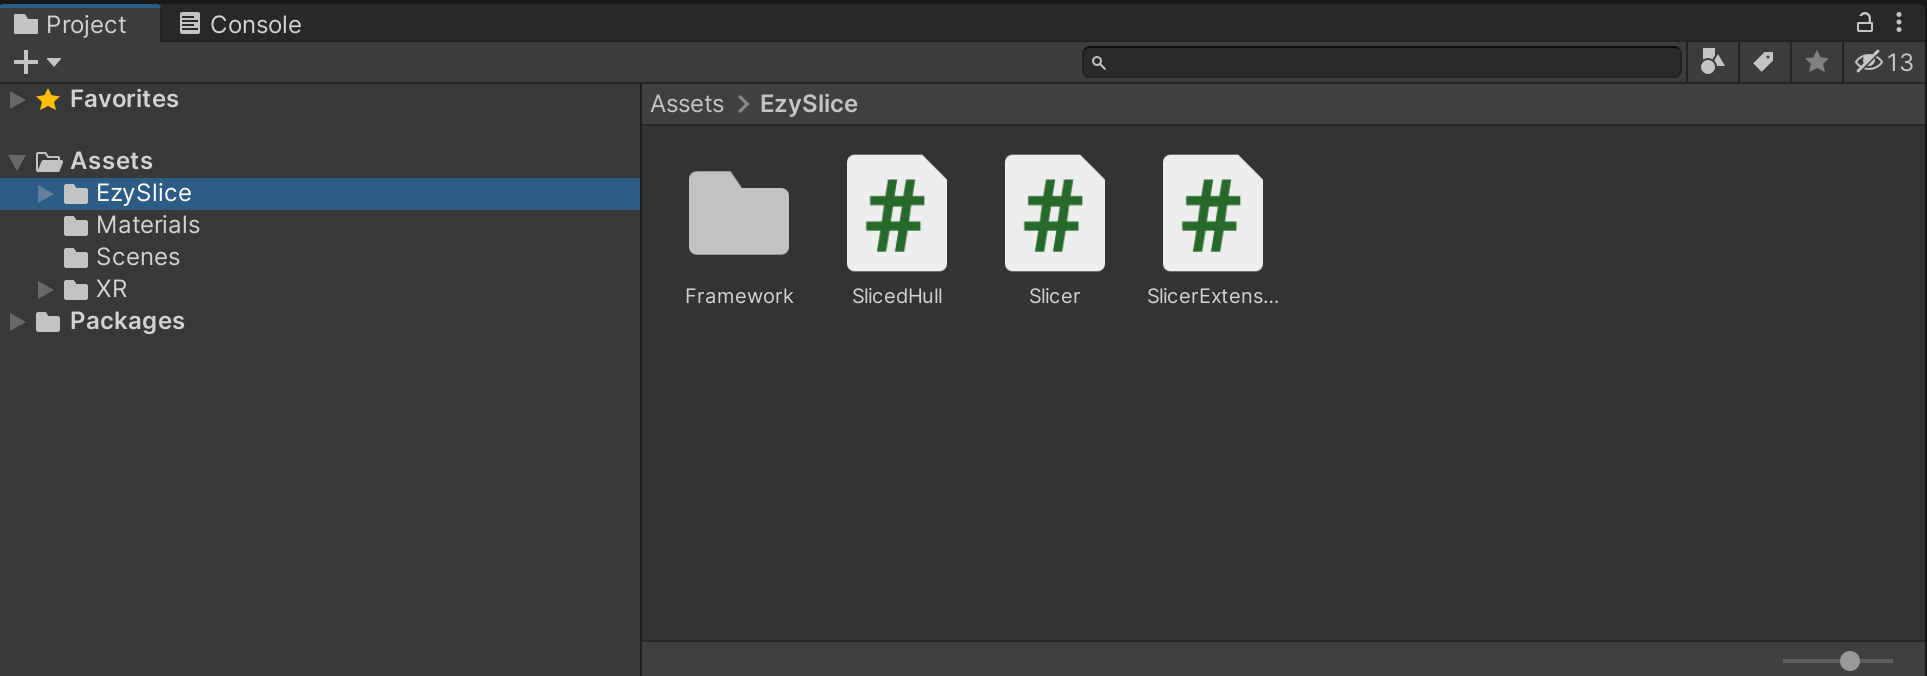
2.3导入切割插件:下载ezy-slice-master切割插件(下载地址:插件下载地址),把EzySlice文件夹导入项目的Assets下面
2.4编写脚本:新建5个C#脚本文件,分别命名为Enemy.cs,SliceUtil.cs,Emitter.cs,SubCube.cs,Sword.cs
编写SliceUtil.cs脚本,代码如下:
cs
using System.Collections;
using System.Collections.Generic;
using UnityEngine;
using EzySlice;

public class SliceUtile
{
    public static GameObject[] slice(GameObject sourceGo, Vector3 slicePos, Vector3 sliceDirect, Material sectionMat)
    {
        var result = new GameObject[2];
        SlicedHull hull = sourceGo.Slice(slicePos, sliceDirect);
        result[0] = hull.CreateUpperHull(sourceGo, sectionMat);
        result[1] = hull.CreateLowerHull(sourceGo, sectionMat);

        return result;
    }
}
编写SubCube脚本,代码如下:
cs
using System.Collections;
using System.Collections.Generic;
using UnityEngine;

public class SubCube : MonoBehaviour
{

    void Update()
    {
        if (transform.position.y < 0)
        {
            Destroy(gameObject);
        }
    }
}
把Enemy脚本挂载到Enemy物体上,代码如下;挂载后把Enemy物体拖拽到Assets中成为预制体,然后删除场景中的Enemy预制体
cs
using System.Collections;
using System.Collections.Generic;
using UnityEngine;
using UnityEngine.UIElements;

public class Enemy : MonoBehaviour
{
    public float speed;

    void Start()
    {
        speed = 5f;
    }

    void Update()
    {
        if (transform.position.z < -0.5f)
        {
            Destroy(gameObject);
            return;
        }
        transform.position = new Vector3(transform.position.x , transform.position.y, transform.position.z - speed * Time.deltaTime);
    }
}
把Emitter脚本挂载到Emitter物体上,代码如下;挂载后设置EnemyPrefab预制体、4个Point点位
cs
using System.Collections;
using System.Collections.Generic;
using UnityEngine;

public class Emitter : MonoBehaviour
{
    public Transform[] point;
    public GameObject enemyPrefab;
    public int totalEnemy=10;
    // Start is called before the first frame update
    void Start()
    {
        StartCoroutine(GenerateEnemy());
    }

    // Update is called once per frame
    void Update()
    {

    }

    IEnumerator GenerateEnemy()
    {
        for(int i = 0; i < totalEnemy; i++)
        {
            int index = Random.Range(0, point.Length);
            Transform generatePoint = point[index];
            GameObject enemy = Instantiate(enemyPrefab, generatePoint);
            yield return new WaitForSeconds(1f);
        }
    }
}
把Sword脚本挂载到Sword物体上,代码如下;然后设置sliceMaterial(切割后的材质)和光剑的材质相同(Red_E)
cs
using System.Collections;
using System.Collections.Generic;
using UnityEngine;

public class Sword : MonoBehaviour
{
    public Material sliceMaterial;
    // Start is called before the first frame update
    void Start()
    {

    }

    // Update is called once per frame
    void Update()
    {

    }

    private void OnTriggerEnter(Collider other)
    {
        if (other.CompareTag("Enemy"))
        {
            var hitPos = other.bounds.ClosestPoint(transform.position);
            var result = SliceUtile.slice(other.gameObject, hitPos, transform.right, sliceMaterial);

            // 隐藏原物体(不要直接Destroy,否则碎片还没生成就消失)
            other.gameObject.SetActive(false);
            Destroy(other.gameObject, 0.01f); // 延迟销毁原物体

            for (int i = 0; i < result.Length; i++)
            {
                result[i].AddComponent<SubCube>();
                result[i].AddComponent<Rigidbody>();
            }
            result[0].GetComponent<Rigidbody>().drag = 10f;
        }
    }
}
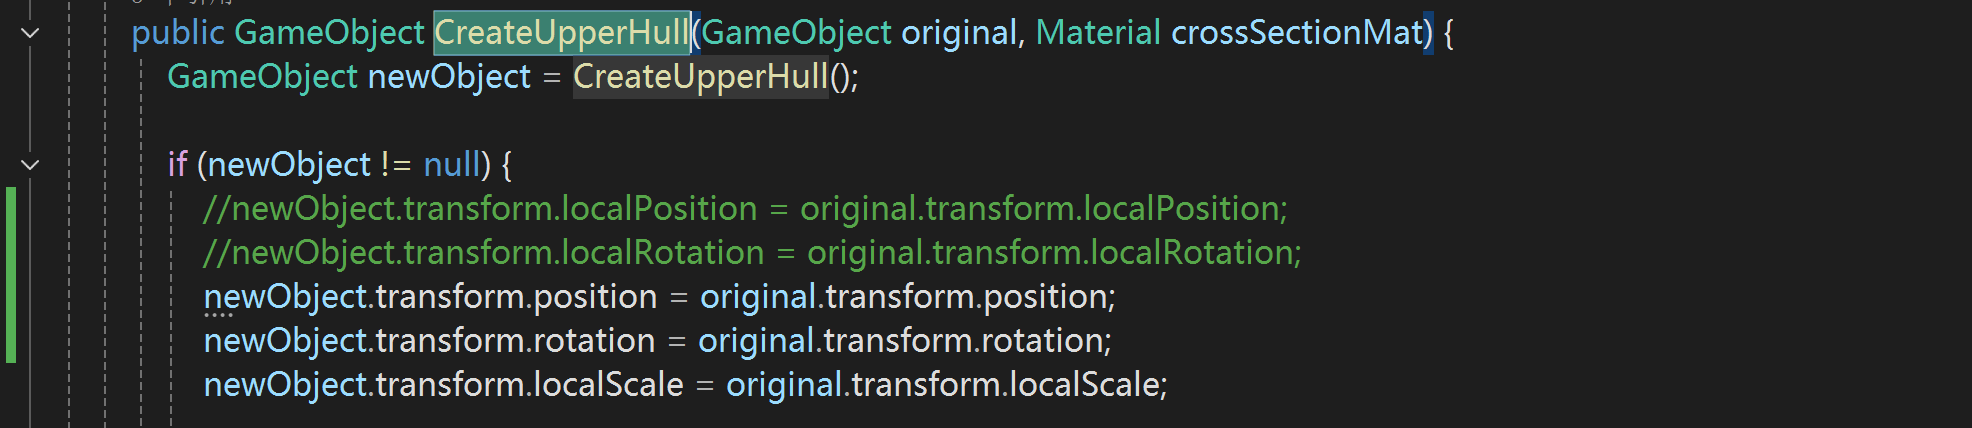
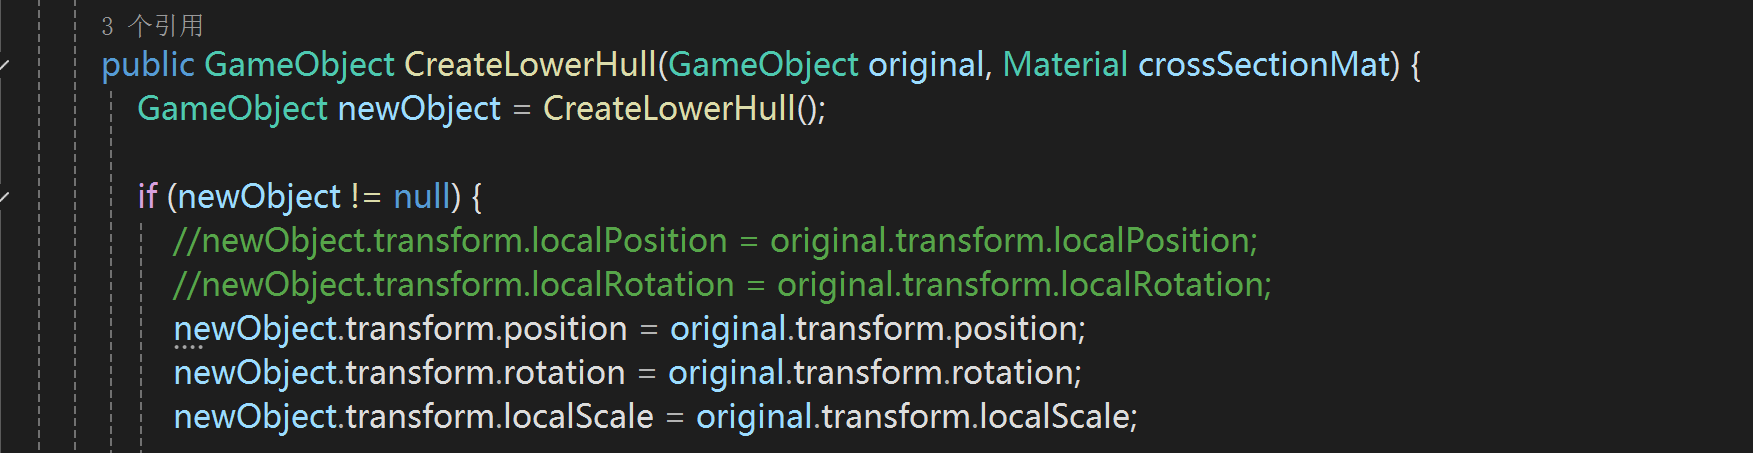
2.5修改插件代码
打开EzySlice插件中的SlicedHull脚本,找到CreateUpperHull方法和CreateLowerHull方法,按照下图修改代码,否则切开之后的碎片会出现在其他位置,而不是出现在被切割物体的同一位置
2.6设置手柄
如果只使用一个右手柄(RightHand Controller),则可以把左手柄(LeftHand Controller)禁用掉;同时,需要取消可用手柄的射线相关组件(取消XR Ray Interactor、Line Renderer、XR Interator Line Visual三个组件的勾选),以便隐藏手柄默认的射线

3.测试运行与发布
3.1 测试
保存工程项目,然后点击Play按钮测试运行,在Scene视口中观察Enemy能否正常生成、运动、消失
在运行状态下,在Scene视口中调整光剑的角度,使其能够切割到方块,看看方块能否被切割开
3.2发布
如果在开发过程中关闭过Unity Editor,则需要在PlayerSettings的Publish Settings部分重新加载KeyStore,并输入ProjectKey的密码:点击Select→Browse,选择之前保存的KeyStore,然后在填入之前设置的KeyStore密码,然后填入之前设置的Project Key的密码,否则会打包失败。
如果在开发过程中没有关闭过Unity Editor,则不需要重新填入KeyStore、Project Key密码,直接把Pico Neo3头显连接电脑,先把当前场景添加到Scenes In Build中,并在Build Setting页面内选择Device为Pico Neo3,并在Android平台下,点击Build,选择好保存位置、设置好文件名,确定后即可打包成APK文件