前文
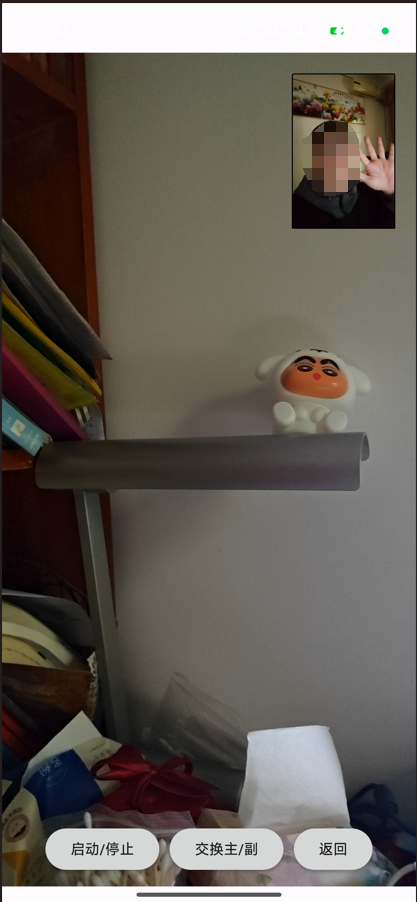
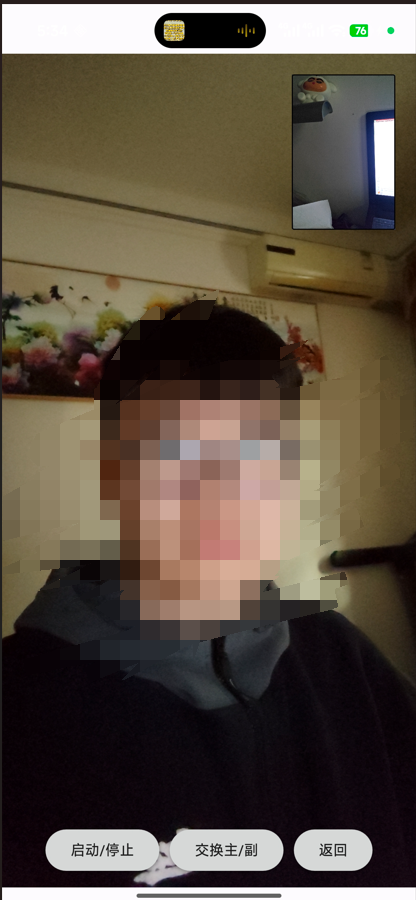
不知道大家有没有见过,有人录制vlog的时候会使用一种双摄像头的内嵌布局,即屏幕的大画面是后置摄像头,拍摄面前风景,而画面的右上角有一个小窗口,显示前置摄像头画面,拍摄人的面部表情。这种布局在一些厂商手机系统相机中已经自带了,但奇怪的是在我最新的小米17手机中居然把这个功能删除掉了。这也是我想要尝试自己实现这个功能的契机。
这个功能涉及到的技术点,一个是双摄像头的同时打开,这需要手机本身允许;然后是前后切换的代码逻辑,还有画面切换时的残留处理。
一、代码示例
代码比较简单,基本上都是逻辑性代码,这里直接放上来吧。
cpp
// DualCameraPage.qml
import QtQuick
import QtQuick.Controls
import QtQuick.Layouts
import QtMultimedia

Page {
    id: dualCameraPage
    property bool hasCameraPermission: false
    property int mainCameraIndex: -1   // 主画面摄像头索引
    property int pipCameraIndex: -1    // 画中画摄像头索引
    property bool mainIsBack: true     // true = 主画面使用后置摄像头

    title: qsTr("双摄同屏")

    MediaDevices {
        id: mediaDevices
    }

    // === 主摄像头 ===
    Camera {
        id: mainCamera
        focusMode: Camera.FocusModeAutoNear
        onErrorOccurred: console.warn("Main camera error:", errorString)
    }
    CaptureSession {
        id: mainCaptureSession
        camera: mainCamera
        videoOutput: mainVideoOutput
    }

    // === 画中画摄像头 ===
    Camera {
        id: pipCamera
        focusMode: Camera.FocusModeAutoNear
        onErrorOccurred: console.warn("PiP camera error:", errorString)
    }
    CaptureSession {
        id: pipCaptureSession
        camera: pipCamera
        videoOutput: pipVideoOutput
    }

    // 主画面容器
    Rectangle {
        anchors.fill: parent
        color: "black"

        VideoOutput {
            id: mainVideoOutput
            anchors.fill: parent
            fillMode: VideoOutput.PreserveAspectCrop
            visible: hasCameraPermission && mainCamera.active
        }

        VideoOutput {
            id: pipVideoOutput
            x: parent.width - width - 20
            y: 20
            width: Math.min(parent.width, parent.height) * 0.25
            height: width / 2 * 3
            fillMode: VideoOutput.PreserveAspectCrop
            visible: hasCameraPermission && pipCamera.active

            Rectangle {
                anchors.fill: parent
                color: "transparent"
                border.color: "black"
                border.width: 1
                radius: 2
            }
        }

        Text {
            anchors.centerIn: parent
            visible: !hasCameraPermission
            text: "等待相机权限..."
            font.pixelSize: 24
            color: "white"
        }
    }

    // 底部控制栏
    RowLayout {
        anchors.bottom: parent.bottom
        anchors.horizontalCenter: parent.horizontalCenter
        anchors.margins: 10
        spacing: 10

        Button {
            text: (mainCamera.active || pipCamera.active) ? "停止" : "启动"
            onClicked: {
                if (mainCamera.active || pipCamera.active) {
                    mainCamera.stop();
                    pipCamera.stop();
                } else {
                    initAndStartDualCameras();
                }
            }
        }

        Button {
            text: "交换主/副"
            enabled: hasCameraPermission && mediaDevices.videoInputs.length >= 2
            onClicked: swapCameras()
        }

        Button {
            text: "返回"
            onClicked: stackView.pop()
        }
    }

    // === 权限处理 ===
    Connections {
        target: permissionHelper
        function onPermissionGranted() {
            hasCameraPermission = true;
            initAndStartDualCameras();
        }
        function onPermissionDenied() {
            hasCameraPermission = false;
        }
    }

    Component.onCompleted: {
        permissionHelper.requestCameraPermission();
    }

    // === 核心逻辑 ===
    function findCameraIndices() {
        let backIndex = -1, frontIndex = -1;
        for (let i = 0; i < mediaDevices.videoInputs.length; i++) {
            const dev = mediaDevices.videoInputs[i];
            if (dev.position === CameraDevice.BackFace) {
                backIndex = i;
            } else if (dev.position === CameraDevice.FrontFace) {
                frontIndex = i;
            }
        }
        return { backIndex, frontIndex };
    }

    function initAndStartDualCameras() {
        if (mediaDevices.videoInputs.length < 2) {
            console.warn("少于两个摄像头,无法启用双摄模式");
            return;
        }

        const { backIndex, frontIndex } = findCameraIndices();
        const total = mediaDevices.videoInputs.length;

        // 设置主摄像头
        if (mainIsBack && backIndex !== -1) {
            mainCameraIndex = backIndex;
            mainCamera.cameraDevice = mediaDevices.videoInputs[backIndex];
        } else if (!mainIsBack && frontIndex !== -1) {
            mainCameraIndex = frontIndex;
            mainCamera.cameraDevice = mediaDevices.videoInputs[frontIndex];
        } else {
            mainCameraIndex = 0;
            mainCamera.cameraDevice = mediaDevices.videoInputs[0];
        }

        // 设置画中画摄像头
        if (mainIsBack && frontIndex !== -1) {
            pipCameraIndex = frontIndex;
            pipCamera.cameraDevice = mediaDevices.videoInputs[frontIndex];
        } else if (!mainIsBack && backIndex !== -1) {
            pipCameraIndex = backIndex;
            pipCamera.cameraDevice = mediaDevices.videoInputs[backIndex];
        } else if (total > 1) {
            pipCameraIndex = (mainCameraIndex + 1) % total;
            pipCamera.cameraDevice = mediaDevices.videoInputs[pipCameraIndex];
        } else {
            pipCameraIndex = -1;
        }

        // 延迟启动以避免硬件冲突
        Qt.callLater(startDualCameras, 200);
    }

    function startDualCameras() {
        if (mainCameraIndex !== -1) mainCamera.start();
        if (pipCameraIndex !== -1) pipCamera.start();
    }

    function swapCameras() {
        if (mainCamera.active) mainCamera.stop();
        if (pipCamera.active) pipCamera.stop();

        mainIsBack = !mainIsBack;
        initAndStartDualCameras();
    }
}
可以看到摄像头的部件都是创建了两份,也就是CaptureSession相关的组件。
在布局中,咱们先放置主画面mainVideoOutput,再放置pipVideoOutput。一定要注意前后顺序,不然可能要设置z轴顺序。
和上一节一样,相机的启动入口在摄像头权限申请成功后的槽函数中,也就是:""
cpp
    Connections {
        target: permissionHelper
        function onPermissionGranted() {
            hasCameraPermission = true;
            initAndStartDualCameras();
        }
        function onPermissionDenied() {
            hasCameraPermission = false;
        }
    }
接下来进入到initAndStartDualCameras(),虽然看上去代码很多,实际上只是为两个camera指定不同的硬件。可以看到,这里有一个标志mainIsBack,主副摄像头的切换就是根据这个bool标志来的。
选择结束后,调用了Qt.callLater来延时启动,这个东西相当于定时器,但是内联方式写得代码更加精简。
其他就没啥了,但实际上开发的时候耗时还蛮久的,调试效果需要不少时间。
最后再介绍一下画面残留的问题,因为切换摄像头的时候我们肯定希望画面直接变黑,而不是残留在上一个摄像头的画面。不然有可能出现前后摄像头画面都是我的大脸,这种情况给人感觉不太好。
我尝试了调用VideoOutput的clearOutput方法,但没有效果。
最后我想到的是把两个窗口放在一个矩形组件里面,然后每次切换的时候都把它们两个小窗口隐藏掉。它们是否显示出来,取决于摄像头是否已经激活,也就是visible: mainCamera.active。
看一下演示效果吧。
二、总结
功能实现得还不错,但肯定还有不少可以优化的地方,比方说我就觉得切换的时候有时候有些过于延时卡顿了,特别是右上角的摄像头。不过整体效果还算正常和流畅吧,可以接受。