目录
2.抽象类中如果一个方法没有具体的实现,那么这个方法用abstract修饰
3.如果一个类有抽象方法,那么这个类是抽象类,相反,如果一个类是抽象类,那么可以没有抽象方法
4.如果一个类继承了抽象类,那么必须重写这个抽象类的抽象方法
5.如果一个类继承了这个抽象类,然后不想重写抽象类当中的方法,只能把当前这个类也被abstract修饰,但要注意的是,这些抽象方法最终都会被重写!只要有其他的普通类继承这些抽象类
[1.接口中的成员变量默认是public static final修饰的,不写的时候也是这样的,为了方便我们一般不写](#1.接口中的成员变量默认是public static final修饰的,不写的时候也是这样的,为了方便我们一般不写)
2.接口当中的方法如果要有具体的实现,只能被static或者default修饰,这些方法默认都是public
[3.接口中的方法如果没有具体实现,那么就写成抽象方法,使用public abstract修饰,public abstract为了简洁代码可以不写](#3.接口中的方法如果没有具体实现,那么就写成抽象方法,使用public abstract修饰,public abstract为了简洁代码可以不写)
一、抽象类
下面是关于抽象类的一些注意事项
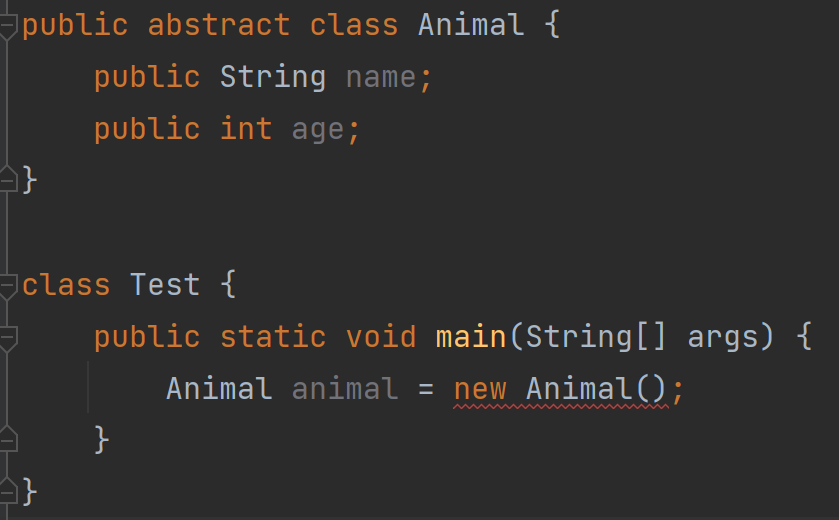
1.不能通过new来实例化对象
2.抽象类中如果一个方法没有具体的实现,那么这个方法用abstract修饰
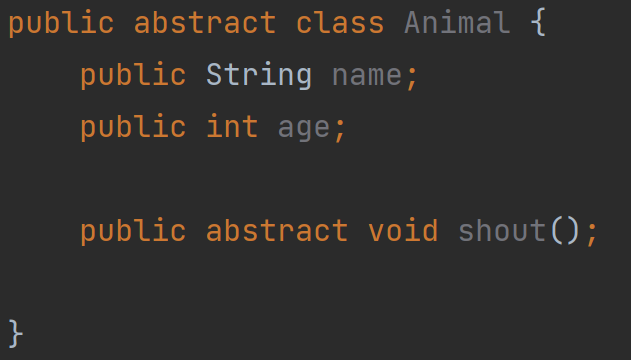
3.如果一个类有抽象方法,那么这个类是抽象类,相反,如果一个类是抽象类,那么可以没有抽象方法
4.如果一个类继承了抽象类,那么必须重写这个抽象类的抽象方法
java
public abstract class Animal {
    public String name;
    public int age;

    public abstract void shout();

    public void sleep() {
        System.out.println(this.name + "正在睡觉....");
    }
}

class Cat extends Animal{
    @Override
    public void shout() {
        System.out.println(this.name+"喵喵喵");
    }
}
5.如果一个类继承了这个抽象类,然后不想重写抽象类当中的方法,只能把当前这个类也被abstract修饰,但要注意的是,这些抽象方法最终都会被重写!只要有其他的普通类继承这些抽象类
二、接口
在Java中,接口可以看成是:多个类的公共规范,是一种引用数据类型。
接口使用interface关键字定义,和抽象类相同,不能被实例化。
1.接口中的成员变量默认是public static final修饰的,不写的时候也是这样的,为了方便我们一般不写
java
public interface Canfly {
    public static final int a = 1;
    int b =2;
}
2.接口当中的方法如果要有具体的实现,只能被static或者default修饰,这些方法默认都是public
java
public interface Canfly {
    public static void fly(){
        System.out.println("可以飞....");
    }
}


public interface CanRun {
    public default void run(){
        System.out.println("可以跑...");
    }
}
3.接口中的方法如果没有具体实现,那么就写成抽象方法,使用public abstract修饰,public abstract为了简洁代码可以不写
java
public interface Canswim {
    public abstract void swim();
}
4.一个类与接口的关系我们使用implements实现
实现该接口以后,就要重写该接口中的抽象方法
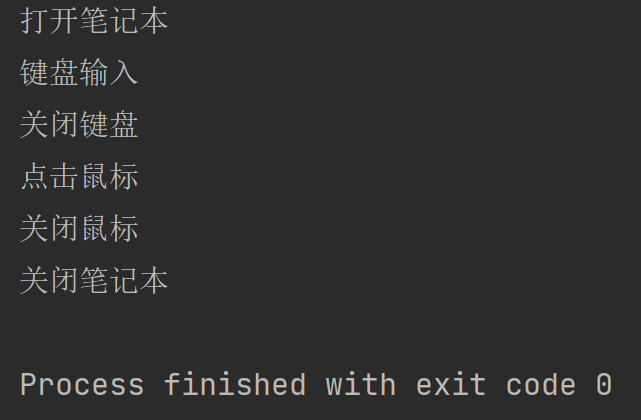
请实现笔记本电脑使用USB鼠标、USB键盘的例子
USB接口:包含打开设备、关闭设备功能
笔记本类:包含开机功能、关机功能、使用USB设备功能
鼠标类:实现USB接口,并具备点击功能
键盘类:实现USB接口,并具备输入功能
java
public interface USB {
    void open();
    void close();
}
java
public class Mouse implements USB{
    @Override
    public void open() {
        System.out.println("打开鼠标");
    }

    @Override
    public void close() {
        System.out.println("关闭鼠标");
    }

    public void click(){
        System.out.println("点击鼠标");
    }
}
java
public class Keyboard implements USB{
    @Override
    public void open() {
        System.out.println("打开键盘");
    }

    @Override
    public void close() {
        System.out.println("关闭键盘");
    }

    public void input(){
        System.out.println("键盘输入");
    }
}
java
public class Computer{

    public void Poweron() {
        System.out.println("打开笔记本");
    }

    public void Poweroff() {
        System.out.println("关闭笔记本");
    }

    public void useDrived(USB usb){
        if(usb instanceof Keyboard){
            Keyboard keyboard = (Keyboard) usb;
            keyboard.input();
        }
        if(usb instanceof Mouse){
            Mouse mouse = (Mouse) usb;
            mouse.click();
        }
        usb.close();
    }
}
java
public class Test {
    public static void main(String[] args) {
        Computer computer = new Computer();
        computer.Poweron();

        computer.useDrived(new Keyboard());
        computer.useDrived(new Mouse());

        computer.Poweroff();
    }
}
5.接口可以实现多态
与继承实现的动态绑定不同,接口不关心你传过来的是什么类型,只要你的类型实现了该接口,
就具备了该功能
java
public interface IRunable {
    void run();
}
java
public interface ISwimable {
    void swim();
}
java
public class Animal {
    public String name;
    public int age;

    public Animal(String name, int age) {
        this.name = name;
        this.age = age;
    }
}

class Dog extends Animal implements IRunable,ISwimable{

    public Dog(String name, int age) {
        super(name, age);
    }


    @Override
    public void run() {
        System.out.println(this.name+"正在跑");
    }

    @Override
    public void swim() {
        System.out.println(this.name+"正在游泳");
    }
}

class Duck extends Animal implements IRunable,ISwimable{
    public Duck(String name, int age) {
        super(name, age);
    }

    @Override
    public void run() {
        System.out.println(this.name+"正在跑");
    }

    @Override
    public void swim() {
        System.out.println(this.name+"正在游泳");
    }
}
java
public class Test {
    public static void walk(IRunable runable){
        runable.run();
    }
    public static void swim(ISwimable swimable){
        swimable.swim();
    }

    public static void main(String[] args) {
        Dog dog = new Dog("wangcai",6);
        Duck duck = new Duck("xiaoya",3);

        walk(dog);
        walk(duck);
    }
}
6.一个类可以有多个接口
java
public interface IRunable {
    void run();
}
java
public interface ISwimable {
    void swim();
}
java
public class Animal {
    public String name;
    public int age;

    public Animal(String name, int age) {
        this.name = name;
        this.age = age;
    }
}

class Duck extends Animal implements IRunable,ISwimable{
    public Duck(String name, int age) {
        super(name, age);
    }

    @Override
    public void run() {
        System.out.println(this.name+"正在跑");
    }

    @Override
    public void swim() {
        System.out.println(this.name+"正在游泳");
    }
}
7.接口可以实现多继承
java
interface A {
    void test1();
}

interface B{
    void test2();
}

interface C extends A,B{
    void test3();
}
public class Test1 implements C {

    @Override
    public void test1() {

    }

    @Override
    public void test2() {

    }

    @Override
    public void test3() {

    }
}
8.通过接口实现自定义类型比较
第一种使用Comparable接口进行比较
java
public class Student implements Comparable<Student>{
    public String name;
    public int age;
    public int score;

    public Student(String name, int age, int score) {
        this.name = name;
        this.age = age;
        this.score = score;
    }

    @Override
    public String toString() {
        return "Student{" +
                "name='" + name + '\'' +
                ", age=" + age +
                ", score=" + score +
                '}';
    }

    @Override
    public int compareTo(Student o) {
        return this.age-o.age;
    }
}
java
public class Test {
    public static void main(String[] args) {
        Student student1 = new Student("张三",19,90);
        Student student2 = new Student("李四",15,60);

        if(student1.compareTo(student2)>0){
            System.out.println("student1>student2");
        }else {
            System.out.println("student1<student2");
        }

    }
}
使用Comparable接口对Student类进行比较,但是使用Comparable接口有一个缺点只能对Student类的某个属性进行比较,比较限制,方法总比困难多,这里给出第二种比较方式,使用Comparator接口
第二种使用Comparator接口进行比较
使用Comparator接口,可以实现Student类任意属性的比较
java
public class Student{
    public String name;
    public int age;
    public int score;

    public Student(String name, int age, int score) {
        this.name = name;
        this.age = age;
        this.score = score;
    }

    @Override
    public String toString() {
        return "Student{" +
                "name='" + name + '\'' +
                ", age=" + age +
                ", score=" + score +
                '}';
    }

}
java
public class NameComparator implements Comparator<Student> {
    @Override
    public int compare(Student o1, Student o2) {
        return o1.name.compareTo(o2.name);
    }
}
java
public class AgeComparator implements Comparator<Student> {
    @Override
    public int compare(Student o1, Student o2) {
        return o1.age-o2.age;
    }
}
java
public class ScoreComparator implements Comparator<Student> {
    @Override
    public int compare(Student o1, Student o2) {
        return o1.score-o2.score;
    }
}
java
public class Test {
    public static void main(String[] args) {
        Student student1 = new Student("张三",19,90);
        Student student2 = new Student("李四",15,60);

        AgeComparator ageComparator = new AgeComparator();
        ScoreComparator scoreComparator = new ScoreComparator();
        NameComparator nameComparator = new NameComparator();

        if(ageComparator.compare(student1,student2)>0){
            System.out.println("student1>student2");
        }else {
            System.out.println("student1<student2");
        }

        System.out.println("================================");

        if(scoreComparator.compare(student1,student2)>0){
            System.out.println("student1>student2");
        }else {
            System.out.println("student1<student2");
        }

        System.out.println("================================");

        if(nameComparator.compare(student1,student2)>0){
            System.out.println("student1>student2");
        }else {
            System.out.println("student1<student2");
        }

    }
}
9.通过接口实现自定义类型排序
要实现给自定义类型排序,自定义类型内部肯定需要有比较规则,使用前面讲过的Compar接口,定义比较的规则为年龄
java
public class Student implements Comparable<Student>{
    public String name;
    public int age;
    public int score;

    public Student(String name, int age, int score) {
        this.name = name;
        this.age = age;
        this.score = score;
    }

    @Override
    public String toString() {
        return "Student{" +
                "name='" + name + '\'' +
                ", age=" + age +
                ", score=" + score +
                '}';
    }

    @Override
    public int compareTo(Student o) {
        return this.age-o.age;
    }
}
java
public class Test1 {
    public static void main(String[] args) {
        Student[] students = new Student[3];
        students[0]=new Student("zhangsan",12,78);
        students[1]=new Student("lisi",17,98);
        students[2]=new Student("wangwu",14,56);

        Arrays.sort(students);
        System.out.println(Arrays.toString(students));

    }
}
还有一种方法,使用Comparator接口,在前者基础上,在 Arrays.sort(students)后面加上比较器,
比较规则是先对Comparable接口内部定义的比较方式进行比较,再对Comparator接口内部定义的比较方式进行比较
java
public static void main(String[] args) {
        Student[] students = new Student[3];
        students[0]=new Student("zhangsan",12,78);
        students[1]=new Student("lisi",17,98);
        students[2]=new Student("wangwu",14,56);

        ScoreComparator scoreComparator = new ScoreComparator();

        Arrays.sort(students,scoreComparator);
        System.out.println(Arrays.toString(students));

    }
我们可以自己写一个排序方法bubbleSort(),内部通过接口实现排序
java
public class Student implements Comparable<Student>{
    public String name;
    public int age;
    public int score;

    public Student(String name, int age, int score) {
        this.name = name;
        this.age = age;
        this.score = score;
    }

    @Override
    public String toString() {
        return "Student{" +
                "name='" + name + '\'' +
                ", age=" + age +
                ", score=" + score +
                '}';
    }

    @Override
    public int compareTo(Student o) {
        return this.age-o.age;
    }
}
java
public class Test1 {
    public static void bubbleSort(Comparable[] comparables){
        for (int i = 0; i <comparables.length-1 ; i++) {
            for (int j = 0; j < comparables.length-1-i; j++) {
                if(comparables[j].compareTo(comparables[j+1])>0){
                    Comparable tmp =comparables[j];
                    comparables[j]=comparables[j+1];
                    comparables[j+1]=tmp;
                }
            }
        }
    }
    public static void main(String[] args) {
        Student[] students = new Student[3];
        students[0]=new Student("zhangsan",12,78);
        students[1]=new Student("lisi",17,98);
        students[2]=new Student("wangwu",14,56);
        bubbleSort(students);
        System.out.println(Arrays.toString(students));
    }
10.克隆接口
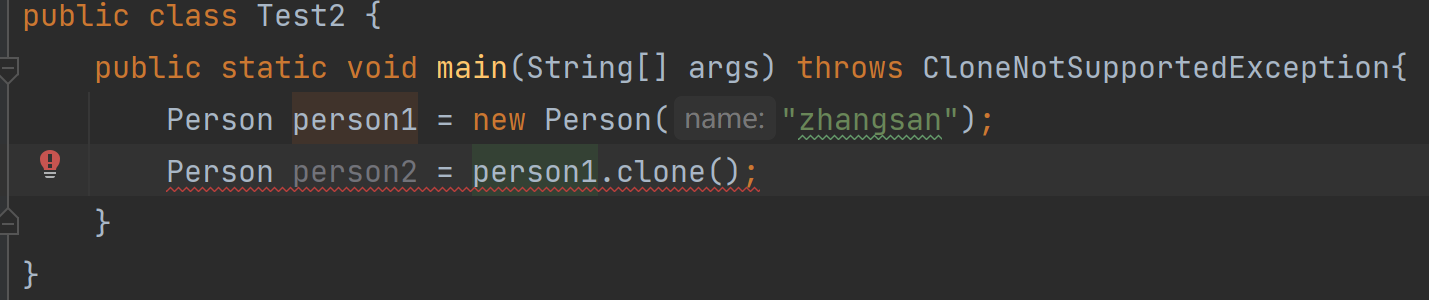
当我们想要实现克隆时,必须要有克隆接口Cloneable,我们定义一个类person实现克隆接口,创建person1对象,并且在创建一个person2对象负责接收person1的克隆,当我们调用clone方法时,发现调用不了
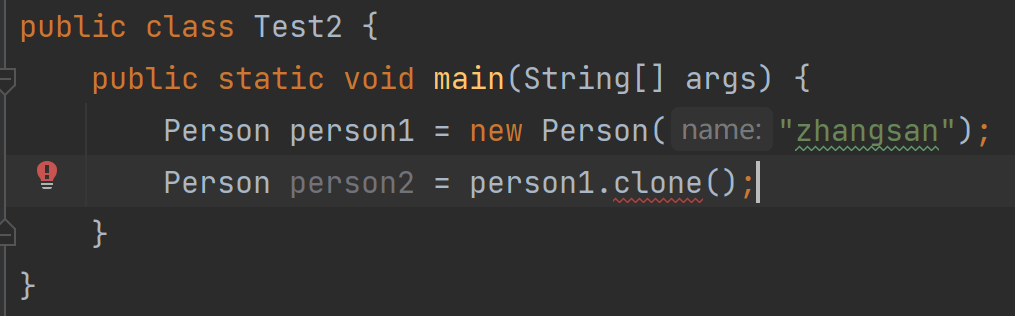
当我们搜索Object类时,发现clone方法由protected修饰

protected的访问权限为同个包的同个类/同个包的不同类/不同包中的子类,clone方法在package java.lang中,而Person在demo2这个包中无法调用,我们需要到Person类中重写clone方法
java
public class Person implements Cloneable{
public String name;
public Person(String name) {
this.name = name;
}
@Override
public String toString() {
return "Person{" +
"name='" + name + '\'' +
'}';
}
@Override
protected Object clone() throws CloneNotSupportedException {
return super.clone();
}
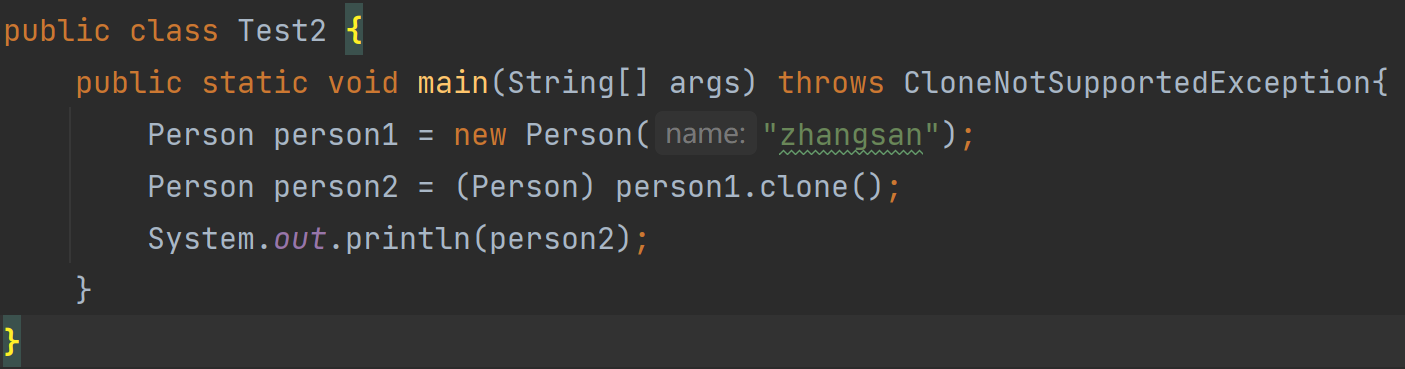
}需要注意的是需要在main函数后加上throws异常处理
这时可以调用clone方法了,但是还是报错那是因为右边是Object类型,需要强制转换为Person类型,这样就不会报错了
java
package Demo2;

public class Person implements Cloneable{
    public String name;

    public Person(String name) {
        this.name = name;
    }

    @Override
    public String toString() {
        return "Person{" +
                "name='" + name + '\'' +
                '}';
    }

    @Override
    protected Object clone() throws CloneNotSupportedException {
        return super.clone();
    }
}
java
package Demo2;
public class Test2 {
public static void main(String[] args) throws CloneNotSupportedException{
Person person1 = new Person("zhangsan");
Person person2 = (Person) person1.clone();
System.out.println(person2);
}
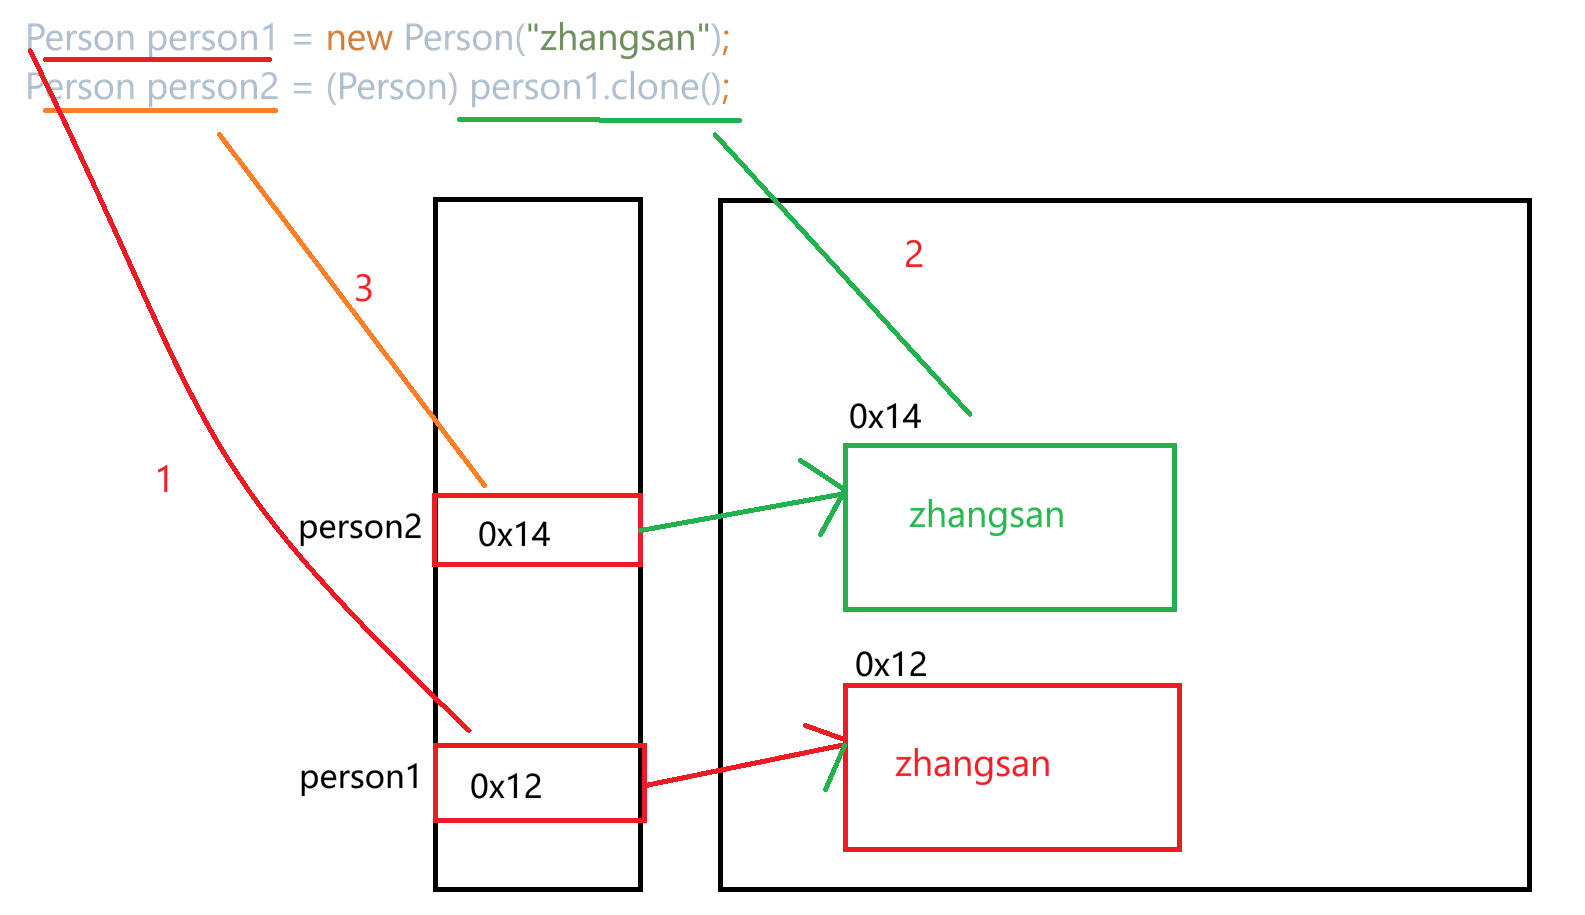
}克隆实现基本流程
浅拷贝与深拷贝
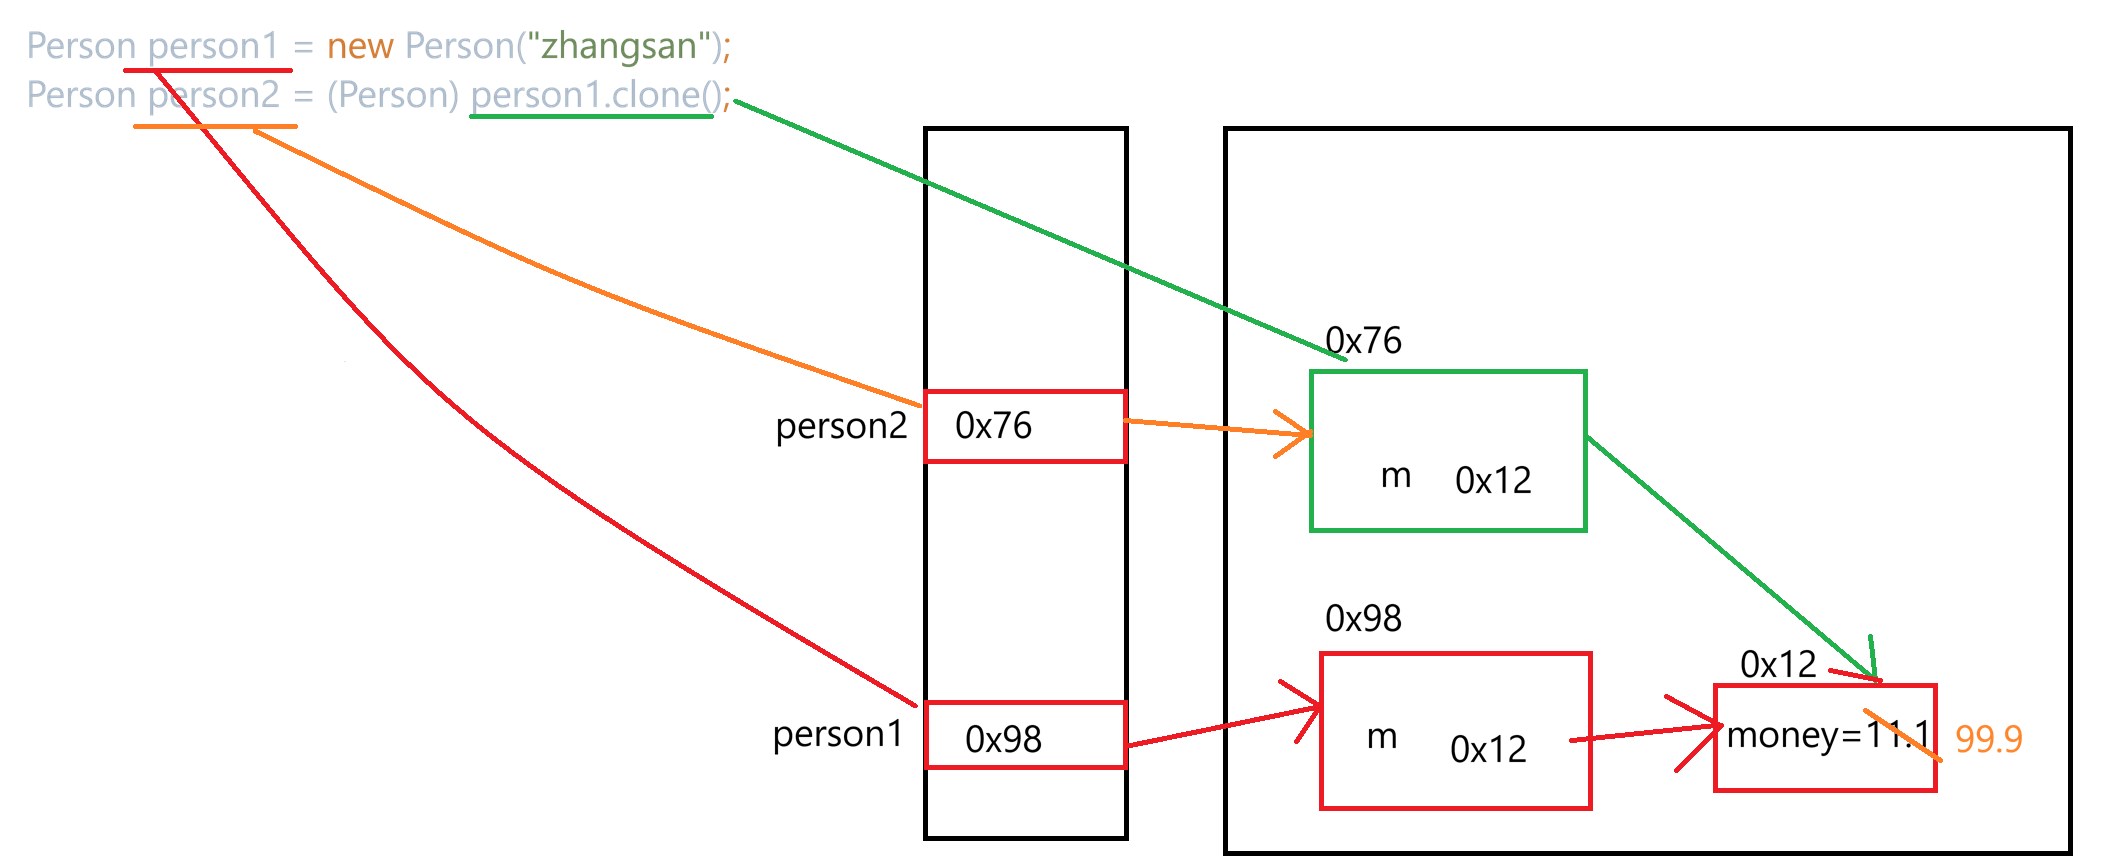
1.浅拷贝
java
class Money{
    public double money = 11.1;
}
public class Person implements Cloneable{
    public String name;
    public Money m;

    public Person(String name) {
        this.name = name;
        this.m = new Money();
    }

    @Override
    public String toString() {
        return "Person{" +
                "name='" + name + '\'' +
                '}';
    }

    @Override
    protected Object clone() throws CloneNotSupportedException {
        return super.clone();
    }
}
java
public class Test2 {
    public static void main(String[] args) throws CloneNotSupportedException{
        Person person1 = new Person("zhangsan");
        Person person2 = (Person) person1.clone();

        System.out.println(person1.m.money);
        System.out.println(person2.m.money);

        System.out.println("========================");

        person2.m.money = 99.9;
        System.out.println(person1.m.money);
        System.out.println(person2.m.money);
    }
}
通过修改person2.m.money,打印person1.m.money和person2.m.money结果都为99.9
2.深拷贝
java
class Money implements Cloneable{
    public double money = 11.1;

    @Override
    protected Object clone() throws CloneNotSupportedException {
        return super.clone();
    }
}
public class Person implements Cloneable{
    public String name;
    public Money m;

    public Person(String name) {
        this.name = name;
        this.m = new Money();
    }

    @Override
    public String toString() {
        return "Person{" +
                "name='" + name + '\'' +
                '}';
    }

    @Override
    protected Object clone() throws CloneNotSupportedException {
        Person tmp = (Person) super.clone();
        tmp.m = (Money) this.m.clone();
        return tmp;
    }
}
java
public class Test2 {
    public static void main(String[] args) throws CloneNotSupportedException{
        Person person1 = new Person("zhangsan");
        Person person2 = (Person) person1.clone();

        System.out.println(person1.m.money);
        System.out.println(person2.m.money);

        System.out.println("========================");

        person2.m.money = 99.9;
        System.out.println(person1.m.money);
        System.out.println(person2.m.money);
    }
}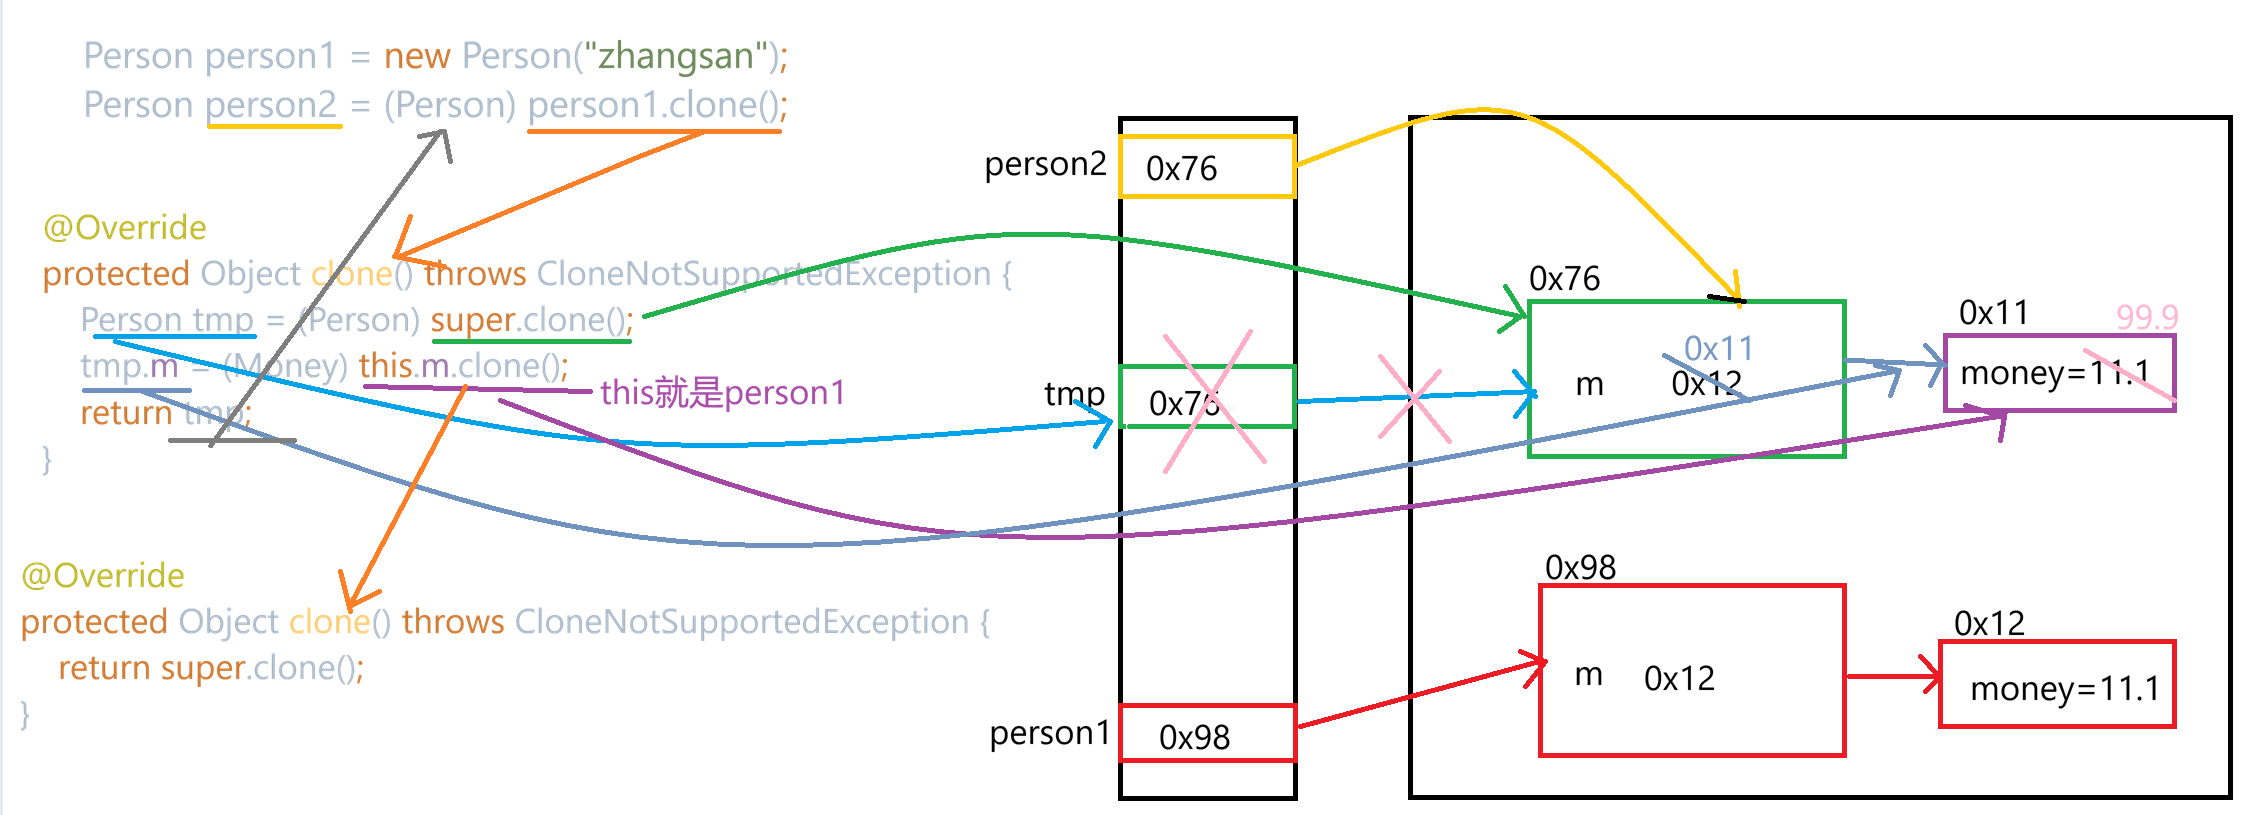
通过修改person2.m.money,打印person1.m.money和person2.m.money结果都为11.1,99.9