1. 实验目的:
- 熟悉堆叠的应用场景
- 掌握堆叠的配置方法
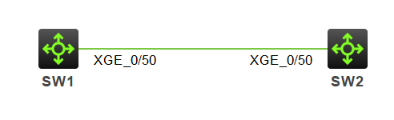
2. 实验拓扑
实验拓扑如图所示。
【技术要点】
现网中公司需要对交换网络扩容,需要将SW1和SW2两台设备使用业务接口进行堆叠。(华为ensp模拟器不支持堆叠,此实验使用H3C的模拟器HCL)
3. 实验步骤
1)选择需要进行堆叠的业务接口,并且将端口shutdown
SW1的配置
<H3C>system-view
System View: return to User View with Ctrl+Z.
H3Csysname SW1
SW1interface Ten-GigabitEthernet 1/0/50
SW1-Ten-GigabitEthernet1/0/50shutdown
SW1-Ten-GigabitEthernet1/0/50quit
SW2的配置
<H3C>system-view
System View: return to User View with Ctrl+Z.
H3Csysname SW2
SW2interface Ten-GigabitEthernet 1/0/50
SW2-Ten-GigabitEthernet1/0/50shutdown
SW2-Ten-GigabitEthernet1/0/50quit
2)将SW1配置成堆叠后的主设备,配置对应的优先级,并将业务线缆加入虚拟的堆叠口
SW1irf member 1 priority 30 //配置设备的堆叠成员ID为1,堆叠优先级为30
SW1irf-port 1/1 //进入虚拟堆叠口
SW1-irf-port1/1port group interface Ten-GigabitEthernet 1/0/50//将物理接口加入到堆叠口
SW1-irf-port1/1quit
SW1irf-port-configuration active //激活堆叠配置
SW1interface Ten-GigabitEthernet 1/0/50
SW1-Ten-GigabitEthernet1/0/50undo shutdown //开启物理接口
SW1save //保存配置
3)将SW2业务线缆加入虚拟的堆叠线缆
SW2irf member 1 renumber 2 //配置堆叠成员ID为1(成员ID不能冲突)
Renumbering the member ID may result in configuration change or loss. Continue?Y/N:y
SW2irf-port 1/2 //进入虚拟堆叠口1/2
SW2-irf-port1/2port group interface Ten-GigabitEthernet 1/0/50//将物理接口加入到堆叠口
SW2-irf-port1/2quit
SW2irf-port-configuration active //激活堆叠配置
SW2interface Ten-GigabitEthernet 1/0/50
SW2-Ten-GigabitEthernet1/0/50undo shutdown
SW2-Ten-GigabitEthernet1/0/50quit
SW2save
4)SW1的配置
SW1quit
<SW1>reboot将设备重启,自动完成堆叠。
SW2的配置
SW1quit
<SW1>reboot
4)实验调试
查看堆叠配置
<SW1>display irf //查看堆叠配置
MemberID Role Priority CPU-Mac Description
*+1 Master 30 0caa-192d-0104 ---
2 Standby 1 0caa-1b49-0204 ---
* indicates the device is the master.
- indicates the device through which the user logs in.
The bridge MAC of the IRF is: 0caa-192d-0100
Auto upgrade : yes
Mac persistent : 6 min
Domain ID : 0
可以看到堆叠ID为1的SW1为master,即主设备,堆叠ID为2的SW2为standby,即从设备。最终可以实现,将多台物理设备堆叠成一台逻辑设备。
持续更新更多文章!