本文主要讲述一个用C#实现的部署在Windows平台的构建机程序,方便局域网环境实现unity打包代理。
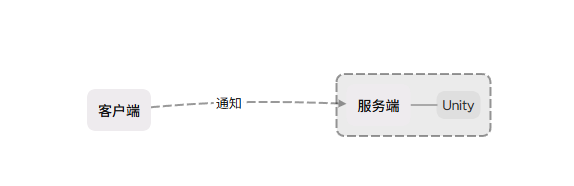
整个结构如下,服务端和Unity在同一台机器下面,客户端通过通知服务端来调用服务端的Unity去构建工程,构建结果会通知给客户端。
Unity:
首先先准备一个能够成功构建的Unity工程。
在Editor文件夹下创建一个脚本BuildScript.cs 设置如下代码
using System.Collections;
using System.Collections.Generic;
using System.IO;
using UnityEditor;
using UnityEditor.Build.Reporting;
using UnityEngine;


public class BuildScrity : MonoBehaviour
{
    [MenuItem("Build/构建")]
    public static void BuildApp()
    {
        string DirectoryPath = Application.dataPath + "/../BuildTarget/Windows/";
        string exportPackagePath = DirectoryPath + Application.productName + ".exe";

        if (Directory.Exists(DirectoryPath) == false)
        {
            Directory.CreateDirectory(DirectoryPath);
        }
        BuildPlayerOptions buildPlayerOptions = new BuildPlayerOptions();
        buildPlayerOptions.scenes = GetBuildScenes();
        buildPlayerOptions.target = BuildTarget.StandaloneWindows64;
        buildPlayerOptions.locationPathName = exportPackagePath;
        buildPlayerOptions.options = BuildOptions.None;
        BuildReport result = BuildPipeline.BuildPlayer(buildPlayerOptions);
        if (result.summary.result == BuildResult.Succeeded)
        {
            Debug.Log("Build Success");

        }
        else
        {
            Debug.Log("Build Fail");
        }
    }
    private static string[] GetBuildScenes()
    {
        List<string> names = new List<string>();
        foreach (EditorBuildSettingsScene e in EditorBuildSettings.scenes)
        {
            if (e == null)
            {
                continue;
            }
            if (e.enabled)
            {
                names.Add(e.path);
            }
        }
        return names.ToArray();
    }
}
在这脚本中简单设置一下构建管线

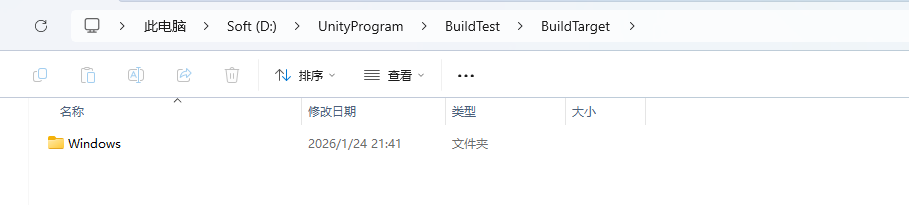
通过菜单项【Build/构建】验证一下是否能够构建出包体,如果构建没有问题的话,你的工程目录下,上面代码的【exportPackagePath】下应该会有对应产物。
服务端:
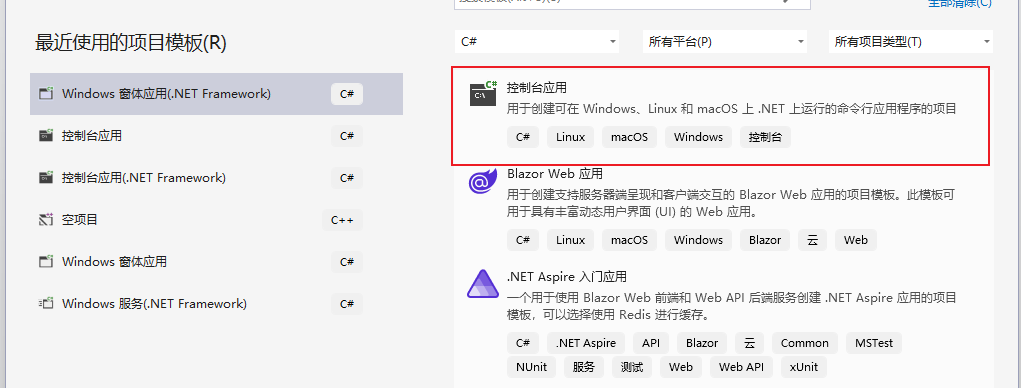
创建一个VS控制台工程,这边使用的VS2022,工程模板使用【控制台应用】
添加一个SimpleServer类,并添加如下代码:
using System;
using System.Diagnostics;
using System.Net;
using System.Net.Sockets;
using System.Text;
using System.Threading;
using static System.Net.Mime.MediaTypeNames;

class SimpleServer
{
    private TcpListener tcpListener;
    private bool isRunning = false;

    public void Start(int port = 8888)
    {
        try
        {
            // 使用IPAddress.Any监听所有网络接口
            tcpListener = new TcpListener(IPAddress.Any, port);
            tcpListener.Start();
            isRunning = true;

            Console.WriteLine($"服务器已启动,监听端口: {port}");
            Console.WriteLine($"服务器IP地址: {GetLocalIPAddress()}");

            // 开始异步接受客户端连接
            tcpListener.BeginAcceptTcpClient(new AsyncCallback(AcceptClient), null);
        }
        catch (Exception ex)
        {
            Console.WriteLine($"启动服务器失败: {ex.Message}");
        }
    }

    private void AcceptClient(IAsyncResult ar)
    {
        if (!isRunning) return;

        try
        {
            TcpClient client = tcpListener.EndAcceptTcpClient(ar);
            Console.WriteLine($"客户端已连接: {((IPEndPoint)client.Client.RemoteEndPoint).Address}");

            // 处理客户端连接
            Thread clientThread = new Thread(new ParameterizedThreadStart(HandleClient));
            clientThread.Start(client);

            // 继续接受其他客户端连接
            tcpListener.BeginAcceptTcpClient(new AsyncCallback(AcceptClient), null);
        }
        catch (Exception ex)
        {
            Console.WriteLine($"接受客户端连接失败: {ex.Message}");
        }
    }

    private void HandleClient(object obj)
    {
        TcpClient client = (TcpClient)obj;
        NetworkStream stream = client.GetStream();
        byte[] buffer = new byte[1024];
        int bytesRead;

        try
        {
            while ((bytesRead = stream.Read(buffer, 0, buffer.Length)) != 0)
            {
                string message = Encoding.UTF8.GetString(buffer, 0, bytesRead);
                Console.WriteLine($"收到消息: {message}");

                // 回声消息
                string response = $"服务器收到: {message}";

                DoBuild();

                byte[] responseData = Encoding.UTF8.GetBytes(response);
                stream.Write(responseData, 0, responseData.Length);
            }
        }
        catch (Exception ex)
        {
            Console.WriteLine($"客户端断开: {ex.Message}");
        }
        finally
        {
            client.Close();
        }
    }

    public void Stop()
    {
        isRunning = false;
        tcpListener?.Stop();
        Console.WriteLine("服务器已停止");
    }

    private string GetLocalIPAddress()
    {
        var host = Dns.GetHostEntry(Dns.GetHostName());
        foreach (var ip in host.AddressList)
        {
            if (ip.AddressFamily == AddressFamily.InterNetwork)
            {
                return ip.ToString();
            }
        }
        return "未找到IP地址";
    }

    private static void DoBuild()
    {

        string UnityPath = "D:\\unity\\Unity 2021.2.7f1c1\\2021.3.23f1\\Editor\\Unity.exe"; // Unity路劲

        string projectPath = "D:\\UnityProgram\\BuildTest"; //项目路径
        string logFilePath = "D:\\UnityProgram\\BuildTest\\Editor.log"; //日志保存路径
        string executeMethod = "BuildScrity.BuildApp"; //要触发的构建方法

        string Arg = string.Format($"-quit -batchmode -logFile {logFilePath} -projectPath {projectPath} -executeMethod {executeMethod}");

        System.Diagnostics.ProcessStartInfo psi = new System.Diagnostics.ProcessStartInfo
        {
            FileName = UnityPath,
            Arguments = Arg,
            RedirectStandardOutput = true,
            UseShellExecute = false,
            CreateNoWindow = true
        };

        using (System.Diagnostics.Process process = new System.Diagnostics.Process())
        {
            process.StartInfo = psi;
            Console.WriteLine("开始构建");

            process.Start();

            string output = process.StandardOutput.ReadToEnd();
            process.WaitForExit();
            if (string.IsNullOrEmpty(output))
            {
                Console.WriteLine($"Unity: {output}");

            }
            Console.WriteLine("构建结束");

        }
    }
}
这个类会启用一个TCP链接监听客户端过来的请求,监听到请求后会在DoBuild中调用本地的Unity进行构建。
在程序的入口中我们创建这个实例:
new SimpleServer().Start();

ConsoleKeyInfo input =  Console.ReadKey();
while (true)
{
    if(input.Key == ConsoleKey.Escape)
    {
        break;
    }
    input = Console.ReadKey();
}
有的模板是Main函数,有的模板是在Program中,只要在程序的入口中调用就好。
程序如果没有问题的话启动的情况应该如下:

端口和IP地址都是客户端那边需要用到的。
客户端:
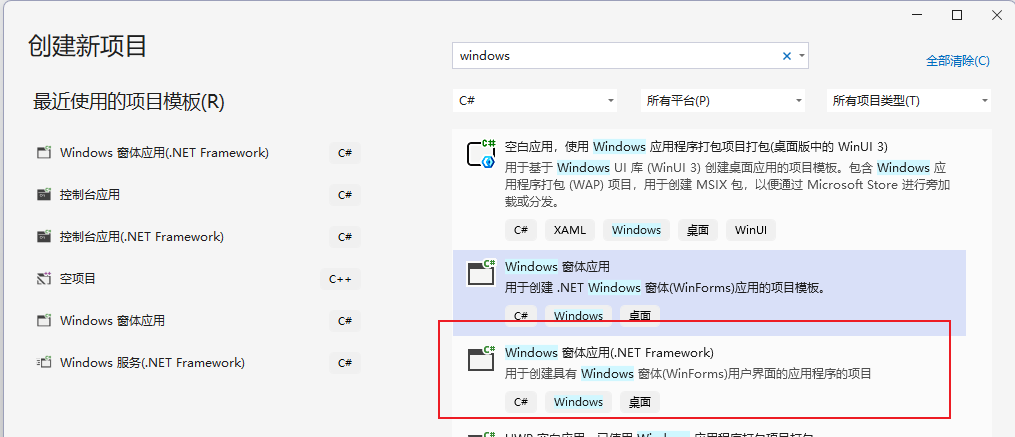
创建一个C# 客户端工程,这次模板使用应用窗口程序模板,主要是为了有GUI界面可以交互。
简单画一个按钮和日志界面:
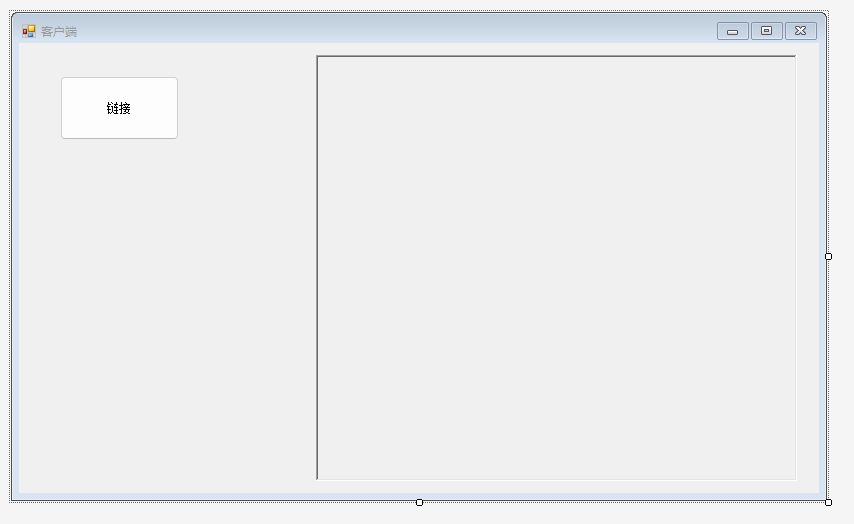
创建一个新的类SimClient.cs 添加如下代码
using System;
using System.Net.Sockets;
using System.Text;
using System.Threading;

class SimClient
{
    private TcpClient tcpClient;
    private NetworkStream stream;
    private bool isConnected = false;

    public event Action<string> OnLog;

    public bool Connect(string serverIP, int port = 8888)
    {
        try
        {
            tcpClient = new TcpClient();
            tcpClient.Connect(serverIP, port);
            stream = tcpClient.GetStream();
            isConnected = true;

            Log($"已连接到服务器: {serverIP}:{port}");

            // 启动接收线程
            Thread receiveThread = new Thread(ReceiveMessages);
            receiveThread.Start();

            return true;
        }
        catch (Exception ex)
        {
            Log($"连接失败: {ex.Message}");
            return false;
        }
    }

    public void SendMessage(string message)
    {
        if (!isConnected)
        {
            Log("未连接到服务器");
            return;
        }

        try
        {
            byte[] data = Encoding.UTF8.GetBytes(message);
            stream.Write(data, 0, data.Length);
            Log($"已发送: {message}");
        }
        catch (Exception ex)
        {
            Log($"发送失败: {ex.Message}");
        }
    }

    private void ReceiveMessages()
    {
        byte[] buffer = new byte[1024];
        int bytesRead;

        try
        {
            while (isConnected && (bytesRead = stream.Read(buffer, 0, buffer.Length)) != 0)
            {
                string message = Encoding.UTF8.GetString(buffer, 0, bytesRead);
                Log($"收到回复: {message}");
            }
        }
        catch (Exception ex)
        {
            Log($"接收消息失败: {ex.Message}");
        }
    }

    public void Disconnect()
    {
        isConnected = false;
        stream?.Close();
        tcpClient?.Close();
        Log("已断开连接");
    }

    public void Log(string str)
    {
        OnLog?.Invoke(str);
    }
}
SimClient中后台传过来的消息都通过事件通知外面,这样方便窗口打印日志。
    public partial class MainFram : Form
    {
        SimClient simClient;
        public MainFram()
        {
            InitializeComponent();
        }

        private void Form1_Load(object sender, EventArgs e)
        {
            simClient = new SimClient();
            simClient.OnLog += (a) =>
            {
                MessageTable.AppendText(a + "\n");
            };
        }

        private void BtnLink_Click(object sender, EventArgs e)
        {
            simClient.Connect("192.168.0.101");
            simClient.SendMessage("搞起");
        }

        private void MessageTable_TextChanged(object sender, EventArgs e)
        {

        }
    }
绑定好按钮事件,将上一步得到服务器的IP填入到Connect中。
效果:
先运行服务端,然后再运行客户端进行构建,流程没有问题的效果如下:
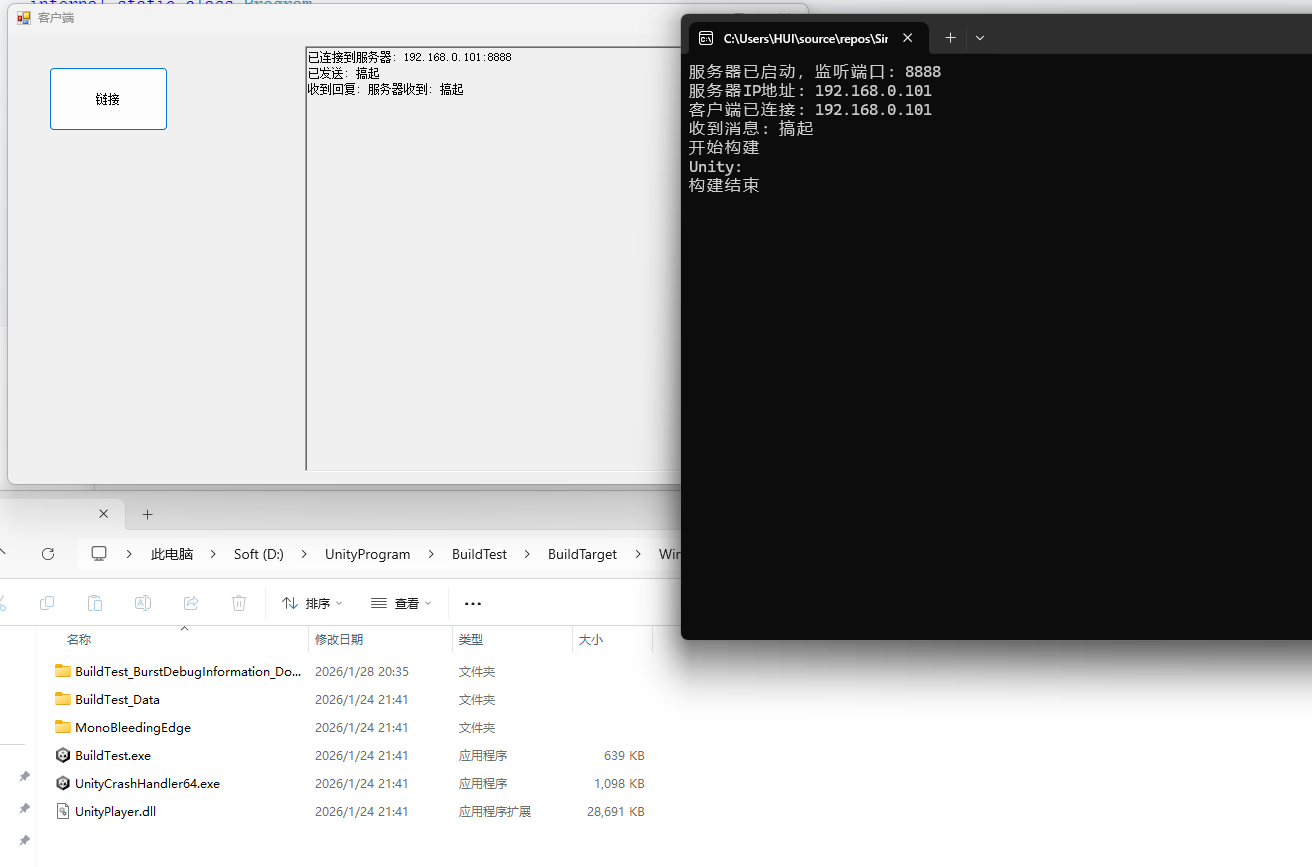
结语:
这只是一个简单的技术实现,很多技术细节还相当毛糙,不少地方都是硬编码,但只要流程都跑通了后续功能都可以自行添加。