前言
在当前数据库交互范式演进的过程中,将自然语言(Natural Language, NL)直接转化为结构化查询语言(Structured Query Language, SQL)已成为提升数据可访问性的关键技术路径。本文将深度剖析如何利用系统级编程语言 Rust 的高性能特性,结合 PostgreSQL Wire Protocol(数据库传输协议)与 DeepSeek 大语言模型的推理能力,构建一个透明的数据库代理层。该代理服务能够拦截客户端请求,智能识别自然语言指令,并在毫秒级时间内将其转换为可执行的高效 SQL 语句,最终在真实的 PostgreSQL 数据库中执行并返回结果。
一、 核心架构与技术选型
本项目不仅仅是一个简单的转换脚本,而是一个完整的网络服务中间件。其核心技术栈选择经过了严谨的考量:
- Rust 语言:作为内存安全且无垃圾回收(GC)的语言,Rust 在处理网络协议解析、二进制数据流操作以及高并发连接管理方面展现出卓越的性能。其所有权系统确保了在多线程环境下的数据安全性。
- PostgreSQL Wire Protocol (v3):通过实现数据库原生协议,代理服务能够伪装成标准的 PostgreSQL 服务器。这意味着现有的数据库客户端(如 psql, DBeaver, Navicat, Tableau 等)无需任何修改即可连接至该代理,实现"即插即用"的无缝集成。
- Tokio 运行时:利用 Rust 生态中最成熟的异步运行时,基于 Reactor 模式处理非阻塞 I/O,使得单机能够支撑成千上万的并发连接,满足生产级网关的性能需求。
- DeepSeek 大模型:作为 SQL 生成引擎,DeepSeek 具备强大的代码理解与生成能力,负责将非结构化的语义意图映射为符合特定数据库 Schema 约束的精确 SQL。
二、 编译环境与工具链构建
构建高性能 Rust 应用的第一步是搭建稳固的开发环境。这涉及操作系统底层的构建工具以及 Rust 自身工具链的配置。
1. 基础构建工具安装
在 Linux 环境下,编译 Rust 程序(特别是涉及底层网络库或加密库依赖时)往往需要 C 语言编译器的支持。build-essential 软件包提供了 GCC 编译器、GNU Make 构建工具以及 glibc 开发库,curl 则用于后续脚本的下载。
在终端中执行依赖安装命令:
bash
sudo apt update
sudo apt install curl build-essential
系统开始解析依赖树并下载所需的二进制包。这一步确保了操作系统具备编译链接 C 代码段的能力,因为许多 Rust 的 crate(库)底层通过 FFI(外部函数接口)绑定了 C 语言库。
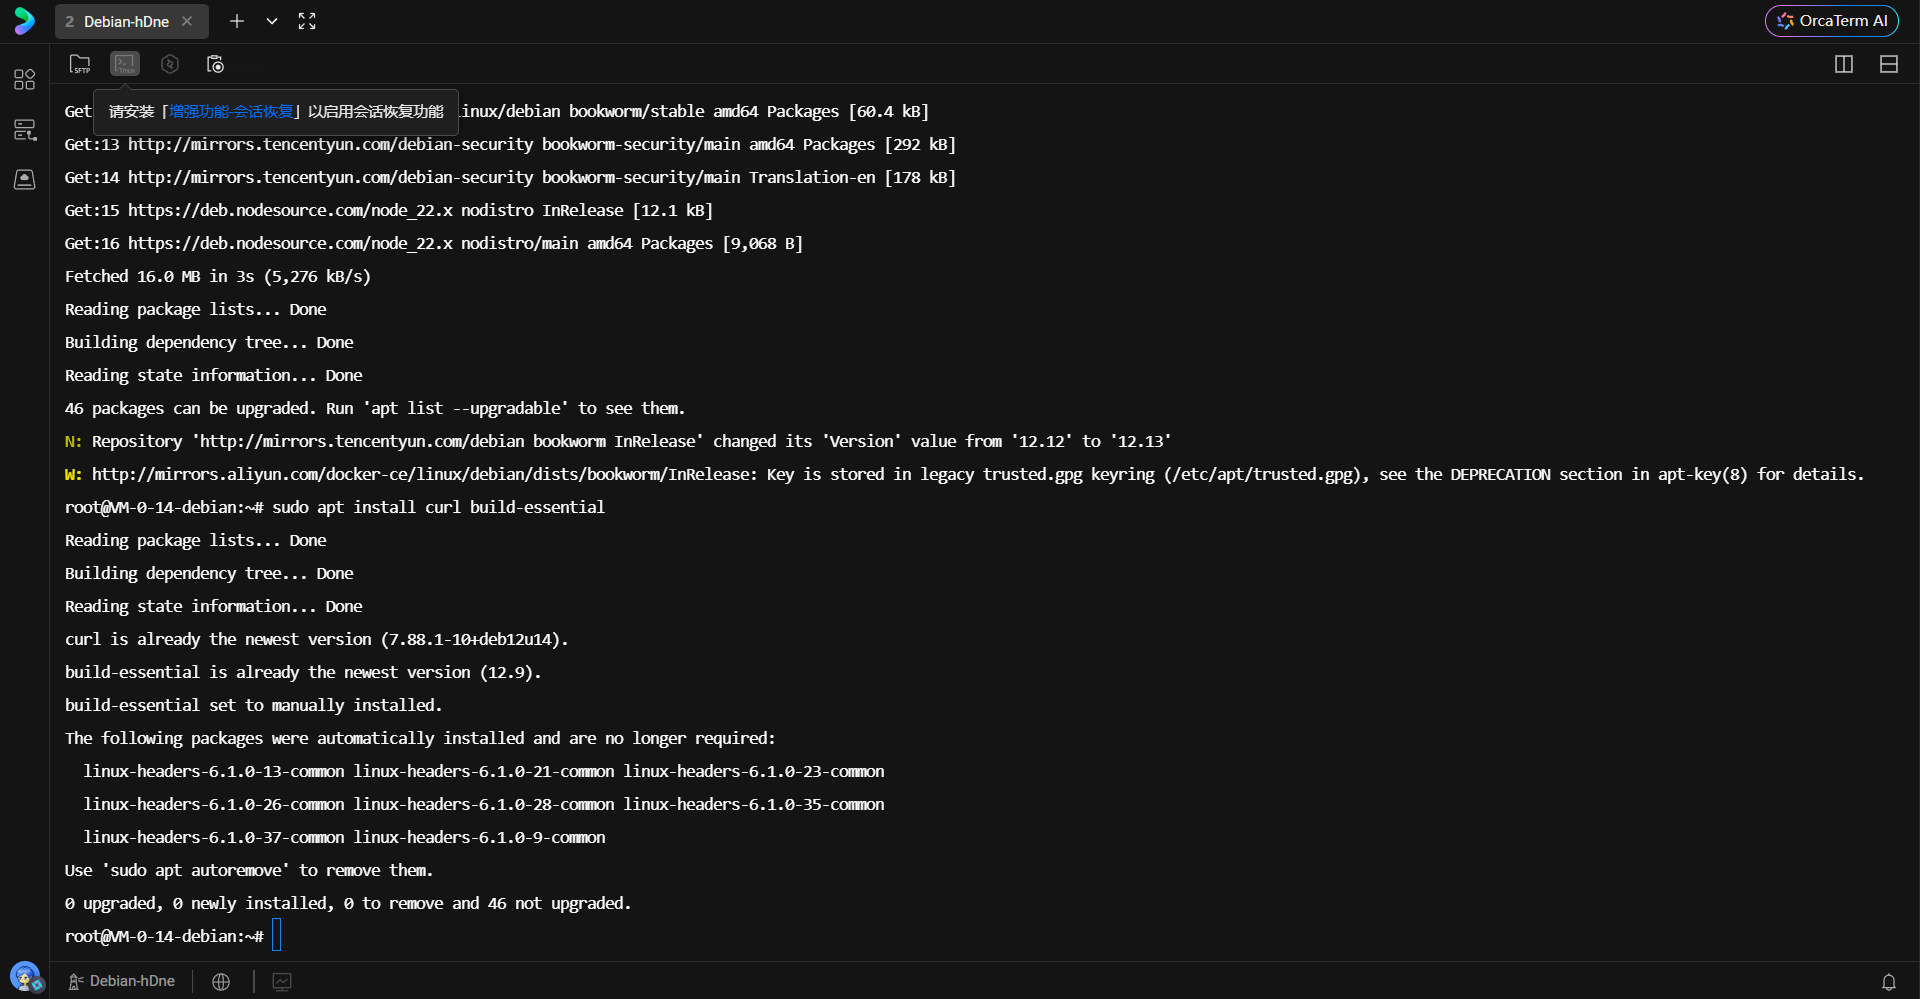
上图展示了包管理器成功安装 curl 和 build-essential 的过程。可以看到系统正确识别了相关依赖,完成了从软件源的拉取与解压安装。
2. Rust 工具链部署
Rust 官方提供了 rustup 作为版本管理和安装工具。该工具不仅安装编译器,还管理标准库文档、Cargo 包管理器以及不同目标平台的交叉编译工具链。
执行以下命令启动安装脚本:
bash
curl --proto '=https' --tlsv1.2 -sSf https://sh.rustup.rs | sh该脚本通过 HTTPS 安全协议拉取安装逻辑,默认安装 stable(稳定版)的 Rust 编译器。稳定版保证了向后的兼容性以及经过充分测试的特性支持。

安装过程中,脚本会自动检测宿主机的 CPU 架构(如 x86_64)和操作系统类型,并下载对应的预编译二进制文件。完成后,脚本会提示环境变量已配置,但需要刷新 Shell 上下文。
3. 环境配置与验证
为了让当前终端会话识别 cargo 和 rustc 命令,必须加载 cargo 的环境变量配置文件。
bash
. "$HOME/.cargo/env"加载完成后,通过版本查询命令验证安装完整性:
bash
rustc --version
cargo --version
rustc 是 Rust 的编译器核心,负责将源码编译为 LLVM IR 并最终生成机器码;cargo 则是 Rust 的构建系统和包管理器,负责依赖下载、编译编排及测试运行。
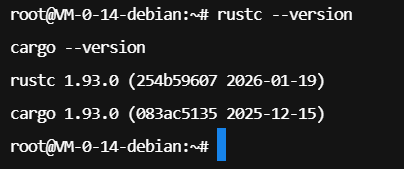
上图明确显示了当前安装的 Rust 版本信息,版本号的正确输出标志着编译环境已准备就绪。为了避免每次登录都需要手动加载环境变量,通常将加载指令写入 Shell 的启动脚本(如 .bashrc)。
bash
echo '. "$HOME/.cargo/env"' >> ~/.bashrc
这一步操作将环境加载逻辑持久化,确保每次开启新的终端窗口时,Rust 工具链均处于可用状态。
三、 服务端基础设施部署
本项目依赖两个外部服务:DeepSeek 推理 API 和 PostgreSQL 后端数据库。
1. 申请推理模型访问权限
在蓝耘广场或 DeepSeek 官方平台创建 API Key。此 Key 是服务进行身份验证的唯一凭证,代理服务将使用该凭证向 LLM 发起 HTTP 请求。
bash
https://console.lanyun.net/#/register?promoterCode=5663b8b127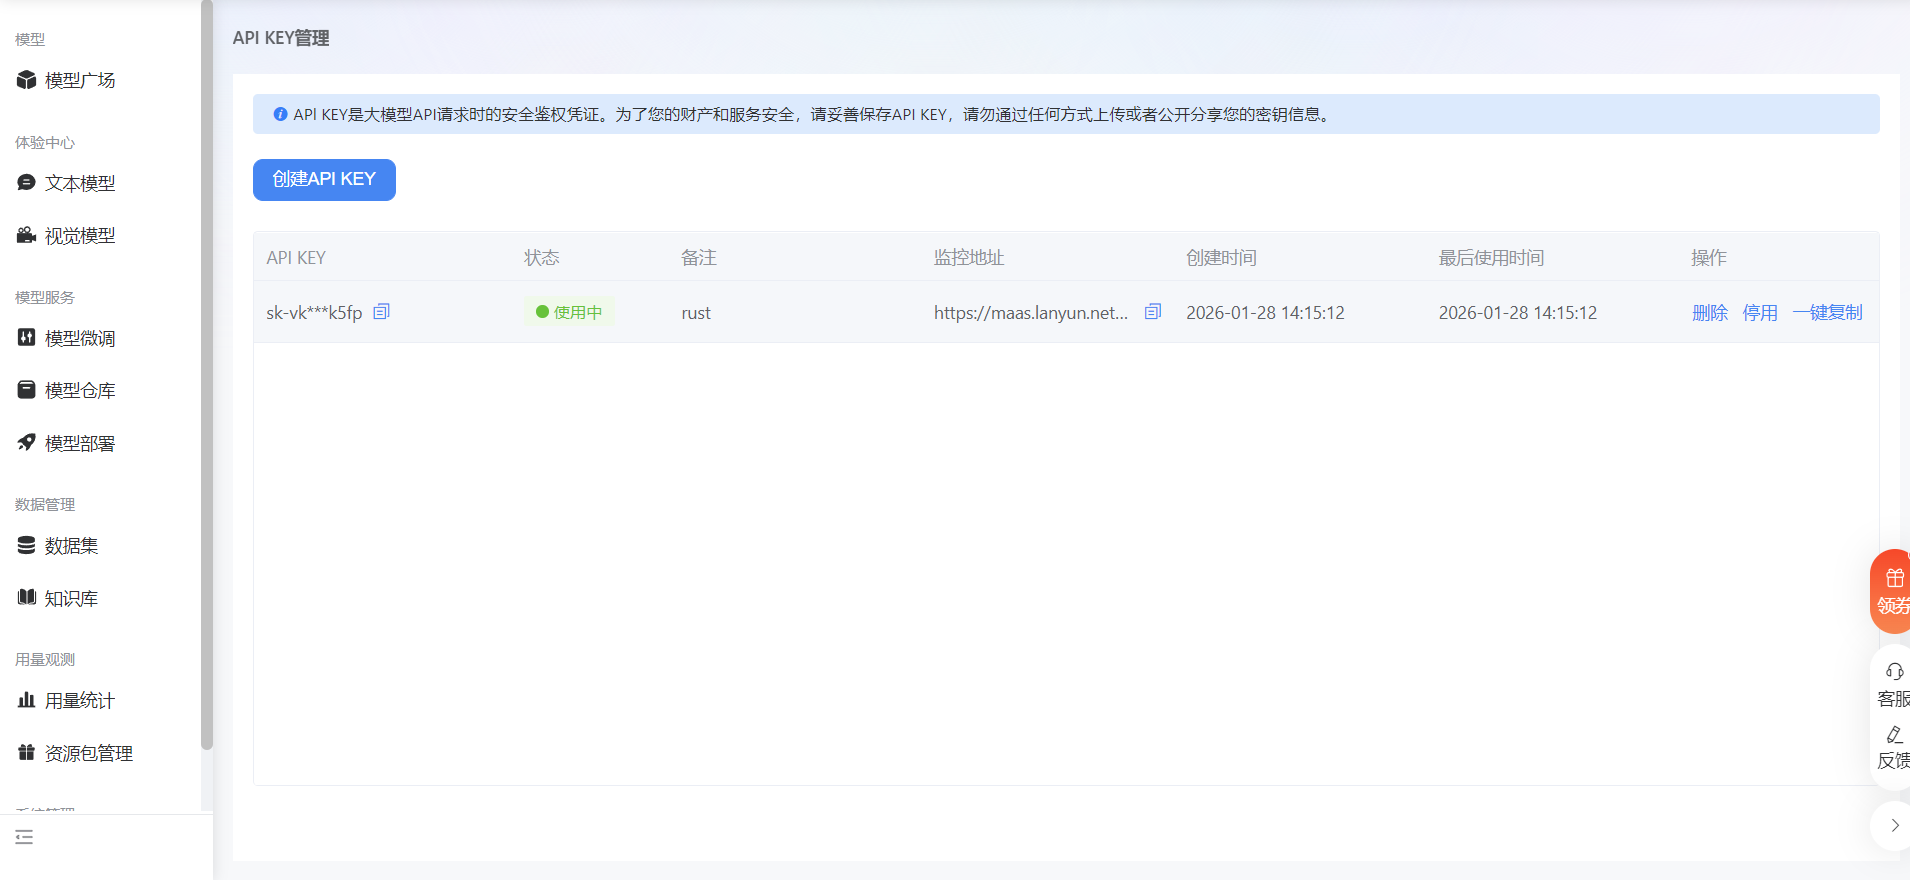
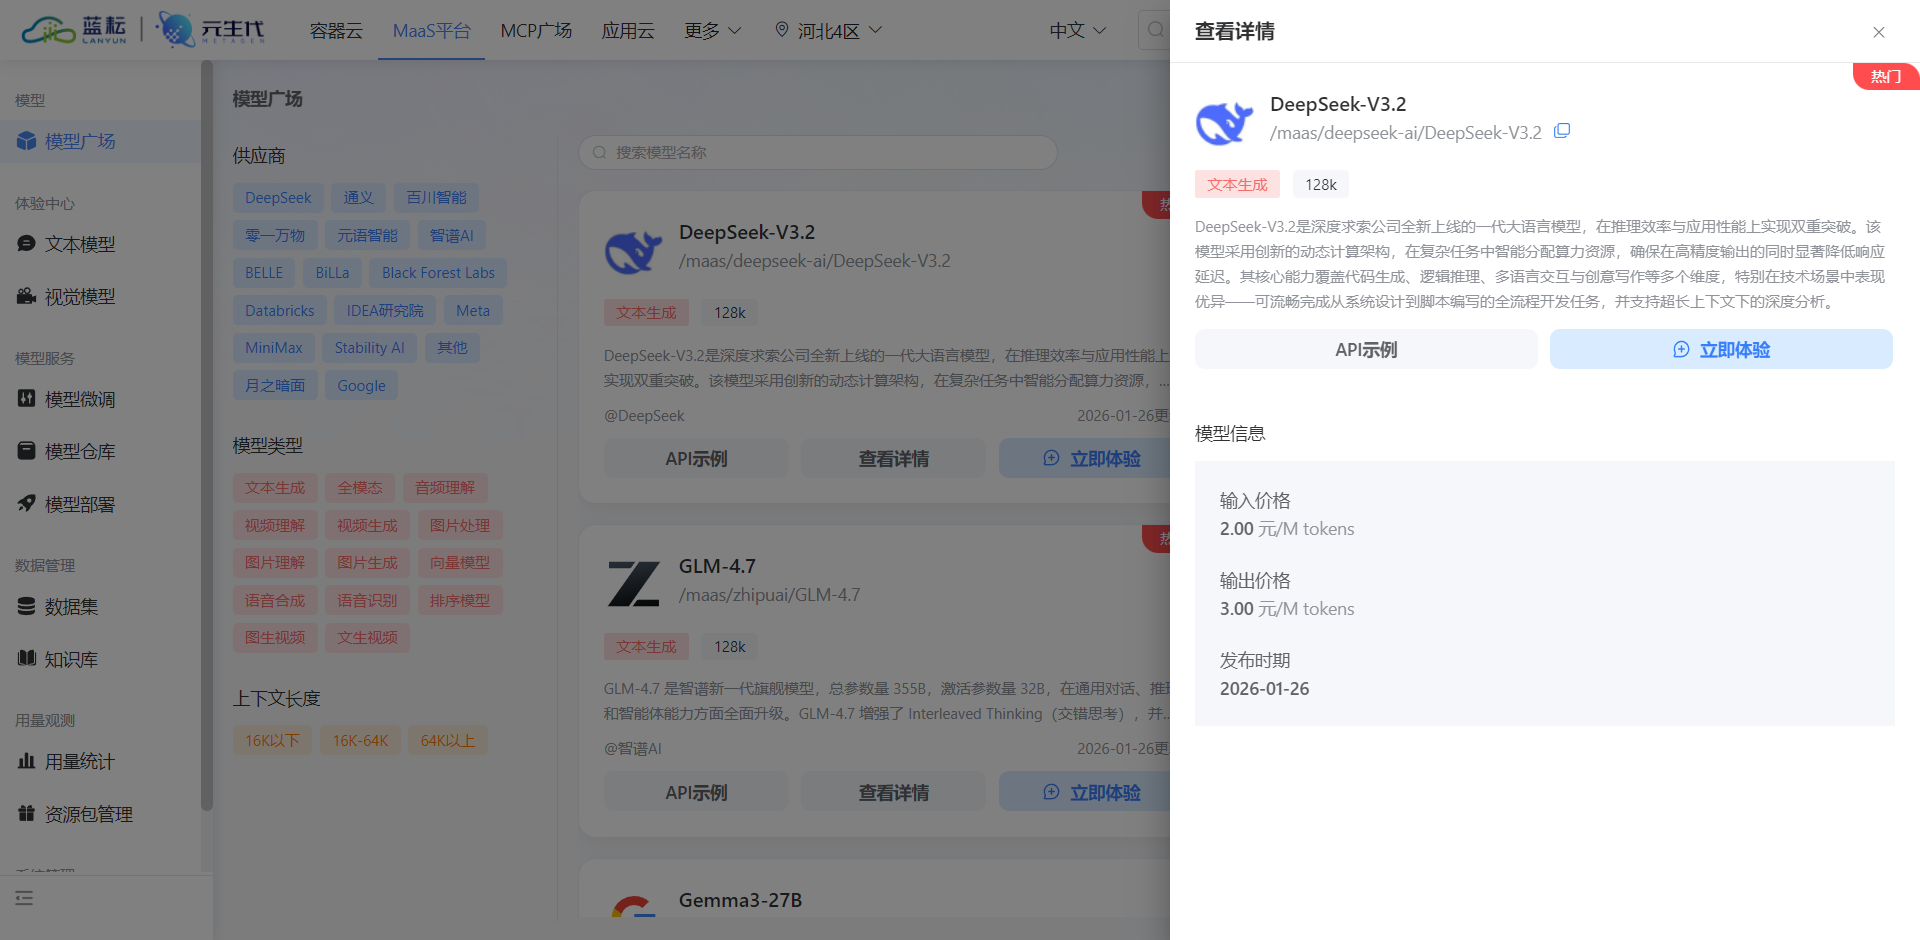
创建凭证后,需选择合适的模型版本。本项目采用 /maas/deepseek-ai/DeepSeek-V3.2,该版本在代码生成任务上进行了针对性微调,能够更准确地理解 SQL 语法规范。
2. 部署后端数据库
为了隔离开发环境,使用 Docker 容器化部署 PostgreSQL 是最佳实践。以下命令启动一个 PostgreSQL 15 版本的实例,并设置初始密码和数据库名称。
bash
docker run -d --name postgres-db -e POSTGRES_PASSWORD=huyunkai -e POSTGRES_DB=test -p 5432:5432 postgres:15这里将容器内部的 5432 端口映射到宿主机的 5432 端口,使得代理服务可以通过 localhost 进行连接。

在云服务器或防火墙配置中,必须确保相应的端口(如 5432 以及代理服务将要使用的端口)已对白名单 IP 开放,以允许外部连接。

上图展示了 Docker 容器成功启动后的状态,容器 ID 的生成表明后台进程正在运行。
四、 项目配置与依赖管理
Rust 项目通过 Cargo.toml 管理依赖,通过配置文件解耦代码与环境参数。
1. 全局配置设计
项目使用 config.toml 文件集中管理服务端口、API 密钥及数据库连接信息。TOML 格式因其语义清晰、易于阅读且支持强类型解析,非常适合作为配置文件格式。
toml
# Text-to-SQL Proxy Configuration

[server]
host = "127.0.0.1"
port = 5433

[deepseek]
api_key = "sk-xxxxxxxxxxxxxxxxxxxxxxxxxxxx"
api_url = "https://maas-api.lanyun.net/v1/chat/completions"
model = "/maas/deepseek-ai/DeepSeek-V3.2"

[database]
# Backend database connection
type = "postgres"
host = "localhost"
port = 5432
username = "postgres"
password = "password"
database = "your_database"
max_connections = 10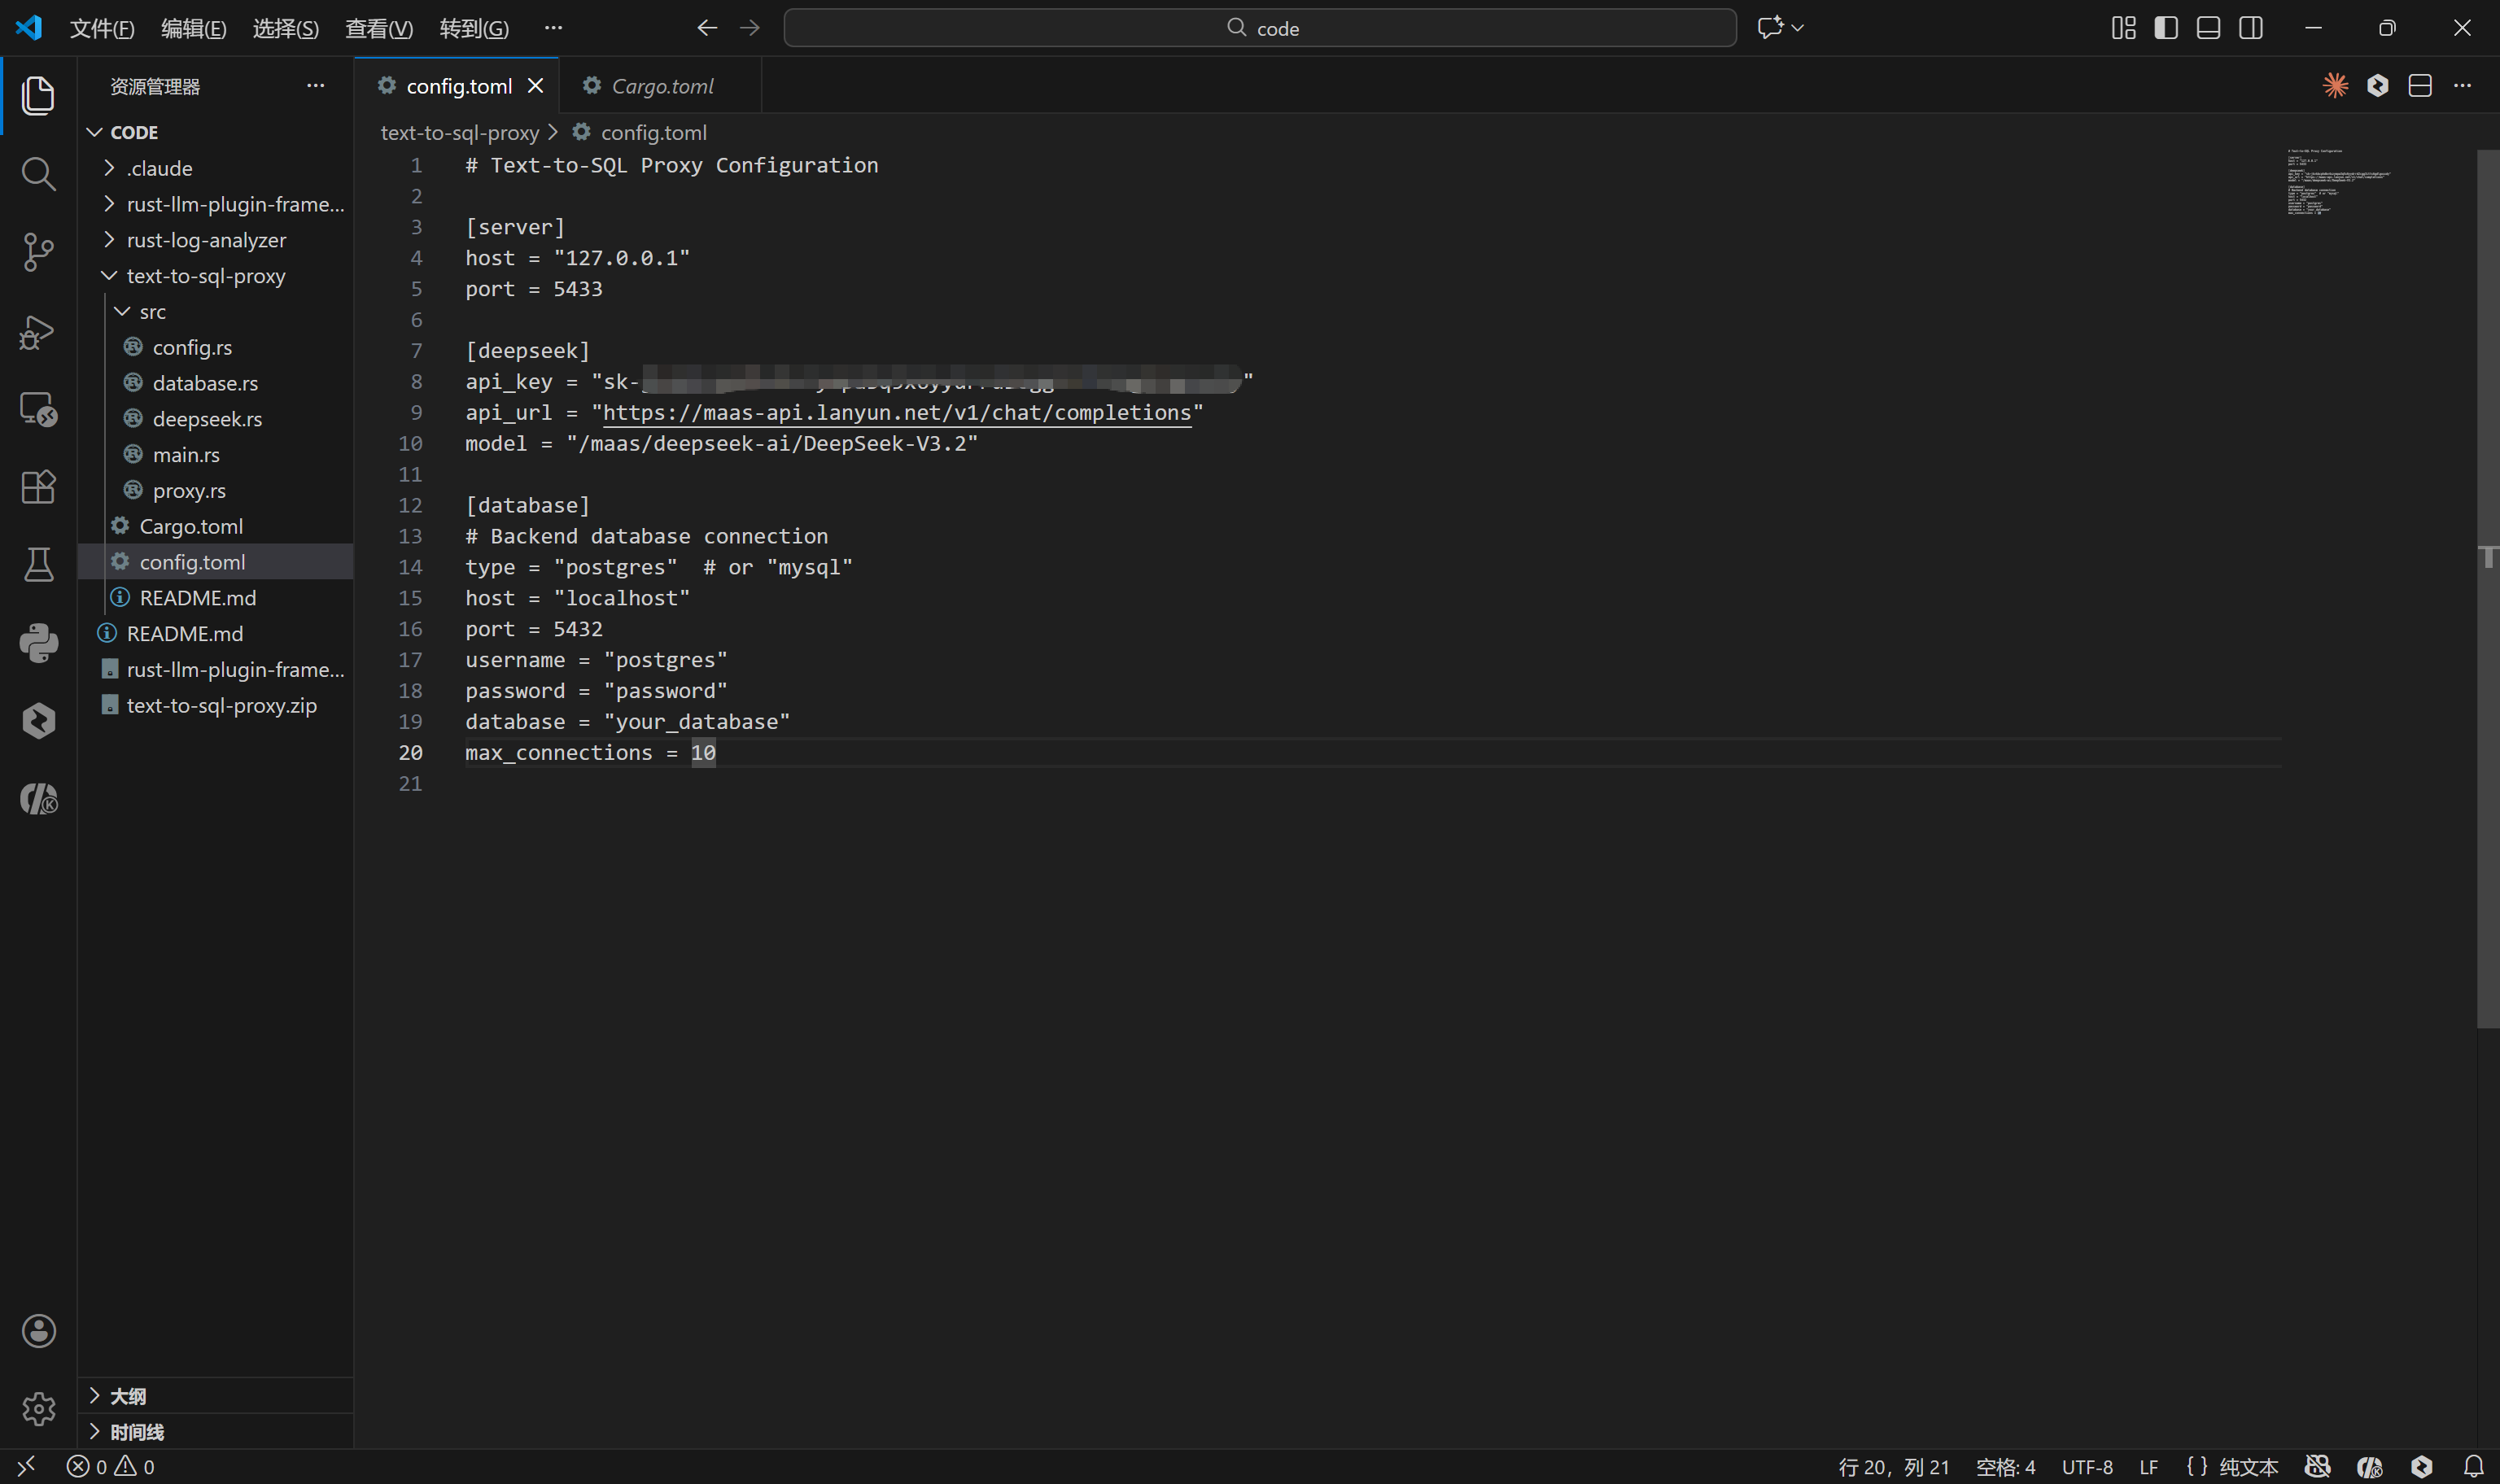
配置文件定义了三个核心部分:
- Server:代理服务监听的地址与端口(5433),客户端将连接此端口。
- DeepSeek:大模型的接入端点与鉴权信息。
- Database:真实执行 SQL 的后端数据库凭证。
2. Rust 依赖库体系
在 Cargo.toml 中定义项目的依赖树。每一个 crate 都扮演着不可或缺的角色:
toml
[package]
name = "text-to-sql-proxy"
version = "0.1.0"
edition = "2021"

[dependencies]
tokio = { version = "1.35", features = ["full"] }
pgwire = "0.20"
sqlx = { version = "0.7", features = ["runtime-tokio-native-tls", "postgres", "mysql"] }
serde = { version = "1.0", features = ["derive"] }
serde_json = "1.0"
reqwest = { version = "0.11", features = ["json"] }
anyhow = "1.0"
tracing = "0.1"
tracing-subscriber = "0.3"
toml = "0.8"
async-trait = "0.1"
bytes = "1.5"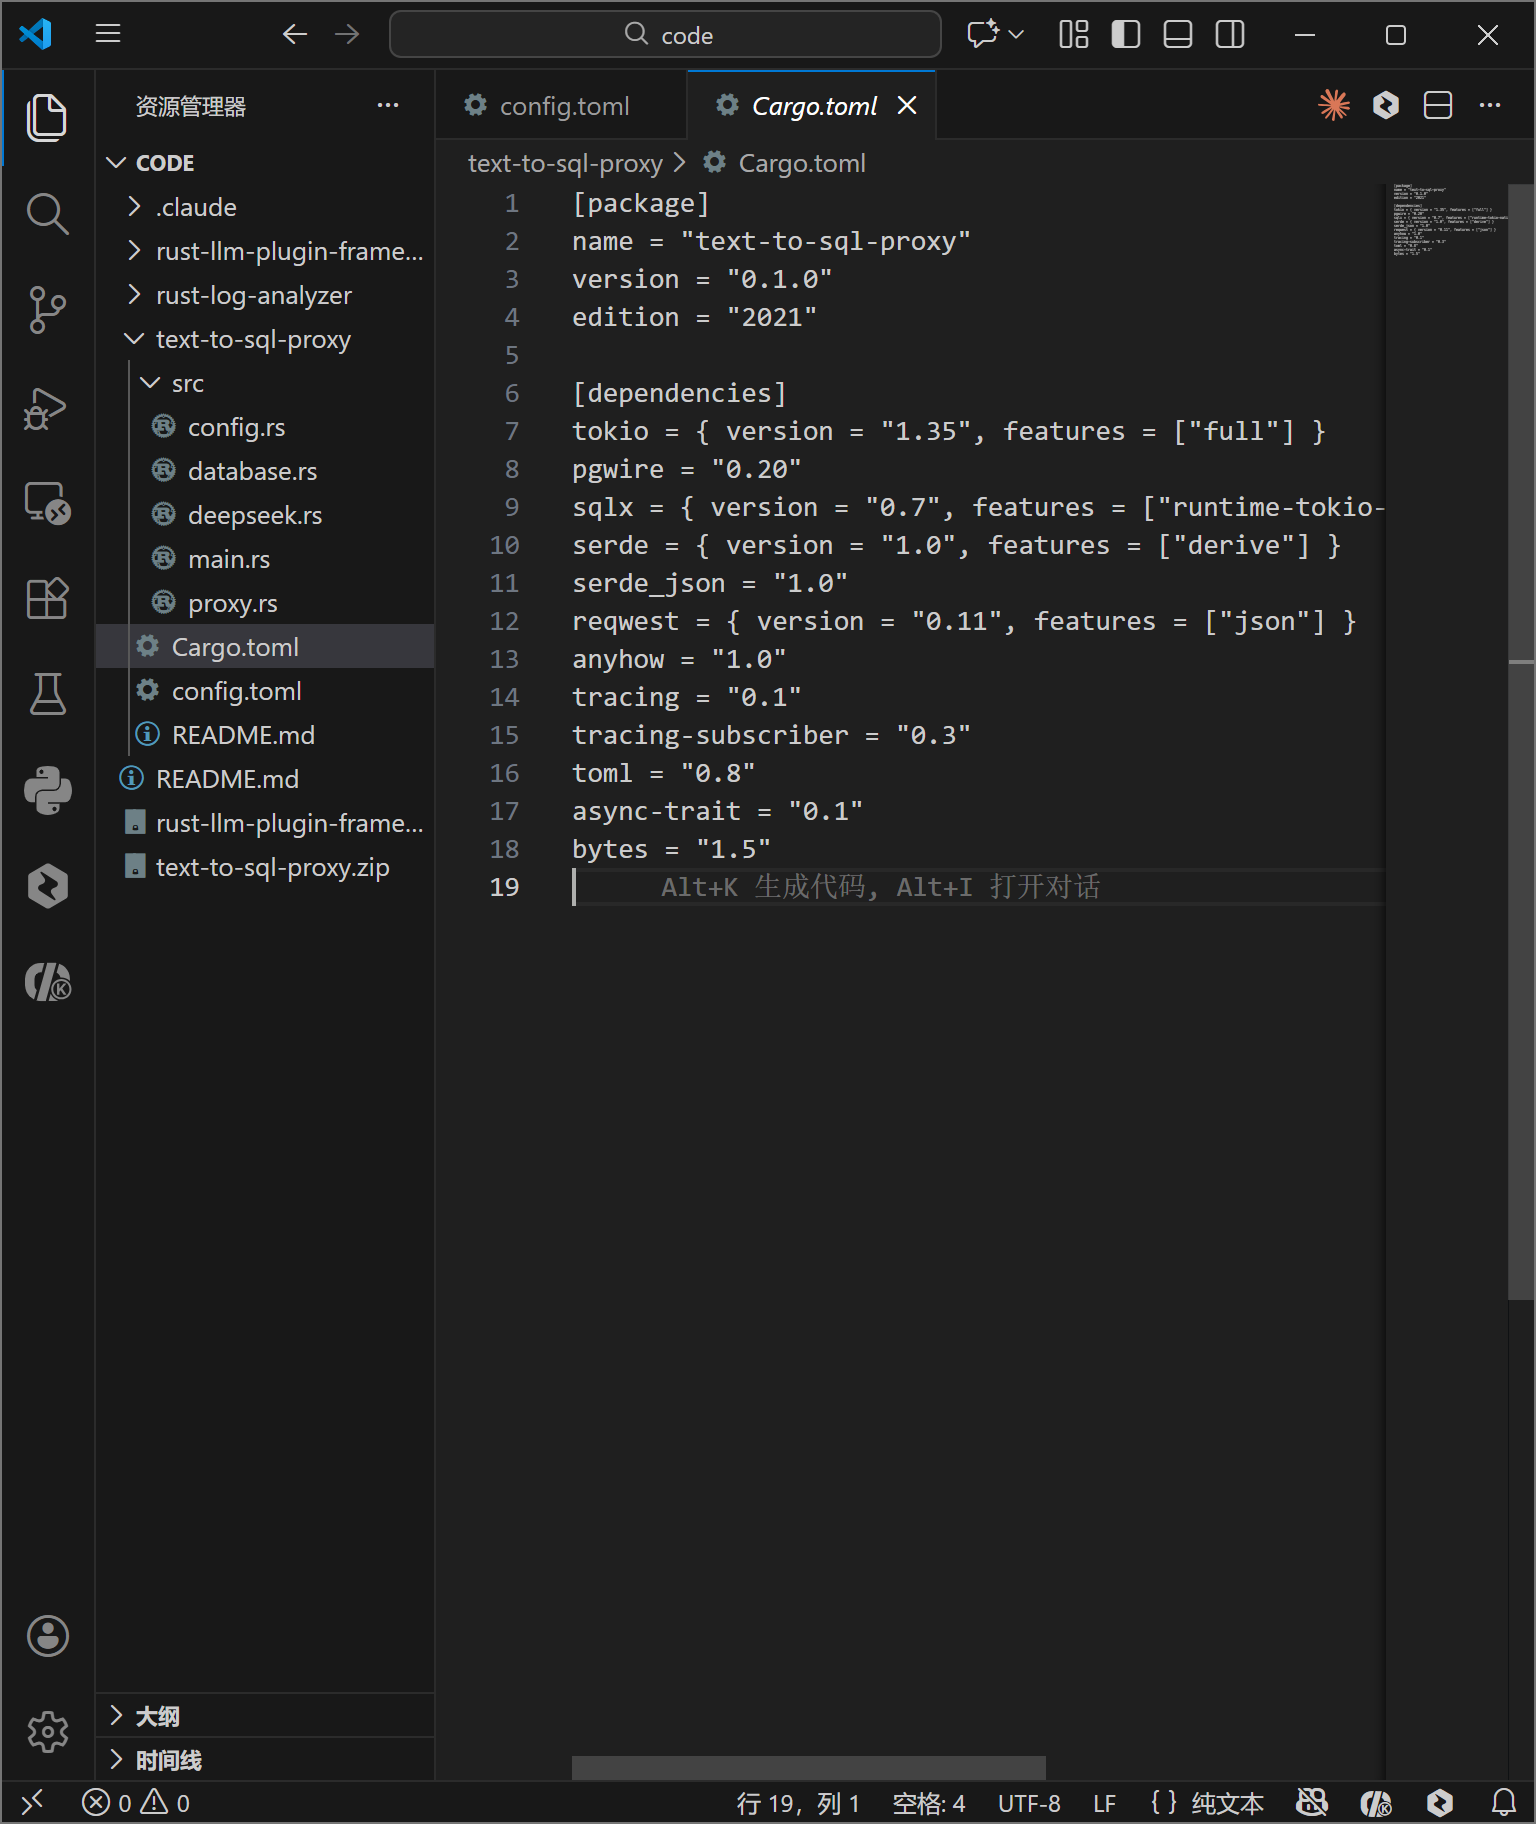
- tokio : 提供了异步 I/O 的核心驱动,
full特性开启了包括 TCP、多线程调度器在内的所有功能。 - pgwire: 本项目的核心组件,实现了 PostgreSQL 的通信协议,使得我们的 Rust 程序能够表现得像一个标准的 Postgres 数据库。
- sqlx: 用于连接后端真实数据库。它是一个纯 Rust 编写的异步 SQL 库,支持编译时检查(虽然本项目主要使用其动态查询功能)。
- serde & serde_json: 处理 JSON 数据的序列化与反序列化,主要用于解析配置文件和处理 DeepSeek API 的响应。
- reqwest: 异步 HTTP 客户端,用于向 DeepSeek 发送 REST 请求。
- tracing: 结构化日志记录库,用于追踪异步任务的执行流。
五、 核心代码实现深度解析
项目代码结构清晰,划分为配置加载、数据库交互、大模型集成、协议处理与主程序入口。
1. 配置加载模块 (config.rs)
该模块利用 serde 的派生宏(derive macros)将 TOML 文本自动映射为 Rust 结构体。
rust
use serde::{Deserialize, Serialize};
use std::fs;
use anyhow::Result;

#[derive(Debug, Clone, Deserialize, Serialize)]
pub struct Config {
    pub server: ServerConfig,
    pub deepseek: DeepSeekConfig,
    pub database: DatabaseConfig,
}
// ... 结构体定义 ...
impl Config {
    pub fn from_file(path: &str) -> Result<Self> {
        let content = fs::read_to_string(path)?;
        let config: Config = toml::from_str(&content)?;
        Ok(config)
    }
}
anyhow::Result 用于简化错误处理,当文件读取失败或 TOML 格式错误时,能够向上传播具体的错误上下文。这种类型安全的配置读取方式避免了运行时因配置错误导致的 panic。
2. 数据库后端抽象 (database.rs)
此模块封装了与真实 PostgreSQL 数据库的交互逻辑。它不仅负责执行 SQL,还负责获取数据库的 Schema 信息,这是 LLM 能够准确生成 SQL 的关键。
rust
use anyhow::Result;
use sqlx::{postgres::PgPoolOptions, PgPool, Row};
use tracing::info;

#[derive(Clone)]
pub struct DatabaseBackend {
    pool: PgPool,
}

impl DatabaseBackend {
    pub async fn new(
        host: &str,
        port: u16,
        username: &str,
        password: &str,
        database: &str,
        max_connections: u32,
    ) -> Result<Self> {
        let connection_string = format!(
            "postgres://{}:{}@{}:{}/{}",
            username, password, host, port, database
        );

        info!("Connecting to backend database: {}:{}/{}", host, port, database);

        let pool = PgPoolOptions::new()
            .max_connections(max_connections)
            .connect(&connection_string)
            .await?;

        Ok(Self { pool })
    }

    pub async fn execute_query(&self, sql: &str) -> Result<Vec<Vec<String>>> {
        info!("Executing SQL: {}", sql);

        let rows = sqlx::query(sql).fetch_all(&self.pool).await?;

        let mut result = Vec::new();
        for row in rows {
            let mut row_data = Vec::new();
            for i in 0..row.len() {
                let value: Option<String> = row.try_get(i).ok();
                row_data.push(value.unwrap_or_else(|| "NULL".to_string()));
            }
            result.push(row_data);
        }

        Ok(result)
    }

    pub async fn get_schema(&self) -> Result<String> {
        let query = r#"
            SELECT
                table_name,
                column_name,
                data_type
            FROM information_schema.columns
            WHERE table_schema = 'public'
            ORDER BY table_name, ordinal_position
        "#;

        let rows = sqlx::query(query).fetch_all(&self.pool).await?;

        let mut schema = String::new();
        for row in rows {
            let table: String = row.try_get("table_name")?;
            let column: String = row.try_get("column_name")?;
            let data_type: String = row.try_get("data_type")?;
            schema.push_str(&format!("{}.{} ({})\n", table, column, data_type));
        }

        Ok(schema)
    }
}
get_schema 方法至关重要。它查询系统表 information_schema.columns,提取所有公有表的表名、列名和数据类型。这些信息将被拼接成一段描述性文本,作为 Prompt 的一部分发送给 DeepSeek,让 AI 理解数据库的结构。
execute_query 方法则展示了代理的通用性设计:它不尝试解析具体的 SQL 结果类型,而是将所有结果统统转换为 String。这种弱类型处理是为了兼容任意的 SQL 查询结果,因为代理层本身无法预知用户会查询什么数据。
3. DeepSeek 客户端集成 (deepseek.rs)
该模块负责构造 HTTP 请求,将自然语言和 Schema 上下文发送给 LLM,并解析返回的 SQL。
rust
use anyhow::Result;
use reqwest::Client;
use serde::{Deserialize, Serialize};
use tracing::{info, warn};

#[derive(Debug, Clone)]
pub struct DeepSeekClient {
    api_key: String,
    api_url: String,
    model: String,
    client: Client,
}

#[derive(Debug, Serialize)]
struct ChatRequest {
    model: String,
    messages: Vec<Message>,
    temperature: f32,
}

#[derive(Debug, Serialize, Deserialize)]
struct Message {
    role: String,
    content: String,
}

#[derive(Debug, Deserialize)]
struct ChatResponse {
    choices: Vec<Choice>,
}

#[derive(Debug, Deserialize)]
struct Choice {
    message: Message,
}

impl DeepSeekClient {
    pub fn new(api_key: String, api_url: String, model: String) -> Self {
        Self {
            api_key,
            api_url,
            model,
            client: Client::new(),
        }
    }

    pub async fn text_to_sql(&self, natural_language: &str, schema_context: &str) -> Result<String> {
        info!("Converting natural language to SQL: {}", natural_language);

        let system_prompt = format!(
            "You are a SQL expert. Convert natural language queries to SQL statements. \
             Database schema:\n{}\n\n\
             Rules:\n\
             1. Return ONLY the SQL query, no explanations\n\
             2. Use proper SQL syntax for PostgreSQL\n\
             3. If the query is ambiguous, make reasonable assumptions\n\
             4. Return SELECT queries when possible",
            schema_context
        );

        let request = ChatRequest {
            model: self.model.clone(),
            messages: vec![
                Message {
                    role: "system".to_string(),
                    content: system_prompt,
                },
                Message {
                    role: "user".to_string(),
                    content: natural_language.to_string(),
                },
            ],
            temperature: 0.3,
        };

        let response = self
            .client
            .post(&self.api_url)
            .header("Authorization", format!("Bearer {}", self.api_key))
            .json(&request)
            .send()
            .await?;

        if !response.status().is_success() {
            let error_text = response.text().await?;
            warn!("DeepSeek API error: {}", error_text);
            anyhow::bail!("DeepSeek API request failed: {}", error_text);
        }

        let chat_response: ChatResponse = response.json().await?;

        let sql = chat_response
            .choices
            .first()
            .map(|c| c.message.content.trim().to_string())
            .ok_or_else(|| anyhow::anyhow!("No response from DeepSeek"))?;

        info!("Generated SQL: {}", sql);
        Ok(sql)
    }
}
这里使用了 Prompt Engineering 技巧:在 System Prompt 中明确注入数据库 Schema,并设定严格的规则(如"只返回 SQL,不返回解释"、"使用 PostgreSQL 语法")。通过 temperature: 0.3 参数降低模型的随机性,确保生成的 SQL 稳定可靠。
4. 协议代理层 (proxy.rs)
这是整个系统的中枢神经。它实现了 pgwire 的 SimpleQueryHandler trait,从而接管了通过 PostgreSQL 协议传入的查询请求。
rust
use anyhow::Result;
use async_trait::async_trait;
use pgwire::api::auth::noop::NoopStartupHandler;
use pgwire::api::query::{PlaceholderExtendedQueryHandler, SimpleQueryHandler};
use pgwire::api::results::{DataRowEncoder, FieldFormat, FieldInfo, QueryResponse, Response, Tag};
use pgwire::api::{ClientInfo, Type};
use pgwire::error::{ErrorInfo, PgWireError, PgWireResult};
use std::sync::Arc;
use tracing::{error, info};

use crate::database::DatabaseBackend;
use crate::deepseek::DeepSeekClient;

pub struct SqlProxyProcessor {
    deepseek: Arc<DeepSeekClient>,
    database: Arc<DatabaseBackend>,
    schema_cache: Arc<tokio::sync::RwLock<String>>,
}

impl SqlProxyProcessor {
    pub fn new(deepseek: DeepSeekClient, database: DatabaseBackend) -> Self {
        Self {
            deepseek: Arc::new(deepseek),
            database: Arc::new(database),
            schema_cache: Arc::new(tokio::sync::RwLock::new(String::new())),
        }
    }

    async fn get_schema(&self) -> Result<String> {
        let cache = self.schema_cache.read().await;
        if !cache.is_empty() {
            return Ok(cache.clone());
        }
        drop(cache);

        let schema = self.database.get_schema().await?;
        let mut cache = self.schema_cache.write().await;
        *cache = schema.clone();
        Ok(schema)
    }

    async fn process_query(&self, query: &str) -> PgWireResult<Response<'static>> {
        info!("Received query: {}", query);

        // Check if it's already a valid SQL query or natural language
        let is_natural_language = !query.trim().to_uppercase().starts_with("SELECT")
            && !query.trim().to_uppercase().starts_with("INSERT")
            && !query.trim().to_uppercase().starts_with("UPDATE")
            && !query.trim().to_uppercase().starts_with("DELETE")
            && !query.trim().to_uppercase().starts_with("CREATE")
            && !query.trim().to_uppercase().starts_with("DROP");

        let sql = if is_natural_language {
            info!("Detected natural language query, converting to SQL");
            let schema = self.get_schema().await.map_err(|e| {
                error!("Failed to get schema: {}", e);
                PgWireError::UserError(Box::new(ErrorInfo::new(
                    "ERROR".to_string(),
                    "XX000".to_string(),
                    format!("Failed to get schema: {}", e),
                )))
            })?;

            self.deepseek.text_to_sql(query, &schema).await.map_err(|e| {
                error!("Failed to convert to SQL: {}", e);
                PgWireError::UserError(Box::new(ErrorInfo::new(
                    "ERROR".to_string(),
                    "XX000".to_string(),
                    format!("Failed to convert to SQL: {}", e),
                )))
            })?
        } else {
            info!("Detected SQL query, executing directly");
            query.to_string()
        };

        // Execute the SQL query
        let results = self.database.execute_query(&sql).await.map_err(|e| {
            error!("Failed to execute query: {}", e);
            PgWireError::UserError(Box::new(ErrorInfo::new(
                "ERROR".to_string(),
                "42P01".to_string(),
                format!("Query execution failed: {}", e),
            )))
        })?;

        // Build response
        self.build_response(results)
    }

    fn build_response(&self, results: Vec<Vec<String>>) -> PgWireResult<Response<'static>> {
        if results.is_empty() {
            return Ok(Response::Query(QueryResponse::new(
                Arc::new(vec![]),
                Arc::new(vec![]),
            )));
        }

        let num_columns = results.first().map(|r| r.len()).unwrap_or(0);
        let mut fields = Vec::new();
        for i in 0..num_columns {
            fields.push(FieldInfo::new(
                format!("column_{}", i + 1),
                None,
                None,
                Type::TEXT,
                FieldFormat::Text,
            ));
        }

        let mut data_rows = Vec::new();
        for row in results {
            let mut encoder = DataRowEncoder::new(Arc::new(fields.clone()));
            for value in row {
                encoder.encode_field(&value)?;
            }
            data_rows.push(encoder.finish());
        }

        Ok(Response::Query(QueryResponse::new(
            Arc::new(fields),
            Arc::new(data_rows),
        )))
    }
}

#[async_trait]
impl SimpleQueryHandler for SqlProxyProcessor {
    async fn do_query<'a, C>(
        &self,
        _client: &mut C,
        query: &'a str,
    ) -> PgWireResult<Vec<Response<'a>>>
    where
        C: ClientInfo + Unpin + Send + Sync,
    {
        let response = self.process_query(query).await?;
        Ok(vec![response])
    }
}
这里使用了 Arc<RwLock<String>> 来缓存 Schema 信息。数据库结构通常不会频繁变动,缓存可以避免每次请求都查询元数据,从而显著降低延迟。
逻辑判断 is_natural_language 采用了简单的关键字排除法。如果输入不以标准的 SQL 动词(SELECT, INSERT 等)开头,系统即认为这是自然语言请求,触发 AI 转换流程。
5. 主程序入口 (main.rs)
主函数负责组装各个组件,并启动 TCP 监听循环。
rust
mod config;
mod database;
mod deepseek;
mod proxy;

#[cfg(test)]
mod tests {
    use super::*;
    use anyhow::Result;
    use std::sync::Arc;
    use tokio::net::{TcpListener, TcpStream};
    use tokio::sync::mpsc;
    use std::time::Duration;
    use tempfile::NamedTempFile;
    use std::io::Write;

    // Mock structs for testing
    struct MockDeepSeekClient {
        should_fail: bool,
    }

    impl MockDeepSeekClient {
        fn new() -> Self {
            Self { should_fail: false }
        }

        fn new_failing() -> Self {
            Self { should_fail: true }
        }

        async fn text_to_sql(&self, _query: &str, _schema: &str) -> Result<String> {
            if self.should_fail {
                Err(anyhow::anyhow!("Mock DeepSeek API error"))
            } else {
                Ok("SELECT * FROM test_table".to_string())
            }
        }
    }

    struct MockDatabaseBackend {
        should_fail: bool,
    }

    impl MockDatabaseBackend {
        fn new() -> Self {
            Self { should_fail: false }
        }

        fn new_failing() -> Self {
            Self { should_fail: true }
        }

        async fn new(
            _host: &str,
            _port: u16,
            _username: &str,
            _password: &str,
            _database: &str,
            _max_connections: u32,
        ) -> Result<Self> {
            Ok(Self::new())
        }

        async fn get_schema(&self) -> Result<String> {
            if self.should_fail {
                Err(anyhow::anyhow!("Mock database error"))
            } else {
                Ok("CREATE TABLE test_table (id INT, name VARCHAR(100))".to_string())
            }
        }

        async fn execute_query(&self, _query: &str) -> Result<Vec<Vec<String>>> {
            if self.should_fail {
                Err(anyhow::anyhow!("Mock query execution error"))
            } else {
                Ok(vec![
                    vec!["1".to_string(), "Alice".to_string()],
                    vec!["2".to_string(), "Bob".to_string()],
                ])
            }
        }
    }

    struct MockSqlProxyProcessor {
        should_fail: bool,
    }

    impl MockSqlProxyProcessor {
        fn new() -> Self {
            Self { should_fail: false }
        }

        fn new_failing() -> Self {
            Self { should_fail: true }
        }
    }

    // Helper function to create a temporary config file
    async fn create_temp_config() -> Result<NamedTempFile> {
        let config_content = r#"
[server]
host = "127.0.0.1"
port = 65432

[deepseek]
api_key = "test_api_key"
api_url = "https://api.deepseek.com/v1"
model = "deepseek-codex"

[database]
type = "postgresql"
host = "localhost"
port = 5432
username = "test_user"
password = "test_password"
database = "test_db"
max_connections = 5
"#;

        let mut temp_file = NamedTempFile::new()?;
        temp_file.write_all(config_content.as_bytes())?;
        Ok(temp_file)
    }

    // Test successful configuration loading
    #[tokio::test]
    async fn test_config_loading() {
        // Create a temporary config file
        let temp_config = create_temp_config().await.unwrap();
        let config_path = temp_config.path().to_str().unwrap();

        // Load configuration
        let config_result = Config::from_file(config_path);

        assert!(config_result.is_ok());
        let config = config_result.unwrap();

        assert_eq!(config.server.host, "127.0.0.1");
        assert_eq!(config.server.port, 65432);
        assert_eq!(config.deepseek.api_key, "test_api_key");
        assert_eq!(config.database.host, "localhost");
        assert_eq!(config.database.port, 5432);
    }

    // Test configuration loading with invalid file
    #[tokio::test]
    async fn test_invalid_config_loading() {
        let config_result = Config::from_file("non_existent_config.toml");
        assert!(config_result.is_err());
    }

    // Test handle_client function
    #[tokio::test]
    async fn test_handle_client() {
        // Create a mock processor
        let processor = Arc::new(MockSqlProxyProcessor::new());

        // Create a pair of connected TCP sockets
        let listener = TcpListener::bind("127.0.0.1:0").await.unwrap();
        let addr = listener.local_addr().unwrap();

        // Spawn a task to accept the connection
        let (tx, mut rx) = mpsc::channel(1);
        tokio::spawn(async move {
            let (socket, _) = listener.accept().await.unwrap();
            tx.send(socket).await.unwrap();
        });

        // Connect to the server
        let client_socket = TcpStream::connect(addr).await.unwrap();
        let server_socket = rx.recv().await.unwrap();

        // Handle the client connection
        let result = handle_client(server_socket, processor).await;
        assert!(result.is_ok());
    }

    // Test initialization sequence
    #[tokio::test]
    async fn test_initialization_sequence() {
        // Initialize tracing
        tracing_subscriber::fmt()
            .with_max_level(tracing::Level::INFO)
            .try_init()
            .unwrap_or(());

        // Create a temporary config file
        let temp_config = create_temp_config().await.unwrap();
        let config_path = temp_config.path().to_str().unwrap();

        // Load configuration
        let config = Config::from_file(config_path).unwrap();

        // Initialize DeepSeek client (using a mock)
        let deepseek = MockDeepSeekClient::new();

        // Initialize database backend (using a mock)
        let database = MockDatabaseBackend::new();

        // Create SQL proxy processor (using a mock)
        let processor = Arc::new(MockSqlProxyProcessor::new());

        // Test that all components were created successfully
        assert_eq!(config.server.port, 65432);
        assert_eq!(config.deepseek.api_key, "test_api_key");
        assert_eq!(config.database.host, "localhost");

        // The processor should be successfully created
        let processor_count = Arc::strong_count(&processor);
        assert_eq!(processor_count, 1);
    }

    // Test server binding
    #[tokio::test]
    async fn test_server_binding() {
        // Initialize tracing
        tracing_subscriber::fmt()
            .with_max_level(tracing::Level::INFO)
            .try_init()
            .unwrap_or(());

        // Create a temporary config file
        let temp_config = create_temp_config().await.unwrap();
        let config_path = temp_config.path().to_str().unwrap();

        // Load configuration
        let config = Config::from_file(config_path).unwrap();

        // Try to bind to a random port
        let server_addr = format!("{}:0", config.server.host);
        let listener_result = TcpListener::bind(&server_addr).await;

        assert!(listener_result.is_ok());
        let listener = listener_result.unwrap();
        let local_addr = listener.local_addr().unwrap();

        // Verify the listener is bound to a valid address
        assert!(local_addr.port() > 0);
    }

    // Test error handling in configuration
    #[tokio::test]
    async fn test_error_handling() {
        // Test with an invalid TOML configuration
        let mut temp_file = NamedTempFile::new().unwrap();
        temp_file.write_all(b"invalid toml content").unwrap();
        let config_path = temp_file.path().to_str().unwrap();

        let config_result = Config::from_file(config_path);
        assert!(config_result.is_err());

        if let Err(e) = config_result {
            assert!(e.to_string().contains("failed to parse"));
        }
    }
}

use anyhow::Result;
use pgwire::api::auth::noop::NoopStartupHandler;
use pgwire::api::query::PlaceholderExtendedQueryHandler;
use pgwire::tokio::process_socket;
use std::sync::Arc;
use tokio::net::TcpListener;
use tracing::{error, info};
use tracing_subscriber;

use config::Config;
use database::DatabaseBackend;
use deepseek::DeepSeekClient;
use proxy::SqlProxyProcessor;

#[tokio::main]
async fn main() -> Result<()> {
    // Initialize tracing
    tracing_subscriber::fmt()
        .with_max_level(tracing::Level::INFO)
        .init();

    info!("Starting Text-to-SQL Proxy Server...");

    // Load configuration
    let config = Config::from_file("config.toml")?;
    info!("Configuration loaded successfully");

    // Initialize DeepSeek client
    let deepseek = DeepSeekClient::new(
        config.deepseek.api_key.clone(),
        config.deepseek.api_url.clone(),
        config.deepseek.model.clone(),
    );
    info!("DeepSeek client initialized");

    // Initialize database backend
    let database = DatabaseBackend::new(
        &config.database.host,
        config.database.port,
        &config.database.username,
        &config.database.password,
        &config.database.database,
        config.database.max_connections,
    )
    .await?;
    info!("Database backend connected");

    // Create SQL proxy processor
    let processor = Arc::new(SqlProxyProcessor::new(deepseek, database));
    info!("SQL proxy processor created");

    // Start TCP listener
    let server_addr = format!("{}:{}", config.server.host, config.server.port);
    let listener = TcpListener::bind(&server_addr).await?;
    info!("Server listening on {}", server_addr);
    info!("Ready to accept connections!");

    // Accept connections
    loop {
        let (socket, addr) = listener.accept().await?;
        info!("New connection from: {}", addr);

        let processor_clone = processor.clone();

        tokio::spawn(async move {
            if let Err(e) = handle_client(socket, processor_clone).await {
                error!("Error handling client {}: {}", addr, e);
            }
        });
    }
}

async fn handle_client(
    socket: tokio::net::TcpStream,
    processor: Arc<SqlProxyProcessor>,
) -> Result<()> {
    let authenticator = Arc::new(NoopStartupHandler);
    let extended_query_handler = Arc::new(PlaceholderExtendedQueryHandler);

    process_socket(
        socket,
        None,
        authenticator,
        processor,
        extended_query_handler,
    )
    .await?;

    Ok(())
}
tokio::spawn 是实现高并发的关键。它将每个客户端连接的处理逻辑提交给 Tokio 执行器,这些任务会在线程池中被高效调度。即使某个连接正在等待 LLM 响应,执行器也可以切换去处理其他连接的 I/O 事件,绝不阻塞线程。
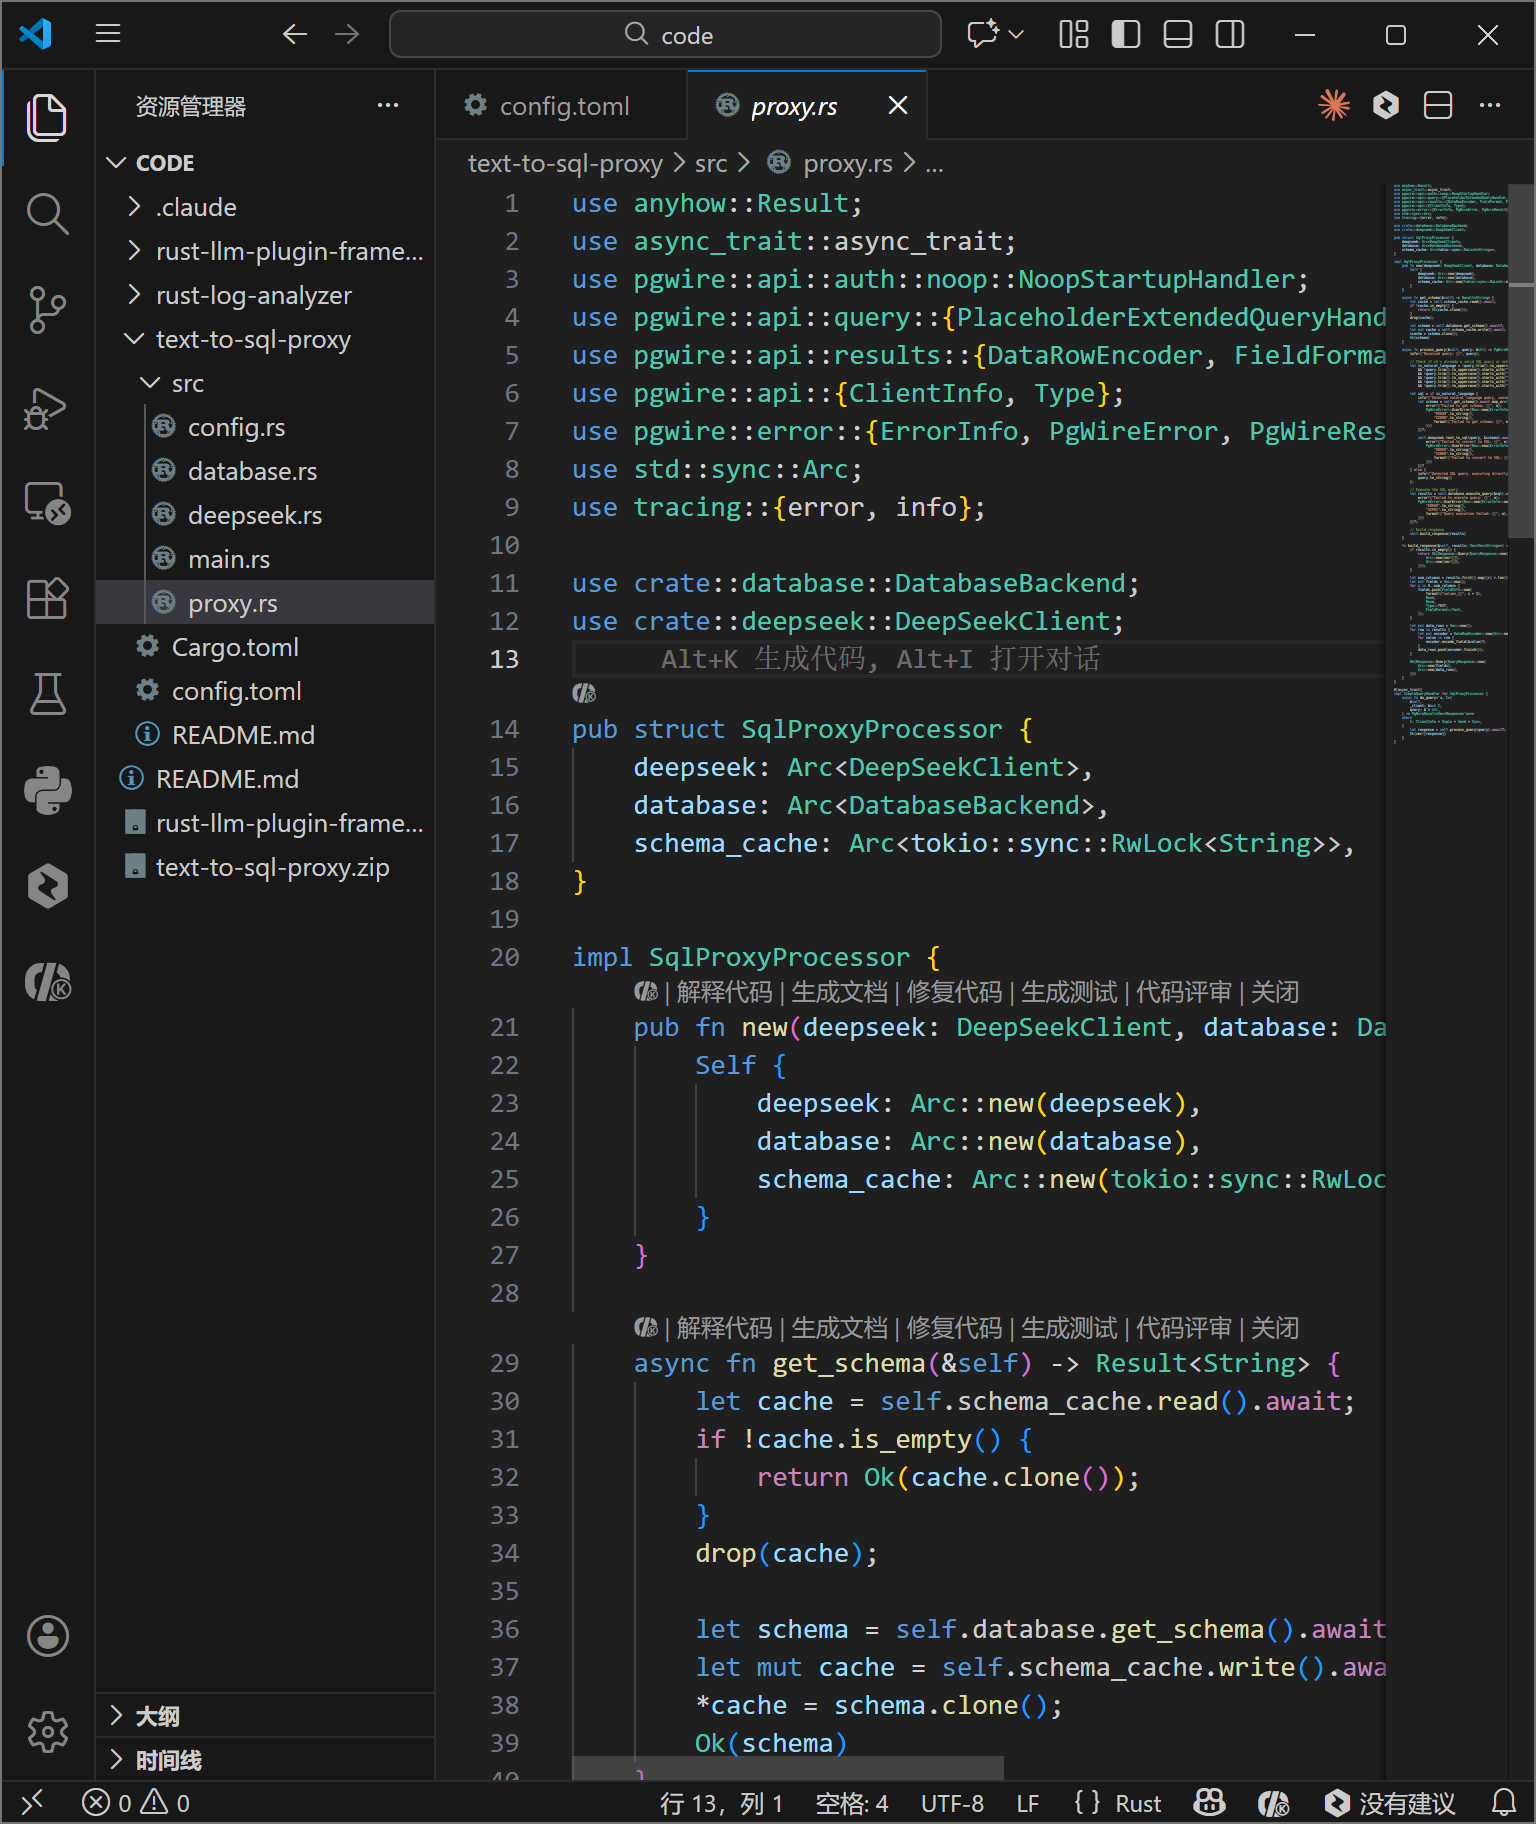
代码编写完成后,目录结构如上图所示。src 目录下包含了所有核心模块,结构清晰,职责分明。
六、 构建与运行
1. 编译发布
使用 Cargo 进行编译。--release 标志告诉编译器进行最高级别的优化(O3),移除调试符号,并进行死代码消除,以获得最佳的运行时性能。
bash
cd text-to-sql-proxy
cargo build --release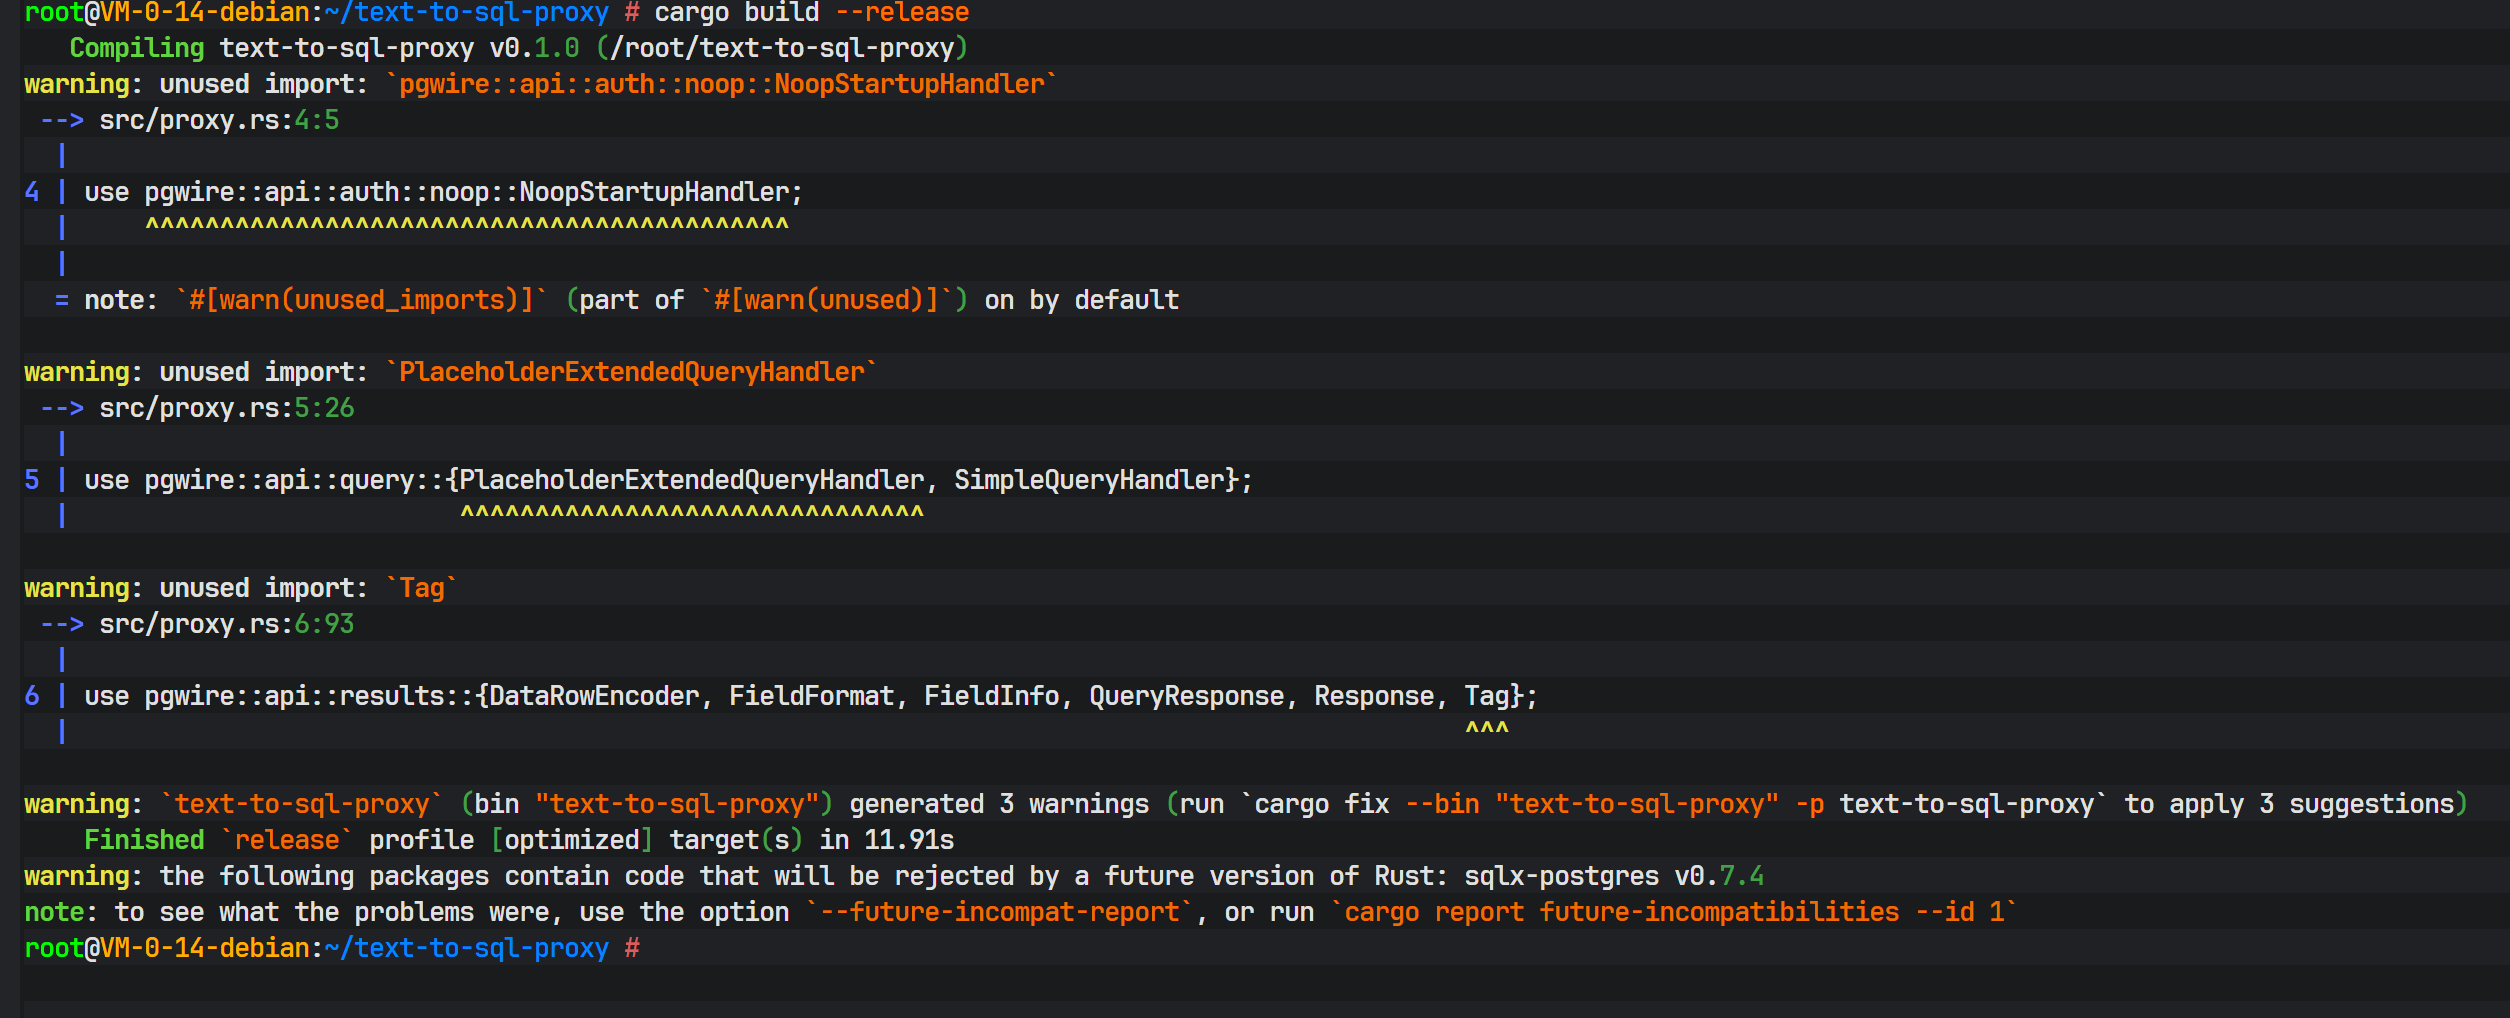
编译过程会下载所有依赖并进行编译,最后生成 target/release/text-to-sql-proxy 二进制文件。Rust 的编译时间通常较长,这是因为其在编译期进行了大量复杂的静态分析和优化。
2. 启动服务
运行编译好的程序:
bash
cargo run --release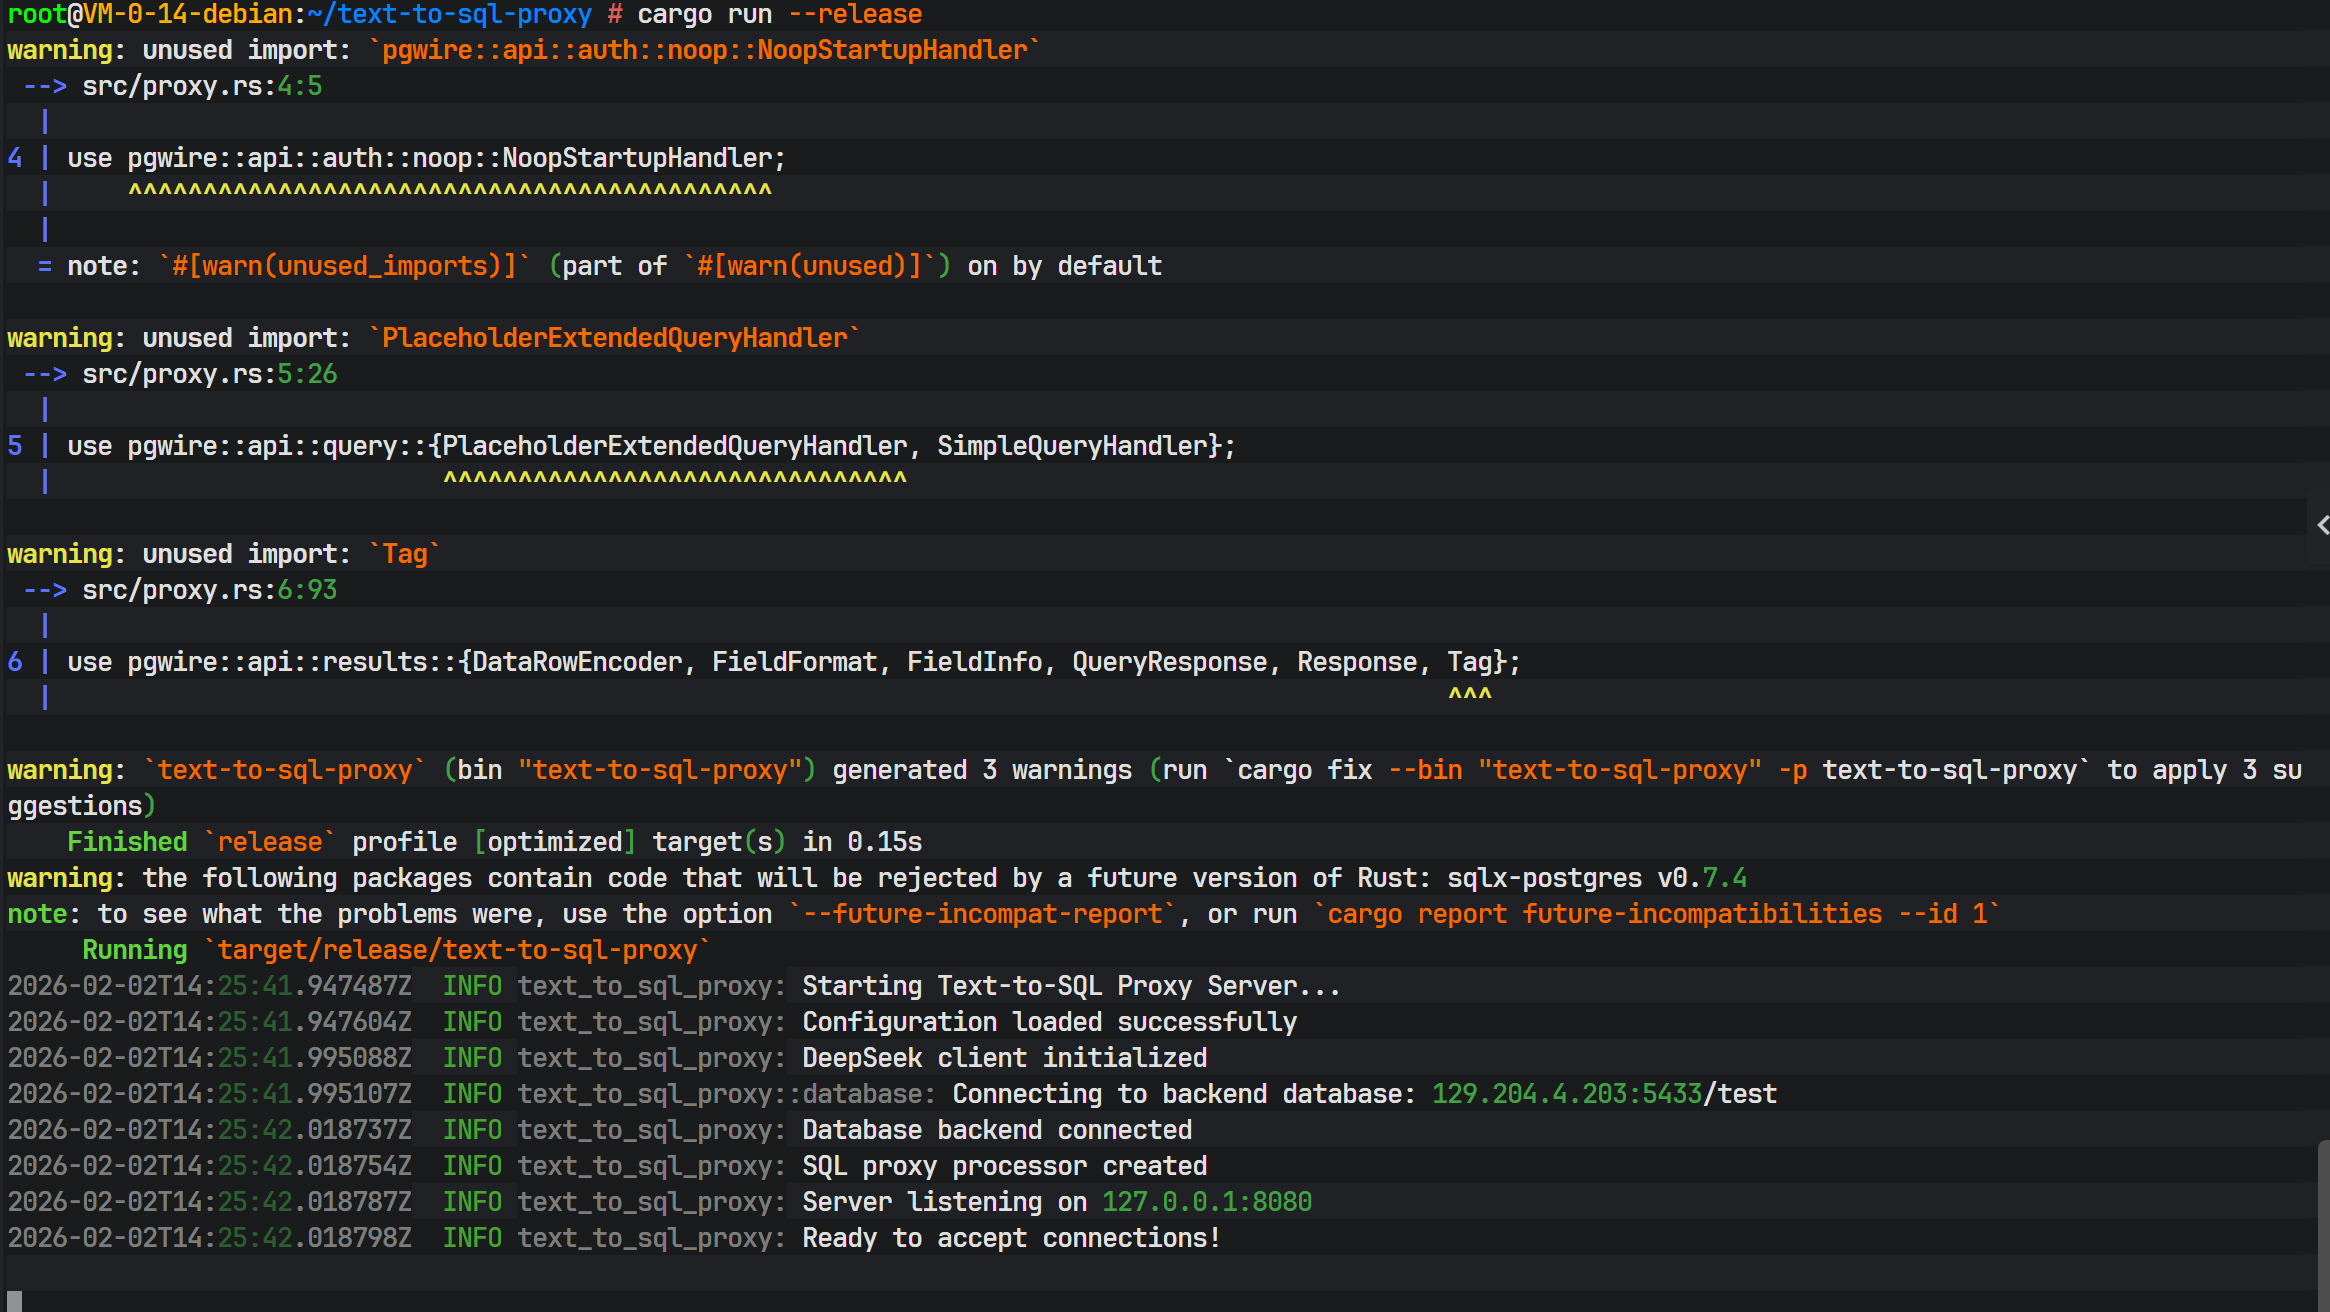
控制台输出显示服务已成功监听在配置端口,数据库后端连接成功,DeepSeek 客户端初始化完毕,系统进入待命状态。
七、 功能验证与交互测试
为了验证系统的实际效果,我们预先在后端数据库中插入了一些测试数据。
上图展示了 user_info 表中的预置数据,包含用户的姓名、邮箱等信息。
1. 客户端连接
开启一个新的终端,使用标准的 PostgreSQL 客户端工具 psql 连接到我们的代理服务(注意端口是 8080 或配置文件中设置的 5433,而非数据库原本的 5432)。
bash
psql -h 127.0.0.1 -p 8080 -U postgres -d test
psql 成功连接,提示符变为 test=#。在 psql 看来,它连接的是一个标准的 PostgreSQL 服务器,完全感知不到代理层的存在。
2. 自然语言查询测试
现在,我们输入自然语言指令而非 SQL:
帮我查询所有用户

系统瞬间返回了结果!这里发生了一系列复杂的后台操作:
- 代理拦截到字符串"帮我查询所有用户"。
- 判定这不是 SQL。
- 提取数据库 Schema。
- 将请求发送给 DeepSeek。
- DeepSeek 生成
SELECT * FROM user_info;。 - 代理在后端数据库执行该 SQL。
- 结果被封装并返回给
psql。
接着测试另一个表:
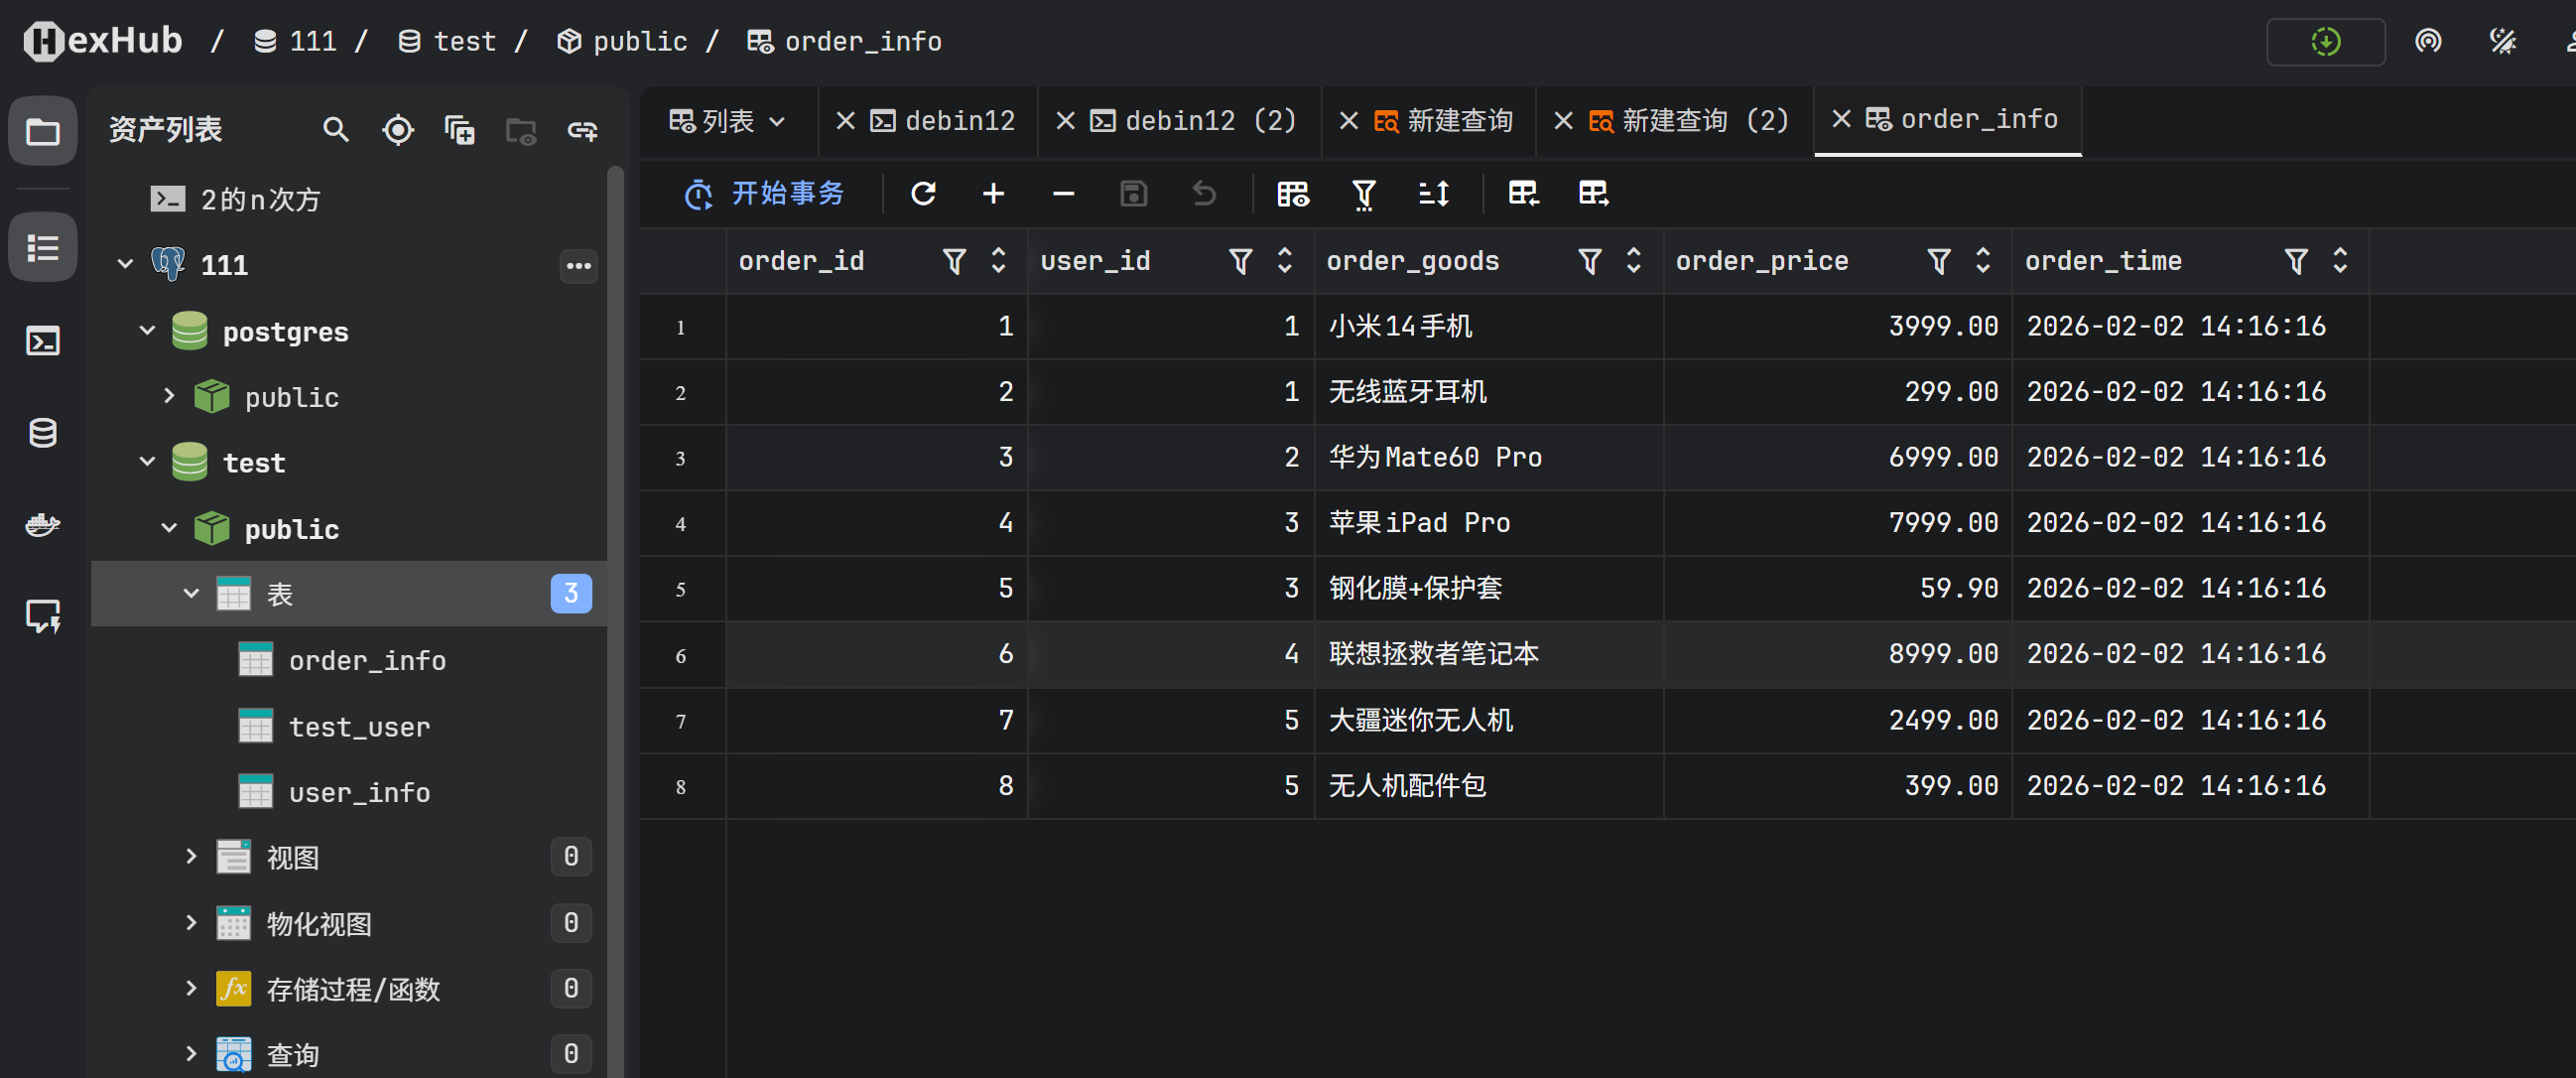
帮我查询下order_info中的内容;
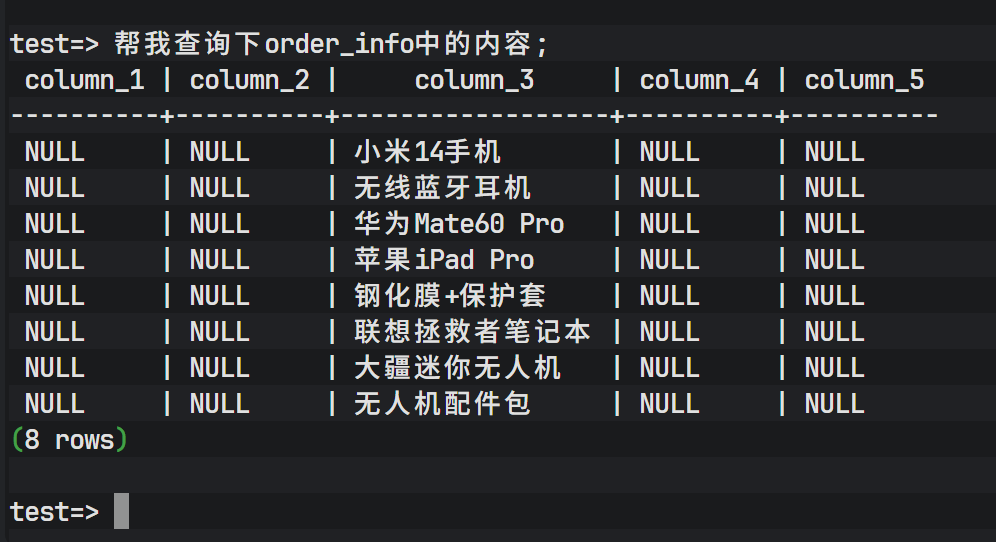
同样成功返回了 order_info 表的数据。
为了验证数据的准确性,我们可以对比直接查询数据库的结果。
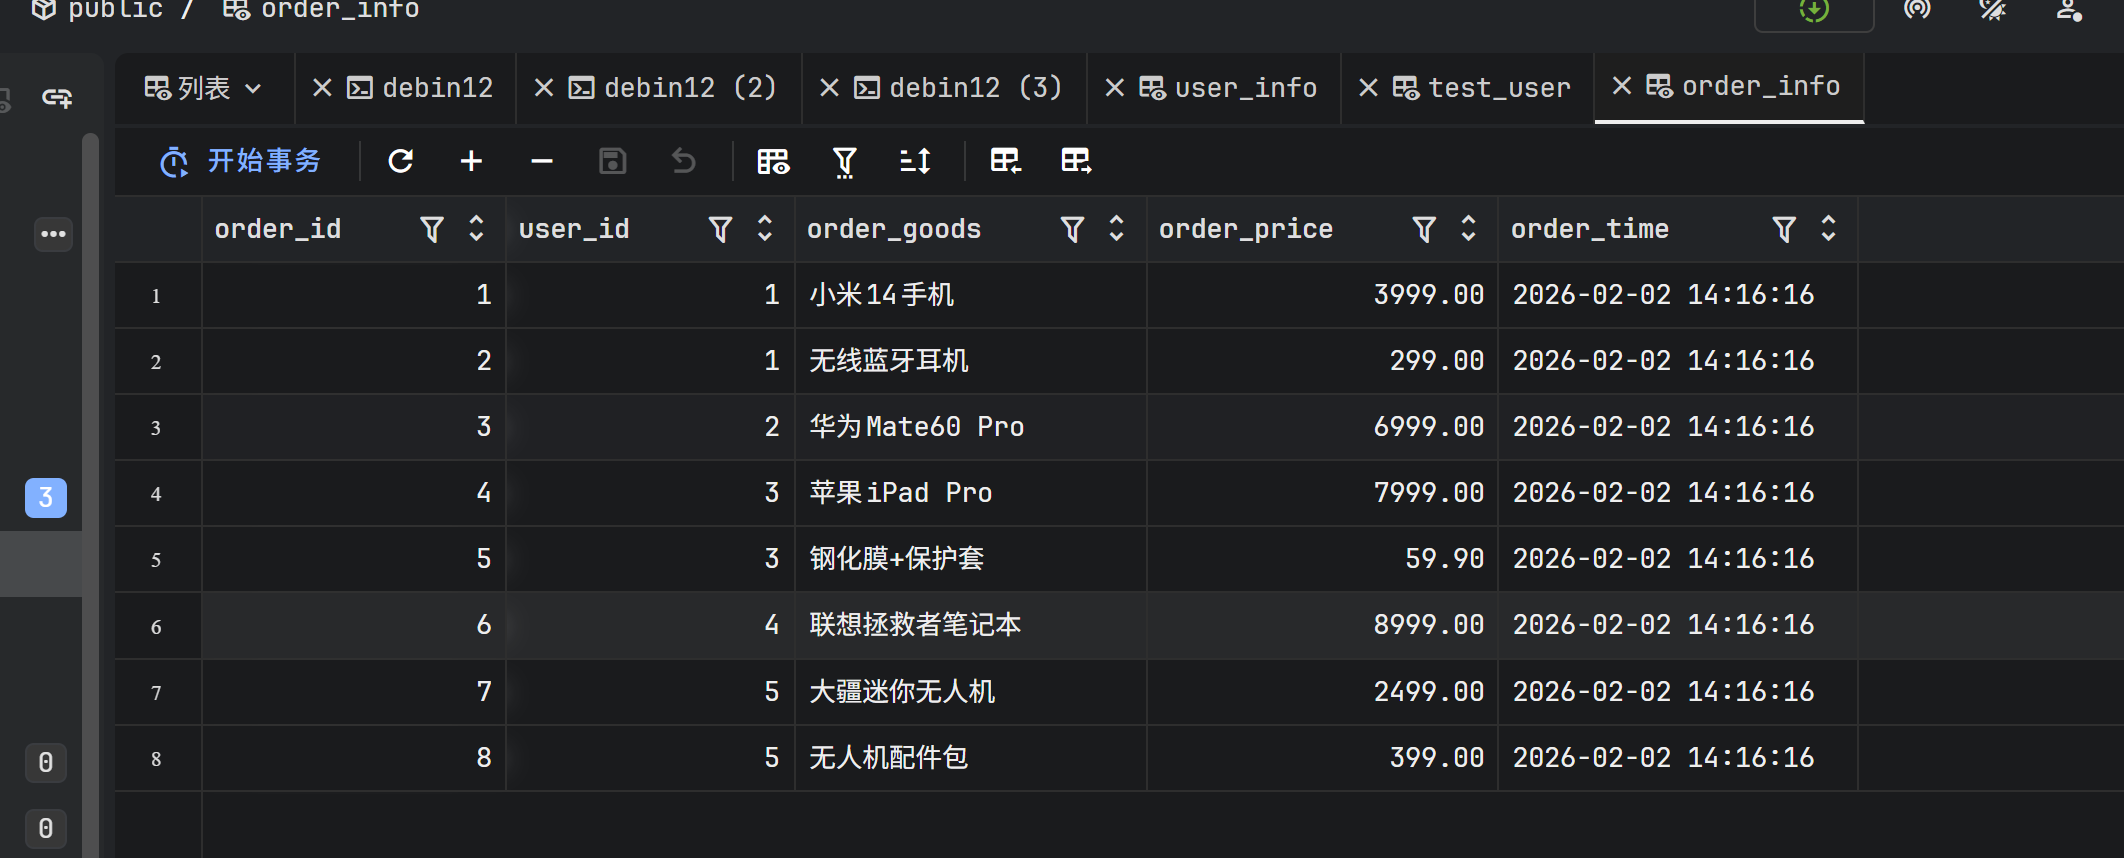
上图证明,通过代理查询得到的数据与数据库中的原始数据完全一致。
3. 后台日志监控
在代理服务的运行终端,我们可以看到详细的结构化日志流。

日志清晰记录了每个步骤:
Received query: 收到用户的自然语言输入。Detected natural language...: 识别意图。Generated SQL: 打印出 DeepSeek 生成的 SQL 语句,方便调试和审计。Executing SQL: 执行阶段。
4. API 调用监控
在蓝耘平台的控制台中,可以看到刚才的请求调用记录。
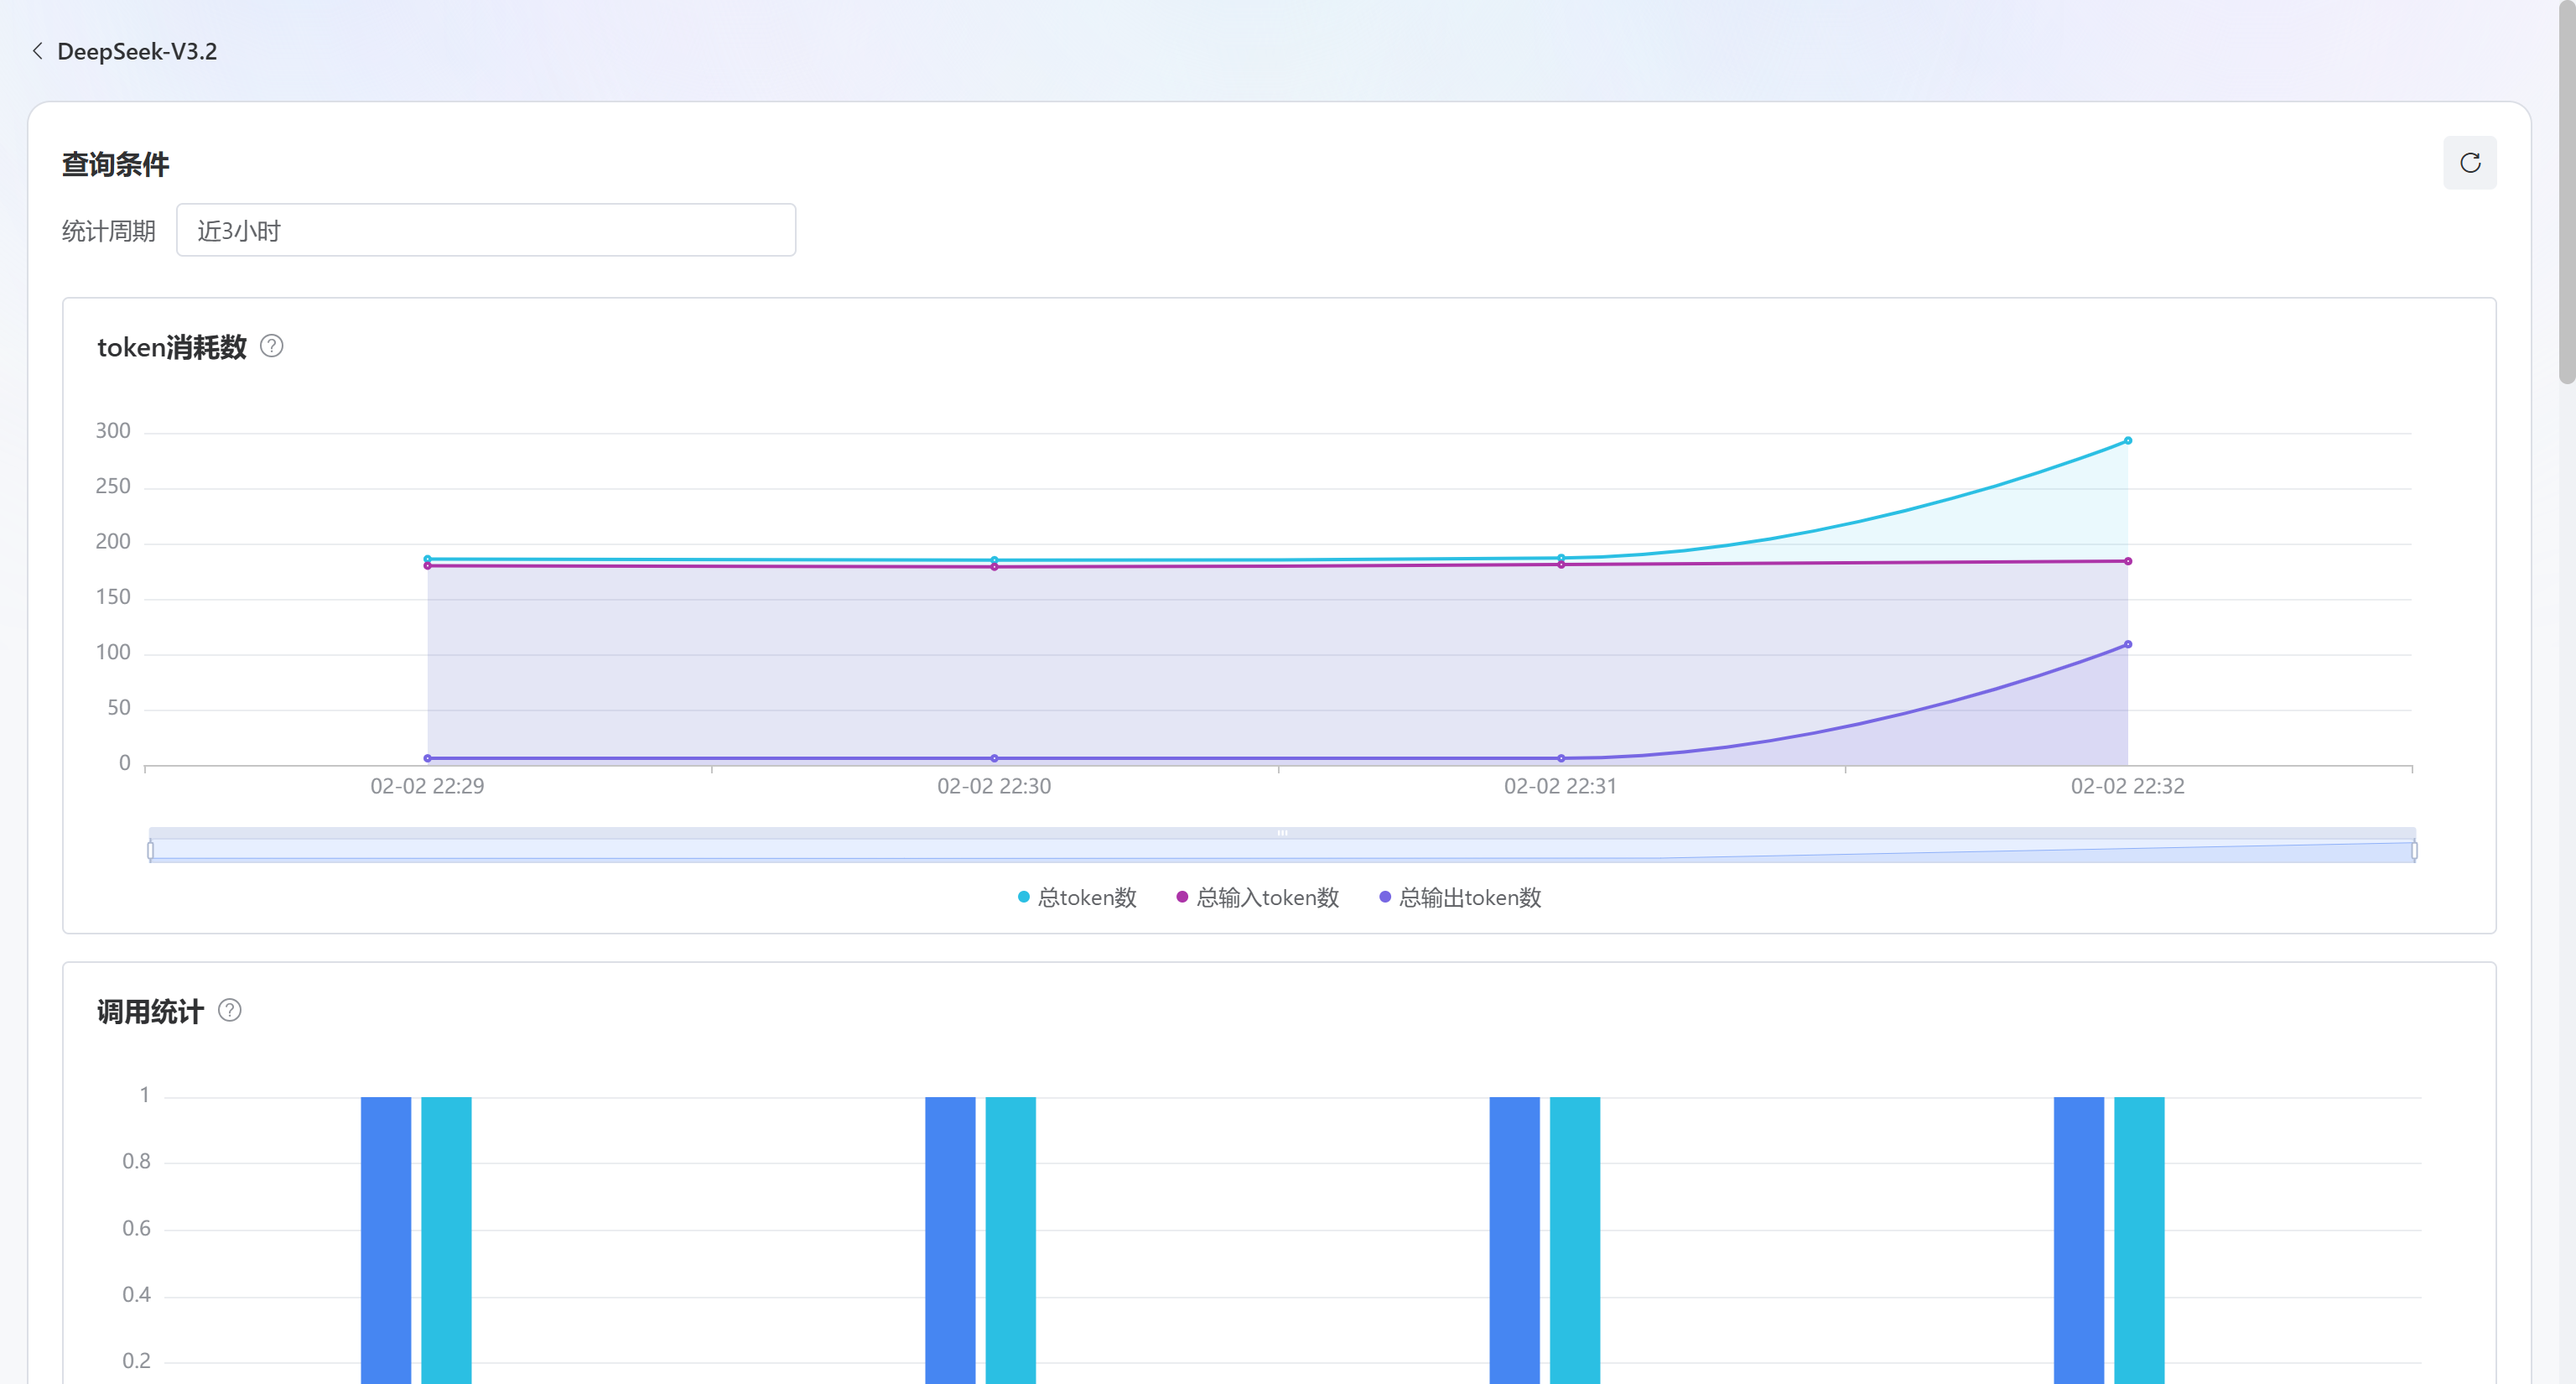
每一次自然语言查询都对应一次 API 调用,token 的消耗量取决于 Schema 的大小和用户输入的长度。
八、 总结与展望
本文展示了如何利用 Rust 强大的网络编程能力和 DeepSeek 的生成式 AI 能力,构建一个高性能的 Text-to-SQL 数据库代理。该架构打破了传统数据库交互的壁垒,让非技术人员也能通过自然语言获取数据。
项目优势在于:
- 高性能:Rust + Tokio 保证了极低的代理开销。
- 透明性:完全兼容 PG 协议,无需更换客户端。
- 智能化:DeepSeek 模型能够理解复杂的查询意图。
未来优化方向可以包括:
- 语义缓存:缓存自然语言到 SQL 的映射,减少 API 调用成本。
- 权限控制:在代理层增加基于角色的访问控制(RBAC),限制 AI 可生成的 SQL 类型(如只读)。
- 多轮对话:支持基于上下文的连续查询。
这一技术方案为企业内部的数据中台建设、BI 报表生成以及低代码开发平台提供了极具价值的参考实现。