一,简介
SRP管线的好处就是任何渲染效果都可以自己去实现,坏处就是任何渲染效果都要自己去实现。
本文在Catlike Coding 实现的【Custom SRP 2.5.0】基础上给出几个经典光照模型的Shader实现,Catlike Coding在这教程中使用的是PBR光照模型,网上常见的实现范例都是基于Unity预设的管线,这边给出这个教程框架下的实现。
二,环境
Unity :2022.3.18f1
CRP Library :14.0.10
URP基本结构 : Custom SRP 2.5.0
三、实现
光照模型主要考虑的如何计算影响到物体上的光,常见的光照区分方式有Phong 模型中区分环境光(Ambient)、漫反射(Diffuse)和高光反射(Specular)。 或是全局光照模型中区分直接光照(Direct Illumination)和间接光照(Indirect Illumination) 。在渲染中有时候还要考虑物体的自发光 ,以及其他地方过来的折射光。
在工程实现角度来讲,拆解光照有助于理解实现思路,毕竟有时候我们并不关心光学理论去解释为什么要这么做。
1,Lambert(兰伯特)光照模型
Lambert光照模型是最简单的光照模型,主要考虑环境光和漫反射光。在这个模型中,漫反射光是主要处理的。漫反射光的处理思想也很简单,只要将各个光源照射到物体表面的颜色叠加起来即可。所以简单来说最终的颜色应该是:
(环境光 + 各个光源的颜色影响) 混合 物体自身颜色
当然,各个光源的颜色影响不是简单的取色,Lambert在处理的时候会将物体表面的法线考虑进去,所以一般的Lambert的简单实现都是类似这样:
光照颜色 * (表面法线与入射光方向的夹角)
公式为:
N 为法线,L为入射光方向,k为其他影响参数比如光源距离、自定义调节等等。
在该管线中shader实现:
Shader "Custom/LambertShader"
{
Properties
{
_Color ("Color", Color) = (1,1,1,1)
_MainTex ("Albedo (RGB)", 2D) = "white" {}
_NormalTex ("NormalTex", 2D) = "white" {}
}
SubShader
{
Pass
{
Tags { "LightMode" = "CustomLit"}
HLSLPROGRAM
#pragma target 4.5
//没错,这个就是代码过于耦合的下场,为了实现一个简单的shader我不得不把一堆引用加进来
#include "Custom RP/ShaderLibrary/Common.hlsl"
#include "Custom RP/ShaderLibrary/Surface.hlsl"
#include "Custom RP/ShaderLibrary/Shadows.hlsl"
#include "Custom RP/ShaderLibrary/Light.hlsl"
#include "Custom RP/ShaderLibrary/BRDF.hlsl"
#include "Custom RP/ShaderLibrary/GI.hlsl"
#include "Custom RP/ShaderLibrary/Lighting.hlsl"
#include "Custom RP/ShaderLibrary/LitInput.hlsl"
struct Attributes {
float3 positionOS : POSITION;
float3 normalOS : NORMAL;
float4 tangentOS : TANGENT;
float2 baseUV : TEXCOORD0;
};
struct Varyings {
float4 positionCS_SS : SV_POSITION;
float3 positionWS : VAR_POSITION;
float3 normalWS : VAR_NORMAL;
float2 baseUV : VAR_BASE_UV;
float4 tangentWS : VAR_TANGENT;
};
#pragma vertex LitPassVertex
#pragma fragment LitPassFragment
TEXTURE2D(_MainTex);
SAMPLER(sampler_MainTex);
TEXTURE2D(_NormalTex);
SAMPLER(sampler_NormalTex);
UNITY_INSTANCING_BUFFER_START(UnityPerMaterial)
UNITY_DEFINE_INSTANCED_PROP(float4, _MainTex_ST)
UNITY_DEFINE_INSTANCED_PROP(float4, _Color)
UNITY_INSTANCING_BUFFER_END(UnityPerMaterial)
Varyings LitPassVertex(Attributes input)
{
Varyings output;
output.positionWS = TransformObjectToWorld(input.positionOS);
output.positionCS_SS = TransformWorldToHClip(output.positionWS);
float4 baseST = INPUT_PROP(_MainTex_ST);
output.baseUV = input.baseUV * baseST.xy + baseST.zw;
output.normalWS = TransformObjectToWorldNormal(input.normalOS);
output.tangentWS = float4(TransformObjectToWorldDir(input.tangentOS.xyz), input.tangentOS.w);
return output;
}
//获取环境光,这里只是简单采样
float3 GetAmbientLight(float3 normalWS)
{
float4 coefficients[7];
coefficients[0] = unity_SHAr;
coefficients[1] = unity_SHAg;
coefficients[2] = unity_SHAb;
coefficients[3] = unity_SHBr;
coefficients[4] = unity_SHBg;
coefficients[5] = unity_SHBb;
coefficients[6] = unity_SHC;
return max(0.0, SampleSH9(coefficients, normalWS));
}
float4 LitPassFragment(Varyings input) : SV_TARGET
{
float4 color = INPUT_PROP(_Color);
float4 baseColor = SAMPLE_TEXTURE2D(_MainTex, sampler_MainTex, input.baseUV) * color;
float4 normalE = SAMPLE_TEXTURE2D(_NormalTex, sampler_NormalTex, input.baseUV);
float3 normal = DecodeNormal(normalE, 1);
float3 normalWS = NormalTangentToWorld(normal,input.normalWS, input.tangentWS);
float3 diffuse = 0;
for (int i = 0; i < GetDirectionalLightCount(); i++) {
DirectionalLightData data = _DirectionalLightData[i];
diffuse += data.color.rgb * max(0, dot(normalWS, data.directionAndMask.xyz));
}
float3 ambient = GetAmbientLight(normalWS);
return float4(baseColor.xyz * (diffuse + ambient),1) ;
}
ENDHLSL
}
}
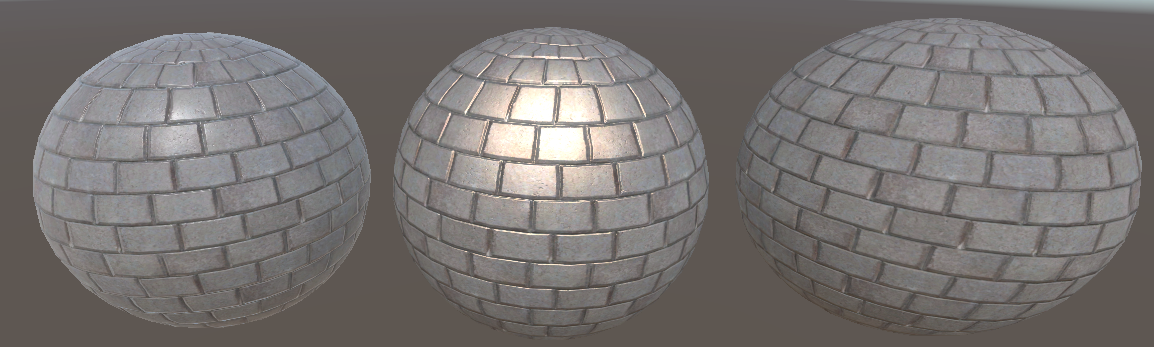
}效果:
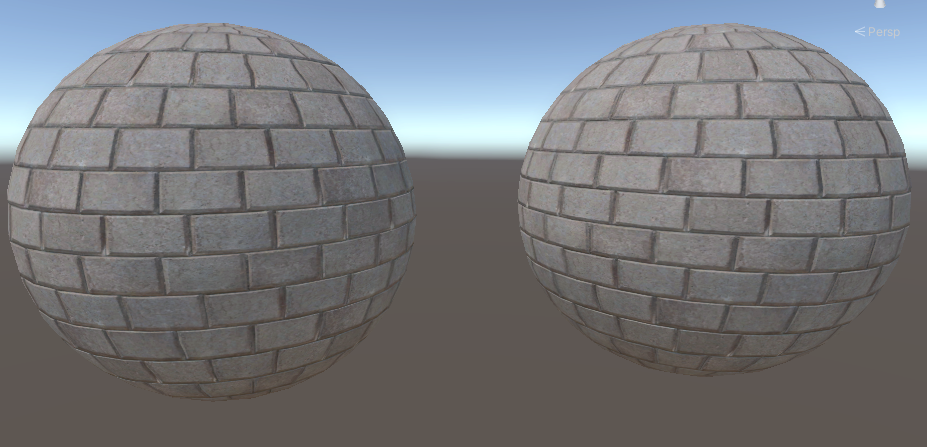
左边是Lambert的实现,右边是教程里的PBR材质shader,当然参数调整了,金属度和粗糙度都归零了
2,Phong光照模型
Phong 光照模型在 Lambert 模型的基础上增加了 高光反射,模拟光线在光滑表面的镜面反射效果。
为此,高光反射的计算公式为:
(光线反射方向 x 视线方向)的s次方
s为反射系数,一般都是自定义,数值越大反射范围越小。
对应代码:
float3 viewDir = normalize(_WorldSpaceCameraPos - input.positionWS);
float3 specular = 0;
for (int i = 0; i < GetDirectionalLightCount(); i++) {

    DirectionalLightData data = _DirectionalLightData[i];
    diffuse += data.color.rgb * max(0, dot(normalWS, data.directionAndMask.xyz));

    float3 reflectDir = reflect( -data.directionAndMask.xyz,normalWS);
    float spec = pow(max(0, dot(viewDir, reflectDir)), _Shininess);
    specular = spec;
}
如果我们将反射强度直输会得到这样的结果:
return float4(specular,1) ;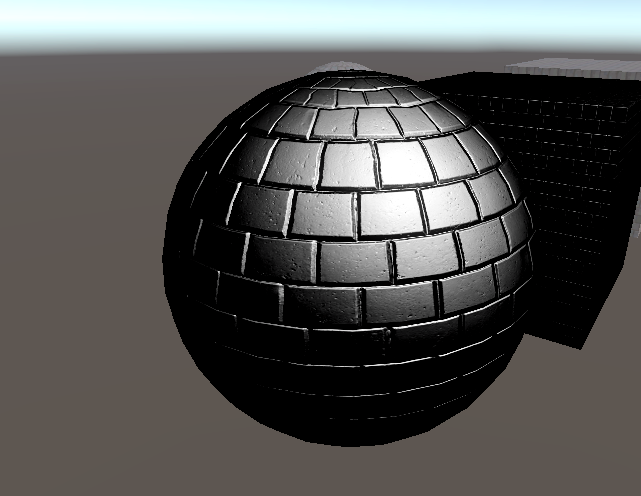
这个模型的核心是如何获取反射光的强度,拿到反射光的强度后,后面怎么使用就比较自由了。比如尝试增强这片区域灯光颜色。
float3 diffuse = 0;
float3 specular = 0;
for (int i = 0; i < GetDirectionalLightCount(); i++) {
DirectionalLightData data = _DirectionalLightData[i];
diffuse += data.color.rgb * max(0, dot(normalWS, data.directionAndMask.xyz));
float3 reflectDir = reflect( -data.directionAndMask.xyz,normalWS);
float spec = pow(max(0, dot(viewDir, reflectDir)), _Shininess);
specular = spec * data.color.rgb;
}
float3 ambient = GetAmbientLight(normalWS);
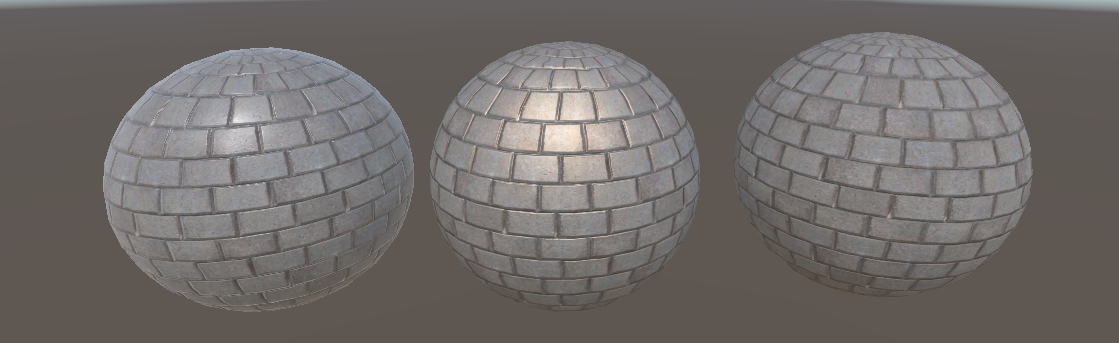
return float4(baseColor.xyz * (diffuse + ambient)+ specular,1) ;效果:
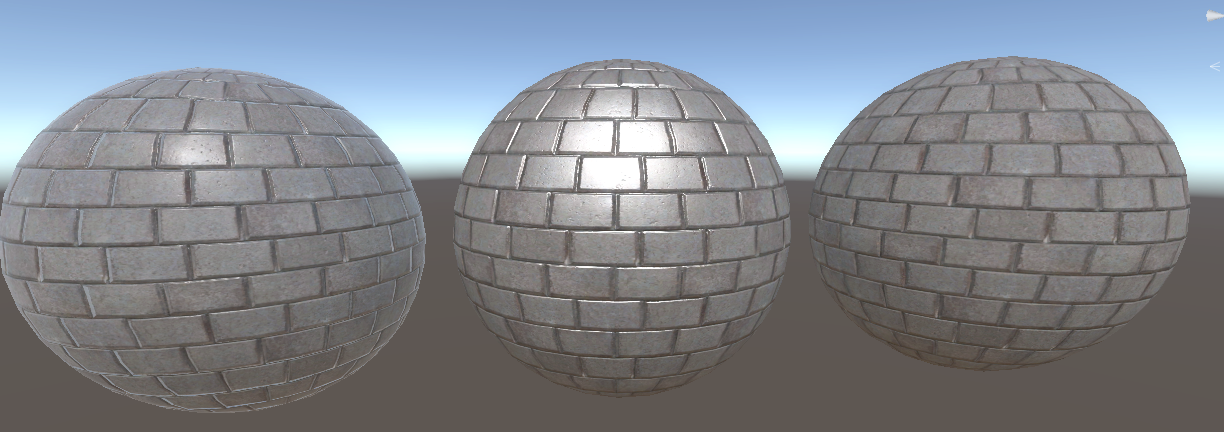
(中间是Phone,右边是Lambert)
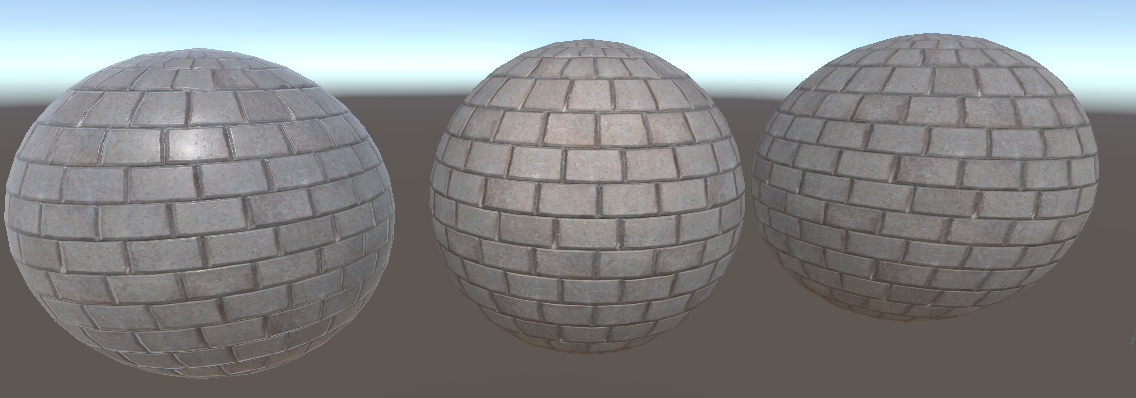
或是混合,效果就比较柔和一些:
return float4(baseColor.xyz * (diffuse + ambient + specular),1) ;效果:
可以再添加一个参数用来控制反射强度:
.......
                    specular = spec *  data.color.rgb * _SpecIntensity;
.......


	            return float4(baseColor.xyz * (diffuse + ambient + specular),1) ;
效果:
3. Blinn-Phong 光照模型
Phong模型的改进版,本质上还是调整高光反射,与Phong光照模型的区别主要在引入半角向量,简化了高光反射的计算。
半角向量的计算为:
( 光线方向 + 视线方向)的归一化
对应代码:
	        float4 LitPassFragment(Varyings input) : SV_TARGET
            {
                float4 color = INPUT_PROP(_Color);
	            float4 baseColor = SAMPLE_TEXTURE2D(_MainTex, sampler_MainTex, input.baseUV) * color;
                float4 normalE = SAMPLE_TEXTURE2D(_NormalTex, sampler_NormalTex, input.baseUV);
                float3 normal = DecodeNormal(normalE, 1);
                float3 normalWS = NormalTangentToWorld(normal,input.normalWS, input.tangentWS);
                float3 viewDir = normalize(_WorldSpaceCameraPos - input.positionWS);

                float3 diffuse = 0;
                float3 specular = 0;
                for (int i = 0; i < GetDirectionalLightCount(); i++) {

                    DirectionalLightData data = _DirectionalLightData[i];
                    diffuse += data.color.rgb * max(0, dot(normalWS, data.directionAndMask.xyz));

                    float3 halfDir = normalize(data.directionAndMask + viewDir);
                    float spec = pow(max(0, dot(normalWS, halfDir)), _Shininess);
                    specular = spec *  data.color.rgb * _SpecIntensity;
		        }

                float3 ambient = GetAmbientLight(normalWS);

	            return float4(baseColor.xyz * (diffuse + ambient + specular),1) ;

	        }
效果:
参考资料: