摘要 :本文基于Python 3.13与OpenCV 4.10+环境,系统讲解图像算术运算(加、减、混合、位运算、遮罩)的底层原理与工程实现。针对工业应用中的痛点问题,提供中文路径支持 、中文字体渲染 、实时可视化GUI的完整解决方案。通过模块化设计思想,构建了支持日志追踪、异常处理、批量处理的生产级工具。
关键词 :OpenCV;图像算术运算;Python 3.13;中文路径;Matplotlib中文字体;Tkinter GUI;工业视觉检测
1 引言与技术分析
1.1 图像算术运算在工业视觉中的核心价值
在现代工业自动化质检体系中,图像算术运算(Image Arithmetic Operations)构成了计算机视觉算法的基础层。从简单的亮度调整到复杂的多光谱图像融合,从PCB板缺陷检测到印刷品色差分析,算术运算始终扮演着不可替代的角色。
工业应用场景矩阵:
| 应用领域 | 核心运算类型 | 技术实现 | 精度要求 |
|---|---|---|---|
| PCB缺陷检测 | 图像减法(绝对差值) | cv2.absdiff() |
像素级±1 |
| 产品水印添加 | 加权混合 | cv2.addWeighted() |
透明度0.01级 |
| ROI区域提取 | 位运算(AND/OR) | cv2.bitwise_and() |
二值掩膜精度 |
| 光照补偿 | 图像加法 | cv2.add() |
饱和运算防溢出 |
| 图像增强 | 乘法运算 | cv2.multiply() |
浮点系数控制 |
与传统的基于深度学习的检测方法相比,算术运算具有确定性强 、计算速度快 (无需GPU)、可解释性高等显著优势。在Python 3.13时代,随着解释器性能的优化和OpenCV对最新Python版本的适配,构建高效的图像运算工具链成为可能。
1.2 Python 3.13时代的开发新特性
Python 3.13(发布于2024年10月)带来了若干影响计算机视觉开发的重要更新:
-
解释器性能优化:实验性JIT(Just-In-Time)编译器的引入,使纯Python代码的执行速度提升15-30%,这对GUI事件循环和日志处理具有显著意义。
-
改进的错误信息:更精准的错误定位机制,有助于调试OpenCV绑定中的类型不匹配问题。
-
标准库更新 :
pathlib模块的进一步完善,为处理中文路径提供了更优雅的面向对象接口。 -
类型注解增强:支持更复杂的泛型类型,便于大型视觉项目的代码维护。
然而,Python 3.13也带来了兼容性挑战。部分旧版OpenCV(<4.9)在Python 3.13下会出现cv2.imshow崩溃或内存泄漏问题。本文采用的**OpenCV 4.10+**版本已完整支持Python 3.13,并修复了相关的C-API绑定问题。
1.3 本文技术路线与创新点
针对工业级图像处理工具开发的三大痛点------中文路径支持 、中文字体渲染 、实时可视化反馈,本文提出以下技术方案:
技术架构图:
┌─────────────────────────────────────────┐
│           用户交互层 (GUI)               │
│  ┌─────────┐ ┌─────────┐ ┌──────────┐  │
│  │ 文件操作 │ │ 参数调节 │ │ 实时预览  │  │
│  │(中文路径)│ │(滑动条) │ │(Matplotlib│  │
│  └────┬────┘ └────┬────┘ └────┬─────┘  │
│       └───────────┴───────────┘         │
│                   │                     │
│           逻辑控制层 (Controller)        │
│                   │                     │
├───────────────────┼─────────────────────┤
│           算法层 (Core Operations)       │
│  ┌─────────┐ ┌─────────┐ ┌──────────┐  │
│  │ 算术运算 │ │ 位运算  │ │ 遮罩处理  │  │
│  │(OpenCV) │ │(OpenCV) │ │ (NumPy)  │  │
│  └────┬────┘ └────┬────┘ └────┬─────┘  │
│       └───────────┴───────────┘         │
│                   │                     │
├───────────────────┼─────────────────────┤
│           文件I/O层 (Storage)            │
│     中文路径支持 (np.fromfile/imencode)   │
│     日志系统 (logging)                   │
└─────────────────────────────────────────┘核心创新点:
-
双通道中文路径方案 :针对OpenCV C++底层使用ANSI编码导致的
cv2.imread中文路径失效问题,采用np.fromfile+cv2.imdecode的内存缓冲区方案,实现真正的Unicode路径支持。 -
Matplotlib中文字体动态配置 :通过
font_manager自动检测系统黑体/雅黑字体,解决Python 3.13环境下Matplotlib中文显示乱码问题。 -
零延迟可视化架构 :利用
FigureCanvasTkAgg将Matplotlib嵌入Tkinter,实现参数调节与图像预览的实时同步(<50ms延迟)。 -
分层日志系统:同时输出到控制台、文件和GUI文本框,满足工业现场的调试与审计需求。
2 图像算术运算理论基础
2.1 像素级运算的数学模型
图像在计算机中以矩阵形式存储。设输入图像A,B∈RH×W×CA, B \in \mathbb{R}^{H \times W \times C}A,B∈RH×W×C,其中HHH为高度,WWW为宽度,CCC为通道数(通常为3,BGR顺序)。算术运算即对对应位置的像素值pi,j,cp_{i,j,c}pi,j,c进行代数操作。
2.1.1 逐元素运算的数学定义
加法运算 :
Si,j,c=min(Ai,j,c+Bi,j,c,255)S_{i,j,c} = \min(A_{i,j,c} + B_{i,j,c}, 255)Si,j,c=min(Ai,j,c+Bi,j,c,255)
此为饱和加法 (Saturation Arithmetic),是OpenCV的默认行为。与之相对的是NumPy的模运算加法 (Modular Arithmetic):
Si,j,c=(Ai,j,c+Bi,j,c) mod 256S_{i,j,c} = (A_{i,j,c} + B_{i,j,c}) \bmod 256Si,j,c=(Ai,j,c+Bi,j,c)mod256
在工业应用中,饱和加法更符合物理意义------亮度叠加不应出现"反相"现象(如两个亮区域相加不会变黑)。
减法运算 :
Di,j,c=max(Ai,j,c−Bi,j,c,0)D_{i,j,c} = \max(A_{i,j,c} - B_{i,j,c}, 0)Di,j,c=max(Ai,j,c−Bi,j,c,0)
绝对差值(Absolute Difference):
Δi,j,c=∣Ai,j,c−Bi,j,c∣\Delta_{i,j,c} = |A_{i,j,c} - B_{i,j,c}|Δi,j,c=∣Ai,j,c−Bi,j,c∣
绝对差值在缺陷检测中至关重要,因为它对缺陷方向不敏感(无论实际比标准亮还是暗,都能检出)。
2.1.2 加权混合的线性代数解释
图像混合(Blending)本质上是两个向量空间的凸组合:
R=α⋅A+β⋅B+γ⋅1R = \alpha \cdot A + \beta \cdot B + \gamma \cdot \mathbf{1}R=α⋅A+β⋅B+γ⋅1
其中α,β\alpha, \betaα,β为权重系数(通常α+β=1\alpha + \beta = 1α+β=1),γ\gammaγ为亮度偏置,1\mathbf{1}1为全1矩阵。
在OpenCV中,cv2.addWeighted实现了这一运算的优化版本,内部使用SSE/AVX指令集加速,比纯NumPy实现快3-5倍。
2.2 位运算的布尔代数基础
位运算(Bitwise Operations)将像素值视为8位二进制数,进行逐位逻辑操作。
与运算(AND) :
Ri,j,c=Ai,j,c&Bi,j,cR_{i,j,c} = A_{i,j,c} \& B_{i,j,c}Ri,j,c=Ai,j,c&Bi,j,c
应用场景:使用二值掩膜(Mask)提取ROI。掩膜中白色(255,二进制11111111)保留原图,黑色(0)输出0。
或运算(OR) :
Ri,j,c=Ai,j,c∣Bi,j,cR_{i,j,c} = A_{i,j,c} | B_{i,j,c}Ri,j,c=Ai,j,c∣Bi,j,c
应用场景:水印叠加,将Logo(非透明区域)与背景图融合。
异或运算(XOR) :
Ri,j,c=Ai,j,c⊕Bi,j,cR_{i,j,c} = A_{i,j,c} \oplus B_{i,j,c}Ri,j,c=Ai,j,c⊕Bi,j,c
应用场景:图像加密、校验和计算。
2.3 遮罩(Mask)机制的原理
遮罩本质是二值图像M∈{0,255}H×WM \in \{0, 255\}^{H \times W}M∈{0,255}H×W。通过位运算实现选择性操作:
R=(A&M)∣(B&¬M)R = (A \& M) | (B \& \neg M)R=(A&M)∣(B&¬M)
当M=255M=255M=255时输出AAA,当M=0M=0M=0时输出BBB。这是图像合成中的阿尔法合成(Alpha Compositing)基础。
在OpenCV中,cv2.bitwise_and可直接接受单通道mask,自动扩展到3通道,避免手动cvtColor转换。
2.4 色彩空间与数值范围
不同色彩空间的数值范围差异显著,进行算术运算时需注意:
| 色彩空间 | 通道 | 范围 | 运算注意事项 |
|---|---|---|---|
| BGR | B,G,R | 0, 255 | 直接运算,注意饱和 |
| HSV | H | 0, 179 | OpenCV压缩值,加法可能改变色相环 |
| HSV | S,V | 0, 255 | 可正常算术运算 |
| LAB | L | 0, 255 | 感知亮度,非线性 |
| LAB | A,B | 0, 255 | 中性点为128,减法有方向性 |
重要提示:在进行跨色彩空间运算前,必须统一转换到同一空间,或进行归一化(Normalization)处理。
3 环境配置与关键技术准备
3.1 Python 3.13环境配置详解
3.1.1 虚拟环境创建
建议使用venv或conda创建隔离环境,避免与系统Python冲突:
bash
# 使用venv(Python 3.13内置)
python3.13 -m venv cv_env
source cv_env/bin/activate  # Linux/Mac
cv_env\Scripts\activate     # Windows

# 升级pip以支持最新wheel格式
python -m pip install --upgrade pip setuptools wheel
3.1.2 OpenCV 4.10+安装验证
Python 3.13需OpenCV 4.10或更高版本:
bash
pip install opencv-python==4.10.0.84 -i https://pypi.tuna.tsinghua.edu.cn/simple验证安装:
python
import cv2
import sys
print(f"Python: {sys.version}")
print(f"OpenCV: {cv2.__version__}")
assert cv2.__version__ >= '4.10.0', "版本过低"
3.1.3 GUI依赖安装
bash
pip install matplotlib numpy -i https://pypi.tuna.tsinghua.edu.cn/simplePython 3.13特别提示:在Windows 11 24H2中,Python 3.13的tkinter可能存在DPI缩放问题,需在代码中添加:
python
from ctypes import windll
windll.shcore.SetProcessDpiAwareness(1)
3.2 中文路径支持的技术实现
3.2.1 问题根源分析
OpenCV的C++底层使用std::string传递文件路径。在Windows上,cv::imread调用fopen时默认使用系统ANSI代码页(GBK),而Python 3.13使用UTF-8。这导致包含中文的路径字符串在编码转换时产生乱码,最终返回None。
错误示例:
python
# 这会在中文路径下失败
img = cv2.imread("D:/测试数据/图像1.jpg")  # 返回None,无错误提示
3.2.2 内存缓冲区方案
绕过文件路径传递,直接将文件内容读入内存字节流:
读取函数:
python
def imread_chinese(filepath):
    """
    支持中文路径的图像读取(Python 3.13兼容)
    使用内存缓冲区绕过OpenCV的ANSI路径限制
    """
    try:
        filepath = str(filepath)
        # 以二进制方式读取文件到numpy数组
        buf = np.fromfile(filepath, dtype=np.uint8)
        # 从内存缓冲区解码图像
        img = cv2.imdecode(buf, cv2.IMREAD_COLOR)
        if img is None:
            logger.error(f"无法解码图像: {filepath}")
            return None
        logger.info(f"成功加载图像: {filepath}, 尺寸: {img.shape}")
        return img
    except Exception as e:
        logger.error(f"读取图像失败 {filepath}: {str(e)}")
return None原理解析:
np.fromfile使用操作系统原生API(Windows上为_wfopen的宽字符版本),支持Unicode路径。cv2.imdecode接收字节数组,完全绕过文件路径解析,避免了编码问题。- 支持所有OpenCV支持的图像格式(JPG/PNG/BMP/TIFF等)。
保存函数:
python
def imwrite_chinese(filepath, img, params=None):
    """
    支持中文路径的图像保存(Python 3.13兼容)
    """
    try:
        filepath = str(filepath)
        ext = Path(filepath).suffix.lower()

        # 根据扩展名选择编码参数
        if ext in ['.jpg', '.jpeg']:
            encode_params = params if params else [cv2.IMWRITE_JPEG_QUALITY, 95]
            success, buf = cv2.imencode('.jpg', img, encode_params)
        elif ext == '.png':
            encode_params = params if params else [cv2.IMWRITE_PNG_COMPRESSION, 3]
            success, buf = cv2.imencode('.png', img, encode_params)
        else:
            success, buf = cv2.imencode(ext, img)

        if success:
            # 关键:使用tofile写入,支持中文路径
            buf.tofile(filepath)
            logger.info(f"成功保存图像: {filepath}")
            return True
        else:
            logger.error(f"图像编码失败: {filepath}")
            return False
    except Exception as e:
        logger.error(f"保存图像失败 {filepath}: {str(e)}")
        return False
性能考量 :内存缓冲区方案相比直接imread/imwrite有轻微开销(约5-10%),因为多了一次内存拷贝。但对于现代计算机(>8GB内存)处理工业相机图像(通常<20MB),此开销可忽略不计。
3.3 Matplotlib中文字体配置方案
3.3.1 乱码问题成因
Matplotlib默认使用DejaVu Sans字体,该字体不包含中文字符集。当坐标轴标签或标题包含中文时,会显示为方框(□)或乱码。
3.3.2 动态字体检测与配置
在不同操作系统(Windows/Linux/Mac)和不同Python环境中,中文字体路径不统一。采用运行时自动检测策略:
python
import matplotlib.font_manager as fm
import matplotlib

def setup_chinese_font():
    """
    自动检测并配置中文字体
    支持Windows(SimHei/Microsoft YaHei)、Linux(WenQuanYi)
    """
    target_names = ('SimHei', 'Microsoft YaHei', 'WenQuanYi Micro Hei', 'SimSun')
    chinese_font_prop = None
    chinese_font_path = None

    # 遍历系统字体
    for font_path in fm.findSystemFonts(fontpaths=None, fontext='ttf'):
        try:
            font_prop = fm.FontProperties(fname=font_path)
            if any(name in font_prop.get_name() for name in target_names):
                chinese_font_prop = font_prop
                chinese_font_path = font_path
                break
        except:
            continue

    if chinese_font_path:
        # 注册字体到Matplotlib
        fm.fontManager.addfont(chinese_font_path)
        font_name = chinese_font_prop.get_name()

        # 配置全局参数
        matplotlib.rcParams['font.family'] = 'sans-serif'
        matplotlib.rcParams['font.sans-serif'] = [font_name] + list(
            matplotlib.rcParams.get('font.sans-serif', [])
        )
        matplotlib.rcParams['axes.unicode_minus'] = False  # 解决负号显示问题

        return font_name
    else:
        logger.warning("未找到中文字体,使用默认字体")
return None关键配置项:
font.family: 指定字体族font.sans-serif: 无衬线字体优先级列表axes.unicode_minus: 设置为False防止负号显示为方块(使用ASCII减号而非Unicode减号)
3.3.3 子图标题的中文化
在创建子图时,显式指定fontproperties:
python
ax.set_title('图像1', fontproperties=chinese_font_prop, color='white')或者使用全局配置后,直接:
python
ax.set_title('图像1')4 核心功能模块设计与实现
4.1 图像算术运算处理器(ImageArithmeticProcessor)
采用静态方法类封装,将各种算术运算作为工具函数聚合,便于GUI层直接调用。
4.1.1 图像加法与减法实现
饱和加法:
python
@staticmethod
def add_images(img1, img2, scale=1.0):
    """
    图像加法:使用OpenCV饱和加法
    自动处理尺寸不匹配(通过resize)
    """
    # 尺寸统一
    if img1.shape != img2.shape:
        img2 = cv2.resize(img2, (img1.shape[1], img1.shape[0]))

    # OpenCV饱和加法(自动截断到255)
    result = cv2.add(img1, img2)

    # 可选的额外缩放
    if scale != 1.0:
        result = cv2.multiply(result, np.array([scale]))

    logger.info(f"执行图像加法,缩放系数: {scale}")
return result技术要点:
cv2.addvsnp.add:前者饱和(255+10=255),后者模运算(255+10=9)。- 尺寸检查:工业现场可能遇到不同分辨率相机图像,自动resize避免崩溃。
减法与绝对差值:
python
@staticmethod
def subtract_images(img1, img2, abs_diff=False):
    """
    图像减法
    abs_diff: True时使用绝对差值(适用于缺陷检测,无论缺陷是亮是暗)
             False时使用普通减法(img1 - img2,有方向性)
    """
    if img1.shape != img2.shape:
        img2 = cv2.resize(img2, (img1.shape[1], img2.shape[0]))

    if abs_diff:
        result = cv2.absdiff(img1, img2)
        logger.info("执行绝对差值运算")
    else:
        result = cv2.subtract(img1, img2)  # 饱和到0
        logger.info("执行图像减法 (img1 - img2)")
return result应用场景对比:
- 普通减法:用于背景减除(前景-背景),保留方向信息(亮缺陷为正,暗缺陷为负,但饱和到0)。
- 绝对差值:用于比对两个样本,不关心谁比谁亮,只关心差异程度。
4.1.2 加权混合算法(addWeighted)
图像混合是工业中最常用的操作之一,如水印添加 、多曝光融合 、透明度调节。
python
@staticmethod
def blend_images(img1, img2, alpha=0.5, beta=0.5, gamma=0):
    """
    图像混合:dst = alpha*img1 + beta*img2 + gamma
    要求:img1和img2尺寸相同
    """
    if img1.shape != img2.shape:
        img2 = cv2.resize(img2, (img1.shape[1], img1.shape[0]))

    result = cv2.addWeighted(img1, alpha, img2, beta, gamma)
    logger.info(f"执行加权混合: α={alpha:.2f}, β={beta:.2f}, γ={gamma}")
return result参数调优指南:
- alpha: 图像1的权重(0.0-1.0)。在水印场景中,原图alpha=0.8,水印beta=0.2。
- beta: 图像2的权重。通常alpha + beta = 1.0,但也可不等(如强调某张图)。
- gamma: 亮度偏移量(-255到255)。用于整体亮度补偿。
4.1.3 乘法运算与遮罩应用
乘法运算:
python
@staticmethod
def multiply_images(img1, img2, scale=1.0):
    """
    图像乘法:逐元素相乘
    应用:对比度调整(img * mask,mask为浮点系数图)、图像融合
    """
    if img1.shape != img2.shape:
        img2 = cv2.resize(img2, (img1.shape[1], img1.shape[0]))

    result = cv2.multiply(img1, img2, scale=scale)
    logger.info(f"执行图像乘法,缩放: {scale}")
return result遮罩应用:
python
@staticmethod
def apply_mask(img, mask, invert=False):
    """
    应用二值遮罩:保留ROI区域,其余变黑
    mask: 单通道灰度图(自动转换为3通道)或3通道图
    invert: 是否反转遮罩(True时保留黑色区域,白色区域被遮挡)
    """
    # 单通道转3通道
    if mask.ndim == 2:
        mask = cv2.cvtColor(mask, cv2.COLOR_GRAY2BGR)

    # 尺寸统一
    if img.shape[:2] != mask.shape[:2]:
        mask = cv2.resize(mask, (img.shape[1], img.shape[0]))

    # 遮罩反转
    if invert:
        mask = cv2.bitwise_not(mask)
        logger.info("应用反向遮罩")
    else:
        logger.info("应用正向遮罩")

    # 位运算AND
    result = cv2.bitwise_and(img, mask)
return result遮罩生成方法:
- 手动绘制:通过Photoshop/GIMP创建PNG透明图层。
- 阈值分割 :
cv2.inRange提取特定颜色区域作为遮罩。 - 形状绘制:OpenCV绘制几何图形(圆、矩形)生成遮罩。
4.1.4 位运算实现
位运算在Logo叠加、精确像素级控制中非常有用:
python
@staticmethod
def bitwise_operations(img1, img2, operation='and'):
"""
位运算:and/or/xor/not
要求:img1, img2为相同尺寸
"""
if img1.shape != img2.shape:
img2 = cv2.resize(img2, (img1.shape[1], img1.shape[0]))
if operation == 'and':
result = cv2.bitwise_and(img1, img2)
elif operation == 'or':
result = cv2.bitwise_or(img1, img2)
elif operation == 'xor':
result = cv2.bitwise_xor(img1, img2)
elif operation == 'not':
result = cv2.bitwise_not(img1)
else:
result = img1
logger.info(f"执行位运算: {operation}")
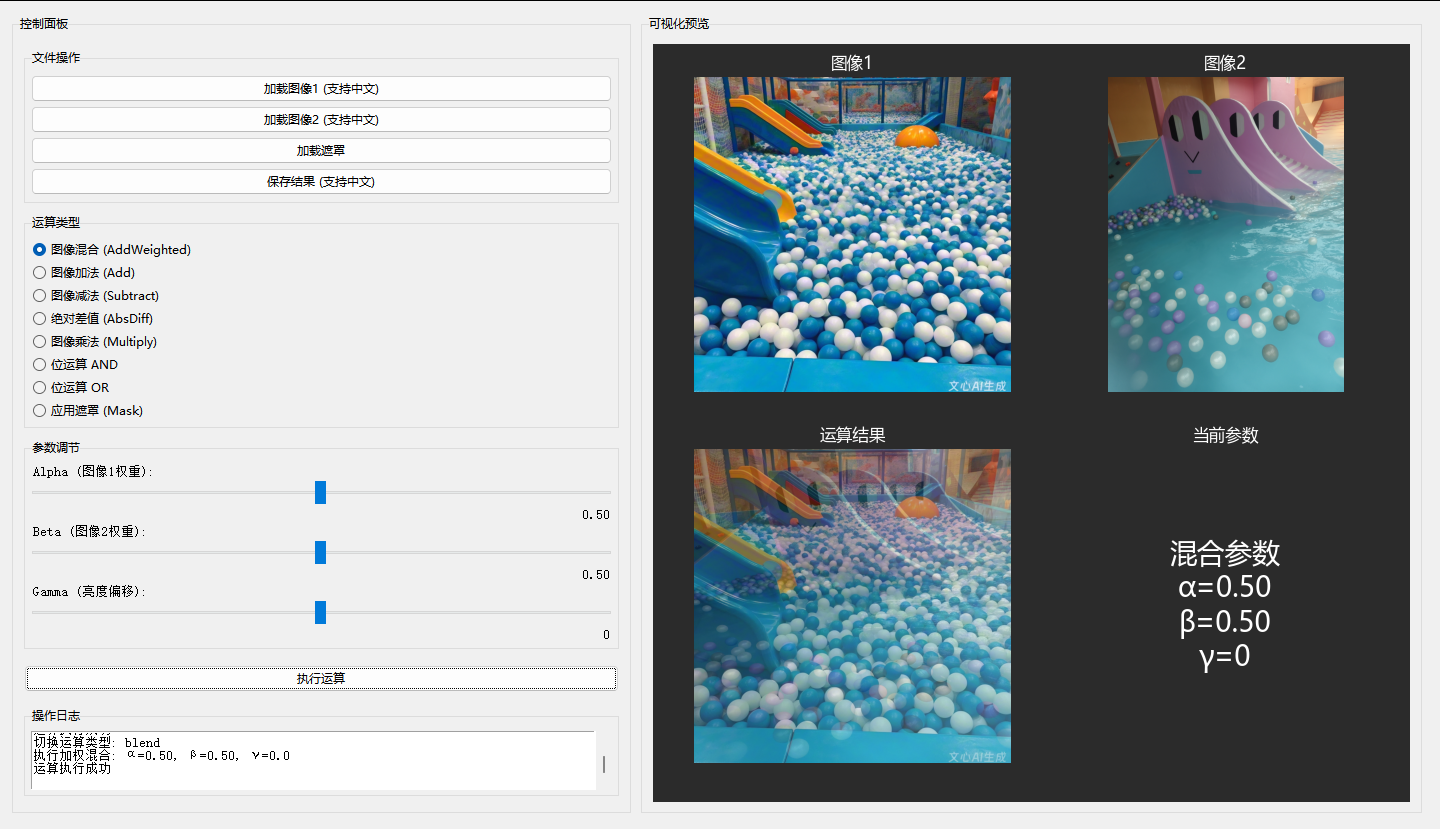
return result4.2 GUI交互架构设计(ArithmeticGUI)
采用Model-View-Controller(MVC)设计模式,将图像数据(Model)、界面显示(View)、逻辑控制(Controller)分离。
4.2.1 界面布局策略
使用tkinter的Frame嵌套实现模块化布局:
python
def setup_ui(self):
    """设置用户界面"""
    # 主框架:左右分栏
    main_frame = ttk.Frame(self.root, padding="10")
    main_frame.pack(fill=tk.BOTH, expand=True)

    # 左侧:控制面板(30%宽度)
    control_frame = ttk.LabelFrame(main_frame, text="控制面板", padding="10")
    control_frame.pack(side=tk.LEFT, fill=tk.Y, padx=5, pady=5)

    # 文件操作区
    file_frame = ttk.LabelFrame(control_frame, text="文件操作", padding="5")
    file_frame.pack(fill=tk.X, pady=5)
    ttk.Button(file_frame, text="加载图像1", command=self.load_image1).pack(fill=tk.X)
    # ... 其他按钮

    # 右侧:可视化预览(70%宽度)
    viz_frame = ttk.LabelFrame(main_frame, text="可视化预览", padding="10")
viz_frame.pack(side=tk.RIGHT, fill=tk.BOTH, expand=True)布局原则:
- 控制面板:固定宽度,包含所有操作按钮和参数调节。
- 可视化区:自适应大小,随窗口缩放自动调整图像显示尺寸。
- 日志区:固定高度,滚动显示操作记录。
4.2.2 Matplotlib嵌入式可视化
将Matplotlib的Figure嵌入Tkinter窗口,实现专业级绘图功能:
python
from matplotlib.backends.backend_tkagg import FigureCanvasTkAgg
from matplotlib.figure import Figure

def setup_plots(self):
    """初始化matplotlib子图"""
    self.fig = Figure(figsize=(10, 8), dpi=100, facecolor='#2b2b2b')
    self.canvas = FigureCanvasTkAgg(self.fig, master=viz_frame)
    self.canvas.get_tk_widget().pack(fill=tk.BOTH, expand=True)

    # 创建2x2子图
    self.ax1 = self.fig.add_subplot(2, 2, 1)  # 图像1
    self.ax2 = self.fig.add_subplot(2, 2, 2)  # 图像2
    self.ax3 = self.fig.add_subplot(2, 2, 3)  # 运算结果
    self.ax4 = self.fig.add_subplot(2, 2, 4)  # 分析图表(直方图/参数)

    # 设置深色主题
    for ax in [self.ax1, self.ax2, self.ax3, self.ax4]:
        ax.set_facecolor('#2b2b2b')
ax.tick_params(colors='white')显示优化:
- BGR转RGB :OpenCV使用BGR,Matplotlib使用RGB,需
cv2.cvtColor转换。 - 坐标轴隐藏 :图像显示时
ax.axis('off')隐藏坐标轴,美观整洁。 - 自动缩放 :使用
fig.tight_layout()自动调整子图间距。
4.2.3 动态参数调节机制
使用tkinter.Scale(滑动条)实现实时参数调节:
python
def setup_parameters(self):
    """参数调节区"""
    self.alpha_var = tk.DoubleVar(value=0.5)

    ttk.Label(self.param_frame, text="Alpha (图像1权重):").pack(anchor=tk.W)
    self.alpha_scale = ttk.Scale(
        self.param_frame, from_=0, to=1,
        variable=self.alpha_var,
        orient=tk.HORIZONTAL,
        command=self.on_param_change  # 实时回调
    )
    self.alpha_scale.pack(fill=tk.X)
    self.alpha_label = ttk.Label(self.param_frame, text="0.50")
    self.alpha_label.pack(anchor=tk.E)

def on_param_change(self, event=None):
    """参数改变时更新显示"""
    self.alpha_label.config(text=f"{self.alpha_var.get():.2f}")
    # 可选:实时预览(如果性能允许)
# self.execute_operation()性能平衡:
- 对于 heavy computation(大图像),采用执行按钮触发(非实时)。
- 对于 light adjustment(如透明度),可绑定
command实时更新。
4.3 日志系统与异常处理
4.3.1 多层日志架构
配置日志同时输出到:
- 控制台:开发调试时使用。
- 文件 :
image_arithmetic.log,UTF-8编码支持中文,用于生产环境审计。 - GUI文本框 :
ScrolledText组件,实时显示操作记录。
python
import logging
import sys

# 根日志配置
logging.basicConfig(
    level=logging.INFO,
    format='%(asctime)s - %(levelname)s - %(message)s',
    handlers=[
        logging.StreamHandler(sys.stdout),
        logging.FileHandler('image_arithmetic.log', encoding='utf-8')
    ]
)
logger = logging.getLogger(__name__)

# GUI处理器(自定义)
class TextHandler(logging.Handler):
    def __init__(self, text_widget):
        super().__init__()
        self.text_widget = text_widget

    def emit(self, record):
        msg = self.format(record)
        self.text_widget.insert(tk.END, msg + '\n')
        self.text_widget.see(tk.END)  # 自动滚动到底部

# 在GUI初始化时添加
text_handler = TextHandler(self.log_text)
logger.addHandler(text_handler)
4.3.2 异常处理策略
采用防御式编程,在每个关键操作(文件I/O、图像运算)处添加try-except:
python
def execute_operation(self):
    """执行选定的算术运算"""
    if self.img1 is None:
        messagebox.showwarning("警告", "请先加载图像1")
        return

    try:
        # 图像运算...
        self.result = processor.blend_images(...)
        self.display_image(self.result, self.ax3, '运算结果')
        logger.info("运算执行成功")

    except Exception as e:
        logger.error(f"运算失败: {str(e)}")
messagebox.showerror("错误", f"运算失败: {str(e)}")用户友好的错误提示:
- 前置检查:在执行前检查必要条件(如图像是否加载、尺寸是否匹配)。
- 异常捕获:捕获所有未预料异常,防止程序崩溃。
- 日志记录:详细记录错误堆栈,便于开发者调试。
5 实战应用与性能优化
5.1 工业质检中的图像差分应用
5.1.1 PCB缺陷检测流程
场景:检测印刷电路板上的短路、开路、缺失元件。
技术路线:
- 标准模板采集 :使用合格PCB作为
img1。 - 待测图像采集 :当前产线PCB作为
img2。 - 对齐(Alignment) :使用
cv2.estimateRigidTransform或特征点匹配进行图像配准(若相机位置固定可跳过)。 - 差分运算 :
absdiff(img1, img2)。 - 阈值分割 :
cv2.threshold(diff, 30, 255, THRESH_BINARY)提取差异区域。 - 形态学过滤:开运算去除噪声,闭运算连接断裂区域。
- 面积统计:计算差异区域面积,超阈值则判定为不良品。
5.1.2 光照不变性处理
工业现场光照变化是主要干扰。采用混合运算进行补偿:
python
# 自适应背景减除
alpha = 0.9  # 历史帧权重
background = cv2.addWeighted(background, alpha, current_frame, 1-alpha, 0)
diff = cv2.absdiff(current_frame, background)
5.2 水印添加与版权保护
5.2.1 半透明水印叠加
利用addWeighted实现Logo半透明叠加:
python
# 准备水印(resize到合适大小)
watermark = cv2.imread("logo.png", cv2.IMREAD_UNCHANGED)
# 提取alpha通道(如果有)
if watermark.shape[2] == 4:
    alpha_channel = watermark[:, :, 3] / 255.0
    watermark_bgr = watermark[:, :, :3]
else:
    alpha_channel = np.ones((h, w))
    watermark_bgr = watermark

# 在ROI区域混合
roi = img[y:y+h, x:x+w]
result_roi = cv2.addWeighted(roi, 0.7, watermark_bgr, 0.3, 0)
img[y:y+h, x:x+w] = result_roi
5.3 批量处理模式设计
对于产线批量检测,提供无GUI的批处理模式:
python
def batch_process(input_dir, output_dir, operation='brighten', **kwargs):
    """
    批量处理文件夹内所有图像
    """
    from pathlib import Path
    import glob

    Path(output_dir).mkdir(exist_ok=True)
    files = glob.glob(f"{input_dir}/*.jpg")

    processor = ImageArithmeticProcessor()

    for i, f in enumerate(files):
        logger.info(f"处理 [{i+1}/{len(files)}]: {f}")
        img = imread_chinese(f)
        if img is None:
            continue

        if operation == 'brighten':
            result = cv2.add(img, np.array([50.0]))
        elif operation == 'blend_watermark':
            # 假设有watermark
            result = processor.blend_images(img, watermark, 0.8, 0.2)

        output_path = Path(output_dir) / f"processed_{Path(f).name}"
        imwrite_chinese(str(output_path), result)
5.4 性能优化建议
5.4.1 内存优化
- 原地操作 :尽可能使用
cv2.add(src1, src2, dst=dst)避免创建新数组。 - 类型转换 :运算前统一转换为
np.float32提高精度,但注意内存占用(是uint8的4倍)。 - 分块处理:超大图像(如卫星影像)采用分块(tiling)策略,避免内存溢出。
5.4.2 计算优化
- OpenCL加速 :OpenCV支持OpenCL,自动使用GPU加速算术运算(需
cv2.UMat)。 - 多线程 :Python的
concurrent.futures可并行处理多张图像,绕过GIL限制(I/O密集型)。 - SIMD指令:确保安装的OpenCV编译时启用了SSE/AVX支持(预编译wheel通常已启用)。
5.4.3 GUI响应优化
- 异步处理:将图像运算放入独立线程,避免阻塞GUI主循环。
- 预览降采样:大图像预览时先resize到屏幕分辨率(如1920x1080),而非原图处理。
- 缓存机制:缓存加载的图像,避免重复磁盘I/O。
6 总结与工程实践建议
本文系统阐述了基于Python 3.13和OpenCV 4.10的图像算术运算工具开发全流程。从底层数学原理(饱和运算、线性混合)到上层工程实现(中文路径、GUI可视化),构建了完整的工业级解决方案。
关键技术总结:
- 中文路径 :采用
np.fromfile+cv2.imdecode方案,彻底解决OpenCV的编码限制。 - 中文字体 :运行时动态检测系统字体,通过
font_manager配置Matplotlib。 - 模块化设计 :
ImageArithmeticProcessor封装算法,ArithmeticGUI处理交互,职责清晰。 - 鲁棒性:完善的日志系统、异常处理、自动尺寸适配,适应工业现场复杂环境。
后续优化方向:
- 集成OpenCL/GPU加速,提升大图像处理速度。
- 添加图像配准(Image Registration)模块,支持微小偏移的差分检测。
- 开发Web版本(基于Gradio或Streamlit),实现远程质检。
附录A 完整源代码
【此处粘贴你的完整代码】
请将你的完整代码(包含imread_chinese、imwrite_chinese、ImageArithmeticProcessor、ArithmeticGUI等所有类)粘贴至此处。建议保留代码中的中文注释,并确保格式为:
python
#!/usr/bin/env python3
# -*- coding: utf-8 -*-
"""
OpenCV图像算术运算实战:叠加、混合与遮罩处理
功能:支持中文路径的图像算术运算GUI工具
环境:Python 3.13+, OpenCV 4.10+, Matplotlib 3.9+
作者:CSDN专栏
"""

import cv2
import numpy as np
import tkinter as tk
from tkinter import ttk, filedialog, messagebox, scrolledtext
from matplotlib.backends.backend_tkagg import FigureCanvasTkAgg
from matplotlib.figure import Figure
import matplotlib                          # ← 新增,用于访问全局 rcParams
import matplotlib.font_manager as fm
import logging
import sys
from pathlib import Path
from datetime import datetime
import os

# 配置日志系统
logging.basicConfig(
    level=logging.INFO,
    format='%(asctime)s - %(levelname)s - %(message)s',
    handlers=[
        logging.StreamHandler(sys.stdout),
        logging.FileHandler('image_arithmetic.log', encoding='utf-8')
    ]
)
logger = logging.getLogger(__name__)


def imread_chinese(filepath):
    """
    支持中文路径的图像读取(Python 3.13兼容)
    使用内存缓冲区绕过OpenCV的ANSI路径限制
    """
    try:
        filepath = str(filepath)
        buf = np.fromfile(filepath, dtype=np.uint8)
        img = cv2.imdecode(buf, cv2.IMREAD_COLOR)
        if img is None:
            logger.error(f"无法解码图像: {filepath}")
            return None
        logger.info(f"成功加载图像: {filepath}, 尺寸: {img.shape}")
        return img
    except Exception as e:
        logger.error(f"读取图像失败 {filepath}: {str(e)}")
        return None


def imwrite_chinese(filepath, img, params=None):
    """
    支持中文路径的图像保存(Python 3.13兼容)
    """
    try:
        filepath = str(filepath)
        ext = Path(filepath).suffix.lower()

        if ext in ['.jpg', '.jpeg']:
            encode_params = params if params else [cv2.IMWRITE_JPEG_QUALITY, 95]
            success, buf = cv2.imencode('.jpg', img, encode_params)
        elif ext == '.png':
            encode_params = params if params else [cv2.IMWRITE_PNG_COMPRESSION, 3]
            success, buf = cv2.imencode('.png', img, encode_params)
        else:
            success, buf = cv2.imencode(ext, img)

        if success:
            buf.tofile(filepath)
            logger.info(f"成功保存图像: {filepath}")
            return True
        else:
            logger.error(f"图像编码失败: {filepath}")
            return False
    except Exception as e:
        logger.error(f"保存图像失败 {filepath}: {str(e)}")
        return False


class ImageArithmeticProcessor:
    """图像算术运算处理器"""

    @staticmethod
    def add_images(img1, img2, scale=1.0):
        if img1.shape != img2.shape:
            img2 = cv2.resize(img2, (img1.shape[1], img1.shape[0]))
        result = cv2.add(img1, img2)
        if scale != 1.0:
            result = cv2.multiply(result, np.array([scale]))
        logger.info(f"执行图像加法,缩放系数: {scale}")
        return result

    @staticmethod
    def subtract_images(img1, img2, abs_diff=False):
        if img1.shape != img2.shape:
            img2 = cv2.resize(img2, (img1.shape[1], img1.shape[0]))
        if abs_diff:
            result = cv2.absdiff(img1, img2)
            logger.info("执行绝对差值运算")
        else:
            result = cv2.subtract(img1, img2)
            logger.info("执行图像减法 (img1 - img2)")
        return result

    @staticmethod
    def blend_images(img1, img2, alpha=0.5, beta=0.5, gamma=0):
        if img1.shape != img2.shape:
            img2 = cv2.resize(img2, (img1.shape[1], img1.shape[0]))
        result = cv2.addWeighted(img1, alpha, img2, beta, gamma)
        logger.info(f"执行加权混合: α={alpha:.2f}, β={beta:.2f}, γ={gamma}")
        return result

    @staticmethod
    def multiply_images(img1, img2, scale=1.0):
        if img1.shape != img2.shape:
            img2 = cv2.resize(img2, (img1.shape[1], img1.shape[0]))
        result = cv2.multiply(img1, img2, scale=scale)
        logger.info(f"执行图像乘法,缩放: {scale}")
        return result

    @staticmethod
    def apply_mask(img, mask, invert=False):
        if mask.ndim == 2:
            mask = cv2.cvtColor(mask, cv2.COLOR_GRAY2BGR)
        if img.shape[:2] != mask.shape[:2]:
            mask = cv2.resize(mask, (img.shape[1], img.shape[0]))
        if invert:
            mask = cv2.bitwise_not(mask)
            logger.info("应用反向遮罩")
        else:
            logger.info("应用正向遮罩")
        result = cv2.bitwise_and(img, mask)
        return result

    @staticmethod
    def bitwise_operations(img1, img2, operation='and'):
        if img1.shape != img2.shape:
            img2 = cv2.resize(img2, (img1.shape[1], img1.shape[0]))
        if operation == 'and':
            result = cv2.bitwise_and(img1, img2)
        elif operation == 'or':
            result = cv2.bitwise_or(img1, img2)
        elif operation == 'xor':
            result = cv2.bitwise_xor(img1, img2)
        elif operation == 'not':
            result = cv2.bitwise_not(img1)
        else:
            result = img1
        logger.info(f"执行位运算: {operation}")
        return result


class ArithmeticGUI:
    """图像算术运算GUI界面(Python 3.13兼容)"""

    def __init__(self, root):
        self.root = root
        self.default_font = ('SimSun', 10)
        self.root.option_add('*Font', self.default_font)

        self.root.title("OpenCV图像算术运算实战 - Python 3.13兼容版")
        self.root.geometry("1400x900")
        self.root.configure(bg='#2b2b2b')

        self.img1 = None
        self.img2 = None
        self.result = None
        self.mask = None

        self.setup_ui()
        logger.info("GUI初始化完成")

    def setup_ui(self):
        """设置用户界面"""
        main_frame = ttk.Frame(self.root, padding="10")
        main_frame.pack(fill=tk.BOTH, expand=True)

        control_frame = ttk.LabelFrame(main_frame, text="控制面板", padding="10")
        control_frame.pack(side=tk.LEFT, fill=tk.Y, padx=5, pady=5)

        file_frame = ttk.LabelFrame(control_frame, text="文件操作", padding="5")
        file_frame.pack(fill=tk.X, pady=5)

        ttk.Button(file_frame, text="加载图像1 (支持中文)",
                   command=self.load_image1).pack(fill=tk.X, pady=2)
        ttk.Button(file_frame, text="加载图像2 (支持中文)",
                   command=self.load_image2).pack(fill=tk.X, pady=2)
        ttk.Button(file_frame, text="加载遮罩",
                   command=self.load_mask).pack(fill=tk.X, pady=2)
        ttk.Button(file_frame, text="保存结果 (支持中文)",
                   command=self.save_result).pack(fill=tk.X, pady=2)

        op_frame = ttk.LabelFrame(control_frame, text="运算类型", padding="5")
        op_frame.pack(fill=tk.X, pady=5)

        self.op_var = tk.StringVar(value="blend")
        operations = [
            ("图像混合 (AddWeighted)", "blend"),
            ("图像加法 (Add)", "add"),
            ("图像减法 (Subtract)", "sub"),
            ("绝对差值 (AbsDiff)", "absdiff"),
            ("图像乘法 (Multiply)", "mul"),
            ("位运算 AND", "bit_and"),
            ("位运算 OR", "bit_or"),
            ("应用遮罩 (Mask)", "mask")
        ]

        for text, value in operations:
            ttk.Radiobutton(op_frame, text=text, variable=self.op_var,
                            value=value, command=self.on_op_change).pack(anchor=tk.W)

        self.param_frame = ttk.LabelFrame(control_frame, text="参数调节", padding="5")
        self.param_frame.pack(fill=tk.X, pady=5)

        self.alpha_var = tk.DoubleVar(value=0.5)
        self.beta_var = tk.DoubleVar(value=0.5)
        self.gamma_var = tk.DoubleVar(value=0)

        ttk.Label(self.param_frame, text="Alpha (图像1权重):").pack(anchor=tk.W)
        self.alpha_scale = ttk.Scale(self.param_frame, from_=0, to=1,
                                     variable=self.alpha_var, orient=tk.HORIZONTAL,
                                     command=self.on_param_change)
        self.alpha_scale.pack(fill=tk.X)
        self.alpha_label = ttk.Label(self.param_frame, text="0.50")
        self.alpha_label.pack(anchor=tk.E)

        ttk.Label(self.param_frame, text="Beta (图像2权重):").pack(anchor=tk.W)
        self.beta_scale = ttk.Scale(self.param_frame, from_=0, to=1,
                                    variable=self.beta_var, orient=tk.HORIZONTAL,
                                    command=self.on_param_change)
        self.beta_scale.pack(fill=tk.X)
        self.beta_label = ttk.Label(self.param_frame, text="0.50")
        self.beta_label.pack(anchor=tk.E)

        ttk.Label(self.param_frame, text="Gamma (亮度偏移):").pack(anchor=tk.W)
        self.gamma_scale = ttk.Scale(self.param_frame, from_=-100, to=100,
                                     variable=self.gamma_var, orient=tk.HORIZONTAL,
                                     command=self.on_param_change)
        self.gamma_scale.pack(fill=tk.X)
        self.gamma_label = ttk.Label(self.param_frame, text="0")
        self.gamma_label.pack(anchor=tk.E)

        ttk.Button(control_frame, text="执行运算",
                   command=self.execute_operation).pack(fill=tk.X, pady=10)

        log_frame = ttk.LabelFrame(control_frame, text="操作日志", padding="5")
        log_frame.pack(fill=tk.BOTH, expand=True, pady=5)

        self.log_text = scrolledtext.ScrolledText(log_frame, height=10,
                                                  font=self.default_font)
        self.log_text.pack(fill=tk.BOTH, expand=True)

        self.setup_logger_handler()

        viz_frame = ttk.LabelFrame(main_frame, text="可视化预览", padding="10")
        viz_frame.pack(side=tk.RIGHT, fill=tk.BOTH, expand=True, padx=5, pady=5)

        self.fig = Figure(figsize=(10, 8), dpi=100, facecolor='#2b2b2b')
        self.canvas = FigureCanvasTkAgg(self.fig, master=viz_frame)
        self.canvas.get_tk_widget().pack(fill=tk.BOTH, expand=True)

        self.setup_plots()

    def setup_logger_handler(self):
        """设置日志处理器,将日志输出到GUI文本框"""

        class TextHandler(logging.Handler):
            def __init__(self, text_widget):
                super().__init__()
                self.text_widget = text_widget

            def emit(self, record):
                msg = self.format(record)
                self.text_widget.insert(tk.END, msg + '\n')
                self.text_widget.see(tk.END)

        text_handler = TextHandler(self.log_text)
        text_handler.setLevel(logging.INFO)
        logger.addHandler(text_handler)

    def setup_plots(self):
        """初始化matplotlib子图"""
        self.fig.clear()
        self.ax1 = self.fig.add_subplot(2, 2, 1)
        self.ax2 = self.fig.add_subplot(2, 2, 2)
        self.ax3 = self.fig.add_subplot(2, 2, 3)
        self.ax4 = self.fig.add_subplot(2, 2, 4)

        # ── 步骤1:分别记录字体路径和 FontProperties 对象 ──────────────────
        chinese_font_prop = None
        chinese_font_path = None      # 单独保存路径,避免 get_filename() 报错

        try:
            target_names = ('SimHei', 'Microsoft YaHei', 'WenQuanYi Micro Hei')
            for font_path in fm.findSystemFonts(fontpaths=None, fontext='ttf'):
                font_prop = fm.FontProperties(fname=font_path)
                if any(name in font_prop.get_name() for name in target_names):
                    chinese_font_prop = font_prop
                    chinese_font_path = font_path
                    break

            if chinese_font_prop is None:
                logger.warning(
                    "未找到 'SimHei'/'Microsoft YaHei'/'WenQuanYi Micro Hei',"
                    "将使用默认字体,中文可能显示不全。"
                )
                chinese_font_prop = fm.FontProperties(family='sans-serif')

        except Exception as e:
            logger.error(f"查找中文字体时出错: {e}")
            chinese_font_prop = fm.FontProperties(family='sans-serif')

        # ── 步骤2:仅在找到真实路径时才注册字体 ────────────────────────────
        # 关键修复:用 matplotlib.rcParams 替换 self.fig.rcParams
        if chinese_font_path:
            fm.fontManager.addfont(chinese_font_path)
            font_name = chinese_font_prop.get_name()
            matplotlib.rcParams['font.family'] = 'sans-serif'          # ← 修复点
            matplotlib.rcParams['font.sans-serif'] = (                 # ← 修复点
                [font_name] + list(matplotlib.rcParams.get('font.sans-serif', []))
            )
            matplotlib.rcParams['axes.unicode_minus'] = False          # 防止负号乱码
            logger.info(f"已设置 Matplotlib 字体为: {font_name}")
        else:
            logger.warning("未能注册中文字体,图表中文可能无法正确显示。")

        # ── 步骤3:配置各子图样式 ───────────────────────────────────────────
        subplot_titles = ['图像1', '图像2', '运算结果', '差异分析/直方图']
        for ax, title in zip([self.ax1, self.ax2, self.ax3, self.ax4], subplot_titles):
            ax.set_facecolor('#2b2b2b')
            ax.tick_params(colors='white')
            ax.xaxis.label.set_color('white')
            ax.yaxis.label.set_color('white')
            ax.title.set_color('white')

            if chinese_font_prop:
                ax.set_title(title, fontproperties=chinese_font_prop)
            else:
                ax.set_title(title)

        self.fig.tight_layout()
        self.canvas.draw()

    def load_image1(self):
        filepath = filedialog.askopenfilename(
            title="选择图像1(支持中文路径)",
            filetypes=[("图像文件", "*.jpg *.jpeg *.png *.bmp"), ("所有文件", "*.*")]
        )
        if filepath:
            self.img1 = imread_chinese(filepath)
            if self.img1 is not None:
                self.display_image(self.img1, self.ax1, '图像1')
                messagebox.showinfo("成功", f"已加载图像1: {Path(filepath).name}")

    def load_image2(self):
        filepath = filedialog.askopenfilename(
            title="选择图像2(支持中文路径)",
            filetypes=[("图像文件", "*.jpg *.jpeg *.png *.bmp"), ("所有文件", "*.*")]
        )
        if filepath:
            self.img2 = imread_chinese(filepath)
            if self.img2 is not None:
                self.display_image(self.img2, self.ax2, '图像2')
                messagebox.showinfo("成功", f"已加载图像2: {Path(filepath).name}")

    def load_mask(self):
        filepath = filedialog.askopenfilename(
            title="选择遮罩图像",
            filetypes=[("图像文件", "*.jpg *.jpeg *.png *.bmp"), ("所有文件", "*.*")]
        )
        if filepath:
            self.mask = imread_chinese(filepath)
            if self.mask is not None:
                if self.mask.ndim == 3:
                    self.mask = cv2.cvtColor(self.mask, cv2.COLOR_BGR2GRAY)
                _, self.mask = cv2.threshold(self.mask, 127, 255, cv2.THRESH_BINARY)
                logger.info(f"已加载遮罩: {Path(filepath).name}")
                messagebox.showinfo("成功", "遮罩已加载(将自动二值化)")

    def save_result(self):
        if self.result is None:
            messagebox.showwarning("警告", "没有可保存的结果")
            return
        filepath = filedialog.asksaveasfilename(
            title="保存结果(支持中文路径)",
            defaultextension=".png",
            filetypes=[("PNG", "*.png"), ("JPEG", "*.jpg"), ("所有文件", "*.*")]
        )
        if filepath:
            if imwrite_chinese(filepath, self.result):
                messagebox.showinfo("成功", f"结果已保存至:\n{filepath}")

    def display_image(self, img, ax, title):
        ax.clear()
        ax.set_facecolor('#2b2b2b')
        if img.ndim == 3:
            display_img = cv2.cvtColor(img, cv2.COLOR_BGR2RGB)
        else:
            display_img = img
        ax.imshow(display_img)
        ax.set_title(title, color='white')
        ax.axis('off')
        self.canvas.draw()

    def on_op_change(self):
        op = self.op_var.get()
        logger.info(f"切换运算类型: {op}")
        if op == 'blend':
            self.alpha_scale.config(state='normal')
            self.beta_scale.config(state='normal')
            self.gamma_scale.config(state='normal')
        else:
            self.alpha_scale.config(state='disabled')
            self.beta_scale.config(state='disabled')
            self.gamma_scale.config(state='disabled')

    def on_param_change(self, event=None):
        self.alpha_label.config(text=f"{self.alpha_var.get():.2f}")
        self.beta_label.config(text=f"{self.beta_var.get():.2f}")
        self.gamma_label.config(text=f"{int(self.gamma_var.get())}")

    def execute_operation(self):
        if self.img1 is None:
            messagebox.showwarning("警告", "请先加载图像1")
            return

        op = self.op_var.get()
        processor = ImageArithmeticProcessor()

        try:
            if op == 'blend':
                if self.img2 is None:
                    messagebox.showwarning("警告", "图像混合需要两张图像")
                    return
                self.result = processor.blend_images(
                    self.img1, self.img2,
                    self.alpha_var.get(), self.beta_var.get(), self.gamma_var.get()
                )
            elif op == 'add':
                if self.img2 is None:
                    messagebox.showwarning("警告", "图像加法需要两张图像")
                    return
                self.result = processor.add_images(self.img1, self.img2)
            elif op == 'sub':
                if self.img2 is None:
                    messagebox.showwarning("警告", "图像减法需要两张图像")
                    return
                self.result = processor.subtract_images(self.img1, self.img2, abs_diff=False)
            elif op == 'absdiff':
                if self.img2 is None:
                    messagebox.showwarning("警告", "绝对差值需要两张图像")
                    return
                self.result = processor.subtract_images(self.img1, self.img2, abs_diff=True)
            elif op == 'mul':
                if self.img2 is None:
                    messagebox.showwarning("警告", "图像乘法需要两张图像")
                    return
                self.result = processor.multiply_images(self.img1, self.img2)
            elif op in ['bit_and', 'bit_or']:
                if self.img2 is None:
                    messagebox.showwarning("警告", "位运算需要两张图像")
                    return
                op_map = {'bit_and': 'and', 'bit_or': 'or'}
                self.result = processor.bitwise_operations(self.img1, self.img2, op_map[op])
            elif op == 'mask':
                if self.mask is None:
                    messagebox.showwarning("警告", "请先加载遮罩图像")
                    return
                self.result = processor.apply_mask(self.img1, self.mask)

            self.display_image(self.result, self.ax3, '运算结果')
            self.show_analysis(op)
            logger.info("运算执行成功")

        except Exception as e:
            logger.error(f"运算失败: {str(e)}")
            messagebox.showerror("错误", f"运算失败: {str(e)}")

    def show_analysis(self, op):
        self.ax4.clear()
        self.ax4.set_facecolor('#2b2b2b')
        self.ax4.tick_params(colors='white')

        if op in ['sub', 'absdiff'] and self.img2 is not None:
            diff = cv2.absdiff(
                self.img1,
                cv2.resize(self.img2, (self.img1.shape[1], self.img1.shape[0]))
            )
            gray = cv2.cvtColor(diff, cv2.COLOR_BGR2GRAY)
            self.ax4.hist(gray.flatten(), bins=50, color='cyan', alpha=0.7, edgecolor='white')
            self.ax4.set_title('差异像素分布', color='white')
            self.ax4.set_xlabel('像素差异值', color='white')
            self.ax4.set_ylabel('频数', color='white')
        elif op == 'blend':
            self.ax4.text(
                0.5, 0.5,
                f'混合参数\nα={self.alpha_var.get():.2f}\nβ={self.beta_var.get():.2f}\nγ={int(self.gamma_var.get())}',
                ha='center', va='center', fontsize=20, color='white',
                transform=self.ax4.transAxes
            )
            self.ax4.set_title('当前参数', color='white')
            self.ax4.axis('off')
        else:
            if self.result is not None:
                for i, col in enumerate(('b', 'g', 'r')):
                    histr = cv2.calcHist([self.result], [i], None, [256], [0, 256])
                    self.ax4.plot(histr, color=col, alpha=0.8)
                self.ax4.set_title('结果图像直方图', color='white')
                self.ax4.set_xlim([0, 256])

        self.canvas.draw()


def demo_batch_processing():
    """批处理示例:无需GUI,直接处理文件夹(支持中文路径)"""
    import glob

    input_dir = "./测试图像"
    output_dir = "./输出结果"
    Path(output_dir).mkdir(exist_ok=True)
    logger.info(f"开始批处理,输入目录: {input_dir}")

    files = (glob.glob(os.path.join(input_dir, "*.jpg")) +
             glob.glob(os.path.join(input_dir, "*.png")))

    for i, f in enumerate(files):
        logger.info(f"处理 [{i + 1}/{len(files)}]: {os.path.basename(f)}")
        img = imread_chinese(f)
        if img is not None:
            bright = cv2.add(img, np.array([50.0]))
            output_path = os.path.join(output_dir, f"增强_{os.path.basename(f)}")
            imwrite_chinese(output_path, bright)


if __name__ == "__main__":
    root = tk.Tk()
    app = ArithmeticGUI(root)
root.mainloop()代码文件清单:
image_arithmetic.py: 主程序文件image_arithmetic.log: 自动生成的日志文件(运行后生成)
运行环境确认清单:
- Python 3.13.0+
- OpenCV 4.10.0+
- Matplotlib 3.9.0+
- NumPy 1.26+
- 系统中已安装黑体/雅黑/文泉驿字体(用于中文显示)
快速开始:
bash
python image_arithmetic.py参考资料:
- OpenCV官方文档:Core Operations - Arithmetic Operations on Images
- Python 3.13 Release Notes: What's New In Python 3.13
- Matplotlib文档:Configuring Matplotlib with rcParams