目 录
前言
前面已经将FastAPI封装的AI能力接入Django形成了一个比较基本的用户UI界面,但是这个用户界面就好像毛坯房,所以这篇博客的主要工作是对"毛坯房"进行简装,过程中将会优化页面的UI 、增加会话列表 、增加文档上传和数据库重建功能 以及增加系统的可解释性。
优化页面UI
完善视图逻辑
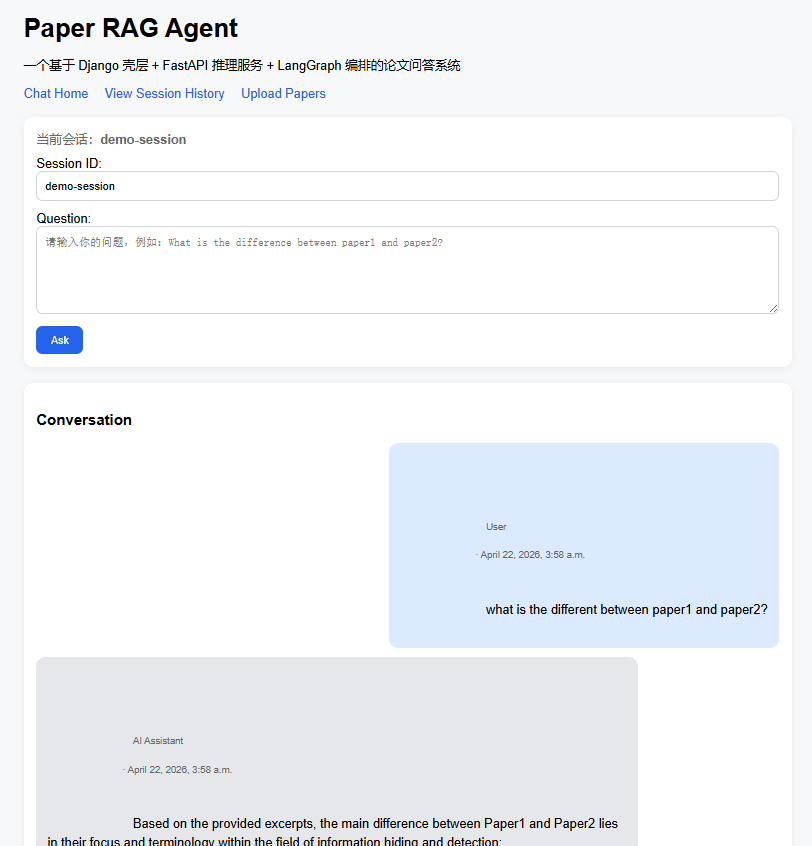
前面已经实现Django可以调用FastAPI,Django可以存历史消息,有session列表和详情,今天对页面的UI进行优化,使系统可以像ChatGPT或者Deepseek那样,聊天页面用户信息和系统信息分开显示。首先修改chat/views.py,让页面在会话页面会显示会话最近聊天的记录,修改是在渲染之前增加:
python
def chat_home(request):
	...

	session_obj = ChatSession.objects.filter(session_id=current_session_id).first()
	    messages = []
	    if session_obj:
	        messages = session_obj.messages.all().order_by("created_at")

    return render(...)
在模版中添加CSS美化
这一步在原有的页面逻辑上增加一些CSS的修饰:
html
<!DOCTYPE html>
<html lang="zh-CN">
<head>
    <meta charset="UTF-8">
    <title>Paper RAG Agent</title>
    <style>
        body {
            font-family: Arial, sans-serif;
            max-width: 960px;
            margin: 24px auto;
            padding: 0 16px;
            background: #f7f8fa;
        }

        h1 {
            margin-bottom: 8px;
        }

        .nav {
            margin-bottom: 20px;
        }

        .nav a {
            margin-right: 16px;
            text-decoration: none;
            color: #2563eb;
        }

        .card {
            background: white;
            border-radius: 12px;
            padding: 16px;
            box-shadow: 0 2px 10px rgba(0, 0, 0, 0.06);
            margin-bottom: 20px;
        }

        .form-row {
            margin-bottom: 12px;
        }

        input[type="text"], textarea {
            width: 100%;
            padding: 10px;
            box-sizing: border-box;
            border: 1px solid #d1d5db;
            border-radius: 8px;
            font-size: 14px;
        }

        button {
            background: #2563eb;
            color: white;
            border: none;
            padding: 10px 18px;
            border-radius: 8px;
            cursor: pointer;
        }

        button:hover {
            background: #1d4ed8;
        }

        .session-info {
            color: #666;
            margin-bottom: 12px;
        }

        .chat-box {
            display: flex;
            flex-direction: column;
            gap: 12px;
        }

        .message {
            max-width: 78%;
            padding: 12px 14px;
            border-radius: 12px;
            white-space: pre-wrap;
            line-height: 1.5;
        }

        .message.user {
            align-self: flex-end;
            background: #dbeafe;
        }

        .message.assistant {
            align-self: flex-start;
            background: #e5e7eb;
        }

        .meta {
            font-size: 12px;
            color: #666;
            margin-bottom: 4px;
        }

        .error {
            color: #b91c1c;
            margin-top: 10px;
        }

        .empty {
            color: #666;
        }
    </style>
</head>
<body>
    <h1>Paper RAG Agent</h1>
    <p>一个基于 Django 壳层 + FastAPI 推理服务 + LangGraph 编排的论文问答系统</p>

    <div class="nav">
        <a href="{% url 'chat_home' %}">Chat Home</a>
        <a href="{% url 'session_list' %}">View Session History</a>
        <a href="{% url 'upload_page' %}">Upload Papers</a>
    </div>

    <div class="card">
        <div class="session-info">
            当前会话:<strong>{{ current_session_id }}</strong>
        </div>

        <form method="post">
            {% csrf_token %}
            <div class="form-row">
                <label>Session ID:</label>
                <input type="text" name="session_id" value="{{ current_session_id }}">
            </div>

            <div class="form-row">
                <label>Question:</label>
                <textarea name="question" rows="5" placeholder="请输入你的问题,例如:What is the difference between paper1 and paper2?"></textarea>
            </div>

            <button type="submit">Ask</button>
        </form>

        {% if error %}
            <p class="error">{{ error }}</p>
        {% endif %}
    </div>

    <div class="card">
        <h3>Conversation</h3>

        {% if messages %}
            <div class="chat-box">
                {% for msg in messages %}
                    <div class="message {{ msg.role }}">
                        <div class="meta">
                            {% if msg.role == "user" %}
                                User
                            {% else %}
                                AI Assistant
                            {% endif %}
                            · {{ msg.created_at }}
                        </div>
                        {{ msg.content }}
                    </div>
                {% endfor %}
            </div>
        {% else %}
            <p class="empty">当前会话还没有消息,先问一个问题试试。</p>
        {% endif %}
    </div>
</body>
</html>
随后可以得到一个稍微美化的对话页面:
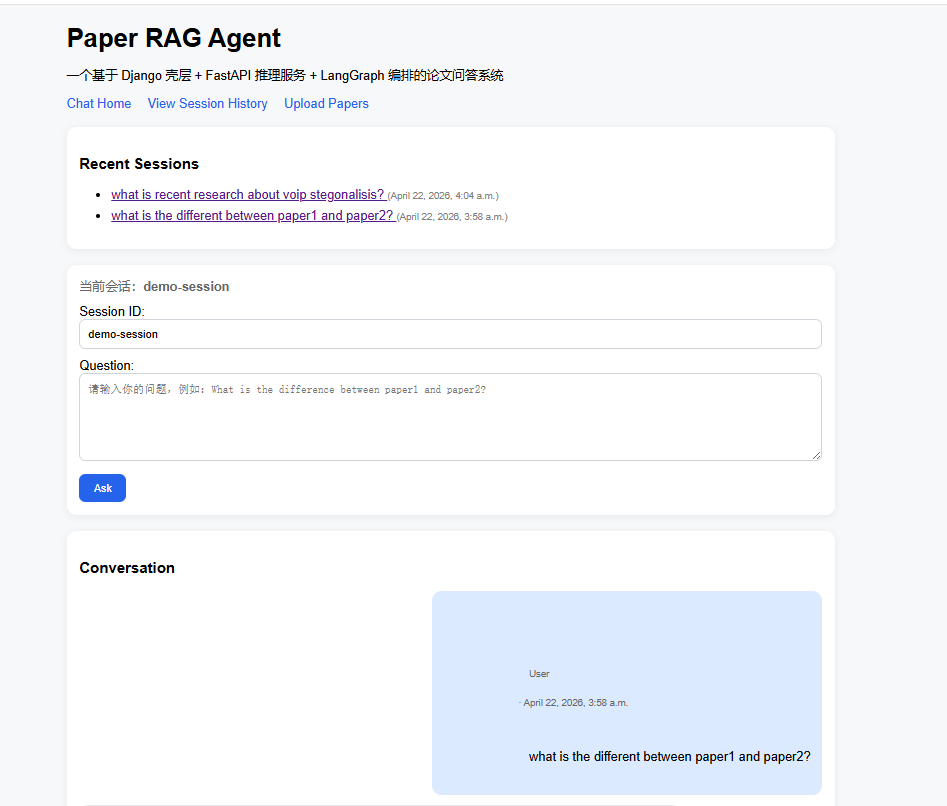
添加会话列表
下一步给UI界面增加会话列表,让系统看着更像是用户产品,在chat/views.py的chat_home函数返回值之前增加字段,除了返回聊天信息还要返回最近会话有哪些。
python
def chat_home(request):
	...

	session_obj = ChatSession.objects.filter(session_id=current_session_id).first()
	    messages = []
	    if session_obj:
	        messages = session_obj.messages.all().order_by("created_at")

	recent_sessions = ChatSession.objects.all().order_by("-updated_at")[:5]

    return render(
    request,
    "chat/chat_home.html",
    {
        "error": error,
        "current_session_id": current_session_id,
        "messages": messages,
        "recent_sessions": recent_sessions,   # 新增
    }
)随后在chat_home.html的导航栏下增加:
html
<div class="card">
    <h3>Recent Sessions</h3>

    {% if recent_sessions %}
        <ul>
            {% for s in recent_sessions %}
                <li style="margin-bottom: 8px;">
                    <a href="{% url 'chat_home' %}?session_id={{ s.session_id }}">
                        {{ s.title|default:s.session_id }}
                    </a>
                    <span style="color: gray; font-size: 12px;">
                        ({{ s.updated_at }})
                    </span>
                </li>
            {% endfor %}
        </ul>
    {% else %}
        <p class="empty">暂无历史会话</p>
    {% endif %}
</div>
增加了会话列表的聊天页如下:
增加文档上传和数据库重建功能
前面的系统做RAG,能检索到的知识还是解析本地提前放在root\data目录下的论文,现在要做功能升级,系统接受pdf文件到上传,并且动态建立数据库。
知识向量数据库重建
增加知识向量数据库重建服务接口
知识向量数据库重建功能属于AI内核的功能,所以这部分业务需要在AI内核部分进行完善,在FastAPI的服务借口部分增加一个重建数据库的服务:
python
@app.post("/reload_kb")
def reload_kb():
    global rag

    print("🔄 Reloading knowledge base...")

    docs = load_pdfs("data")
    chunks = process_documents(docs)

    rag = RAGSystem(chunks)
    rag.build_index()

    return {
        "status": "success",
        "message": f"Knowledge base reloaded. Total chunks: {len(chunks)}"
    }
创建上传文件视图逻辑
在AI内核有了知识向量数据库重建的逻辑后,接下来在Django部分增加文档上传逻辑,我们在页面提交论文的pdf后,需要让pdf文件存入我们的root\data目录下,修改documents/views.py:
python
import os
from django.shortcuts import render
from django.conf import settings


DATA_DIR = os.path.abspath(os.path.join(settings.BASE_DIR.parent, "data"))


def upload_page(request):
    message = None
    error = None

    if request.method == "POST":
        file = request.FILES.get("paper_file") # 接受前端paper_file标签传过来的文件

        if file:
            try:
                save_path = os.path.join(DATA_DIR, file.name)

                with open(save_path, "wb+") as f:
                    for chunk in file.chunks():
                        f.write(chunk)

                message = f"File uploaded: {file.name}"

            except Exception as e:
                error = str(e)
        else:
            error = "No file selected"

    return render(
        request,
        "documents/upload.html",
        {
            "message": message,
            "error": error
        }
    )
知识向量数据库重建
知识向量数据库的重建发生在文件上传之后,所以的在刚刚的文件上传完成后增加重建FastAPI的请求,这样就可以完成重建:
python
if request.method == "POST":
    file = request.FILES.get("paper_file")

    if file:
        try:
            save_path = os.path.join(DATA_DIR, file.name)

            with open(save_path, "wb+") as f:
                for chunk in file.chunks():
                    f.write(chunk)

            #  文件写入成功
            message = f"File uploaded: {file.name}"

            #  在这里触发知识库重建
            import requests
            FASTAPI_URL = "http://127.0.0.1:8000"
            try:
                requests.post(f"{FASTAPI_URL}/reload_kb", timeout=10)
            except Exception as e:
                print("⚠️ reload_kb failed:", e)

        except Exception as e:
            error = str(e)
    else:
        error = "No file selected"
这里补一个小功能,就是在Django的文件上传页面显示现在的data目录下已经有哪些pdf文件:
python
files = []
try:
    for f in os.listdir(DATA_DIR):
        if f.endswith(".pdf"):
            files.append(f)
except Exception as e:
    print("list files error:", e)

return render(
    request,
    "documents/upload.html",
    {
        "message": message,
        "error": error,
        "files": files   # 新增
    }
)然后在文件上传页面django_shell/templates/documents/upload.html添加一个文件列表:
<hr>
<h3>Current Knowledge Base Files</h3>

{% if files %}
    <ul>
        {% for f in files %}
            <li>📄 {{ f }}</li>
        {% endfor %}
    </ul>
{% else %}
    <p>暂无文件</p>
{% endif %}
加系统的可解释性
在科研工作中有一个现实痛点,看论文、做实验、写论文周期往往比较长,有的时候我论文产生了某一个Idea而等到我写论文的时候,我往往就忘了这个Idea是出自哪一篇参考文献,所以我希望有一个论文检索和分析智能体系统,我可以通过对话的方式让它帮我回忆起我的想法是来自哪一篇参考文献。
所以问答系统在做RAG的时候,我需要他告诉我它是依据知识向量数据库中的哪些知识回答我的问题的,这样我在看到哪些知识的时候,能回忆起那篇工作的同时,也能避免大模型瞎编回答。
显示检索到的Top-K内容
首先需要对最早的RAG系统的回答逻辑进行修改,让他返回值不仅是一个最终结果,还要包含召回的相关知识,需要在rag_system.py的类中增加一个方法ask_with_trace方法:
python
def ask_with_trace(self, question, chat_history=None):
    if chat_history is None:
        chat_history = []

    retrieved = self.retrieve(question, k=self.top_k)

    # rerank(用 text)
    texts = [c["text"] for c in retrieved]
    sorted_indices = self.rerank(question, texts)
    best_chunks = [retrieved[i] for i in sorted_indices[:self.rerank_k]]

    # 拼 context(加来源)
    context = ""
    for c in best_chunks:
        context += f"[Source: {c['source']}]\n{c['text']}\n\n"

    messages = [
        {
            "role": "system",
            "content": "You are a helpful assistant. Answer based on context and conversation history."
        }
    ]

    # 保留历史对话
    messages.extend(chat_history)

    messages.append({
        "role": "user",
        "content": f"{context}\n\nQuestion: {question}"
    })

    response = client.chat.completions.create(
        model=CHAT_MODEL,
        messages=messages
    )

    answer = response.choices[0].message.content

    retrieved_chunks = []
    for c in best_chunks[:5]:
        retrieved_chunks.append({
            "source": c["source"],
            "text": c["text"]
        })

    return {
        "answer": answer,
        "retrieved_chunks": retrieved_chunks
}这一步完成后,工具层的工具当然也需要变,不再调用以往只返回结果的ask()方法,而是调用新方法:
python
def rag_tool(query, chat_history=None):
return rag.ask_with_trace(query, chat_history=chat_history)调整问题回答节点,这里有个坑,以前是这样写的:
python
tool_result = state["tool_result"]

if isinstance(tool_result['tool_output'], dict):
    return {
        "final_answer": tool_result.get("answer", ""),
        "retrieved_chunks": tool_result.get("retrieved_chunks", "")
    }
但是现在的数据是这样包装的:
state
 └── tool_result
      └── tool_output   ← 真正的 rag 返回
所以需要对问题回答节点进行调整,多取一层数据:
python
tool_result = state["tool_result"]

output = tool_result["tool_output"]  #  关键

if isinstance(output, dict):
    return {
        "final_answer": output.get("answer", ""),
        "retrieved_chunks": output.get("retrieved_chunks", [])
    }

return {
    "final_answer": str(output),
    "retrieved_chunks": []
}随后,对编排层app/graph/workflow.py的输出也要进行相应的调整,以前返回的是状态图的final_answer字段,现在返回整张状态图:
python
class AgentWorkflow:
    def __init__(self, tools, rag=None): #传入一些构建编排层的外部依赖
        self.tools = tools
        self.rag = rag
        self.graph = build_agent_graph(tools, rag=rag) # 建立图

    def invoke(self, session_id: str, query: str, chat_history=None):
        if chat_history is None:
            chat_history = []

        state = {
            "session_id": session_id,
            "query": query,
            "chat_history": chat_history,
        }

        result = self.graph.invoke(state)  #返回结果仍是状态图
        return result
然后调整FastAPI,加上返回的Top-K:
python
result = workflow.invoke(
    session_id=req.session_id,
    query=req.question,
    chat_history=history
)

answer = result.get("final_answer", "")
chunks = result.get("retrieved_chunks", [])

session_manager.append_turn(
    req.session_id,
    req.question,
    answer
)

return {
    "session_id": req.session_id,
    "question": req.question,
    "answer": answer,
    "chunks": chunks,
}相应的调整django中chat/views.py的视图逻辑, 接受chunk和回答结果:
python
result = ask_ai(...)
# 后面补充
chunks = result.get("chunks", [])
# rander也要加上对应字段
"chunks": chunks
再在页面中增加:
python
{% if chunks %}
<hr>
<h3>Retrieved Context (Top-K)</h3>
<ul>
    {% for c in chunks %}
        <li>
            <strong>{{ c.source }}</strong><br>
            {{ c.text }}
        </li>
    {% endfor %}
</ul>
{% endif %}
这里有个大坑 ,状态图也要调整,我在做的时候忘记修改状态图的定义了,导致节点没有间没有传递retrieved_chunks: list[dict[str, Any]]状态,所以要在状体图中补相应的定义。
如果这篇文章对你有帮助,可以点个赞~
完整代码地址:https://github.com/1186141415/Paper-RAG-Agent-with-LangGraph