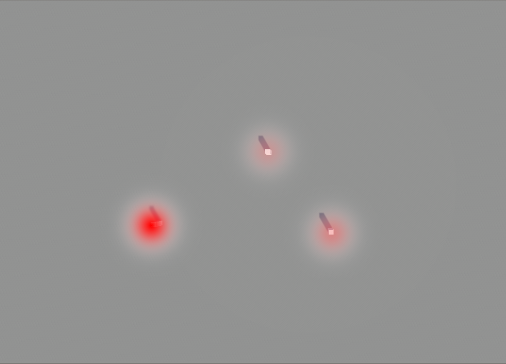
1.单纯使用CPU进行初步的思路学习
思路:使用rawimage充当热力图,rawimage位置定死,在rawimage对应的三维地面上创建两个transform,分别对应左下角与右上角,将需要进行热力图显示的设备框在这个范围内。然后,在代码中使用rawimage本身的宽高和三维对应点的x z 差值,计算出设备在rawimage上的对应点。将设备温度转换为对应颜色,将颜色赋值给前面算出来的像素点。
代码:
using SpringGUI;
using System.Collections;
using System.Collections.Generic;
using UnityEngine;
using UnityEngine.UI;

public class TestHeatMap : MonoBehaviour
{
    public RawImage heatmap;

    public List<GameObject> equipment;

    public Transform statPos, endPos;

    private float rawimageWidth, rawimageHeight;

    private float realWidth, realHeight;

    public Color maxColor = Color.red;

    public Color minColor = Color.blue;

    public float maxValue = 60;

    public float minValue = 10;

    /// <summary>
    /// 颜色衰减范围
    /// </summary>
    public float radius = 10;

    public enum FalloffType
    {
        Linear,
        Quadratic,
        Gaussian
    }

    public FalloffType falloffType = FalloffType.Linear;

    private Texture2D tex;

    private Color[,] colorBuffer;

    private void Start()
    {
        rawimageWidth = heatmap.rectTransform.rect.width;

        rawimageHeight = heatmap.rectTransform.rect.height;

        realWidth = endPos.position.x - statPos.position.x;

        realHeight = endPos.position.z - statPos.position.z;

        tex = new Texture2D((int)rawimageWidth, (int)rawimageHeight);

        colorBuffer = new Color[(int)rawimageWidth, (int)rawimageHeight];

        Color[] pixels = new Color[(int)rawimageWidth * (int)rawimageHeight];

        for (int i = 0; i < rawimageWidth; i++)
        {
            for (int j = 0; j < rawimageHeight; j++)
            {
                colorBuffer[i, j] = Color.clear;
            }
        }

        // 2. 放置"热点" (只标记中心点,不画圆)
        List<Vector3> points = new List<Vector3>(); // 存储 (x, y, intensity)

        for (int i = 0; i < equipment.Count; i++)
        {
            Vector3 pos = equipment[i].transform.position;

            int x = (int)((pos.x - statPos.position.x) / realWidth * rawimageWidth);

            int y = (int)((pos.z - statPos.position.z) / realHeight * rawimageHeight);

            float intensity = float.Parse(equipment[i].name) / maxValue; // 归一化强度

            points.Add(new Vector3(x, y, intensity));
        }

        // 3. 卷积核(定义热量如何扩散)
        int blurRadius = 30; // 扩散范围(调大这个值!)
        float sigma = 15f;   // 扩散平滑度

        // 4. 遍历画布,计算每个像素受所有热点的影响
        for (int y = 0; y < rawimageHeight; y++)
        {
            for (int x = 0; x < rawimageWidth; x++)
            {
                float totalHeat = 0;
                foreach (var p in points)
                {
                    float dist = Vector2.Distance(new Vector2(x, y), new Vector2(p.x, p.y));
                    // 高斯权重
                    float weight = Mathf.Exp(-(dist * dist) / (2 * sigma * sigma));
                    totalHeat += p.z * weight;
                }
                // 根据总热量映射颜色
                pixels[y * (int)rawimageWidth + x] = Color.Lerp(minColor, maxColor, totalHeat);
            }
        }

        tex.SetPixels(pixels);
        tex.Apply();
        heatmap.texture = tex;
    }

    /// <summary>
    /// 绘制圆形衰减
    /// </summary>
    /// <param name="centerx"></param>
    /// <param name="centery"></param>
    /// <param name="baseColor"></param>
    void DrawCicularGradient(int centerx, int centery, Color baseColor)
    {
        int radiusInt = Mathf.CeilToInt(radius);

        for (int x = centerx - radiusInt; x <= centerx + radiusInt; x++)
        {
            for (int y = centery - radiusInt; y <= centery + radiusInt; y++)
            {
                if (x >= 0 && x < rawimageWidth && y >= 0 && y < rawimageHeight)
                {
                    float distance = Mathf.Sqrt(Mathf.Pow(x - centerx, 2) + Mathf.Pow(y - centery, 2));

                    if (distance <= radius)
                    {
                        float falloff = CalculateFalloff(distance);

                        Color pixelColor = baseColor * falloff;

                        colorBuffer[x, y] += pixelColor;

                        //限制颜色不超过1
                        colorBuffer[x, y].r = Mathf.Clamp01(colorBuffer[x, y].r);
                        colorBuffer[x, y].g = Mathf.Clamp01(colorBuffer[x, y].g);
                        colorBuffer[x, y].b = Mathf.Clamp01(colorBuffer[x, y].b);
                        colorBuffer[x, y].a = Mathf.Clamp01(colorBuffer[x, y].a);
                    }
                }
            }
        }
    }

    void ApplyColorBufferToTexture()
    {
        for (int x = 0; x < rawimageWidth; x++)
        {
            for (int y = 0; y < rawimageHeight; y++)
            {
                tex.SetPixel(x, y, colorBuffer[x, y]);
            }
        }

        tex.Apply();
    }

    /// <summary>
    /// 计算衰减因子
    /// </summary>
    float CalculateFalloff(float normalizedDistance)
    {
        switch (falloffType)
        {
            case FalloffType.Linear:
                return 1 - normalizedDistance;
            case FalloffType.Quadratic:
                return 1 - normalizedDistance * normalizedDistance;
            case FalloffType.Gaussian:
                // 高斯衰减:e^(-距离² × 5)
                return Mathf.Exp(-normalizedDistance * normalizedDistance * 5);
            default:
                return 1f - normalizedDistance;
        }
    }
}
代码运行效果: