不回避世界的寒凉,也不放弃自己生火的能力;在认清生活的冷色调后,依然愿意做自己生命里的光源。人生没有不受伤的旅程,但我们可以决定以何种姿态走向下一程。真正的重建,从来不是回到从前,而是带着裂痕,走向更辽阔的自己。------《自我重建》
一、Semantic Kernel 简介
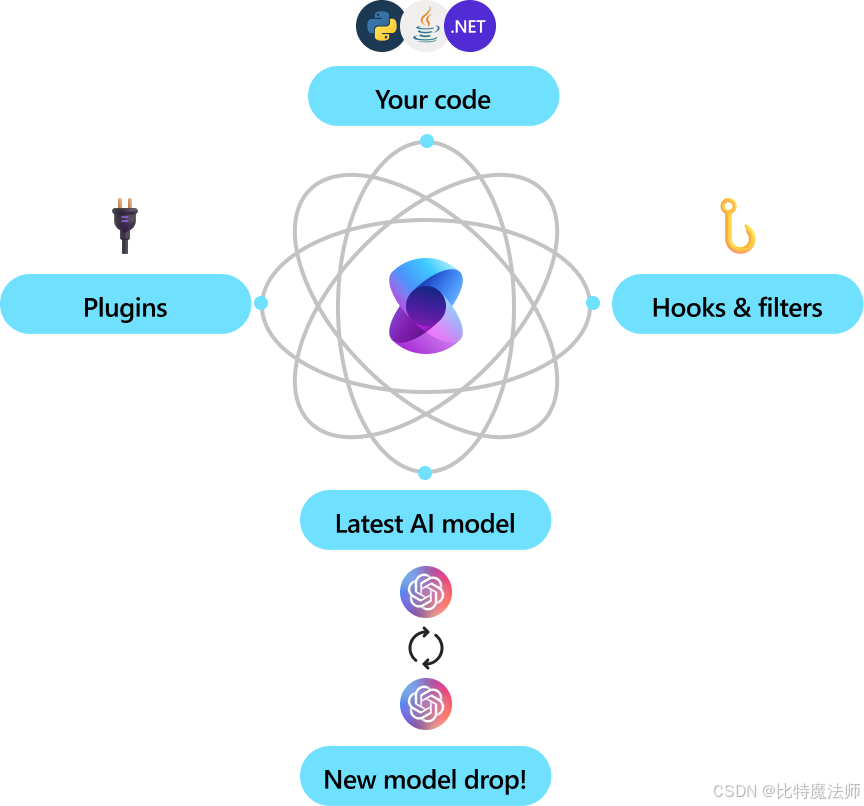
Semantic Kernel 是一个轻量级、开源的开发工具包,旨在帮助开发者轻松构建 AI 智能体(AI Agents)并将最新的大语言模型集成到现有的 C#、Python 或 Java 代码库中。
1、核心特点
企业级就绪
- 灵活模块化:采用模块化设计,便于扩展和维护
- 可观测性强:支持遥测(telemetry)、钩子(hooks)和过滤器(filters),助力构建负责任的 AI 解决方案
- 多语言支持:1.0+ 版本同时支持 C#、Python、Java,承诺非破坏性更新
- 未来兼容:可轻松切换新发布的 AI 模型,无需重写整个代码库
自动化业务流程
- 提示词 + API 结合:将自然语言提示与现有业务 API 结合,让 AI 模型能调用函数执行实际操作
- 智能中间件:SK 作为中间层,负责将模型的意图翻译为函数调用,并将结果返回给模型
模块化与可扩展
- 插件机制:可将现有代码封装为插件(Plugin),最大化复用已有投资
- OpenAPI 支持:遵循 OpenAPI 规范(类似 Microsoft 365 Copilot),便于团队共享和协作
- 开箱即用连接器:提供多种预置连接器,快速集成主流 AI 服务
2、适用场景
| 场景 | 说明 |
|---|---|
| AI 智能体开发 | 构建能自主调用函数、完成复杂任务的 Agent |
| 企业系统集成 | 将 LLM 能力嵌入现有业务系统,实现智能自动化 |
| 多模态扩展 | 从聊天 API 轻松扩展到语音、视频等模态 |
| 快速原型验证 | 通过插件和连接器快速验证 AI 应用想法 |
二、入门指南
1、创建项目
bash
dotnet new console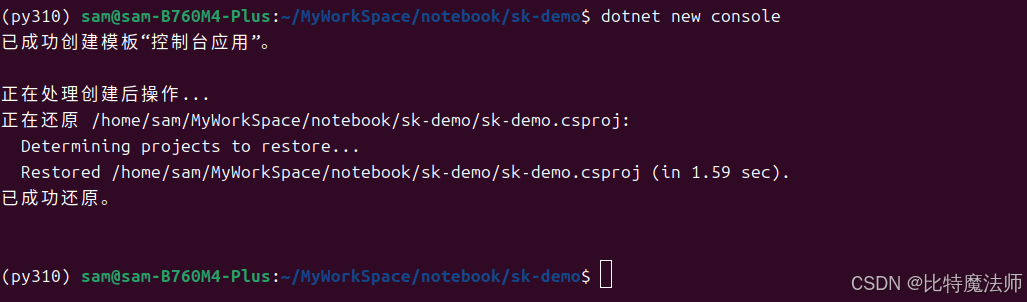
2、安装依赖
核心依赖:
bash
dotnet add package Microsoft.SemanticKernel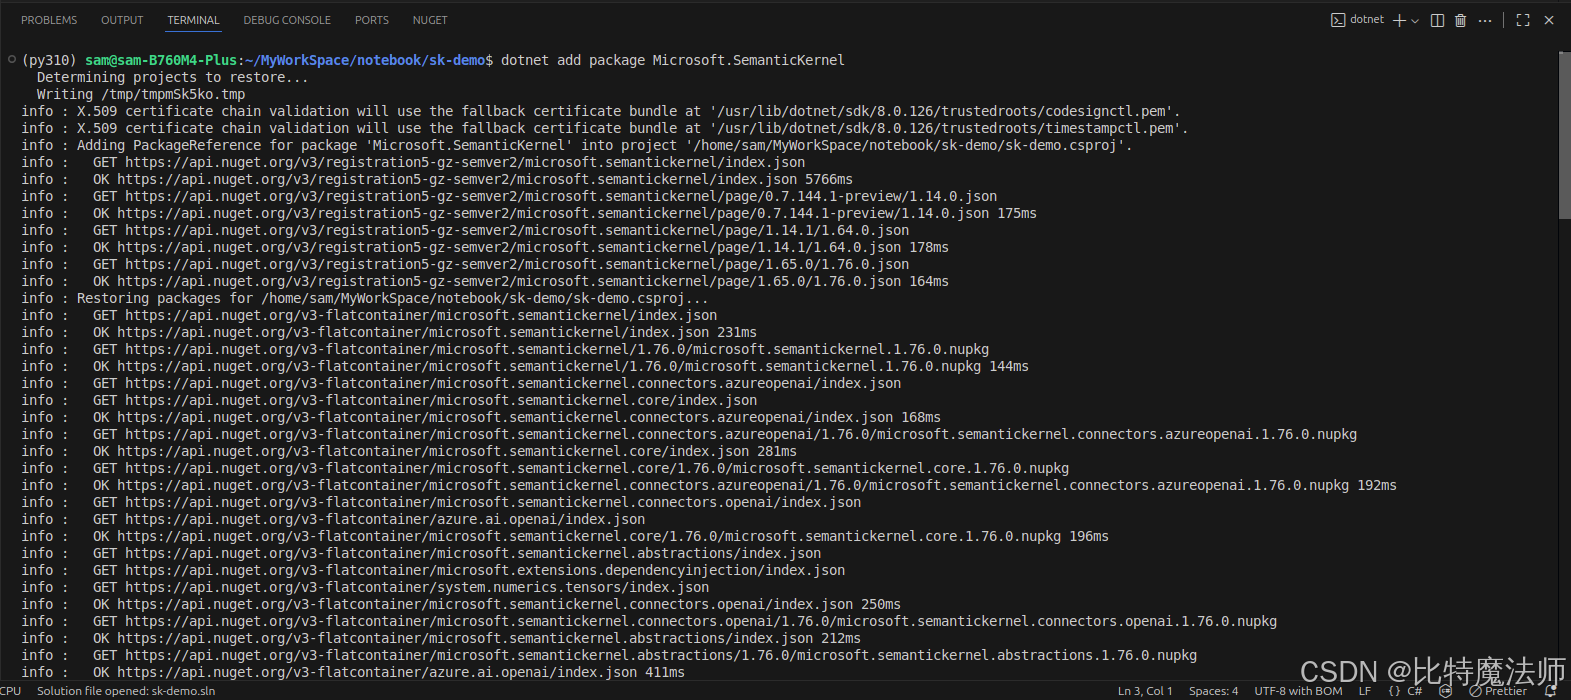
日志依赖:
bash
dotnet add package Microsoft.Extensions.Logging
dotnet add package Microsoft.Extensions.Logging.Console
3、使用示例
Program.cs 代码如下:
csharp
// Import packages
using Microsoft.Extensions.DependencyInjection;
using Microsoft.Extensions.Logging;
using Microsoft.SemanticKernel;
using Microsoft.SemanticKernel.ChatCompletion;
using Microsoft.SemanticKernel.Connectors.OpenAI;

using System.ComponentModel;
using System.Text.Json.Serialization;

// Populate values from your OpenAI deployment
var modelId = "Pro/zai-org/GLM-5.1";
var endpoint = new Uri("https://api.siliconflow.cn/v1");
var apiKey = "sk-xxx";

// Create a kernel with Azure OpenAI chat completion
// var builder = Kernel.CreateBuilder().AddAzureOpenAIChatCompletion(modelId, endpoint, apiKey);

var builder = Kernel.CreateBuilder().AddOpenAIChatCompletion(
    modelId: modelId,
    endpoint: endpoint,
    apiKey: apiKey,
    serviceId: "SiliconFlow"
);

// Add enterprise components
builder.Services.AddLogging(services => services.AddConsole().SetMinimumLevel(LogLevel.Trace));

// Build the kernel
Kernel kernel = builder.Build();
var chatCompletionService = kernel.GetRequiredService<IChatCompletionService>();

// Add a plugin (the LightsPlugin class is defined below)
kernel.Plugins.AddFromType<LightsPlugin>("Lights");

// Enable planning
OpenAIPromptExecutionSettings openAIPromptExecutionSettings = new()
{
    FunctionChoiceBehavior = FunctionChoiceBehavior.Auto()
};

// Create a history store the conversation
var history = new ChatHistory();

// Initiate a back-and-forth chat
string? userInput;
do {
    // Collect user input
    Console.Write("User > ");
    userInput = Console.ReadLine();

    // Add user input
    history.AddUserMessage(userInput);

    // Get the response from the AI
    var result = await chatCompletionService.GetChatMessageContentAsync(
        history,
        executionSettings: openAIPromptExecutionSettings,
        kernel: kernel);

    // Print the results
    Console.WriteLine("Assistant > " + result);

    // Add the message from the agent to the chat history
    history.AddMessage(result.Role, result.Content ?? string.Empty);
} while (userInput is not null);


public class LightsPlugin
{
   // Mock data for the lights
   private readonly List<LightModel> lights = new()
   {
      new LightModel { Id = 1, Name = "Table Lamp", IsOn = false },
      new LightModel { Id = 2, Name = "Porch light", IsOn = false },
      new LightModel { Id = 3, Name = "Chandelier", IsOn = true }
   };

   [KernelFunction("get_lights")]
   [Description("Gets a list of lights and their current state")]
   public async Task<List<LightModel>> GetLightsAsync()
   {
      return lights;
   }

   [KernelFunction("change_state")]
   [Description("Changes the state of the light")]
   public async Task<LightModel?> ChangeStateAsync(int id, bool isOn)
   {
      var light = lights.FirstOrDefault(light => light.Id == id);

      if (light == null)
      {
         return null;
      }

      // Update the light with the new state
      light.IsOn = isOn;

      return light;
   }
}

public class LightModel
{
   [JsonPropertyName("id")]
   public int Id { get; set; }

   [JsonPropertyName("name")]
   public string Name { get; set; }

   [JsonPropertyName("is_on")]
   public bool? IsOn { get; set; }
}
运行效果:
User > 帮我关一下灯
trce: Microsoft.SemanticKernel.Connectors.OpenAI.OpenAIChatCompletionService[0]
      ChatHistory: [{"Role":{"Label":"user"},"Items":[{"$type":"TextContent","Text":"\u5E2E\u6211\u5173\u4E00\u4E0B\u706F"}]}], Settings: {"service_id":null,"model_id":null,"function_choice_behavior":{"type":"auto","functions":null,"options":null}}

...

info: Microsoft.SemanticKernel.Connectors.OpenAI.OpenAIChatCompletionService[0]
      Prompt tokens: 329. Completion tokens: 59. Total tokens: 388.
Assistant > 已经帮您把**吊灯**关闭了!现在所有的灯都已关闭状态:

1. 🪔 台灯 --- 已关
2. 🏠 门廊灯 --- 已关
3. 💡 吊灯 --- 已关

还有其他需要帮忙的吗?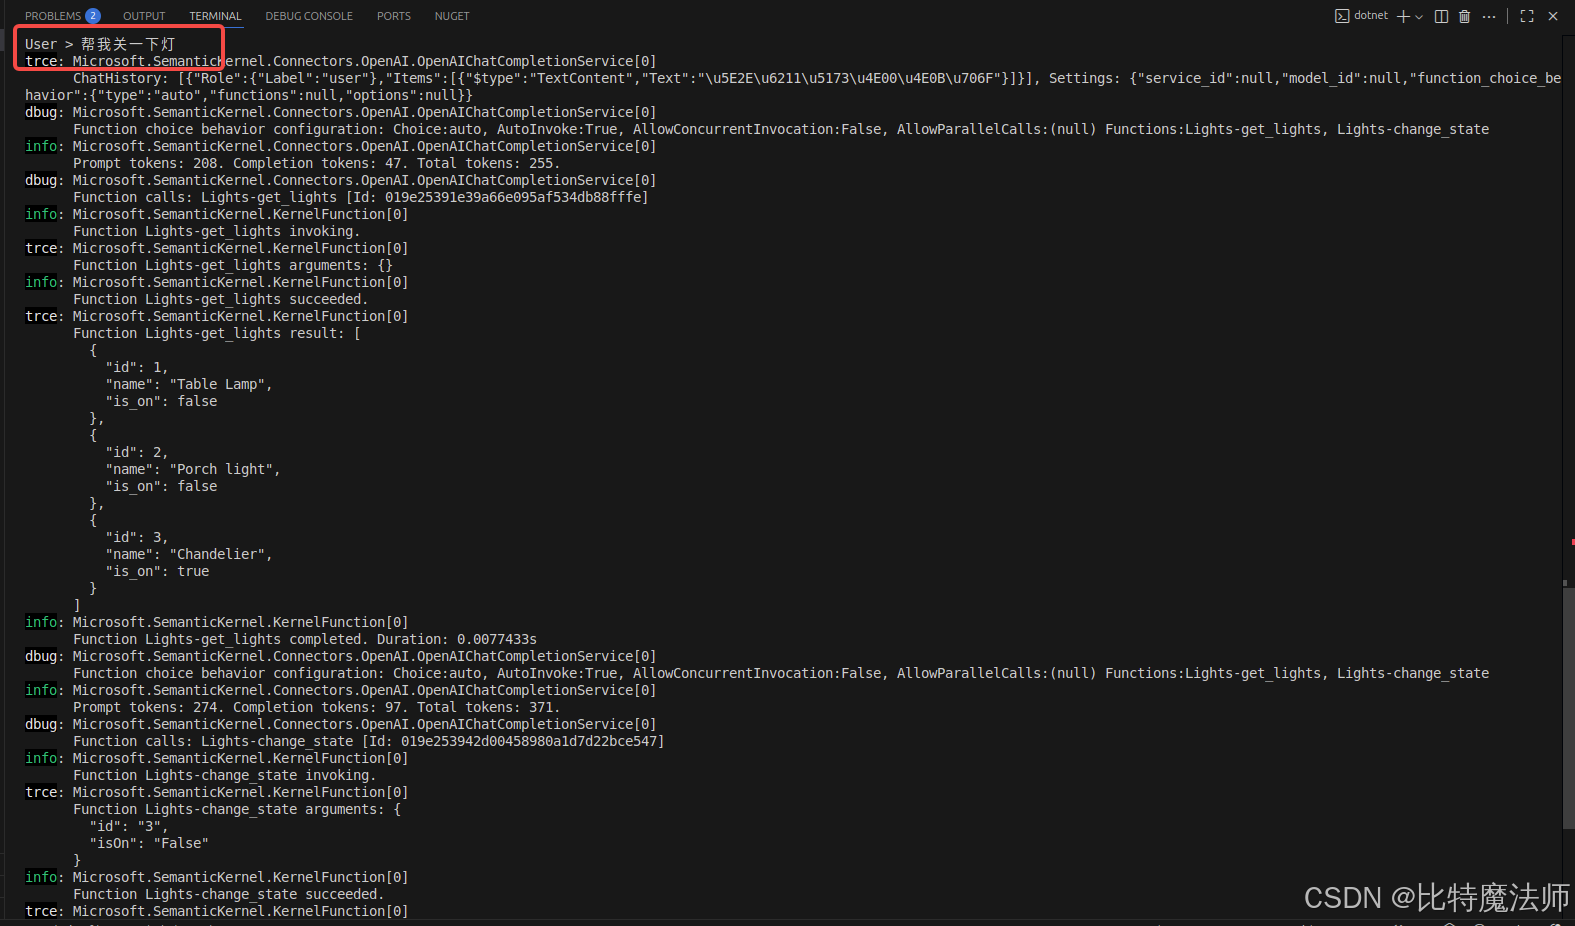

三、代码解析
1、导入核心依赖
csharp
using Microsoft.SemanticKernel;
using Microsoft.SemanticKernel.ChatCompletion;
using Microsoft.SemanticKernel.Connectors.OpenAI;
2、添加 AI 服务
官方示例使用了 Azure 云服务:
csharp
// Create kernel
var builder = Kernel.CreateBuilder().AddAzureOpenAIChatCompletion(
    modelId: modelId,
    endpoint: endpoint,
    apiKey: apiKey,
    serviceId: "Azure"
);
国内可以使用硅基流动(后文有补充):
csharp
var builder = Kernel.CreateBuilder().AddOpenAIChatCompletion(
   modelId: modelId,
   endpoint: endpoint,
   apiKey: apiKey,
   serviceId: "SiliconFlow"
);
方法参数如下,注意生产环境使用环境变量避免硬编码:
csharp
var modelId = "Pro/zai-org/GLM-5.1";
var endpoint = new Uri("https://api.siliconflow.cn/v1");
var apiKey = "sk-xxx";
至此,我们添加了内核中最重要的部分:AI 对话服务。
3、添加企业组件
我们将日志记录服务添加到内核中,用于帮助调试 AI 智能体。
csharp
// Add enterprise components
builder.Services.AddLogging(services => services.AddConsole().SetMinimumLevel(LogLevel.Trace));
4、构建内核并获取服务
添加好服务后,我们就构建内核并获取对话服务以备后用。
csharp
// Build the kernel
Kernel kernel = builder.Build();
var chatCompletionService = kernel.GetRequiredService<IChatCompletionService>();
5、添加插件
通过插件,可以赋予 AI 智能体执行代码的能力,从而从外部来源获取信息或执行操作。因此,这里的插件概念跟 LLM 中的 function calling 是一致的。在上述示例中,我们添加了一个插件,允许 AI 智能体与灯泡互动。下面,我们来看下如何创建这个插件。
csharp
using System.ComponentModel;
using System.Text.Json.Serialization;
using Microsoft.SemanticKernel;

public class LightsPlugin
{
   // Mock data for the lights
   private readonly List<LightModel> lights = new()
   {
      new LightModel { Id = 1, Name = "Table Lamp", IsOn = false },
      new LightModel { Id = 2, Name = "Porch light", IsOn = false },
      new LightModel { Id = 3, Name = "Chandelier", IsOn = true }
   };

   [KernelFunction("get_lights")]
   [Description("Gets a list of lights and their current state")]
   public async Task<List<LightModel>> GetLightsAsync()
   {
      return lights;
   }

   [KernelFunction("change_state")]
   [Description("Changes the state of the light")]
   public async Task<LightModel?> ChangeStateAsync(int id, bool isOn)
   {
      var light = lights.FirstOrDefault(light => light.Id == id);

      if (light == null)
      {
         return null;
      }

      // Update the light with the new state
      light.IsOn = isOn;

      return light;
   }
}

public class LightModel
{
   [JsonPropertyName("id")]
   public int Id { get; set; }

   [JsonPropertyName("name")]
   public string Name { get; set; }

   [JsonPropertyName("is_on")]
   public bool? IsOn { get; set; }
}
如上所示,创建一个本地插件就像创建一个新类一样简单。创建完插件后,需要将它添加到内核中,这样 AI 智能体才可以访问它。在示例中,我们将 LightsPlugin 类添加到了内核中。
csharp
// Add a plugin (the LightsPlugin class is defined below)
kernel.Plugins.AddFromType<LightsPlugin>("Lights");
6、规划
通过 function calling 调用,LLM 可以请求或调用特定的函数以满足用户的请求,然后,语义核心将请求调度到代码库中相应的函数,并将结果返回给 LLM,以便 AI 智能体生成最终响应。
- LLM:请求执行
get_lights函数 - Kernel:根据
get_lights函数名找到public async Task<List<LightModel>> GetLightsAsync(),然后执行函数,将结果result返回给 LLM - LLM:根据
result生成最终响应
为了启用自动函数调用,我们首先需要创建适当的执行设置,以便语义核心知道在 AI 智能体请求函数时自动调用内核中的函数。
csharp
// Enable planning
OpenAIPromptExecutionSettings openAIPromptExecutionSettings = new()
{
   FunctionChoiceBehavior = FunctionChoiceBehavior.Auto()
};
7、调用
最后,我们调用带有插件的 AI 智能体。示例代码演示了如何生成非流响应,但我们也可以使用 GetStreamingChatMessageContentsAsync 方法生成流响应。

csharp
// Create chat history
var history = new ChatHistory();

// Get the response from the AI
var result = await chatCompletionService.GetChatMessageContentAsync(
    history,
    executionSettings: openAIPromptExecutionSettings,
    kernel: kernel
);
流式传输:
csharp
// Initiate a back-and-forth chat
string? userInput;
do
{
// Collect user input
Console.Write("User > ");
userInput = Console.ReadLine();
// Add user input
history.AddUserMessage(userInput);
// Get the response from the AI
// var result = await chatCompletionService.GetChatMessageContentAsync(
// history,
// executionSettings: openAIPromptExecutionSettings,
// kernel: kernel);
// 流式获取AI响应
var streamResult = chatCompletionService.GetStreamingChatMessageContentsAsync(
history,
executionSettings: openAIPromptExecutionSettings,
kernel: kernel
);
// 处理流式输出
Console.Write("Assistant >");
var fullResponseBuilder = new StringBuilder();
await foreach (var streamingContent in streamResult)
{
// 实时输出每个内容块
if (!string.IsNullOrEmpty(streamingContent.Content))
{
// 累积内容
fullResponseBuilder.Append(streamingContent.Content);
Console.Write(streamingContent.Content);
Console.WriteLine(); // 换行
}
// 如果需要查看其他元数据
Console.WriteLine($"Role > {streamingContent.Role}");
Console.WriteLine(); // 换行
Console.WriteLine($"Author > {streamingContent.AuthorName}");
Console.WriteLine(); // 换行
}
// Print the results
// Console.WriteLine("Assistant > " + result);
// Add the message from the agent to the chat history
// history.AddMessage(result.Role, result.Content ?? string.Empty);
var completeResponse = fullResponseBuilder.ToString();
Console.WriteLine($"Assistant > {completeResponse}");
// 保存到历史记录
if (!string.IsNullOrWhiteSpace(completeResponse))
{
// 注意:需要确定角色,流式响应通常是 Assistant
history.AddMessage(AuthorRole.Assistant, completeResponse);
Console.WriteLine(); // 换行
}
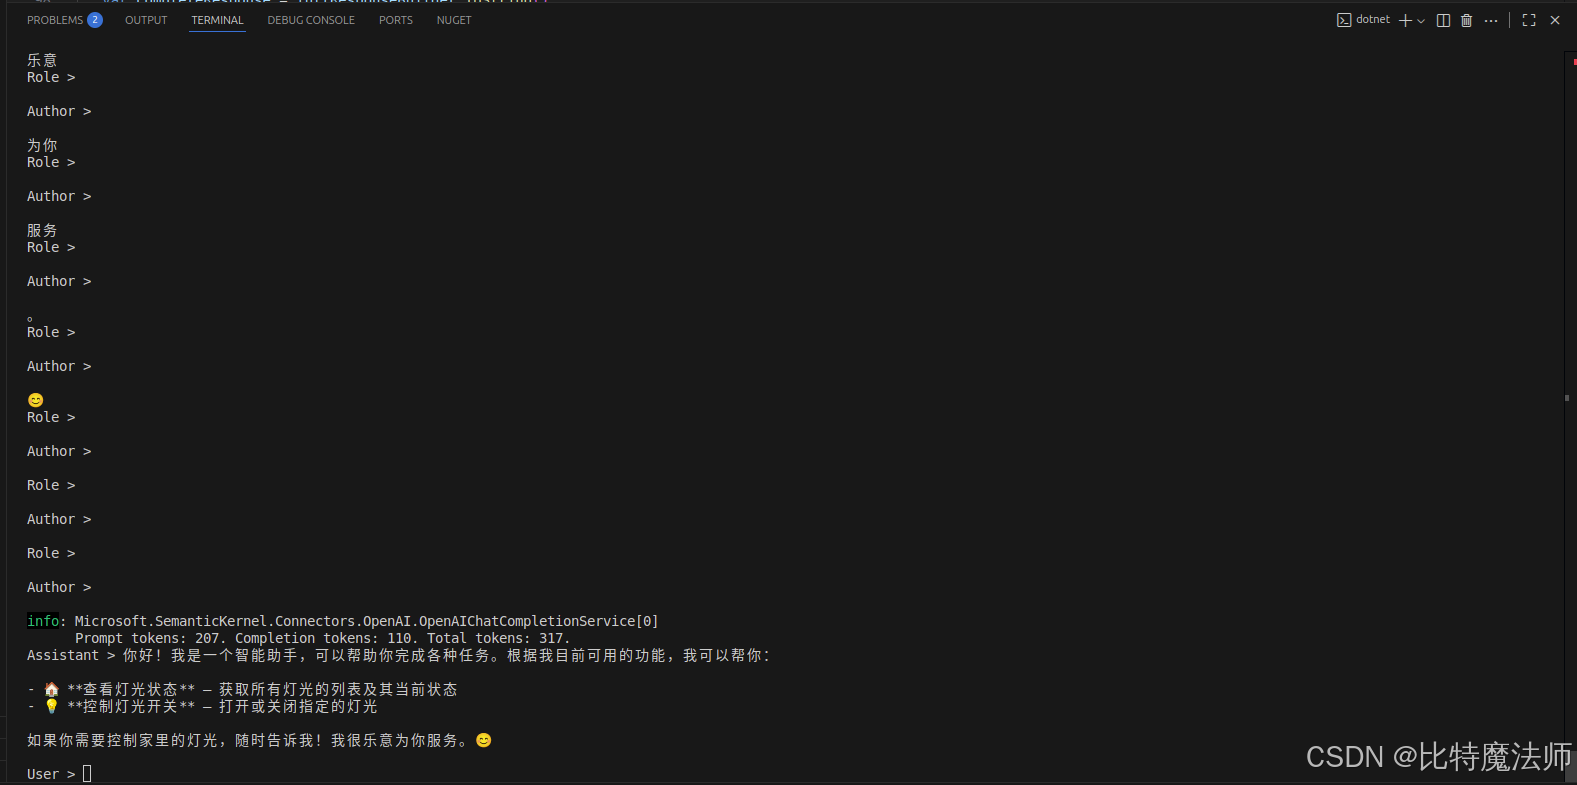
} while (userInput is not null);效果:
四、模型聚合平台
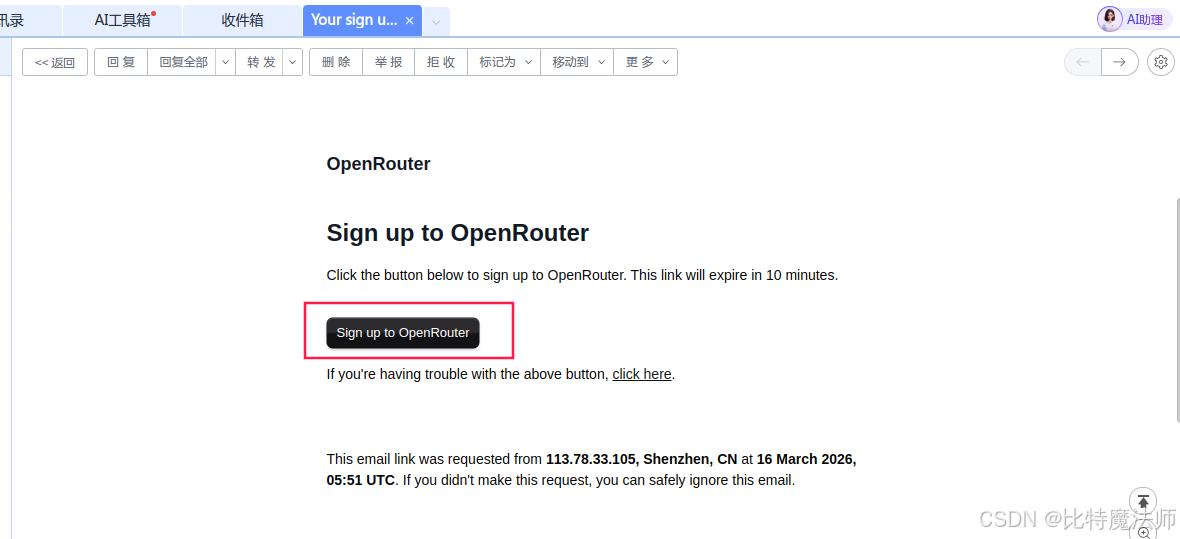
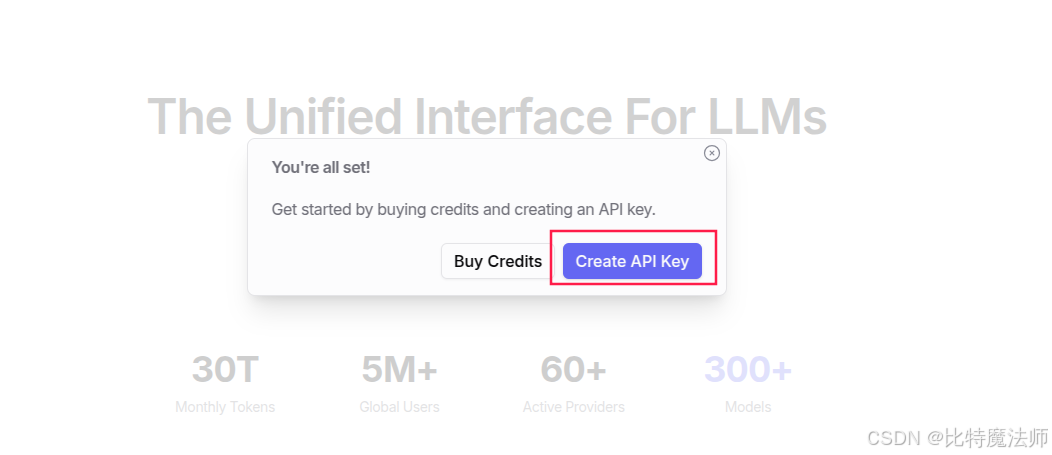
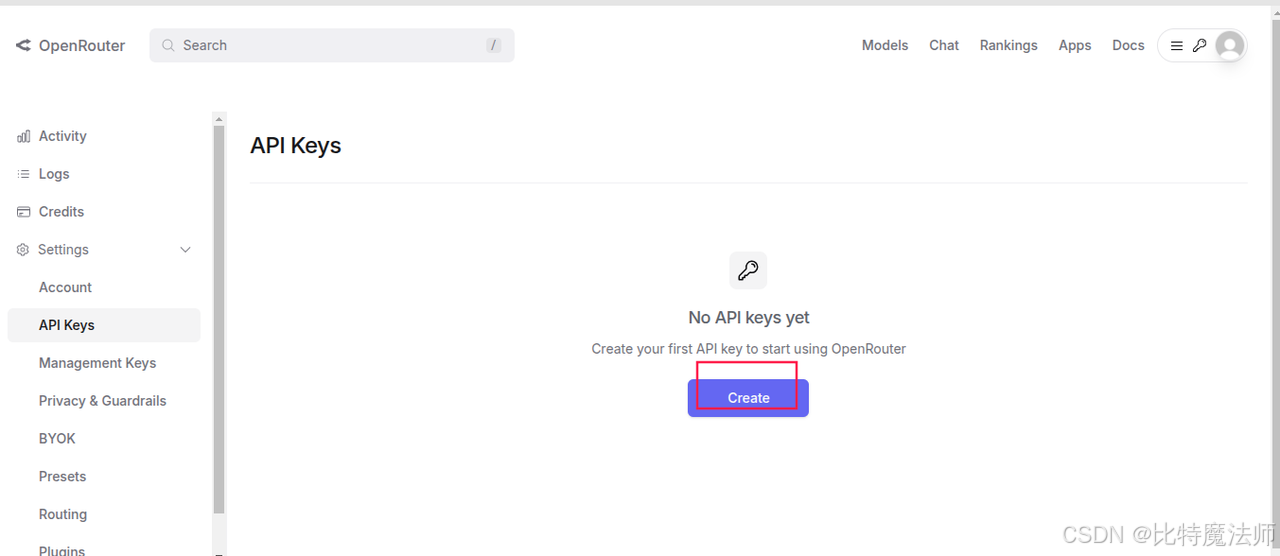
1、openrouter
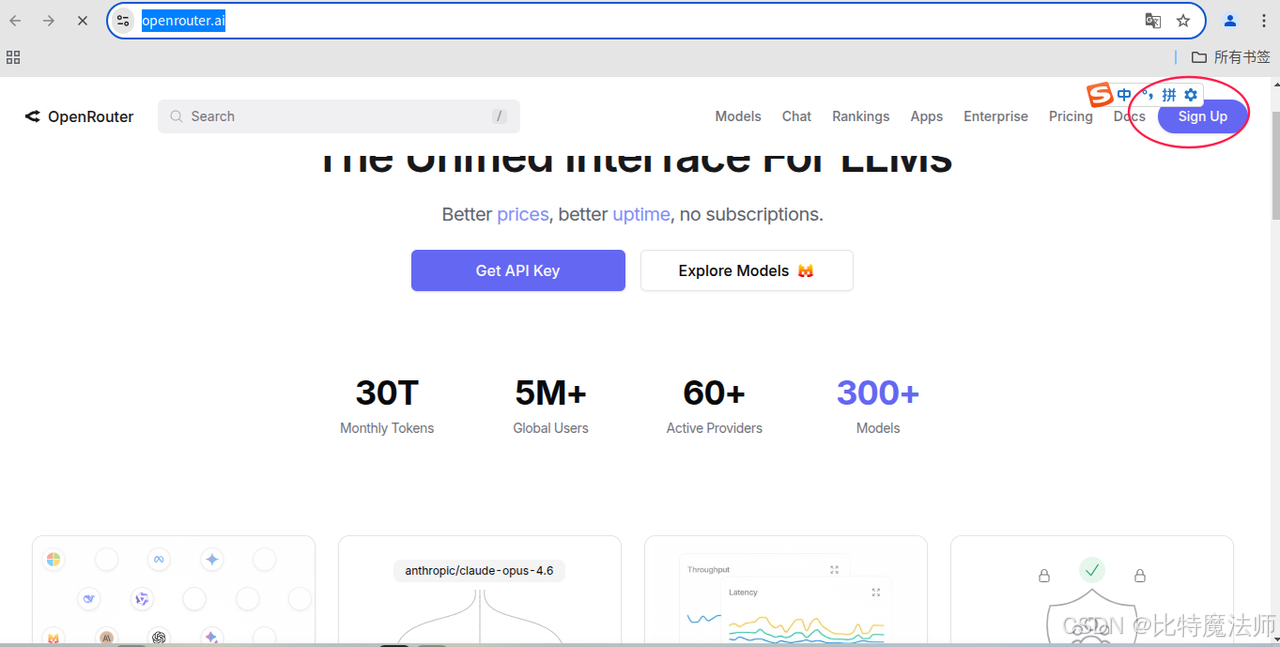
使用邮件注册:
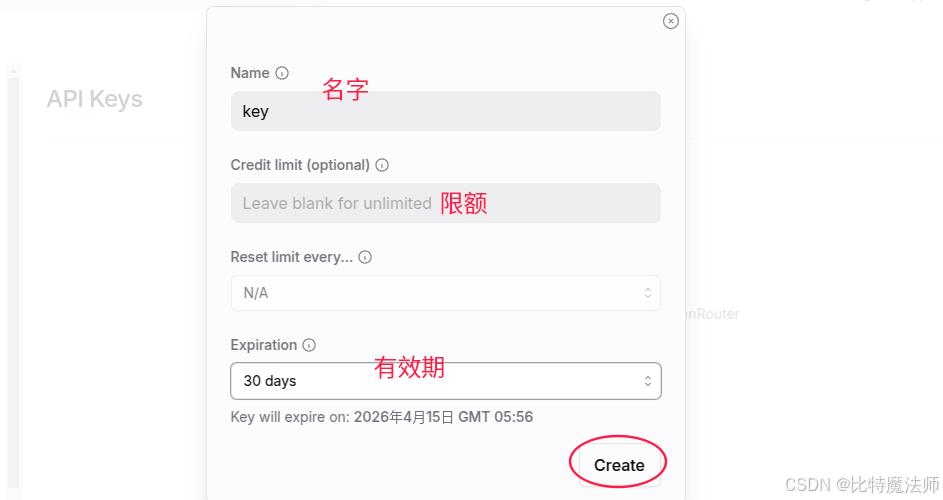
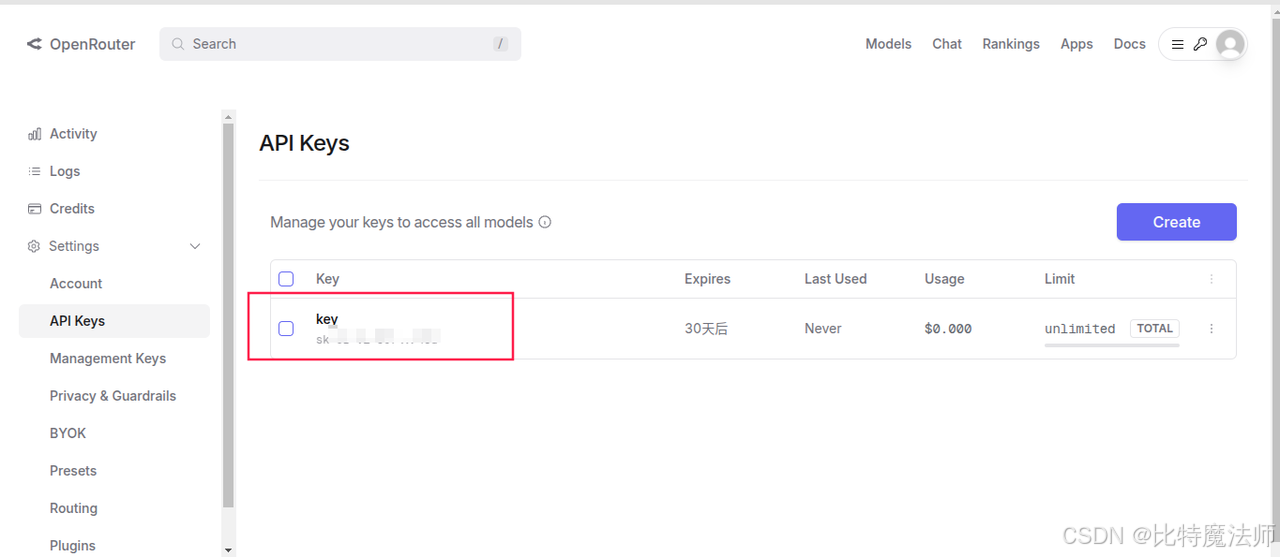
创建一个 api key:
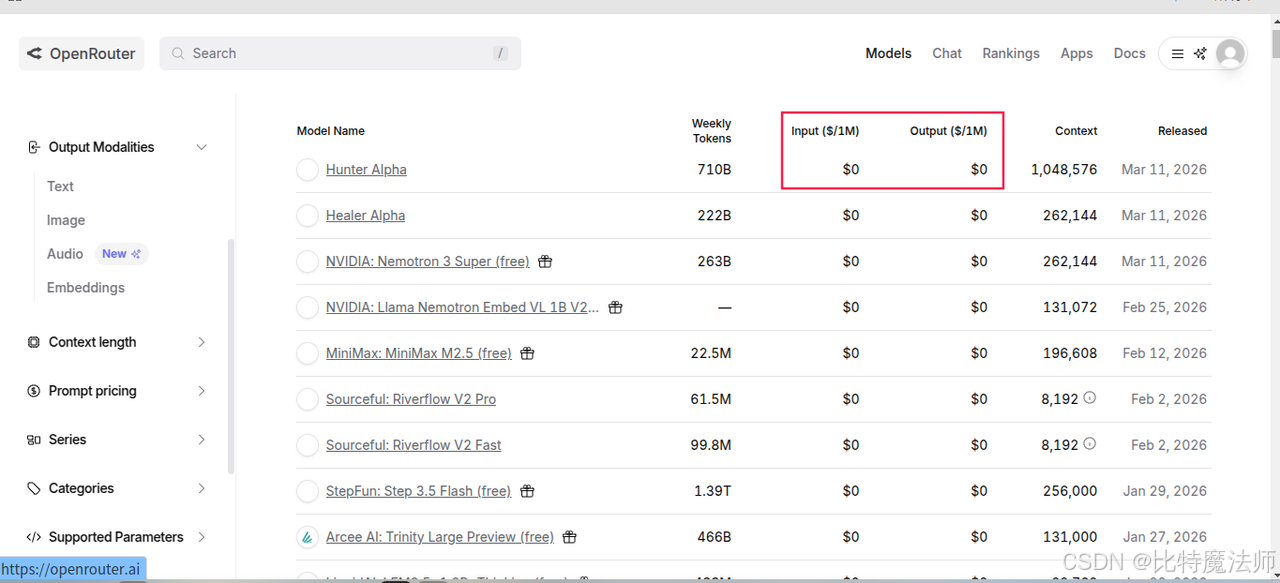
免费模型:
(可选)测试 api:
python
import requests
import json

url = "https://openrouter.ai/api/v1/chat/completions"
model = "openrouter/healer-alpha"  # 选择的模型
request_headers = {
    "Authorization": "Bearer sk-xxx",  # 替换为你的 API 密钥
    "HTTP-Referer": "http://localhost:8088",
    "X-Title": "test"
}
default_prompt = "You are an AI assistant that helps people find information."

def llm(user_prompt, system_prompt=default_prompt):
    messages = [
        {"role": "system", "content": system_prompt},
        {"role": "user", "content": user_prompt},
    ]
    request_json = {
        "model": model,
        "messages": messages,
        "max_tokens": 2048
    }
    response = requests.request(
        url=url,
        method="POST",
        json=request_json,
        headers=request_headers
    )
    return json.loads(response.content.decode('utf-8'))

if __name__ == '__main__':
    print(llm("你好,介绍一下你自己"))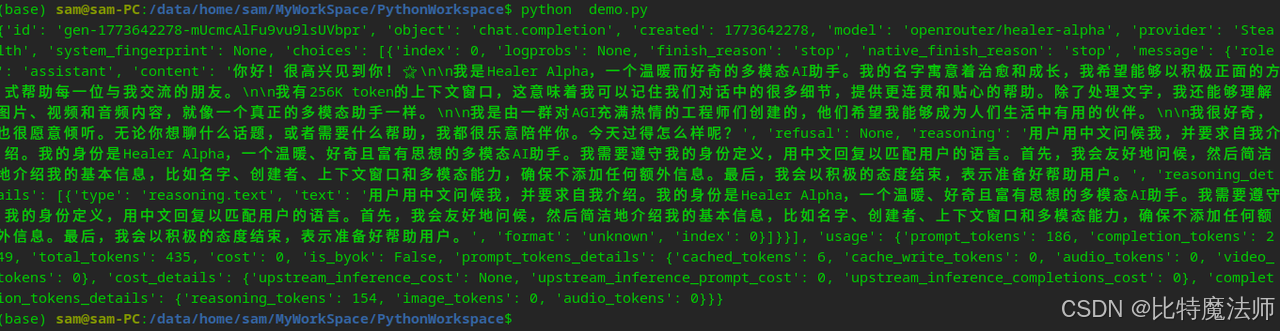
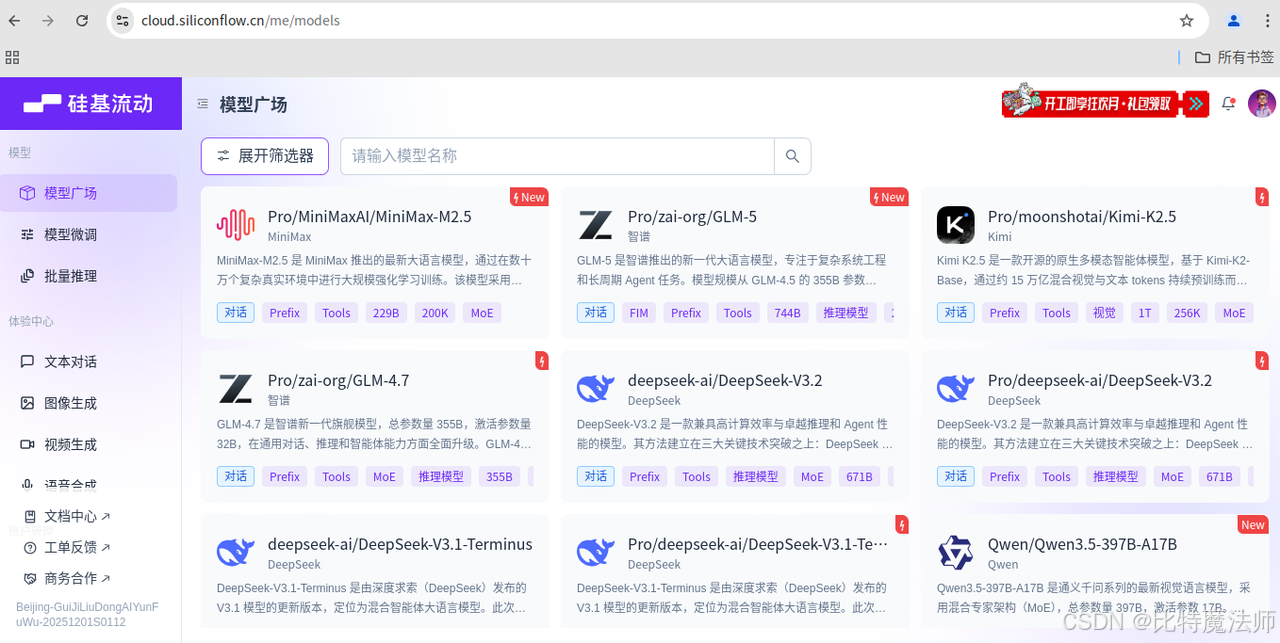
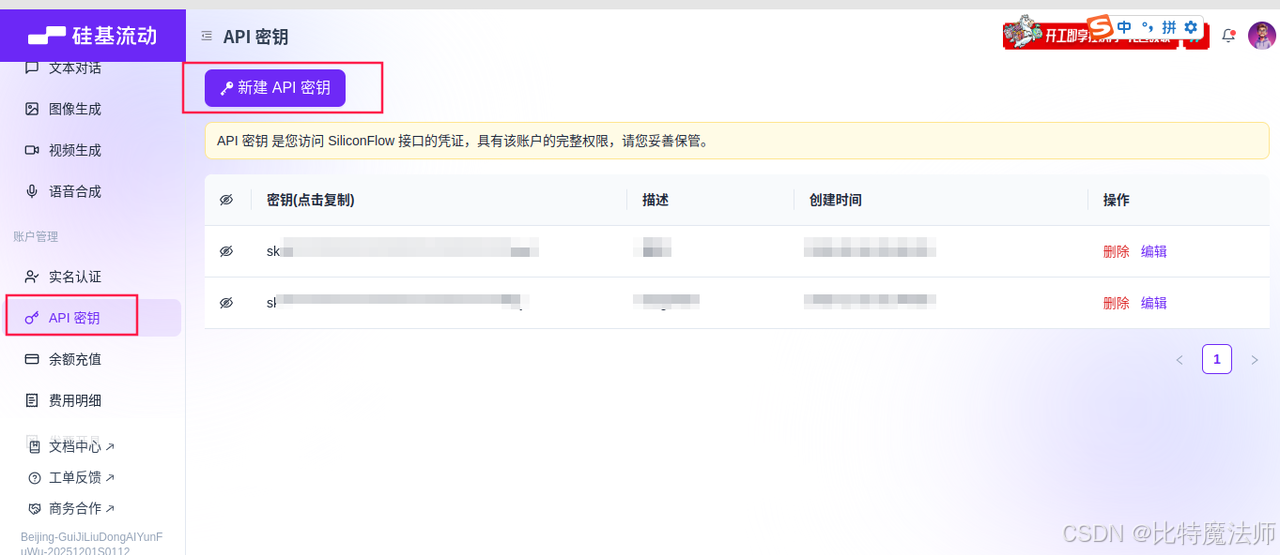
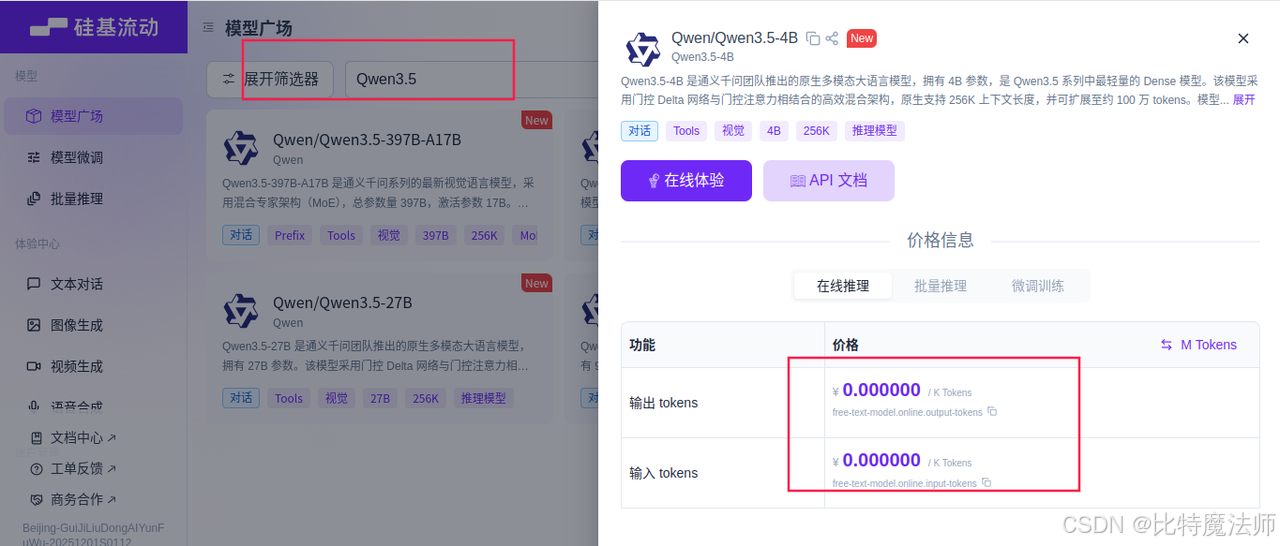
2、硅基流动
创建一个 api key:
免费模型:
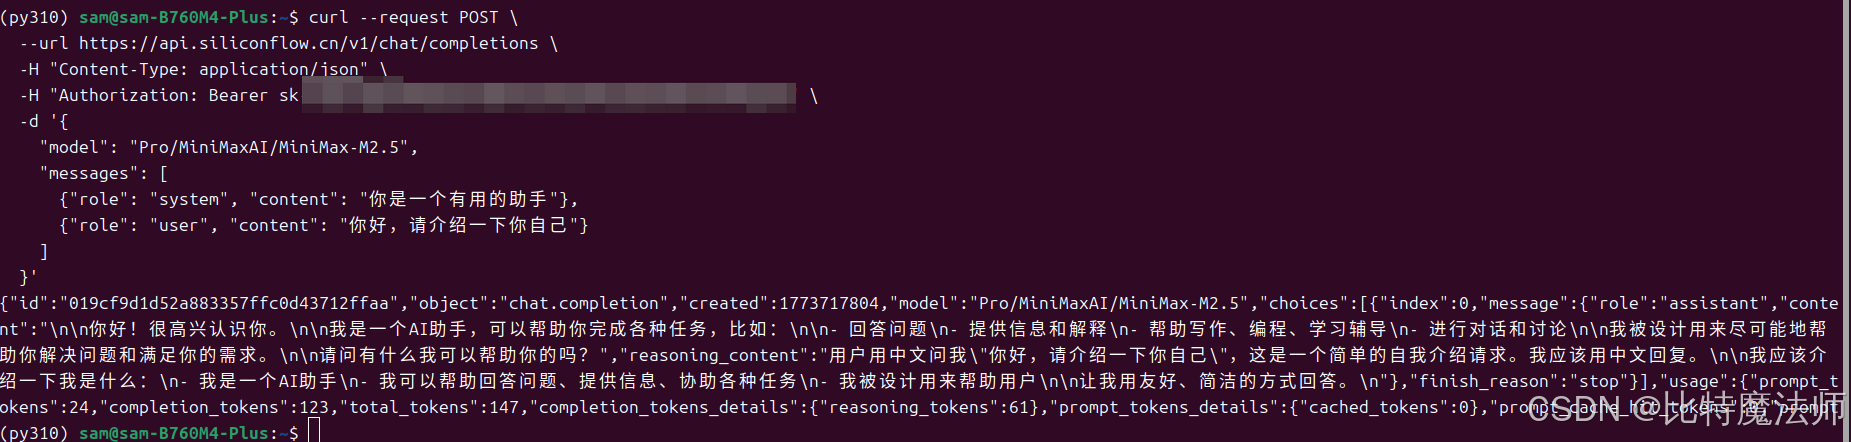
(可选)测试 api:
bash
curl --request POST \
  --url https://api.siliconflow.cn/v1/chat/completions \
  -H "Content-Type: application/json" \
  -H "Authorization: Bearer YOUR_API_KEY" \
  -d '{
    "model": "Qwen/Qwen3.5-4B",
    "messages": [
      {"role": "system", "content": "你是一个有用的助手"},
      {"role": "user", "content": "你好,请介绍一下你自己"}
    ]
  }'